Greg528it
-
Posts
88 -
Joined
-
Last visited
Content Type
Profiles
Forums
Events
Blogs
Gallery
Store
Everything posted by Greg528it
-
I like the cattle brand.. I think the name so one can google it. I would NOT buy something in leather or other NICE product if it's all text with email, web address.. To be big enough to be read when stamped into leather, a www.bobsleather.com is going to be long. I would NOT buy a holster or other leather product where the makers mark is on the front readily seen. I would not and did not buy an El Paso saddlery holster just cause of that. Well that and I now make my own. Brands and stamps should be subtle and not front and center. and lastly nowhere anywhere should your makers mark say MAKER on it. If they don't know you made it by signing / stamping it, well never mind. All above are my opinions.
-
Heading For Texas Tomorrow
Greg528it replied to Red Cent's topic in Gun Holsters, Rifle Slings and Knife Sheathes
Other than the screws at the buckle and near the other end, how is the smaller belt attached to the wider? I was curious if the small one moved around much while wearing. I like it very much. -
I use a sharp wood plane on Veg tanned.
-
The answer is.. YES. I have sandblasted leather before and after. The effect is different, and will depend on what effect you want. Hog Hunter knife sheath.. blasted AFTER stained. I tried to blast past how deep the stain soaked in. Leather portfolio.. this is drum died leather. for my wife, a nice subtle look stained leather.. a piece I blasted BEFORE I stained, it opened up the grain and really took the stain. I also put vinyl decals on from my vinyl cutter and it masked leather work.. the piece of leather plain as I sand blasted it.. with the decal stuck to it. the laser burns.. I suspect it'll darken the leather, so may never be able to get a light pattern.
-
Like.
-
Being Doing A Bit Of Leathercraft On My Motorcycle
Greg528it replied to holmesmarsh's topic in Motorcycles and Biker Gear
Very nice. I can only do one at a time. Ride a motorcycle or do leather. I can not be doing a bit of leather while on a bike. :-) -
Rifle Scabbard
Greg528it replied to Manypawz's topic in Gun Holsters, Rifle Slings and Knife Sheathes
Not only a lot of leather.. a LOT of basket weave over and over.. I like it, I'd be afraid I'd be mostly done and whack one sideways. Very nice. -
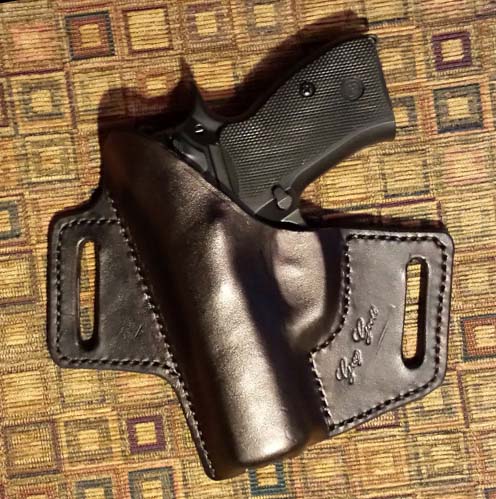
1911 4" Holster(My First One)
Greg528it replied to hunter131's topic in Gun Holsters, Rifle Slings and Knife Sheathes
Stitch stitch stitch..... Oops. Too far. I get that. :-) I lay may stitches out before I start to sew. I use straight edges, circle guides, and or french curves to keep them smooth, straight and flowing. The portion to protect your waist from the hammer and slide looks too square. Radiusing the corners might help. Looks good for the first try. -
Anyone Done Any Hotrod Pinstripe Tooling?
Greg528it replied to The Grizzly's topic in How Do I Do That?
My first thought would be to stitch the pattern with red and white thread. Second thought, a stitch grooving tool run free hand to the pattern. Or I my self would sand blast the pattern using photo resist. It would also be real easy to paint with the resist still on. -
Purple Jeweled Holster For Her
Greg528it replied to Quillleather's topic in Gun Holsters, Rifle Slings and Knife Sheathes
Is it lined on the front? And or how are the jewels attached? Rivet or screw head burried? -
Nice
-
Looks great
-
I've made several stamps, including my signature as the mark. I combined my sandblasting techniques and blasted them into glass tiles, that were bonded to wood dowels. As long as i dont drop them, they will last forever. Using wood working carving skills, dremel, point chisels one should be able to make your own by hand. If working with wood, used something hard like oak or maple or other. Since the cased leather wont be overly damp, moisture transfer back to the wood should minimal. I expect the mark would be used once then not again for quite awhile. Other materials should work as well. Someone just made a mall using a cutting board. That material should work. and one last point, dont put the word MAKER in your mark. That would have been like Picaso also signing Painter. :-)
-
First Try At A Knife Sheath
Greg528it replied to Twisted 66's topic in Gun Holsters, Rifle Slings and Knife Sheathes
I like the red stitching. Add a welt next time if not one we cant see. And looks like the holes are sized for the laces. Most non leather workers wont care. -
A Lineup Of Cowboy Holsters
Greg528it replied to JBLeatherworks's topic in Gun Holsters, Rifle Slings and Knife Sheathes
I like. pretty much all of them. far left nudges a hair to the lead. -
I like it. The only thing I've heard about tooled black belts.. some people think they look like cop belts. To which I would reply. "so?" I like the tooling and think it stands out just fine. yeah more subtle but subtle is good.
-
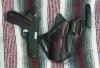
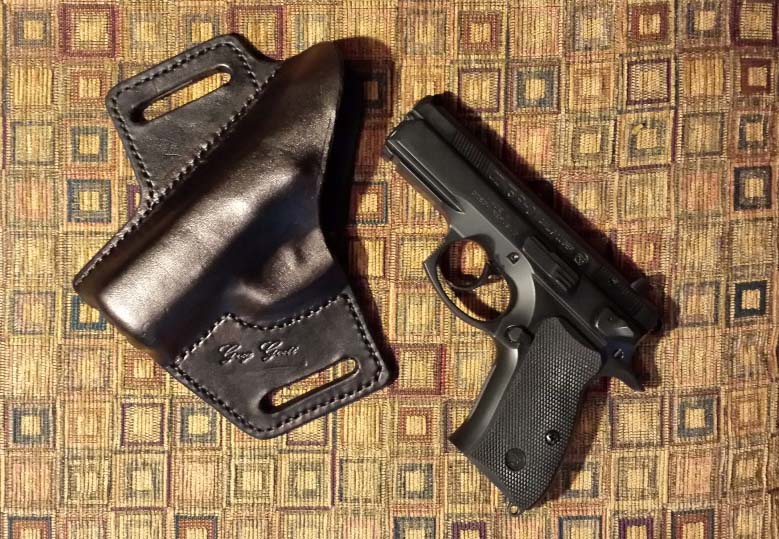
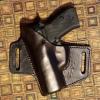
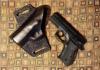
Latest Holster. Clean Simple.
Greg528it replied to Greg528it's topic in Gun Holsters, Rifle Slings and Knife Sheathes
I then allow the leather to dry at room temp. I then trim the excess leather off. Bevel the edges. Burnish. Cut the loops. Because the front leather is shaped around the gun, the stress at the stitched line is less. Its only holding the front to the back. But a second line of stitching would not hurt any. It is formed to the gun well. It retains well, with just a modicome of drag coming out. -
Latest Holster. Clean Simple.
Greg528it replied to Greg528it's topic in Gun Holsters, Rifle Slings and Knife Sheathes
No pattern. Drew onto paper, tranfered to leather. I draw 2 lines 3" apart. This is the belt line. Place the gun over the 2 lines cant until looks right. Make sure grip is above the top line enough to get all your fingers on it. Trace the outline of the gun. i then add enough room on either side of the gun for the loops. I then make smooth transitions from the angular lines using various circle templates. I then cut this out of the paper. for the back piece, I used some 1/4" thick leather I got at Tandy. I dont know oz sizes very well. 10-12? I cut it to that shape plus 1/4". For the front I used some 7-8? Leather. Only wanting to stretch the front I cut the left side to the shape. I then slid the paper 1" to the right and cut that side. Now the front is longer than the back. I then lay out my stitching lines on each end. I use the pattern with gun profile. I add about 1/4 - 3/8" of set back away from the gun profile. I lined up the left ends. Applied glue under the stitched area. Glued together. Clamped and allowed to dry some. I then stiched the left side. After the left side was stitched I then lined up the right side ends. This will cause a loop or bubble in the top layer, where the gun resides. I glue under the stitched area, clamp it while the glue has time to set up and dry. I then stitch the right side. Now i have the basic outline of the holster and its wanting to bend the back piece 10-12 some. I wrap the gun in plastic wrap, wet the front leather 7-8, and then force the gun into position. The front leather will stretch, the back remain pretty flat. I bone and shape the leather as I wish. -
Great idea Dwight. My buddy has a bunch of tubing, we'll try that. I did the math,, 1.25" dia tube should ne me a 1.75" long by 5/16" wide slot.
-
So far I've been using a circle punch at either end of the belt loop in the holsters, and connect with a knife. I do not make very many. BUT.. it seems a single large oblong punch would be sweet. Of course I looked at Tandy, they have one that is 1.5" and while most belts are 1.5" or less, there are a few either really thick 1.5" belts or 1.75" belts. Who has a 1.75" - 2" oblong punch? Is it problematic to drive square? Does anyone re stamp with a smaller oblong? punch thru, slide down a bit and re punch? Thanks (and yes my maker mark was angled a bit and I got the edge.
-
a few mistakes. but nothing too bad.

-
I'm pretty new at this, BUT.. I've had good success with the back piece in 7-8 and 2 flesh side to flesh side together as the front for a lined holster. The manager at the local Tandy shop, when showing me his lined holsters warned me.. Shape the inside piece then the outside piece, gluing as you go along. I took it to heart and have had very smooth insides, no wrinkles. I have since read on here, a week or 2 ago. Glue them flat then form. If you form it right you get no wrinkles. I should try that. This of course does NOT answer your question. On the pieces I've lined (run 2 -- 4-5 oz) I ran both inside and outside long and let them be longer than the back. The back I've cut to a hair over net shape. I sew together, than trim the excess off leaving 1 smooth edge to then radius and then burnish.

-
Clips For Holster
Greg528it replied to Emmo's topic in Gun Holsters, Rifle Slings and Knife Sheathes
Nice holster -
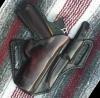
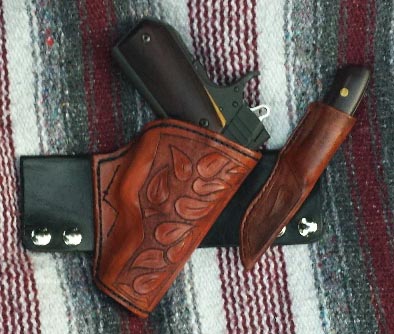
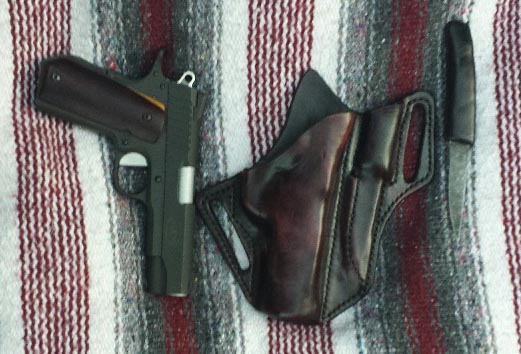
Holster / Sheath Combo
Greg528it replied to Greg528it's topic in Gun Holsters, Rifle Slings and Knife Sheathes
I figured it wasn't new. I had not seen one yet. Yes the 2nd one I posted on The High Road earlier this year. In 2010 I wasn't making leather. Yes it snaps around the belt. Since it was long.. I figured I'd go ahead and add the sheath. Nice thigh rig. They are certainly love or hate items.. read thru The High Road forum and quite a few guys HATE on thigh rigs. I made one earlier this year as well. -
I had not seen them combined before. I thought I'd try one. The 1st the black cherry one. The knife blade it supported with a thick layer of leather, plus the layer to keep the knife edge from the threads. The die to cut the circles for the belt loops drove wider than I was expecting. Still functional. a few other flaws, but.