


Tannin
-
Content Count
199 -
Joined
-
Last visited
Posts posted by Tannin
-
-
Looks good. You might find some of the ideas for sheathing round-knives/head-knives discussed here of interest: http://leatherworker.net/forum/index.php?showtopic=56687 . Feel free to contribute ideas & insights of your own too of course - we're all trying to learn from each other. Looks like you are in a good part of the country for leatherworking & leather tools (and beer of course!)

-
Thank you Unicornleather, that is very helpful
 I will try to put that into practice. Making the two sides of the tool uneven makes sense to me although, me being new to this & the tool being new, I will likely be cautious grinding the tool down. I almost bought a used screw crease (was out-bid several times) - I expect some used ones would already have been ground-down; I saw one where the edges looked quite fine/slim, almost sharp. Interesting to hear how you use this to mark your stitch line, I will try that; I currently use a pair of old cobbler's dividers to scratch my guide line (per Nigel Armitage's youtube videos).
BTW This is Dixon's ebay store: http://www.ebay.co.uk/usr/joseph-dixon-leather-tools
-
Thanks Bob. I have a new Dixon screw crease. I bought mine from Dixon's on eBay.co.uk, they just started selling there. I made an offer price and they accepted it. Simpler and better than ordering from their website I think. The tool itself looks better than their standard image the screw is rather long tho.
-
Neat. I recently bough a screw crease. I warmed mine on the top of my wood-burner (I used a wooden stick to keep the wooden handle off the hot surface). It seemed to work well enough but I am still new to this tool. I found it quite difficult to follow edges, particularly round corners - although it work well on a straight strap. I wonder if a thick, curved piece of wire or an old screw driver, ground with a curved & rounded edge might work as well or better though.
-
Hi David, that many folk who do heavy duty work use only coarse grinding doesn't surprise me. I carve wood and most of my tools - including axes - have bevels hand stropped to a polished finish, however, I sharpen my wood splitting maul, billhooks and rip hooks (/"reap hooks"/sickles/hand scythes) with only a coarse stone. But the reason I do that is simply because it is good enough and also it is normal to stroke the blade of a rip hook with a coarse stone regularly during use, to keep the edge keen. Perhaps their logic is that if they stop at, say, 600 grit they are no longer removing metal?
Sharpening kitchen knives is a bit of hobby/practice-ground for me. A lot of the cheaper knives & old knives need to be worked on a wet stone wheel to establish the edge before sharpening - otherwise it would be a very long process. A cheap oil combi-stone is then enough for normal use, as regular sharpening will be required. I sometimes strop too but seems excessive. Recently I switched to using a 480/1000 Japanese waterstone - it creates a keen edge but very dull -- not as good/shiny as the cheap oil stone. I've added a 3000/8000 waterstone to the process and that gives a pretty refined finish but, again, it seems excessive - because kitchen knives really need to be sharpened regularly. BTW Stropping with compound gives a similar result to the 8000 stone.
Hi Barra,
Intrigued by your knife idea but couldn't quite grasp the details from your description/image. Are you using the knife handle like a burnisher/slicker?
-
Hi David, yes sharpening is certainly a learning process. Yes, 600 grit tends to be my rule of thumb starting point for general routine light-ish sharpening too - by which I mean 600grit wet & dry paper, which seems somewhat similar to my 1000 grit Japanese waterstone, and my cheap but good Draper combination oilstone.
I guess "too much" of anything isn't good by definition but I don't see a problem with stropping. It is effectively directional straightening (like a butcher's iron) and polishing of the blade. But perhaps you can explain?
...
The blade done with high grits like doesnt work have great edge retention on stiff materials like stiff veg. Knives that are done on coarse stone below 600 american standard grit has better edge retention on tougher materials. Still have to do tests to figure out the best combination, stiff veg probably rough stones 600 grit being the highest and strop. Thin stretchy chrome tan probably 5k or 8k stone and strop...That sounds wrong to me. Perhaps several different things are being confused? Broader angle bevels give better edge retention - more metal behind the edge supporting it. Coarser grinding does not have better edge retention in my experience - it is more likely to catch & break/nick but it is quicker to achieve. Coarser ground blades do, however, sometimes cut well, things like soft vegetables/fruit (like tomatoes) & rope, because they have been left with micros-serrations like tiny saw teeth.
Also, it might be better not to use chrome-tan for a strop as it is known to cause corrosion of carbon steel blades (green compound might have similar issues, TBD) and so is generally not recommended for sheaths.Veg tan leather contains tannin which does react with carbon steel too (so perhaps best to clean off any residue) but the blue-black stain it produces is a more stable, protective iron compound (and it is the basis for "rust convertor" products). In practice, it probably has little effect, especially as the strop ages and is, perhaps, used with polishing compounds and/or oil but perhaps worth considering?
-
...I hear people mention that certain brands come polished sharp from the factory such as the Douglas. If you look at the blades next to each other the Douglas is almost mirror like and the VB is a dull steel color. Is that actually a sign of sharpness or a different type of steel? As far as I can tell I now have the VB as sharp as the Douglas but it still isnt shiny. Maybe someone with better understanding of these tools and sharpening can chime in.
The Douglas could very well be the superior quality tool but for me I have had better luck with the VB. maybe its my lack of experience.
A blacksmith-toolmaker assured me that you don't need mirror shiny bevels to achieve a razor sharp working edge - and many professionals can't justify the time to get that level of finish. That said, the tools made by this guy have very shiny bevels! Also, I notice that many pro leather workers do have very shiny bevels on their knives. While it is true that unpolished bevels can be plenty sharp enough, refining the bevel with successively finer stones & then stropping with compound/polish also refines the edge, which tends to help make the sharpened edge last a little longer. A shiny/oiled edge might also slip into the cut material a little easier. It also suggests a higher level of finish/care - although that can be misleading.
I strop my tools frequently, sometimes with bare leather (from cheap old suede welding gauntlets or fancy belt/saddle leather) mounted on a piece of flat wood - sometimes with a little Autosol metal polish or white compound added. I recently got some green compound in a kit which is a tad coarser - the green pigment is the grinding compound in the "fat". Consequently most of my tools now have shiny bevels, whether they originally came that way or not - I like to think they get better the more I use them
. Frequent stropping means that I rarely need to re-sharpen my tools.BTW Well known veteran Swedish woodcarver Wille Sundqvists recommends stropping blades rather than buffing, as he believes buffing rounds the bevels; the Swedes tend to prefer dead flat "Scandi" bevels, especially for carving, although a convex bevel produces a more robust, longer lasting edge (commonly used on woodland axes & bushcraft knives for that reason).
-
Useful posts and great video
...
You might find the attached link useful as it outlines a number of processes in pictures.
http://www.journeyman-leather.co.uk/aboutleatherworking.htmlThat link no longer works but I reckon this is probably an updated version of it: http://www.journeyman-leather.co.uk/aboutleatherworking8.html
Nice. -
...
Knives and awls are no longer supplied in what I would call a 'finished' condition. Knives have to be honed and stropped, and awls have to be sharpened and polished. I wonder if this is in deference to craftsmen who prefer to put their own finish on tools, or is it a way of cutting out the final stage of production to save on costs and avoid price increases (or increase profits!)?
Any further thoughts . . ?
I think you probably got it spot on. I don't know if these tools were ever sold honed & stropped but I suspect not. Nowadays you can buy some blades that a sharpened, honed & stropped - Scandinvian tools often come this way (Gransfor Bruks axes, Mora/Frost knives, Martiinni filleting knives, Hans Karlsson tools) - but you will usually pay a hefty premium for it: it takes time, tools and skill. I could have shaved with my Gransfor Bruks axe when it arrived and that is not an exaggeration - I had no idea a tool could be that sharp, especially an axe, the Swedes are master sharpeners.
Like many craftsmen in the past, leather-workers would have had to either know how sharpen, hone and strop their cutting tool or, perhaps, have access to somebody who could (perhaps a dedicated sharpener in a tannery/workshop?), because they would need to use these tools sharp, day-in day-out. Also, "back in the day", men-folk would have to sharpen their razors in order to shave. When I took up bowl carving, I quickly realized that I needed to learn how to sharpen and maintain the edges of my hand-tools. So I learnt (and am still learning), such that I am no longer worried if tools arrive blunt (as long as the price reflects that) as I know that I can sharpen them myself and learn something from doing it. I quite enjoy it, it's therapeutic, and I get to decide bevel angles/lengths/shape/finish.
It takes time though and, for professionals, time is money - in which case it may well be worth paying the premium. You'll still need to need to learn how to maintain your blades for day-to-day use though (I find frequent stropping drastically reduces the need to sharpen or even hone my tools).
-
I've bent several leather needles (esp. JJ 002's) by accident, so I already have several that might be suitable :D
I just heat up a straight needle and bend the end.
Yes, Al Stohlman's book (with "The Art of..." or the tool one, I forget which) suggests doing exactly that if you have trouble finding curved needles/awls. His drawing shows a match (or possibly a candle?) being used as the heat source*. Apparently it works for awl blades as well as needles.
*I expect some leatherworkers already have a heat source available for tools such a crease/double-crease. BTW what do folk generally use for that, a small spirit lamp/candle/bunsen burner/lighter/...?
-
:D you are an incorrigible reprobate JLS
-
Yeah, agreed, that is disrespectful. Don't hear that kind of thing much these days. Not missing it.
-
Hint - waxed linen thread doesn't last long as a stringer for beads. I am going to have to restring it soon.
Hi Holly, I was going to suggest using a leather lace/thong - I've been cutting my own recently using the inexpensive "lace maker" tool* (a round black plastic handle with a single-sided razor blade mount near the top) - but I think it would be too thick for your beads. I have some black braid in 2 diameters (2mm & 3mm I think) from the Italian company Omersub, it strong, smooth & compact - used for spearfishing but handy for all kinds of things - which would likely be ideal, as long as you don't mind using synthetic materials.
*The lace maker didn't work with thick leather - broke 2 blades trying - but worked quite well with thinner leathers, once you get it started. I had trouble finding replacement blades but I had a chat with my barber, he told me that blades vary a lot in quality and gave me some new English made Wilkinson Sword twin-blade razor blades - which can be snapped in half - they work much better, very smooth, presumably because they much sharper. Makes it a much better tool. Good video on using it - although I found it worked better on soft leather than hard leather:
Leather laces are expensive to buy here, so this seems like a good way to use up some left-over scraps of leather.
-
Nice job. I like to see old tools restored & used.
BTW electrolysis is a gentle, easy way to clean off surface rust. I use washing soda solution (cheap & safe) as the electrolyte and an old homemade 12V battery charger (about 1 amp I think) for the "juice", and an old gardening fork as the other electrode (don't use stainless steel, polarity is important).
Another simpler approach I've heard recommended is to simply soak the metal in white vinegar for a few hours. Or wire wool and some "elbow grease" - old school! None of these approaches alone will give the highly polished, shiny metal finish shown above though, which I am sure is better than when the tool was brand new
-
Wow, nice job.
-
Unfortunate. Sometimes, despite best efforts/intentions, things just don't work out. At some point, somebody has to say "enough is enough" for the good of all concerned.
Yes, I use or at least try to use only solid brass hardware. I like the patina against the leather as it ages.....
Ditto. I bought Sam Brown studs recently, some shiny chrome/nickel & some shiny brass. Also some press studs: antiqued brass, chrome & gun metal. I hold them against a workpiece to see which I think works best and most often I go for brass. Also got my wife to pick for a piece recently and she chose brass, without hesitation. Often, to me, it looks best & seems most versatile. I'll happily use nickel/chrome on black leather though. I haven't used the gun metal finish on anything yet - although I notice that top Swedish craft axe maker Gransfors Bruks use matt black/gun metal studs & rivets on most of their leather axe guards.
-
I really like your fish, horse, cow and building designs. What is it with leather masks though? One of my leather books (see below) features a couple of moulded leather masks:

You'd probably like them - creative - but it had me scratching my head!
Is that a stamp/punch that you made to emboss the first fish design? I would quite like a large one of those fish on a T-shirt (keen fisherman).
BTW what is the leather spatula shaped thing with the cool horse & cow/buffalo & beaded lanyard?
-
ebay would be an obvious choice for anything leftover. It's probably as close to a true market as you'll find. I love using old tools. I particular value tools that belonged to my father & grandfather (only a few remain) and have refurbished several, replacing lost & broken handles and sharpening blades - holding them & using them helps me to retain a connection to them. "Honor thy mother & father"
-
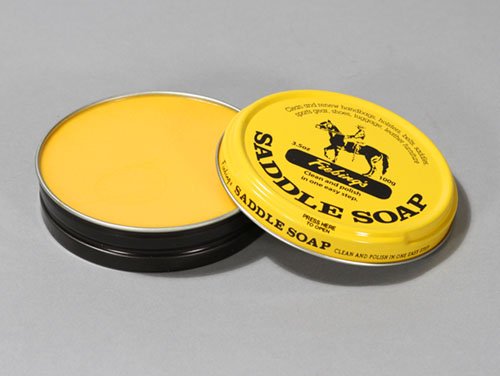
I am thinking of saddle soaping an elaborately tooled & dyed leather belt (shooting scenes with dark and light/white areas) that I bought for my brother in the USA 27 years ago but then it occurred to me that it might do more harm than good. The belt is well worn now - and still being used daily! - so perhaps better left as it is? Or perhaps saddle soap only the back?
[i'm currently using USA-made Fieblings saddle soap (yellow) and have been pleased with its rejuvenating qualities so far.]
-
That is kind of you Walter - but please don't "bust a gut" rushing to get this out if you are busy. As for your English, I usually get the gist of it and, if not, we can always ask.
I use Google Translate when I need to translate things (so far, I have used it for: German, French, Italian, Swedish, Welsh, Spanish and Japanese!) - it is not perfect but it usually works well enough for my needs. Folk on the WWW have helped me translate a few tricky/uncommon phrases.
-
Perhaps he was "just being a man"? I am told we always try to solve problems for women when really they just want us to do is shut up and listen :D (Is that what I'm doing now?!). As a mechanic - his role in life is problem solving - and god bless 'em all for it, I hate working on cars.
I grew up in the countryside but never really got to grips with all the farming lingo but perhaps he was thinking of, the Red Heifer.
-
If you have half an hour to spare, it can be quite interesting & fun to browse images on pinterest.com - don't ask me what its purpose is or how it works, I just know it has interesting collections of related images of crafty/leather things and workshops, among other things. I saw one image of a guy with racks of leather folded over dowels - unfortunately I cannot find it now
 .
.Here is the sort of image that catches my attention - then I often end up following links off the page that interest me: http://www.pinterest.com/pin/294211788127828858/
Here is another: http://www.pinterest.com/pin/479703797779892404/
Your mileage may vary. (I'd post a picture of my storage system but my leather is all in a big cardboard box in my garage currently - so not very interesting
) -
That's really nice.
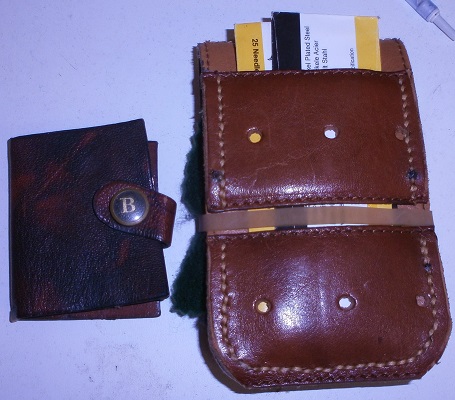
When I started recently, I needed something similar for my hand-sewing saddlers needles. My needle holder evolved...First I bought a small vintage needle-wallet*. I like the design but it was much too small for the leather needles. So I made my own, much larger version from an old belt. Initially I used white muslin "pages"
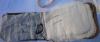 at the suggestion of a dressmaker. But they were too flimsy for the heavy leather needles, so I replaced them with felt (which is also what my small vintage wallet uses)
 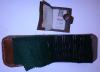 - much better
 Then I added small pocket inside the cover to store some needle threaders - shown above (I needed the threaders before I got an eye test and new reading glasses recently :D !).
But then, like you, I decided that I wanted to keep new needles in their original envelopes.
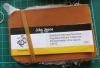 So I added a shallow pocket to the outside back cover and strap higher up to hold the long thin envelopes.
 - made from left-over pieces of another belt. It's not fancy but I'm really pleased with it, it is very practical - made specifically for my needs I suppose
 I would now like to keep my little thread clippers with this, so I might add something to hold that later.
*The small vintage needle-wallet has a leather cover, white felt pages and pop-fastener with a 'B' on it. It is the small wallet shown alongside the much larger leather-needle wallet I made for myself, which now has black felt pages.
-
Hi Tanin ....................
...Of course, the topic of "Sewing Awl" is also something that should be necessarily improved. One issue that should be urgently improved also 99% of the leather craftsmen. Unfortunately, the awls will prepare nowhere more not shown correctly even by the learned saddlers.
In our traditional saddlers this is something which is most practiced what has been learned very thoroughly and at least 3 years requires exercise until you can do it right.
But a usable sewing horse is always the first requirement to do so.
Hi Walter,
Any chance that you could post information on how you prepare awls (here or perhaps in a new thread)?
I was surprised when I first learnt that awls must be sharpened before use. I have several sharpening stones & sharpening sticks* & recent experience sharpening hand-tools & knives and so keen to learn. I learnt a technique from Nigel Armitages free youtube video:
...and more recently from one of Al Stohlman's books (probably the tools one) - although not identical, their techniques are consistent with each other.
*Wooden batons wrapped with wet & dry paper. I normally use worn-down 600grit but for awl blades that seem too coarse, other than perhaps for a short initial grind, so I recently bought some 1200grit (from Screwfix.co.uk, as my local hardware store doesn't carry grades finer than 600) specifically for awl blades. I also made a small leather strop stick & rubbed it with white compound ("rouge"!). For the baton, in this case I re-used old MDF (Formica covered medium density fibre board - dreadful stuff!) - flat & v. smooth.


Need A Pattern Or Some Ideas On A Sheath For A Dagger Type Knife
in Patterns and Templates
Posted · Edited by Tannin · Report reply
Yes, the traditional Scandinavian style sheaths might suit your knife as it has no guard (quillons). E.g.:
Although a dagger without a cross-guard (quillons) doesn't make much sense to me, other than perhaps as a throwing knife, as pushing/thrusting it would tend to force your hand up the blade. (Which is sometimes used to point out why good, inexpensive Scandinavian craft knives, such as made by from Mora/Frost, should be considered craft tools and not weapons.) But perhaps it is intended a craft tool with two cutting edges (like a double-faced axe)?