


leatherisfun
-
Posts
134 -
Joined
-
Last visited
Content Type
Profiles
Forums
Events
Blogs
Gallery
Store
Everything posted by leatherisfun
-
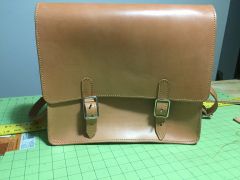
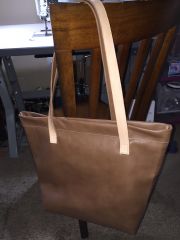
From the album: Gussetts
-

From the album: Gussetts
-
 I used a Dayton shaded pole motor, single phase 1/8 HP, two speed (1000/850 rpm), 115V, 1/2" shafts. Unfortunately it's no longer made, but a similar motor will work. A single speed motor will also be perfect. Ideal rpm range is between 1000 rpm to 1500rpm . Higher rpm could burn while burnishing. I get a perfect finish at 1000 rpm. Shaft size at 1/2" is important because if you also want to do sanding, the rubber sanding spindle fits perfectly. I got it on by hand but it doesn't slip during use. These motors require wiring to get a power cord connected, so a single speed motor is easier wire than a double or triple speed motor. Burnisher I made myself. It was pressed unto a sleeve of 1/2" inner diameter with set screws at either end to secure the sleeve to the shaft. Price List Motor: $40 - $90. I purchased mine on ebay for $40 Delta 2" sanding spindle kit: $9 - ebay Sleeve shaft 1/2" inner diameter: $2 (to keep the sanding sleeve in place) Double Pole switch: $4 - hardware store (lowes) Appliance power cord with wires exposed: $15 (lowes) Wiring connectors: $3 (gotta be safe) 12" wide board to attach motor: $8 (I didn't have anything lying around and wanted something nicer than pine) Bolt, nuts & screws: $3.40 Sheet metal aluminum to mount switch: $5 I already had the wood to make the burnisher, a friend made the sleeve. My total was about $110 when you factor in shipping, not counting the time I spent figuring it all out. Well worth it to get exactly what I wanted.
 -
From the album: Home made Burnisher/Sander
My project is finally done, thanks in part to Ross. Two speed motor with lots of torque. I made the burnisher myself, was fun. -
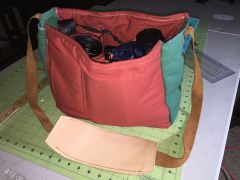
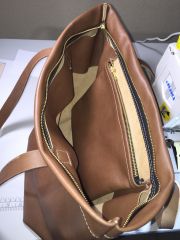
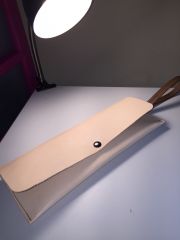
From the album: Camera bag
I needed something more compact than what I was carrying around. Used scraps I had lying around. -
I'm Going To Scrap My Machine Soon
leatherisfun replied to venator's topic in Leather Sewing Machines
The thing is that those charts were created from the experience of those who came before us and is a good guide to go by. I'm a believer because I had issues with needle/thread combination until I followed it. That isn't to say that there aren't times when you can get away with breaking the rules. However going by the chart is a great way of eliminating one avenue, making it easier to solve the problem at hand. I have done this, turn the needle the wrong way, not install the foot all the way up the shaft and then I was wondering why . Little things that might not be associated with your issue but something to consider nonetheless. -
I'm Going To Scrap My Machine Soon
leatherisfun replied to venator's topic in Leather Sewing Machines
Minimum size for 207 thread it #24 needle -
 Beautiful work Yin. One question, why not have the seam down, would be more comfortable to hold.
 -
Made in Japan by Juki? If I leave the thread long enough, it isn't a problem. But I have gotten used to holding it, so not a bit deal anymore.
-
Always get more than you think you will need because at some point you will. I would highly recommend saving a bit more and getting the 3500. It will sew just about anything you will throw at it and there is the accessory table that you can purchase when you need it. I know it's not easy to wait a bit longer, but it will be worth it because you will not be in "whudda, shudda, . . . " land.
-
The top thread is the one that needs to be held, not the bobbin thread.
-
I had this same problem happen to me the second day after using the same model a little over a month ago. Took it back to the dealer and the repair guy was kind enough to fix it immediately. I watched him work on it and asked a lot of questions. Everyone is correct in saying that the safety clutch did engage to prevent damage. My problem was that there was thread caught in the hook. To fix it, remove the needle plate and feed dog. Press in the button on the bed and turn the flywheel backwards. If it click and releases, then you are good to go. However you might need to get a tweezers out to remove the offending thread that is stuck in the hook. Should have said this before, remove the bobbin. It's ok to remove the curved arm, but don't remove the hook. Getting it setup correctly for timing is a pain. Turn the wheel, don't use too much force. Be patient even though you are frustrated, there is thread stuck in there. Mine had about 1/4" of thread stuck in the hook. He removed it and I haven't had a problem since. As a last resort, you might have to remove the hook from the shaft. The key to preventing this from happening is to hold the top thread before starting for the first 2 stitches then release. If you don't hold it, this will happen again.
-
Read this thread to the end: http://leatherworker.net/forum/index.php?showtopic=25239 It will answer your question. Click on the links of the sponsers at the top of the page compare machines.
-
 Made it yesterday. Haven't used it as yet. I will use it for burnishing.
 -
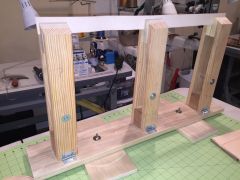
From the album: Super Stitch Pony
-
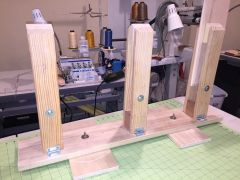
From the album: Super Stitch Pony
The feet pivot for take up less space for storage -
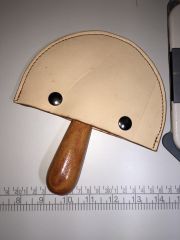
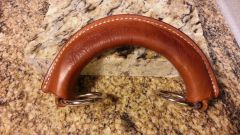
From the album: Vergez Blanchard round knife
-
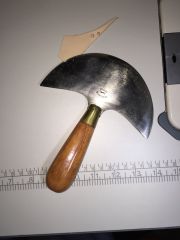
From the album: Vergez Blanchard round knife
-
Zippers twice over
leatherisfun commented on leatherisfun's gallery image in Gallery- Our Leatherwork
 Thanks LW
 -
From the album: Zippers, tick!!!
-
From the album: Zippers, tick!!!
Second version of a bag I made previously. Ripped the zippers out the first time around. -
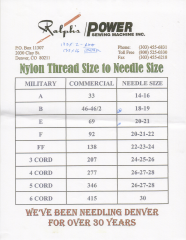
From the album: Thread to Needle Chart
-
From the album: My first stuff
-
From the album: My first stuff
-
From the album: My first stuff