victorl
-
Posts
38 -
Joined
-
Last visited
Content Type
Profiles
Forums
Events
Blogs
Gallery
Store
Everything posted by victorl
-
Hi everyone, I see a lot of threads with people struggling to highlight their tooling with antique dyes, so I thought I'd share a technique I've been using that is easy and foolproof. I'm sure it's nothing new or anything, but maybe it can be of some help to someone. Basically what I do is use neatsfoot oil the same way as a highlighter, applying it liberally and evenly over the entire piece. The key is to quickly wipe the excess oil off the surface with a cloth or paper towel, which will make the surface lighter than the highlighted areas when it dries. Pros: Fast, easy and foolproof Gives a clean, natural-looking highlight No messy antiques or resists needed Cons: Doesn't give as much contrast as proper antique dyes Too much oiling can lead to oversaturation, especially with thinner leather.

-
I struggled a lot with my basketweave for a while as well. The above videos are very helpful and I think it's just a matter of time and practice before you get it. Another thing that really helped me was saving up and buying myself a nice Barry King stamp. Once I got it, it made me realize the cheap stamp I was using was not perfectly symmetrical and the results are like night and day. I also have a Kyoshin Elle stainless steel rope basket stamp that's cheaper but still very sharp and looks amazing (http://www.leathercrafttools.com/shouhin.jsp?id=9718).
-
First Projects
victorl replied to victorl's topic in Purses, Wallets, Belts and Miscellaneous Pocket Items
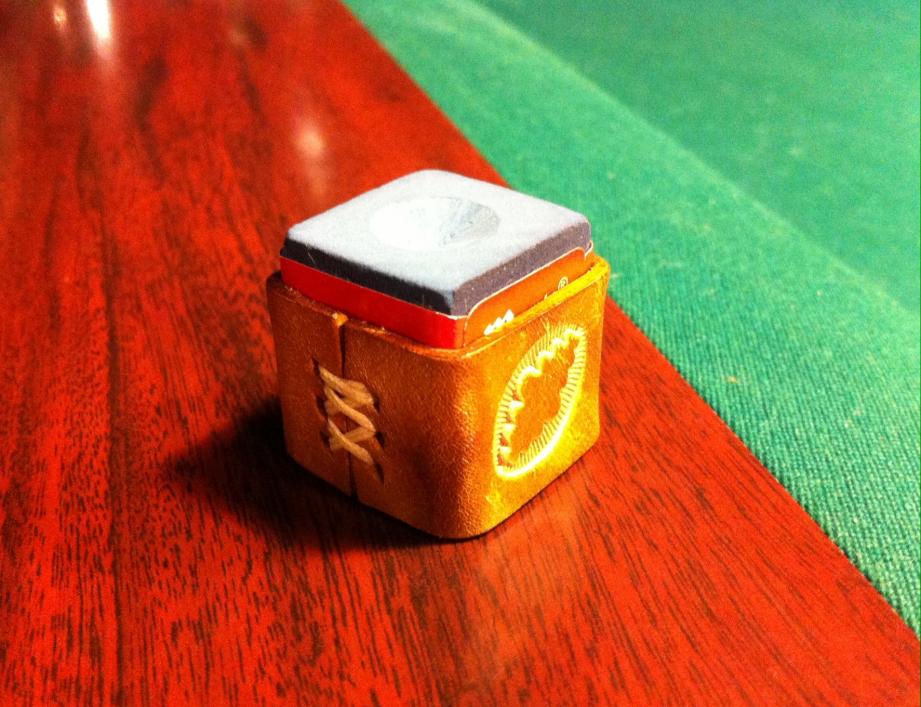
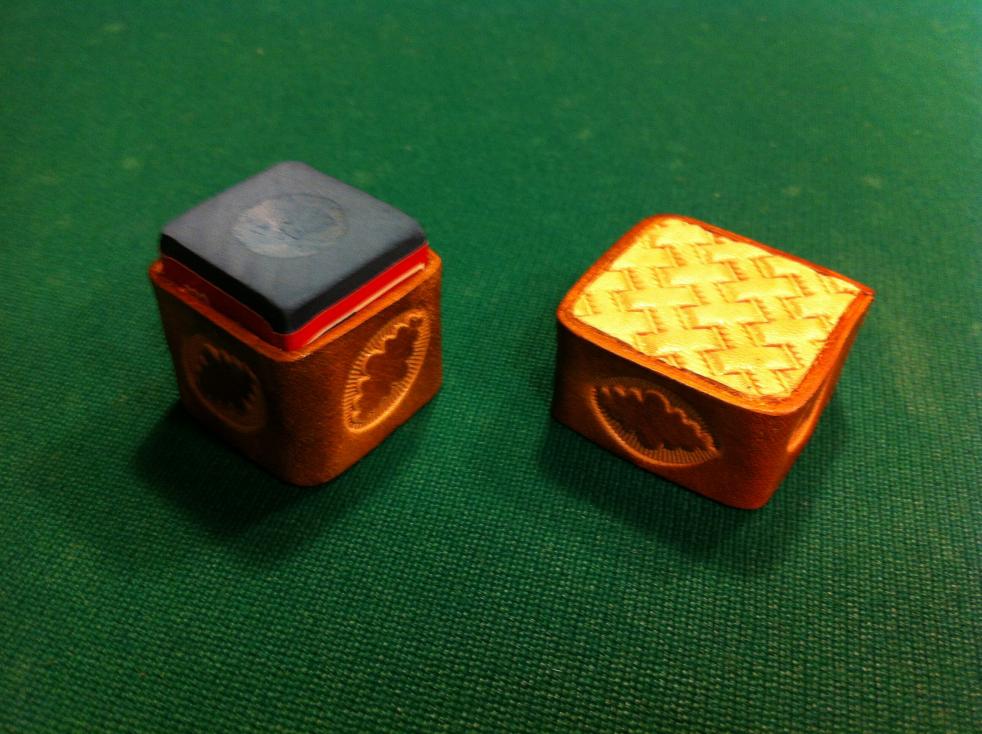
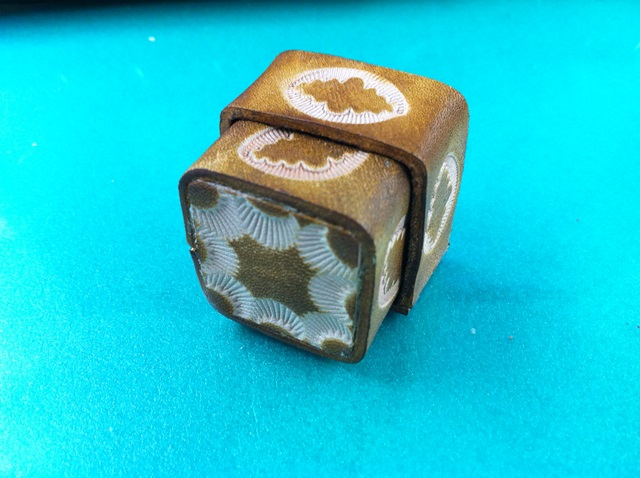
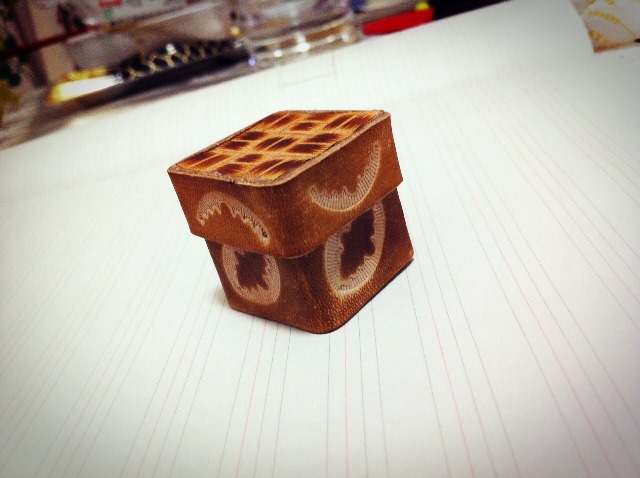
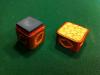
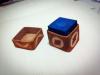
I got some good advice regarding strengthening the chalk holder from some members here so this is the latest version I made. I used slightly thicker leather, stitched up the side seam instead of gluing it, and put extra backing on the top and bottom pieces, so it's quite solid now. I've tested a few colors and designs, but I think this walnut brown with white leather basketweave lid looks the best.

-
I've got a bunch of leftover leather that is wrinkled/marked that I couldn't use for my other projects, so I was wondering if I could get some ideas on how to use it. I've seen some very nice looking wallets and other things made with wrinkled leather and I'd like to see some more examples if possible. Thanks in advance, Victor
-
Tan Kote Question
victorl replied to dfrensdorff's topic in Dyes, Antiques, Stains, Glues, Waxes, Finishes and Conditioners.
Looks like you they messed up and sent you tan-colored Edge Kote... totally different product. I'd try to return it or exchange it if you can. -
I'm a newbie myself and learned a great deal from forum advice and youtube videos. It was definitely a struggle at first and took forever and the stitches looked like I was working with my feet instead of my hands. Once I practiced enough to get into a rhythym things started looking better but there's always room for improvement. After some practice and experimentation, you'll be able settle on a technique that works for you. Also as someone recommended earlier, try the Seiwa stitching chisels as they will make punching holes a breeze and eliminate the need for an awl so you can just concentrate on your needles and thread.
-
First Projects
victorl replied to victorl's topic in Purses, Wallets, Belts and Miscellaneous Pocket Items
Thank you Bruce. The vegtan I used was a little on the darker side, I didn't use dye, just neatsfoot oil and some sunshine. (The color in the pictures looks a little darker than the real thing.) -
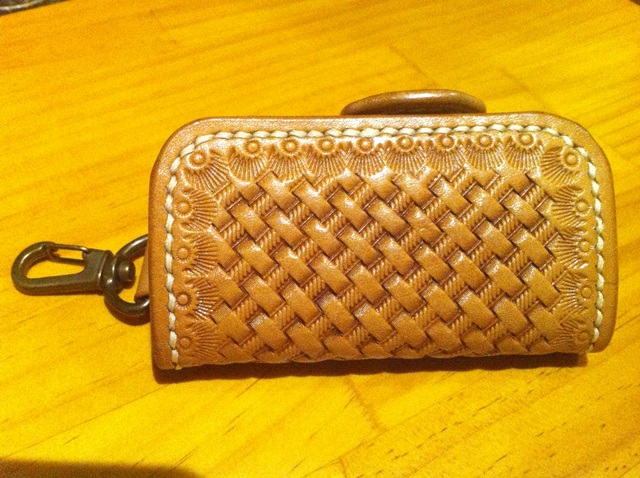
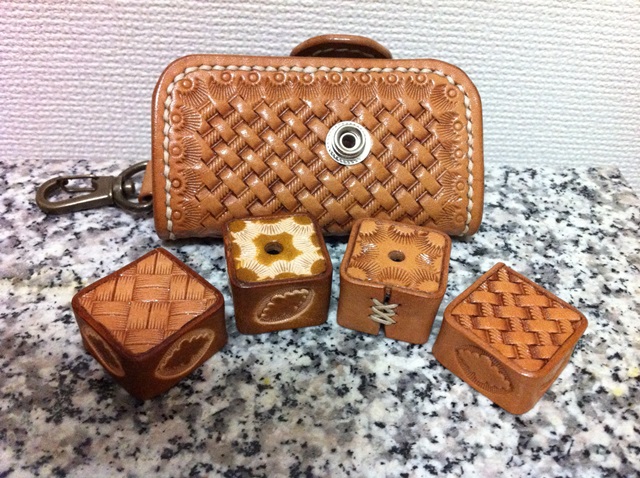
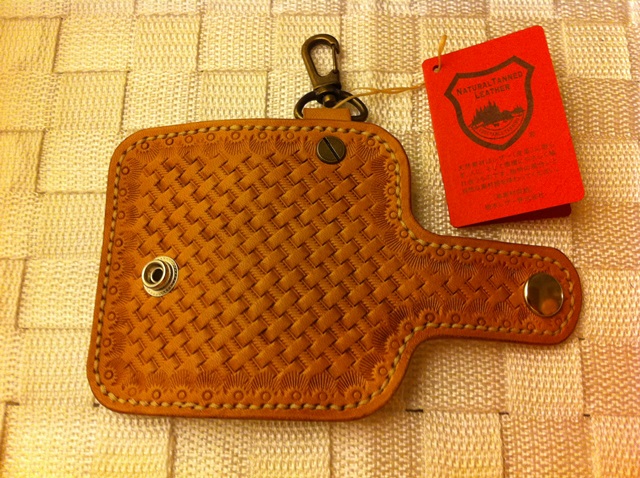
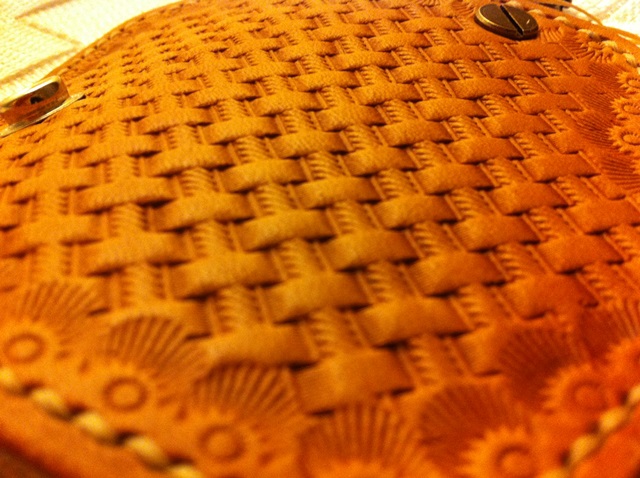
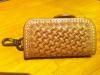
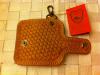
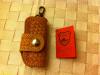
Hi all, Just a couple of projects that I finished recently. One is leather key wallet from a youtube tutorial and the other is just a simple pool chalk holder. For the key wallet, I messed up the stitching a bit in places, but got the hang of it part way through. For the tooling, I was planning on getting a Barry King basketweave, but tried Kyoshin Elle's stainess steel series rope basket and it turned out a lot better than I expected. The chalk holder is just some scrap leather glued together at the edges and not very durable, so I'm thinking to redesign it with some stitching to keep it from falling apart over time. Anyone have any ideas on how to stitch together something small like that without adding bulk or changing its shape? Any comments/advice, would be greatly appreciated and thanks for looking! Victor

-
Minimum Thickness For Granite Slab?
victorl replied to Artificial Intelligence's topic in Leatherwork Conversation
I picked up a 10-inch thick piece of unwanted granite for 10 bucks from a local tombstone maker and it was a bugger to carry home, but it's super smooth and works like a charm. Haven't got a bench yet so I just put it on the floor and no matter how hard I hit, the only sound I hear is the maul hitting the stamps. -
Thank you for the replies. Block dying sounds like a great way to do it. Appreciate the help!
-
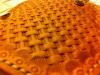
I'm trying to figure out how to get this light-colored stamping on dyed leather. Is the tooling being resisted before dyeing or is the dye carefully applied around the tooling? Or is it something much simpler than that? Sorry for the newbie question and any help would be greatly appreciated. Cheers, Victor
-
Images In Signatures Should Be Banned
victorl replied to AndersenLeather's topic in Feedback and Suggestions
If you go to the bottom left of the screen and hit the Change Theme button, you can choose Mobile mode. No signatures, just content. -
Hi all, newbie here just starting out and spending hours reading all the great threads here. Anyway, I've been having a problem with edging a project with 2 layers of leather. After sanding and burnishing with gum tragacanth, I can still see the seam between the 2 layers and it looks like its splitting apart in some areas as well. I'm wondering if I didn't burnish it enough or maybe I didn't glue the leather together well enough...Any advice would be greatly appreciated. Cheers, Victor