


MisterSmith
-
Posts
52 -
Joined
-
Last visited
Content Type
Profiles
Forums
Events
Blogs
Gallery
Store
Everything posted by MisterSmith
-
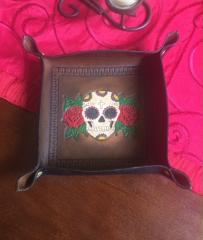
From the album: Desk Valet/Catchall
He we have a 7x7 desk valet made from 6oz vegtan. I used a meandering boarder with an acrylic painted sugar skull. I used ecoflo medium brown antique for the color. Nothing special about the construction, just four chicago screws in each corner -
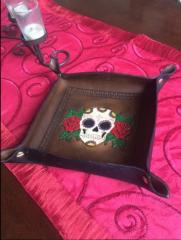
From the album: Desk Valet/Catchall
He we have a 7x7 desk valet made from 6oz vegtan. I used a meandering boarder with an acrylic painted sugar skull. I used ecoflo medium brown antique for the color. Nothing special about the construction, just four chicago screws in each corner -
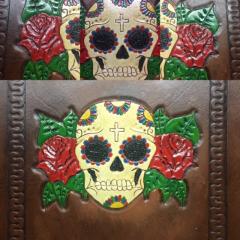
From the album: Desk Valet/Catchall
He we have a 7x7 desk valet made from 6oz vegtan. I used a meandering boarder with an acrylic painted sugar skull. I used ecoflo medium brown antique for the color. Nothing special about the construction, just four chicago screws in each corner -
Valet Tray Prototype
MisterSmith commented on Bonecross's gallery image in Our Leatherwork Galleries
 Great work very beautiful! You'll get great response out of these
 -
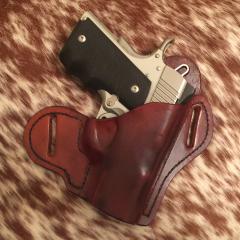
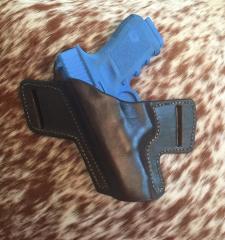
 @CaptQuirk yup this was the 1st go with the vacuum kit. The detail is a bit muted in the photo, but it did show the frame and lower barrel feature. I dont stitch around my belt loops because the Barge cement has a great hold and I dont feel that the added stitch around them are necessary. I wear one of my holsters almost daily, and am taking it on and off a 1 1/2 in heavy nylon and kevlar belt. After a year of this, its not showing any abbrasion or signs of separating.
 -
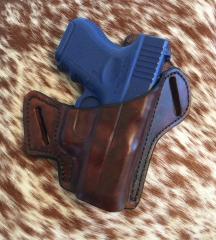
From the album: OWB Holster
An OWB 1911 holster from 9oz veg-tan. Hand stitched and vacuum molded -
FullSizeRender 2.jpg
MisterSmith commented on MisterSmith's gallery image in Gallery- Our Leatherwork
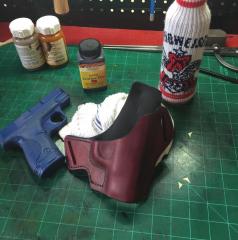 @CaptQuirk I took this newfangled vacuum and bag press for a spin yesterday, and yup, its as advertised. I got so much more detail than I ever could than by doing it by my old method. I use fairly thick leather (8/9 oz), and this thing saved my poor arms and shoulders. The kit and pump I ordered went together in about 20 min., and is pretty user friendly. I did one holster yesterday, and all totaled it took me about 4-5 minutes to form. One quick tip if you're going to hand form the holster while in the bag, get some silicon spray and lightly coat the area where you are going to use your molding tools Cheers!
 -
FullSizeRender 2.jpg
MisterSmith commented on MisterSmith's gallery image in Gallery- Our Leatherwork
@Dwight I'm dying laughing at your description of your first vacuum form! Thanks again for the added insight. Very much appreciate what you do for the members on this page -
FullSizeRender 2.jpg
MisterSmith commented on MisterSmith's gallery image in Gallery- Our Leatherwork
@CaptQuirk I ordered a vacuum pump from Harbor Freight, and the bag and vacuum kit from veneer supply (the links are pasted below). I used a coupon code at Harbor freight from retailmenot.com and got 20% off. All totaled it cost me $250 after shipping. Haven't received any of the supplies yet, but I'll let you know how it works out. http://www.harborfreight.com/25-cfm-vacuum-pump-98076.html http://www.veneersupplies.com/products/Project-CRS-Continuous-Run-Pump-Vacuum-Press-Kit.html http://www.veneersupplies.com/products/VS-Standard-Vinyl-Vacuum-Bag-2-x-2.html -
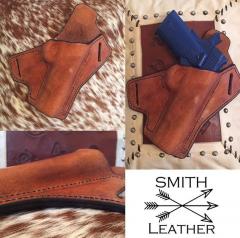
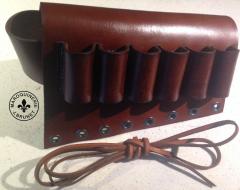
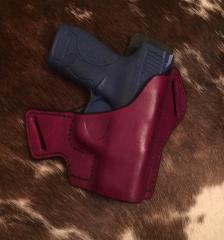
 Beautiful work. I love the gold rivets and red suede interior, very nice accent to the brown exterior.
 -
FullSizeRender 2.jpg
MisterSmith commented on MisterSmith's gallery image in Gallery- Our Leatherwork
Thank you Dwight. I took your advise and ordered a pump, bag, and vacuum kit. Very excited to get It going and look atthe differences in results. -
Buttstock Shellholder for 12ga Uzkon AS40 with Backstrap
MisterSmith commented on Bonecross's gallery image in Our Leatherwork Galleries
 Very clean! Well done.
 -
From the album: OWB Holster
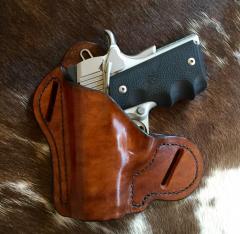
a few special order items over the last couple of months. Hand stitched, and molded (no press or vacuum) I used 8/9oz leather. -
From the album: OWB Holster
Lefty's need love too -
From the album: OWB Holster
1911 compact from 8/9oz veg-tan. Hand stitched and molded -
From the album: OWB Holster
a glock concept I've been tinkering with... -
From the album: OWB Holster
Lefty's need love too -
FullSizeRender 2.jpg
MisterSmith commented on MisterSmith's gallery image in Gallery- Our Leatherwork
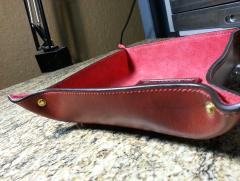
I actually got a medium/light density foam roller from a sporting goods store to do the intial wet forming. Put a rolled up hand towell behind it, place on a firm surface and then roll my full weight over the holster & blue gun for a few minutes. From there I just finish it with a wood burnishing and boning tool. Its the most economical way I've found to wet form a holster. A poor man's hydraulic press -
From the album: OWB Holster
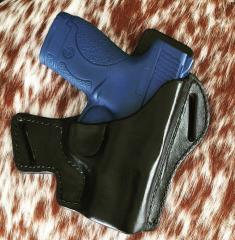
Ox-bllod in black. Hand saddle stitched and molded by hand. I used herman oak 8/9oz leather -
From the album: OWB Holster
-
20161031_124505.jpg
MisterSmith commented on MartinHrcka's gallery image in Gallery- Our Leatherwork
 Well done
 -
Where to start: 1911 full size conceal carry
MisterSmith replied to VTleather09's topic in How Do I Do That?
Dwight and the others had some great advice up there. if youre starting from scratch draw an outline of the pistol on some heavy posterboard, and sketch out your holster design to cut out and use as a template, better to waster cheap poster board than leather. if you're pensive about wet molding around your own, or someone else's firearm I recommend bluegunstore.com for molds. They've never done me wrong and have accurate, hard plastic molds that will stand up to forming leather around them. -
I've always had the best luck with Barge cement. Its common with boot and shoe makes, and is typically available at local hardware stores, tandy, and springfieldleather.com
-
Redgold, Since the pattern is already pre-fabricated with established stitch lines; you'll first want to start with burnishing your edges esecially the ones that will not be bonded to any other piece of leather. Next I would "case" the leather that you'll be tooling. I'm assuming the classes at your Tandy store had you wet the leather, transfer your pattern and start tooling once you started to see some natural color re-appear. Thats is fine for small patterns, but once you start tooling larger projects you'll want your leather to maintain even saturation. I recommend this article from Rick Jorgenson (http://jorgensonleather.com/?p=199) I would also read the forum here, and look up some youtube videos. After you've done your tooling and allowed your leather to dry, you may dye your leather. (In the future if you decide to wet form a piece of leather in a project I would save color application for the end) Finally install your hardware, bond & stitch your pieces together, and then give all your finished edges a final burnishing. You can apply leather sheen or Acrylic Resolene to the project for a nice hi gloss finish. The leather in the tandy kits are great for learning and practice, so manage that expectation of your final product. In working with leather, expect to make mistakes, lots of them. Chalk those up to learning, and use them to help refine a process that you feel works best; everyone have their own process.
-
Recent Dog Collar Projects
MisterSmith replied to barbedwireboutique's topic in Collars, Cuffs, Leashes and Leads
The tooling looks great. I especially like "patches" collar. A little tip that I was given here on the forums was to utilize a fine tip black sharpie marker to help acrylic stand out agaist the background. Strong work!