Shelly
-
Posts
328 -
Joined
-
Last visited
Content Type
Profiles
Forums
Events
Blogs
Gallery
Store
Everything posted by Shelly
-
Last night I got a good dose of 'sticker shock' when I went on my web search for lighted magnifiers - doctors, dentists, etc, have some really fancy stuff, and I thought they were pretty pricey at $750 - $950, but figured the optics are/have to be 'over the top'...then I finally found a few gun engraver sites that sold good equipment, and it was a good thing I was already sitting down! I'd like to watch some of these guys do this kind of engraving under these microscopes...it would be interesting! I did find an opti-visor with a dual led light setup that will add direct light to what you are looking at, so that may be what I'd be most interested in pursuing...and I agree that this is probably not going to be something I look forward to wearing! Thanks for the feedback, Troy - I'm enjoying all the replies this topic has generated!! Makes for some fun reading!! (Thankfully, I still see well enough for that!)
-
I agree - I'd already planned to take a measurement of how far my eyes are from my rock when carving/stamping, as well as another when sewing binders and horns, so I can give that info to my opthamologist when I go in next...and I do go every year, seems I think my vision is changing a bunch, and it's only a tiny bit - amazing to me how sensitive I am to these changes!! Thanks for the input and the link, I've checked these out as well...giving them consideration, as well as the Opti-visors...
-
Can't wait to welcome you into 'our world'! No one said getting old was for the faint of heart, and it sure isn't for sissies!! (At least I have a good excuse when I show my reining horses - if I miss a marker when running to a sliding stop, I can just tell my trainer (husband), 'I just didn't see it!!')
-
Well, I don't have any glucose problems (yet), and I do wear Progressive bifocals - I am considering just having the 'reading distance' shortened to be more 'user friendly' for my work...funny thing is, now that I need a new prescription, I see the computer screen best by just taking the glasses off entirely - I find myself looking over the top of them to see the screen clearly! But, when I'm up close to a cantle binder, and sewing, to look under the binder is a royal pain in the -ss!! Can't see at all at that distance! I first noticed this at 39 - would be sitting in my chair, braiding, which I have always done at about chest level - with elbows bent, that's about where it has always just been comfortable, not because I couldn't see, and would look up at the television, and would have to squint a little until my eyes readjusted to the distance...and it was like that for awhile, having to wait for the eyes to readjust when looking farther away, especially noticeable when working on braiding in my lap, which was clear - have had 20/20 vision all my life, until about then - didn't notice my distance really going South until we would be in an area (I do about all of the driving), that I wasn't familiar with, and found myself not being able to make out street signs until they got about a trucklength away! (If I take the glasses off now, I can't read anything really clearly past the end of the quarterpanel, but could still drive)... Around home was different, since I just didn't have to read the street signs, already know where I'm going! So, I ended up with a prescription for distance - a few years ago, add in the 'near' part, and we are now in no line bifocals - I don't mind them too much, but do miss being able to see clearly to the outside edges of my vision - pain to have to always turn and look directly at something in order to see it...and my vision isn't that bad! I like wearing contacts when I ride, etc - I don't have to turn my head for things to be focused! But, absolutely no good to be able to read anything that is closer than the windshield of my Dodge - everything closer than that, find the readers!! Ever notice how many of those things we end up with, and still can't lay your hands on a pair when you need them?? I don't think 'not taking care of your eyes' has anything to do with this deal - totally age-related! I am only 49, but feeling more and more that youth is really wasted on the young!! Thanks for the link - checked this out, not quite what I had in my mind...but appreciate the help and the recommendation! This I saw today in my errand rounds - I did give it alot of consideration, but finally decided that it won't work for me when I need to sew binders on the saddles, etc...thanks!
-
OK - here's a new one that many of you may already be experiencing! I don't really have a heavy prescription for my glasses/contacts - but, at 49, and after all the years of very close work with the braiding, etc, I've now found I'm having some frustration 'seeing' what I'm tooling, hand-stitching, etc...mostly because of age related focusing issues, I think. I have plenty of light over my work area, but I like a more concentrated, yet not blindingly white light, directly on the area I am working on - also, I don't 'see' what I'm working on as well as I could - even with the glasses on - probably need a new prescription...I have a light that has a 'circle' tube, and the center is a magnifier - I actually used it yesterday and today, to carve, tool, and finish cut a floral belt...I couldn't believe how much easier it was! Like doing flowers and leaves 4" in diameter! (1 1/2" belt) So, my question formed while I was doing this and feeling really dumb looking thru the top of this magnifier, and having to be very careful to not break the glass on the tube while running my tools - surely someone on this forum is using some type of magnification device that also has light with it to illuminate the work! I'm thinking about what would a gun engraver be using - they have such a tiny area to fill with so much, and I know it must be much more tedious than the carving that we do - so, if there is something out there available that will do this for them, I want that tool myself!! I've even tried to wear my contacts (for distance - from the ends of my fingers to...), to the shop, and when I needed to sew a binding, etc, I put those magnifying readers on - works better than trying to see what I'm doing that closeup with just the bifocals (no line type). I believe if I keep on like this I'll strain my eyesight even more than necessary, then what!? Can't wait to hear what the suggestions are - in the meantime, I'll try surfing the net for something interesting! Thanks to all, SL
-
Chuck Treon did something similar to this some years back, for a display at a high dollar benefit function - he made the leather bra by using a real one as a pattern, I think, and the cups were done in mulitple pieces, and I think he made it strapless, but did have the main part around the ribcage. This had a matching set of chinks, then was also floral carved (he may have done a vest..?) He made it up to look like a cowgirl with blond braids (yarn, I think), and boots, and put this on one of the tables as a centerpiece. He was working for David's Western Store at the time, and the store still has it, in the front window in Weatherford, TX. I have to go right by there tomorrow when I run my errands, so will try to stop in and take a few pix of it...will also find out how much they are pricing it for. I do know they've almost sold it at least 3 or 4 times, but was out of the budget of the women that were interested in it...! So, will see what I find out tomorrow...! Stay tuned!
-
Hi Keith! Well, hadn't even given it a thought when I did it - I had taken the pic, didn't like the angle of it and kept flipping it around until I got what I was after - it is a reverse, as I always wrap left over right! I guess you must be the first to notice it...! I suppose it would be understandable - I'm left-handed - but I do lots of things like a right handed person will...including braiding...I taught myself from the Bruce Grant books, and always assumed it was somewhat harder for me at first, because my assumption was the diagrams and instructions were most likely for right-handed people...the man that got me interested in the first place was also right-handed - but the plaiting he showed me how to do doesn't really matter as far as which side you are dominant on - it didn't get interesting until I started braiding buttons - and cutting/beveling my own rawhide and kangaroo was especially interesting trying to use Hansen's cutter the first time - was really a trial for about a week, called him and told him I wasn't having much success with the thing, and he thought to ask if I were left-handed - then he sent one that was set up for that, and I sent the RH one back - never had any trouble afterward! Now have had a couple other cutter/bevelers, but both are 'user-friendly', and can work for either, which is handy when your help is right-handed and I'm left! I have to stop and think sometimes when I'm teaching him something new, as I have to switch it around in my head to adjust for him, or anyone else that's right-handed... How's things in Cody?? The store in Scottsdale still doing well?? You've always given me something to aspire to and look up to - first class work, first class stores, etc...sometime I'll be able to get out to Sheridan again, and will make time to visit Cody longer than just half a day - maybe I can talk Bruce into a 'vacation' and spend a week...!
-
Not yet - it's after 50 that's the new 'middle age'! Happy Birthday!
-
Casing leather
Shelly replied to UKRay's topic in Purses, Wallets, Belts and Miscellaneous Pocket Items
OK - I've read this entire thread with interest - I personally will dunk large pieces in a tub of hot water, but will be sure it's not soaked thru, take it to the stamp rock, turn over and cover until I'm ready to start on it. I've used pro-carve, and now don't, because of the cost and because I couldn't really tell much difference, and I felt that my tools didn't stay where I put them when stamping (that was mentioned, I think) I am interested in knowing the breakdown on the mix of Lexol, water, and brown listerine - how much of each in the spray bottle (my bottle is a 'industrial type' from Wally-world - sprays a fine mist when the trigger is depressed as well as continuing this mist as it is released). I think it holds a qt...sort of sounds like mixing up salad dressing...I have a bottle of Lexol, and have two different floral saddles that I am interested in trying this out on...! -
Try Ron Burke - Tx Leather Machinery - 940-736-4707 I bought a band knife, crank skiver, clicker, Randall Spotter, and a Adler sewing machine from him...all are good machines, but I do have a mechanic come out at least once per year to be sure all of them are still working at peak, tuned up, etc. I already owned a Landis 3, and a Consew flatbed for chaps, etc. Bought a Campbell 2 years ago as well, privately. The Landis is my big stitcher for saddles, breastcollars, etc, and the Campbell is set up to stitch small goods, chap tops, headstalls, etc. I still use the Consew (have had it since 1987) for chaps. Ron was a big help when I opened up my own shop, 'full time' - I felt I needed the big machinery to make my business successful quickly, in order to be as efficient as possible. I don't have to drive anywhere to 'borrow' a splitter, etc. I had checked with quite a few dealers, and he had the biggest selection, and his prices were better than most. I do think it is a good idea to check out what you plan to buy if you can - take some leather with, and use it so you know if it is ok, or something that might need worked on, etc. These machines are all older, so have to be aware of what you are buying - same applies to Ebay - have bought a few items there as well, ended up reselling later on...
-
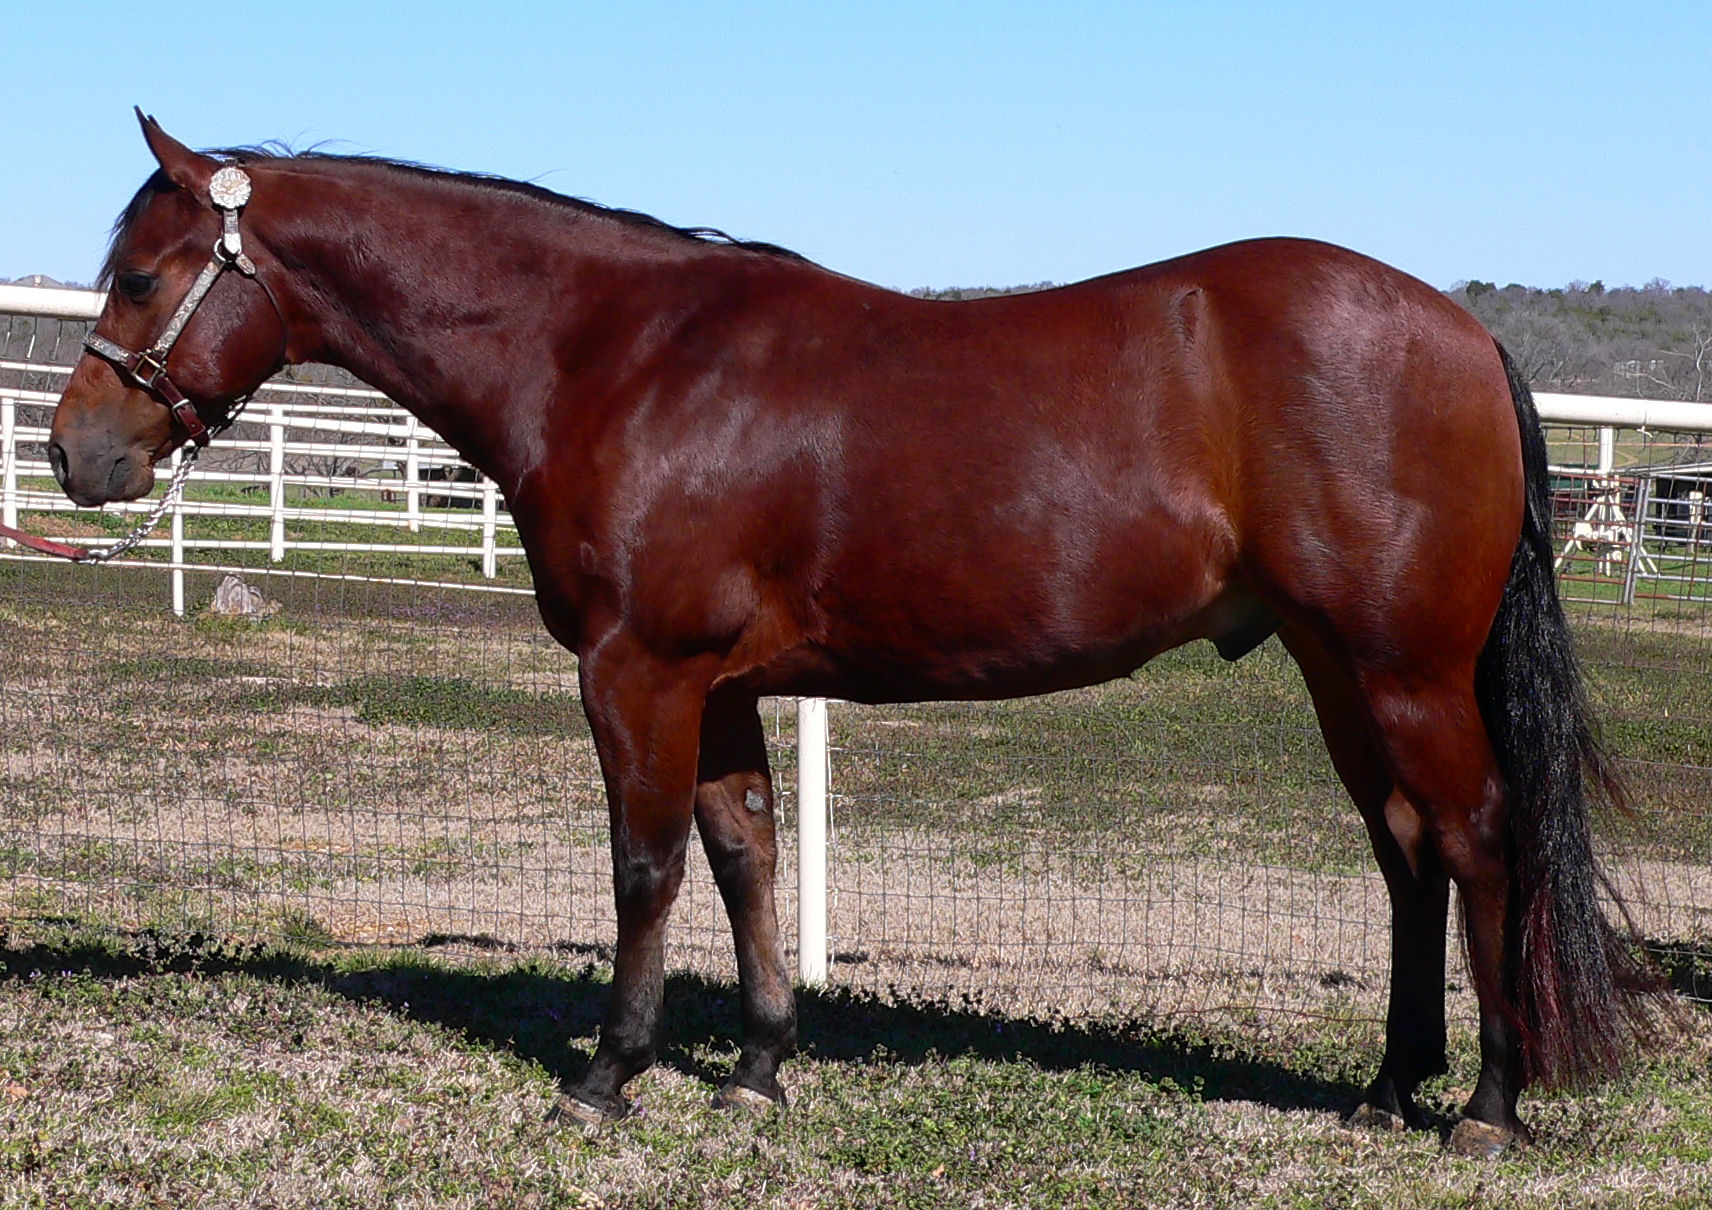
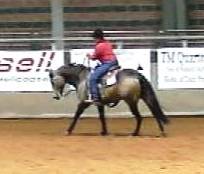
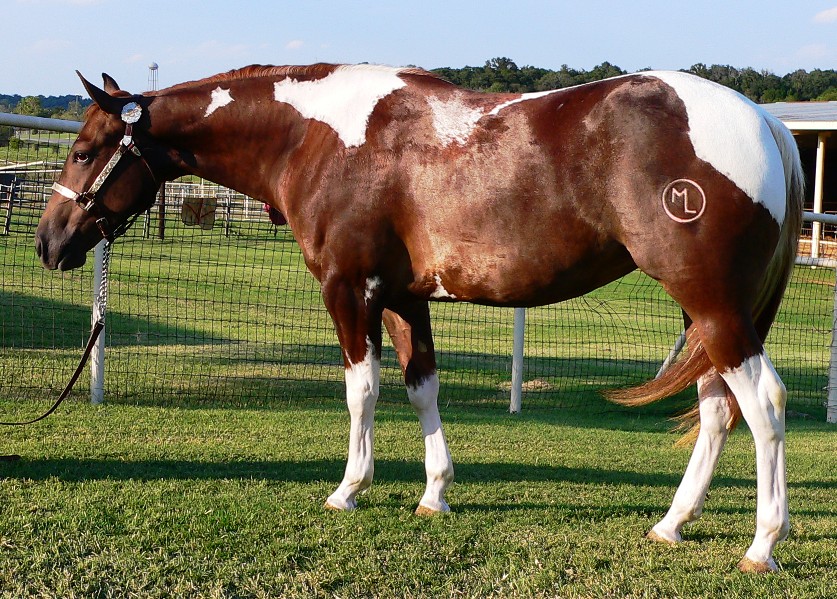
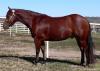
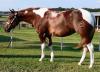
Yep! Have traded for breeding fees, horses, etc - right now I'd entertain a trade for a gooseneck trailer, about 24' long, that I can haul hay with - would have to have double axle and duals on each axle...to handle the weight/any distance/stability. I traded for my 3 yr old paint filly - she's a daughter of Dual Jazz, out of a paint mare that won about $4500 in APHA cutting, sire has won over 70,000.00 - this deal was pretty good, in that the breeder wanted a floral saddle, and what he wanted for the filly ended up being about half the value of the saddle - we drew up a contract, I picked her up, and he handed me a check - I think he was pretty happy in the end, as I hear from various people how great that saddle turned out and how good it rides...also traded for a filly a couple years ago, she wasn't terrible, but didn't pan out - bred nice, and got her sold for the value of the saddle - lost our time, etc on her, but that's a risk I can stand if they will make something - that's why they are called 'prospects'! I have only paid for three breeding fees in the last 10 years - have traded equal value all along for the other eight years. Sometimes they will end up giving me a check for the difference, sometimes it works out that I owe a bit, but we always are ok in the end. Currently have a customer that would like to do some trading with me, on some young stock he's raising - but, I've got pretty much all the horseflesh I need for now...a palomino broodmare w/foal, bred for '09, a 4 yr old dun mare to show in the reining, a 9 yr old bay gelding, and a 3 yr old sorrel paint mare - plan to show her in the reining next year. (FYI - I do have all of these horses in my saddle shop business - they are added/depreciated, I write off the expenses - they are owned by the shop, and I have a registered freeze brand that I put on any stock I purchase or raise - check out the left hip on the sorrel paint, and the bay gelding now has the same brand - pic is just before he was branded...) I don't do too bad - They are advertising the shop when I show, because the owner is listed on programs, as well as announced over the loudspeakers, and when they are eventually sold, I try to make a profit - been doing it this way for the last 3 years, and the last two, I've been able to show a profit on horse sales - thankfully, I have enough to write off that it offsets any capital gains made, but I have been able to show 'intent to make a profit' to satisfy Uncle Sam...


-
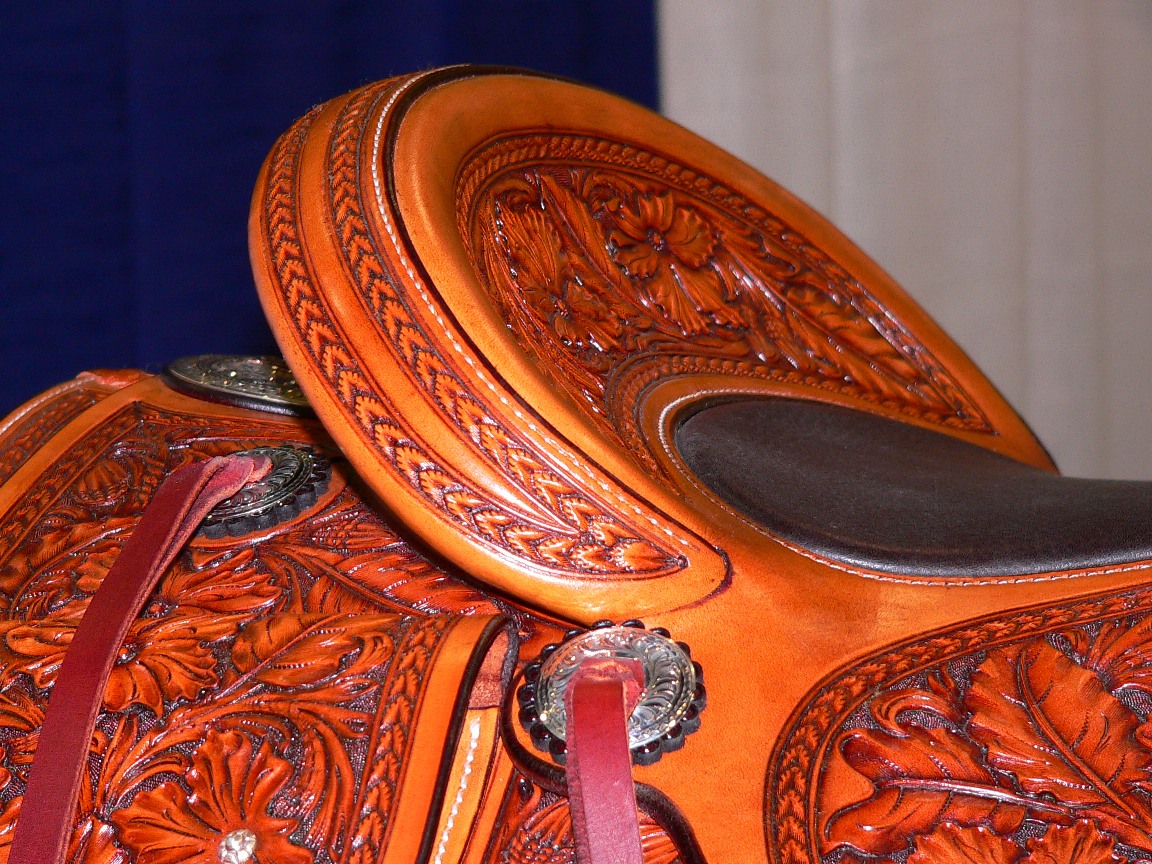
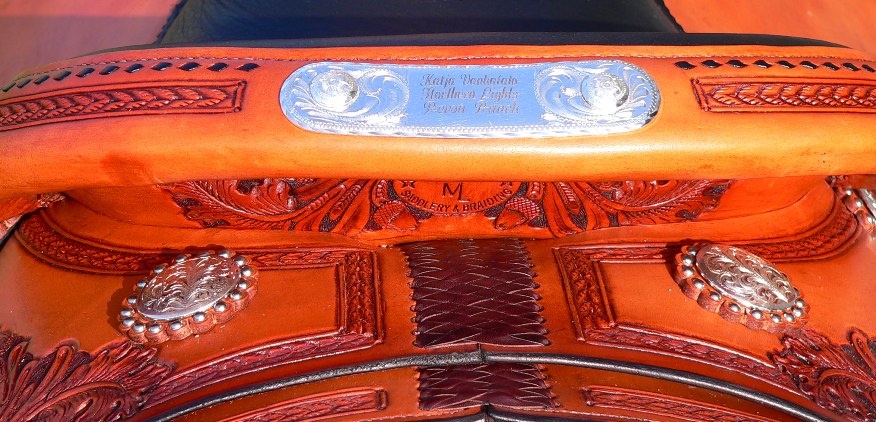
Ok - ya'll want to know about this Border Treatment - got this from another friend, so it's not an 'original' idea, but I loved it as much when I saw it the first time...comes from Pedro Pedrini - saw it first on a saddle he made for submission to the TCA last year, and, he did gain membership in that elite group by way of the workmanship, etc, of that saddle. He just called me yesterday, and was telling me that he will have to come to DFW a few days before the TCA show opens this fall in OKC, as he has been awarded the 'Saddlemaker of the Year' award - I think this is the Cowboy Artists of America org... Anyway, the main stamp is from Horseshoe Brand Tools, and a Craftool F120 - this tool is cheap, and we buffed off the lines. I will start by deciding how far from the edge I need to run my double line, running that with a ceramic blade - then I will make a light impression with the HBT next to that line, so I know how far apart to set the dividers to mark the second double line. Run the HBT after both double lines are done - a little scrap piece helps before the real deal - then use the modified F120, and a little tap with the wider end at the base of each of the HBT impressions. Once done with that, I bevel the inside edges, then the outside edges. I've also done this border with shell tools, etc, just to change the look - IMO, not as pretty as just the double line, keeping the outside edges clean, and not distracting. Attached is a closeup of that border treatment on the cantle, etc of that saddle.... Pretty simple - three stamp tools and a double line swivel knife... Enjoy - SL

-
Thanks to all for the nice comments - I don't profess to be at the level of the TCA - but it's good to have those people out there to give me something to aspire to - I've had some 'over the top' comments about my braiding abilities over the years,(and now the saddles), but never really believed in them...especially when I've got an Argentinian knife and sheath to remind me of some really 'over the top' work! I do get good feedback from my customers, and that is generally what keeps me in it - just really like the good feeling I get from them when they give such positive reports - but, I'm pretty grounded, I know I'm not going to please everyone all the time, so I just do the best I can, and keep trying to get better on the next one...I did have a friend that does high end saddle work comment once about the buckstitching (when I did that for the first time) - some food for thought for all - 'Be careful what you put on your work - be sure it's something you don't mind doing, and make sure you charge accordingly for it, just in case you start wishing you'd never done it' Reason for this comment is because later on, this has become a 'signature' add-on - I get requests for this on lots of my cowhorse/reining saddles, and it does take lots more time to do - because of that, I went up enough on the price to be sure I was compensated for the time/effort required to do the application...anyway, just glad I can actually make a living at doing what I like to do!
-
And a few more pix...


-
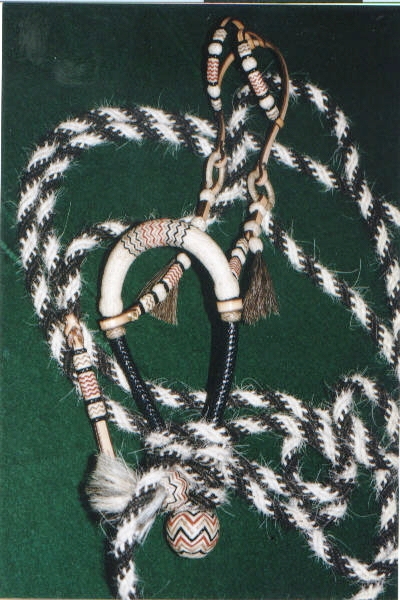
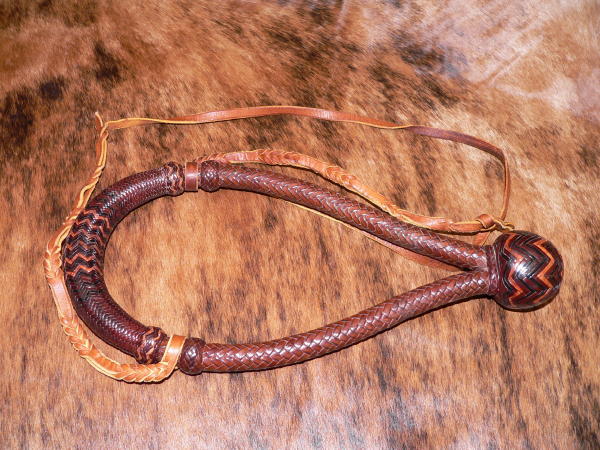
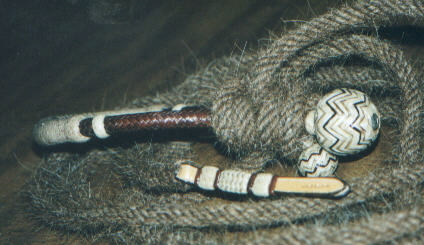
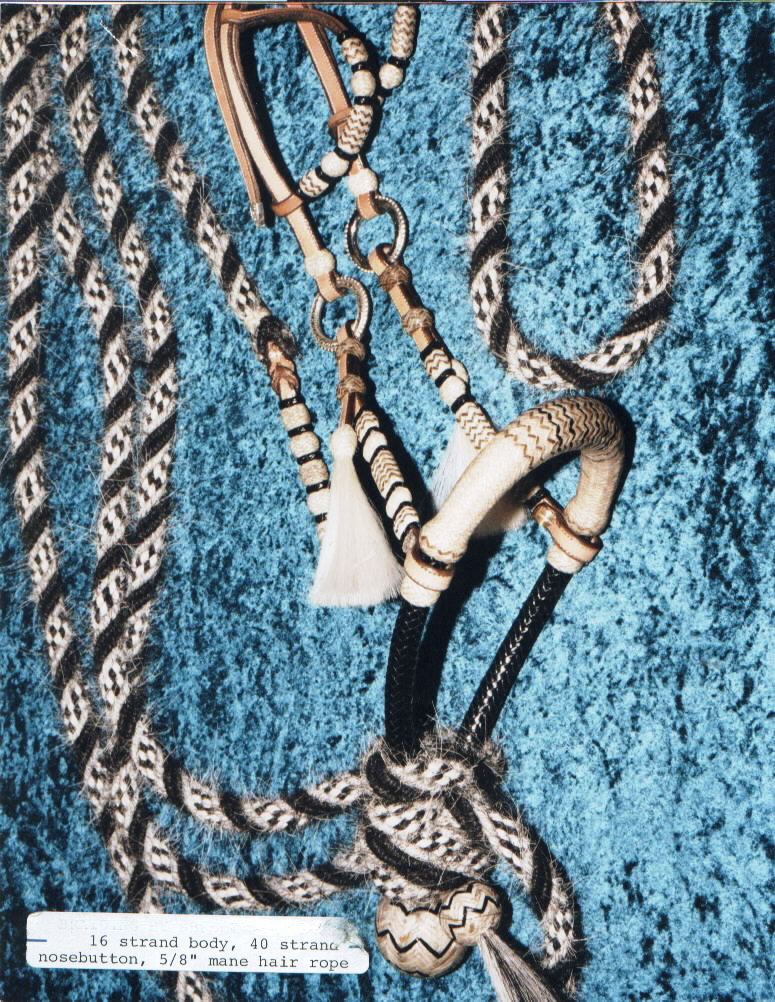
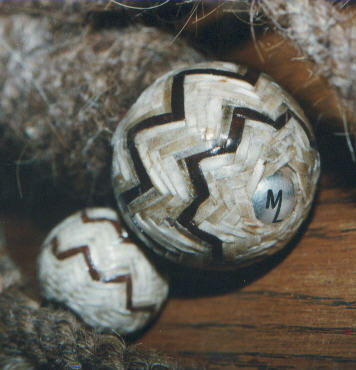
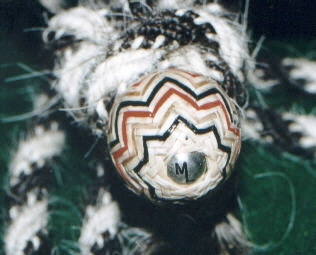
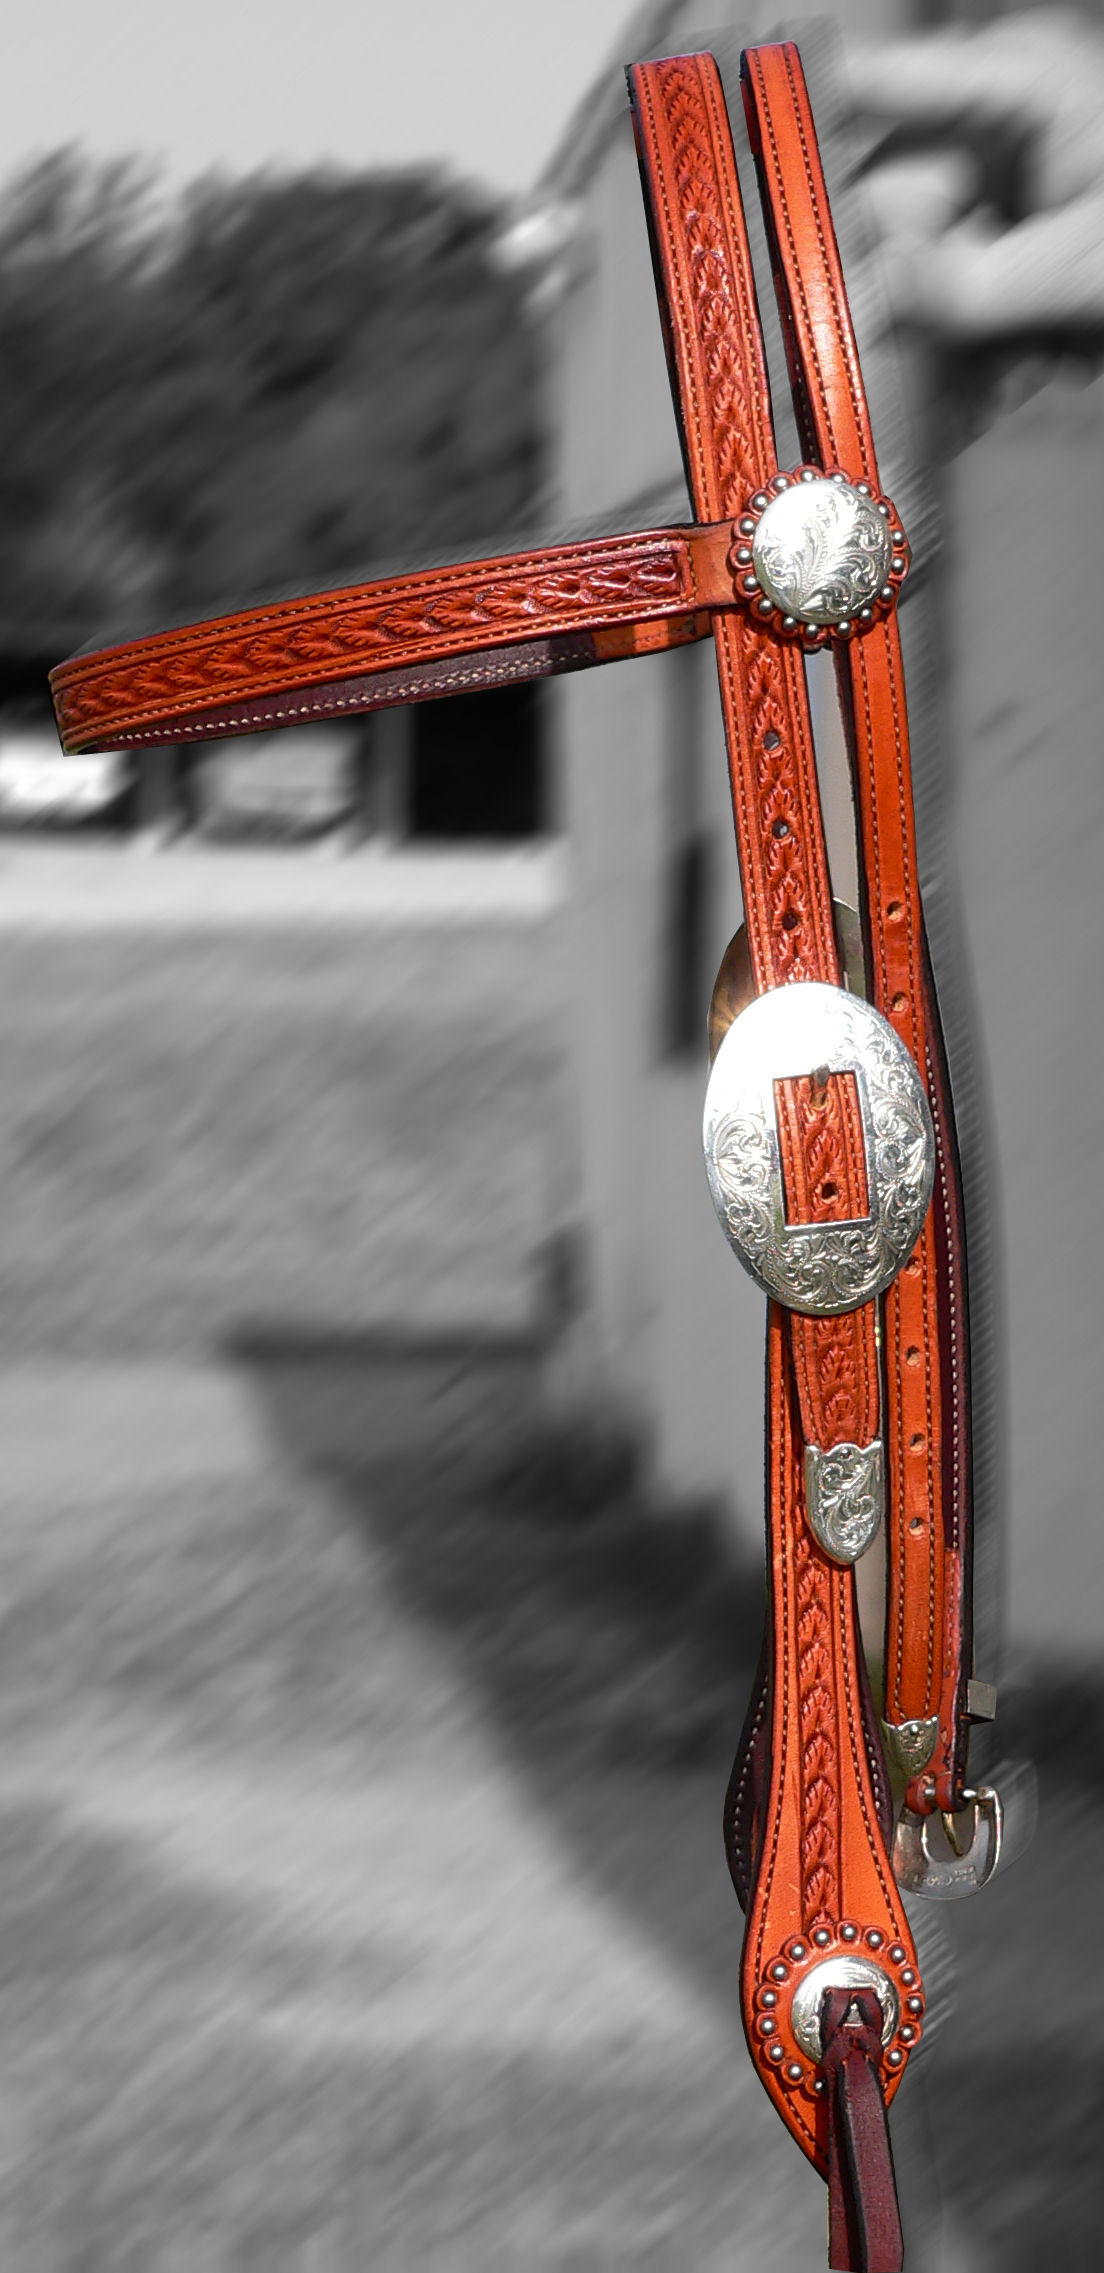
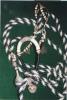
Here are pix of some braiding I've done....bosals are 16 plait bodies, nosebuttons are 32 strands, heel knots have 5 to 9 passes (over/under that many strings when interwoven)...a few headstalls, etc..


-
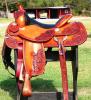
Well...had to re-register after the hack! I suppose that means I get to repost my pix as well! These pix are of one of the most recent saddles I finished up - the gal that owns it flew over for 3 weeks, from Finland, and stayed here with us while I built it. She also rode horses with my husband, helping in the barn with the horses, and then spending time in the shop when not out there...I put her to work after she decided she wanted antique, dyed edges, and dyed background....I did the background dying, and I taught her the steps for the antiquing, and let her do a lot of the edges, as long as it wasn't 'critical' that I did that...This would have cost her over $700.00 US for ship/ins, by way of FedEx - she would have needed to pay duty once it arrived also. She was told she could just about fly over and get it herself, and when she told me that, I invited her to come on - she could help out in the barn in exchange for her room/board...because she has a board/training facility over there, she was pretty keen on that - now I have a new friend half a world away! When she got home, she had no luggage - no saddle, either! The airline delivered it all to her a few days later, brought everything to the farm for her...best part - she didn't have to declare anything! Never had any of it looked at by customs....no duty, etc...how lucky was that?!


-
My personal choice in riggings is the inskirt - as for a slot or rear dee, doesn't matter to me very much - majority of the cutters I build for want a 7/8 drop rigging, sometimes a call for a full double, and the ones that want the inskirt will be adamant about it. The inskirt is the best way to have the least amount of leather between you and the horse, as well as having the least obstruction to forward swing. I always install rigging connectors to help the stirrup leathers to ride up and over the rigging - it's still not the best...IMO... As for the rear dee/slot placement - I've done enough of these to know that I'm really aiming for the lowest part of the rear bar pad - regardless of the seat length, as placing the dee behind a struck line from the cantle point is not always going to get you to that - my husband's saddles are a prime example - he will ride a 14.5 to 15 seat in his saddles, and if I place the rear dee just behind the point of the cantle, the flank would ride forward too close to the front cinch, be in his way, and in general, not look right (balanced) - as well as not being properly positioned for best security. (One thing I also notice - when I go to the major cuttings - most flank cinches are not being cinched snug enough to make any real difference when the horse is being worked and shown - almost all will have daylight and even when a horse gets in the ground and comes back thru itself on the turns, very few are actually being 'engaged') As for reining horses - most will remove the flank and billets completely, and never use them. In the cowhorse circles, I see more that actually snug the flank up to where it does touch, but not tight - this is my preference when I ride - have always had it drilled into me that any more than that, it's of no use, and you are asking for a wreck, in that the horse may get a hind foot hung in it, (seen it) ... Now my opinion about skirt patterns, etc - I have made many of them, and I completely agree with Steve Mason - you do need to be able to make your own patterns - I have rough blocked a skirt on a tree and then made a run for the barn - needing a 'victim'! Will take at least three different aged horses, put a pad on them, then the tree with the blocked on leather - will then take a 36" ruler, and check myself for 'square to the world' as it relates to what it looks like on the horse - that line you struck in the shop won't always look right on the horse - also, even tho the front edge of my skirts will be approx. 1 1/2" off the front edge of the bar, I still need to make sure the line coming down from that mark doesn't look like it's going backward on the horse - needs to be straight down at the worst, and for best look, I think slightly ahead - have the same issues about the rear of the skirts - I usually go no more than 3" off the back of the bar - but, I never want the total overall skirt to measure more than 28 1/2" to 29" overall, so, if I must adjust for a much longer bar, such as used for a 17 1/2" seat, (do have an order now and then) - I need to be sure it won't interfere with the horse, so I will shorten if needed, at the rear. I personally like the looks of my backhousings to show at least an inch of the bottom skirt, usually 1 1/4" is what my dividers are set to when I make my lines when fitting the backhousings - I also like to show at least the stitching on the edge of the front skirts when fitting my seats...in the end, I'm trying to keep form to function for the horse and rider, and then trying to find lines and balance to please me - I will also do this process again when I have my skirts trimmed out as I want them, and blocked on to dry - will usually want to do a check of rigging placement on a live animal, so will place full doubles or dropped riggings after the skirts are blocked on, and hold them in place with my smallest spikes (two to three) - I will measure off the bottom of the bar to the fold around the dee, placing the ruler under the dee, on top of the skirt, and butting up aganst the bar pad - I can also measure from the front edge of the dee to the front edge of the skirt - once the first one is in place and 'square to the world', I use the measurements to place rig #2 - then I double check all by running a string from the center of the cantle nail to the dees, in two spots, usually the back inside corner and the front inside corners, on both sides. If I have gone thru the process above, and made sure the skirts are visually level on the horse, then, when I come to the point of placing rigs, I will want the dees to be level with the skirts bottom edge...I will be able to double check this and how it sits on the horse when I go back out there for a visual check once I've placed the rigs...if I've done it right, both sides will look level and in balance with the horse, and my rigs won't interfere with the horse...and lastly, I always want to block the skirts deep enough that I won't have interference behind, when the skirts are laced together - always use a scrap of leather strip across the top of the bars, finding center, to use as a guide line when making a new pattern or checking an old pattern for a different bar, etc. I will block deep enough that the leather is level with the top of the bars - then, give it a visual from a side angle, to be sure the rear of the skirts are following the same angle as the bars, not winging upward, and not downward - straight. This way, the rear edge of the skirt doesn't bother the horse when standing at rest, or when working. I've worked in shops that used a pattern to cut skirts on - and they did not lace the skirts together because they felt lacing them interfered with the action of the horse - it will if you are using different bars/treemakers - and not making adjustments accordingly. Also note that different bars/front heights/widths will make it necessary to adjust or fit skirts, rather than 'cut on the line'. I will always fit my skirt patterns full around the top edges when I change things on a tree, even if it's the same treemaker, and I'm using the same front/cantle combination - if I've asked for a taller gullet height, wider, narrower, or a bar modification, it will all require rechecking or refitting - after I do this and have the skirts where I want them, have off the tree for stamping or tooling, I will use a slicker to smooth the blocked areas, and make a new pattern for myself, if I plan to build again on that configuration of tree. Seat length will affect bar lengths, and I've sometimes had different bar lengths in the same seat lengths in two different trees - in essence, when I place my skirt pattern up under the trees to check to see if they will be acceptable for that individual tree/saddle, I always check, regardless if that is the same maker, configuration, etc - might need to lengthen/shorten my pattern slightly to keep me at my chosen 3" at the rear, and so on... I do like to make patterns for lots of my repair work - will have different makers saddles in for new rigs, etc, and will make patterns as necessary for replacement riggings, etc - each shop seems to have a little different design, but it helps to be able to reinstall the new rigs to cause the least amount of change on the saddle. I've found that even replacing horn covers has brought about complaints that they aren't the same size cap as the old one - we now will attach the old cap we've cut off, to the saddle when it goes home, so the owner is able to see that we have recovered using the same measurements for the stitching and then the finished cap width...we are also careful to be sure the cap, filler, and apron are the same thicknesses as what comes off - this is easy enough for me, with a band knife in the shop! By doing it this way, I have not had a single complaint since...just my 'dollars worth'!