EfrainBG
-
Posts
86 -
Joined
-
Last visited
Content Type
Profiles
Forums
Events
Blogs
Gallery
Everything posted by EfrainBG
-
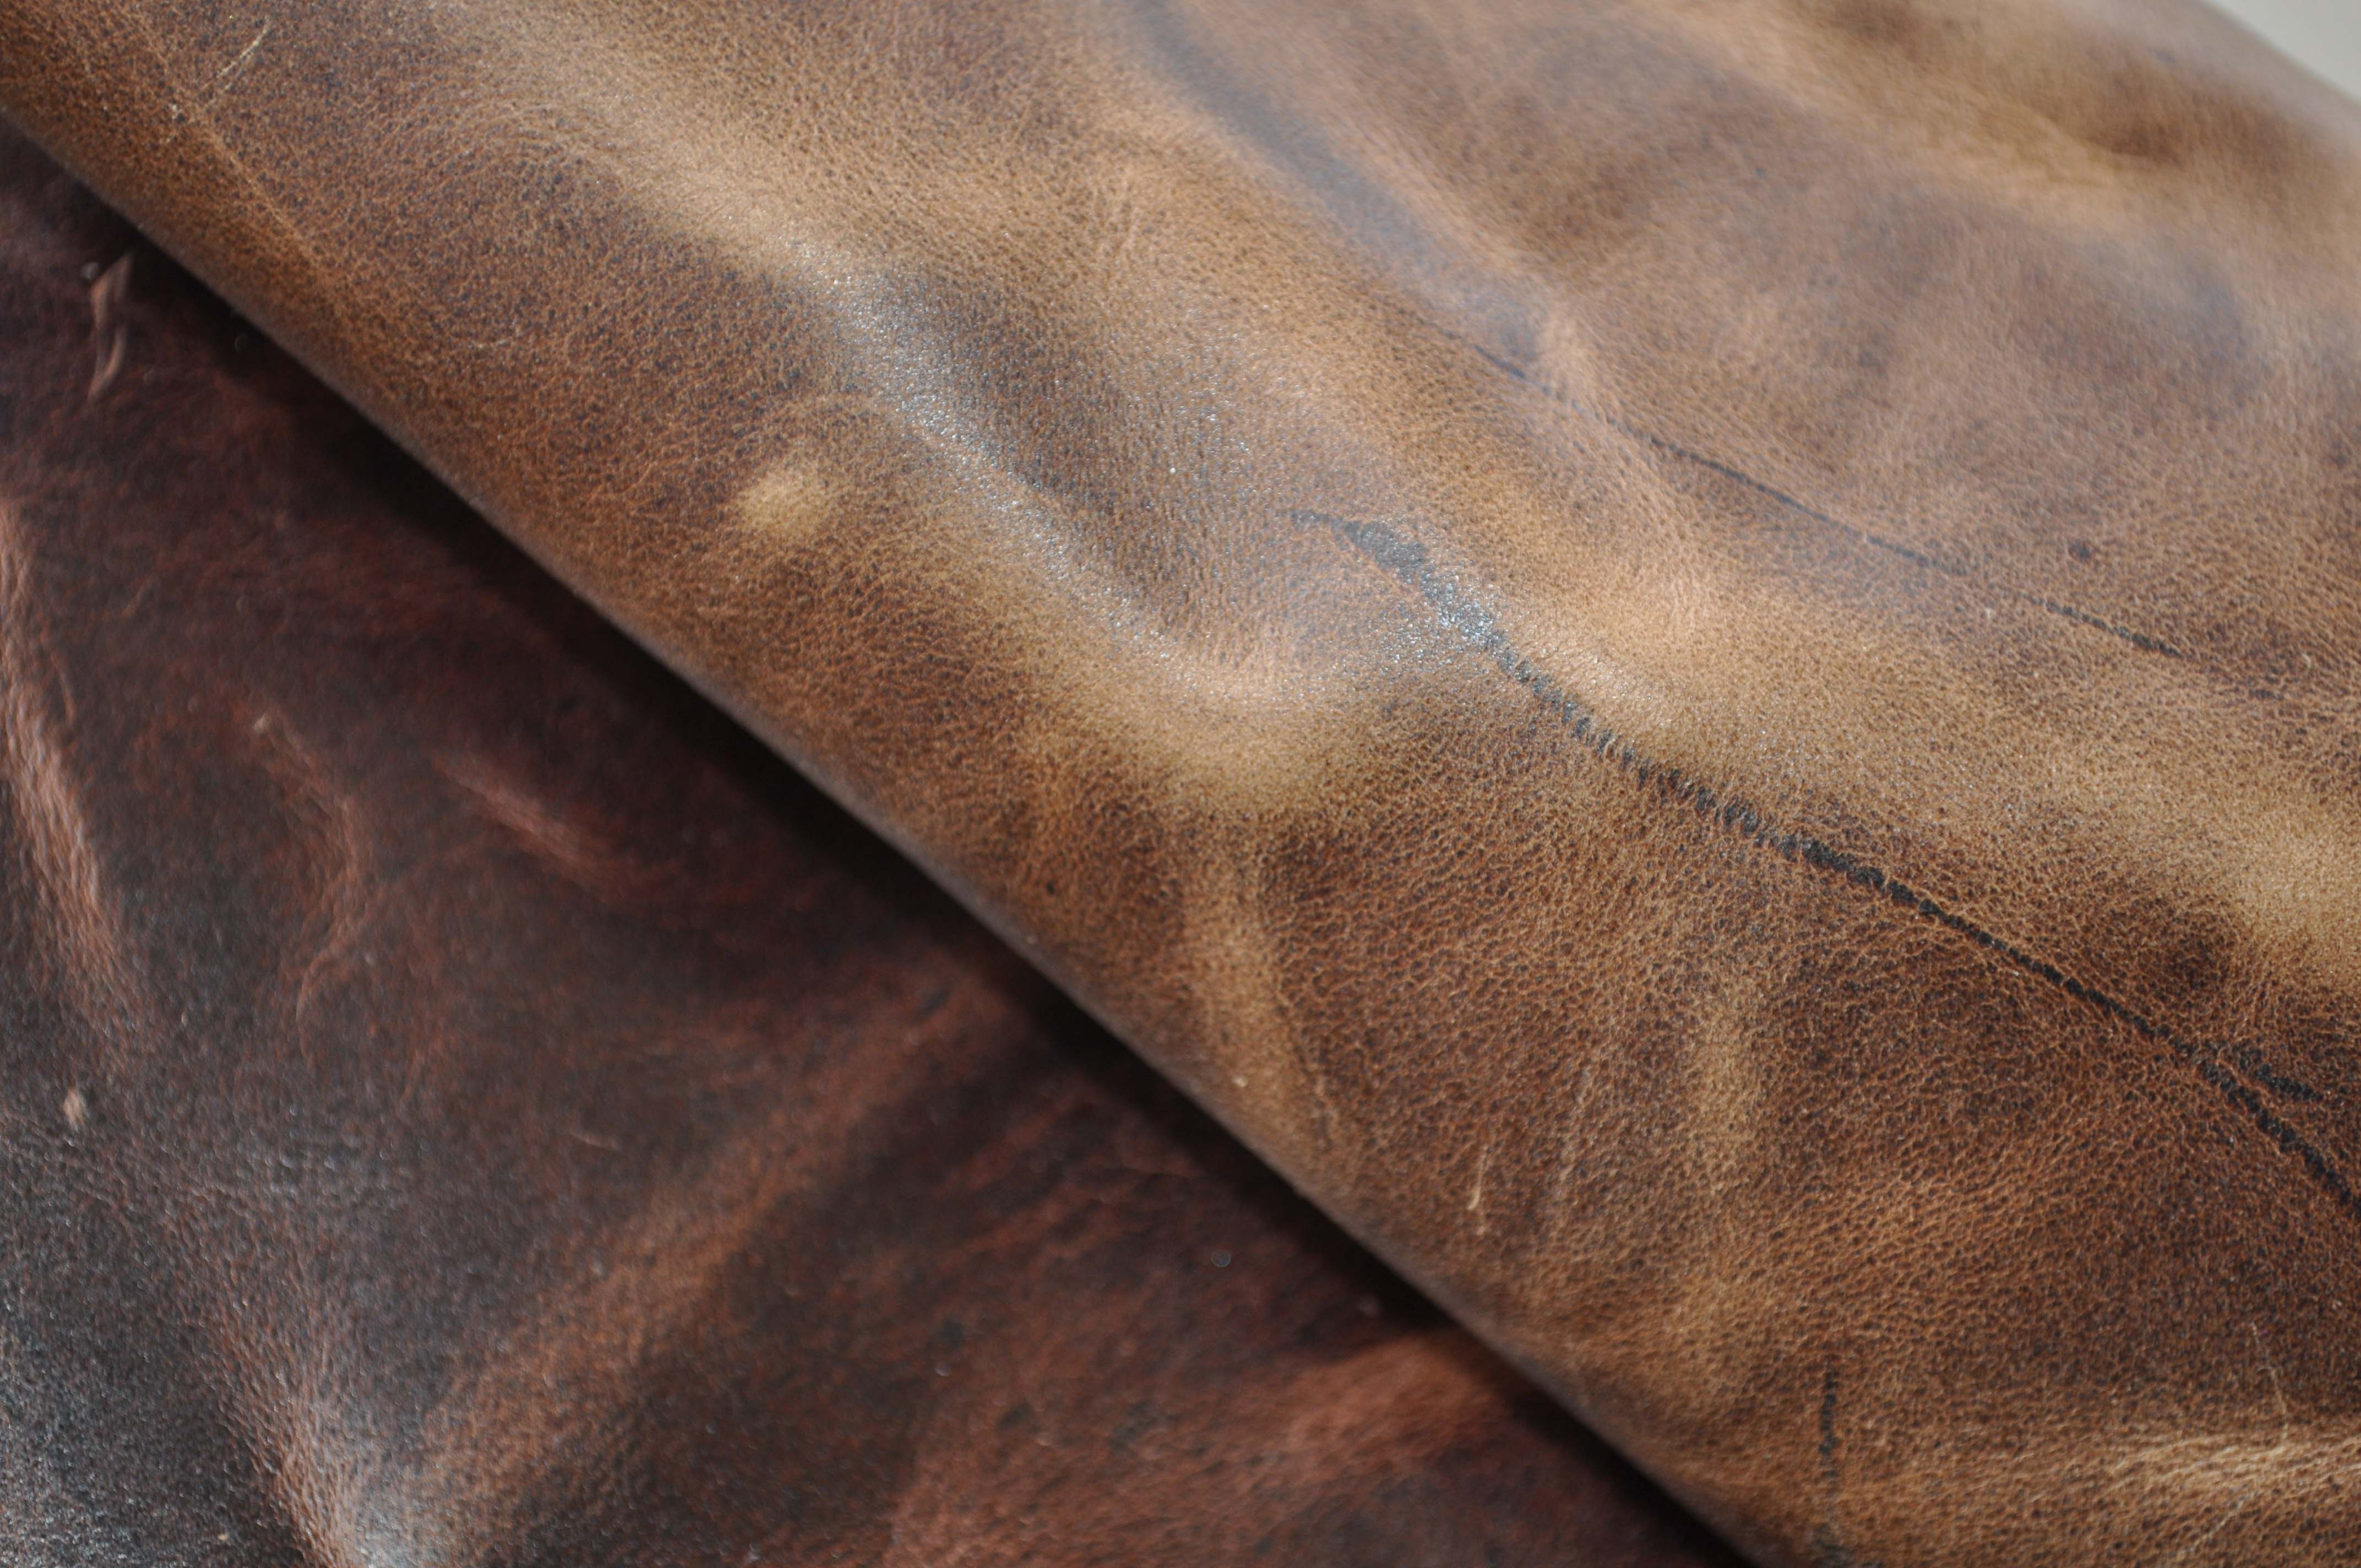
Thanks for the tips! I'll take a look at The Hide House. But, to be clear, the leather I showed here does not come from Chahin. I recently asked for the samples, but I haven't bought anything from them yet. I couldn't say where this particular leather comes from... the worker didn't know (Ithink he was honest about it). Now that I remember, there's another tannery I looked up a while ago. If you know anything about them I would appreciate it if you shared. They're LEFARC, from Guanajuato, Mexico. I found them because of Saddleback Leather... to be honest, I don't know if they even sell in the local market.
-
You have a point in getting some references before using a product. I only bought these because I asked arounf in local shops (saddles, shoe makers, general leather goods) and was pointed to those specific brands. I even used on previous small projects and did extensive testing on scrap pieces before using any on a project, no mater how small. However, now might be as good a time as any to try something new. Fiebing's seems to be a generally liked product and with lots of references around this and other sites. I live in Monterrey, Mexico. I tracked down a mexican tannery that makes some of the leathers sold by Weaver. The name is Industrias Chahin (Chahin Industries) and they're who I ordered the samples from. It's going to take a while until I get my hands on something I like, but that's probably ok, since it's rain season around here and I hate treating leather in interiors... you know, smells, vapors, all that. Besides, since I like treating the whole side to get an even result, I have to do it all outside and give it some time to dry in the sun. Anyway, I'm not in a hurry and I would very much appreciate any tips on where to buy. Thanks a lot!!
-
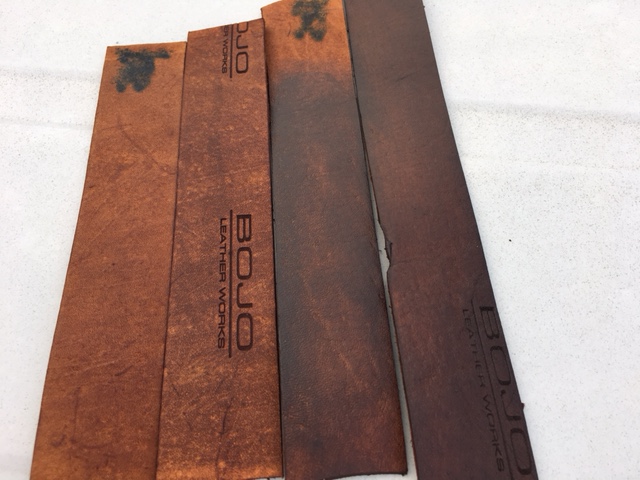
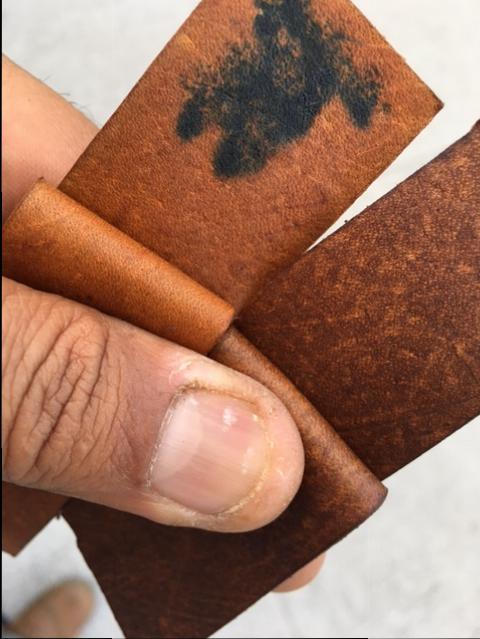
First of all, Hi, everyone! Thanks for you answers. I'll try to answer each question: The pull-up is, the way I understood, when leather color becomes clearer in spots where it's bent or pinched, like in the picture attached. This is not mine, It's a picture I borrowed from the Internet. I used stain as a base in all of them. Very diluted. When it dried the color came out very clear, yellowish. When I applied the neatsfoot oil it darkened quite a bit... to be precise, darkened to what you see on the first sample, from left to right. That's pretty much the base I was looking for to avoid white spots when applying the dye. On #1 and #2 (left to right) I used only stain. In #1 the stain was applied before NF oil, in #2, after NF oil. On #3 and #4 besides the stain I applied dye after a second coating of NF. #3 has undiluted dye, #4 has diluted dye 1:1. - I left the brands out at the beginning because I'm using mexican products and I don't think they are really that well known out of Mexico. The stain brand is "Pielux", the dye brand is "La Corona". I'm really using these for availability reasons. I have no problem purchasing and importing from the US (other than transport regulations for certain products)... in the end, the prices is very similar, although slightly more expensive when buying from the US. - I'll look up for a comprehensive list of resists... I read in a thread here that it was used as a resit, but I checked already and it was mentioned as an aid in antiquing. My mistake. - I'll look for denatured alcohol... is that the one you get in a drugstore? I tried diluting dye with it and all it did was to separate into a pink liquid and a blotch of pasty-rubbery brown stuff that was unusable... almost as if it was cheqing gum... it tasted funny... hehe, just kiddin'!! - The only thing I used to dip was the stain... I applied the dye with a dauber since I don't like what it does to the flesh side of leather. - Another nice tip on the correlation between dyeing, conditioning and pliability... in the case of this project I'm working on, pliability is very desirable, so, nice to know to achieve a little extra of that one. - I'm looking for that drum dyed piece of leather but I haven't been able to find it with my local provider... I did call several tanneries and ordered a sampler. I'm interested in the process because this natural colored, chrome tanned /veg retanned has a very nice feel to it and comes at an amazing price (give or take, around 3-3.5 dlls/sqft)... full grain and all. Really, thanks a lot to all of you for your time and interest. I'll keep looking into this for more advice.

-
A quick (not that quick, really) question about dyes... acrylic dyes, to be specific. Question #1: Once I apply one of these I can kiss any pull-up in the leather goodbye, right? I ask because I'm looking for a very dark brown or chestnut color, but I have only natural color leather at hand. I've made some progress with stains and dyes through trial and error, but I'm not quite where I want to be in terms of color (I've actually found a color I' might use on another project). All straps have the same base: 9 parts brown stain, 1 part black stain, 40 parts light paint thinner (UN number 1263... in case that means something). All straps were dip-stained in that soup and let dry. The differences: From left to right: - #1 and #3 were resisted with neatsfoot oil and dried before staining. - #2 and #4 were stained first and then neatsfoot oiled once they dried. - all of them received an extra layer of neatsfoot oil when dried from the previous steps. - #3 and #4 were dyed with acrylic dye, #3 without diluting and #4 at 50% dilution (diluted with the same paint thinner mentioned above). (NOTE: These look rather dull in the photo, but are actually quite shiny and nice) Once dried, all received a coat of Fiebing's Tan-Kote The color I'm after is basically the one in #3 and #4, but, having used an acrylic dye, I'm afraid they loose that nice, light pull-up I've got from #1 and #2 (shown below)... #1 and #2's by the way, is the color I mentioned I'll use for another project... Question #2: Is there anything on the market that can give me the color I want without loosing the pull-up effect? Thanks in advance!!
-
First messenger bag
EfrainBG replied to LederRudi's topic in Purses, Wallets, Belts and Miscellaneous Pocket Items
really nice work there, LederRudi! -
really beautiful work!! nicely done!
-
Horween Latigo bag, Saddle stitched
EfrainBG replied to 9tpi's topic in Purses, Wallets, Belts and Miscellaneous Pocket Items
Beautiful work!! And I feel what you say about planning your work. I do spend some time prototyping with paper, felt and foamy sheets. It takes out a lot of guessing. -
Dyeing and finishing
EfrainBG replied to EfrainBG's topic in Dyes, Antiques, Stains, Glues, Waxes, Finishes and Conditioners.
Here's the end result, Richard.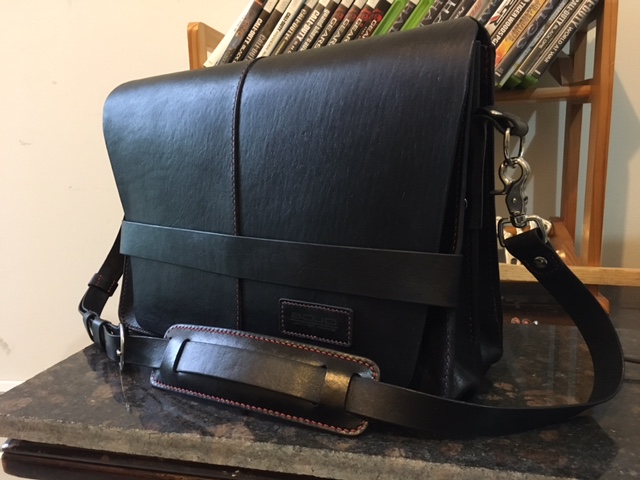
-
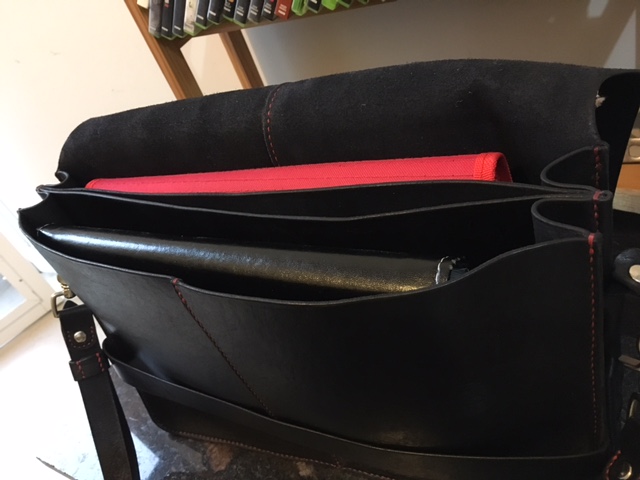
thanks so much, everyone!! As I said, I'm very happy with the results. I still have a couple of issues to attend before actually starting to sell this baby (a very feasible possibility now that my wife has started to show it off, by the way). @RockyAussie: I had some serious concerns about this variable, so I made extensive testing (2-3 runs, actually) making some corners out of several scrap pieces I had around. The idea was to create a suspension of sorts with the gusset for the contents of the bag, so the interior flap is about 1 inch narrower and about 1/2 less tall than the front piece (1/2 inch on each side in contact with the gusset) to try and avoid the rib in the middle from touching the ground. In the end, this feature actually gave the bag some structure and allowed for it to stand on its own very nicely. The curve in the corners is about 2 inch radius, while the one in the middle was about 1 5/8. This diference ended up pulling the gusset corners in helping to that suspension thing I blabbed about... hehe
-
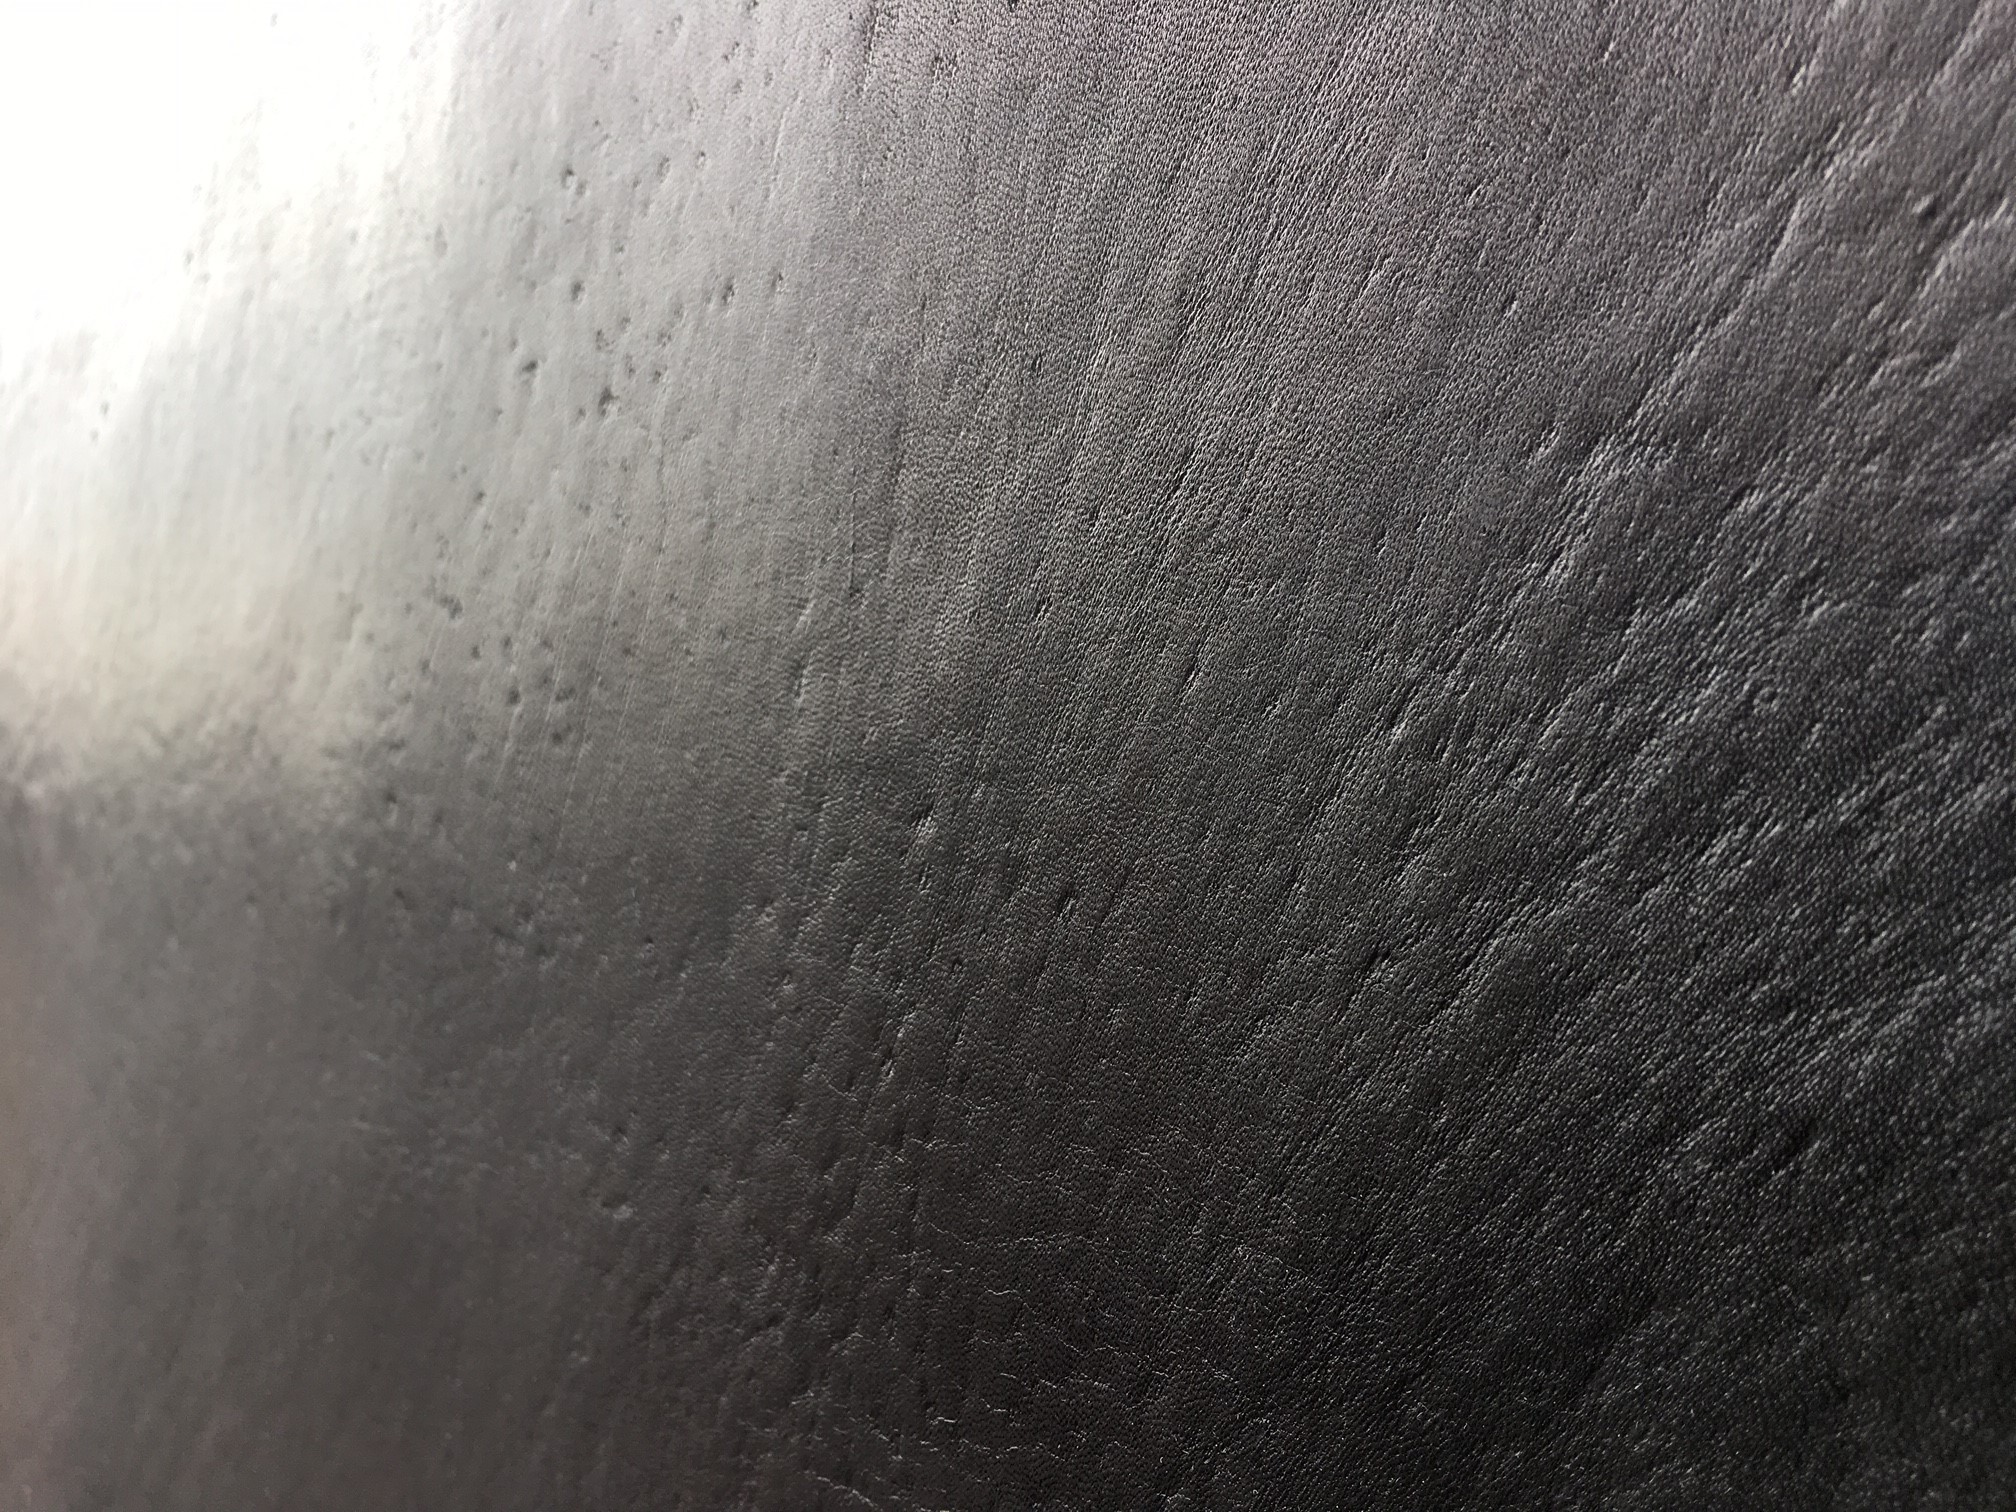
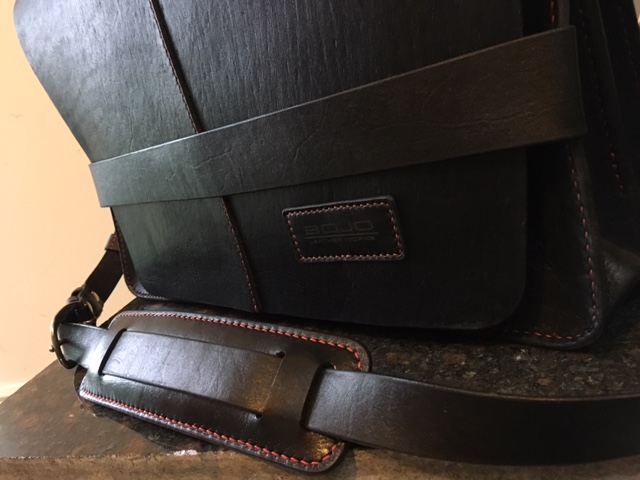
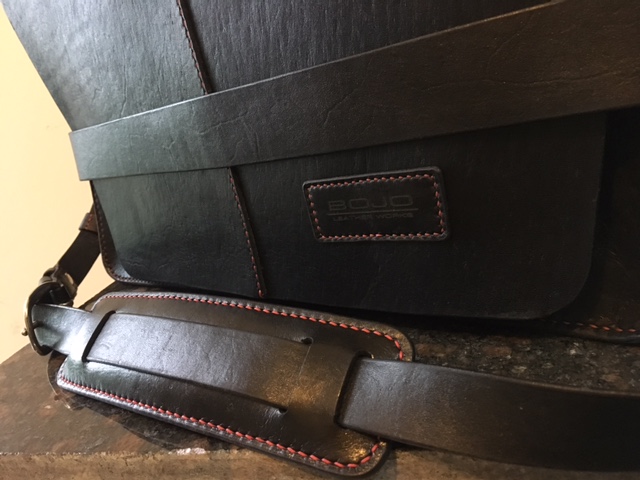
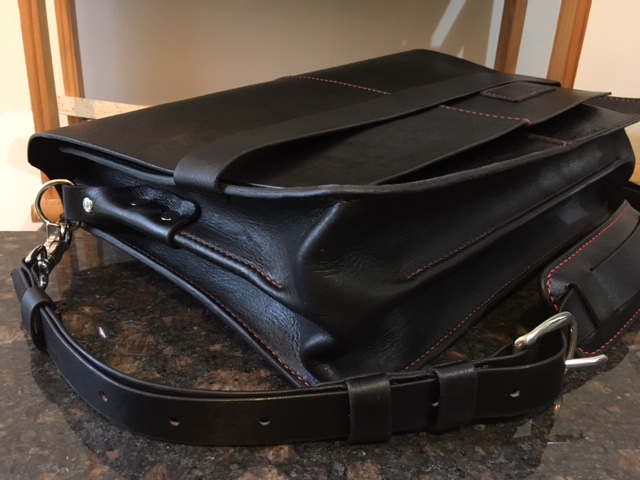
Hi, everyone! I just wanted to share the latest project. I just finished it this morning. I Promised my wife a while ago that I would make her a bag for her laptop, but she wanted something fancy to show off in her meetings, hence the black finish. I started looking around for design elements that would suit her tastes and started making the patterns. I was surprised at how quickly I finished this thing once I got past the coloring and treatment stage. I spent basically a couple weeks coloring and finishing the leather prior to even drawing the patterns on the side I bought because I wanted a uniform look around the bag. My process was: - black stain - neatsfoot oil - 2 layers of black dye - Kote - cleaning and buffing with Chamberlain's #1 I waited a full day between those steps and I loved the results. I used 0.8 mm red Tiger Thread (which is a delight to work with) I sturggled a bit with the burnishing and didn't quite get the shiny look I was after in the first place, but I changed my mind very quickly when I hit that matte look. Anyway, I'm very happy with the end result... it has definitely room for improvement, but I willtake care of those details when (if) I manage to sell one of these babies by way of my wife luggin' it around. I hope you like it!! Cheers!


-
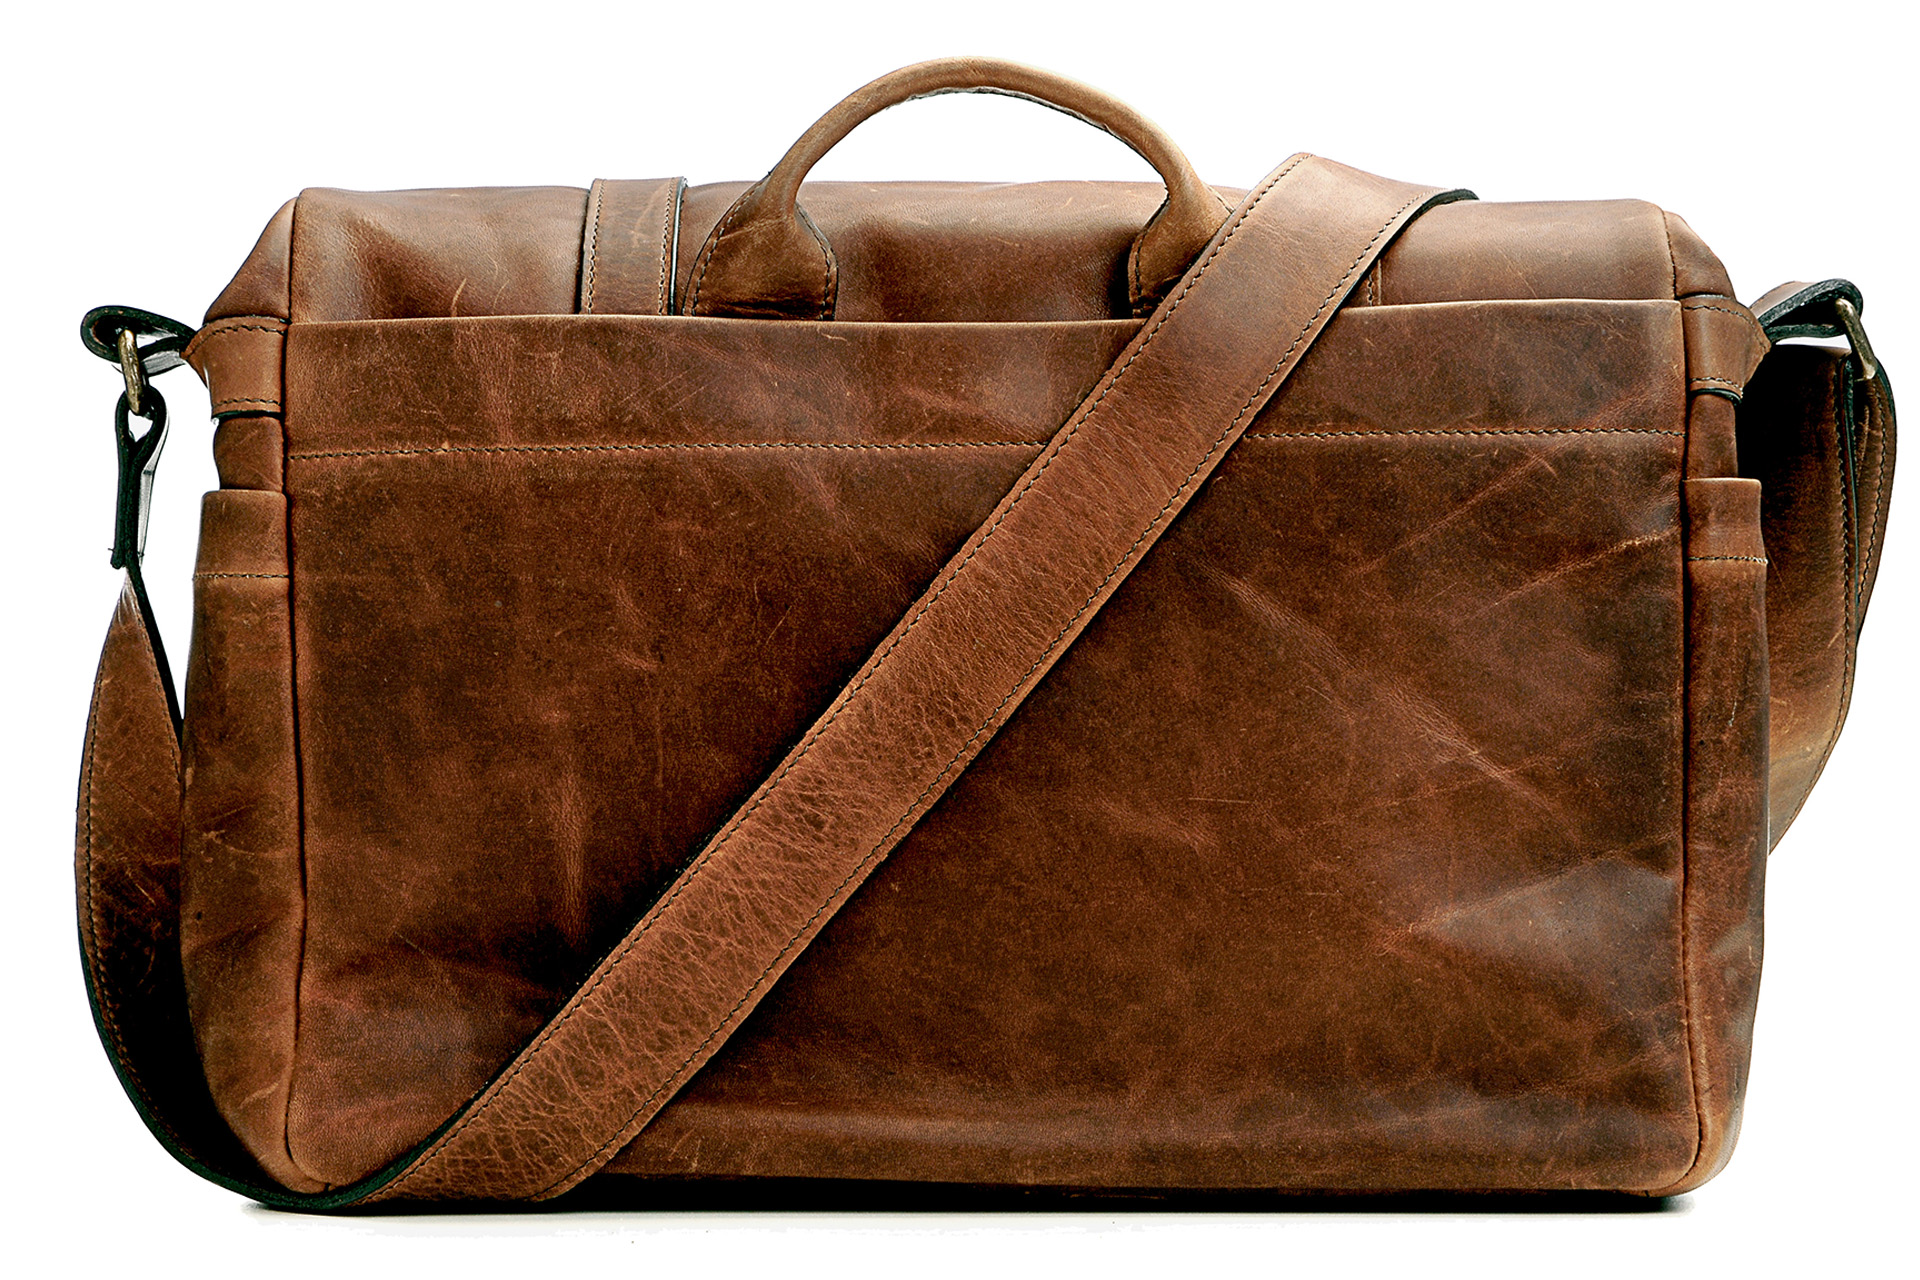
Thanks a lot, Harry! I'm flattered, Tony. Thanks fo much for your kind comments. Now I'm on to my second camera bag. The backpack turned out to be quite heavy for an everyday photographic carry and it's messing up with my back. I still use it as a laptop backpack since those walks are far more apart and quite shorter than a photowalk. The english is indeed my second language (it shows up quickly in conversations ) but I happen to be a grammar geek in spanish and learning to write in english was relatively easy. Back in college I read very heavy technical books all in english and I continued the habit with novels and whatnot... that's where I picked up most of the idioms and vocabulary I use. You're totally on point about Nuevo Laredo and the rest of the country. Right now is kind of messed up with crime and violence, but as long as you know where not to go, you'll be relatively safe. Thanks a lot for the advice on the search engine! Thanks a lot!! Thanks a lot!! I'll see you around, everybody!! Thanks for stopping by!!
-
I wish someone had caught me on tape... I literally spit my coffee on the cow part... Now, back on subject. I'm designing right now a laptop bag/briefcase for the Mrs. Since I always ended up mith either stitches that were too long or too short, I decide I would start marking the stitches in the middle of the bag and work my way out... on the pattern!! That way I would see which stitch was the closest one to the projected size and "round up"... I'm having a breeze assembling this thing together!!!
-
Dyeing and finishing
EfrainBG replied to EfrainBG's topic in Dyes, Antiques, Stains, Glues, Waxes, Finishes and Conditioners.
I will, Richard. It's going to go fast once I start cutting the pattern. It's taken a lot to be patient and wait until I have everything finished before start cutting, and now I have to wait for another week for the last items to arrive from Buckle Guy: Tan Kote and a 500 meters spool of Tiger Thread. I'll upload the end result in here and the show-off thread, maybe... hehe Again, thanks for your time! -
Dyeing and finishing
EfrainBG replied to EfrainBG's topic in Dyes, Antiques, Stains, Glues, Waxes, Finishes and Conditioners.
thanks a lot, Richard. I did check it was properly dried and buffed before applying both neatsfoot oil coats. It was originally natural colored, almost white/beige, but the project asks for a very black and shiny leather. So I did the following: - stain both sides black. - neatsfoot oil grain side. - dye grain side - neatsfoot oil grain side Waiting a good 20-24 hours between steps. Fortunately enough we've had very good, sunny and warm weather here in Monterrey. Right now, it looks like in the attached picture. In my head, the nest steps are - apply carnauba on the flesh side, let dry and sand. - finish with Tan Kote on the grain side. All of this before even starting to cut out the pattern, since I want a very uniform look through out the project.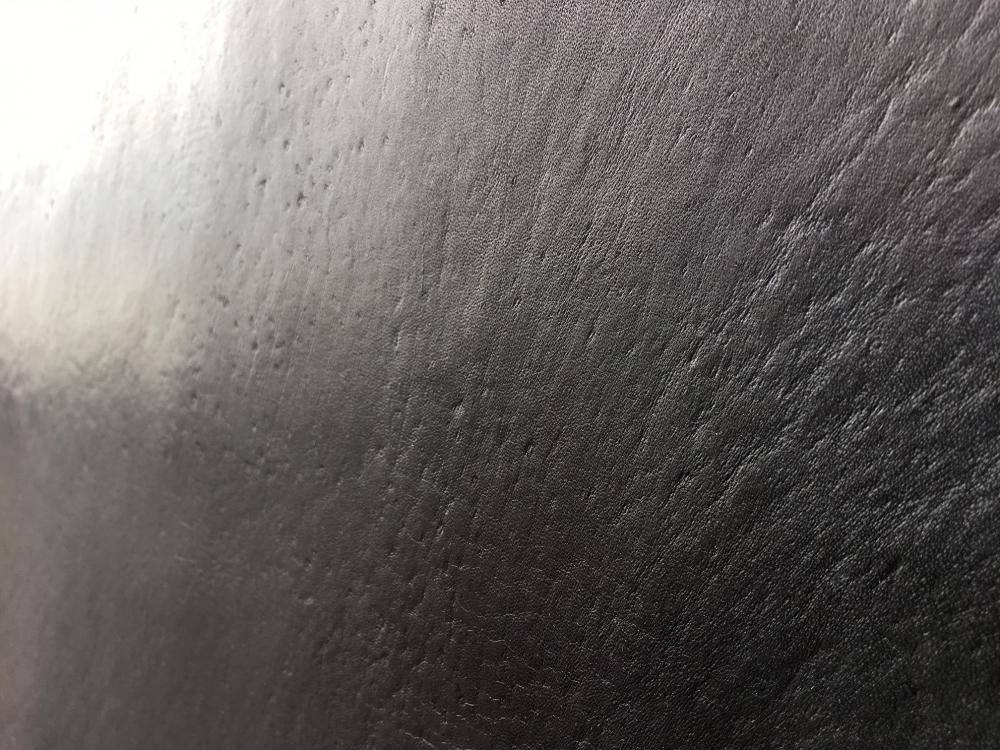
-
It's not much, but I just finished hand dyeing a whole side of top grain harness... the whole nine yards! staining (both sides), oiling and dyeing... over a 48 hour period from the staining... I gotta say it, I have a new found respect for Daniel Larusso!! I did it this way because I'll be using most of the side to make a bag and wanted a uniform finish all over the piece. I'm just waiting for a new bottle of Tan Kote to apply the final touch. I just wanted to ask: Is it ok/customary/advisable to apply a second coat of neatsfoot over the dye before the Kote? Also, I want to apply a coat or two of Carnauba on the rough side. It won't be finished. In fact, I'll sand the beejesus out of that one side before assembly to get that somewhat of a suede/ante like appearance. Any thoughts?
-
that's definitely the best I could do. I was just trying to see whether there was a rule or aid in figuring this stuff out... I'll try to find some crap pieces I can work with, but my main concern with this, as you mention is the scale. It won't bend the same way if the target piece is 14 inches and the scrap is only 7. Thanks a lot for replying
-
I draw my patterns using inches. It's easier for me to measure, mark and do math in my head with fractions, even though I grew up using the metric system. Also, as someone mentioned above, much of the hardware used is described using imperial units. It makes more sense to me to stick to one system to work out aspect ratios or scale up or down when drawing than to convert back and forth between systems.
-
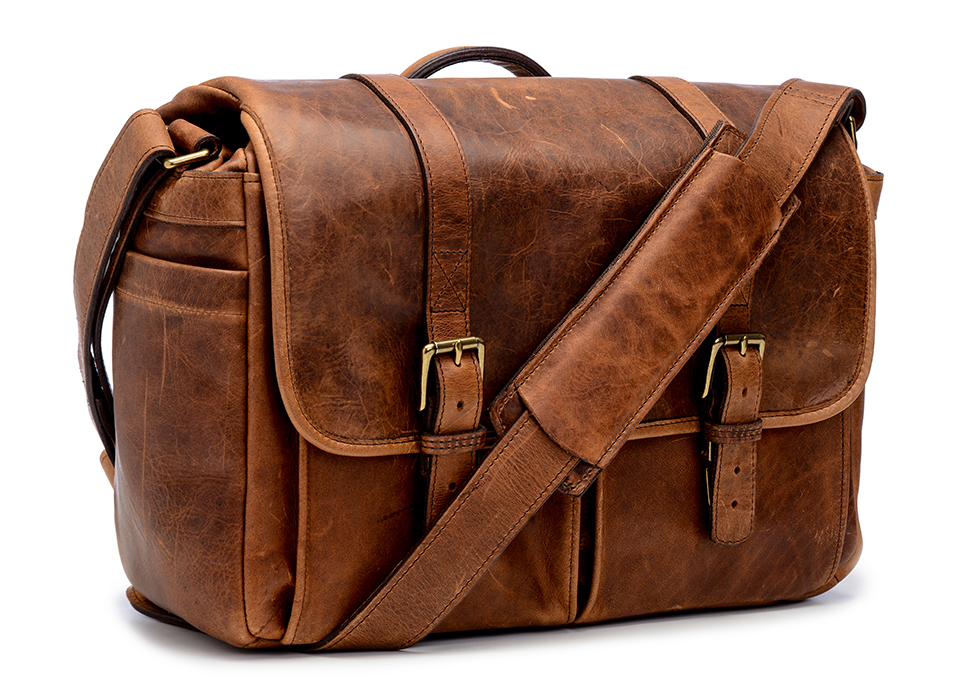
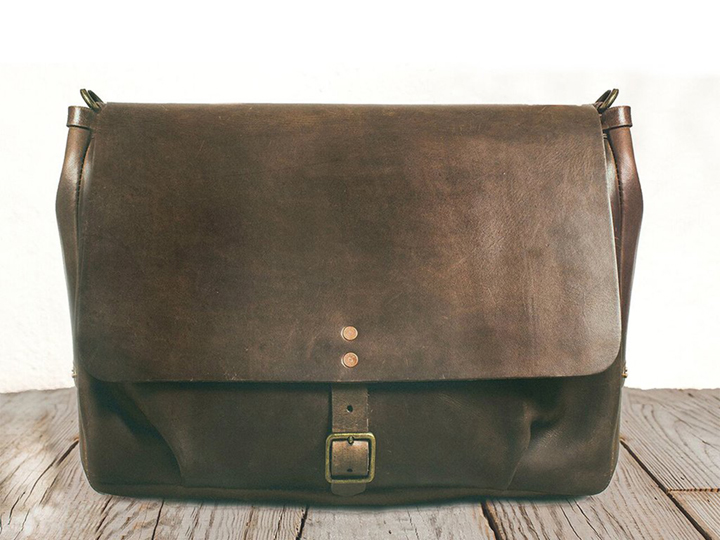
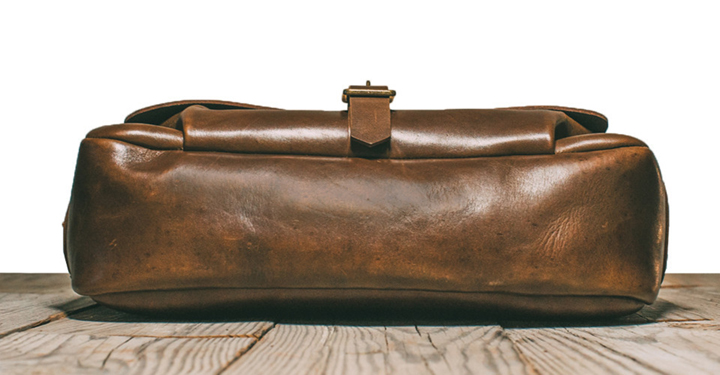
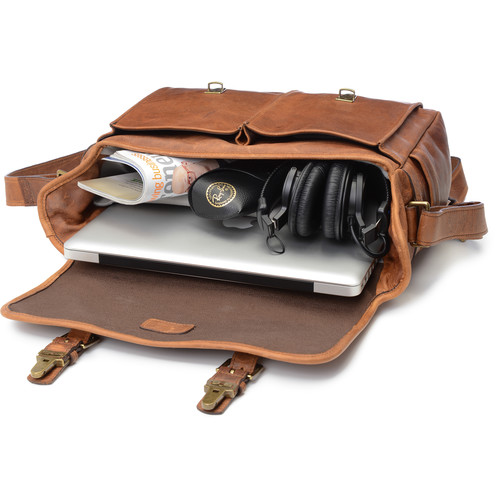
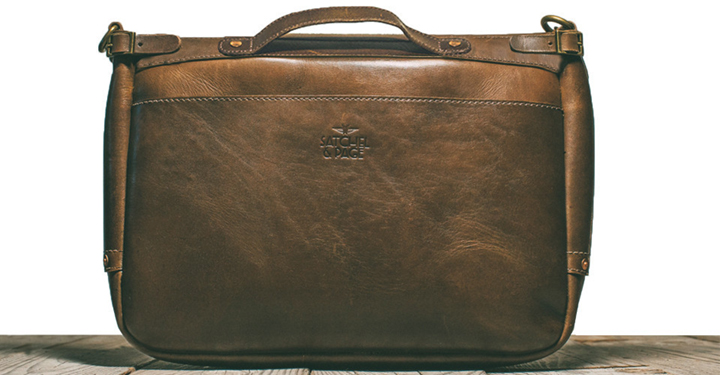
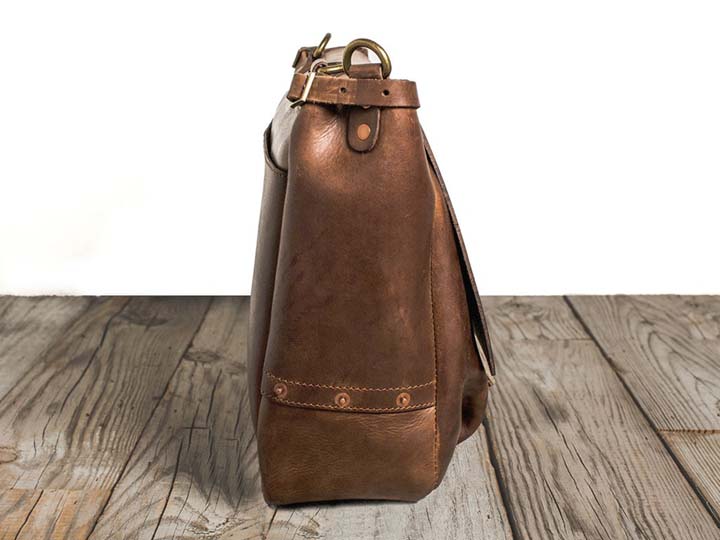
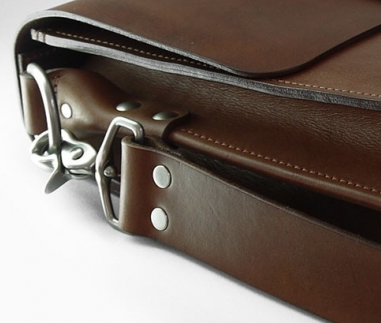
Hi, everyone. Once again, bothering you in search of some wisdom. I'm about to start designing a camera bag using the basic design of an old USPS mail bag, adding some modifications to adapt that design to my needs and to change the look a little bit. Mainly the changes will involve a change in size (not as tall and a bit deeper from front to end) to acomodate a padded insert, add a couple of pockets under the flap and a couple of straps on the sides to attach/dettach another set of pockets at will, depending on my carrying needs for the day... it's a bit of a Frankenstein monster from several different ideas I've seen around. I plan on using chrome/veg tanned leather, 4-5 or 5-6 oz, the likes of a Dublin or Chromexcel, but with what I have at hand to buy here in Mexico... (BTW, do you have something to sher about Chahin leather? I might get a good deal from them but I'm still working that out). The design I liked the most to begin with is this one from Satchel & Page. Like I said, I'll be changing a lot of things, but the basic form and idea of this one filled my eye. For starters, I'll change the closing from a single buckle to a double strap, double D-ring fastening, since I found it easier and quicker. Also, I'll add a couple of sets of D-rings at the bottom to carry a blanket, or tripod or whatever that doesn't fit inside the bag. I'll keep the magazine pocket in the back because... well, you never know!! Second of all, I'll change the front face of the base bag to acomodate two pockets more or less to the style of the ONA Brixton, since I find those very handy for keeping my cameras accesories, film, lightmeters, pens, notebooks and other stuff. I love the gusset on this one, so I won't change a thing here (rivets and double seam). I'll just add a couple of straps sewn or riveted onto the gusset (towards the sides and top of the bag) as anchor points for a couple of dettachable pockets for storing lenses, cellphone, whatever... Now, on to the questions about designing this thing. I don't care too much if I miss my target size by 1/4 or 1/2 inch because of the joints. But, since there's going to be two layers of leather at the front and at the back, I was wondering if anyone in here would be kind enough to share some light as to how much I should compensate on the size of the outer layer to fit the one on the inside. Say, if the inner front piece is going to be 14 inches wide from one stitch line to the other, how much should the outer piece be? 1/8" - 1/"4 extra to each side? Like I said, I'll be using leather of about 4-5 or 5-6 oz for this project. Another doubt I have is how far should the stitch be from the edge of the leather. I will use waxed poly thread, 0.040 and I normally mark my stitch line at about 1/8" from the edge. But, since the stitches will be on the side, I have my doubts whether the fact that it's a turned bag with several layers would be too much of a load for such a small edge. One other topic I can't decide yet is whether to use piping or not. If I do it it would be by means of a single narrow strap of the same leather I use for the rest of the bag, showing the cross section of the leather (burnished and all) instead of folding it over itself. I understand piping is used to release some tension out of the bent joints of the project. Is this at least somewhat true? Anyway, I hope I made some sense with all this and to get some ideas as to how to skin this particular cat. Cheers, everybody!
-
thanks a lot, ThinkerTailor! If make the hole exactly the size of the shaft for the double caps (or even a bit tight), is the shaft bending still an issue? I hear you about the Chicago screws, but I've had several items (not made by me) in the past where those have come apart. I'd still need to try the thread locker. Again, thanks for your help!
-
Thanks for the kind words, Bill. You're welcome in Monterrey any time you want. There's plenty to do around here!
-
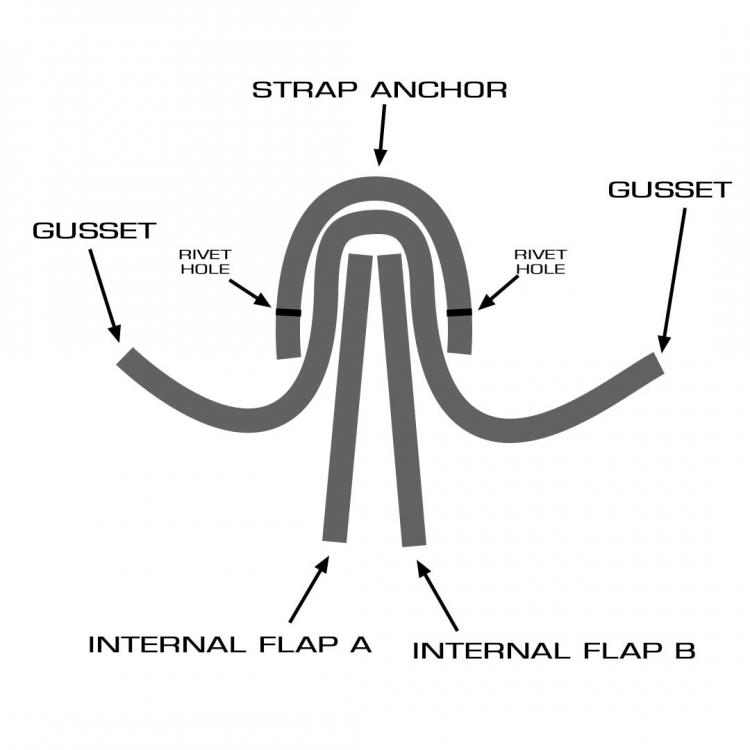
Hi, everyone! I don't even know whether the title is right, but I'm struggling at making some decisions while at the design stage for a laptop briefcase. I've seen several things here and there as to how I want it to look (or how the Mrs. wants it to look, to be more accurate). We reached a veredict and I'm ok and able to do everything she wants in the bag... or at least I have a very good idea on how to approach almost every step of the assembly. The only doubts I have have to do with the anchor points for the strap. For starters, It's going to look like the first image attached. I love that look, and I have no problem with buying the tools required for any kind of rivet necessary. The first trouble I have is decidiing what kind of rivet to use. I only have used copper rivet and burr style until now, but my wife wants all the hardware in the bag to be silver colored (i.e. nickel plated or stainless steel). I have only used copper rivets because I believe those to be the strongest ones (I have absolutely no argument to support that claim other than what I've read around). My main concern is that it seems to me that this is a part of the bag that deals with a lot of stress and I dont know whether any other kind of rivet is going to hold over time. I get it, the stress on the joint is going to be vertical and not along the axis of the rivet, but still... I've looked at two different types of rivets: double cap and tubular rivets. I don't know whether these two are exactly the same thing, but at least they appear listed as separate items within the same seller. About the double cap style, it seems to me that if I screw up with the size of the rivet I'd be stuck waiting for the right size. As for the tubular ones (I couldn't attach an image, but they're listed as Items 00104-NP-10/16 and 00104-NB-CAPS at Weaver Leather). It looks as if I can go with one large sized rivet and trim down as required. (The downside with these last ones is that they only sell a minimum of 1000 units). For these two, the question is: are they tough enough for the job I want them to do? I plan on using 2 mm leather, so we're talking a rivet post about 15 mm Thanks for your time!!

-
messenger bag Looking for advice for messenger bag project
EfrainBG replied to EfrainBG's topic in How Do I Do That?
oh, don't say that, man!! It's full of errors!! (most of them very well hidden:) this is a totally new kind of beast I'm tackling and I need all the help I can get. -
messenger bag Looking for advice for messenger bag project
EfrainBG replied to EfrainBG's topic in How Do I Do That?
well... as per Tandy's guide, 1 oz = 1/64 of an inch... so, I'm aiming for 1/16-3/32 tops!! I made a backpack with the same leather but at full thickness and it ended up being about 1/8 thick (1/4 in the seams and even more in reinforced areas). It's a tank!!! (about 8 pounds empty) but it was all sewn so the stitches are visible. It was definitely a struggle in some places but it was worth it (for a backpack). here's a link to a show-off post: -
messenger bag Looking for advice for messenger bag project
EfrainBG replied to EfrainBG's topic in How Do I Do That?
thanks a lot, man. now, newbie here too, so... when you say "doubled", does that mean you glued/sewn two layers together? I totally see your point, don't get me wrong. I have actually considered using thinner leather, but at 5-6 we're talking about 2 mm thick. At anything less than that, my guess is that I'd be forced to use lining to let the bag hold some structure. I don't like the idea of lining, but I could give it a go... a new thing to learn never hurts. Gear protection is not that critical since I'd be using a padded insert. Again, I've never worked with leather this thin before, so, I'm open to suggestions. I just wanted to be sure that 4-5 or 5-6 oz was not too ambitious. Thank you! -
messenger bag Looking for advice for messenger bag project
EfrainBG posted a topic in How Do I Do That?
Hi, everybody! I'm about to embark in my second large project. I don't know whether that's the right term, but it's how I saw it referred to in a Youtube tutorial (by Leodis Leather). It basically refers to a bag with the stitches on the inside... saddle stitching, that is. I'm planning to make a bag somewhat similar to a Brixton by Ona Bags: esentially, a messenger bag with two pockets on the front side and one pocket on each side of the bag. Although I won't be selling this bag since it's for myself, I plan to make some modifications to the design as to keep it original, such as measures, form, handles, straps, thickness of leather to be used, no lining, fastening with double rings instead of buckles, burnished instead of folded over edges, attachment points in the corners to extra stuff (tripods, blankets, whatnot...), etc. In the end, it would be a bag of about 15"W x 12"H x 5-6"D As I said before, the bag won't be lined, since I intend to use a heavy full grain leather. In the range of heavy leathers, I currently have access only to a 8-10 oz that seems to be chrome tanned (when you cut it it has a white/blueish color in the middle) with some color applied to both sides of the leather. I know it's a thick leather for a bag and I have some questions about it. First of all, the leather used in Ona seems to be about 3-4 oz (only a guess from what I see in the photos and some basic scale math I've been doing). Actually, I intend to make my bag from a leather in the 5-6 oz range, either by searching for a different leather source or by thinning down on what I have at hand. and here is where my first question lies: how do I thin down from 8-10 to 5-6 oz without a splitter? I would need to thin down the entire piece of leather before cutting to achieve a uniform look and feel for the bag. I thought of using a circular sander on the suede-like side, but I've made some tests and it would be an obscene amount of work to do. On the other hand, I've noticed that sanding really ends up softenning the leather up really nice, no matter how thick it ends up being. My second question: If you look at the picture, you'll see that on the corners of the fron side of the bag, there would be as many as four layers of leather to be sewn together. If I manage to reduce the thickness of the leather to my target 5-6 oz, we're still talking of a seam that would around 8-10 mm thick... and that's only on a straight line. Wouldn't this put too much stress on the joints when I try to flip the bag inside out? how about the corners? By the way, I'm using (or planning to use) Tandy's Tejas poly waxed thread... it fades a bit with extensive use, but that's actually something I've come to like in my backpack and a couple wallets I've made so far. If the stress is too much on the joints, what are my choices? skive the places where the seams will be? or change the design altogether to an outside stitch one? One possibility I've been contemplating (although I would really like to make it this way) is to get rid of the side pockets and instead put some attachment straps to do some sort of modular system. This would add the benefit of loosing some wanted weight depending on the situation. I hope I made any sense and I'm really looking for your advice on this one.