luxuryluke
Members-
Posts
74 -
Joined
-
Last visited
Content Type
Profiles
Forums
Events
Blogs
Gallery
Store
Everything posted by luxuryluke
-
Difference between using a Larger Pulley vs. Speed reducer?
luxuryluke replied to tofu's topic in Leather Sewing Machines
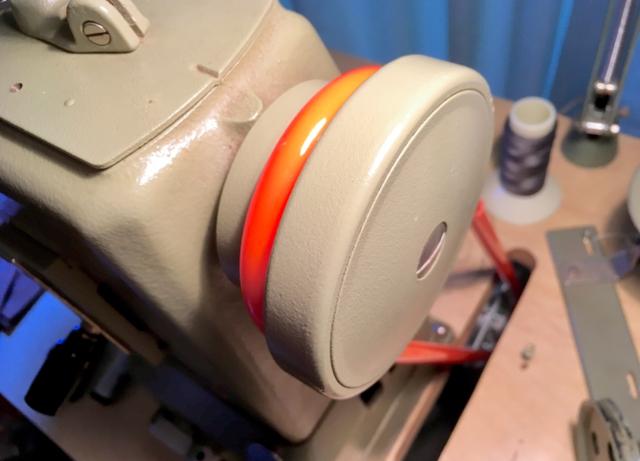
Speaking of pulleys and reducers, I prepared a urethane belt to fit with a torch and razor blade. It worked out well and it grabs the small 45mm pulley rather nicely: -
Cylinder bed tables, adapters, handcranks, and more!
luxuryluke replied to luxuryluke's topic in Leather Sewing Machines
As far as that site is concerned, I linked to their metals section and it describes cold roll steel, hot roll steel, aluminum, etc. and all various thicknesses. Clearly aluminum would be lighter weight, yes. Let us know what you dream up! Also, I just sized some urethane round belting for the new motor since I had to find the exact size of a new belt to get it to fit, I figured I’d check this stuff out. There are videos explaining how to melt the urethane to make a belt, in case you’re interested. This is .5” solid. It grips the new 45mm small motor pulley really well. -
Cylinder bed tables, adapters, handcranks, and more!
luxuryluke replied to luxuryluke's topic in Leather Sewing Machines
Not specifically, no. It’s for my old Necchi 840 cylinder arm, which is similar to Adler 69 and Pfaff 335 machines (I suspect) so it’s certainly not identical. -
Cylinder bed tables, adapters, handcranks, and more!
luxuryluke replied to luxuryluke's topic in Leather Sewing Machines
-
Difference between using a Larger Pulley vs. Speed reducer?
luxuryluke replied to tofu's topic in Leather Sewing Machines
There's no way I have the equipment in the garage to come up with something that impressive, @rchaven. Nice job! Spokane! Another Washingtonian. Welcome to the forum! -
Dang, what an incredible find.
-
Difference between using a Larger Pulley vs. Speed reducer?
luxuryluke replied to tofu's topic in Leather Sewing Machines
In my limited view the makeup of the pulleys and belts is also important. Slick pulleys and worn out belts is a potential point to consider. My machine has like a 3.5” handwheel. Installed the consew 3000 servo yesterday with the 75mm stock pulley. The 45mm pulley just arrived. Both pulleys seem to be made of rough cast aluminum so they’re sticky. Also, the SR2 “3/6/9” speed reducer arrives imminently. This servo has the lowest speed setting of 200rpm. I’m fabricobbling my own urethane round belts to fit. This topic is interesting to me but I haven’t seen how slow I’ll be able to sew yet. I’ll find out in a few days. Will report. -
Cylinder bed tables, adapters, handcranks, and more!
luxuryluke replied to luxuryluke's topic in Leather Sewing Machines
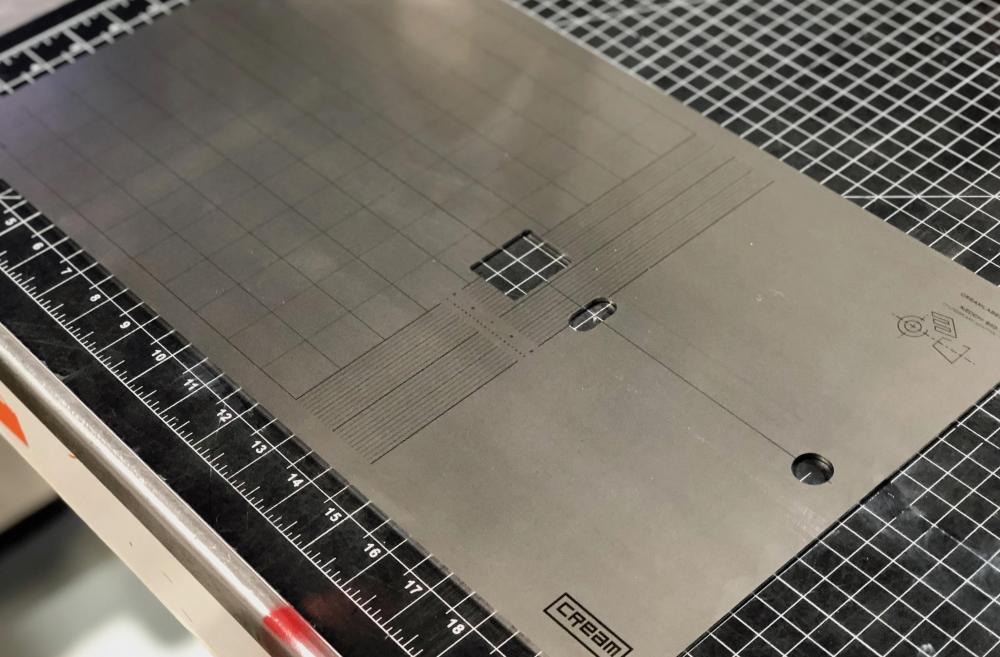
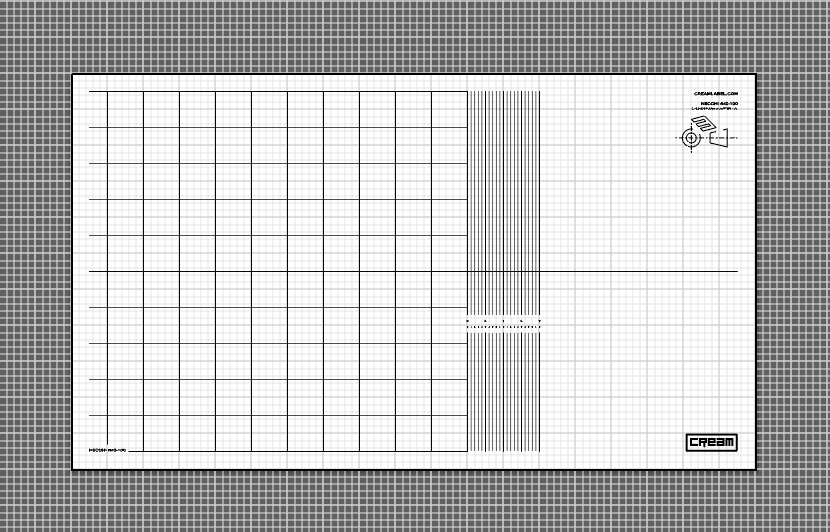
So, after having that video in my brain it occured to me that having a steel table, you could use all sorts of guides and alignments that used magnets (simply because a swing down alignment guide is not available for my machine). So I'd remembered that you could get various metals laser cut from this one site for a relatively low cost. https://sendcutsend.com/pages/available-metals So I did it. I drew up what I thought a table adapter should look like and drew it up in Illustrator (my favorite app). Creating an order on their site for what I designed was like $39+shipping. After making the order I received the receipt that mentioned they do etching as well. So i requested that they etch it with a grid and alignment lines on another file, as well as my company logo. We'll see how soon they ship it out and i'll post a pic of it here. Finding common sizing for specific machines might work, but it would take some time and finicky revisions to get them just right. So i'm starting down that path with my machine, and you're welcome to have me order one for you if you're interested as a favor. Attached is the die cut for the laser as well as the grid etch pattern that will go on it (the vertical lines are .1" apart and line up with the needle moving away to the right) around 11" x 19" wide (the holes are for the needle plate and binder attachment plate bolts to move freely). It will need a lot of sanding and testing, to make sure it works and is stable, but I'll keep you posted here. Die: Etch: -
Flatbed table attachment for Adler 869?
luxuryluke replied to drunknpirate's topic in Leather Sewing Machines
Absolutely, Uwe. I had no intention of hiding it, but didn't want to be labeled as a silent promoter of any site or service beyond mentioning them. The final quote was around $50 for the adapter, but $140 shipping to Seattle. :O The setup for ordering products was quite a bit different than I've ever witnessed, but I guess it works for them (create an account, join program, request offer, serious offer, quote, comitment, pay, etc.) They had more than twenty or so different styles, too. Here it is: https://www.strima.com/30501-premium-table-top-for-pfaff-335/item/321754/ -
Pressure foot issues with Cowboy 3200
luxuryluke replied to TheHollerLW's topic in Leather Sewing Machines
Not to muddy this up with beginners (like me) jumping in, but is it possible there is a presser foot tension that is too high? That mixed with the style/brand of veg tan you are using a possible culprit? -
Flatbed table attachment for Adler 869?
luxuryluke replied to drunknpirate's topic in Leather Sewing Machines
Watching this thread. I found a Polish site that sells at least 30 kinds of table adapters but my old Necchi cylinder is not likely among them. Pricing was competitive but the cart system seemed really odd. So I passed. Looking to make my own but I’m sure that is likely not realistic for most people and a diversion from work. -
Thanks for the info, @Gregg From Keystone Sewing. I’m on the lookout. So, yes, looking for the best way to have an edge guide for consistent results. I’m also looking to make a table adapter for my machine. Currently the options on the table are sheet aluminum or steel. servo arrives tomorrow! Ordered the SP2 speed reducer from Bob @ Toledo IndSew. It’s not on his website but he has them at a great price. ; spent some time doing stitch lessons and getting accurate on the machine. I’m a noobie but I’m learning. Cylinder arm is the way to go for me!
-
That looks beautiful. What year do you think it is? I love seeing old equipment put back to use.
-
Hello, @Gregg From Keystone Sewing, Great to find that you’re on here! Do you think there’s any chance this might fit my 355 style machine? Let me know if I should take a pic. I’d appreciate your advice. It’s been troublesome finding a flip down roller guide for my machine (no screw holes). https://store.keysew.com/parts/sewing-parts/gr1245-spring-edge-guide-foot-set
-
Absolutely, @Bugstruck. Also, thanks for clearing up my suspicions, @dikman. I’ve ordered the Consew 3000 servo and just in case that’s not slow enough, I’m ordering the reducer. I spoke with Bob at Toledo IndSew and I’m going to install his 3/6/9 speed reducer. He is very helpful. Recommended. More updates soon.
-
I’m not sure this is the machine for me, but it is a lovely machine, that much is true. I think I need a machine for thick work that say a Cobra could handle. It doesn’t appear to me that sewing leather with T90 thread is tough enough. Thanks for the tips, @Bugstruck. Great points there. Getting a newer machine might be the solution for my needs.
-
Whoa, that Consew CSM-4002 has a port for presser foot lift.
-
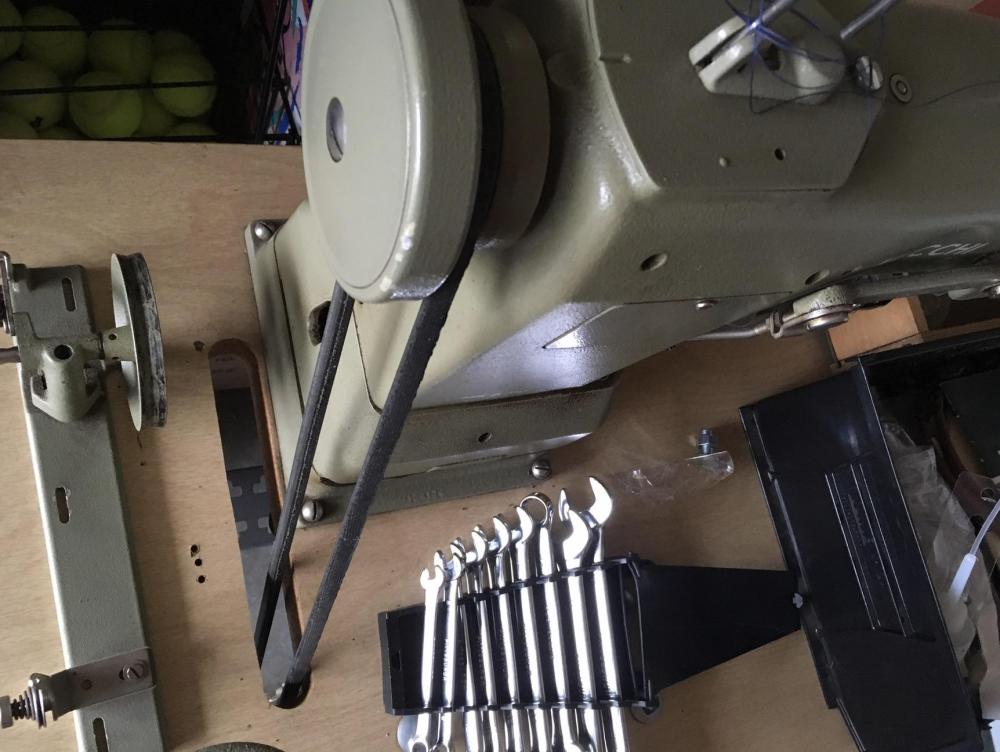
(I'd love to change the title of this thread to be specifically about this model Necchi machine) Success! Drove down to Portland to pick up the machine from CL seller this week. It's a beautiful machine. Seller gave all sorts of great advice on how to use it normally and with the RB (rotative bindery) attachments. It sewed wonderfully, and the clutch motor was actually pretty quiet, but likely too fast for my needs. I need to have it acclimatize to normal temperatures in the office for a bit and we'll start sewing with it this week. Considerations now: Which Servo will I go with? After all of my research here and comparing specs/speeds/and power, I'll likely just call Bob @ Toledo as many here have suggested. Is it recommended or even smart to run a Speed Reducer along with a Needle Positioning sensor? Need to learn what range of thread sizes this machine can tolerate. I know it states that it uses the 134 needle system and it is running T90 thread currently. Has anyone used some of those flexible round pulley belts on their machines? Seems like it'd be nicer in the hand than a regular belt. Here's a pic of the handwheel on the 840-100 and the old bobbin winder that needs to be oiled and put back into proper service: Any helpful info is surely welcome! More info about this machine will go here in the future.
-
Cylinder bed tables, adapters, handcranks, and more!
luxuryluke replied to luxuryluke's topic in Leather Sewing Machines
This video from @Uwe of a massively transformative cylinder experience: -
Feel free to post anything referencing this topic here. I’m looking to gather more info on setups. Speaking of flywheels, adapters, and cranking by hand on cylinder arm/bed machines, check out these two vids. They’re both in Japanese but we know more or less what’s being explained. Look at that table adapter later in video 1! And that handwheel crank in video 2!
-
Just picked up a Consew 206RB-2 for $300
luxuryluke replied to myjtp's topic in Leather Sewing Machines
@Wizcrafts Was referencing this info. I should have quoted it. -
Just picked up a Consew 206RB-2 for $300
luxuryluke replied to myjtp's topic in Leather Sewing Machines
Thanks for the more info on servos! -
Okay, I know this sounds silly, but I know there are some very adept electricians on this forum that have abilities way beyond mine. Some just use the switch that came with our motors from the factory, but some excel at modifications. I know some motors you have to reach way under the table to turn it on. So here it is: What is your current (get it?) power switch setup for powering on your machine? Footswitch, missile launch, arcade buttons, modern, slick, industrial, minimal, lights, leds? What’s your flavor? Extra points for unique or style setups. Take some pics and share it with us. (Forum mods feel free to delete this indulgent post.)


