


BondoBobCustomSaddles
-
Content Count
1,033 -
Joined
-
Last visited
Posts posted by BondoBobCustomSaddles
-
-
Yes, I too got that letter. Now while I don't buy everything from them, I do use them quite a bit since they are just down the road, so to speak, and if I order it today, it usually is here in two days, and; I probably buy that much from them a year easily. However that is still a slap in the face. They seem to be going down the same road as Tandy. For sure I will not buy a wholesale club membership, Sorry state of affairs. Perhaps the guy that is on this sight that works for them, will get the message back to them. Just sayin'.
Bob
-
Very sorry to hear that. I am sure that you are doing what is best for you and yours. You will be missed here, please don't be a stranger. Drop into the sight once in a while.
Best Wishes!
Bob
-
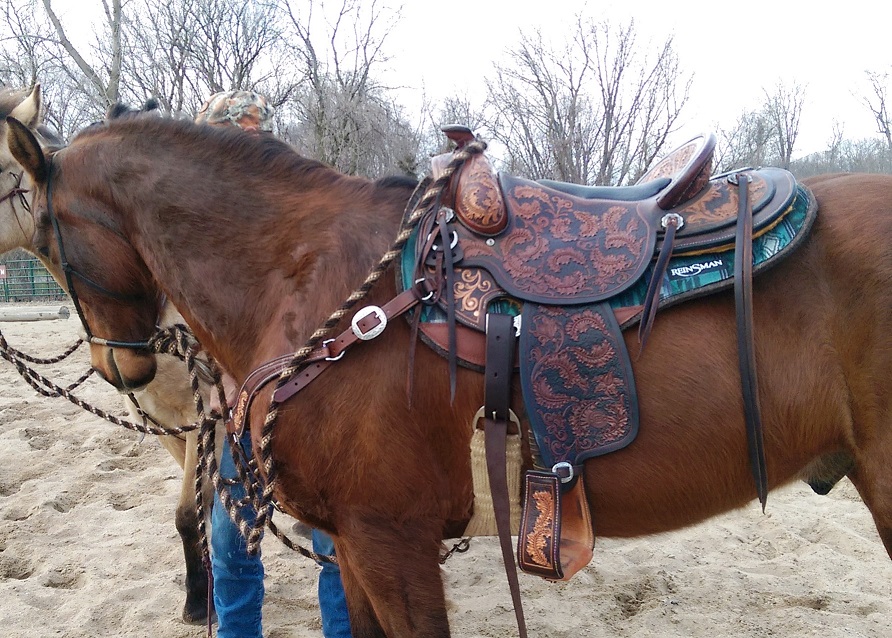
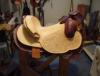
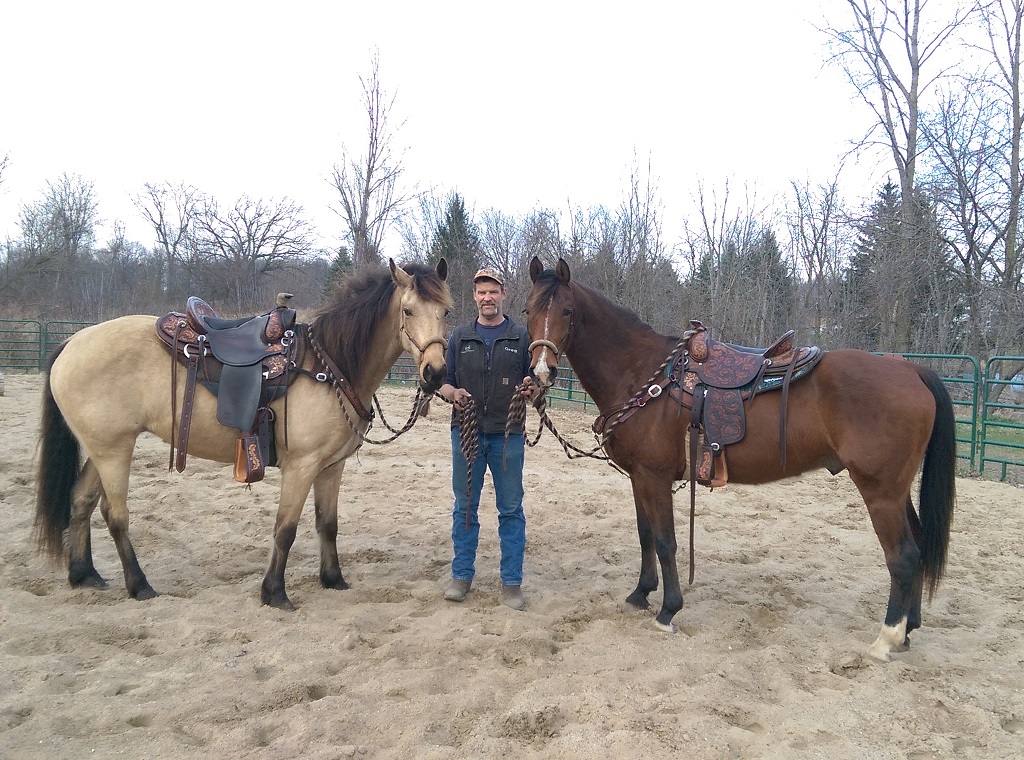
So a little while ago, I posted a saddle I did this winter for a lady who is into Western dressage, and well, her husband decided he needed a new one also and wanted one that looked like hers but, more on the working ranch side. So, this one is tooled not quite as much but, similar, with regular stirrup slots , Oversize boot stirrups, and a few additional D rings to hang things on, a mule hide horn wrap, set up for a Tennessee Walker. Here is the finished product as a pair. Also after some serious oiling.
Bob
.thumb.jpg.b92cf44c56da6677ed61ba73668b5328.jpg)


-
Dwight, when I am going to bend , roll over , or stress the surface of a piece of leather in some way I do it wet, then go on and finish the tooling or whatever I am doing to the project before finishing it. I would rather see the stretch marks when I am working on the piece and after I fold it see the marks go away. That is how I do it. In some cases, like a buckle end of a belt, just before I fold it, and before I put finish on it, I wet it, then fold then let it dry and finish. By the way, I only make lined belts, so when I make them, I stop the lining right where the slot for the buckle tongue is and skive the folded end to almost feather edge and fold the front, single ply over the buckle bar and then glue and stitch or affix with a snap, depending on the customer's wishes. Hope that helps without being too confusing.
Bob
-
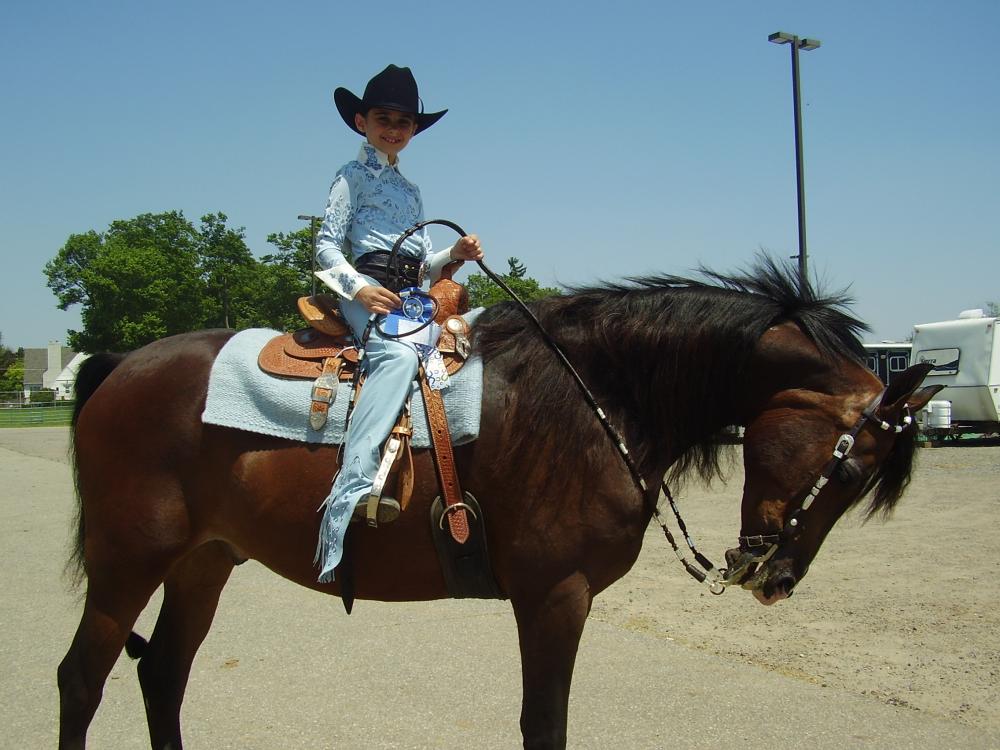
52 minutes ago, Dwight said:Hey, BondoBob, . . . thanks pal for the picture of the little lady in the pink.
Haven't been feeling all the way up to par, . . . needed something to bust the monotony, . . . erase the fog, . . . y'know.
THAT picture did it. Seeing the smile on her face, . . . ribbon in her hand, . . . and that beautiful piece of horseflesh she is riding, . . . just made my day.
Again, thanks for posting, . . .
May God bless,
Dwight
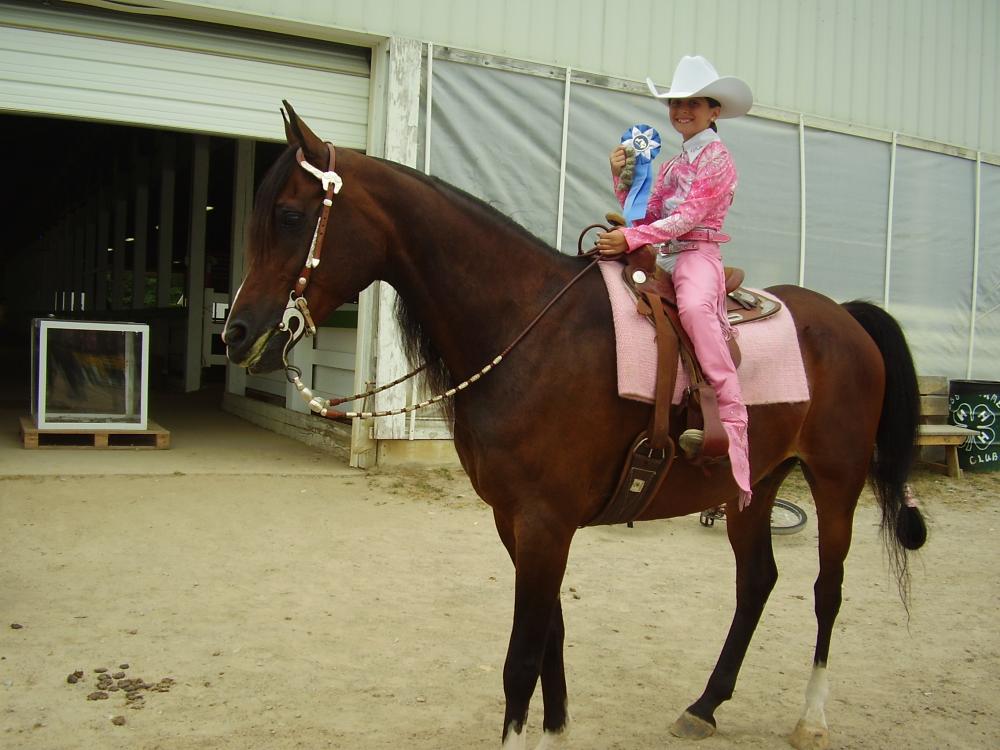
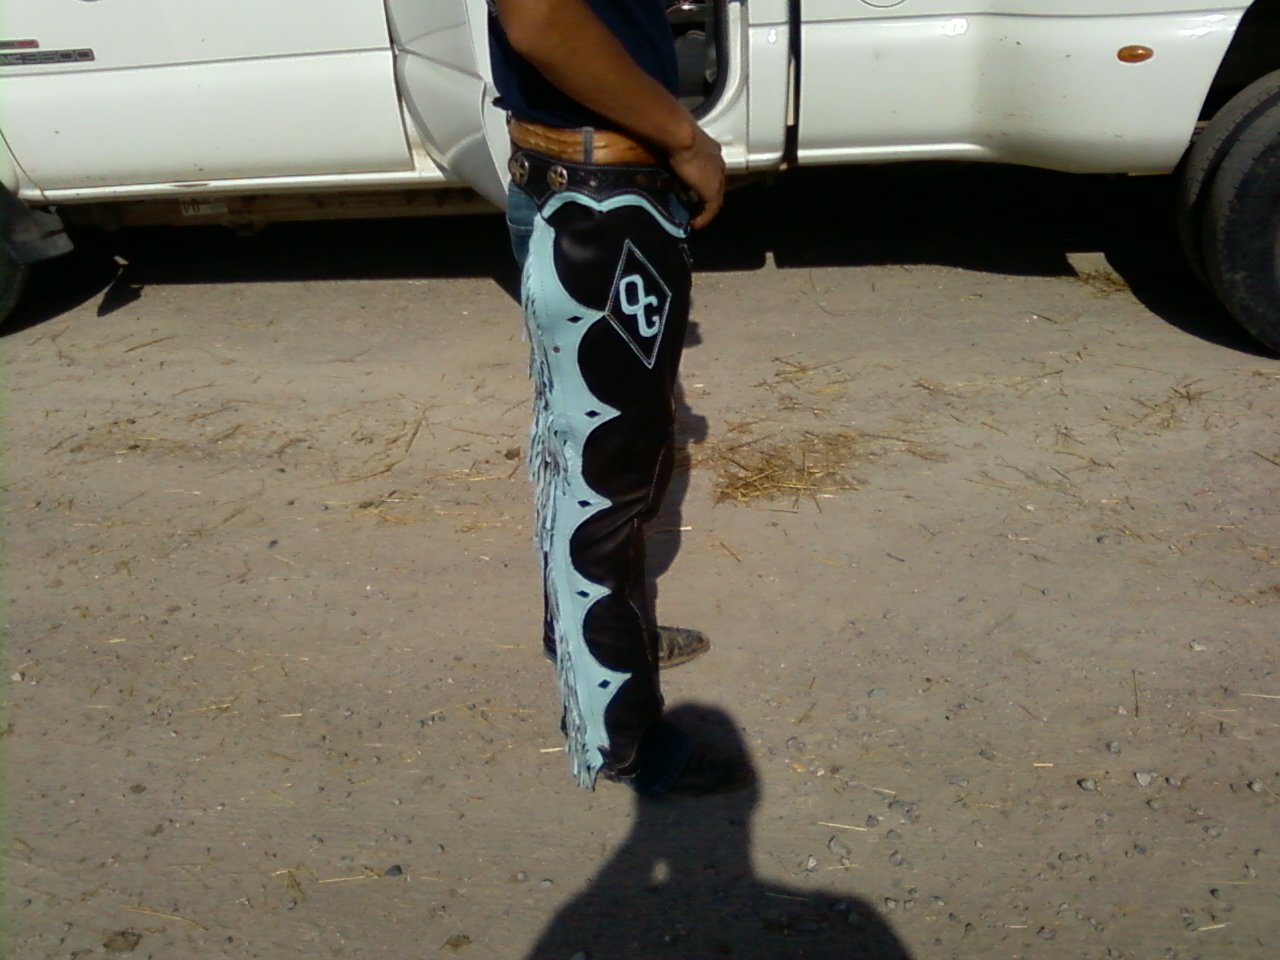
Dwight, just in case you needed a little pick me up today, here is another pic of the pink girls' sister in her blue glove leather chaps. Both girls have now grown out of those, but; are still showing on the Arab circuit here in MI. They are both the sweetest things, must have been the chaps!
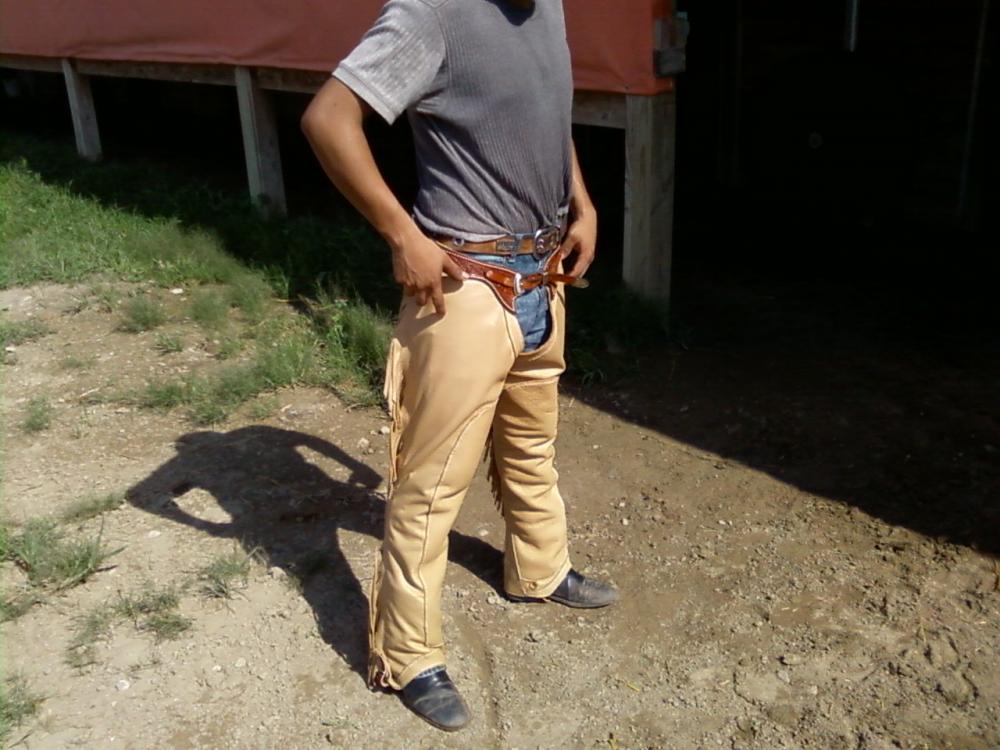
Barrel Pony, I like to use either, buffalo hide or deer tanned cowhide, for show chaps, they make nice soft, feeling chaps. You can often fine a nice selection of the deer tanned cow hide at Tandy's. Not priced too steep either. If you have your pattern with you, you can take it in to the store and actually see it there is enough on the side you select to do the job, before you buy it. There is an advantage to being able to personally select your hides where ever you go.
Bob
-
On 3/19/2016 at 7:49 PM, Big Sioux Saddlery said:I agree with Dirt. With your measurements, you should be able to get them out of one side if it's relatively clean and decent size. Most chap sides are between 25-29 sq feet. And check, double check to flip your pattern so that you are not, as Dirt says, cutting two of the same leg. Yep, done that!
That was good for a morning laugh, done that too!
-
If you are very careful on placing your patterns you should be able to get it done. You may need to add the fringe as opposed to cutting as part of the chap leather. Here are 3 pics of chaps made of different types of leather. The pink were made of glove leather the other ones were made of deer tanned cowhide. In all three cases I made them out of about 27 sq ft with plenty left over.
Bob

-
Welcome to the forum, enjoy the ride!
Bob
-
Ok I might be all wet here,

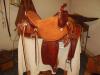
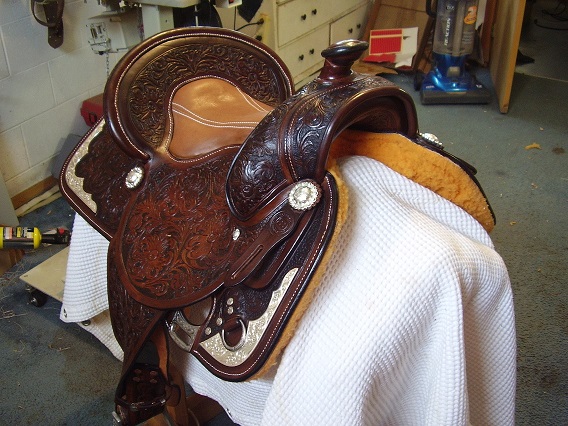
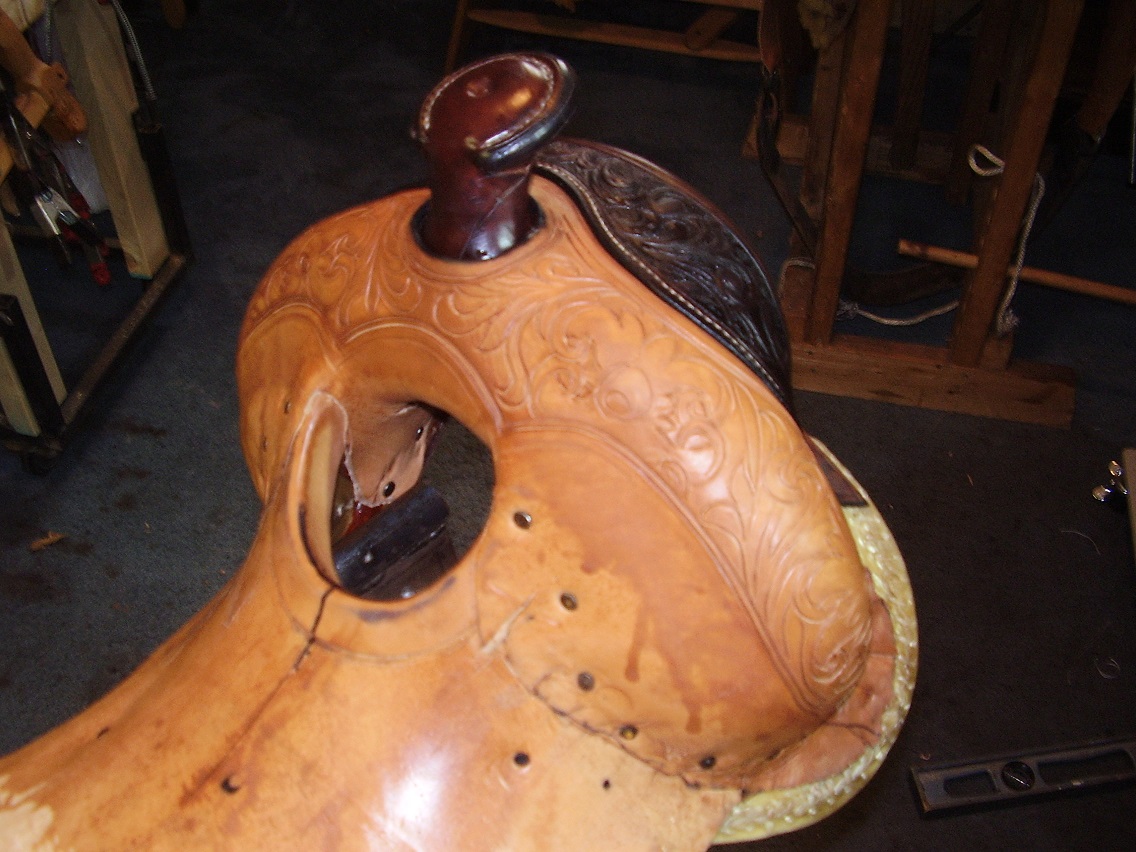
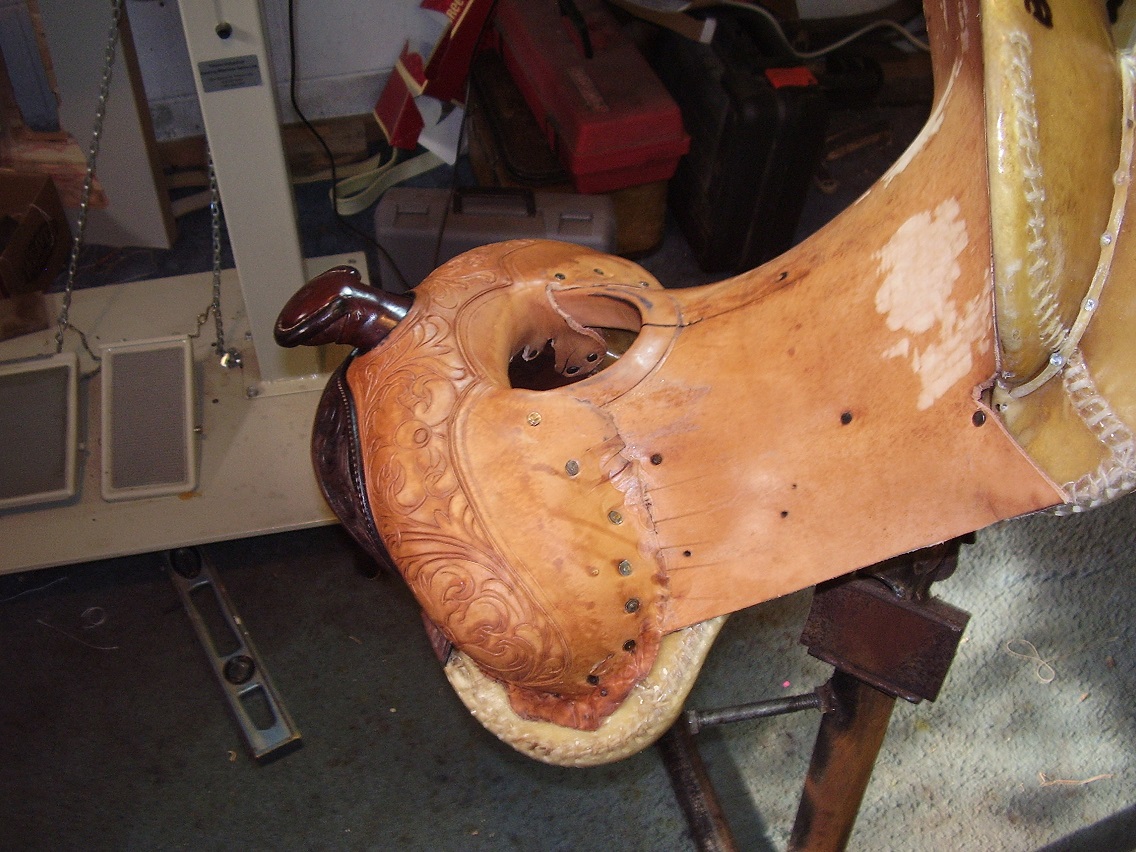
 excuse the pun, and I am sure that if I am out there in left field, I'll hear about it, but; this is what I do. First it must be said that if I understand it correctly, "casing" is the process of wetting the leather thoroughly then keeping it wet for a period of time to let the fibers in the leather become more uniform in their direction. That being said, if that is true, then when I case a piece of leather for say a fork cover, and bring it to the dryness that I like to use to form it over the fork, I get it formed/stretched and set first, then let it dry. Once dry and fitted and actually glued and tacked in place for the last time, I let it dry. Now I don't think that the fibers are going to get all unraveled or what ever it is that they were before casing, so once dry and when I am ready to tool which is usually much further down the line in the saddle building, I wet (using a spray bottle) with a mixture of distilled water, mild dish soap, and Listerine. When it has dried to the level that I like to tool at I go at it. If I don't get it done in one sitting, I give it a spray and cover it with a plastic bag till I get back to it. This works for me. I think what I am saying is, once cased, always cased. This is what works for me. Here is are some pics done that way. One during the process and two finished.
Bob

-
depending on the size you need you can also look on ebay. I use it for padded seats and love the way it stretches and feels in my seats.
Bob
-
That's the best part of making "stuff", you get to do it for the ones you love. Nice job Colt.
Bob
-
Welcome to the forum Roy! Lot's of good folks here, and lots of information on doing whatever it is that you want to do. What part of Tx are you located? My grandson was just racing down there at the AT&T stadium. The little guy had a ball, said the folks down there made it the best.
Bob
-
 As always the advice from Sioux and Denise is spot on. Just to add to the mix, I have built a lot of Bomans ( very popular around here) also, I have a couple that I built several saddles for who own a livery stable, and they are riding all day six days a week, and on the seventh, they rest and go trail riding! Their choice is a C.S.Roper tree with 4" cantle. Like I said I have made several for them and ride more than anyone else I know. They have a whole stable full of saddles to choose from, but; C.S.Roper is their saddle of choice. Here is one.
Bob
-
All the advice given is good. As a side note, there is an inexpensive book by Al Stohlman I believe it is called Hand stitching leather. It will help you get to where you want to be. By the way, in case you didn't catch it from the other posts, practice, practice, practice. Finally, you will never get the holes you want/need for good stitching with anything less than a really sharp awl. It tells in the book how to properly sharpen awls.
Good Luck in you projects!
Bob
-
Glad to see you get well deserved recognition! Congrats!
Bob
-
Certainly worth reading. Lots of really good information. I will be adding it to my "library" ,
Thanks for sharing!
Bob
-
I'm with Art. Never had a reason to change.
Bob
-
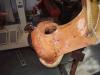
In simple terms, remove the horn cover, dampen till pliable and un-stitch the fork cover to uncover the base of the horn anchored in the fork. Then determine how to get it out, most likely 4 large screws and some glue and it will come out. Then you need to get the type you intend to use and insert it glue it screw it and recover it with rawhide, then a new horn wrap and fork cover back on and "vwala". That is the basics. What type of tree was original, what type of horn and was originally used, if you can get the same make of horn, and your level of ability may all be factors. Good luck. If it ain't a really good saddle, I would say the process would be cost prohibitive.
Bob
-
Nice work "P". Lot of bikers would like those.
Bob
-
Hi Bob,
The Burr is the thinnest part of the edge rolling over onto the side of the edge opposite the stone. It has to go to the side away from the stone as the stone will cut and remove anything on the side it is grinding. The stone moving toward or away from the edge makes no difference. The thinnest part of the edge, unable to remain upright, will be rolled over. It is not gravity, but the burr simply has nowhere else to go. Even if you use forward and backward strokes on a stone, if you are properly positioned with the stone grinding the edge, when you have ground as much as needed and go that fraction of a bit further, the burr will come up. While the burr is indeed good edge metal dieing, it lets us know that we have gone as far as we can on this bevel. As long as be don't bring-up big gnarly burrs, we can flip to the other side and the stone will remove the burr, of course the burr will come up on the other side, and then you are finished with that grit. The burr will always have grit all over it. Before going to a new grit, you have to remove the burr and the old grit. There is no problem with wiping the knife down (getting the grit and most of the burr off) and then stropping it to remove the burr before going to a finer grit. You will generally have bigger burrs with coarser grits. On final passes on say 1200 grit (everyone has their own grit system and it is confusing as hell), which is 3 micron or about an 8000 stone, the belt or stone is smoother than a baby's cheek and polishes more than removes more than a few hundred molecules, the burr will be indistinguishable for most, still, with the right angle, I can bring-up kind of a micro burr, I might need to look through a 30x loupe to do it, but it will be there. We seldom need this kind of precision for a head knife, but precision scissors are a different story. There is a problem with burrs though. It is easy to bring-up a "false" burr by rolling-up onto the edge. This is why I recommend jigs, and use them myself. This isn't easy with a head knife, so you have to realize when you are doing it, or that you can be doing it. As I have said before, there is some science here, but also a level of art.
When the stone has sharpened the edge to the point there is complete contact between edge and stone, there is no place for the burr to go but to the other side, complete contact keeps anything from getting between the stone and the edge. Complete contact is what we want, the edge is sharp.
So, it really doesn't matter which way the stone goes, unless the stone is less hard than the edge. Yes, the strop has to go over the edge, and away from it. Put power into the equation and the knife becomes part of a splitting machine.
After one of these knowledge dumps, I have to ask simply, did I answer the question?
Art
As always, you got it covered.
Thanks,
Bob
-
I gave this some thought over the past couple of days. As you approach finer grits, you should be looking at one pass over the stone or so to raise what amounts to a really small burr. A big hard to remove burr means you are removing too much metal or really don't have the knife sharp enough to be using finer grits yet, or you are not engaging the bevel at the proper angle. It takes a whole lot of experience to engage this bevel at the exact angle without a jig. The only other happenstance is that your steel is soft. This is not a happy thing as the knife really needs to be annealed, worked on if necessary, heat treated, and sharpened, and that brings the complication of knowing what it was made of in the first place. If you keep having trouble, have someone do a hardness test on it up near the edge.
Art
Art, I have what has been a nagging question for me for ears now. When I was a boy and was taught to sharpen my blades,(some 60+ years ago) I was taught that you are supposed to move the blade on the stone into the edge not away, at 1/2 the included angle desired. This move the metal up away from the edge and there is no burr to deal with. This has served me well for many years and still does today. Seems like I hear and see more about the burr being there to remove when sharpening, what has changed in the sharpening world to cause a person to draw a blade across a stone as if he/she were stropping it?
Bob
-
Price?
-
Thanks for the post Art. Needed a good smile today, like you said, if you are not having fun, and learning, try something else.
On another note, have meant many times to ask about that bird in your profile pic. Obviously you must be a vet, what was you MOS?
Just can't help asking.
Bob
-
Like some here have said, I too work alone. In an attempt to not let my leather work stop me from doing anything else, I employ two ideas, one, I have raised my prices to what the market will bear, and two I have a waiting list. If you want one of my saddles, you will have to put down a non refundable deposit, that gets you on the list, and our material including tree ordered. When your time comes up, I will notify you that it is time to start, and what the approximate finish time will be, also finalize any requirements. My waiting list currently is about one year out. For smaller items, like repairs I fit them in while there is wait time in the saddle making process (like the leather casing of a fork cover drying and so on) . I only make one saddle at a time, that is how I do it and it works for me.
Bob
.jpg.6d2794fb7c183c12a9b23f29f19f8e1a.jpg)


Mcclellan model 1917 mule
in Saddle Identification, Restoration & Repair
Posted · Report reply
JV I have not personally worked on one of these, however; typically the front strap is screwed/tacked over the front of the fork, and the rear is over the back of the tree behind the cantle, they then extend down to the "ring" where they are looped over and stitched. Not too sure what you are looking for here, they are just as they appear in most pics.
Bob