Silverd
Members-
Posts
489 -
Joined
-
Last visited
Content Type
Profiles
Forums
Events
Blogs
Gallery
Store
Everything posted by Silverd
-
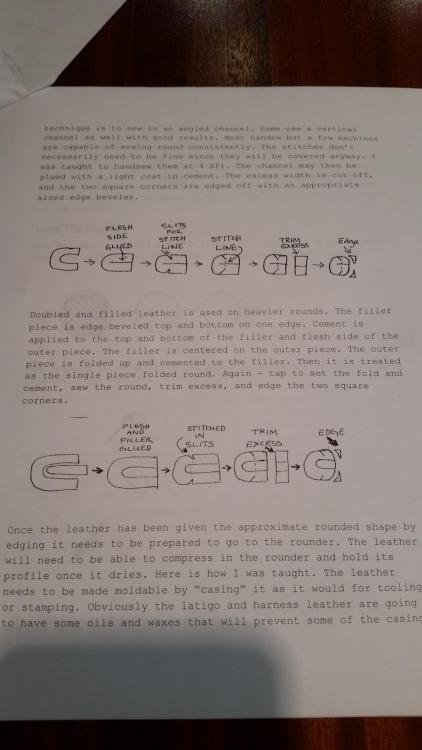
Purchased a rein rounder today. Will con structure Throat Strap using these instructions including the slits top and bottom.
- 53 replies
-
- herman oak
- water proofing
-
(and 3 more)
Tagged with:
-
- 53 replies
-
- herman oak
- water proofing
-
(and 3 more)
Tagged with:
-
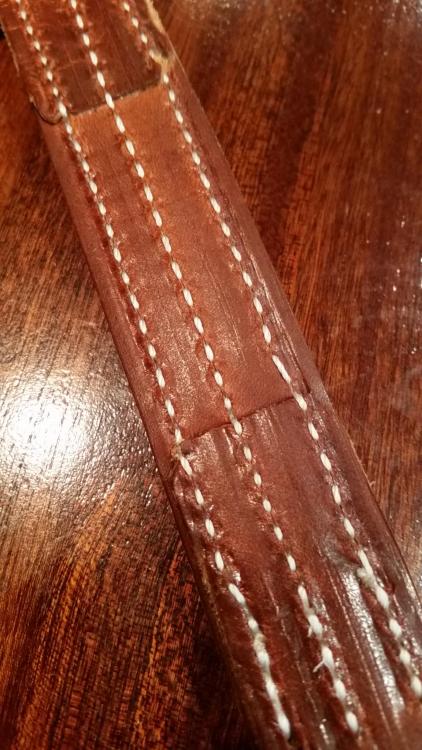
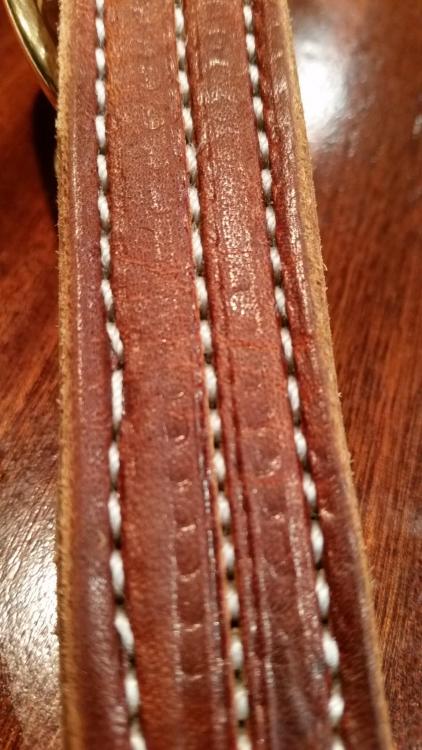
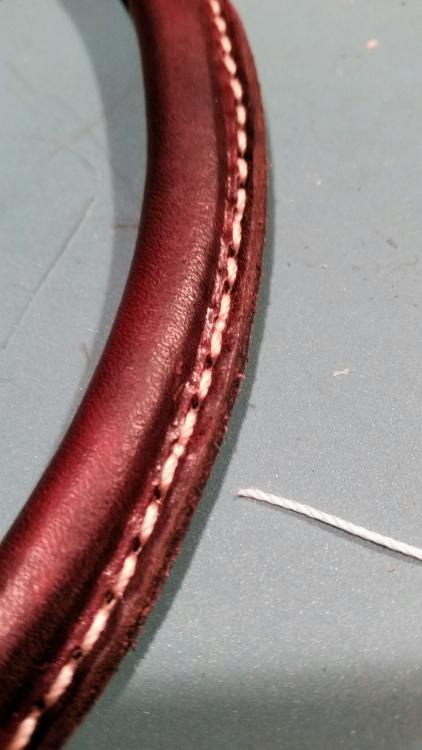
Terrible terrible terrible sewing. It's a total fail. Not cased. Oiled after stitching. Double Presser foot set at lightest pressure adjustment. What a mess! And I assumed this would be the easy part!. I've sewn a lot of leather but not with these results. I'm thinking the tensions are just too high. What say you re using silcone thread lube? Silverd
- 53 replies
-
- herman oak
- water proofing
-
(and 3 more)
Tagged with:
-
Oh my #2 with no disrespect intended Madam. I thank you for clarifying if only for the sake of transparency. This what I have so far. My focus has been to just get one halter made and in the process figure out what else I need...mostly everything at this point! Silverd
- 53 replies
-
- herman oak
- water proofing
-
(and 3 more)
Tagged with:
-
I was taught to give credit where credit is due Sir. Thanks again for your help. I've made four or five throat straps for practice since your last response using your advise...and had one or two end up looking kinda close. Do you recommend sewing into a slit and using a Rein Rounder on the finished strap? Now I'm having stiching issues with sewing the plain straps (cheek pieces etc) on the 441. I just determined it may associated with the Herman Oak leather. Combination thread and needle size (277 / #25) is resulting in a nasty scraping sound as the needle travels through the leather. I thought it was the machine but its the needle! Top thread is burying its self into the surface...too tight stitches. Not looking too good on something I thought I had control of. Should I use thread Lube? Silicone? I think you will like my next set of photos. Silverd
- 53 replies
-
- herman oak
- water proofing
-
(and 3 more)
Tagged with:
-
My oh my. Your ability to articulate may only be surpassd by your knowledge of the topic. I'll need to reread your response a few times to take it all in which I will do. I'm mentally regrouping at this point. I want to establish a process that achieves results as close as I resonably can come to what you are describing. More to follow Don
- 53 replies
-
- herman oak
- water proofing
-
(and 3 more)
Tagged with:
-
I have a Weaver stripper that uses these or very similar blades. I'm also at a lose to understand how this is happening, however...If there is a side load on the blades during the cutting process then it could lead to this failure. The picture looks like that might be the case. These blades are very strong along the web axis but not very strong perpendicular to it. Check that the top roller shaft that turns the blades does not have side to side play. It might be that it has become loose in the end bearing block...The bearing block associated with the drive side if your machine is a Weaver or weaver like is the one I suspect. But I just got my machine and have not taken the cover off to examine the design. Possibly call Weaver if it is of that make. They are quite helpful. Good luck! Silverd
-
Ok...I understand. The old harness is actually pretty round.. its end returns are folded backwards of mine however...A minor difference that does not affect the construction of the round. I'm going off of Dover catalog photos of modern day equine tack and Seinke book images which I think show similar construction as I have going. But now I'll need to verify. Got some questions for you: -What is the ideal diameter of the round supposed to be? -Is a Throat Strap made with a true "round" better or perceived to be better than one with a lip? -It seems the filler piece should also have a round section? About what diameter? Perhaps a softened square shaped strip pulled thru a rein rounder? -Is the filler skived and sewn into the end returns? -How does one stitch thru the center of the round section and connect everything together...I can see how two rows of stitching (one for each rolled edge) sewn through the center might work? -After stitching...is the round portion of the strap finish trimmed to give it more of a true round section shape? -Are two rows of stitching acceptable? Thank you! Silverd
- 53 replies
-
- herman oak
- water proofing
-
(and 3 more)
Tagged with:
-
- 53 replies
-
- herman oak
- water proofing
-
(and 3 more)
Tagged with:
-
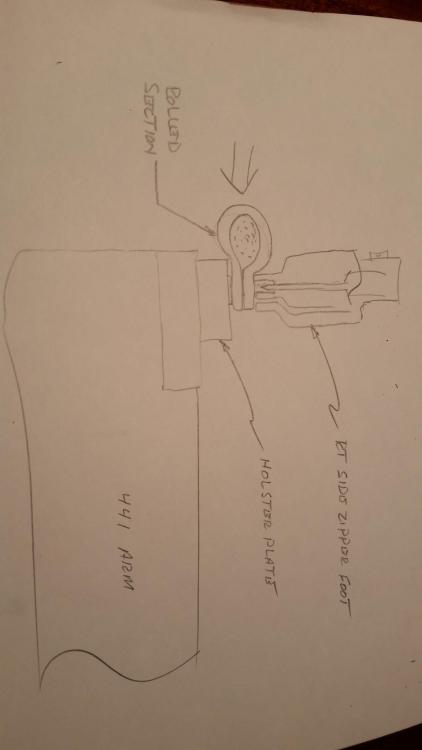
I can see why you say the 441 is not idealy suited for this work. 277 bonded nylon with a #25 needle. I don't have a 26 but I'm placing an order. Thank you for your time again. I certainly appreciate it very much. I should be able to get the tension issues under control. I understand the princples of matching top and bottom etc. Bottom tension was high and to match it top tension was causing thread to abraid. Im working several projects all with different threads and sometimes takes short cuts when changing thread sizes. The 277 problem was most notable when back stitching. The stitches have been laying on the bottom surface of the leather straps. I've since reduced lower tension and top to match. So it's much better. Allowing the leather round strap to dry before sewing certainly helped with reducing presser foot marks on sample 2. I've given some thought to this and think that by starting out with a strap that is very ; possibly 1.75" in the roled section will provide enough width for the right side zipper foot to make full contact whIle the needle foot is pushed hard against the raised roll edge. Hope this makes sense. I' m using a holster plate. See sketch. I'll then trim off the excessively wide seam allowance then edge finish being careful not to stain tge stitches.
- 53 replies
-
- herman oak
- water proofing
-
(and 3 more)
Tagged with:
-
Thank you BTW. If you look closely at the first sampe you can see presser foot scares all over the place. The latest attempt was sewn after drying over night. Still having tension issues. Silverd
- 53 replies
-
- herman oak
- water proofing
-
(and 3 more)
Tagged with:
-
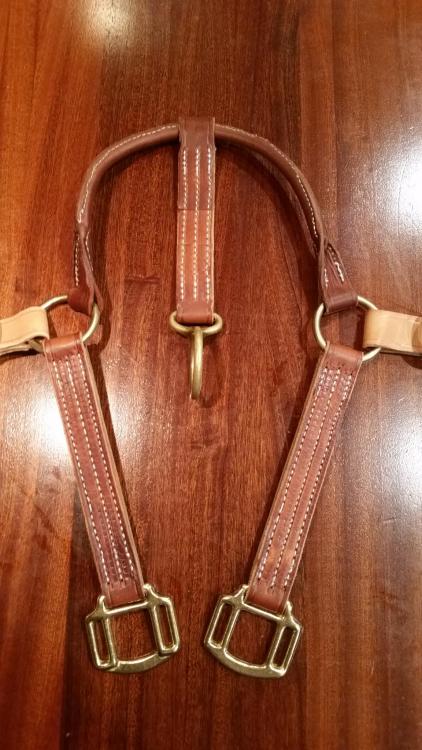
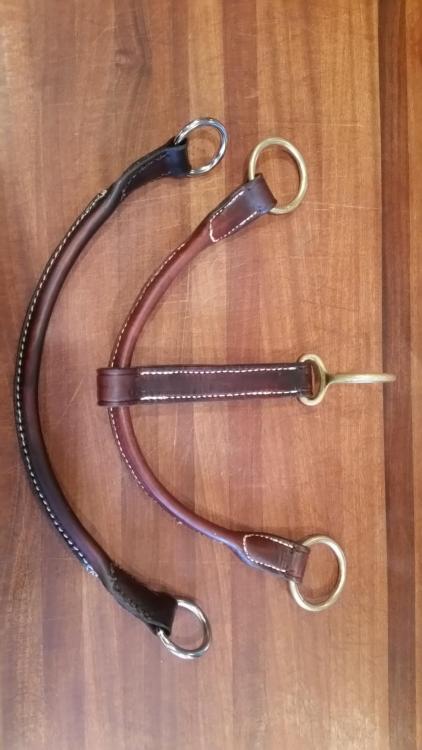
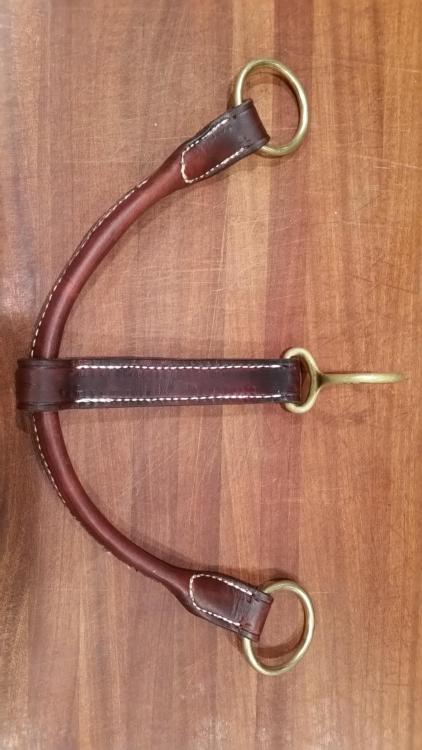
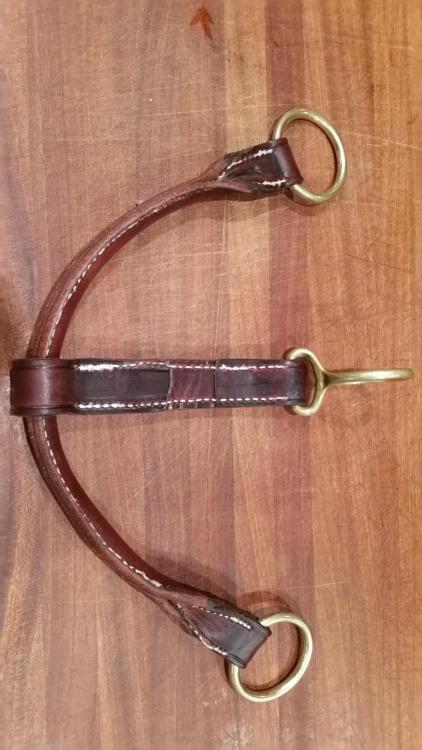
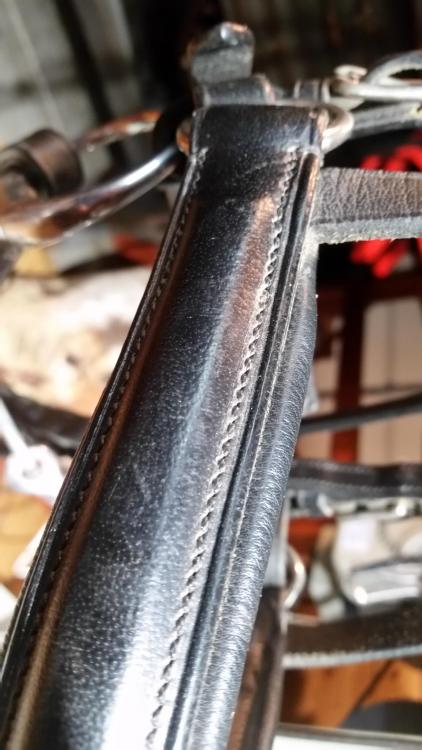
Good advise. The issue for me is dying the fresh beveled edges after sewing without staining the stitching. But it can be done. This is Throat strap I did last night...not without issues. I started out with a 1.5" wide blank which gave me enough web width to place under the zipper foot. Then I trimmed the edge back, beveled, dyed, oiled, waxed. I don' like the hand stitching over the outside since it' susceptible to abrasion.
- 53 replies
-
- herman oak
- water proofing
-
(and 3 more)
Tagged with:
-
- 53 replies
-
- herman oak
- water proofing
-
(and 3 more)
Tagged with:
-
First attempt. The "good" side!
- 53 replies
-
- herman oak
- water proofing
-
(and 3 more)
Tagged with:
-
I'm following you on this topic, completely. I started another one this evening and have a few hours into it. Im waiting for the dye to dry and leather to harden before attempting the sew. Now I think I have the skive part very close. I'e been able to use my 5 in 1 to skive the strap full length on both sides and just the last 7/8" of each end. I'm attempting to fold the return to the inside. Same as Steinke teaches. If I were hand stiching I'd be done...but my objective is to machine it. Silly me huh! Again I appreciate your guidance and letting me tough it through. I will get this cause failure is not an option for me...know what I mean? Sounds like you do. This really is the fun part after all!
- 53 replies
-
- herman oak
- water proofing
-
(and 3 more)
Tagged with:
-
Oops! I've cut a bunch of blanks but have only finished two straps so far...quite the disaster they both are! The folded throat strap was almost impossible to sew. What''s the secret with that one??? Do you still put a wire inside like Steinke instructs? The lead strap didn't lay flat on the needle plate and the back side stitch line came out almost off the edge in one section. Back stiches are laying on top back side so some tension adjustment needed. Terrible work! But I learned a lot. And the Herman Oak is really nice. I'm buying ebay used halters with good hardware to canabolize and have an order in with Weaver for 6 sets of new brass fittings. .photos to follow...you'll have a good chuckle!
- 53 replies
-
- herman oak
- water proofing
-
(and 3 more)
Tagged with:
-
So much really appropriate first hand information. Thank you again Big Sioux. You have been very influential in my making path. I got strips cut for the prototype haulters this am. They are mostly from the belly side of the hide at this point. I trimmed the shoulder end off the hide a bit. Cut enough material for five haulters if I don' screw up too much! Do you recommend Beveling all of them at this point? Silverd
- 53 replies
-
- herman oak
- water proofing
-
(and 3 more)
Tagged with:
-
Ok.. Great info. I'll do just that. Thank you! On another note since the topic or robust construction has surfaced. Somewhere up away in this string someone suggested that a Turn-out Halter should be designed or constructed at least to pull apart if the horse gets it caught on something...Fence, barn door latch etc. The sample I'm using is not like this that I can tell but I'm not sure if its a true Turn-out halter. Are Turn-out halters made exclusively with a break away feature and other halter types made stronger? Silver
- 53 replies
-
- herman oak
- water proofing
-
(and 3 more)
Tagged with:
-
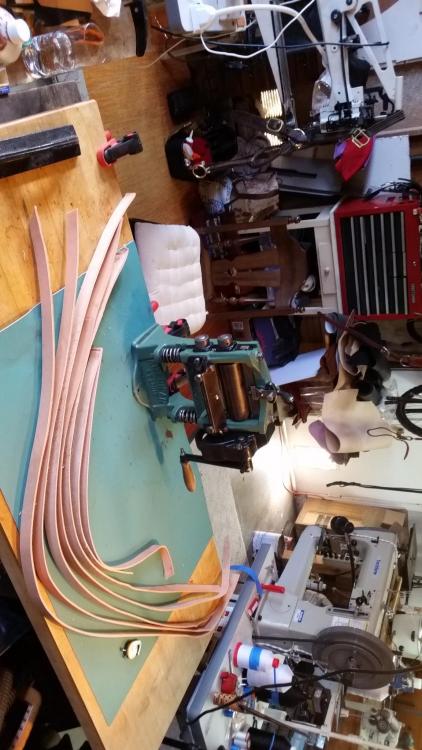
Bridle work: Challenging Work and the Weekend Plan A very exciting time. This weekend I'm putting everything together; my new equipment, new processes, what I've learned from reading and practice making, what this group has taught me and with the help of an awesome assistant and a bunch of luck I intend to make my first of five Halter sets. This is my plan: -I'm starting with a full hide of Herman Oak untreated Skirting with a straight edge cut on the belly side. -A Weaver hand crank slitter set up with the proper spacers and cutters; Making prototype halters for a local Equine rescue center that lost tack in the CA fires last year + we'll cut a few extra sets of straps to cover my mistakes. -A Weaver Easy Edger set up to bevel 10-12oz straps -An American splitter with a freshly Tormek sharpened hollow ground and honed blade -A Landis 5 in 1 with freshly hollow ground blade (for skiving buckle returns) -A Randal creaser for decorative grooving the straps -A Weaver bench mounted edge slicker and bar of saddle soap -An oil warming Crock Pot -A Gallon of Saddle Oil and a tub of expensive leather wax -An old E-bay purchased halter that will be my design target and hardware cannibal; a range of sizes will be attempted using measurements listed in the Bridlework: by Robert Steinke -An experienced Seamstress & Equine Extraordinaire helper to keep me straight -A Chinese 441 set-up and ready to roll with 138 thread (which I think is right). More to follow...Wish me luck! Silverd
- 53 replies
-
- herman oak
- water proofing
-
(and 3 more)
Tagged with:
-
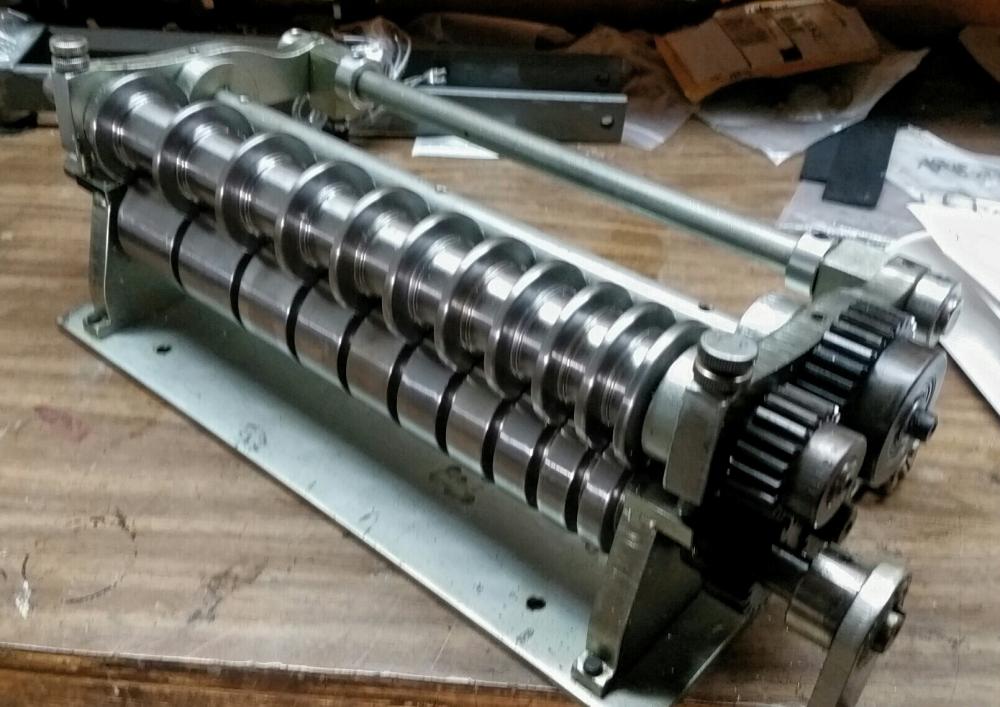
Thank you for the leads. I'll attempt to contact Mr. Johnson re this matter. I guess I'm looking for the same roller set that Mark842 displayed with Radii rollers. Now that I finallt figured out I already own a Randal creaser machine...I know, I know...I feel pretty dumb about now. Silverd
- 8 replies
-
- bridle tack
- grooving
-
(and 2 more)
Tagged with:
-
Wow. Spectacular! Exactly. I own one similar but the rollers are quite wide and no radius groove profiles. Can rollers like tge ones you have be purchased? Possibly a new top roller can be made from scratch...a little lathe work. Silverd
- 8 replies
-
- bridle tack
- grooving
-
(and 2 more)
Tagged with:
-
I'm making equine tack and harnesses and want to place decorative grooves along each side of some of the straps similar to stitch lines. Is there a roller / press machine that can be used for this operation? Silverd
- 8 replies
-
- bridle tack
- grooving
-
(and 2 more)
Tagged with:
-
Hummmm...not liking what I'm hearing, but I understand what you are saying. I'd be better off making western tack, certainly to start with. My first equine product effort I'm planning are the Turn Out haulters for the local Charity. They appear very makable with equipment and skill set I currently have. I also ordered the book Bridlework, by Robert Steinke. Any good do you know? I'll reassess the English bridle work activity going forward as you recommend. Silverd
- 53 replies
-
- herman oak
- water proofing
-
(and 3 more)
Tagged with:
-
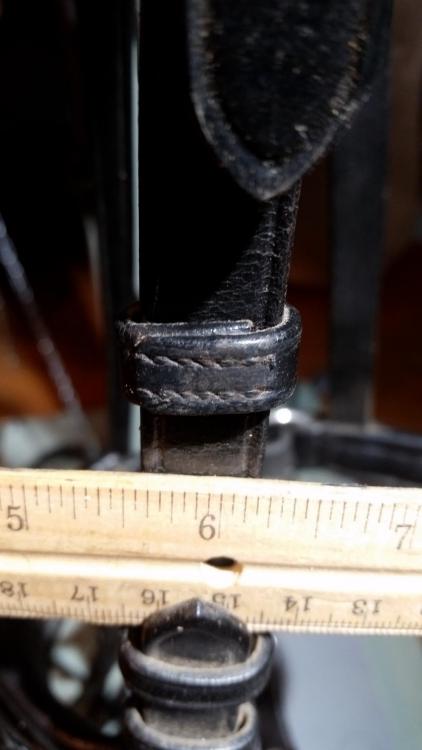
I'l see if I can post a photo...very difficult this site...fussy! Ok... It stuck. This belt loop is wrapped around a 5/8 wide bridle strap...so not very big. Wow...what kind of machine do I need to buy so I can sew one. Really impressive work these bridle people. I have another one for you. The nose strap on many bridles have a cool hump section. How is this sewn together. I've made one by skiving strips of leather and got it to look very nice all glued up...sewing it was a disaster. I think it calls for a custom presser foot that will accommodate the hump radii. My 441 (Chinese) with 7/8" would just fit it. But I couldn't roller guide it well enough or place the stitch line accurately to call it even close to good. What do you think? Over my head? BTW. Skirting Test straps are soaking in neadsfoot oil now. Thanks in advance Silverd
- 53 replies
-
- herman oak
- water proofing
-
(and 3 more)
Tagged with:
-
Thank you both. I understood at the time of purchase from Goligher Leather in Ventura Ca that buying Pre died and conditioned bridle leather would have been easier but choose my current path so as to gain additional first hand experience of the craft....which you will have helped me accomplish. I wanted to go through the process at least once. The nuance of using a little water as a temporary softener really connected the dots for me. I've done a bit of Veg Tan molding so this totally makes sense! Carlos at Goligher suggested using a crock pot to warm the oil so yesterday I brought in a thrift store buy and will test the complete process before applying to my finished straps. I have another queston re machine sewing bridle nose strap. My first attempt was a total fail! I'll post specifics and photo later if interested. Thank you so much again for the advise on the oiling process. Silverd
- 53 replies
-
- herman oak
- water proofing
-
(and 3 more)
Tagged with:


