
Silverd
-
Posts
489 -
Joined
-
Last visited
Content Type
Profiles
Forums
Events
Blogs
Gallery
Store
Everything posted by Silverd
-
Well your work is exceptional. I picked up a Landis 16 recently, have a 441, a Claes 30 and a little Singer MK2. The 441 is the most versatile by far. Silverd
-
Such impressive work. Absolutely beautiful. Silverd
-
Im certainly listening to your advise. Excellent common sensical feedback. I thank you. We will be advancing the product into the market but as you suggest, we need to pull our act together with finalizing our previsional patent application and non disclosure documentation. I've had a few supplier responses to my original inquiry through leatherworker.net that appear promising and will take up with them again once our afares are in order. Silverd
-
Great information. The product size is compatible with the smaller press dims you presented. My partner is concerned with publishing images at this time unfortunately. I'm respectful of his reluctance at this time but will take up supplier vetting once we have resolve. Silverd
-
Hi I'm looking to have production quantities of a simple pattern die stamped or laser cut. Start-up qty would run 500 pcs. This is ether a clicker press or laser job. I have not made a clicker die at this point. Leather for the project is 10-12 oz HO bridle in three finishes. There are additional operations also needed. Some stitching, edge finishing, possible decorative stamping, hardware installation and packaging. Contact me if you are interested in subcontracting this type of work for me. Thanks! Silverd Don 805-701-3990
-
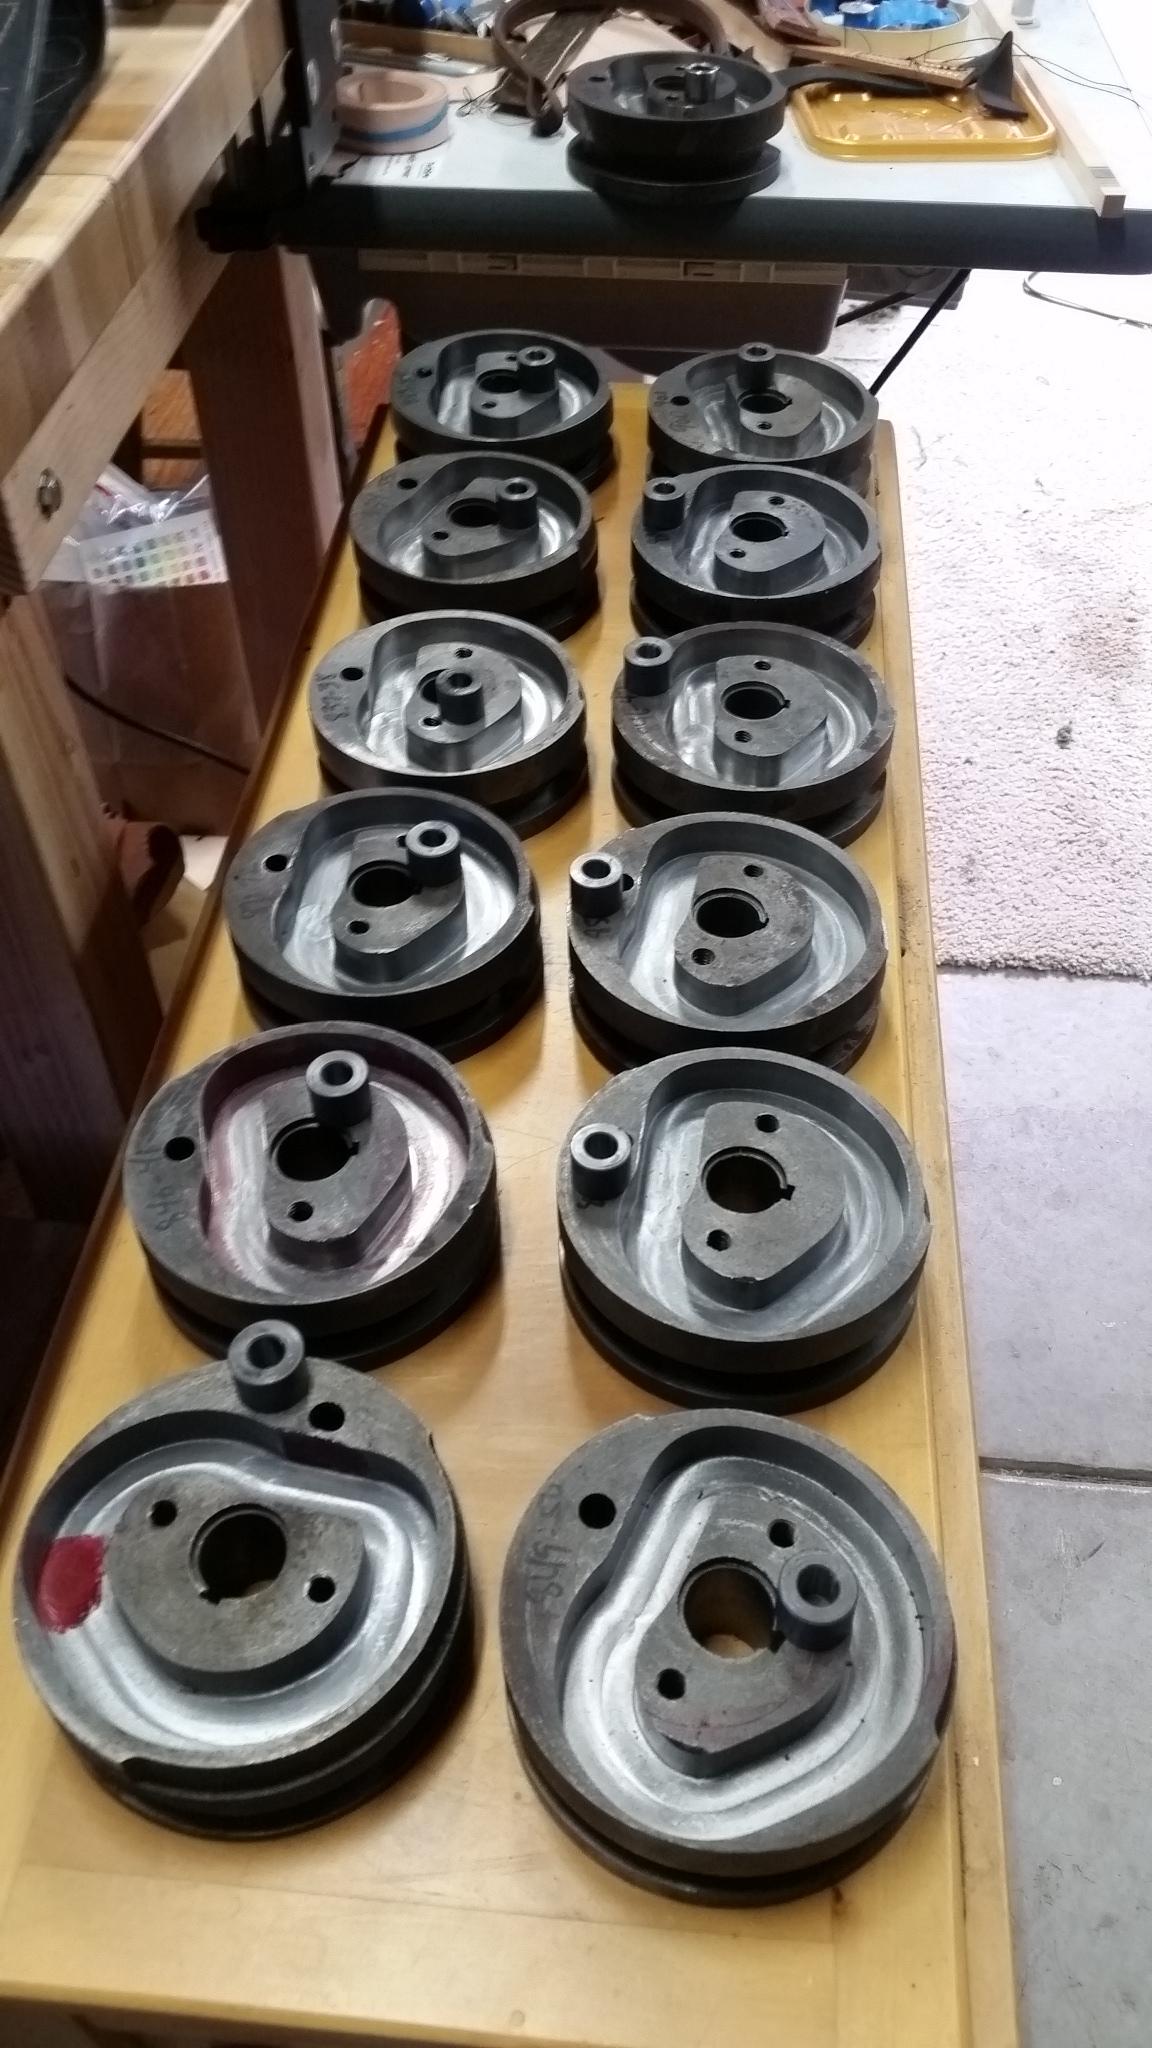
Up-Date: The front facing channel of the cam in my Landis 16 was badly worn. Working with Eli Schlabach of Landis International I devised a refurbishment method that I thought might be of interest to some of the members. This particular cam is really the only cam in the 16, according the Eli, that has a high degree of wear. The cam roller that rides in the channel moves the presser foot and has to push against the presser foot spring which is why it wears at a faster rate than the other two cams in this machine. Eli had a dozen worn-out cams that he wanted to have refurbished and I had one out of the machine I recently purchased. The rework process started out by taking a scan of the cam and creating a Solid Works CAD file. Using this file the cam channel path was defined and from there a CNC machine G-code program was generated. Each cam was mounted into a simple clocking fixture in the CNC mill. Running the G-Code program the CNC cutter followed the established cutter path exactly centered in the cam channel without touching the inner walls until a feature called Cutter Compensation was initiated. This feature allows the CNC control to move the cutter off center incrementally until it started removing material from the channel walls. The process continued until both sides of the channel were completely cleaned up. This process resulted in a cam channel that is wider than the original so the old cam roller can no longer be used. Each cam was them measured to determine the new diameter of the roller. Rollers were made -0.001" smaller than the cam channel. Each cam now has a custom roller which when used together are completely backwards compatible with the OEM cam and roller. I'm planning to complete the refurbishment work to my machine after I reassemble it with the rebuilt cam and roller for testing. I'll post my progress going forward if there is interest. Folks that own a Landis 16 and are interested in replacing the lift cam can contact Eli Schlabach for details and counsel on how to do this work. Let me know if you need his contact information. Silverd

-
Did you replace any cams?
-
Hi Where did you obtain the parts you speak of. And what parts have you replaced. Recently bought a 1952 16 and am in the process of refurbishment. Silverd
-
I paid a visit to the HITS horse show in Thermal CA this past weekend. Spend the better part of 2hours talking with the show saddler and tack maker Brad who travels with the HITS and other major shows around the country 45 weeks a year in a self contained trailer that includes his leather shop. He repairs tack and saddles for the show contestants and was reasonably busy from what I could tell. He had just finished replacing a seat in one saddle which to my eyes looked as good as new. He also makes and sells a complete line of English tack. Most impressive was his shop which contained only minimal tools and equipment as well as limited space. My shop is much better equipped for what good that does for me! Brad has been working in the English horse world for 35years and scoffed at my idea of making knee roll and billet repairs by only partially dismantling the saddle. His method is to disassemble the saddles completely thereby allowing the rolls to be worked on the bench including machine sewing the pockets closed and to gain complete access to the Billets. He also suggested that he will typically find other issues with the saddle that he can address. I came back from the visit having a better understanding of the business and the challenge someone like me will face making new equipment for sale. Without a very through understanding of horsemanship and or traditional tack making methods, I don't really stand a chance. Saddle fitting included. Brad indicated that the saddle reassembly process goes quickly once understood. I visited your site and was very impressed by the images of your work. Very nice products and very professional presentation. My work pales in comparison. Silverd
-
May I ask what you typically charge for this work? Silverd
-
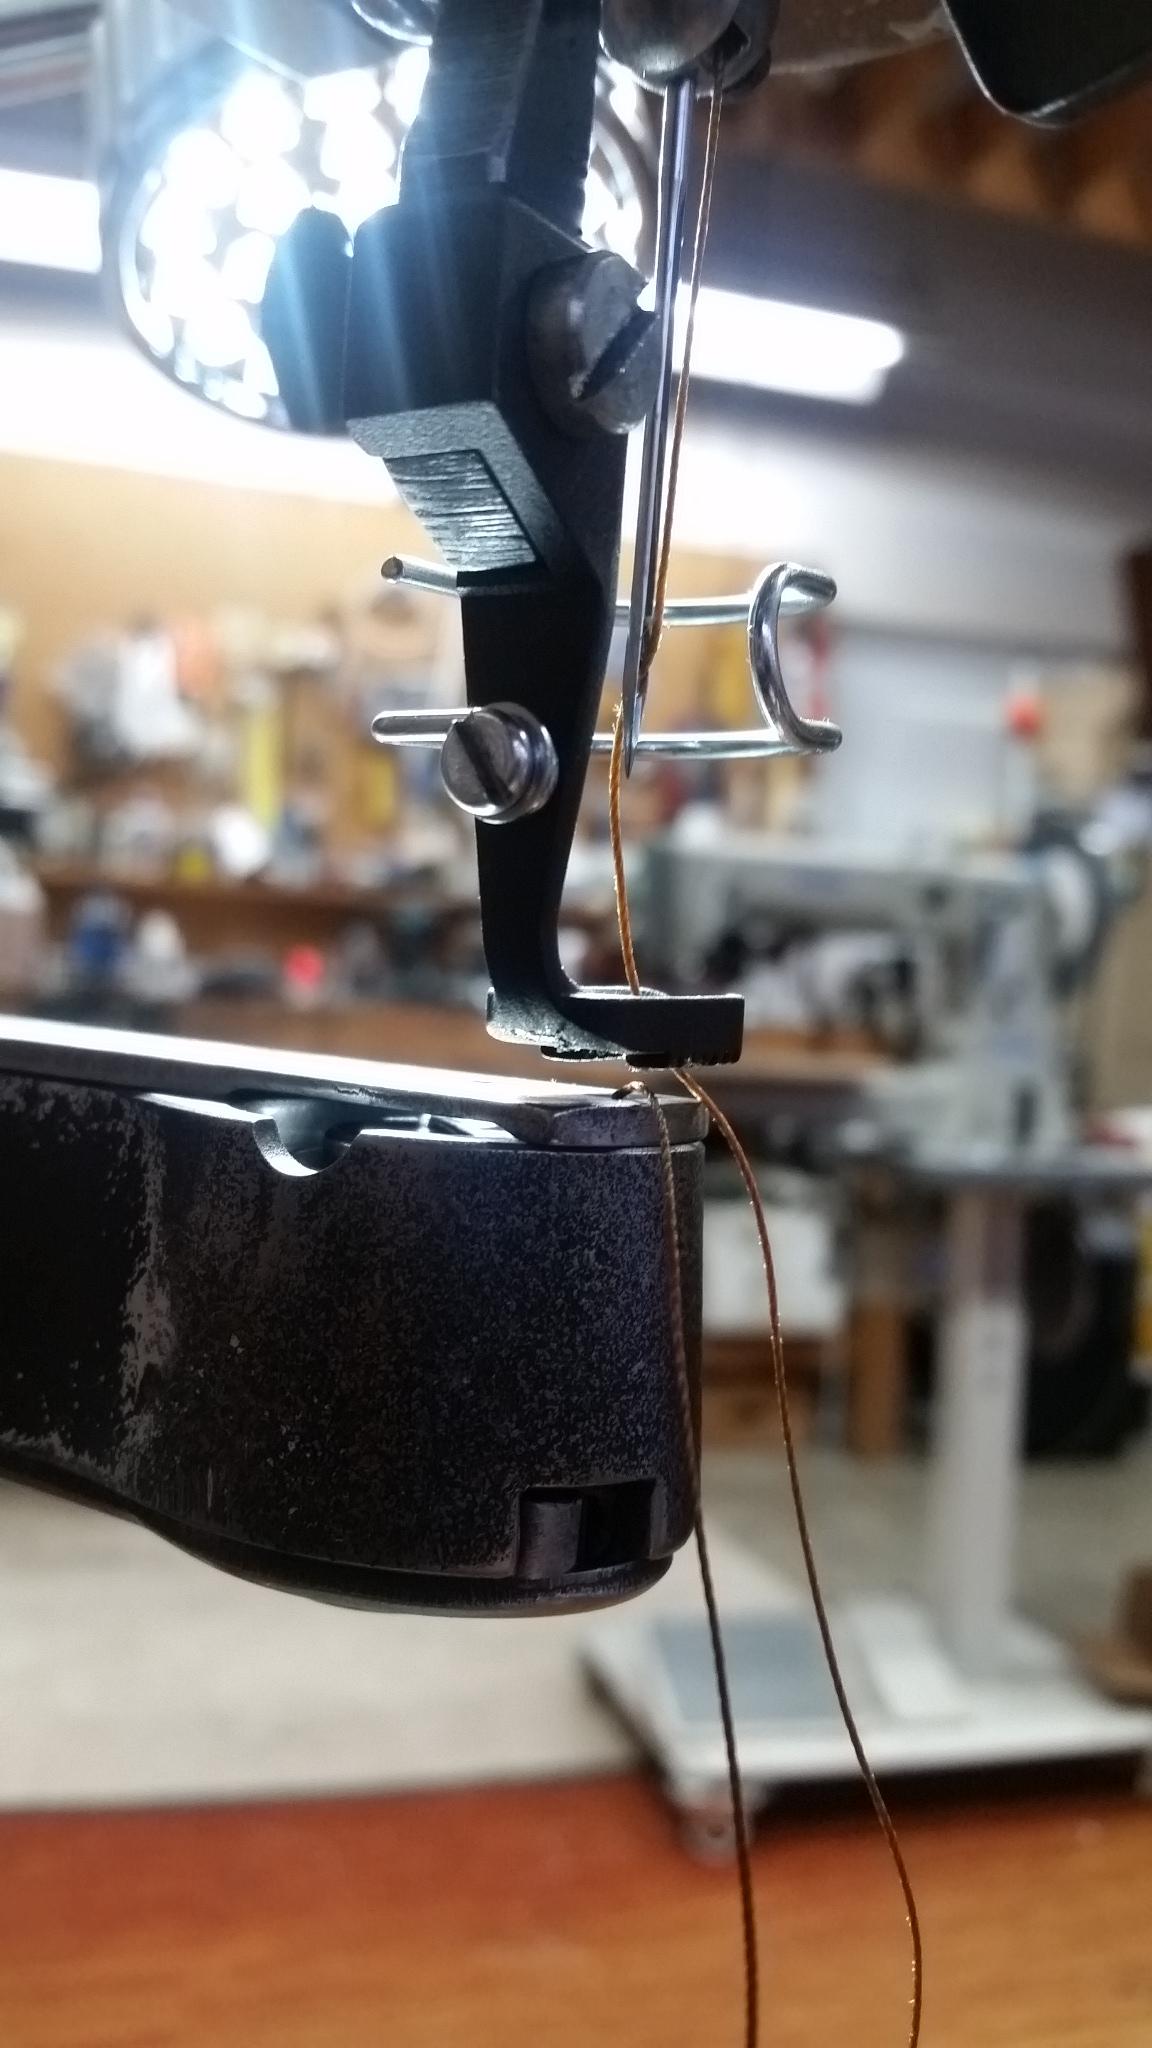
I align the needle holes using small brads that are removed as the machine stitching commences. I also grind the point off the needle I'm using so it is more likely to find the existing hole instead of making a fresh one. Lastly I wear prescription spectacles designed for me to view the action at 10 inches distance. Every stitch is carefully placed and depending on the spacing may require lifting the presser foot and adjusting the work location under the needle. Key is being able to control the machine speed down to a creep when needed. Silverd
-
Hitting the previous needle holes when making repairs: 100% is the goal. For repair work I'm currently use a Claes 30 patcher and a 441 (Clone) both with speed reducers and Bob Kovar motors and controllers or I hand stitch. I tossed out the motor and controller that came with the 441 (Clone from TECHSEW as the system did not function correctly and was largely unsupported by their customer service folks). Do I sound like a difficult customer?...I likely am because I know what is possible when it comes to motor control systems being that I have worked in the CNC machine tool industry for 20+ years. That said I'm new to the leather community and to the Equestrian world. The reason I mention this is because hitting the old holes requires a tremendous amount of machine control, good lighting and for me vision aids as you likely know. If one cannot machine sew and hit all of the existing needle holes then hand stitch the work. in my opinion. 1/2" Latex: I bought 3/4" Plastazote Foam 45KG / cubic Meter density but I can see where 1/2" may serve as well. I think as long as the foam density is correct the type of foam may not be completely important aside from it being of a closed cell type so it does not absorb water. The Stubben customer belongs to a local ranch that I desire to have good word of mouth reporting of my services so I went with Abbey England's recommendation. Is the Latex foam you use an economical alternative to the Plastazote? Lastly: Turning Work Away: Indeed. I agree completely with this notion. One must work within our skill set / equipment & knowledge abilities as opposed to our financial plans. Silverd
-
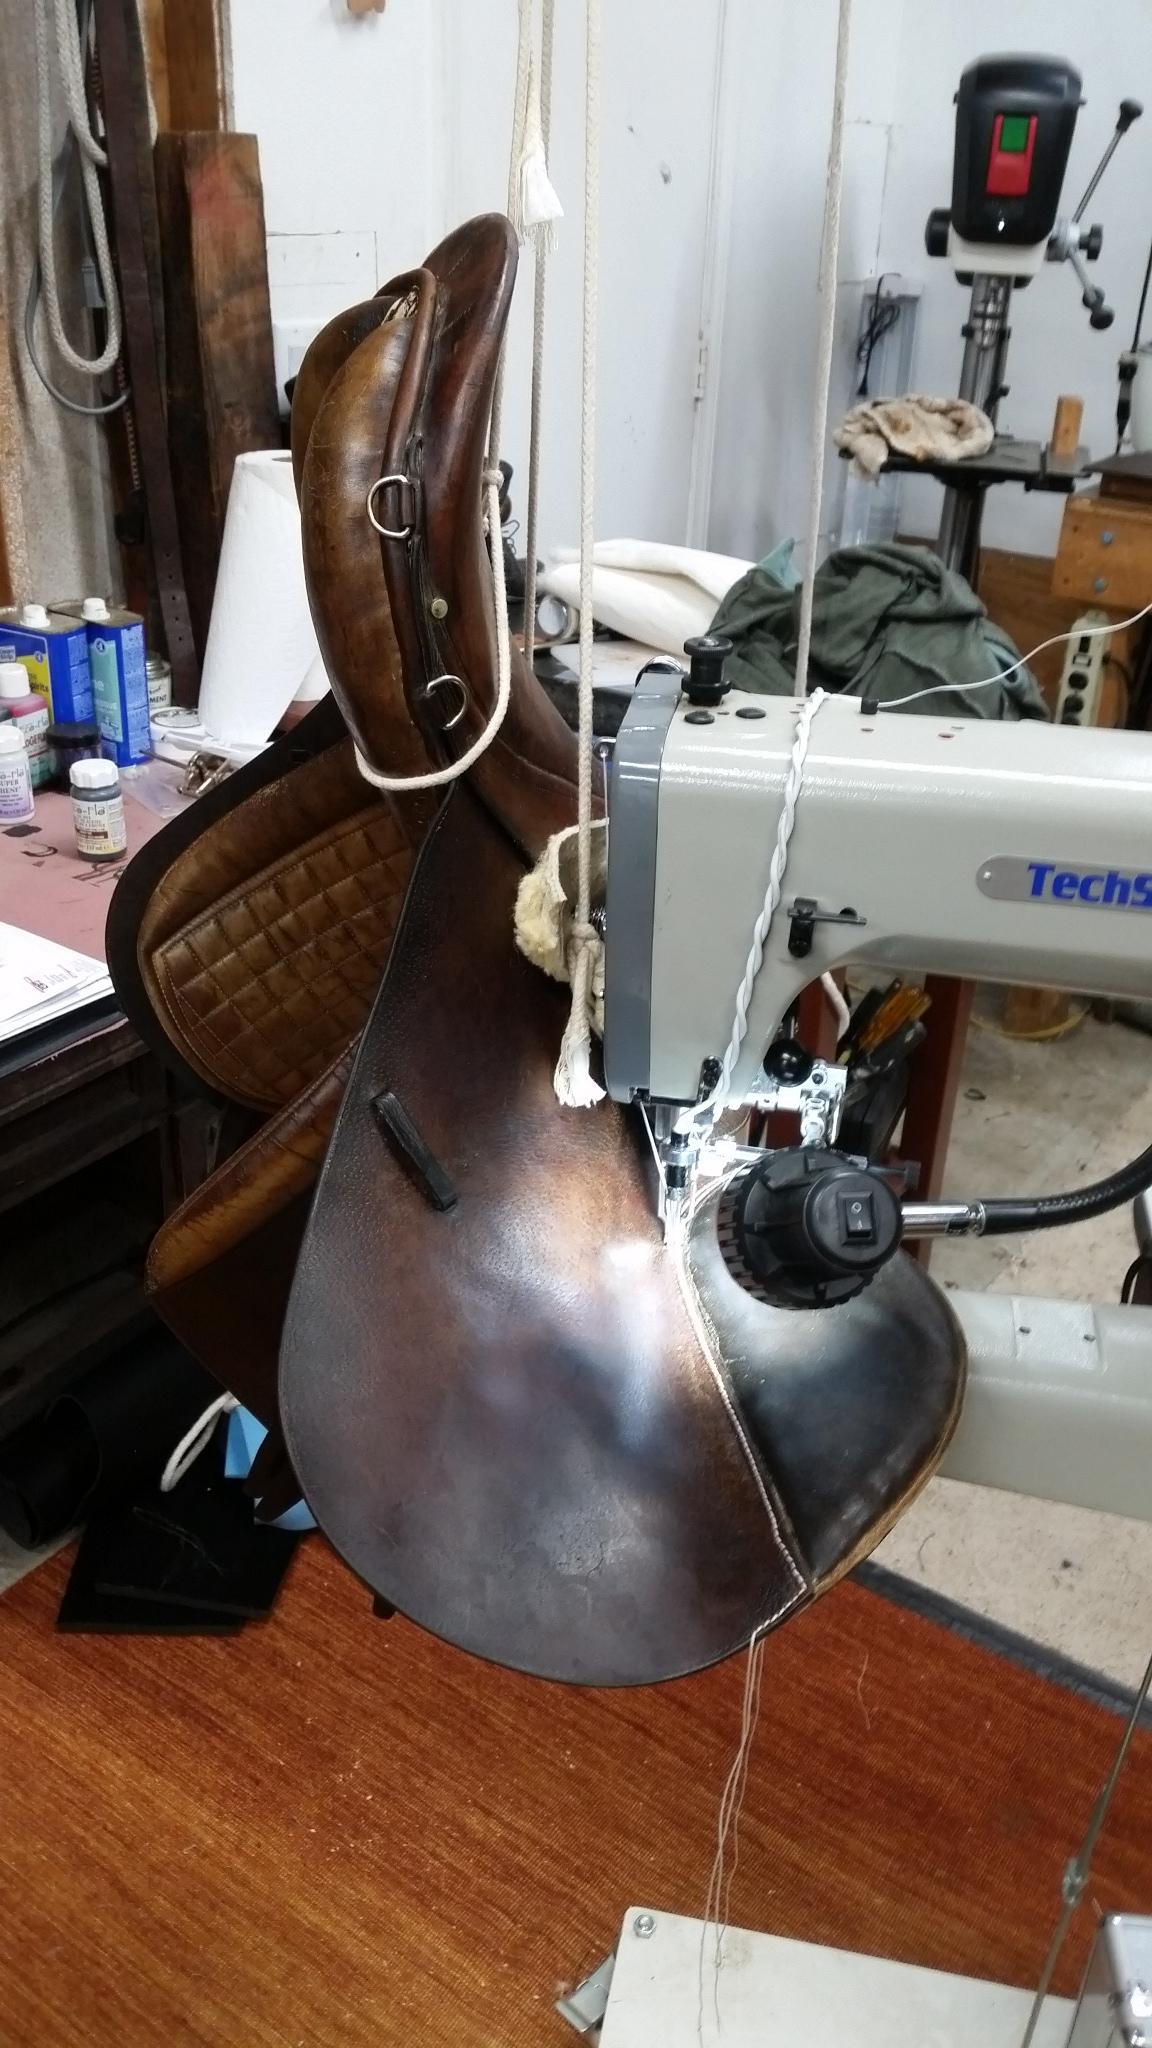
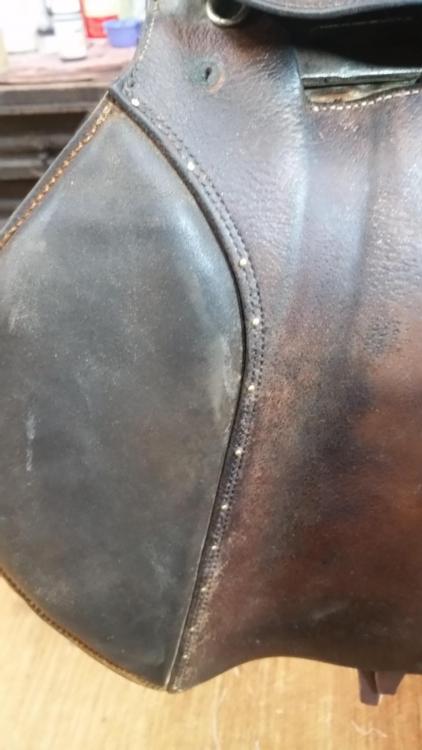
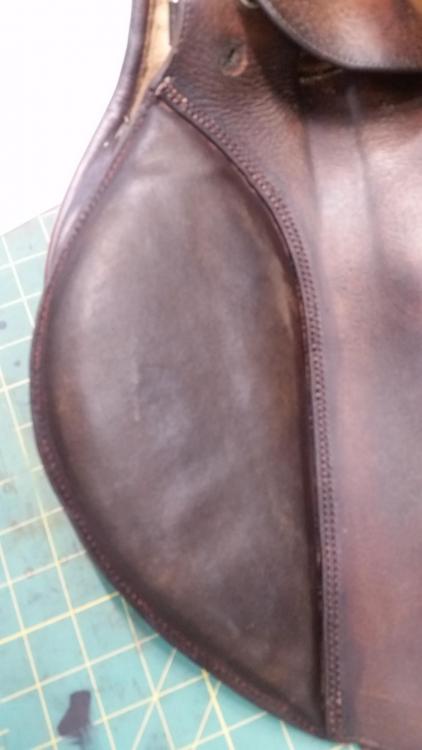
Hi Jcuk Appreciate your candor. In the tack room at this ranch hang hundreds of examples of tack in a range of condition. The saddles however are the best example of neglect and in your words, questionable safety and certainly questionable creature comfort I suspect. I'm not ready to take on panel replacement with my limited experience at this point and she's not willing to pay for a qualified saddler for the reasons you state. It's dissapointing to me to witness a pro level owner, manager display such a high level of disrespect for the tools of her trade and to the students of this community not to mention the animals. I'm waiting for a shipment from Abbey England that should include the big head pommel nails. I need to replace one on the Argentina saddle, then pop stitch it all back. ...Then I'll take on the Stubbed repair. One thing at a time. Photo of the Argentine saddle and the repaired knee insert sewn back on the flap using my 441 (clone). Silverd
-
Problem of Site not redirecting to forum properly?
Silverd replied to kgg's topic in Feedback and Suggestions
Same issue that I have been experiencing. Silverd -
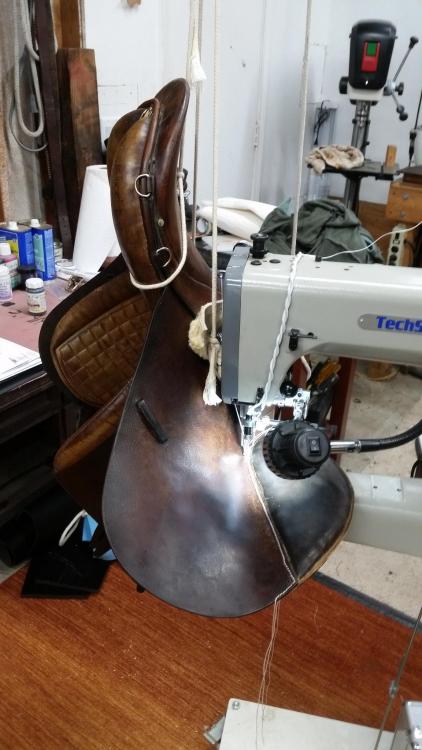
Hi Thank you for the great input. Went to Abbey of England as they should know what they are doing. Customer service very prompt and helpful. This is what they recommended. Plastazote Foam 45KG / cubic Meter density. This converts to about 2.8lb / cubic ft. I ordered a 40" X 40" sheet of 3/4" from Amazon...$130.00 or so. A bit more expensive than I'd like to pay but I'll have it and can tell skeptical customers that it is Abbey England recommended. "Can of Worms" Indeed. I purchased an inexpensive Argentinian Saddle that also requires knee roll re-stuffing. The leather on this saddle is in pretty good condition so I don't plan to replace the pad covers but I'm using it as a practice mule in preparation for repairing my real client's Subben saddle that does need pads re-stuffed and recovered. I've cut the pop stitches on the Argentinian Saddle at the saddle front to allow me access to the Billets and knee pads which I stuffed with some foam scrap material that I had already, then re-stitched the pads back together and back onto the flaps using a 441 clone. I made a simple sling suspend the saddle from the ceiling at the correct height and orientation for the machine. Things went relatively well considering its a first attempt! The point of all of this effort is for me to offer knee pad and billet replacement without having to pull the saddles completely apart or hand stitch the pads back onto the flaps. From what I have seen locally this is a common repair but is normally quoted at a rate that often exceeds the value of an older saddle if it can be done at all. The other comment I read in the string above is with respect to the underside padding and how it changes shape over time to the point where they no longer fit the horse correctly. I don't have any saddle fitting experience; obviously something I'll need to get training on if I want to one day address an important part of English Saddle repair and or making. But I have been working with a Rancher who teaches, judges and who has been in the Equestrian industry for a very long time...Was a Jockey at Santa Anita track etc. She has many student saddles, some of which are in incredibly poor condition she uses regularly. These saddles not only have knee pads that are torn out or missing but the underside pads on some are cracked and open. My initial thinking was they are worthless junk, but she maintains they still fit the target horse and are acceptable as is...So where in lies the truth? Do the pads really require re flocking at some point or is this procedure that is largely an unnecessary practice for horse owns who are very fussy?
-
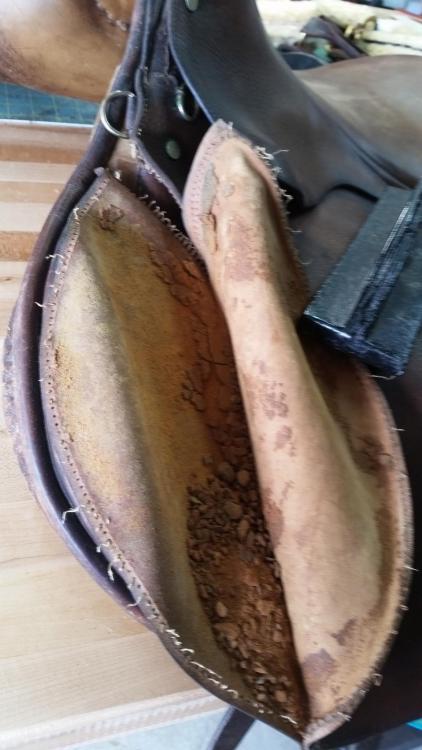
Original knee roll freashly opened....that's how old! Anybody want to take a stab at what kind of padding I should consider using for the repair? Sikverd
-
Hello, I have a client wishing to repair an older Stubbed Saddle. The work will include new billets and replacement of the knee rolls. Currently there is nothing in the rolls, no padding, horse hair or frock and the top leather of both pockets are torn. I plan to drop the front of the saddle to gain access to the billets and will remake and sew in new pocket top leather as needed. What is the preferred and proper padding material to use? Thank you in advance, Silverd
-
Hi Constabulary, When I had the head taken apart I measured the needle diameter bar at wear area and non wear area. The difference is about 0.003" -0.004". I think replacement is warranted. The presser foot cam also shows sign of wear which probably contributes to the reduced max stitch length possible on my machine. I can buy these parts from Landis int. In Canada, but was wondering if you have access to them? Also, you included a repair manual that looked very useful. Is that for sale by chance, or would you consider selling a photo copy version? Thanks! Silverd
-
Hi I found nothing out of the ordinary during my delve into the Claes head. And it sews perfectly as long as the material is sufficiently thick so the presser foot can reach. My theory at this point is that the cylinder arm is been bent down. Have you seen this before? Can you possibly measure the distance between the needle plate and bottom of head on your machine for me? Silverd
-
Who uses a Pearson #6
Silverd replied to T Moore Medicine Hat Saddlery's topic in Leather Sewing Machines
Way to go Big Sioux! Silverd -
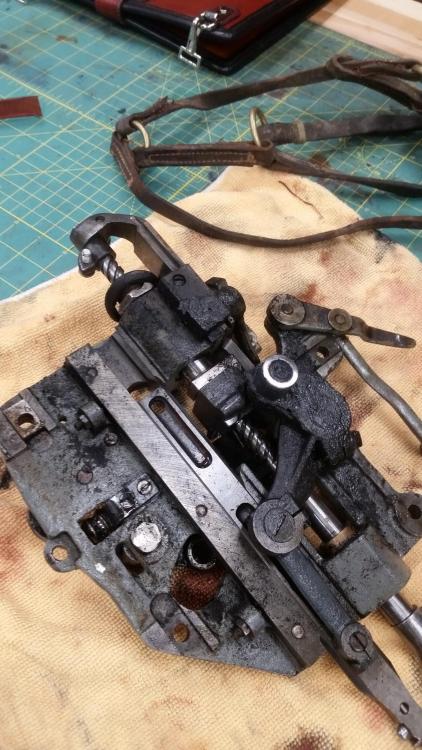
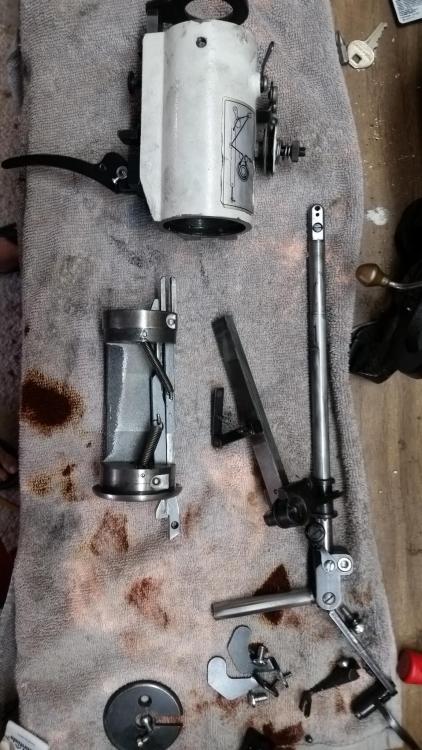
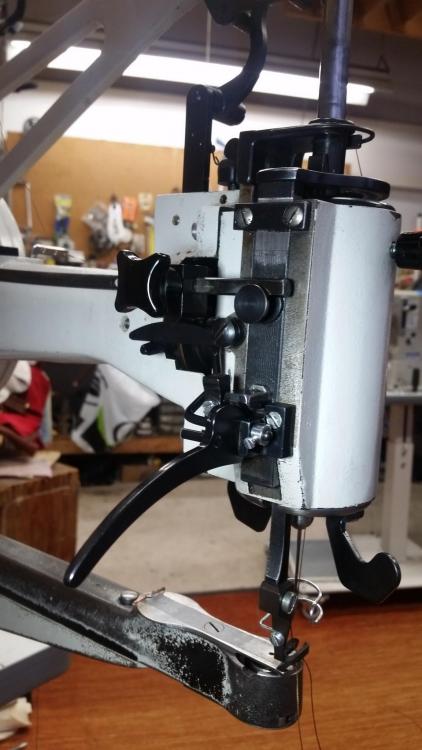
Hi Hook 39 did at one point snap off of the bushing but was replaced. Internal spring 41 is in place. Presser foot appears to come down against a hard stop. Note the presser foot slider at top of head that shows evidence of reduced travel (black oxide finish has rubbed off from when the machine operated correctly in the past) Silverd
-
Hi Need some advice. I purchased a well used but rebuilt Claes 30 from Landis International earlier this year. I'd been using it successfully for odds and ends when suddenly the presser foot will no longer drop all the way down to the needle plate, and it will no longer sew a stitch longer than 1\8". Otherwise sews well. Landis has been useless in providing a solution and I've not located US service provider Any ideas? Silverd

-
You are amazing my friend. Very interesting! Silverd
-
Ok. Sorry. System didn't appear to respond until the fourth attempt. Thank you Don