


Alaisiagae
-
Posts
136 -
Joined
-
Last visited
Content Type
Profiles
Forums
Events
Blogs
Gallery
Posts posted by Alaisiagae
-
-
At the risk of me sounding like a slow, stupid child: Did you harden your leather with hot water, @Frodo ?
@fredk How long does it take for the leather to dry after being soaked in water (and soaked for how long?)? Is there a leather thickness you think is good - 6 to 7oz? Thinner? I did buy some neatsfoot oil (100% pure, but I think I overpaid for it, oops), so I've got that now.
-
Hello! I'm a beginner at leathercrafting, too. That item you made (a cord organizer for earbuds?) looks very nice, I like the paws. ^_^ That's really cool that you were able to repair that messenger bag! Must have been a lot of stitching, yes?
-
Thank you all for the advice. However, none of the videos I watched (I watched 3) mentioned boiling the leather at all. @fredk Why does the leather piece have to be so stiff/hard?
 That hard, why use leather at all and not some other material?
-
Hello, I'm going to make a small strop, and I was wondering what kind of leather to use. I have read on these boards that "hard jacked horse butt" is supposed to be good, but I don't have that and I'm not sure how to get it. I have some thick (8-10oz) veg tan cow belly, and was thinking of using that - or would it be too smooshy and soft? I plan to eventually order some veg tan from Springfield Leather, so I could order a small piece of thick, regular veg tan. Or, should I use thinner leather (I have some 4 oz and thinner scraps on hand)?
As for glue, I have Fiebing's basic leather craft glue that looks like elmer's white glue, regular rubber cement, and superglue. My dad likely has more potent adhesive chemicals that are not designed for leather - would those be better options?
-
-
4 hours ago, Hardrada said:
ADDENDUM: You know, I've also gotten good results with a paddle: https://tandyleather.ca/collections/supplies/products/craftool-stainless-steel-edge-paddle
I mostly use the rough side of that paddle.
I use that paddle, too, with Fiebing's Edge Kote.
-
When I mix dyes, I use a plastic disposable pipet and put some of one dye into a paint pallette, and then add some of the other color, swirl a bit, and grab my wool dauber to test it out. I was able to get a nice kelly green using some yellow and blue eco-flo dyes mixed together. You could do the same with red and yellow to get orange. Not sure if this is the type of mixing you were thinking of. The disposable pipets are really cheap, you can get them on Amazon. I have 3mL, which seems to be a nice size for what I use it for.
-
I spoke with my dad and he suggested using a clear acrylic finish to get waterproofing. I have a spare coaster/scap leather I can use to test it out, see if it darkens the leather or not.
-
On 7/24/2020 at 5:55 PM, Workinman said:
Those are awesome...at any level of skill, let alone your first solo project ! Great job !!
I'm curious how your waterproofing is working ? I also make (veg tan) coasters, but noticed they begin to stain really badly after a few weeks of use. Coffee and wine seem to be really bad, but even water leaves a stain. I've experimented with; 1) Fiebings Leather Balm; 2) Tandy's Eco Flo Super Sheen; 3) Tandy's Eco Flo Top Finish; 4) Mink Oil; 5) Saddle Soap, and; 6) Dr Jackson's Oil for Leather- ALL recommended by Tandy and Fiebing. I've even experimented applying each on to dry leather, cased leather with 1 coat to as many as 4 coats. NONE work perfectly (of course, some better than others). Also, most leave a shiny film on the surface, which for my coaster designs is not desireable.
I'm sure open for suggestions any one
")
I don't know hiow they're holding up, my sister hasn't mentioned them - I don't even know if they've gotten any use. The guy at the Tandy store recommended I use Rustoleum's "Never Wet" spray. I figured I'd use the Sno-Seal and water-repellant spray that I had on hand. I used a hair drier to heat up the leather and sno-seal, hopefully that helped the sno-seal get into the pores better. Maybe I'll get some laquer as Tom suggested and ask her to let me touch up the coasters.
-
That looks gorgeous! The handle is exquisite, really one-of-a-kind. I think you have a lot of talent and skill to be able to fabricate your own maul like that.
-
Thank you, @jcuk for the videos, that guy is a pro at using this tool - he makes it look so easy! But it also made me realize that when I used my tool, it did get a bit grabby on the badly beveled side, and was hard to control. I'm going to contact the seller about his offer for a replacement.
And thank you all for the tips for sharpening and stropping, I'll definitely need to use those. I don't have a whetstone - I wasn't sure what grit was appropriate for my cutting tools like my edge bevelers. I don't want to put a new edge on my tools, I just want to make them sharp. Stropping seems to help, but they get dull again quickly. I don't have that many cutting tools, just two swivel knife blades, a keen edge beveler, edge beveler, groover, and now the french edge skiver. I have a utility knife and bought some replacement blades for that, as well as a craft knife and 45mm rotary cutter.
-
Wow, that stitching horse looks fantastic!
I wish I knew how to do woodworking, but, alas, I have no room for the tools and no suitable workspace.
-
Those look great! I'm envious of your basketweave stamping skills.
-
I was wrong, the store re-opened this week. Yay! I know they're not top-of-the-line, but I'm really glad it's there.
-
Yes, I've heard that the leather will drink up oil-based dyes - but, wow, three bottles seems like a lot! Glad you got the color just the way you want it, it's always satisfying when the color comes out great.
-
You could start with a knife sheathe kit, they come with all the leather pre-cut and instructions. Grab a bottle of dye, wool dauber to apply the dye, a finishing solution, and you're all set! The kits are an easy and fun way to dip your toes into leathercrafting. You can even make a template out of the pieces (before you assemble them) so that you can recreate it from a blank hide in the future.
-
Thanks, Fred, I'll have to try that. I don't have any pure neatsfoot on hand - would mink oil work by any chance? It's kind of more of a paste than an oil, but it sure helped my hiking boots (which I abused as gardening/landscaping shoes). I also have Dr. Jackson's Hide Rejuvenator (bought it to keep the skin side of a woodchuck pelt from getting too dry).
Is there a brand of pure nfo that you'd recommend?
-
When I dye the leather - particularly if I dye both the grain and flesh sides - it dries such that the leather becomes rather stiff. This worked great for a valet tray I made, it's shape is rock solid. But for a coin pouch, I want that to remain somewhat flexible and not stiff. I'm not sure what I'm doing wrong. Do I need to wait for the leather to dry completely after I've tooled it? After I dye and before I apply the finish? Do I need to flex the leather as its drying from the dye? Is this just a normal thing veg tan does?
I'm using the Eco-Flo Dye, and I also have a few of the Eco-Flo Waterstains, too (I usually use those on the flesh side). For a finish, I use Super Shene (acrylic-based) or Neatlac.
-
They closed the Tandy store in MA, I don't see it on their website listing of stores anymore. I'm sad to see it go - it was only 20 minutes' drive from me. Now the nearest one is over 2 hours' drive away. I made an online order last week, finally got it today. They made a slip - my thonging chisel set handle says "Ivan" on it, not Craftool. Guess it's no secret who their supplier is!
I really enjoyed the classes at my local store, and the staff were pretty knowledgeable though in my opinion I think there could have been more professionalism and salesmanship. The store was pretty tiny, but was set in an old mill building, lots of character. I enter the door to the mill building and it smelled like leather as I got closer to the store. Smells so good!
-
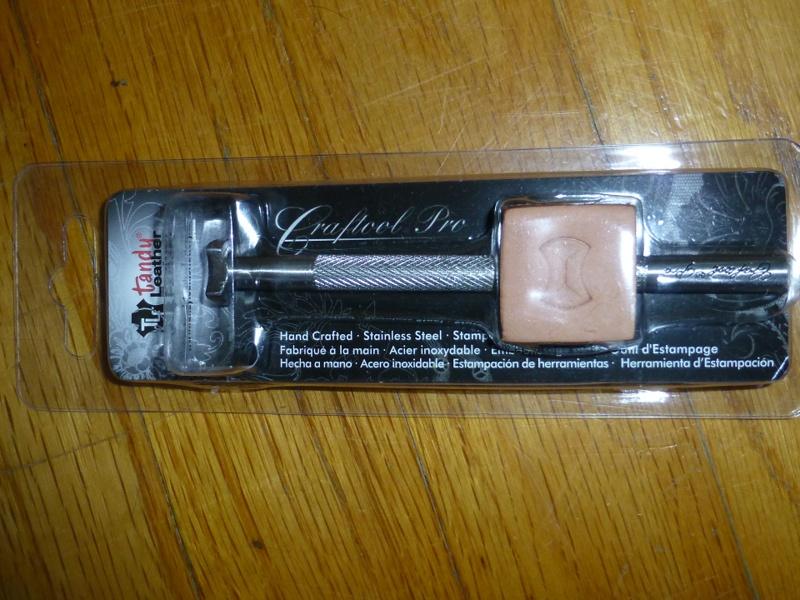
It looks a lot like a standard hand press for leather working. I've never used one before, so I don't know how it works. I know Tandy sells one that looks like yours, it comes with a brass anvil that can be replaced with dies for setting rivets and stuff.
-
Thank you!
I bought detail brushes (the smallest being 0/20) and those helped a lot with painting the stamped areas and applying the resist (I used Neatlac). I used Cova Colors paint, and used several layers to make the color stand out vividly. My arbor press came in handy for doing the coaster boarder pattern, all I had to do was rotate the coaster and then pull the lever.
-
It looks great! The curves of the brown leather on the front are a really nice addition. And that blue is so vivid!
-
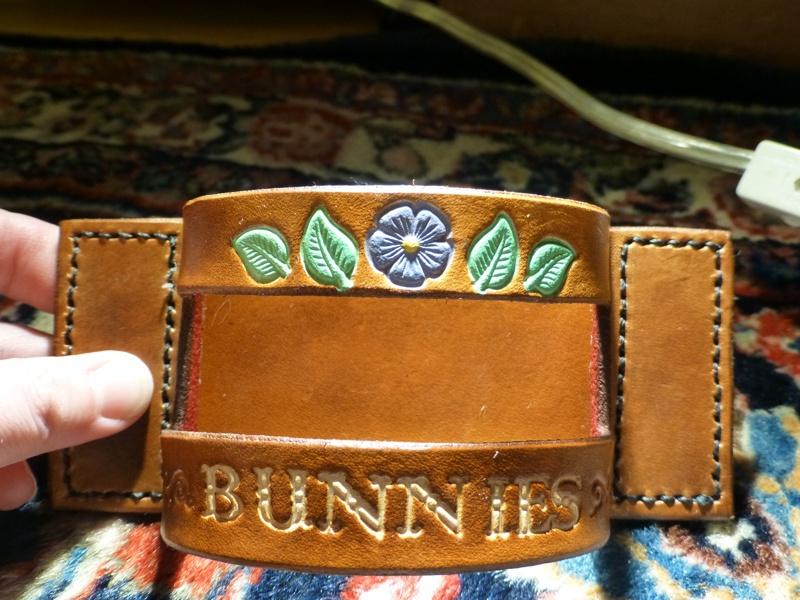
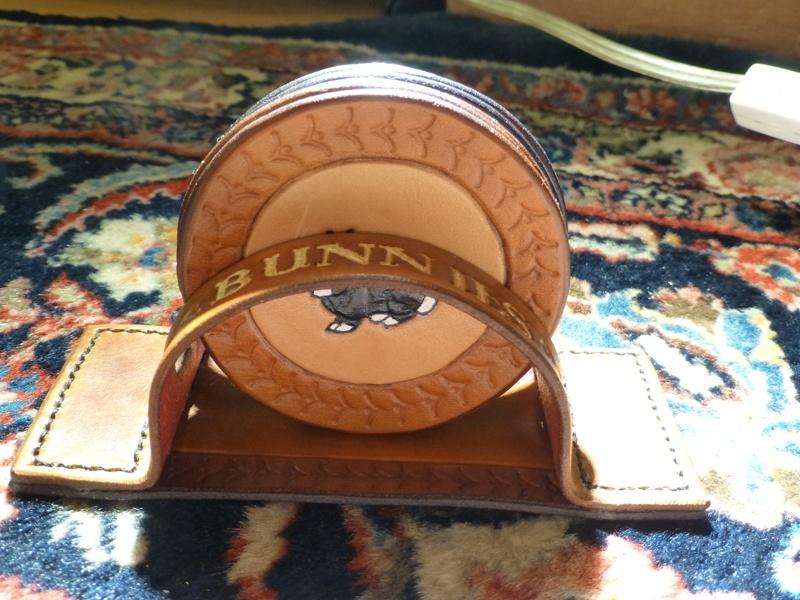
The server migration ate my original post! I made these last Christmas as a gift to my sister and brother-in-law. It's my first by-myself, not-from-a-kit or class project. The coaster holder is from a Leathercraft Library template. I'm really proud of these, it took me a few tries to get that coaster holder cut correctly. I tried to waterproof the coasters using Sno-Seal wax and the Scotch-Guard I use on my leather dress shoes. It was fun coloring each bunny a different color, but I think the black one is my favorite because it's the most complex.
.jpeg.60e59556bdc4b77e1bad44b9c811ed42.jpeg)
-
I have some items I'd like to sell or trade. Prices don't include shipping, buyer pays shipping. Prices are less than what I paid for these.
I'm new to the site but not to trading and selling - see my GTZ profile here, 100% positive feedback on over 100 trades.
Embossing Wheel Carriage + 8 Wheels (will come in original packaging) - $65
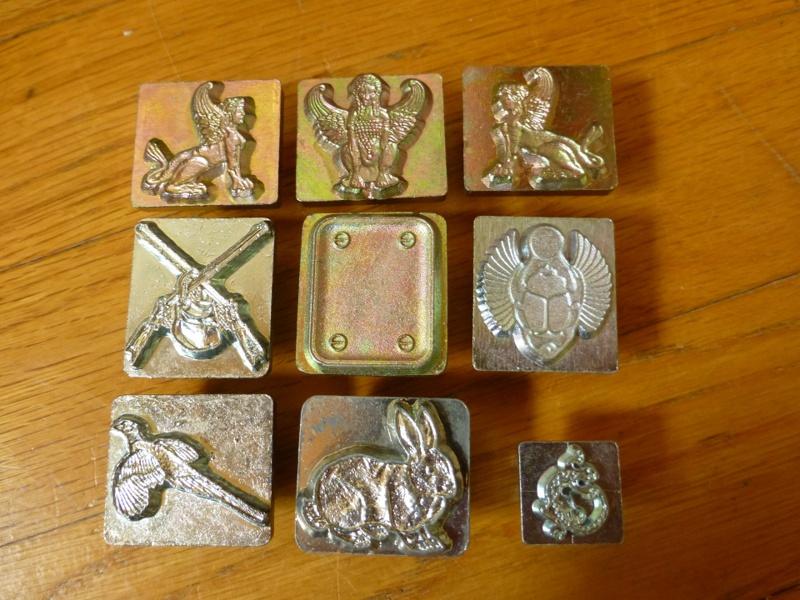
3D Stamps
- 3x Sphinx (may not be Tandy) - $3 each
- Crossed Guns (Craftool Co. USA) - $5
- Plate (not Tandy; from SLC)
- Scarab (Tandy, w/original packagin) - $3
- Pheasant in Flight (Craftool Co. USA) - $5
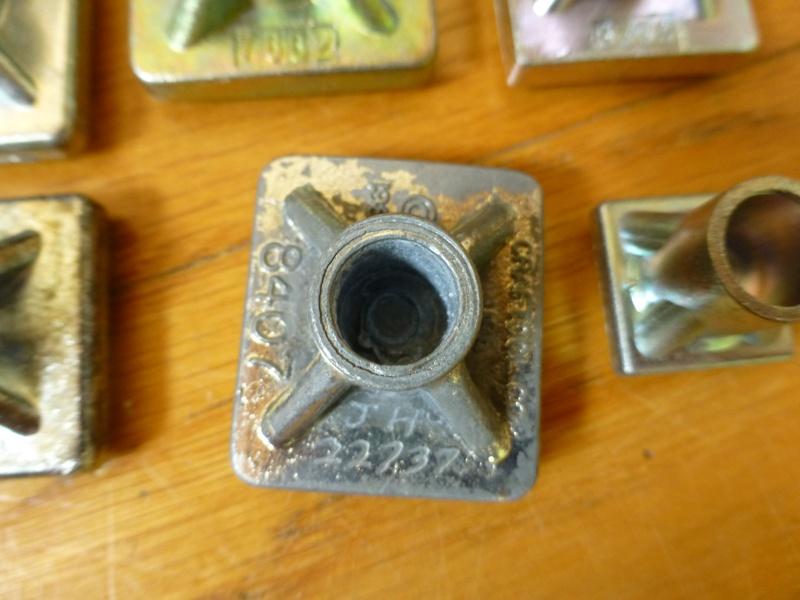
- Bunny (Craftool Co. USA) - $5 (note: chrome plating has fallen off in some places, especially the edges and back; the back of the stamp has wear & engraving, see photo)
- Lizard (Tandy, w/original packaging) - $1
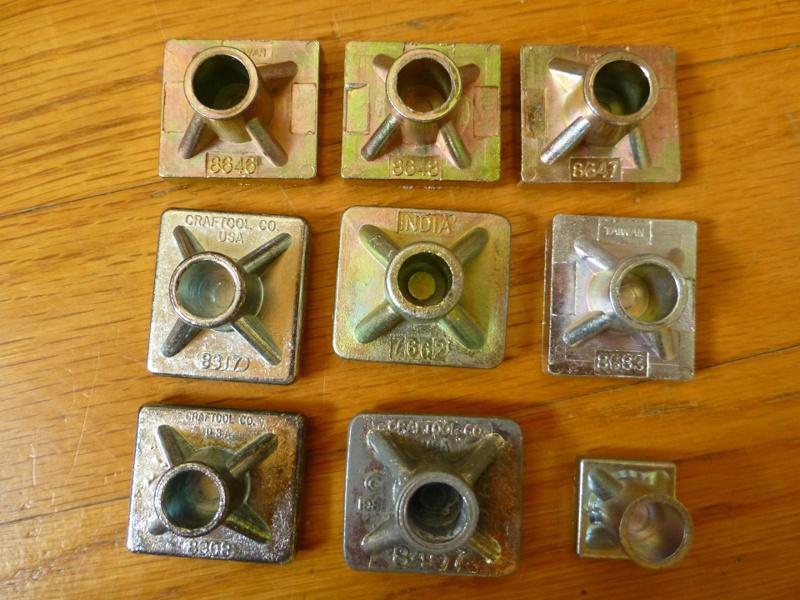
Craftool Stamps - $3.50 each.
- From left to right: F902, E675, F941, G536, G538, L949*, L948* (* = Craftool Co.)
Craftool Pro Stamp X2862 - $5
Hardware - $1 each
- 2x key hook plates
- 3x Sphinxes
- 5/8" roller buckle, nickle
- 5/8" roller buckle, brass/gold tone

Fiebings Antique Finish paste
- Mahogany and Tan colors. 80-90% unused. Will need to be stirred.
Tandy Eco Flo bleeding when sealing
in Dyes, Antiques, Stains, Glues, Waxes, Finishes and Conditioners.
Posted · Edited by Alaisiagae
For the 2-tone, my suggestion is to apply the finish (satin shene?) to just one of the colors. Maybe do 2 or 3 coats. Then do the other color. My thinking is that the first part will act as a "resist" and resist the dye from being further picked up when you go to do the other color. I'm not sure a paintbrush is the best tool - I've always used a damp sponge (cut up into small pieces for easier handling and control). When I use satin shene, yes, it will pick up the dye pigmentation molecules that didn't penetrate into the leather. It actually helps a little with smoothing out any blotchiness from dyeing. How long are you letting the dye dry before applying the finish?
Wool daubers are recommended for applying dye, though I imagine a paint brush may be helpful for additional control. The problem might be getting the dye out of the paintbrush afterwards! Sometimes it wicks up into the ferrule and no matter how many times I rinse or let the brush soak, more dye keeps coming out, like a cornucopia.