RidgebackCustoms
-
Posts
92 -
Joined
-
Last visited
Content Type
Profiles
Forums
Events
Blogs
Gallery
Store
Everything posted by RidgebackCustoms
-
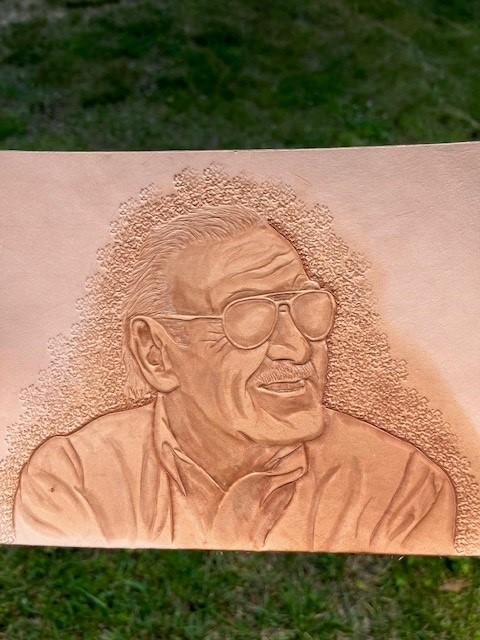
I've been spending my leather time learning to do portrait work. The Elktracks studio courses by Annie Libertini have been invaluable in that effort. My first from scratch portrait is Stan "The Man" Lee. I love comic book heroes and his voice overs from the old cartoons always carry fond memories. As an adult it was great watching the Marvel universe come to life on the big screen, especially the X-men and Spiderman. Appreciate any criticisms or notes for improvement. I already know I probably wouldn't do the background the same. It seems to busy to me and distracts the boundary between figure and background, especially around the hair.
-
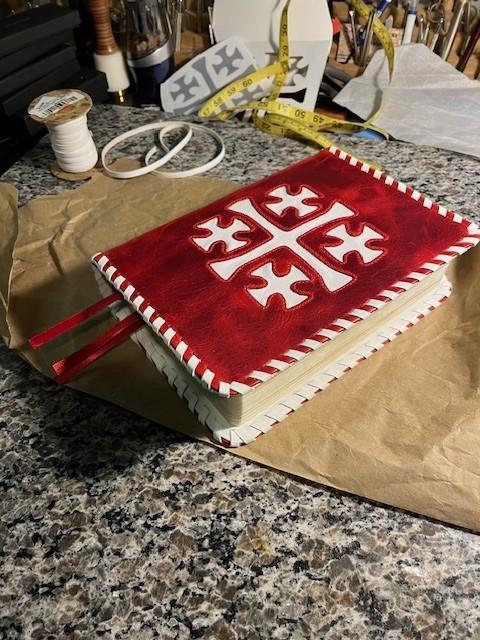
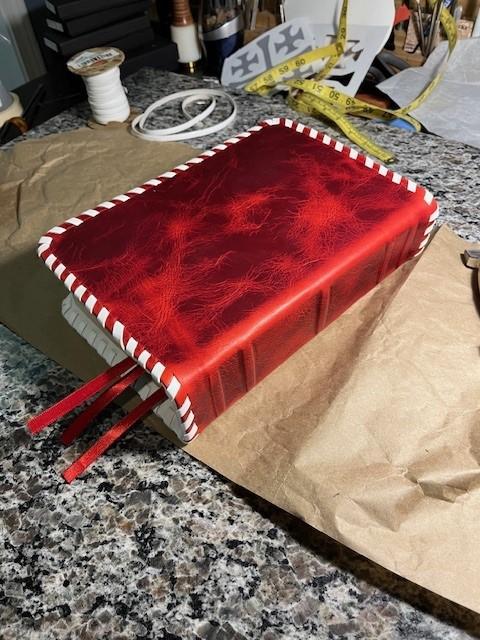
Finished the latest Bible binding project. Certainly not understated, lol. I think it would be a cool special Bible to bring out at Christmas with the red and white theme. Looks like a candy cane. Liner is white lambskin. The exterior is red waxy leather from Badalassi Carlo with the same white lambskin liner. I've got plans for more, but I've exhausted my leather budget for the month. Maybe next month.

-
I like leatherstampmaker.com If you reach out direct, they can probably help you. They sell their letters and adapters to fit several hot foil machines.
-
Check out talasonline.com. It's a book binding website, but they have leather tools, including an assortment of decent skiving knives for decent prices. They also have good deals on bone folders.
-
 Yes. Just load up shearling with tan kote, and then buff the flesh side until smooth.
 -
At the end of your stitch line do you backstitch?
-
Needed a catchy title to maybe get more eyes. I cut out and collect the brands I find in the hides I buy. Some people like them, some people don't. For the people that like them I hang on to them and use them for special projects. For example I have a HP brand that I'm just waiting for the right customer to come along (initials or something) to use. I have an Omega symbol that I've also been hanging on to to hopefully mate with an Alpha symbol. Maybe for a custom bible rebind? I don't know. My question is: 1. Does anyone else collect their brands they find or am I a weirdo? 2. Is there any site or service that offers up brands to makers? I.e. you can specifically buy the brand you're looking for or cool brands to integrate into a project? 3. What other unique ideas have you had to use those branded pieces?
-
I'm guessing 2 threads knotted together and saddle-stitched. I'm curious how you did the thread terminations. I've done something similar, but the thread terminations gave it away. Wondering if you found a way to terminate them hidden/cleanly?
-
Check out the post of a similar machine in Leather History. Some members have experience with them based on this thread.
-
Do not take them apart! If the sewing machines are functioning do not take them apart. Quite a few people who own these machines or want them do not also possess the technical knowledge to work on them. I can drive a car, but would be walking everywhere if I also had to know how to work on the transmission. If they're working, include video of them functioning in whatever post you're selling them in. You could also post a classified in Leatheworkers Journal and / or Illume magazine. You'll reach a target audience of serious leather workers.
-
Here's a cool video for similar piece of equipment/design that shows some application information. Probably more interesting than useful, but cool video.
-
I see a lot of traffic on alternative ideas for vacuum, but thought I'd throw in my two cents on how these units (the original picture) work. These type of units use high pressure air to generate a small vacuum / low pressure area just ahead of the nozzle. Material is pulled into the nozzle in the local area and rather than being "sucked" through the hose for the majority of travel, the scrap is pushed by the compressed air along the length of travel. They're useful when you want to push the scrap a long way or up a vertical section as pushing with compressed air is more efficient than pulling with vacuum. I would expect to see a set up like this in more of a industrial setting where instead of consolidating the scrap near the machine, several machines are ganged together and their combined scrap is pushed away from the workers. The unit will only run as long as the compressed air is running through the unit. Manufacturing facility air typically sits at 80 psi or so. Higher pressures create higher vacuum areas near the nozzle, but once in the pipeline a lower pressure would be capable of pushing the scrap. If you wanted to use this set up you would want to mount the vacuum unit (the piece with the compressed air fitting) as close to the scrap as possible as it doesn't tend to "pull" very well compared to other vacuum options. If not feasible, you would want the scrap to fall through the pipe with little to no bends or turns so that gravity is doing most of the work of getting the scrap near the mouth of the vacuum unit. If I already was in a shop with compressed air/big reserve tank I would set this up with a simple on/off valve and push the flow to a scrap area farther away. If I didn't have that already I'd probably go with one of the more conventional vacuum options (shop vac type system).
-
I use it to paste finish the flesh side of leather. It works really well for laying down fuzzy leather. Have to use a piece of shearling or something to get good coverage out of a given volume, but it's a go to for me.
-
That's an idea. I like projects with a lot of "canvas" to work from. Fair, I just worry about skin oil, sweat, etc. prematurely aging the work.
-
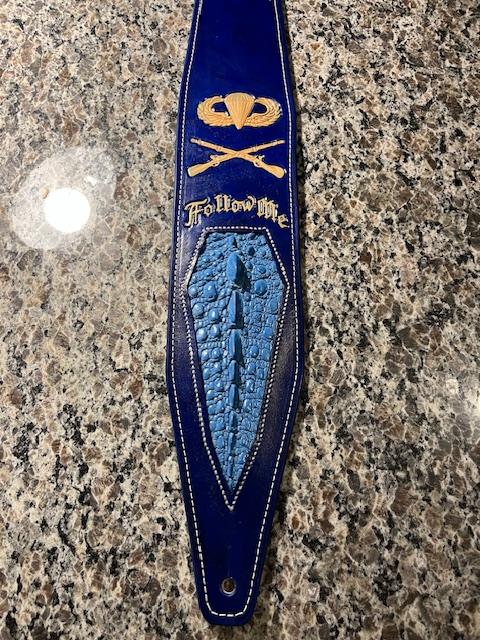
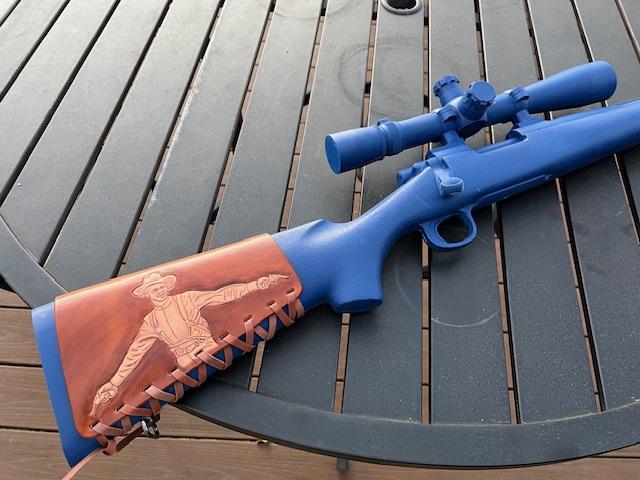
I want the art facing out when shooting. So right side for a right handed shooter, etc. Probably my only option for adding function to form with these designs. Fair
-
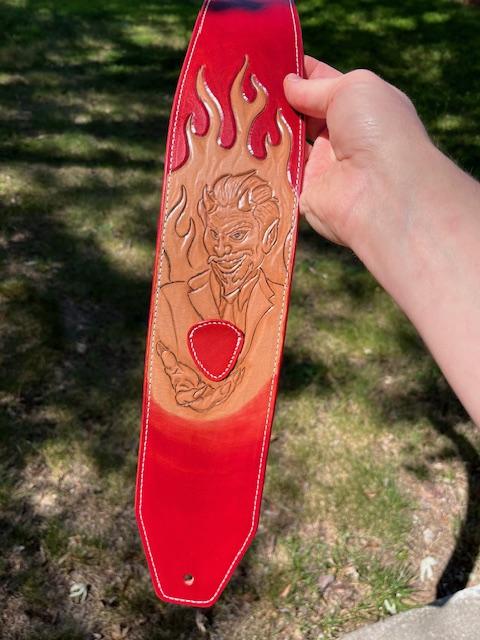
Made these mostly to practice the tooling, but wanted to start fleshing out a stock cover design as well. Genuine question: Does anyone think there's a market for purely decorative covers? Maybe in the SASS? I like the real estate provided by the project for decorative tooling, but not much function to it.


-
C.S. Osborne quality control thru the years.
RidgebackCustoms replied to DieselTech's topic in Leatherwork Conversation
Great read! Thank you for the history and insight. -
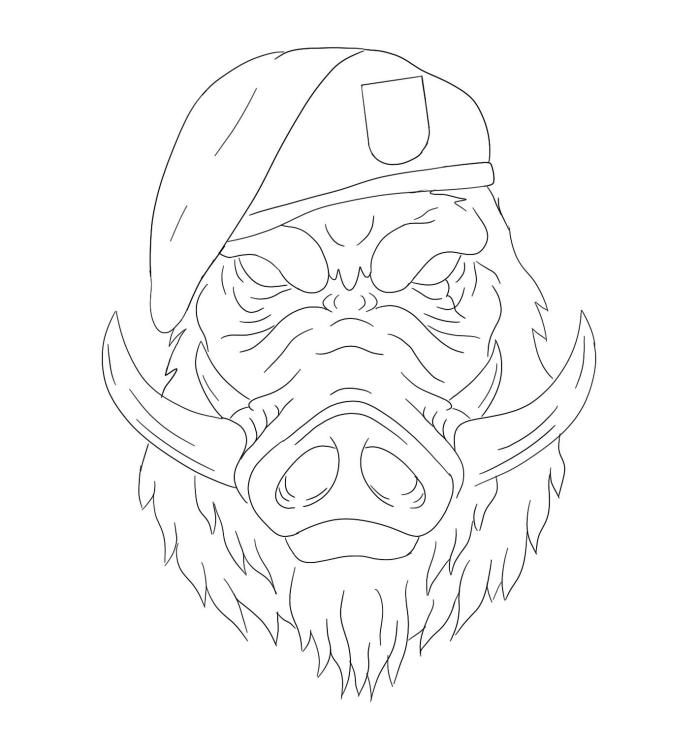
UPDATE: Made some changes to the line drawing. Haven't gotten around to re-tooling though. Shortened the beret up on both versions. Dropped from 4 tusks to 2 on one of them. Personally I like the 4 tusk version still, but like the shorter beret.

-
I really like the logo.
-
Stingray Leather Inlay Guitar Strap
RidgebackCustoms replied to RidgebackCustoms's topic in Show Off!!
Thank you! -
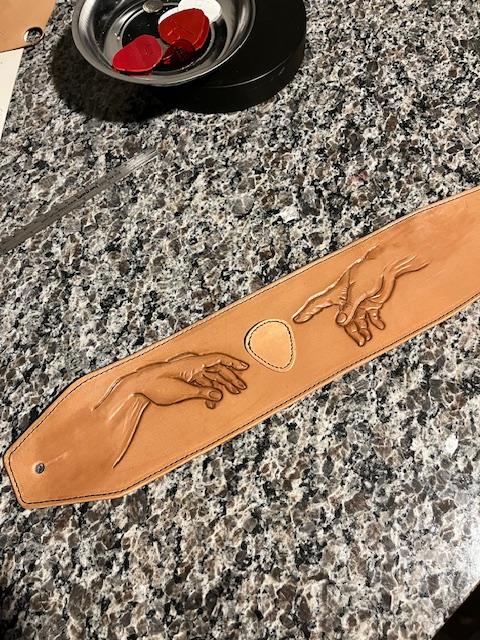
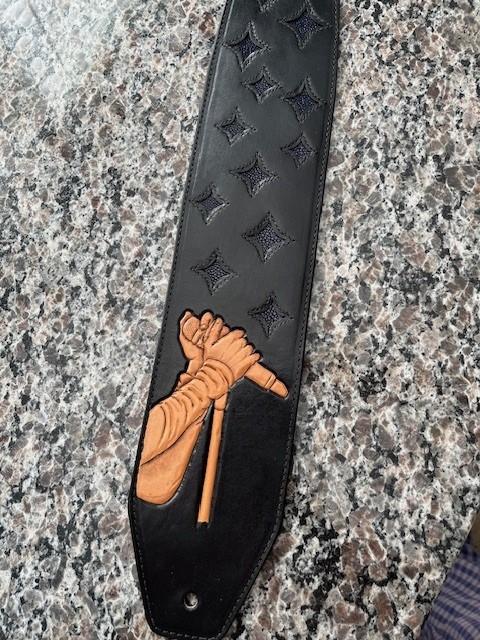
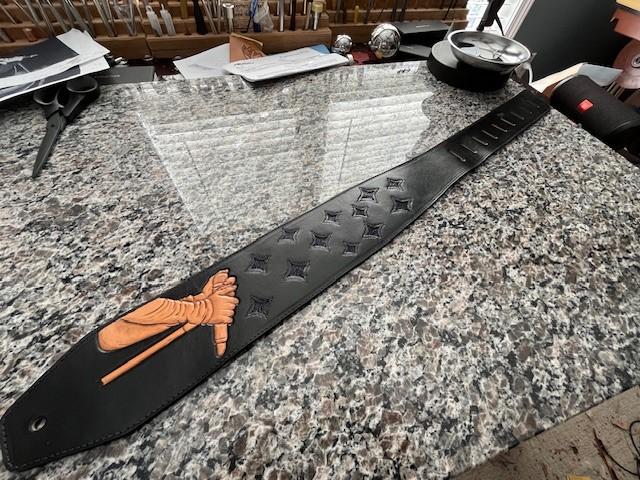
Latest guitar strap done! I wanted to do a tooled portrait, but my skills aren't quite there yet. I think the faces turned out well, but didn't bear enough of a likeness to Chester. The guitar strap is tooled leather, Fiebing's black pro-dye for the background. I used dark brown antique for the hands and a matte resist. Although to be honest I don't see much of a difference between the matte and the high sheen after a few days, comparing it to other straps I've done. The inlay is sanded stingray. The leather is 6-7 oz, so to get the cutouts to sit lower I hand skived the back to reduce thickness along the stitch line. Lisa Sorell's book The Art of Leather Inlay and Overlay was a great teacher for that technique. As an aside, I'm trying to get my hobby to pay for itself, but having trouble finding a place to sell my work at cost that doesn't cost me money to post and sell. I feel like posting to facebook / instagram only gets me in front of the same 30 people and the support I get there is great, but they're not customers. I don't want to pay for advertising since I'm practically giving my work away anyway. I'm at a loss. As always compliments and criticisms are welcome. And criticisms are more important for improvement. Thank you! -Ben


-
Detailed pictures of the pick pocket construction:


-
They are pick pockets. I stitched a false top across the top of the pocket and then finished the stitch attaching to the strap itself. So there’s an opening at the top to put a pick but it’s a complete border just looking at it. There’s also a little tab on the inside of the pocket to keep the pick from popping out. I’ll post a pic soon.
-
Fair. I definitely want to try this design again to continue practicing hands.
-
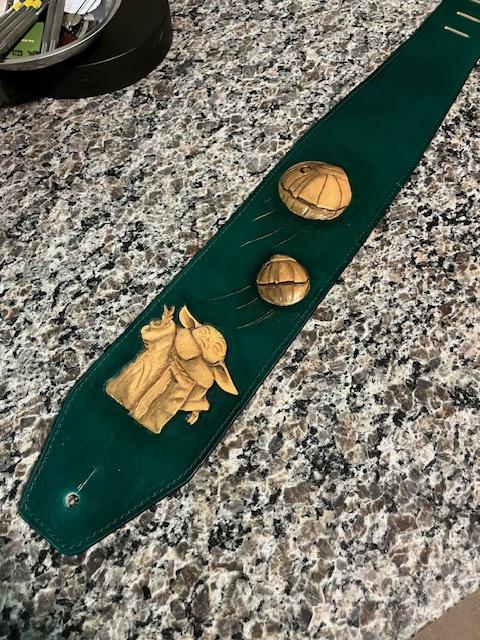
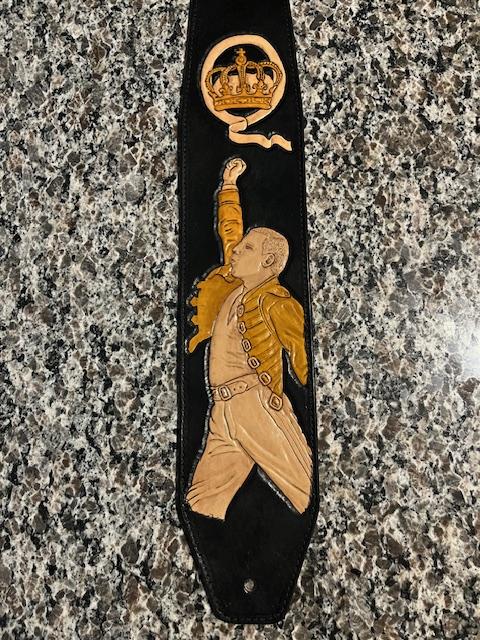
Been on a guitar strap kick recently. Some of these designs have been kicking around my head for a couple years. Finally decided to sit down and get them knocked out. Each one was done to practice a particular thing I needed more reps with. As always, criticism is appreciated and more valuable than compliments for continuing to improve. Thank you!