Search the Community
Showing results for tags '111w155'.
-
My original work light is long gone on my Singer 111W155. I still have it's mounting bracket. Looking for an LED work light with a flexible mounting. What LED work light are you using? Thank you!
-
I've rebuilt a "parts machine" 111W155. Initially it sewed well but I tried to adjust the alternating presser foot height by the manual and things went in the crapper. The vibrating foot lifts 3/8ths -1.2 inch. the alternating presser foot (outside) barely clears the material being sewn. This makes it difficult to sew across height variations like seams. The mechanics appear to pivot the outer foot off the inner.... but when I adjust them for the same lift (standard) the inner foot binds on the feed dogs and locks up the machine. The manual doesn't specify where/what their starting point/position should be. Anyone else experienced this? Thanks. (Needle bar height is set correctly)
-
I'm new to industrial walking foot machines and leather work. I saw two machines for sale but unsure of which to get. A Singer 111w155 which I see a lot of info online about and a Singer 153wsv13 which has virtually no info online about but I see similar machines for sale. I know the open arm is generally a more versatile choice but like I said, I am having trouble finding into on the 153wsv13. Anyone have info about this model?
-
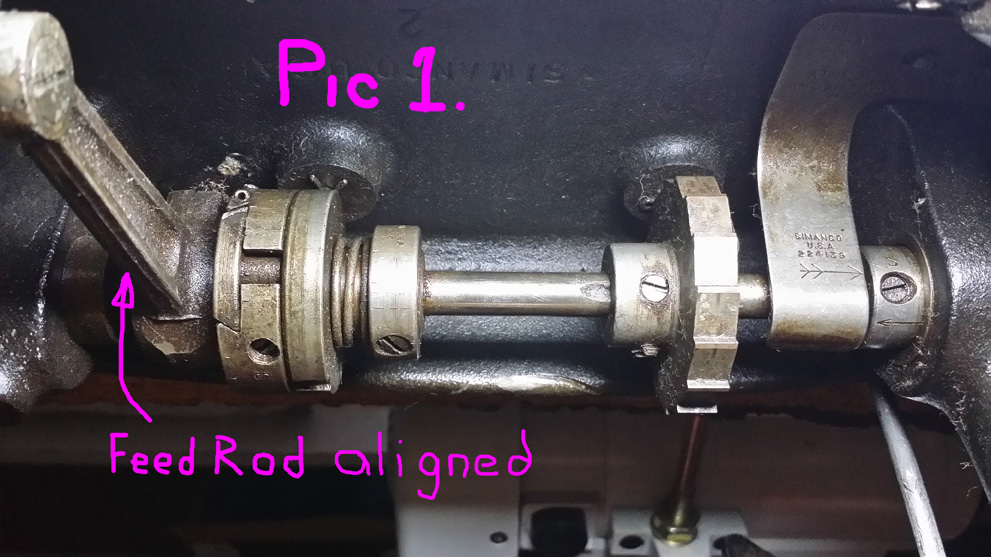
Hi Guys and Dolls. My first post after lurking for 3 months. I love this forum, one of the best I have ever been on. So I have been making a small product from garment leather and was sewing it (or struggling to) with a Singer household machine. I located and purchased a Singer 111W155 with table and new Consew Servo motor for $175. The previous owner was fed up taking the machine in for repair. Right now it won't sew. Leather or fabric won't move etc. It looks like a new timing belt has been installed so I thought I would check the upper and lower main shafts timing. According to this video https://www.youtube.com/watch?v=5ZXu--P2ips to have the upper and lower shafts in time, the Feed Drive Connector Rod should be at its lowest point of arc and perpendicular to the lower main shaft (see picture 1) and the thread pickup arm is at its highest point and the 2 arrows should be aligned. My arrows are not aligned and my thread take up arm drops 3/8". When I put the arrows together and have the thread take up arm at its highest position my Feed Rod is not in the correct position ( see picture 2) according to the video. What is out of whack or is it supposed to be this way? Thank you, Will Central Florida
-
Good Evening, I recently purchased a Singer 111W155 for $225 . The seller had inherited it. The seller plugged it in and pressed the foot pedal. The needle went up and down without cloth and thread. Motor and machine sounded ok. After getting it home, I sanded the top, re-stained and put a poly coat on it. I cleaned the fuzz and wiped it down. I plugged it in and put a piece of thick cloth in it and pressed the pedal. The needle danced up and down, but the cloth did not feed. I researched and found some videos and refurbish sites. I also found this site and have been searching and reviewing. This topic was helpful: As I went through this topic, I read Eric's post and Uwe's post and video. I then decided to check out the upper and lower shaft timing. It was off. I corrected it. The cloth then fed. Also the handwheel was not tight. It had only one screw with flat end in the grove position. I purchased the correct screw and made sure they were in the correct positions. The position of the stitch length indicator was off. I turned it toward the lowest position until it stopped. I loosened the set screw and rotated the indicator until the bottom of the number 32 was centered in the hole. I re-tightened the set screw. I turned the handwheel until the maximum stitch length position was achieved. The top of the number 32 was centered in the hole. I haven't found a description on how to do this. I downloaded http://militarynewbie.com/wp-content/uploads/2013/11/NAVEDTRA-14217-Aircrew-Survival-Equipmentman-1-C.pdf using tjas's link. I used the print to pdf function to print only chapter 4 to a pdf file. Then printed it off. I also downloaded the TM10-3530-202-24 as well but haven't got to it yet. After reading Eric's comments I decided to go through Chapter 4 in order. The feed dogs were set to maximum height. I tried to correct this. I found that if I set the valley between the teeth level with the top of the throat plate using the front half of the dogs then the rear half of the dogs are a little too high. Is this good? or am I splitting hair here? Many thanks to all the contributors and support vendors.
-
Hi I am hoping that someone out there has experience with threading up the Singer 111 w 155 ! And that person would be willing to explain to me how to do it. Years ago I hired a mechanic to come to my home to look at my machine and he said that it was fine, I just had it threaded incorrectly. He threaded well, and it was fine. I always changed thread by lifting the foot and pulling new thread through. Couple of years later, I broke the thread, pulling it through and had to rethread. Couldn't get it right. I bought a reprint of the manual and couldn't figure out the threading. I have tried many times to rethread and it always breaks when I sew. The mechanic was quite old and has since passed away. I really want to use the machine again! Can someone help?
- 22 replies
-
- 111w155
- threading the tension disks
-
(and 1 more)
Tagged with:
-
I am seeking to learn about edge guides, and then purchase (or possibly make) one for my singer 111W155. It seems like there are two different styles, one that bolts onto the bed or bobbin cover and is able to pivot away when not in use. The other bolts to the back of the machine and swings down. Both offer fixed guides as well as roller feet. Other than the difference in price, with the swing down being more expensive, what are the benefits each has? Does the swing down offer much more versatility? The bed of my machine has several tapped holes in it already, so it looks like a swing away guide was previously installed. Thanks guys!
- 10 replies
-
- 111w155
- stitching guide
-
(and 3 more)
Tagged with:
-
I'm looking at a local Singer 111w155 and my web research says those machines came with triple feed but the guy says it has a walking foot but not a walking needle. Has anyone ever seen a 11w155 without a walking needle? Thanks in advance for your help. Chris
- 21 replies
-
- 111w155
- needle feed
-
(and 1 more)
Tagged with:
-
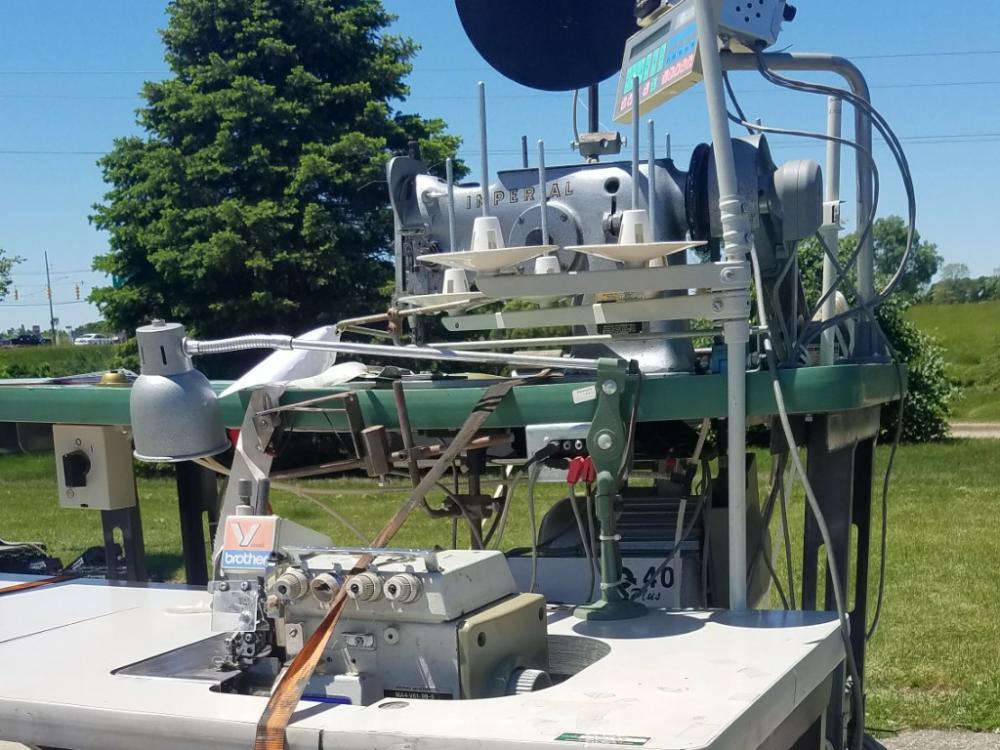
Hello all, just wanted to say hello and see what suggestions people have on some thoughts of mine. I just got into sewing and purchased a 111w155 in good shape for $250. Has a good clutch motor on it. I will be using this machine for knife sheaths and some upholstery work. However, I got lucky at an auction and got an Imperial zigzag (not much info online but its identical to the singer 143 models) with a Quick Rotan setup for $70. Also got a Brother MA4-V61-98-5 serger for $25. I think I got a pretty good deal. Anyway, im thinking of switching the quick rotan setup to the singer 111w. Primarily for slower control and the needle up and down options that the rotan controls offer. Do you guys think this will do well on the 111w? It took me 3 days of scouring the web but managed to find pdf manuals for the quick rotan setup. Not sure what the pulley ratio would be but I can machine a correct pulley if needed. Appreciate any thoughts. Didn't find any topics with anyone doing this on an old singer 111w. Thanks, Adam
- 12 replies
-
- 111w155
- quick rotan
-
(and 1 more)
Tagged with:
-
I nearly gutted the machine and cleaned it, oh boy did it seem like it sat in mud! Then I gave it some new paint and fancy decals. The tension release guide has been the biggest pain in my butt. So the thing first of all was broken when I bought it, no big deal. Ordered a new one. New one broke while putting it on. Ordered a different one, same look, put it on and the thing barely worked. Wouldn't release the tension and appeared the pin wasn't long enough. Well I measured my pin against a brand new one and it's the same size sooooo I go back to it today and now the somewhat-working tension release guide doesn't work at all. What the heck. I don't see it broken but I just give up. I'm throwing my money at the one he bought below hoping it fits my singer as it seems just so much better made. Here is the link, anyone have experience if it'll work or not for my singer?
- 24 replies
-
- tension release guide
- singer 111
-
(and 1 more)
Tagged with:
-
Well, I finally finished my sewing table and have started going through the Navy manual for my 111W155. I've hit a few snags already, and thought it would be a good idea to ask a few questions before I chase my tail around in circles for too long. 1. In the manual, it indicates that the arrows on the timing collar and timing plate should be aligned when the thread take-up lever reaches the highest point. Putting the thread take-up lever in that position, I removed the connection belt from the lower pulley and advanced the lower pulley by hand. With the timing marks lined up, the teeth on the clutch pulley don't quite mesh with the belt. Sliding the connection belt back on, ends up retarding the timing marks by about 1/16". Is there a way to fix this? 2. Starting on centering the feeding action, I noticed the Navy manual said to set the maximum stitch length at 3 1/2 SPI. My 111W155 stitch length indicator has an engraved 5. However, I am able to depress the plunger and turn the balance wheel beyond the 5 indicator, but when I count the stitches, it's more along the lines of 4 1/4 SPI. Does a 111W155 have a 3 1/2 SPI indicator? Or is the furthest rotation point of the balance wheel supposed to be set at that length, and mine is off? 3. Lastly, I noticed that my needle is not centered in the throat hole, it's a bit too far back. Looking at the manual, it says to loosen the needlebar rock frame rockshaft connection crank pink screw (figure 4-7 [A], table 4-2). Which, best I can tell, is the only screw near the needlebar. Loosening that screw doesn't allow for any adjustment of the needlebar within the hole of the throat plate, it just lets me slide the needlebar up and down... Any advice is well appreciated! I'm eager to get this machine up and running, but also want to take the proper time to get everything set correctly from the beginning. Thanks, Paul
-
I have the original manual and a variety of military manuals. I've read previous forum posts on here and looked for videos. I've taken out / loosened all screws involved and I removed the pully. This bushing is stuck! This machine is a beauty and has about 99% of all it's original USA parts. The bushing is original USA and I don't think it's ever been removed. The machine belonged to an elderly woman who sold her house and left the machine there for the realtor to get rid of. I got wild and chopped out the original timing belt for obvious old belt reasons. I'm trying to get the bushing out to put the new belt on. I can't help but think I must be missing something. If there are tricks to getting out arm bushings that seem fused in, I am open to any and all suggestions.
- 23 replies
-
I have two walking foot industrial machines for sale. Singer 111w155 and 111w153, complete with industrial tables and motors. Both are in perfect working condition, timed, oiled and ready to go. Great for leather, denim, canvas, vinyl upholstery, and more. $600 each, or $1000 for both. I am located in New York, NY. Willing to discuss shipment options if local pickup is not possible. Text or call Jeff: 646-470-9445 https://www.youtube.com/watch?v=H-8c1LN6usA
-
I'm currently building a table top for my Singer 111W155. It did not come with an existing top, so I've been referencing images online. However, one thing I would like to get some more information on, is the distance between the server motor and the pulley on the sewing machine. To position the servo motor lever that connects to the foot pedal roughly in the center of the table, I ended up positioning the motor 10 inches from the sewing machine (measuring horizontally, center line of pulley to pulley). Should the servo motor be closer to the sewing machine? Is a shorter vbelt preferable to a longer one? Currently I have a 3L400 on it. In the image below, you can see the mockup that I've made with the 10" spacing. The socket cap bolts show the location of the servo motor. If I keep this configuration, it also seems like the vbelt channel does not have to be connected to the sewing machine cutout, which is pretty much how ALL the cutouts I've seen are. Here's a diagram of my table top. There's an 1.5" tube steel frame inset 1.5" from the edge, indicated by the dashed line. The sewing machine is positioned 4" from the bottom and 7" from the right side, should leave plenty of space for the bobbin winder without running into the steel frame.
- 5 replies
-
- 111w155
- diy sewing table
-
(and 1 more)
Tagged with:
-
So I recently came by a Singer 111W155 that was used in a production environment. This is my venture into the world of industrial sewing machines and know very little about them. That being said, I’m pretty excited to get this machine back up and running. It did not come with a table, motor, bobbin winder, pedal, presser foot lever, and I’m sure several other things I’m overlooking. The presser foot lever has been removed and there seems to be some type of compressed air system in place. I’m not sure if there’s a way to manually lift the foot via a screwdriver but I would like to restore that functionality. If possible, add the knee presser lever I’ve seen on a few tables too. I’m guessing getting it cleaned up is the first step. I was thinking I would give it a kerosene bath followed by some copious oiling. Is there a specific oil these old Singer machines like? Then I need to look into a servo motor, table, and all the missing attachments. Looks like there are a few service manuals floating around the internet. Should go a long ways in helping me understand just what I'm looking at. http://navyaviation.tpub.com/14218/index.htm Here are some pictures: Front of Machine Model + Serial Number Presser Foot Back of Machine & Cut Wires Gearing + Timing Belt
-
I have been a member of this forum for some time, but this is my first post. I would like to thank everone who have posted all of the valuable information that has made my journey down the leather craft path much easier. I decided to take the leap sometime back and purchase several sewing machines to make my holser making and general sewing projects easier. I am now the proud owner of a Singer 111w156. The machine however has given me some thread tension issues. I have tried thread from 69 to 207, and the machine handles it ok except for the upper thread tension. First let say I realize this model is not made for larger thread, so I would expect to have thread tension issues with the larger size threads. However I can successfully get good stitches be maxing out the takeup spring travel and increasing the takeup spring tension. I do however have to put a considerable amount of tension on the tension spring to get a decent stitch. Is this normal for this model? Would a heavy duty cone and takeup spring help? I have also noticed that as the thread rotates around the bobbin case the thread catches on the bobbin latch for a fraction on a second causing the thread to jump In the takeup spring. Is this normal? Thanks for your help and suggestions.


