Search the Community
Showing results for tags 'sword'.
-
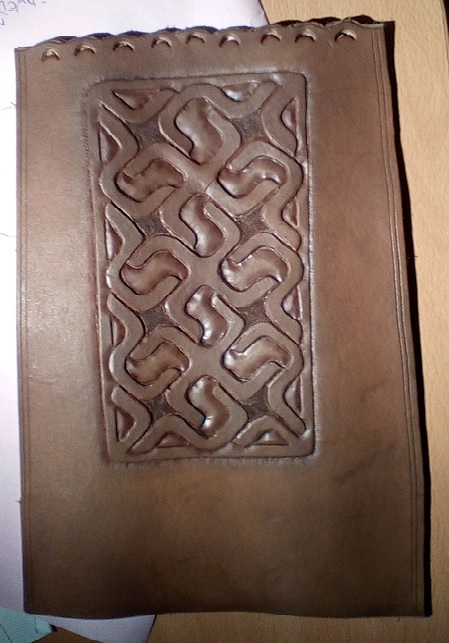
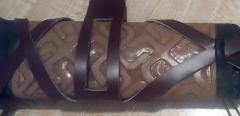
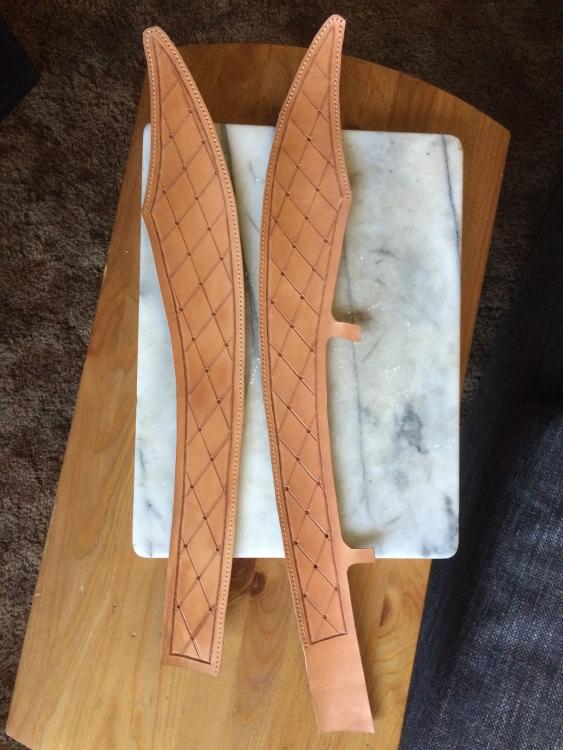
I have always wanted a laced sword scabbard, but the amount of work (and wood working experience) required to create a scabbard is daunting. I have a sword, but it already has a scabbard, so what to do? Finally, I got a brainstorm -- I'll just make a sleeve which goes AROUND the existing scabbard, and that'll do the trick! So here's the original tooled design, a key-work panel on the sleeve, with Fiebing HiLighter (modified slightly from the original design, taken from a church in Wales): Geometrics are a pain...but to get it right, go SLOWLY with the swivel knife, and use a straight edge wherever possible. Here's a mock-up of what it will look like, when all done: All that intricate lacing...it's painstaking work -- you can't really cut the slits until you have the belt strips ready to mock it up. The triangular piece to the bottom of the picture is a type of "buckle." The other strap (top center) will end in two strips, which will tie through the holes in the "buckle." It's period -- some medieval art features scabbards done that way. I also decided to cut a 'window' in the wide middle strap to hide less of the nice tooling. Here's the back -- I'm using a baseball stitch to butt-stitch the pieces together, using flat lacing. I'd forgotten how tedious lacing can be; you really have to pay attention to avoid twisting the lace, or getting the pattern wrong (only had to undo two stitches so far!) Here you can see the interlaced straps, linked through each other. I didn't realize it, but the baseball stitching doesn't close the edges as closely as other stitches, so I think the hanger might be a bit loose on the scabbard itself. However, I can glue a 'shim' of thin leather inside the hanger sleeve, and that should snug it right down.
-
-
-
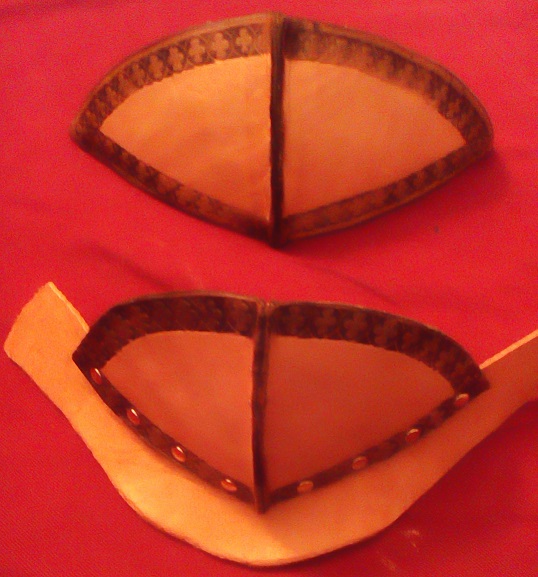
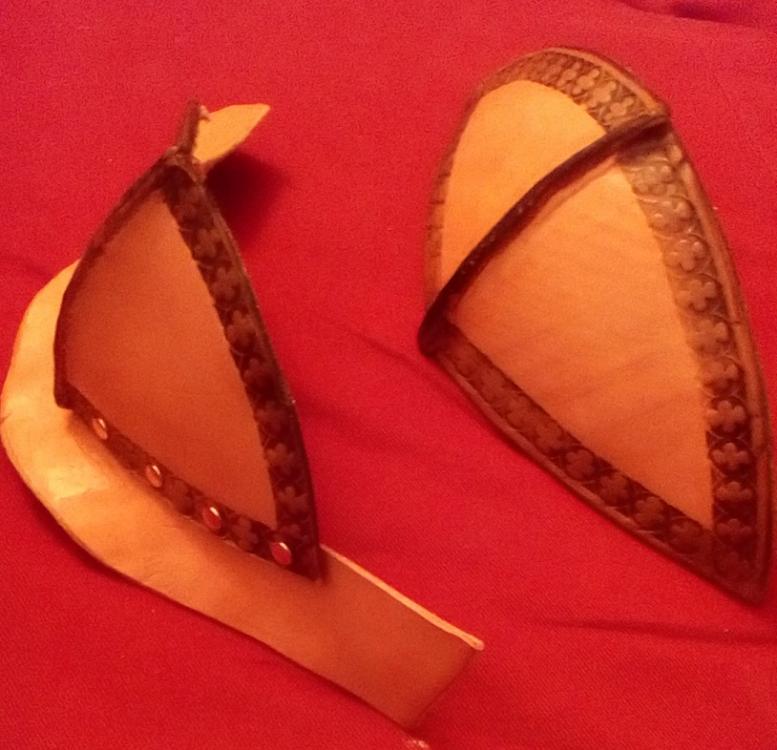
Another work in progress For doing HEMA (Historical European Martial Arts), a basic fencing mask is a good start, but they're not really enough protection for using steel in tournaments. Thus, there are mask overlays on the market, which add padding and protection to your head (a good thing to do!). I decided that I could make my own custom overlay, using leather to add the rigid or semi-rigid "plating" to the mask. These are the first two pieces. (I'll add others as I complete them.) The larger one goes on the forehead, a place which sees a lot of sword strikes. It will get some foam padding underneath it later on. The smaller one goes under the chin, and it will hold an additional throat protector that goes over the mask bib. That protector bit will be riveted to the strip of leather Using a fencing mask, I made a pattern from paper to get the curves right, then cut them out of leather. The border is done with a Tandy stamp, a Christmas gift (Craftool Pro Stamp-Border D2171) from their recent sale. I sewed both pieces together using my new stitching pony (brought back from Korea). The seam is left standing up, for more reinforcement. I got them nice and wet, then molded them to the fencing mask itself, strapping them down to hold shape as they dried. I used a block-out resist for the big inside panels, and a Tandy Antique Black for the border itself. The edges were burnished with water. I may use an edge paint, but I haven't decided yet. I left the leather a natural color-- it's a nice contrast. I then riveted the strip to the chin piece, and wet-molded that to shape. I have the patterns for the throat plate, but I haven't completed that part yet. I'm really pleased with the way they look so far (and they're really nice on the mask itself-- but no pictures of that yet!) to be completed: 1) Create and attach throat plates (probably leather articulation). 2) Finish design for sides and top of mask, create the same. 3) mount all pieces so they strap tightly on. 4) add foam padding 5) make back of head panel.
-
Well...just finished a scabbard for a scimitar. 5oz veg with a simple geometric pattern, no frills dealio for a friend. I was excited to get some pictures up and show off my first sword sheath. Delivered it...he was happy with it, and all was well. Got home and realized I didn't take any pics of the finished product...duh. Maybe next time! Anyways, below is the only pic I took during the project.
-
From the album: DJole -- Completed Work
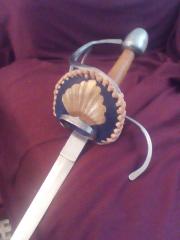
This is a shell guard for my rapier, protecting the back of the hand better.- 3 comments
-
- sca
- historical
-
(and 1 more)
Tagged with:
-
And here´s just a new sheath I made some time ago. Sadly I was a little late, so I didn´t get the chance to make some photos. Luckily, the new owner send me some I actually can use It is lined with loden and formed over a wooden model. The design was a special whish of the customer (including the knot-thing on the upper end). Hope you like it.
-
Hi there, even if I think that a lot of you are mainly interested in stuff for other areas, i just wanted to show you two sheaths I made for a larp sword and a larp sax. Sadly the leather isn´t that good quality so the tooling came out quite unsatisfying. Gotta find a better leather-source.... Bot are wetformed by using a wooden model an lined with loden. The fur is from a goat. Hope you like it
-
From the album: A few of my latest...


