Members MonicaJacobson Posted February 20, 2015 Author Members Report Posted February 20, 2015 WinterBear, that's exactly what I was thinking. Bag flaps seem to be the safest bet. I'd like to do portfolio pouches, but I'm not sure how much demand there is for something like that. Laptop sleeves would also be fun, but the variation in size is so great. Quote http://monicajacobson.com/ https://www.etsy.com/shop/TrimGoTrix?ref=si_shop
Members RStevenson Posted February 21, 2015 Members Report Posted February 21, 2015 (edited) Oddly enough I like the first wallet you made the best, it seems like it has some character and the leather has a really nice look. Edited February 21, 2015 by RStevenson Quote
Members BobW Posted February 21, 2015 Members Report Posted February 21, 2015 (edited) Monica, Nicely done! I especially like the contrast in texture and color between the exotic and the smooth leathers. I'm a little reluctant to offer advice on stitching. But what I will do is share with you the process that works for me. My first pieces done with a stitching chisel were awful! I've slowly got to the point I can keep the lines straight (nearly) all the time. The process that works for me is as follows: 1. I mark my stitch line with an scratch awl, making a fairly deep impression. 2. I mark stitch position in the grooves left by the awl with the chisel. I press the chisel down firmly by hand to leave a highly visible and tactile mark. 3. I align the stitch line away from me, not side to side, to better control the angle of the chisel. 4. I position the chisel by letting it fall into the the divots I left earlier. 5. From this point on, my focus is solely on keeping the chisel perfectly vertical. I don't look at the mallet, only at the chisel. I don't try to hammer it through with one blow. I use multiple light and then medium blows. I take my time to re-position the chisel after each rap of the mallet. 6. I don't use a stitch groove on the front but I do apply a light groove to the back after it is punched. An example of my stitching can be seen in my album that I just posted in the Gallery section. Thanks, Bob Edited February 21, 2015 by BobW Quote Bob
Members MonicaJacobson Posted February 22, 2015 Author Members Report Posted February 22, 2015 RS - that's Horween Derby, a veg tanned similar to Dublin. It's a cool leather, and my 7 year old would agree with you. He's using it to carry his money. Castoffs, one of the perks of childhood in a home with a leatherworker. Bob, thanks for your detailed procedure. Your end product looks great, I was just looking at it in the gallery before you wrote this comment. I imagine the parallel technique might work well if you have a good eye and focus. And if you can avoid the multiple steps other methods use, that's an added bonus. Quote http://monicajacobson.com/ https://www.etsy.com/shop/TrimGoTrix?ref=si_shop
Members Hi Im Joe Posted February 22, 2015 Members Report Posted February 22, 2015 Well, I must admit that the stitching isn't always correct.. you can see an inconsistency or two in the way the stitch lays in the croc print one. Are you going all the way through with the chisel? Or going part-way through and finishing with an awl? Once I get an awl blade thin enough for 8spi, I might end up doing that as well. It's about half as much work if your awl is sharp and you have a groove or mark to guide your stitching line. I mark it with the iron and then open the hole with an awl. When I first started doing it this way (I switched from punching the chisel all the way through the leather) it looked horrible. There is definitely a learning curve and some muscle memory that needs to be developed. I feel much more comfortable with it now. I know that the more I practice the better I'm going to get. Quote http://www.sevenhillsleather.com/
Members Oldtoolsniper Posted February 22, 2015 Members Report Posted February 22, 2015 I switched to pricking irons. Blanchards was the first set I bought. I make my own awl handles with an ivory dot inlay to keep track of the awl orientation. I was shocked at how much I allowed the awl blade to drift from the slots //////// if I did not pay attention. Even a little variation makes the stitch look slightly wrong on the front and way wrong on the back. Having those ////////// marks really reminds you to correct your awl orientation each time you penetrate the leather. If your awl is sharper than you think it needs to be then it might be sharp enough. I have a long way to go but the leap in improvement for me came with the use of a pricking iron. It caused me to really see the errors in my awl orientation. I also use tiger thread and that too added to my neatness after using some "Tandy Waxed Boat Anchor Rope". Look at these two phone cases and you can clearly see "awl orientation" issues, especially as I get close to the corners. Quote
Members MonicaJacobson Posted February 22, 2015 Author Members Report Posted February 22, 2015 I have 8spi blanchards, and they're really great. Maybe this year I'll be able to buy another size. I like your idea for the ivory dot- I'll definitely incorporate it soon, as I need to buy a smaller awl blade. Yes, I see the stitching variation, but that's a sweet phone case! What is the exotic? Oh, yeah, that's the beaver tail one. Very cool. It doesn't look quite like anything else. By the way, how has your glue joint lasted? I remember you mentioned that you had to glue the beaver to a liner. I'm gluing lizard (and possibly) ostrich shin to pigskin or thin veg tanned, and I'm supposing I have to stitch along the top. But I'd prefer not to, as it doesn't look as clean. Anybody have any advice on that subject? Quote http://monicajacobson.com/ https://www.etsy.com/shop/TrimGoTrix?ref=si_shop
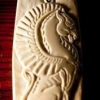
Members Oldtoolsniper Posted February 22, 2015 Members Report Posted February 22, 2015 Monica, Your work is awesome. You, like the rest of us tend to focus on any error we make. I've made quite a few of these for friends and they love them. I see the flaws and they see them as incredible. Truth be told I'm making them to practice my sticthing so I can improve, they take up hardly any leather and I've been able to give them all away with no problems. The finger knife added to the back was a seemingly simple idea until you have a go at it with a pricking iron. It's all one big curve and the pricking irons are straight. I bought a blanchard combination pricking wheel tool and there is again another learning curve to deal with. The nice thing about the knife sheath is that the stitches on the back are not visible. Stitching on a curve has really challenged me. I have a hard time with straight stitching and those pesky curves tend to amplify those problems greatly. Quote
Members MonicaJacobson Posted February 22, 2015 Author Members Report Posted February 22, 2015 (edited) Ha, I'd for SURE take one of those for free. I think you have lucky friends. I'm pretty sure you'd have no trouble selling them, either. I bought a tiny 2 prong for going around corners and helping with curves. It's pretty much invaluable. In fact, the fineleatherworking people probably thought I was crazy - I couldn't afford to buy both the 2 prong and a 10 prong, so I had them custom make (at no extra charge) a six prong instead. I wouldn't want to use it for anything bigger than a wallet, it'd take forever. They were like... okay, whatever you want. Are you sure you don't want a 10 - 20 prong? Heh. Edited February 22, 2015 by MonicaJacobson Quote http://monicajacobson.com/ https://www.etsy.com/shop/TrimGoTrix?ref=si_shop
Members thefanninator Posted February 22, 2015 Members Report Posted February 22, 2015 I switched to pricking irons. Blanchards was the first set I bought. I make my own awl handles with an ivory dot inlay to keep track of the awl orientation. I was shocked at how much I allowed the awl blade to drift from the slots //////// if I did not pay attention. Even a little variation makes the stitch look slightly wrong on the front and way wrong on the back. Having those ////////// marks really reminds you to correct your awl orientation each time you penetrate the leather. If your awl is sharper than you think it needs to be then it might be sharp enough. I have a long way to go but the leap in improvement for me came with the use of a pricking iron. It caused me to really see the errors in my awl orientation. I also use tiger thread and that too added to my neatness after using some "Tandy Waxed Boat Anchor Rope". Look at these two phone cases and you can clearly see "awl orientation" issues, especially as I get close to the corners. The ivory inlay is a great idea. I'll have to mark a dot on my awl. Your work looks great as usual and the ostrich looks awesome. Can't wait to see what you make with it. Quote http://www.instagram.com/fannintexas/


Recommended Posts
Join the conversation
You can post now and register later. If you have an account, sign in now to post with your account.
Note: Your post will require moderator approval before it will be visible.