

All Activity
- Past hour
-
How to increase pressure of roller on a pfaff 491? the stitch length is inconsistent.. hoping more pressure will help the material move better while stitching, and keep the stitches even
- Today
-
Hello everyone, first timer here. And I suppose a relatively new comer to the world of leather making. I started about 3 years ago as a creative outlet to keep me sane whilst doing my usual day job... I'm hoping that eventually I can turn my leatherwork into my day job. Not that it will be any less hard work, but certainly more enjoyable. I shall be posting again soon. Thanks for having me x You can find see some of my work here www.headboneleather.com
-
Hello. I picked up a landis three a few days ago. It's running good however it keeps lifting the leather. I've tried adjusting the feeder foot pressure. I'm sewing 3 layers of 12/13oz together. Making lead harness traces. So it's pretty heavy. Does anyone know what might be causing the lifting and how to correct it? Thank you for any and all help.
-
Helps if you quote a part of the post or tag the user so they get a notification in case they don't have notifications setup correctly. @esheeran
-

Singer 211 U166A walking foot problem
friquant replied to NowhereMan01's topic in Leather Sewing Machines
Closer, and much slower. 😉 With the machine moving at an even speed (a snail's pace) and never moving in reverse. And with the phone on its side (landscape) instead of up and down. Here is an example of close, slow videos from today: https://leatherworker.net/forum/topic/131845-pfaff-345-issues/ I agree with ALZilla. From your latest video, the hook is about 150 degrees ahead of where it should be. (Love those timing marks, so visible!) It would be ideal if you could master the art of tripping the safety clutch and then resetting it. Because there is no point in setting the hook timing unless the safety clutch has been re-engaged. While you're making friends with the safety clutch you could also adjust it so that it trips with less torque. That way you won't end up with the belt skipping time again the next time the hook gets bound up. "A" for persistence 🏆 -
Nice job on the videos! Adequately slow, in focus, and that second was such a CLOSEUP!!! 🤩 As the others have indicated, the hook timing needs to be retarded. In the first video, see the loop of thread that gets dragged around the bobbin the first time the hook grabs it? That loop is what gets pulled tight to form the next stitch, and the loop needs to be in front of the hook point in order to do so. Otherwise the hook will grab that loop on the hook's second time around and the machine will bind. To fix, you retard the hook timing until that loop is safely 5-10mm ahead of the hook point when the hook comes around the second time. (Or you can set the hook timing according to factory specs---that will probably accomplish the same goal.) 😀
- Yesterday
-
I'd like to sharpen the hook on my Singer 144W103 in order to reduce skipped stitches. With the needle guard removed, the hook is barely close enough to graze the needle. But it's not the tip of the hook that strikes the needle. About 2mm back from the hook tip---that's the part of the hook that actually strikes the needle. I don't know if that means the hook is simply dull, or if it has been improperly sharpened in the past. When sharpening scissors, for example, the going strategy is to only grind on one face of the blade. So what are the rules of thumb for sharpening a hook? File one side, or both? What angle to use? Here are photos of the hook


-
Thank you, that’s what I needed
-

Singer 211 U166A walking foot problem
AlZilla replied to NowhereMan01's topic in Leather Sewing Machines
Looking back through this thread, I don't see where you checked the hook timing. Did I miss that part? It seems to have started with the walking foot problem and progressed to not catching the bobbin thread. -

Singer 211 U166A walking foot problem
NowhereMan01 replied to NowhereMan01's topic in Leather Sewing Machines
I really appreciate all of the help and I feel like it is very close to being resolved, but it's not quite there yet. Apparently, I did have the wrong set screw engaged with the V slot, and I've now got the slightly-rounded one in the slot. I also did the clutch engagement trick, and I did not hear a significant click (as I saw/heard on a YouTube video), but it did seem to have a small bit of "give" when pushed with some force, so it might have been out. Yet, the issue persists... Here is another video of the bobbin area, with me turning the wheel by hand. LMK if any other view might be helpful. -
This post and the few that follow talk about timing a 545. Maybe it'll be helpful to you:
-
thanks a lot to everyone for your help
-
Thanks for the reply, I’ll have to research on how to time this model…I’ve read something about the eccentric adjustment screws but not sure if that’s how to proceed.
-
Your timing is a little bit of (hook should be at the needle scarf when already on the way up, distance is definde in the manual) and probably the needle is too far from the hook (it should almost touch the needle, but not exactly, ca 0.1mm). I suggest you to find the engineering manual and follow it to time your machine.
-
Greetings, I’ve been trying to solve some issues for the past few days of thread entanglement and so far not so good. I’ve disassembled the bobin case up to the bobin case lever to make sure no thread was in between. Currently I’m using 134-35 #21 needles and #138 thread. In the second video, I removed the cover to show the needle to hook action. I’m aware that this video is probably not enough to solve the problem but I’m willing to follow guidance and post more as needed. Thank you for your time. IMG_9290.mov IMG_9291.mov
-
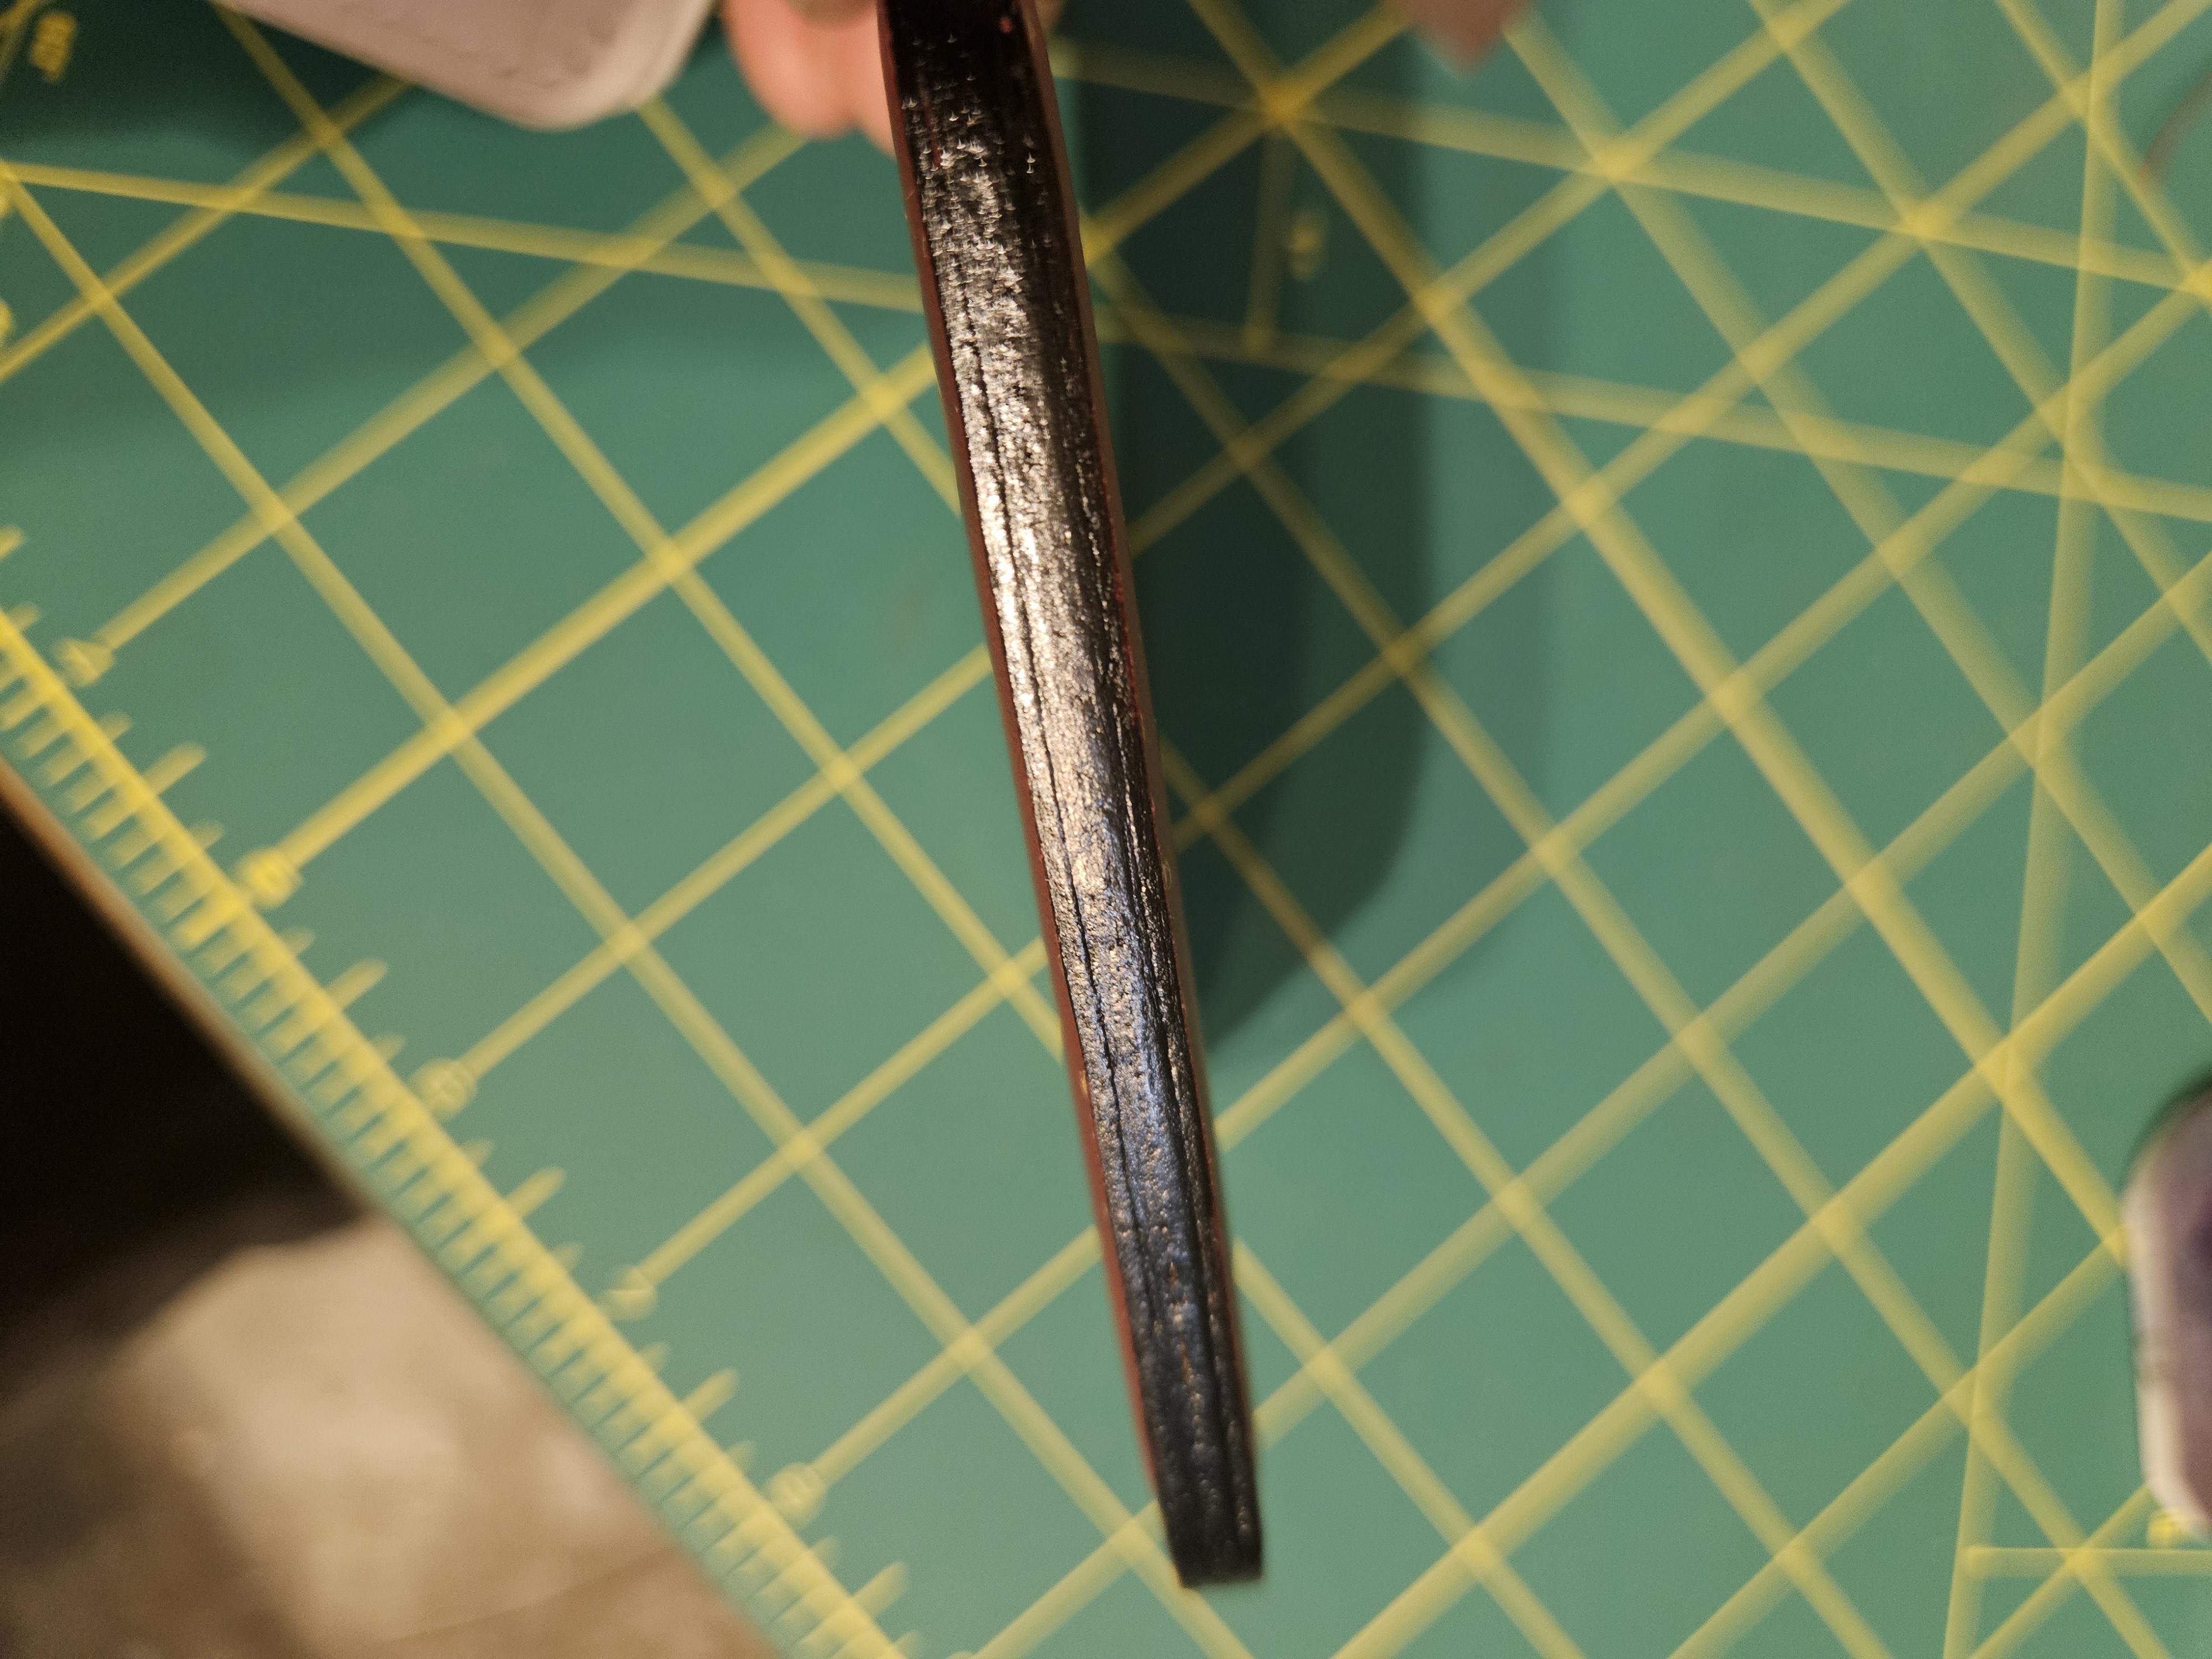
Yes, you have the right to use artistic license and do anything the way your want but my opinion is that the edges are not "rustic" but rather totally out of congruence with the rest of the project. Everything looks well finished, nice leather, good stitching, etc... except for the edges. Because of this contrast, they do not look "hand-made" or roughly made, they look poorly made. If the wallet were rough-out leather, it may work just fine. As others have mentioned, the first step is to use the proper gluing technique to create a good bond with all the layers. Second, the edge needs to be sanded, probably with progressively finer grits going to 600. On a small project like this, it won't take much. A few strokes with 220 and a little more with 600. Use a sanding block to keep the edge flat and level. Sanding will remove any glue the seeped from the edges. It should feel like one piece of leather. Then burnish with Tokonole using the tool of your choice. Apply enough Tokonole to cover the edge without getting it on the grain side. Spread it with your finger and et it soak in for 10-15 seconds. Then, bear down with the tool as firmly as possible, without mushrooming or rolling the edge over. Use rapid back and forth strokes and pressure to create heat and bond the fibers together, as if you are trying to start a fire. As it dries, it may start squeaking. It should be very glossy in the end. I think you will like the results.
-

Singer 211 U166A walking foot problem
CowboyBob replied to NowhereMan01's topic in Leather Sewing Machines
I think the clutch is kicked out,take the bobbin out,try pushing on the stitch length button ,turn the handwheel backwards until it goes into the slot,while holding the button down push the handwheel backwards until you hear a click or until it just won't turn anymore.This "should" get the clutch re-engaged. -
I would say, seeing as it's a Cobra machine, I would give Steve a call at Leather Machine Co.
-
Additionally, it's built like a tank and is worth every penny, and Toledo Industrial Sewing is a great company to deal with.
-
Just recently, I got a box-style reducer from Bob Kovar, bearings, yes, it has them.
-
Singer 211 U166A walking foot problem
friquant replied to NowhereMan01's topic in Leather Sewing Machines
You will want to get the correct set screw screwed into the groove in the shaft, as there are timing adjustments downstream of this that will be affected if this is incorrect. Typically there are two set screws, 90 degrees apart on the shaft. I can see the shaft has a groove in it. One of the set screws is meant to be tightened into the shaft groove (this screw often has a rounded tip that fits well into the groove). The other set screw is meant to be tightened against the regular face of the shaft. (this screw will likely have a flat tip) After you get that sorted, I would check that the clutch safety is engaged. And send us another video zoomed in on the needle and bobbin area, slow motion turn with the handwheel like four seconds or so per revolution. -
Thanks, no paint just Tokonole and slicking. Thanks, I did this in my next iteration. Does it look better? Thanks, I kinda agree, it really shows it was handmade. Thanks for your feedback, I tried the edge paint in the second version. Next I will try to put some elbow grease in the edge. It really takes a lot of time :).

-
Singer 211 U166A walking foot problem
NowhereMan01 replied to NowhereMan01's topic in Leather Sewing Machines
Thanks! Although I don't see anything marked "S", there are 2 distinct screws on the eccentric that can be screwed into the slot. The first one I tried resulted in no stepping at all, but the other one seems to work, as it is now stepping, and the stitch length adjustment even seems to be within the correct range too. However, now the bobbin hook is not catching the thread, so I assume that something went out of alignment. Any hints/suggestions on what/how to adjust would be much appreciated. -
 Karbo joined the community
 -
I copped a boo at one of my speed reducers that bolts to the table in a box above the motor. It looks like it has a bronze case bearing, but, I'm not sure about that. I bought it about 10 years ago and it may be outdated. I have different reducers on machines in my shop. I will look at them later today and try to remember to report back here. Nonetheless, Bob Kovar, at Toledo Industrial Sewing Machines, sells the most current accessories. So, the newer speed reducers might have roller bearings in all models. Ask him.
-
 Many years ago, I had a Union Lockstitch machine that was made to sew horse tack. The ULS is a needle and awl machine. The needles are barbed like hand sewing needles are. I explored all of the available thread options, then bought needles and awls that would punch the proper size holes for that size of linen thread. In my searches, I found that the thickest linen thread sold in the USA at that point in time was Barbour's Irish Linen in 8 cords. This is equivalent to .828 mm diameter. It called for a gigantic needle, size 30, which nobody had in stock. The largest needle I could get was a #250. It was able to hook and sew with 6 cord linen thread. I later discovered that these thicker sizes of thread were meant for the shoe repair trade, not saddlers. Some shoe sole sewing machines were apparently capable of handling up to 10 cord linen thread, which is about 1 mm diameter. They are specialized machines that can weigh 500 pounds or more. I would recommend that the OP searches for an old time shoe repair shop that uses old sole stitchers and see if they can sew his or her projects for a nominal fee.


.thumb.jpg.6e903dd66163ad5672f00f144058c571.jpg)


