All Activity
- Past hour
-
I realize this post is a few months old, but I did want to mention a different style of sharpener that I've used with some success: https://www.amazon.com/TrueCut-TC-01-1345-TrueSharp-Linear-Sharpener/dp/B07ZWGX3DH/ref=dp_prsubs_d_sccl_3/133-5690165-7664204?pd_rd_w=zRq1I&content-id=amzn1.sym.be3a2f09-77ee-4ba3-b2da-1b73c76c3fe2&pf_rd_p=be3a2f09-77ee-4ba3-b2da-1b73c76c3fe2&pf_rd_r=DZ721CH81TF02JS63SM7&pd_rd_wg=WZGeF&pd_rd_r=63833c2a-5555-465e-8890-9635e3c15f1d&pd_rd_i=B07ZWGX3DH&psc=1 You pretty much just roll the blade through it as if you were cutting something, no need to remove the blade or anything.
-
good thinking. ive been raised with a servo motor 😆 sure i always hold on to the ends of the tread. but the needle was always in the up or down position. with the clutch motor ill need to keep my eye on that i geusse. good tip. ill keep my eye on that. i have been looking for a bigger handwheel pulley but didnt find any. so ill keep looking and see if i can find one for this machine. thats would help slowing it down to.
-
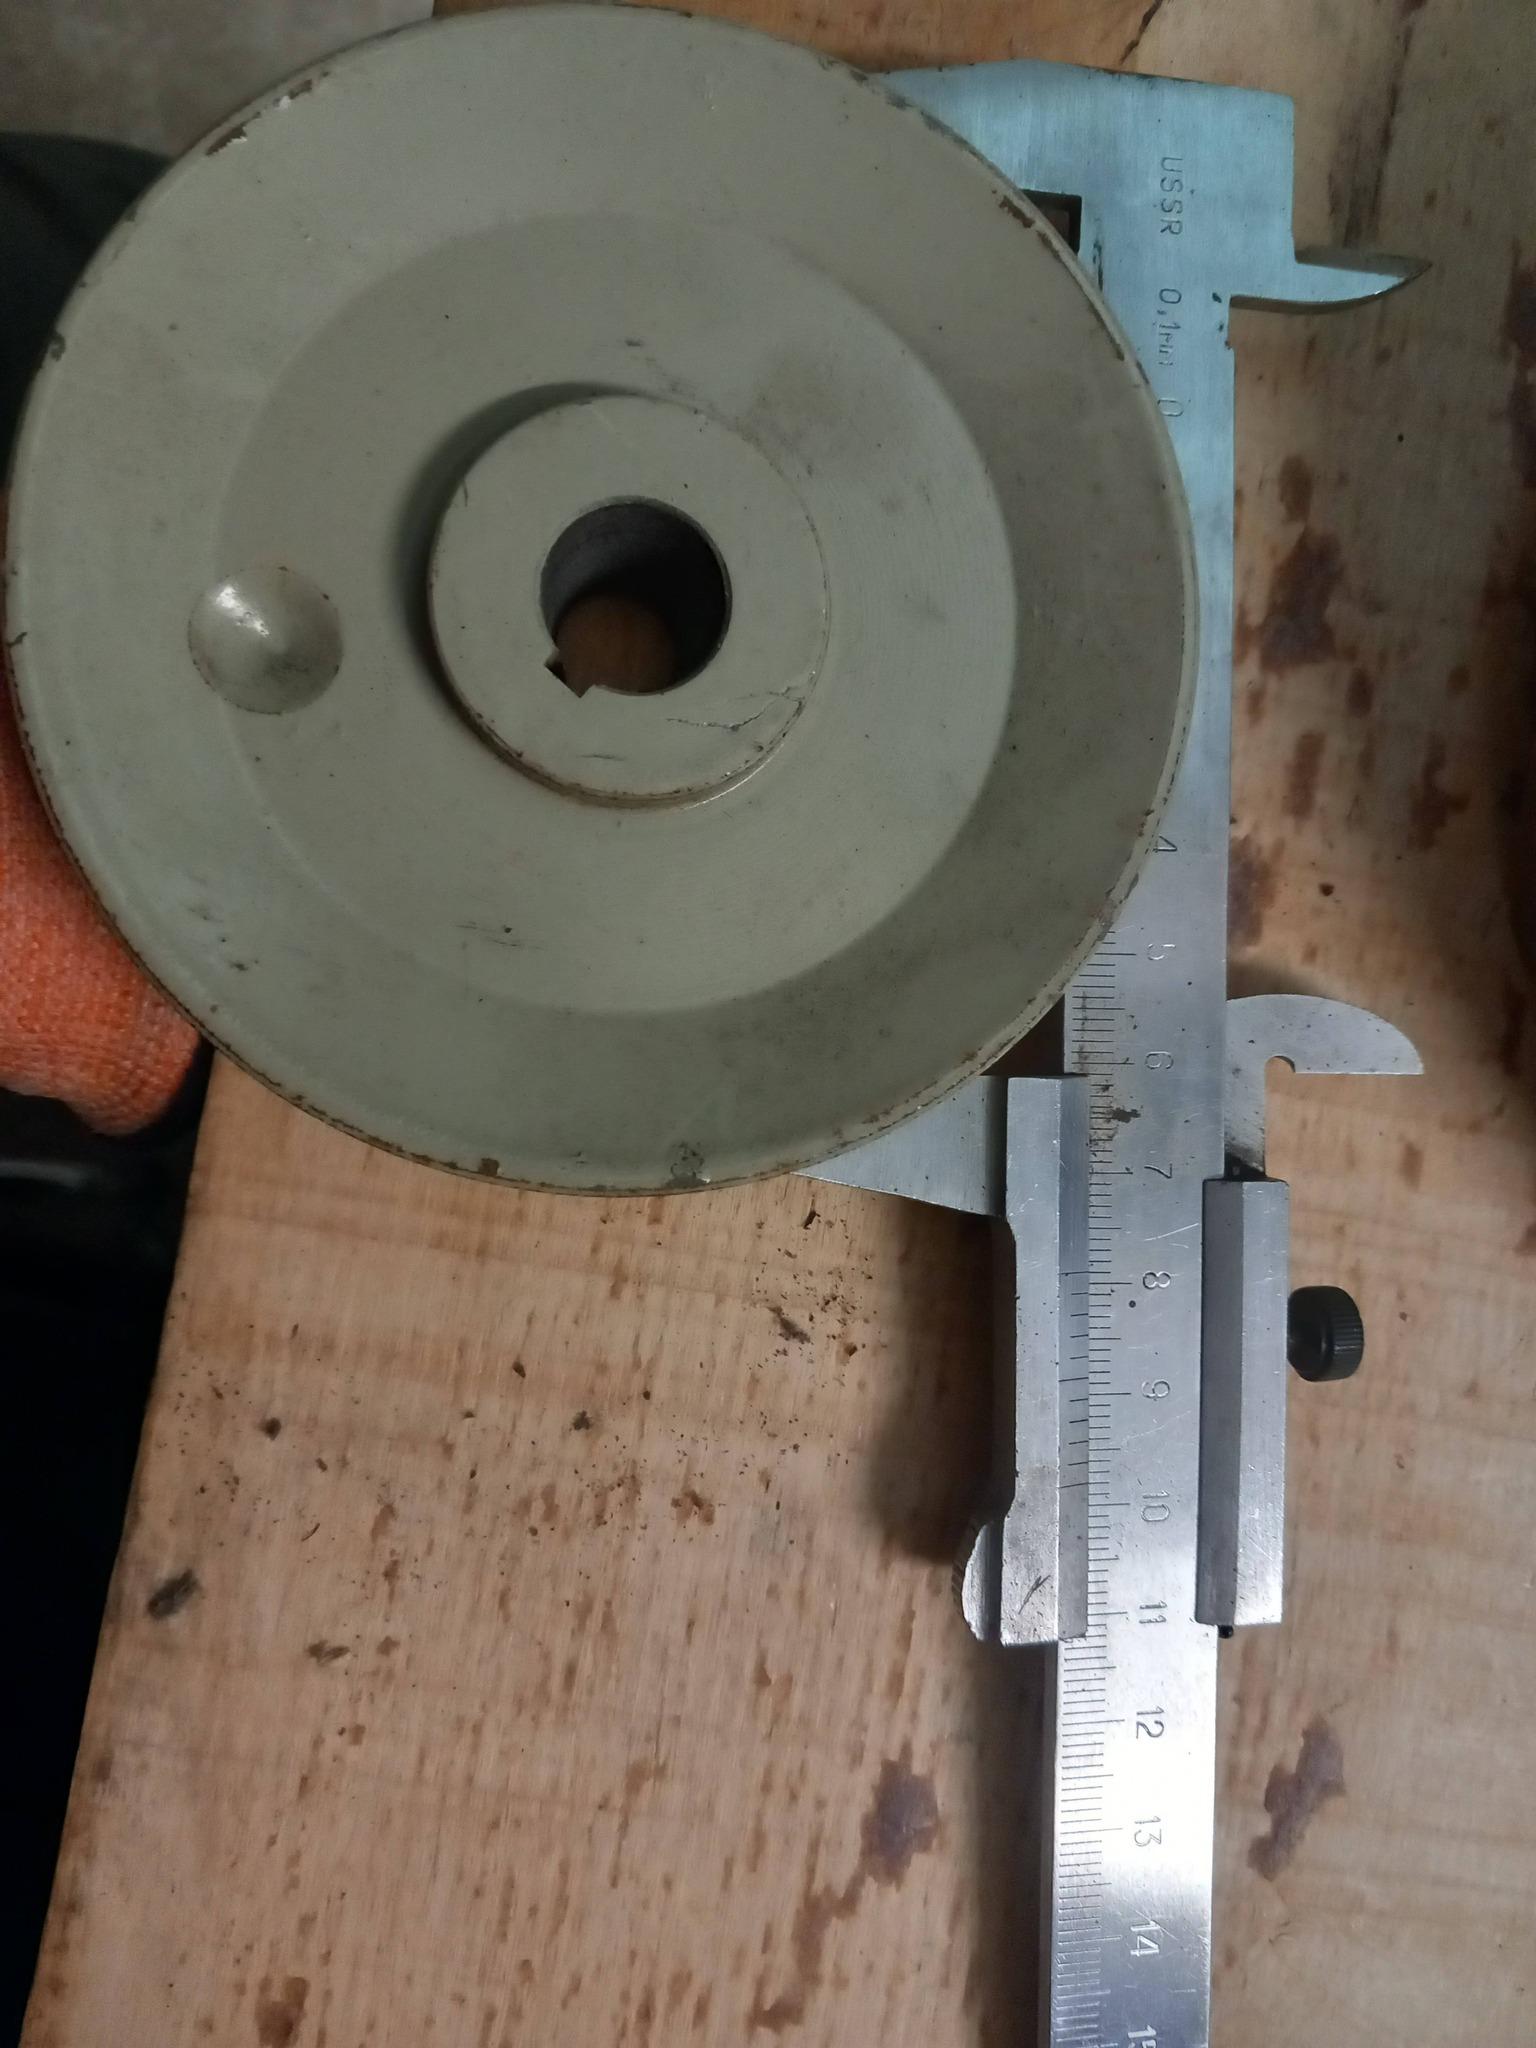
i dont have the machine running i was turning it by hand to check if it would sew right. im stil waiting for the new pulley before i can get it running with the motor. i checked the safety clutch that was all good and yes good idea to look for a new belt especially with the smaller pulley smart thinking thank you. yup i believe i ordered the 45mm pulley
-
Have you oiled up the slide on the clutch motor so it doesn't stick? And short stitch length is your friend when learning a clutch motor. Won't run away so fast You can also replace the handwheel with a 300mm pulley 🎡 😀
-
I have only done one so far but I used the double gusset method shown in the YouTube video by Makers Leather and Don Gonzales, it is fairly simple once you watch them do it a couple of times and it worked well. Todd
-
For industrial machines, this start/end sequence works for me: Start each seam with the take up lever at its highest position. (Otherwise thread yanked from your fingers) Hold the top thread for the first couple of stitches (Otherwise thread jams) Finish each seam with the take up lever at its highest position. (This locks the final stitch and allows you to pull the material away from the hook)
- Today
-
You'll see a difference, assuming you ordered a 45mm? Don't forget you'll also probably need a smaller belt too. Check your safety clutch on the machine to see if it was tripped, that was the problem with mine when i bought it.
-
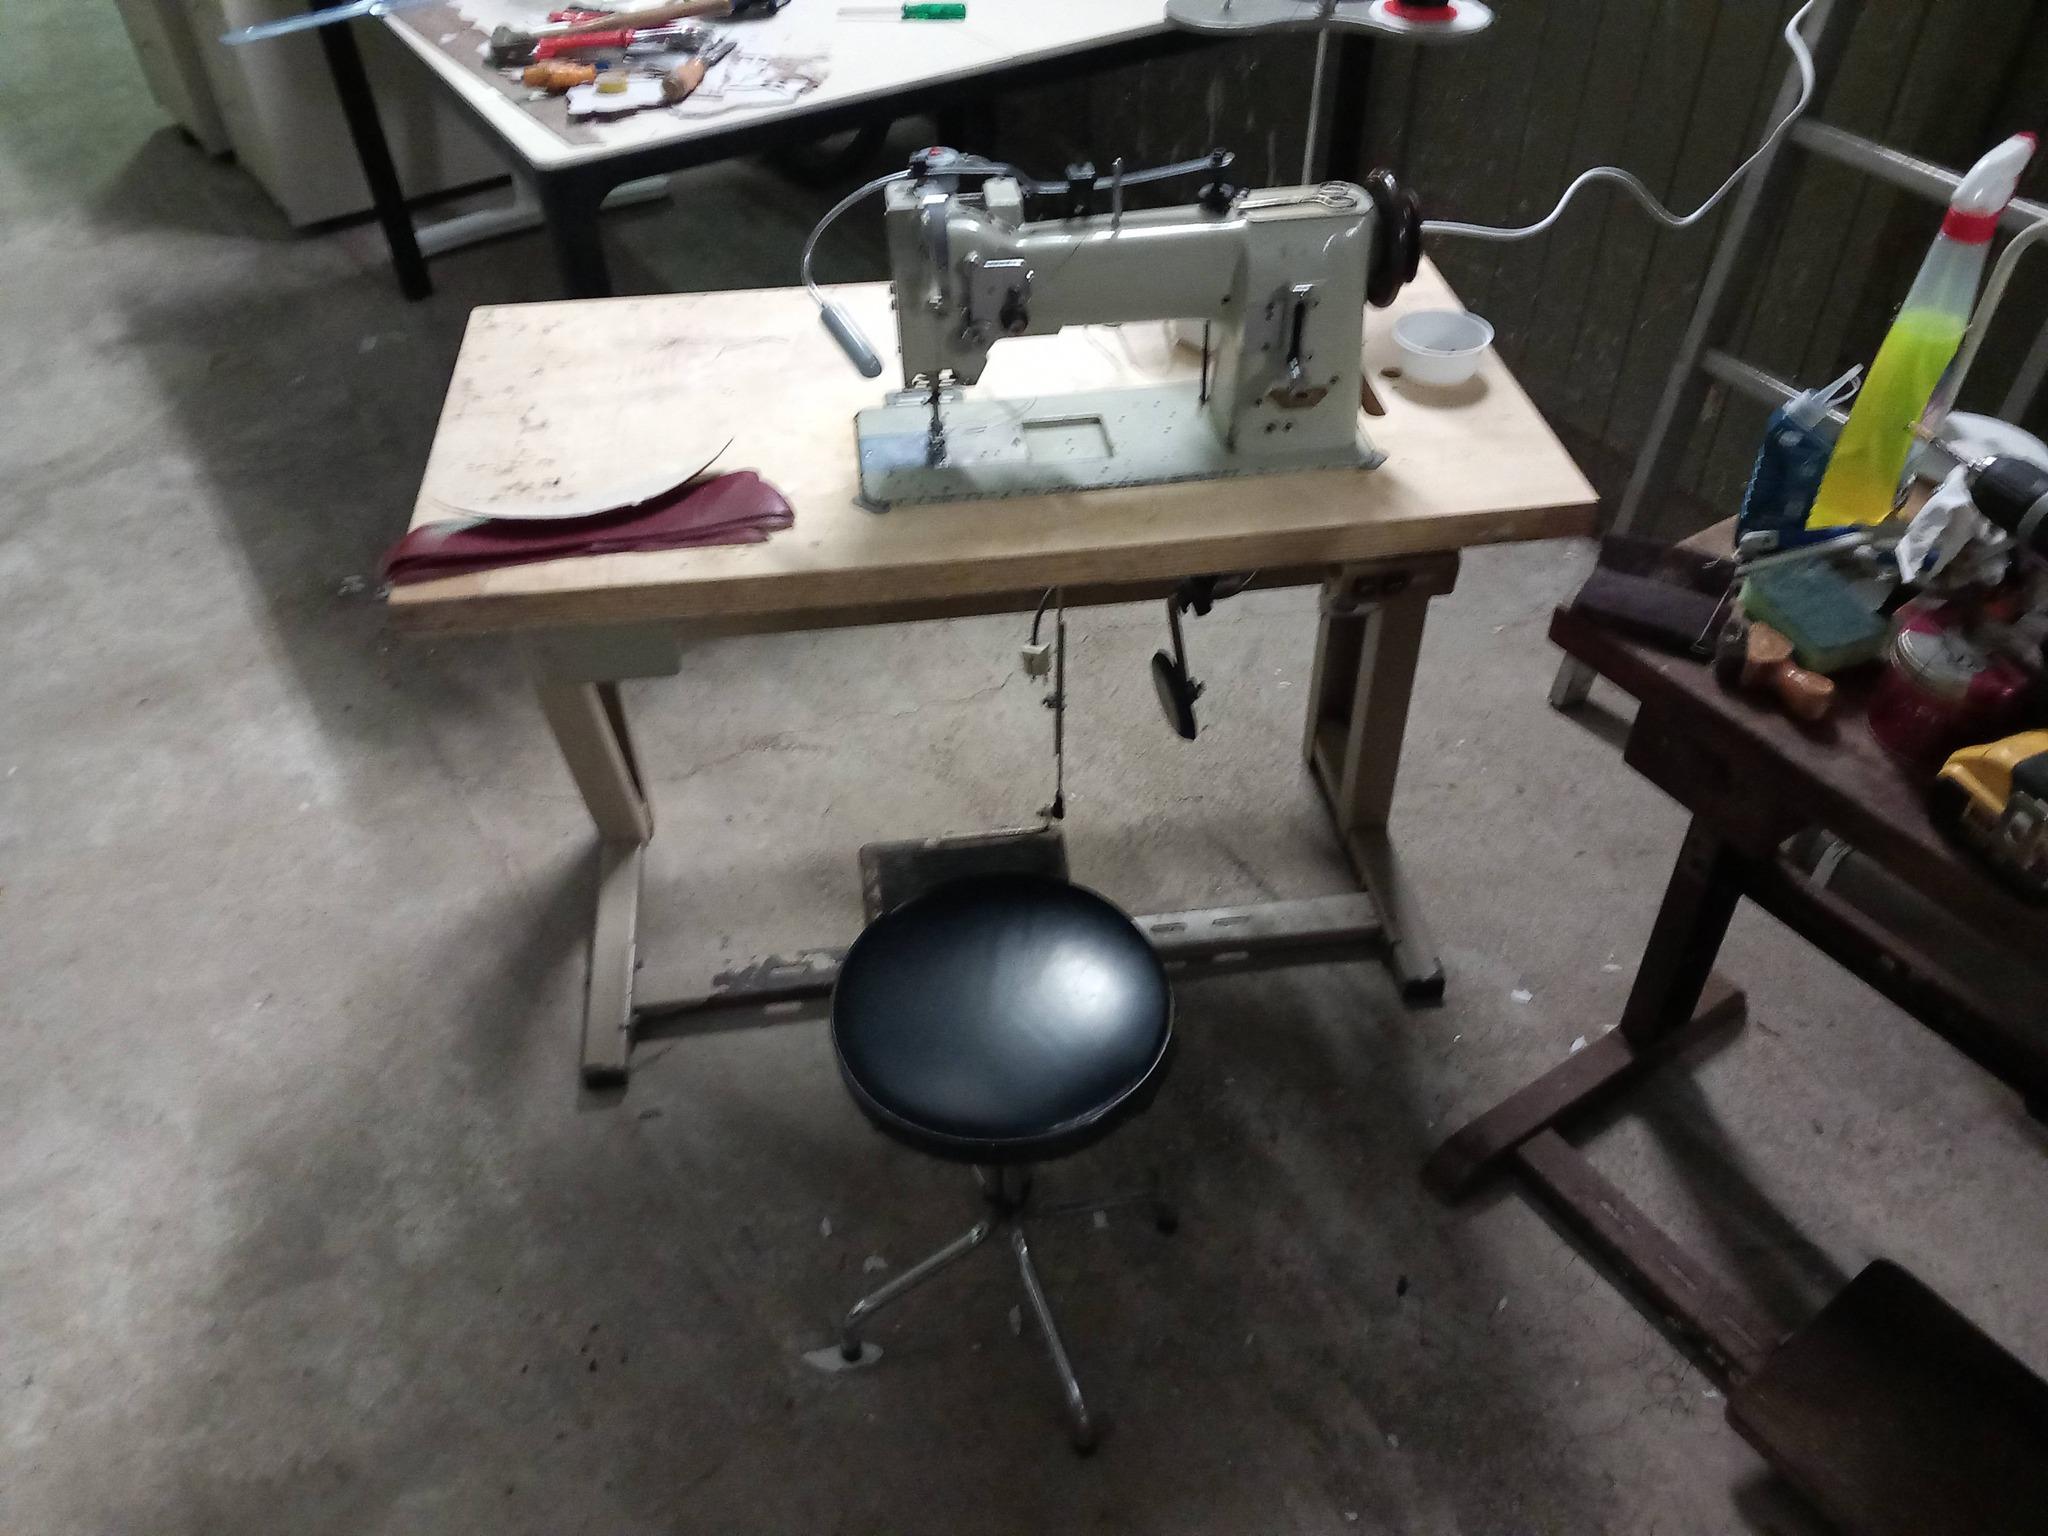
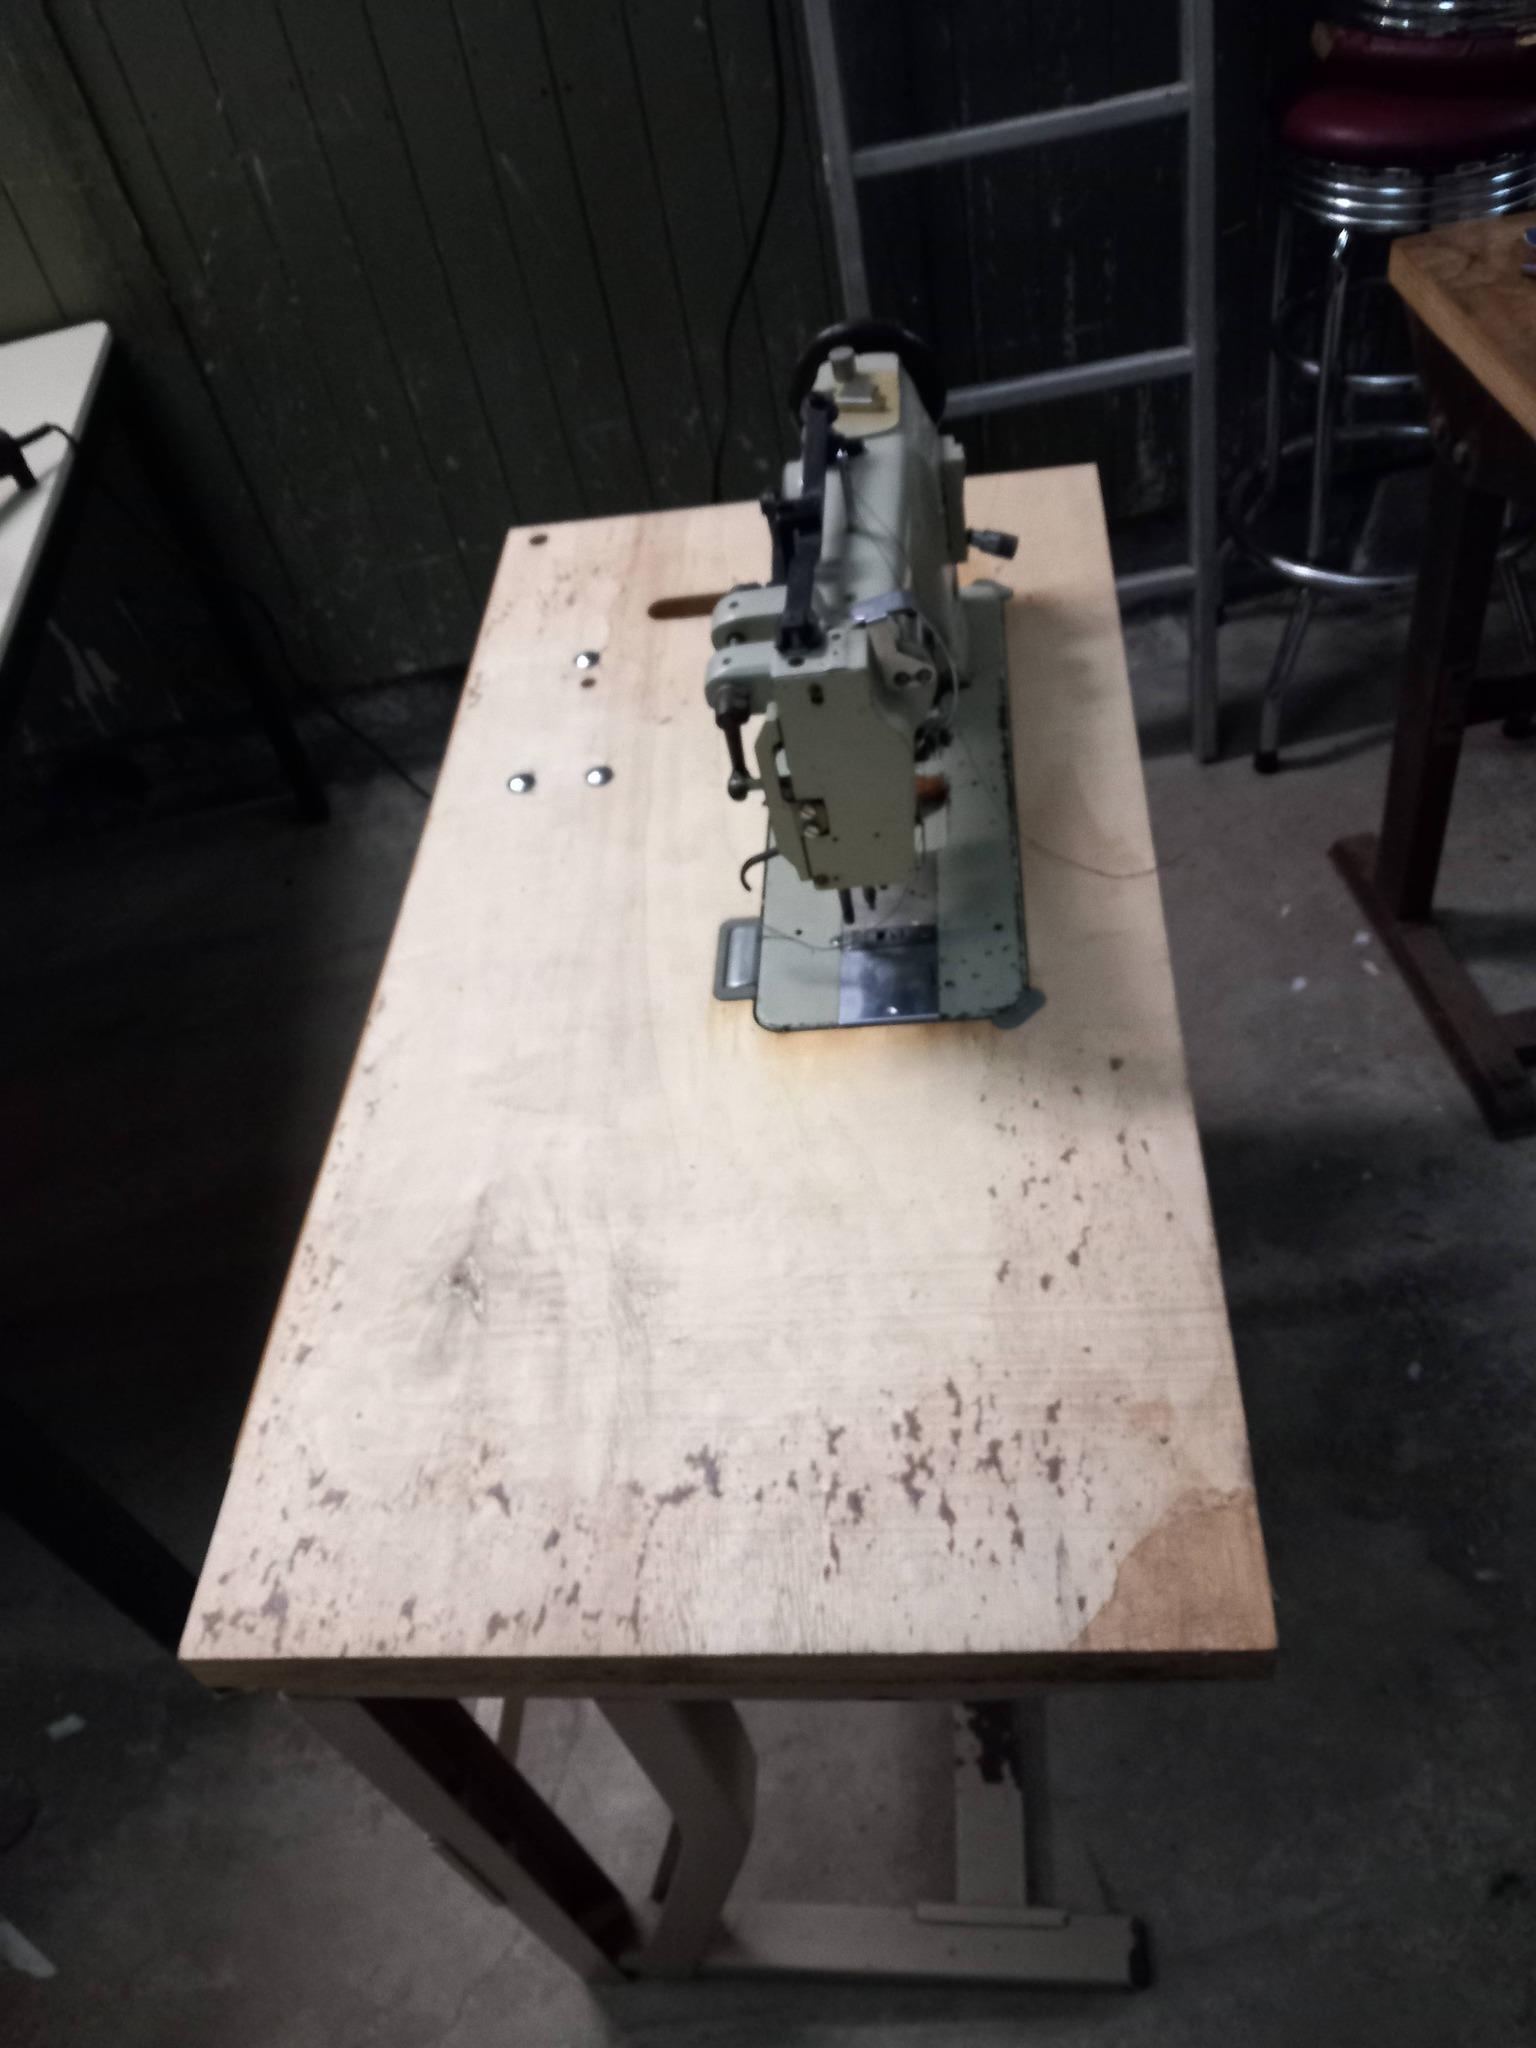
cleaned up the machine. oiled it. took apart the tensionplate cleaned and polished everything and put it back together. set up the treads and tried sewing and sadly it jammed. 1 stitch and it gets stuck. i turn the wheel a bit back and then i can pull back the material and i have 4 threads coming out so thats not right. if anybody has handy vids. tips. or hints i appreciate sharing them. i geusse im gonna need to adjust it and set it up right. ill go check the manual and see if i can find the problem there
-
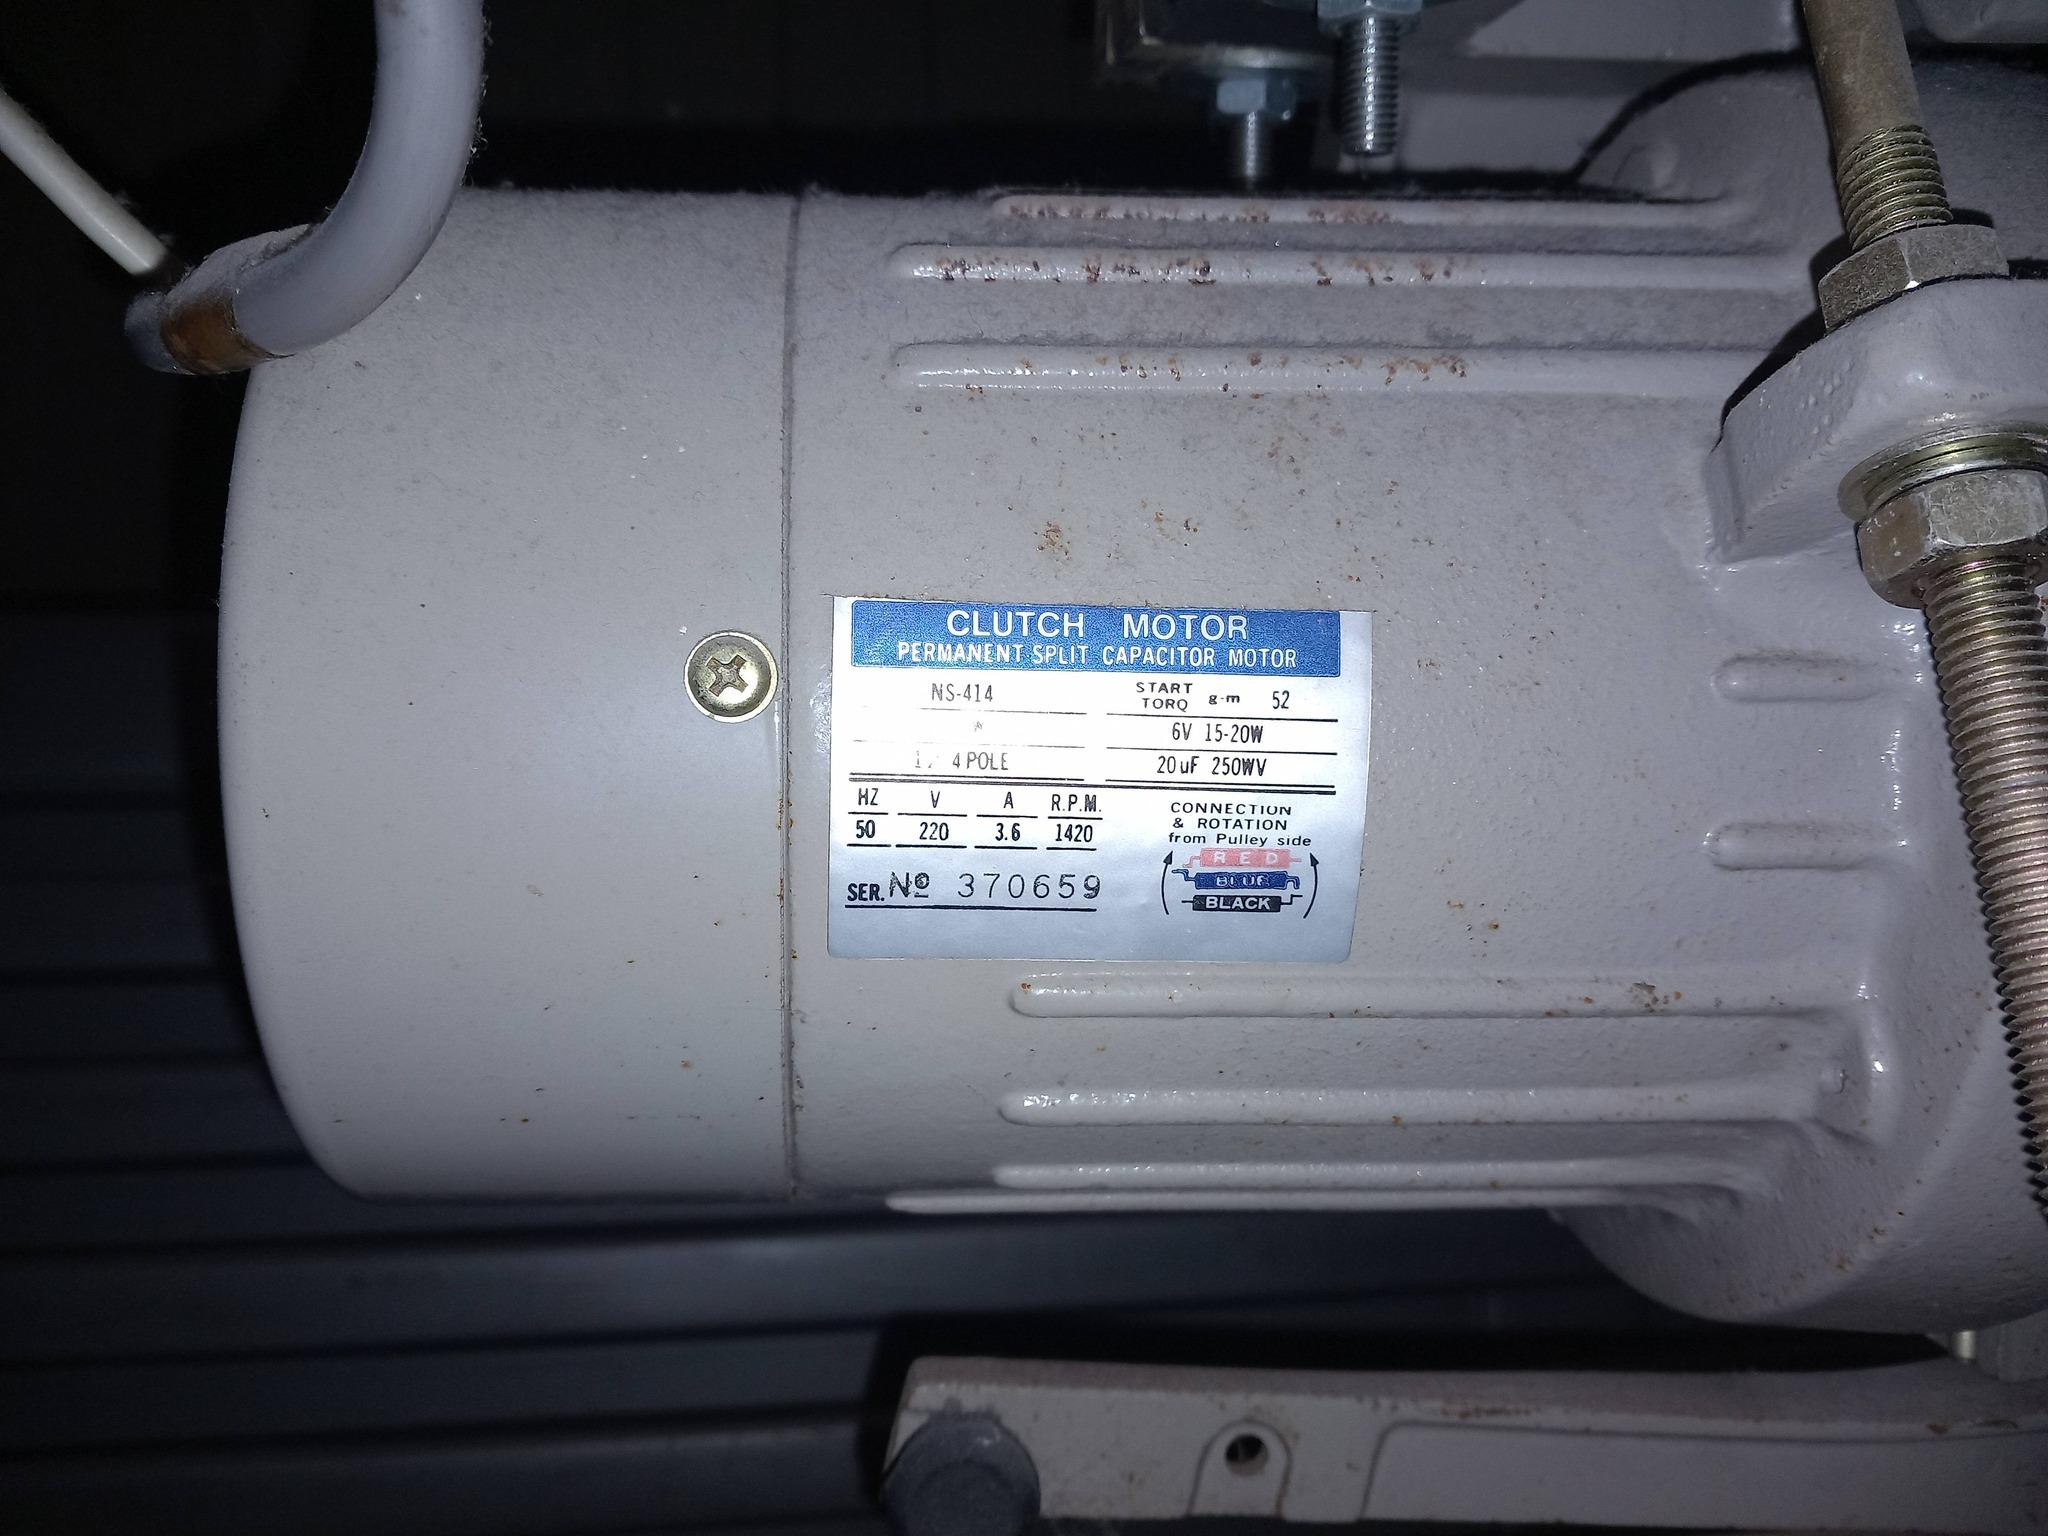
checked the clutchmotor and it runs at 1420 RPM thats gonna be a bit extreme for me so i ordered a smaller pulley and see if thats gonna be enough gonna be a big difference hopefully as there was a big one on there.
-
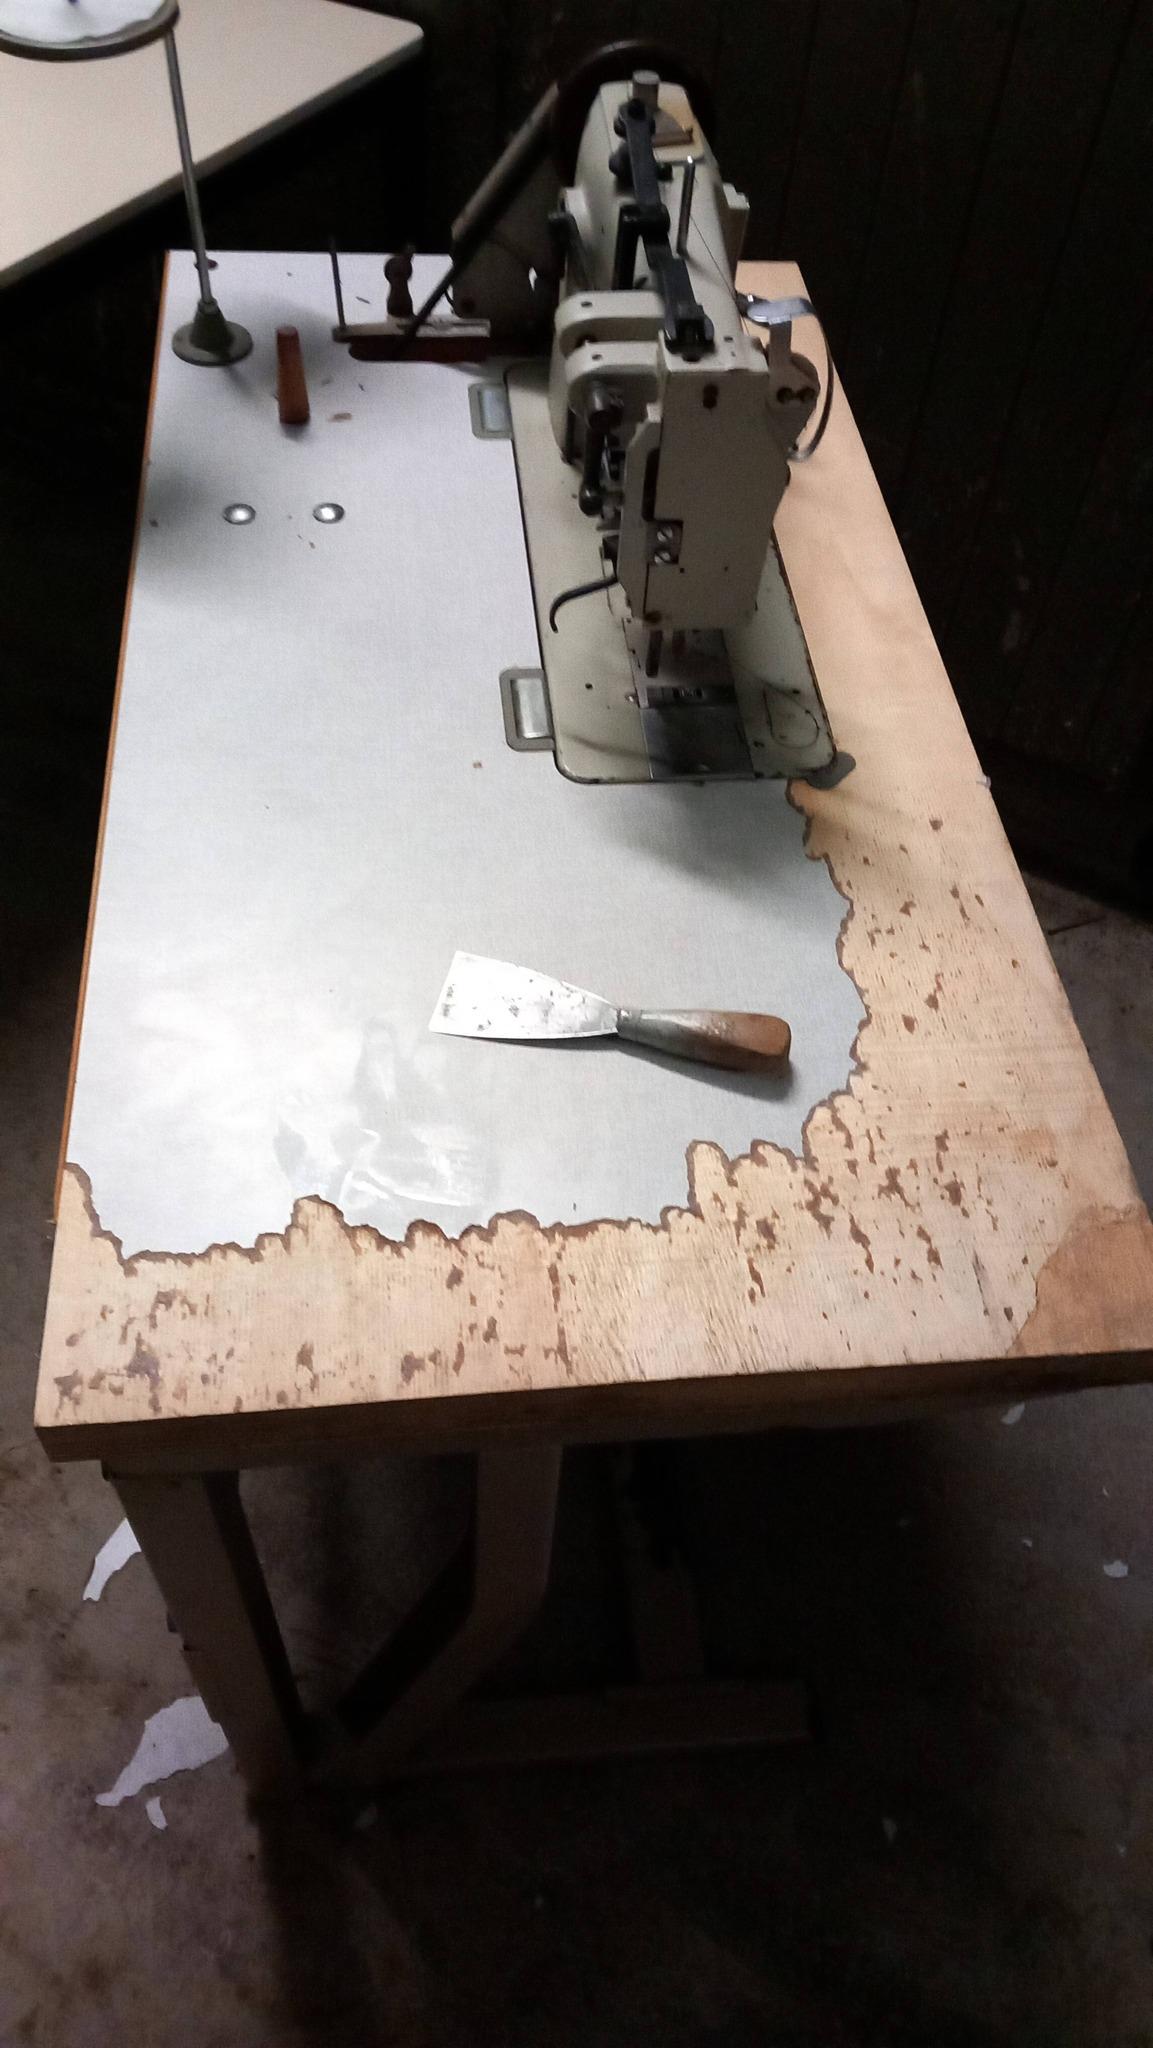
little update. wel a few updates. i got the right needles and learned whats what with those. i took of the tabeltop. it was damaged and ugly so got it down to the wood and waiting for a new top

-
Outstanding!
-

Unknown Chinese servo motor controller manual needed
1hp replied to Einherj's topic in Leather Sewing Machines
you can remove pins from connectors without cutting the wires. https://www.cycleterminal.com/terminal-extraction-procedure.html -

Unknown Chinese servo motor controller manual needed
Einherj replied to Einherj's topic in Leather Sewing Machines
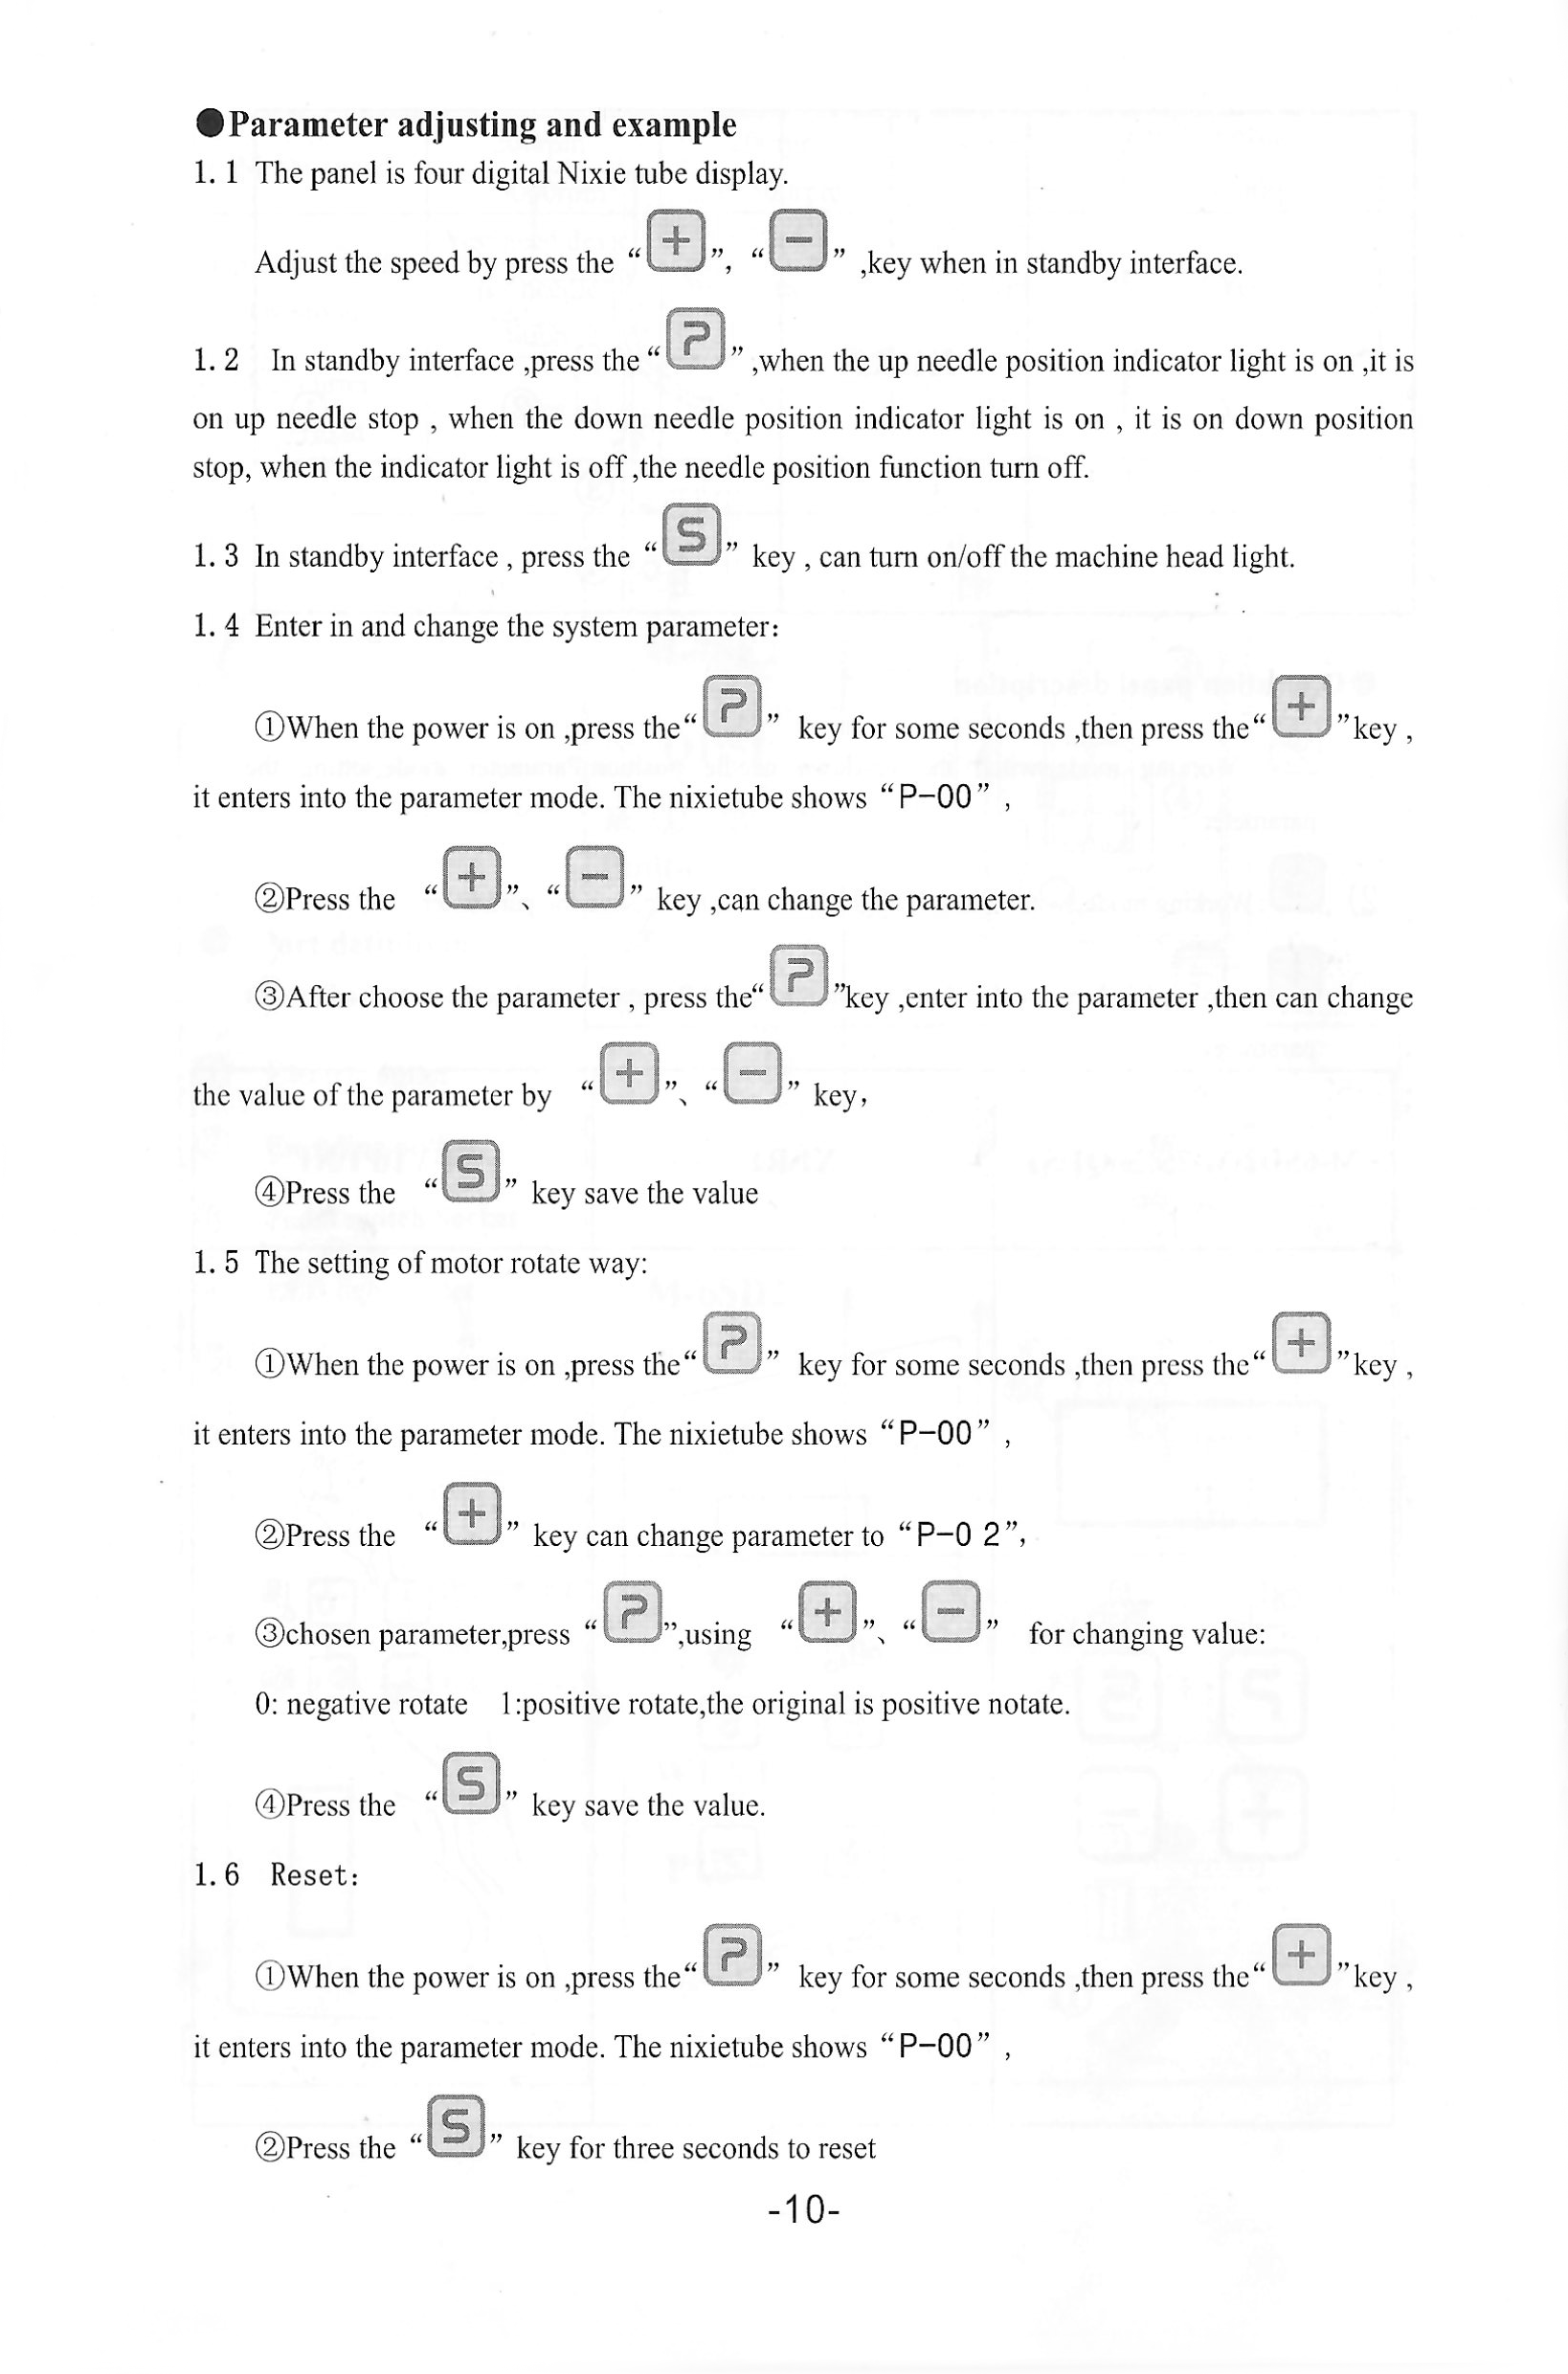
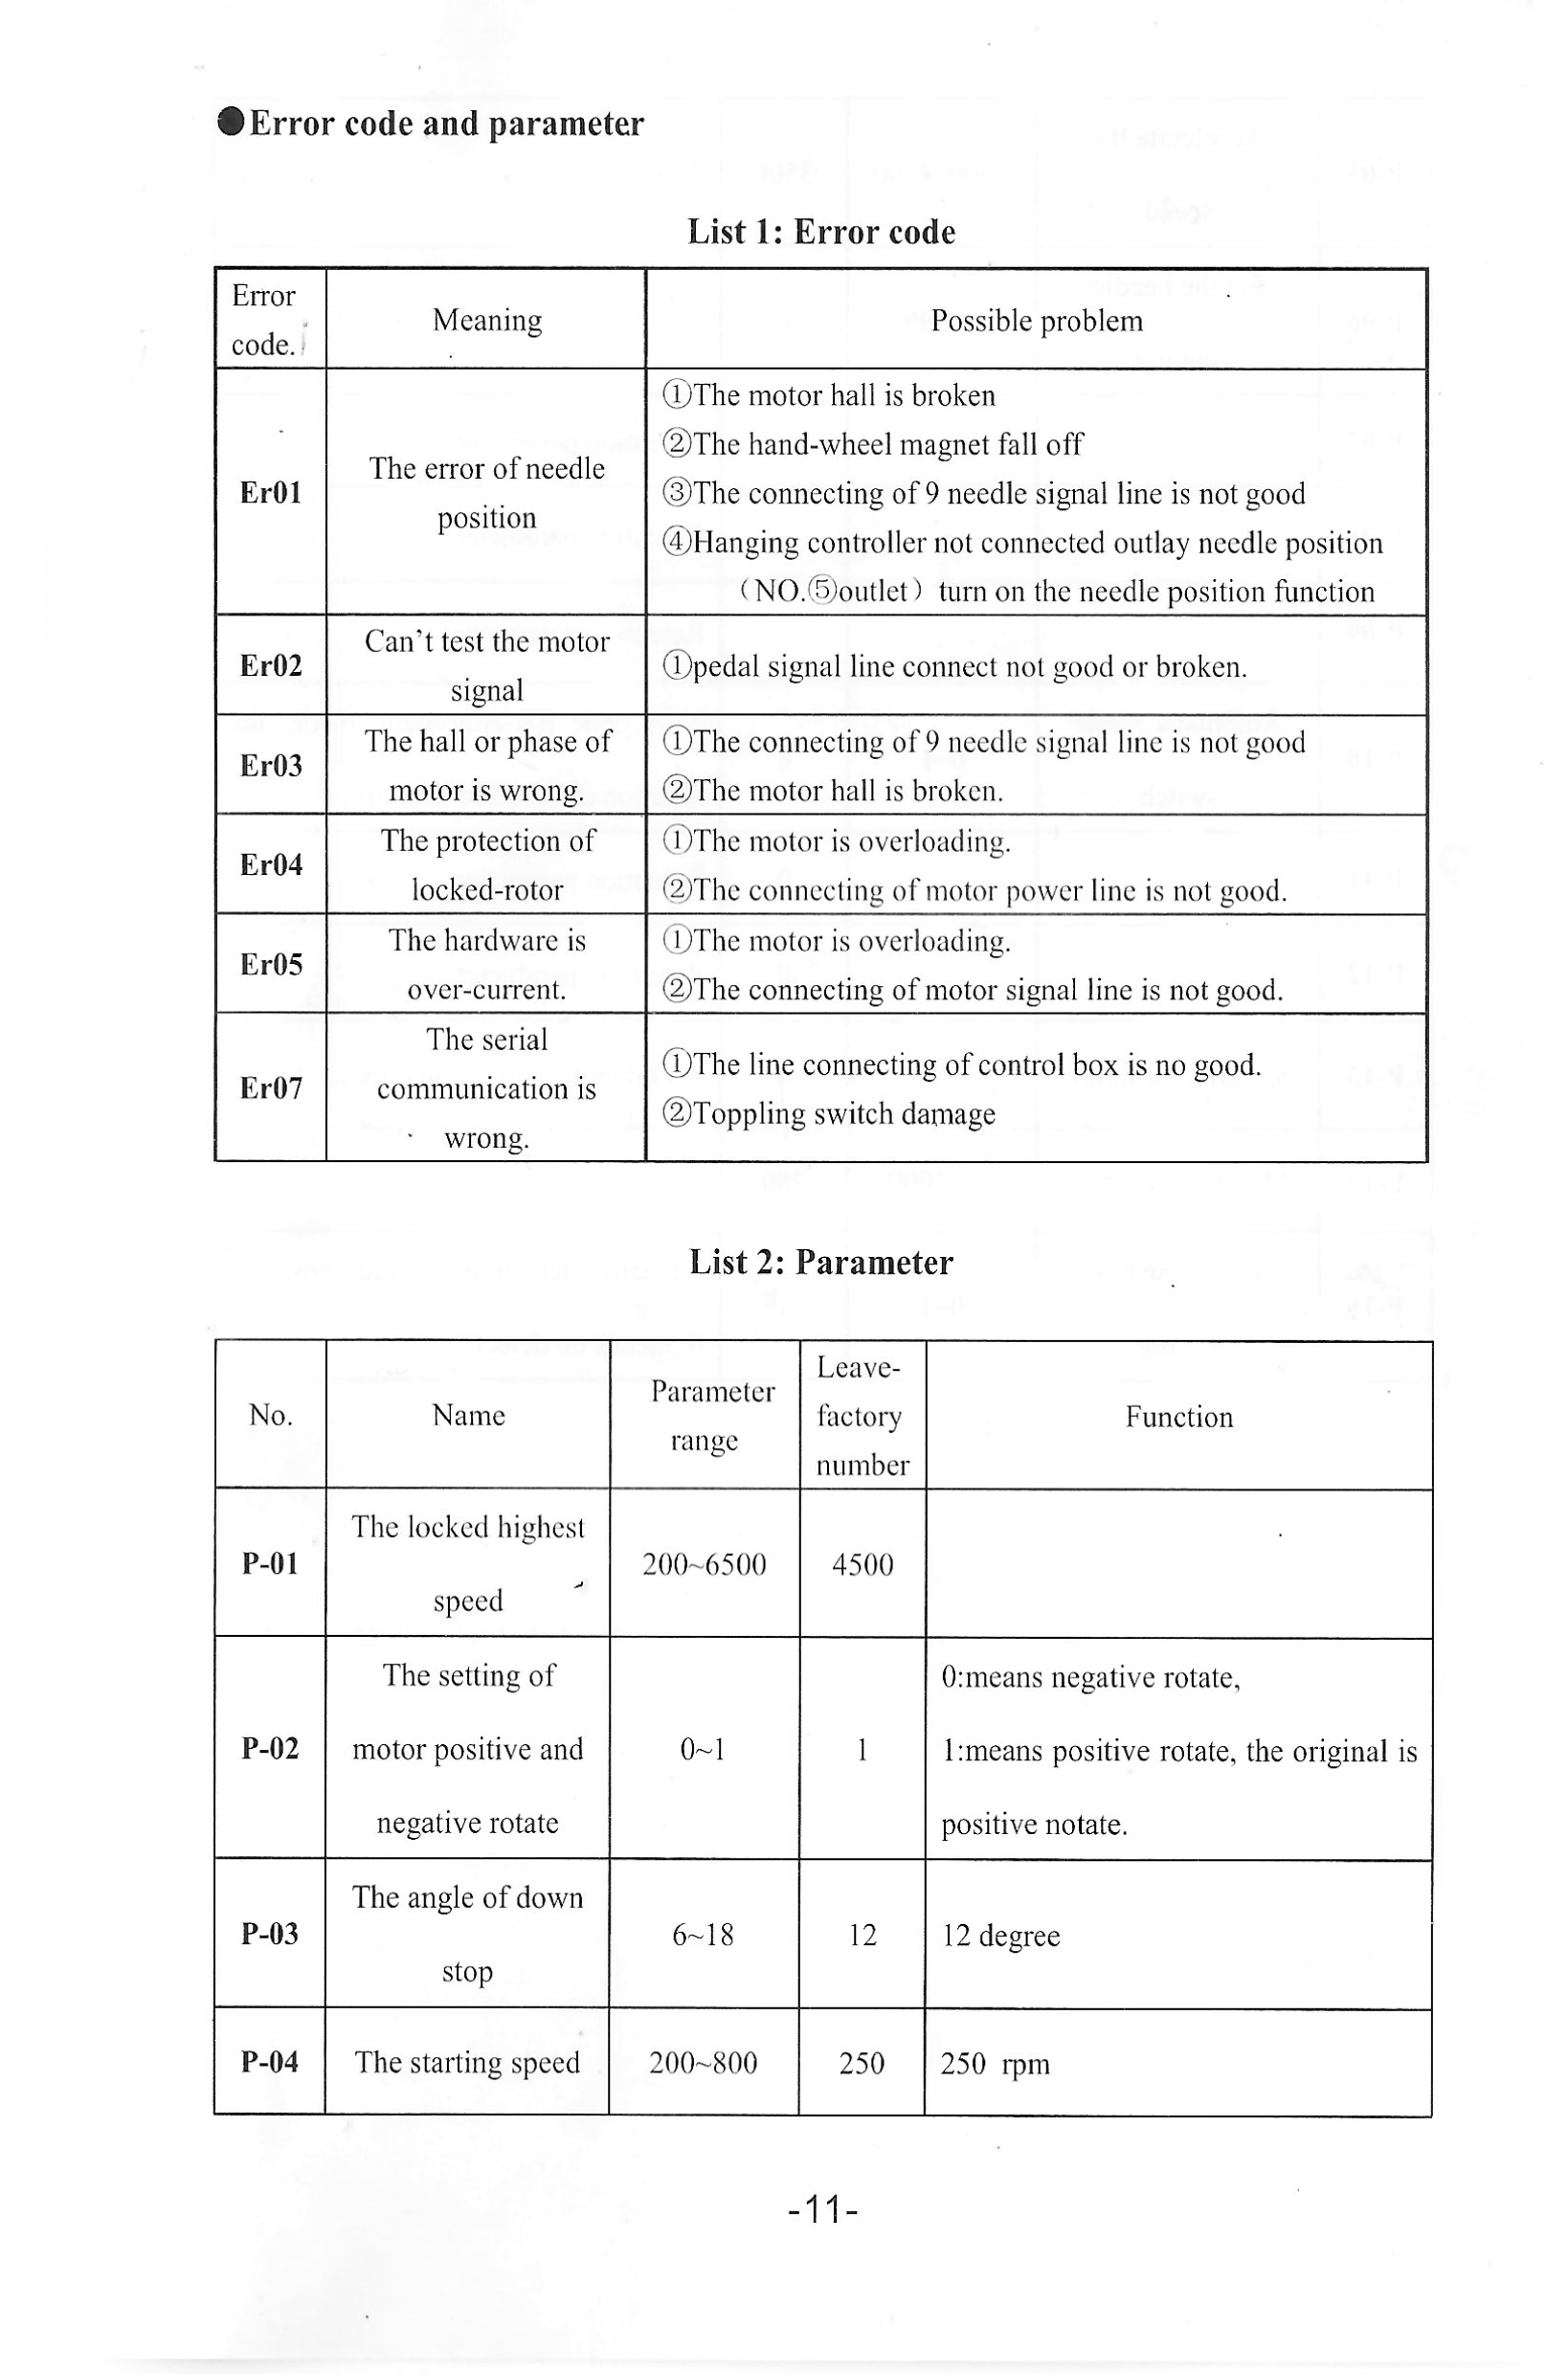
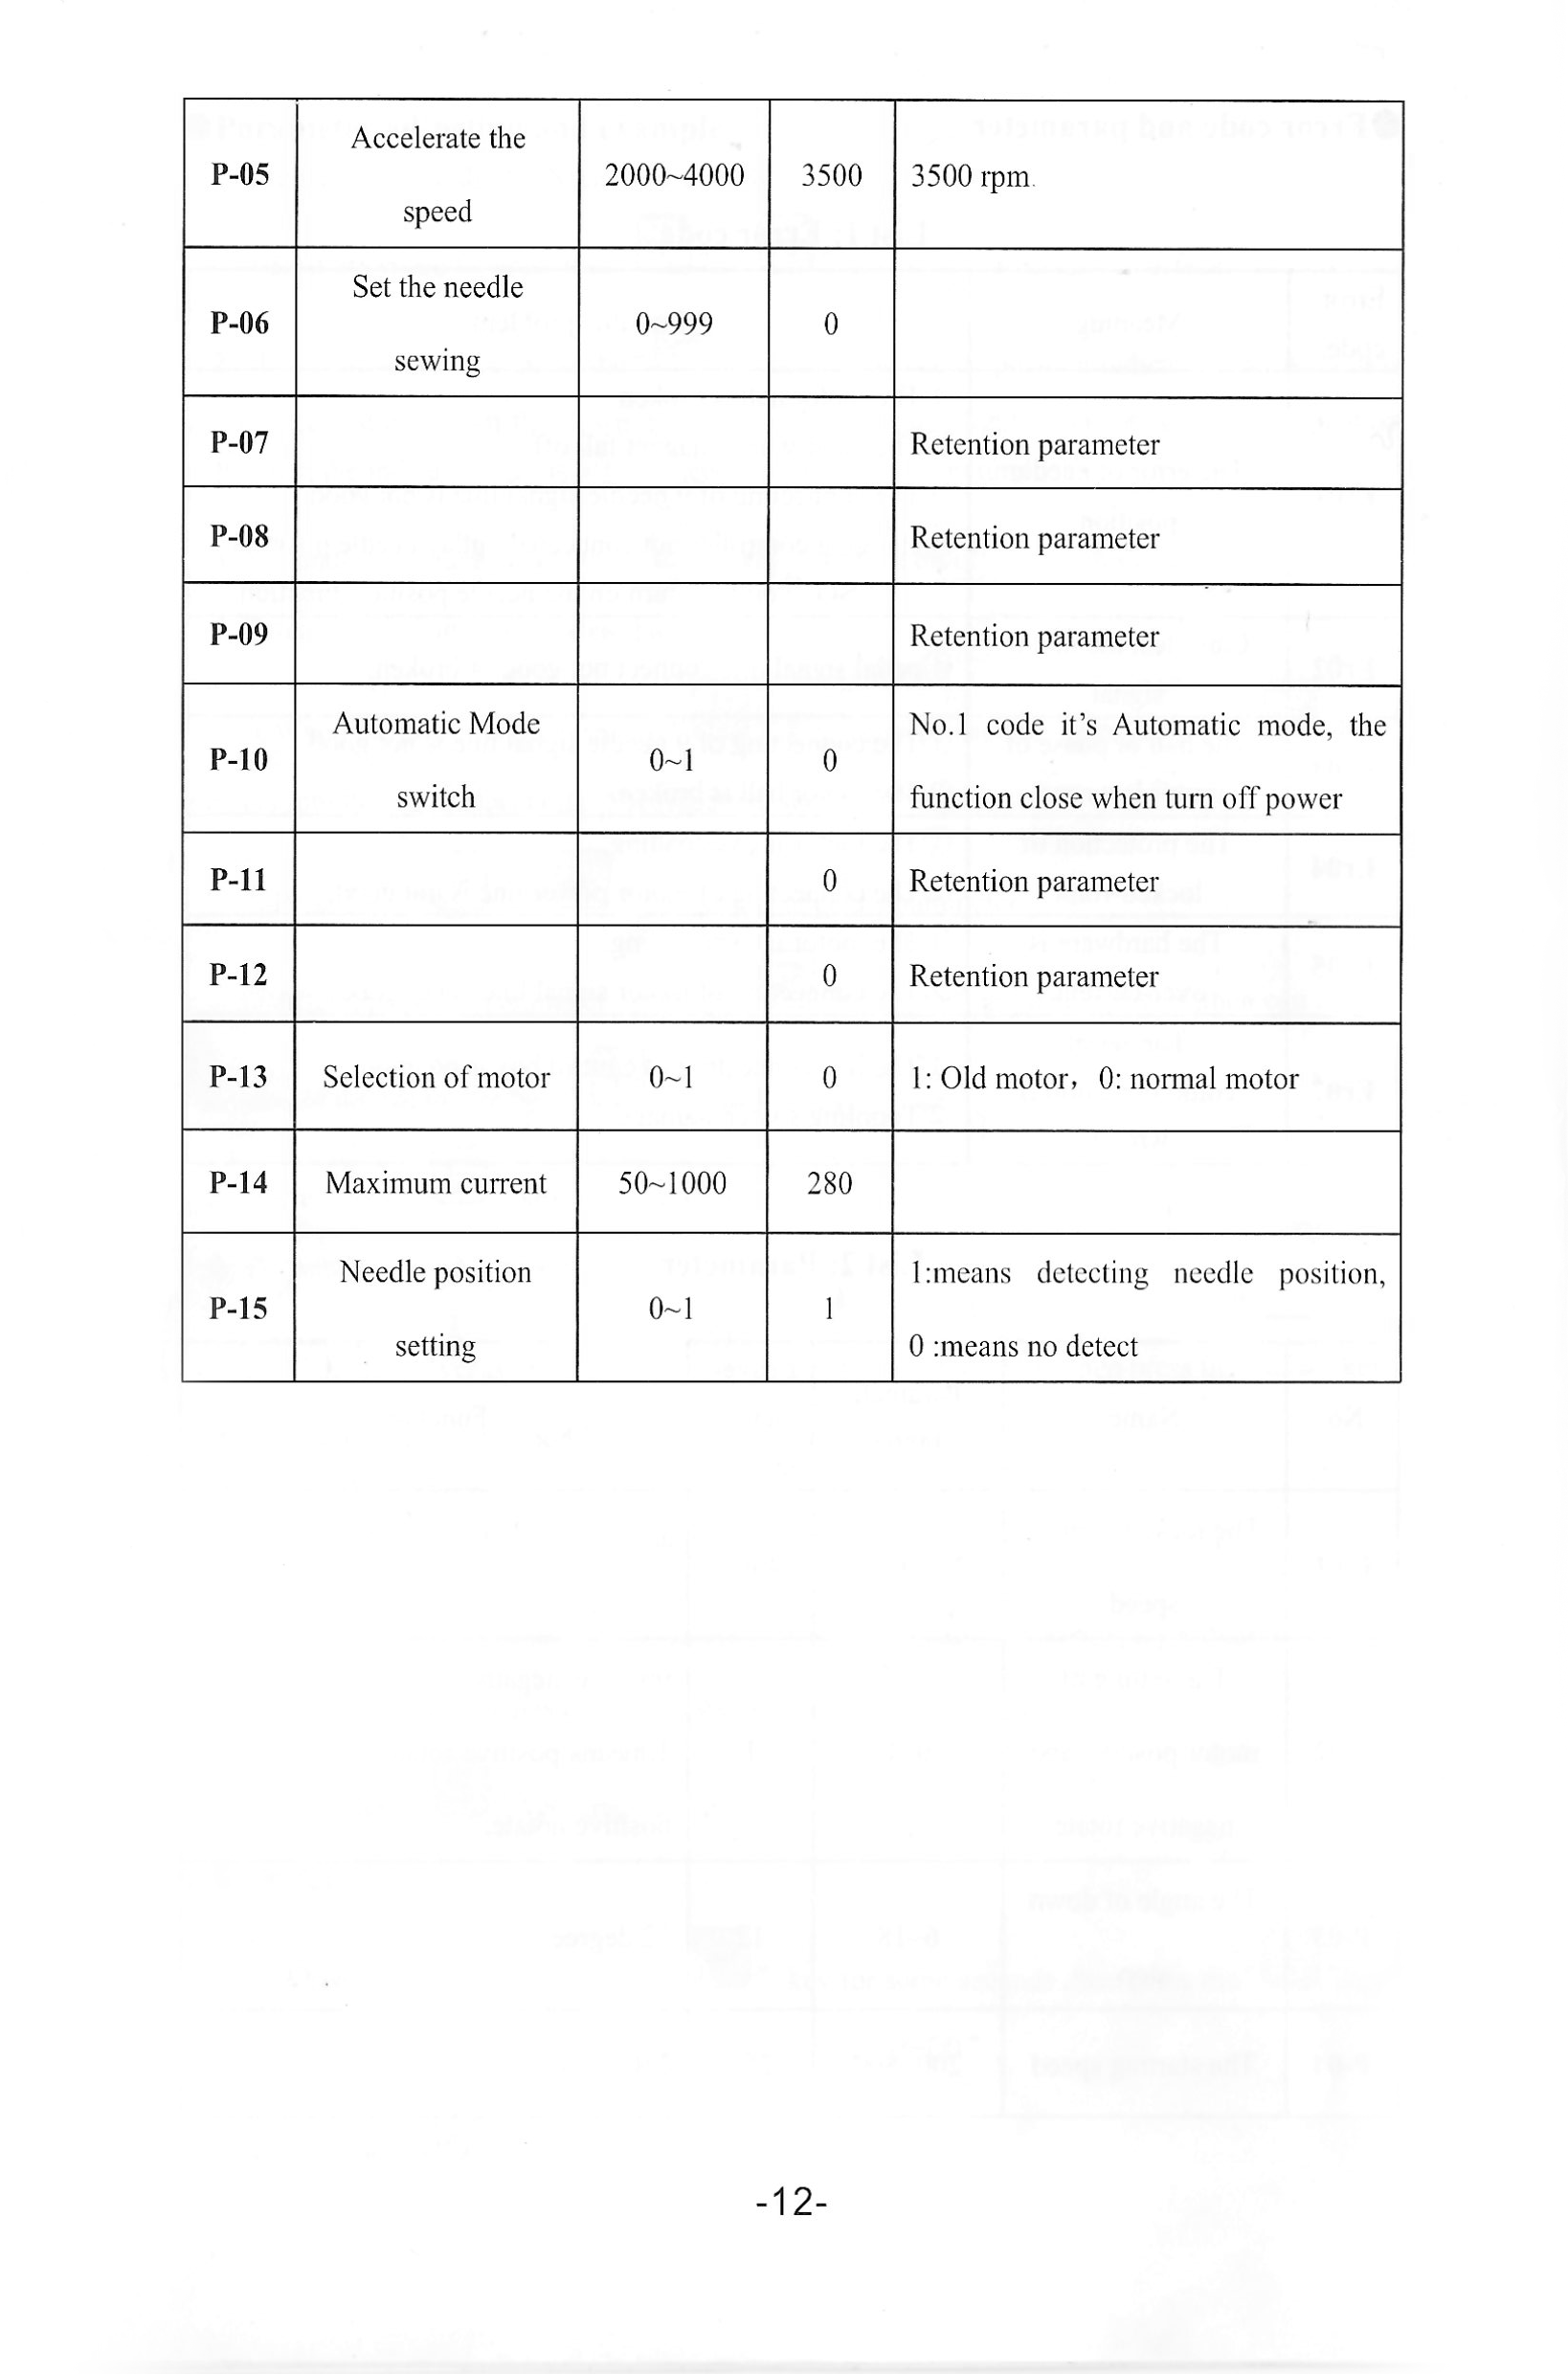
I also ran the original Chinese parameter table through chatGPT and it clarified that P-06 is most likely the number of automatic lock stitches at the start and end of sewing. This is desirable when doing bar tacking, etc. -
Unknown Chinese servo motor controller manual needed
Einherj replied to Einherj's topic in Leather Sewing Machines
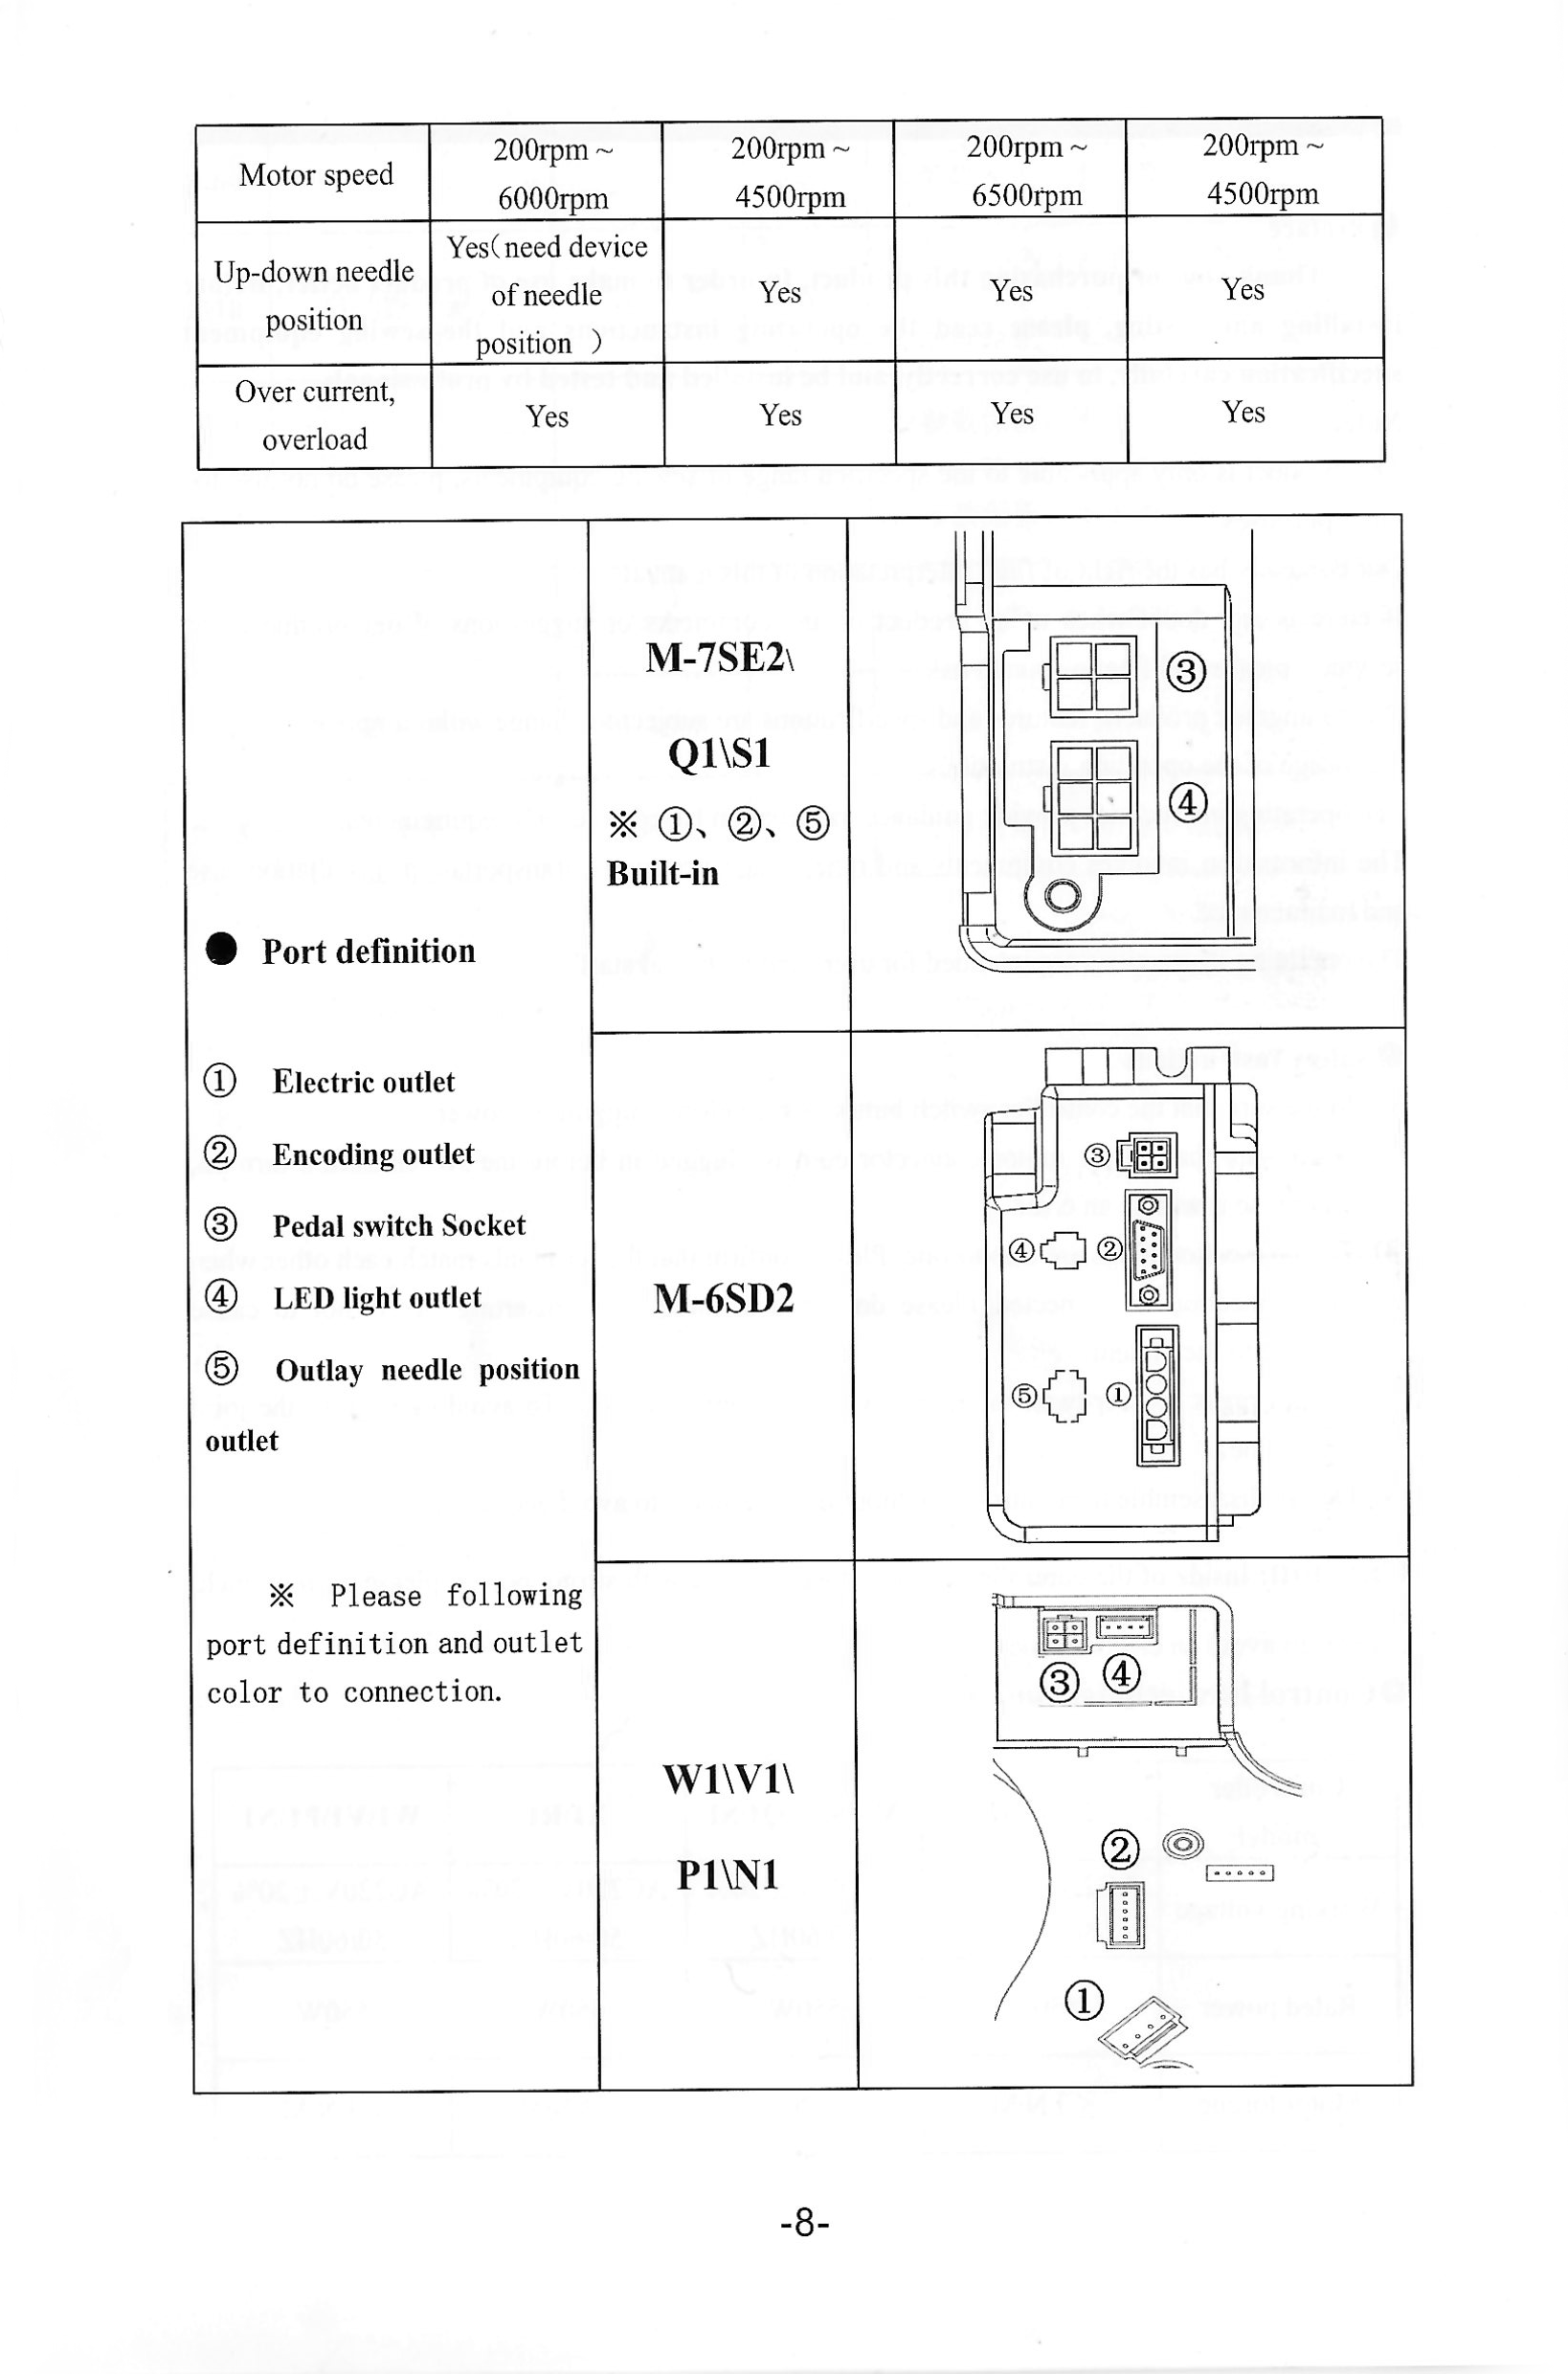
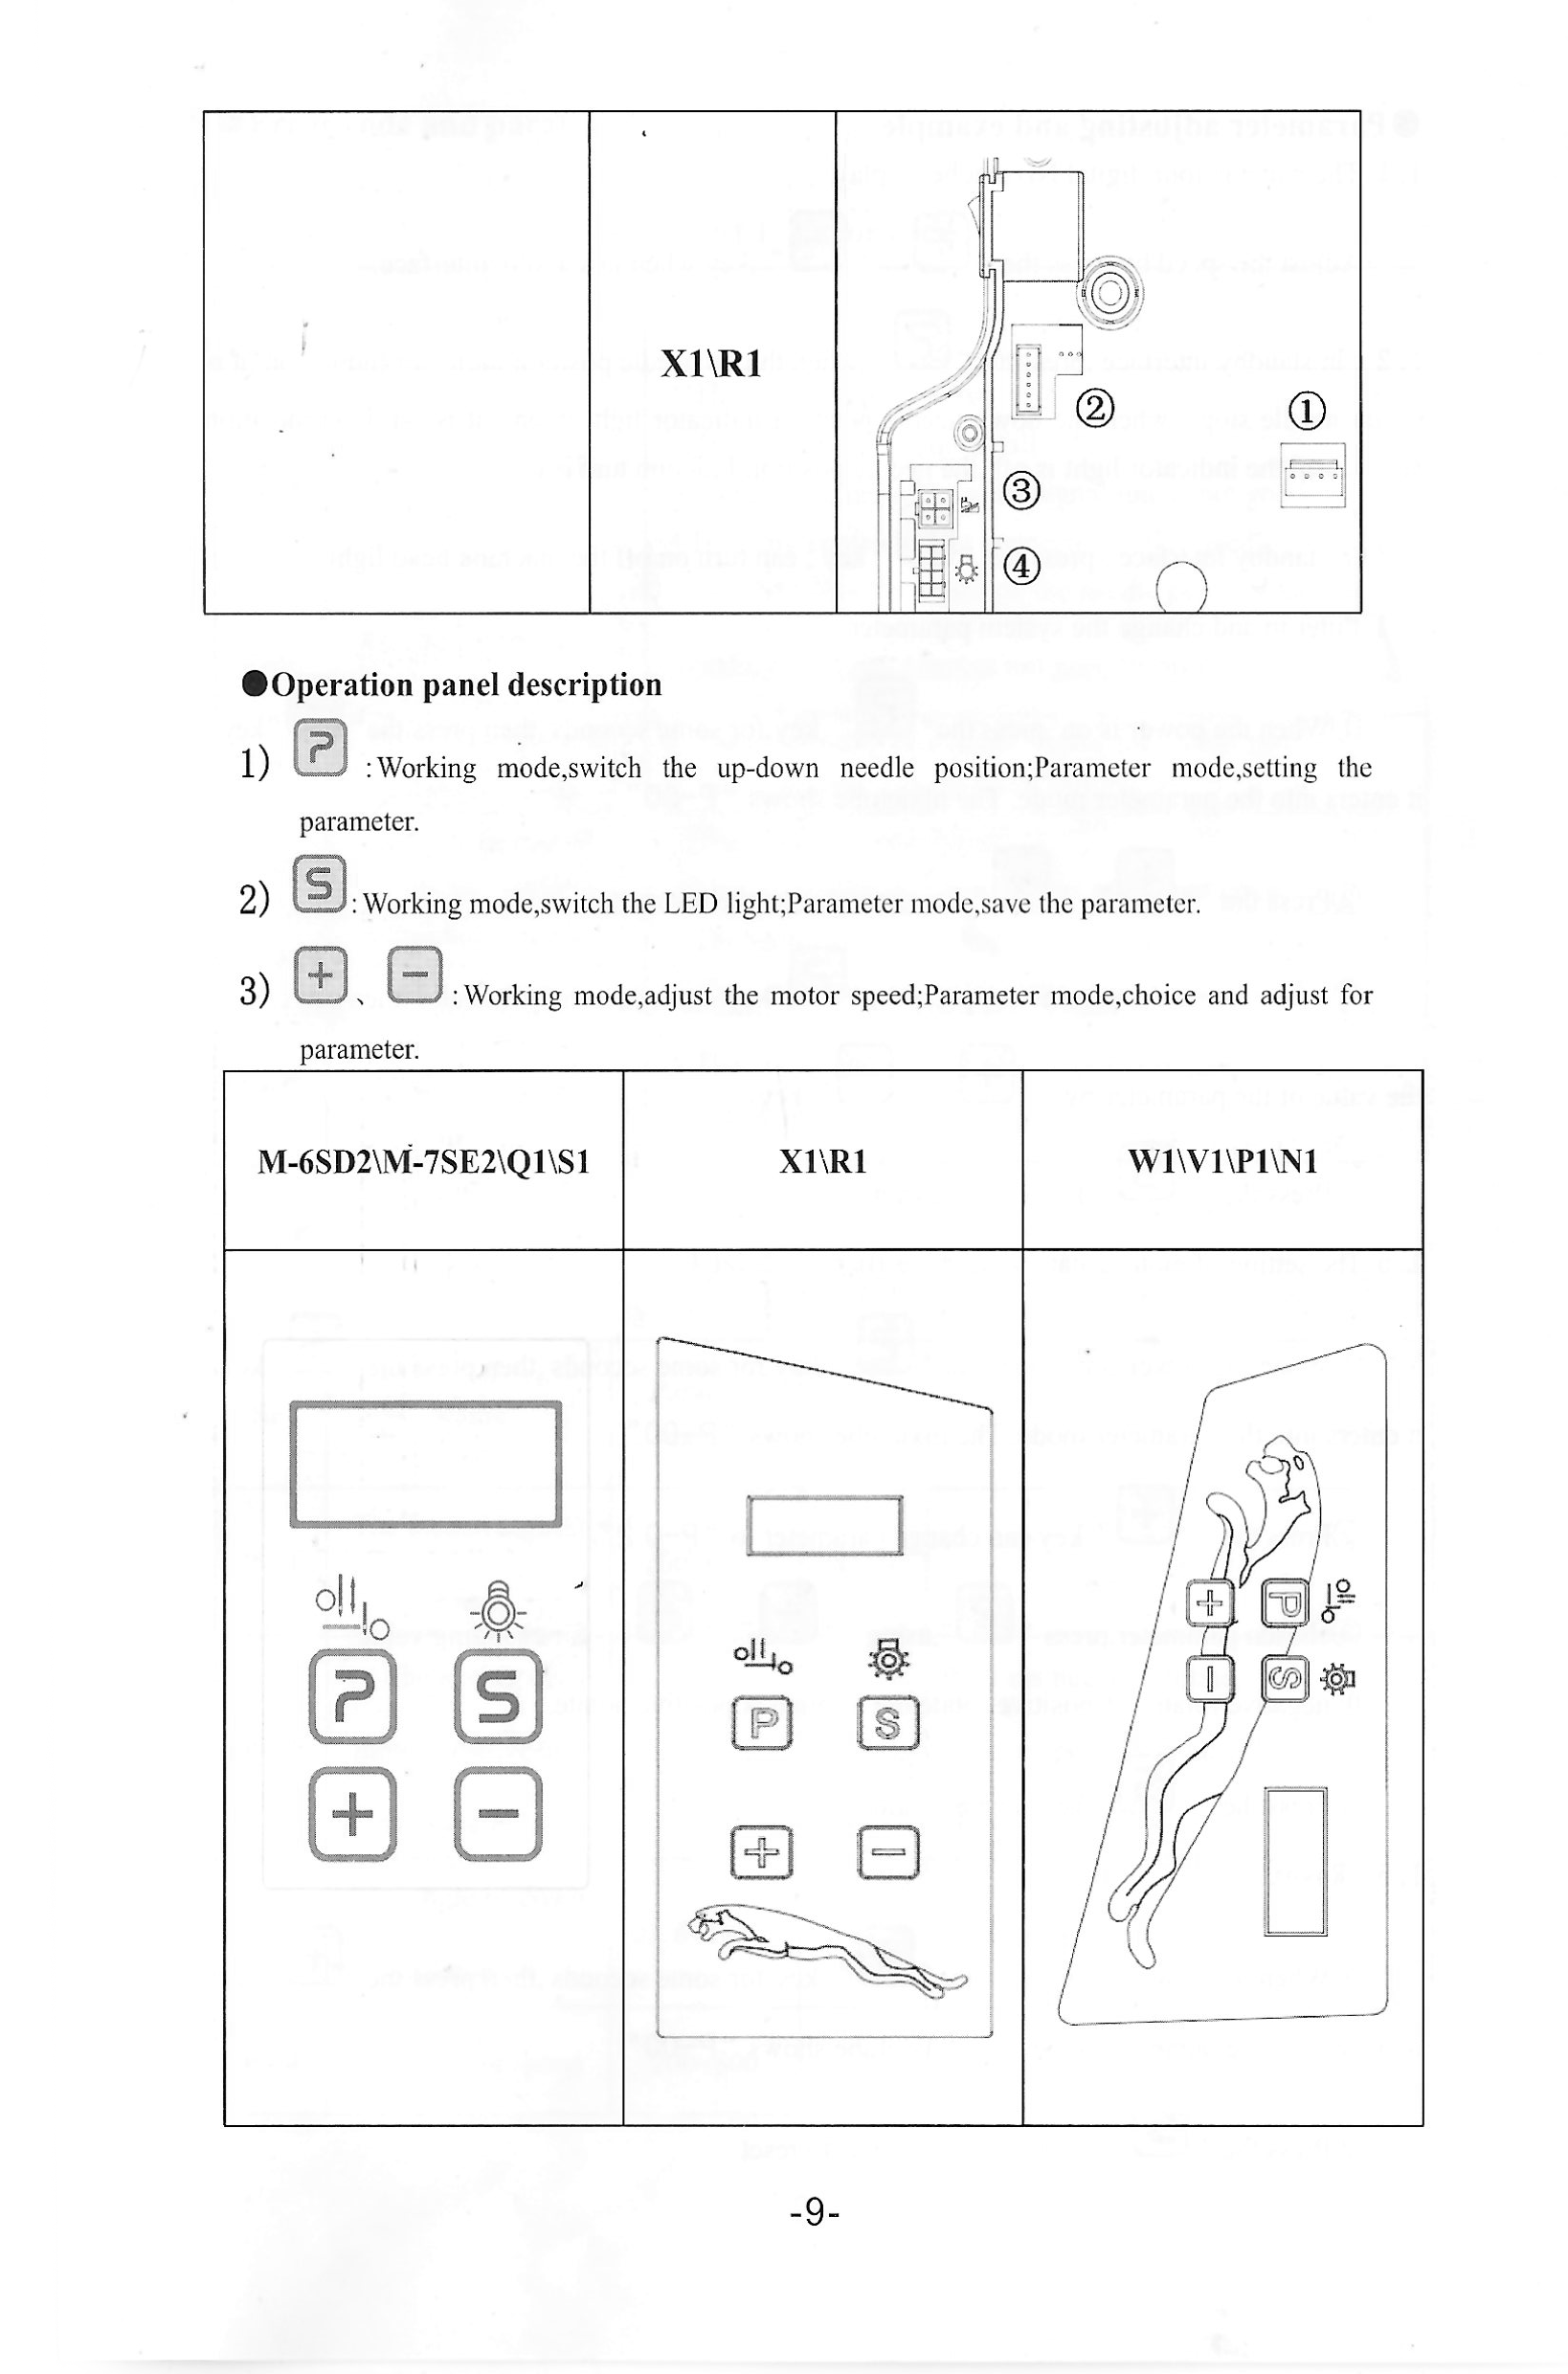
I found the manual. Turns out, my controller model name is M-6SD2. There are other controllers listed in the same manual. I was going through my document drawers and it was there, under the pile. I scanned the English translated pages for future reference. I can't edit my first post, but I will attach the scanned files here.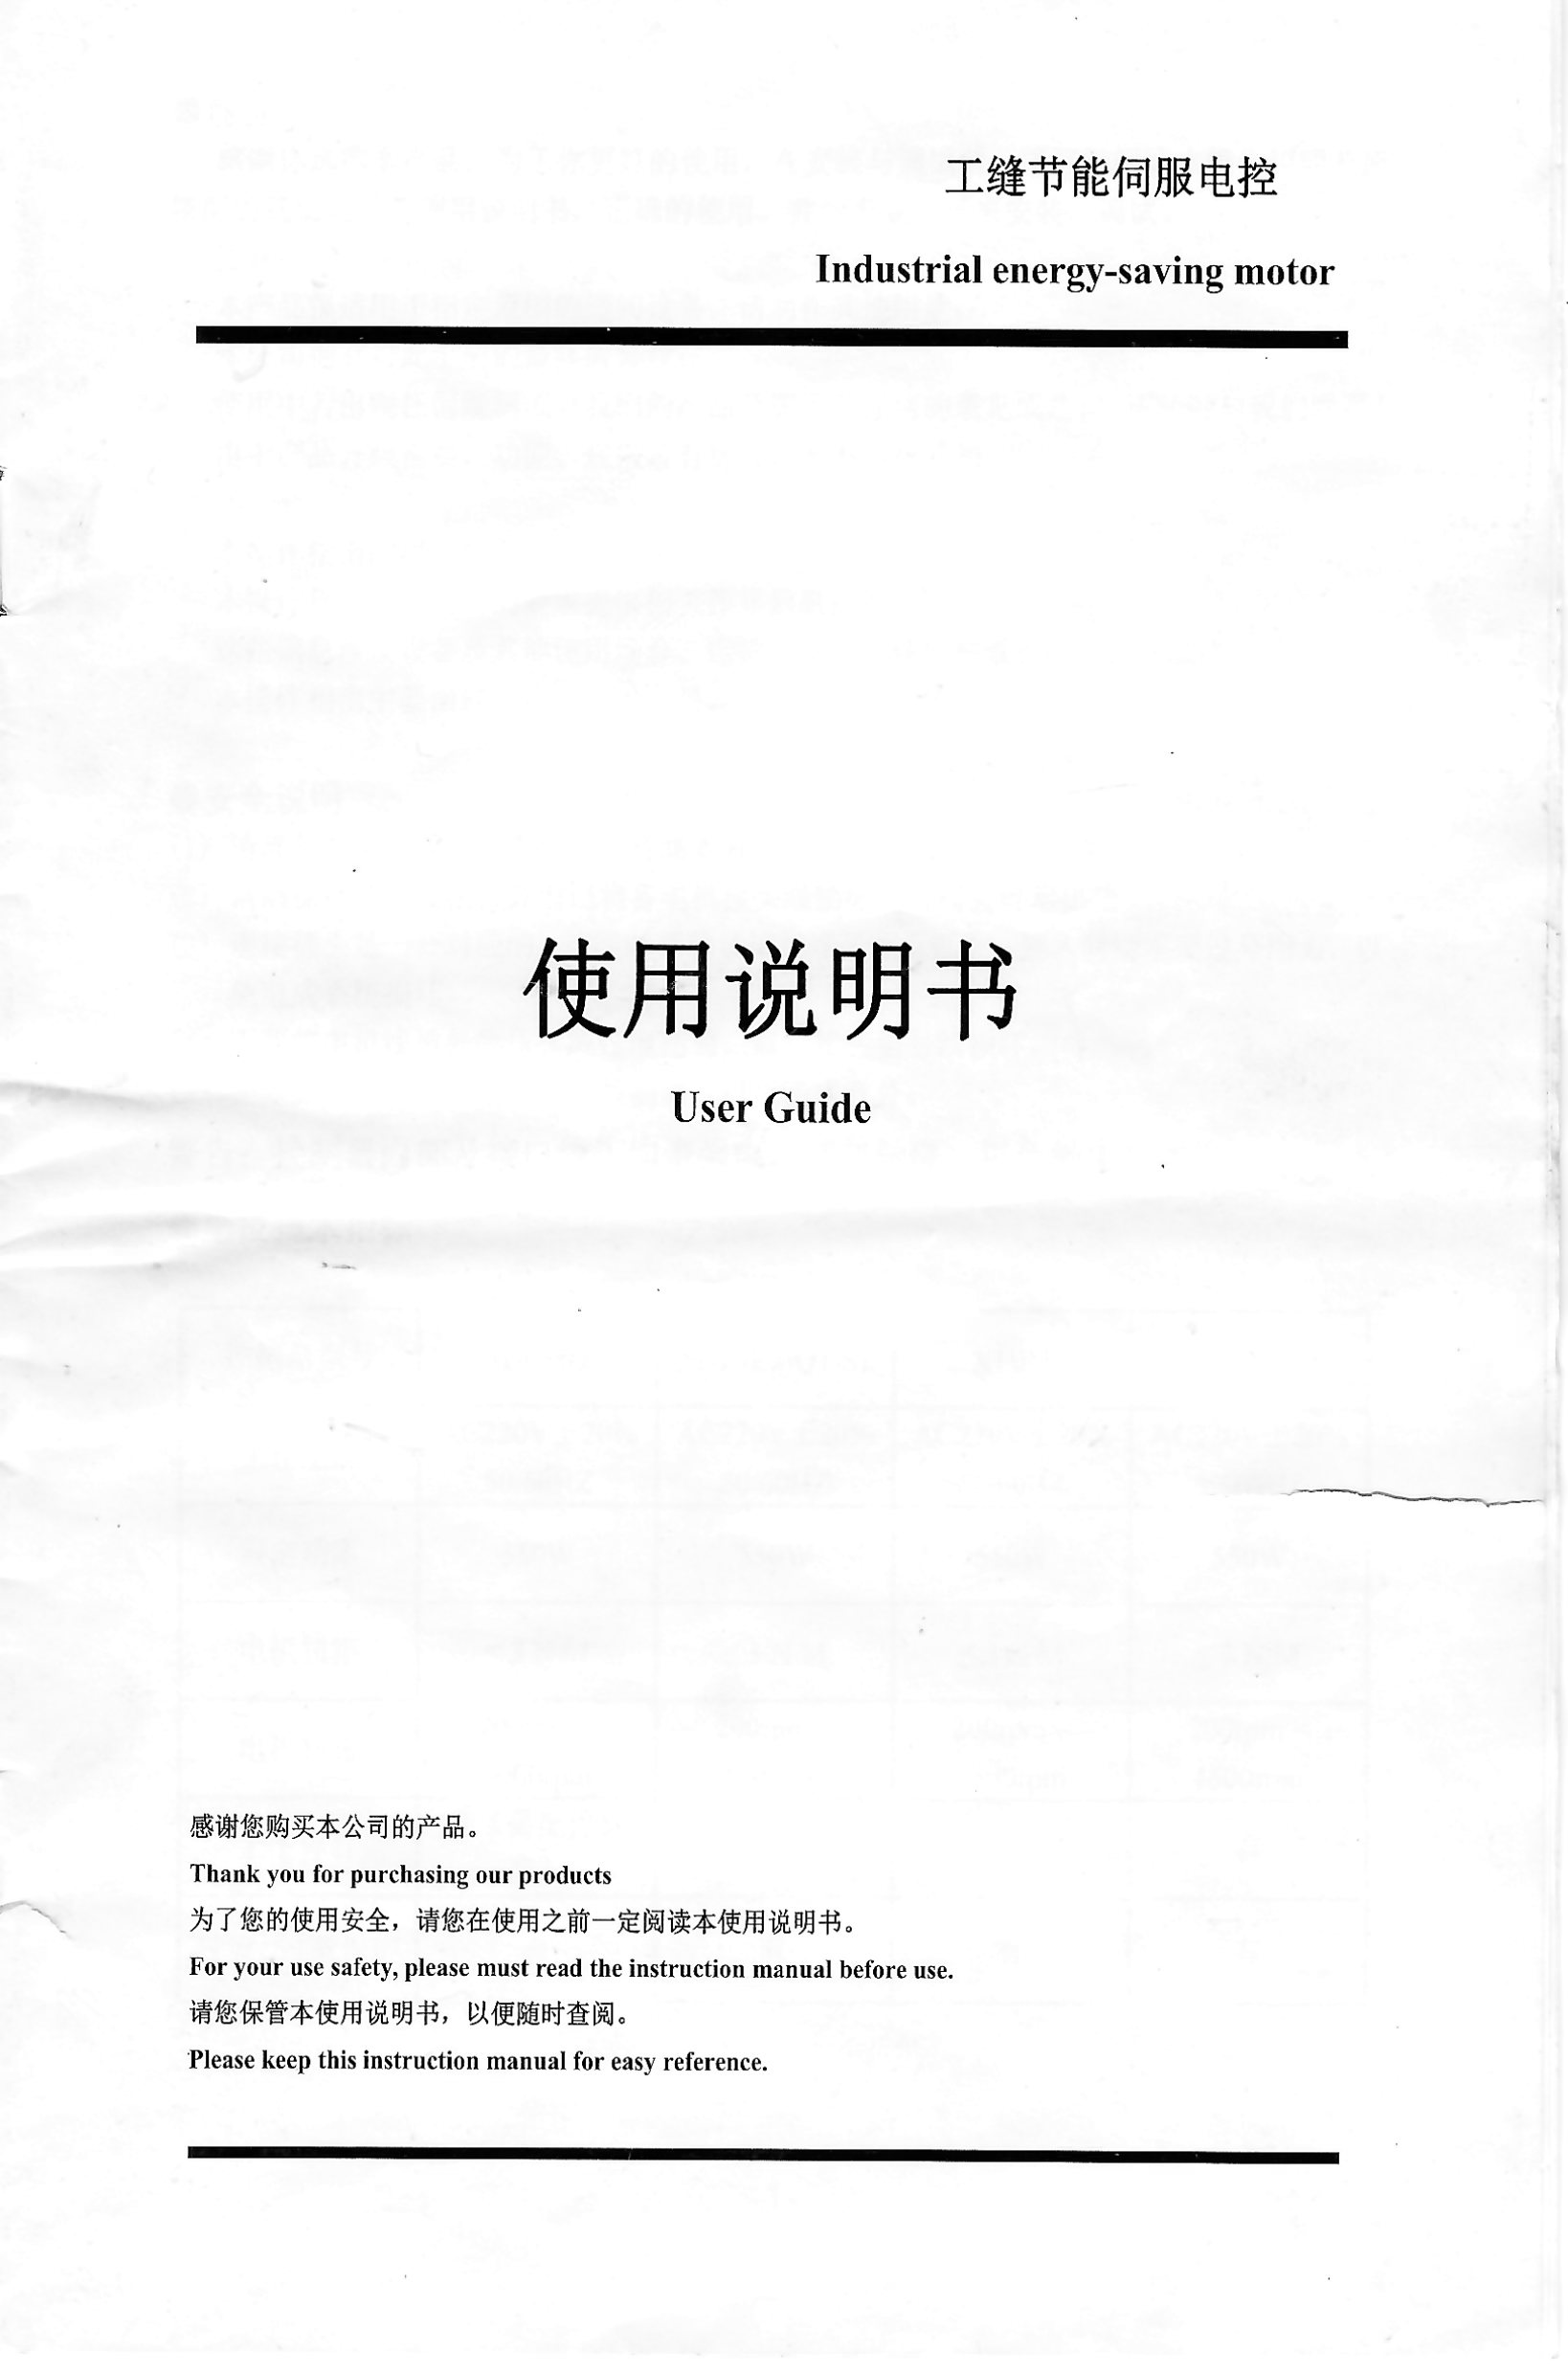

-
Unknown Chinese servo motor controller manual needed
Einherj replied to Einherj's topic in Leather Sewing Machines
I tested the synchro on my other machine that has the same controller, but no speed reducer, and it worked fine. I've seen other controllers with some type of "belt scale" setting, where you can compensate for the difference in motor pulley size and machine pulley size. -
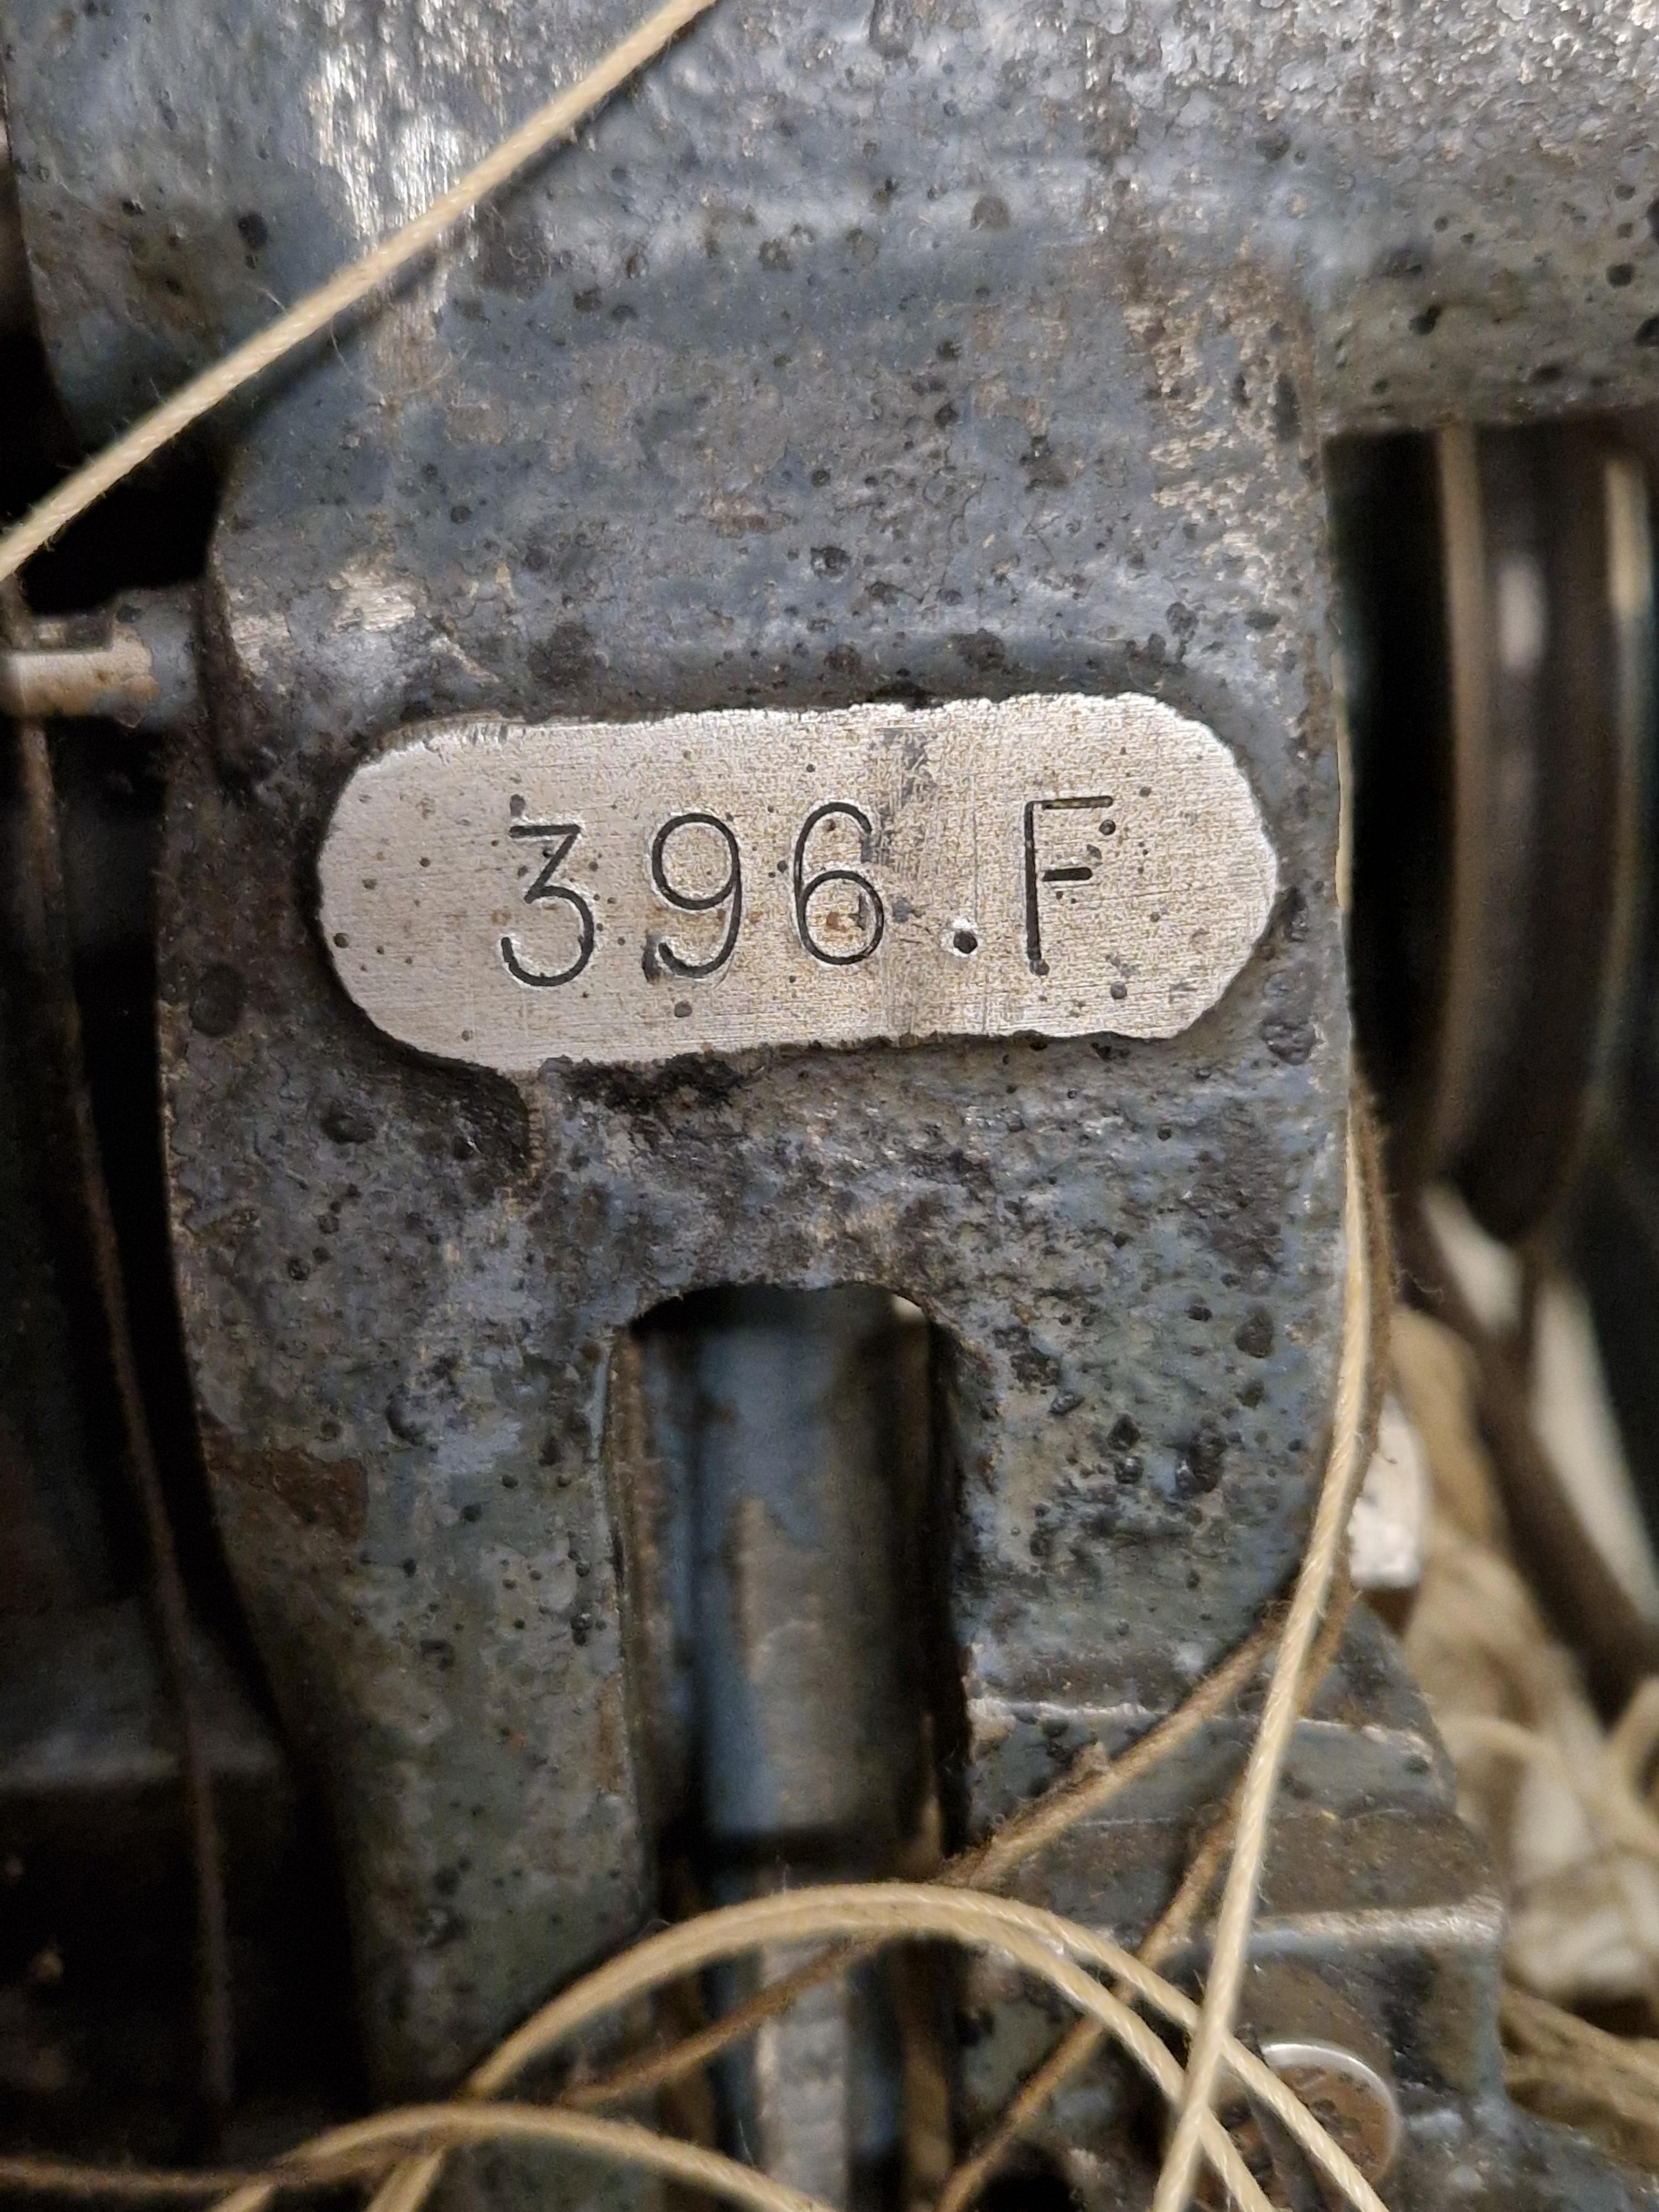
 Hello all, I am Morgan. I own the following machine (see photo) and I’m trying to find its user manual. It is a USMC machine, and there is a metal plate marked 396F on it. Would anyone happen to have an operating manual, documentation, or any information about this model? Thank you very much for your help.
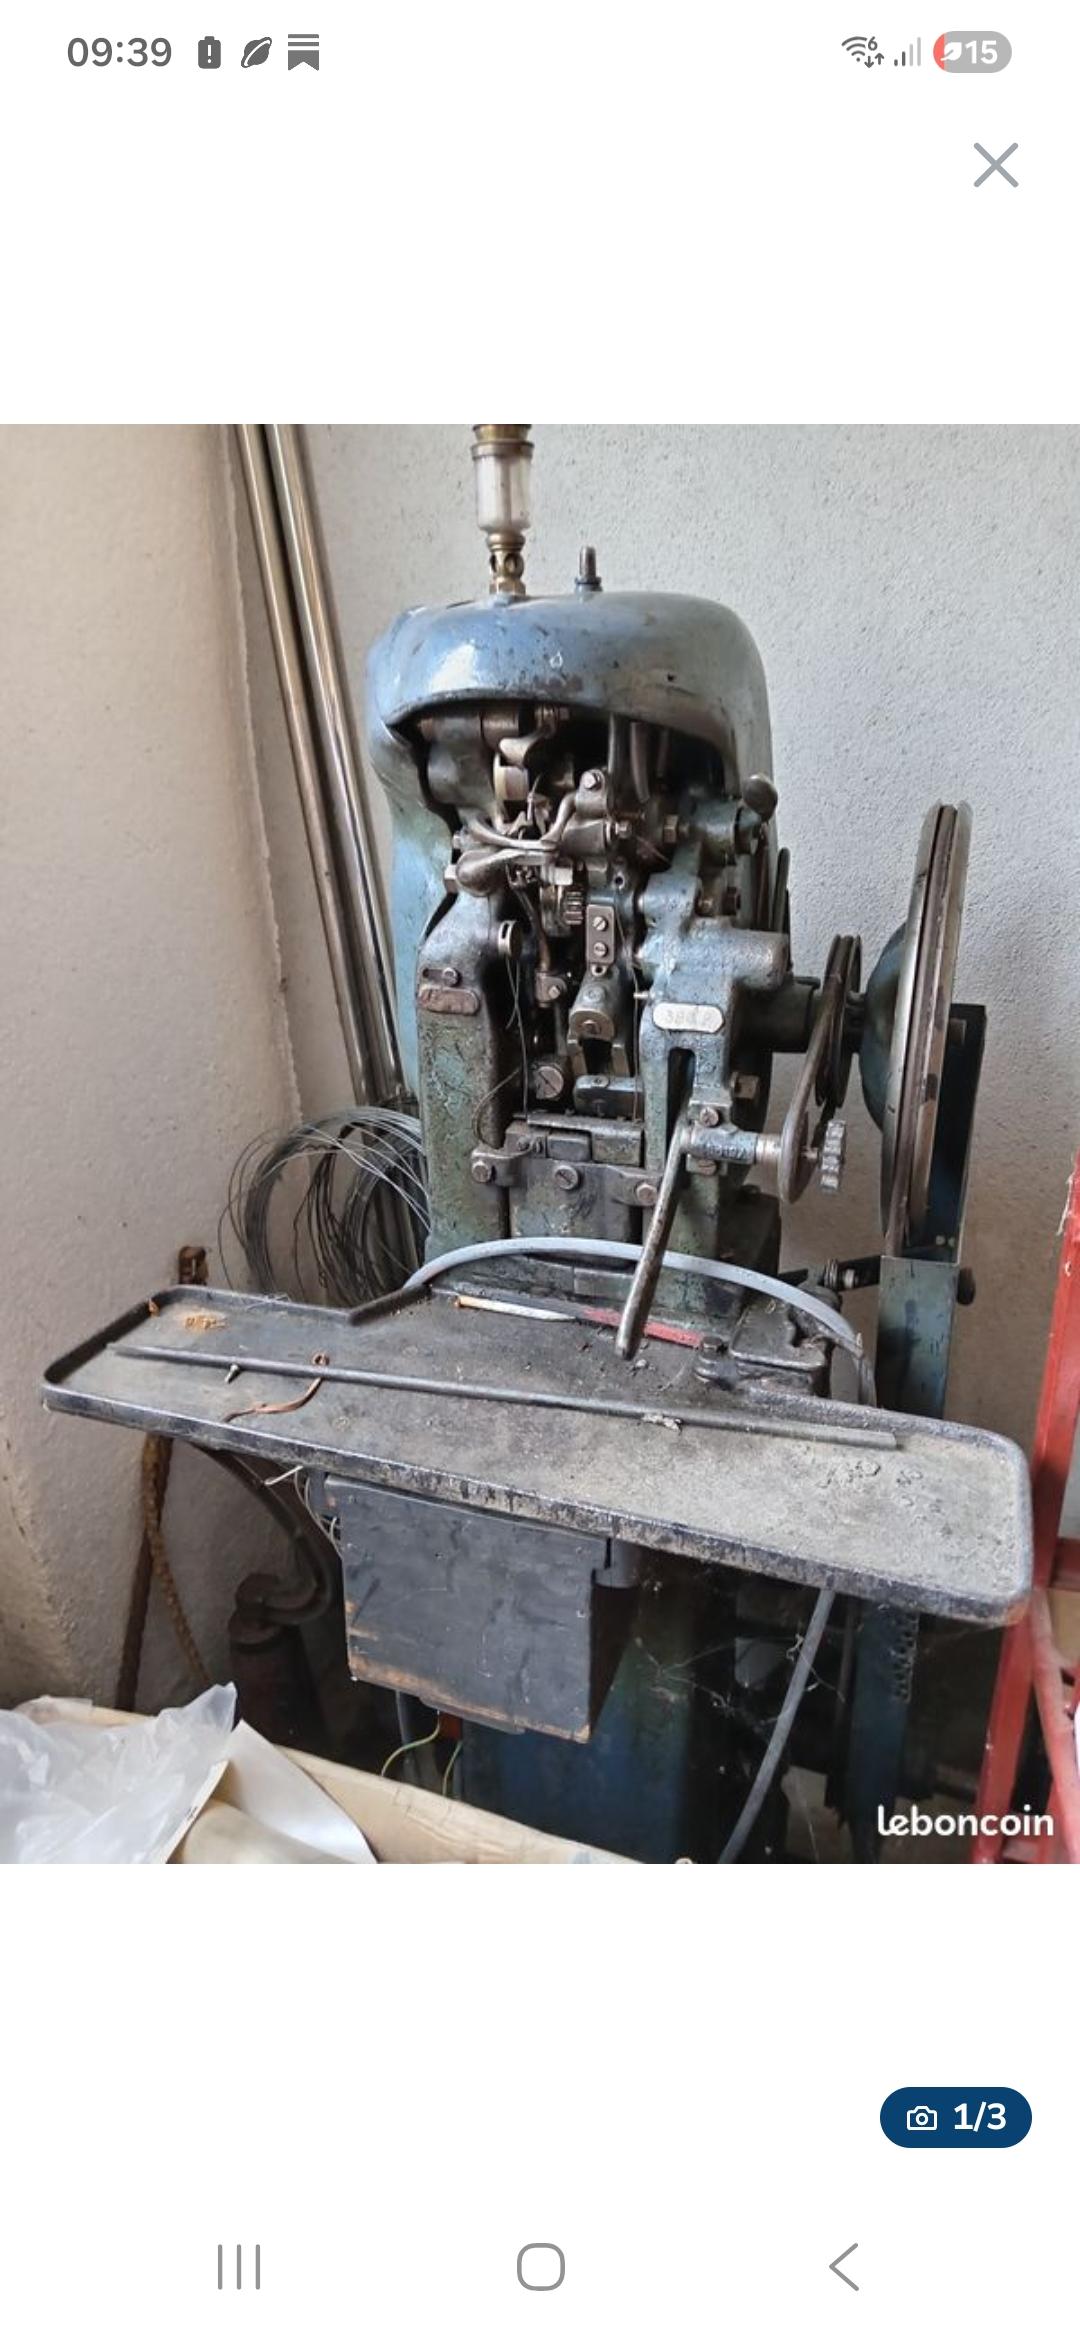

-
 RustyShea joined the community
 -

Inadequate knife sharpness, or too much moisture. Ugly "drag line"
YinTx replied to LakeOtter's topic in How Do I Do That?
This! The sample you show looked a bit loose. Another trick I've learned is to make casing solution with some saddle soap, it really helps to lubricate the surface and allow for cleaner/smoother more controlled cuts. Give it a try. Also, sometimes I'll run a glass slicker over the surface a bit to help even the compression of the fibers. At any rate, after I've cut for a bit, almost inevitably material builds up on the blade and I will begin to feel a bit of drag, so strop again... and again. Casing solution done right can help prevent any mold forming. I live in a very humid environment, and have had work on the bench for days with no issues. Heck, the first thing I ever tooled got interrupted by a hurricane, stayed in a zip loc bag with no air conditioning in hot conditions for over a week before I could come back. It is now a 3 ring binder with an eagle. Do some experimenting with scraps to see if you have any issues. -
The image you show looks like a "T" pocket shape design, and the stitched edge is only 2 layers of leather thick: one pocket and the backing. Leather I've used for pockets is generally around 1.25-2oz. Edge skiving helps a lot.
-
Thanks, I'll start down that route. Technically it is a BGMC, but they are no longer around and have't been for some time now. I tried contacting them when I first started this thread, but they were already awol then.
-
The Techsew 2700 is a Juki LS-341 clone. I would use the engineering manuals or video's for the Juki LS-341 or LS-1341. kgg
-
Heads Up:I am going to sell most all my leather "stuff"
YinTx replied to Ferg's topic in Hand Tools-Leatherworking Tools
Ferg, Sorry to hear of your current situation. It has been a pleasure seeing your works and all, I pray for your improved health. -
I did finally manage something, not entirely happy, and will adjust for any future designs, but it worked well enough.
-
That's an incredibly detailed design, well integrated! I really like the texture you used on the background for the perimeter of your floral work, and I can only wish my decorative cuts were as well placed as yours. Nice work!
-
Well, been a long while since I posted here, life has a way of keeping you busy! I did finally clean up that rats nest, and have been trying to get the machine back in correct timing etc. which has been a real challenge. I feel like the timing belt is quite loose: anyone know how tight it is supposed to be, or is a large amount of slack normal? I have not found how you are supposed to adjust the feed dog timing (vertical timing is not quite right), so if anyone can point me in the right direction there I'd appreciate it. Only videos I've seen are for the 226, which this is not. The Techsew 2700 instructins have the following: 22. Adjusting the timing of feed (Fig. 19) Standard position: When the feed dog appears from the needle plate and begins to feed, the needle should move downward, and is nears the needle plate and aligns with the hole on the plate. Please adjust the position of feed cam and rock shaft crank to adjust the timing of feed. 2) Install the feed cam At first, adjust the stitch length to zero, and open the up. per cover, turn the balance wheel counter clockwise by right hand; divide two screw of the feed cam equally as the oil hold is bisector. Anyone care to translate what that even means??!!? Consew 227 instructions are not much better, and I am not sure they actually relate to the feed dog vertical timing: TIMING OF THE VIBRATING PRESSER FOOT This is the normal timing when, turn the balance wheel toward you, after lowering the presser bar lifter, the vibrating presser foot should reach the feeder earlier than the needle eye comes to, and when the needle raises, the vibrating presser foot should leave the feeder after the needle eye has left the feeder. This is due to the reason that the vibrating presser foot must tightly hold the goods while the needle is passing the goods for avoiding irregular stitches. To adjust this, set the lift of the alternating presser feet to equal, loosen the two screws (3, Fig. 27) and adjust the rotating position of the cam (4, Fig. 27) faster or slower as may be desired, and tighten the screw. Any help is greatly appreciated!!!
-
Unknown Chinese servo motor controller manual needed
Einherj replied to Einherj's topic in Leather Sewing Machines
Thank you very much. Gotta go and troubleshoot some more. I have a speed reducer between the motor and the machine, so it might be that the motor spins a full rotation and doesn't find the needle position since the machine (where the synchro is) hasn't done a full rotation yet.