

All Activity
- Past hour
-
Well . . . if you google . . . "image: boston mass firefighter helmet shield" . . . you should get something near 20 pages of information. Google is your friend when wanting to see something . . . just start with the word "image" May God bless, Dwight
-
You should never put shoe polish on before any kind of oil. It can block the oil from penetrating. But since you have already done it . . . go for it. I ALWAYS . . . oil before I even think of dyeing or stamping . . . and I use just a light coat of neatsfoot oil. For me it has been THE thing that makes my dye jobs much more even. May God bless, Dwight
-

Singer 211 U166A walking foot problem
NowhereMan01 replied to NowhereMan01's topic in Leather Sewing Machines
I got it working! It seems that the safety clutch got kicked out again, and when I finally snapped it back in place, the hook timing was way off (not sure how I missed any of that). Anyways, I adjusted the hook timing as discussed in the video below (which, btw, is a very similar machine to mine). It now sews. I probably still need to fiddle around with the safety clutch, as it seems to kick out before I get to the maximum stitch length, but otherwise, it appears to be working as well as it ever has in the (relatively short) time that I've owned it. Thanks again for all of the suggestions and help. This was a fantastic learning experience for me, as I now have an infinitely better understanding of how the machine works, and I believe that I should be able to keep it going for the foreseeable future... -
I'm starting a resto-mod on a vintage leather bag. I've got a test piece to the color and finish I'm looking for. At least until I remembered that I wanted to add Mink Oil to keep the wet out as much as possible. I know it will likely turn the end result darker, and I'm fine with that. At what stage do I add a couple thin layers of mink oil? To get to where I am now, I've deglazed, foam scrubbed, 3-4 light coats of Angelus Ox Blood, a couple light coats of Red shoe polish. The leather is fairly solid veg-tan.

-
Does anyone have any leads they could point me towards on making a Boston style firefighter helmet shield? I was contacted on Facebook about making one. Not going to lie, I have a list longer than my leg of things I want to make and shields are on there but haven't as yet had a chance to do so. Any help to figure out if it's something I can manage would be greatly appreciated! Thank you!!
- Today
-

Singer 211 U166A walking foot problem
friquant replied to NowhereMan01's topic in Leather Sewing Machines
I've been meaning to ask you, when you tightened the position screw (rounded tip that goes in the groove) and the set screw (flat tip that goes against the wall of the shaft) on that feed eccentric...By any chance did the screws end up in different holes than originally? If they did, the feed mechanisms that run on that eccentric would be out of time. (Hook timing would be unaffected.) The feed mechanisms could be made to run either way, but may be quicker to get it all straightened out if it's the same way as original. -
Be wary of people advertising machines as "semi-industrial" or "heavy duty", in most cases they will simply be older domestic machines.
-
Singer 211 U166A walking foot problem
friquant replied to NowhereMan01's topic in Leather Sewing Machines
Let's get it to where the hook reliably picks up the needle thread. If the thread breaks when it gets picked up, we'll solve that when we get to it. How to stuff a hook Meaning how to use the needle guard to ensure that the hook point is always stuffed into the scarf regardless of material thickness, forward/reverse, stitch length, slightly bent needles, machine speed, etc. Correct needle system Brand new needle, of the size that you use most often Make a black mark on the inside of the scarf of the needle indicating where the point of the hook should cross. (Usually about 3mm above the top of the needle eye, the manual will say for sure) Needle fully inserted. (Look in the window to verify) Needle orientation: Scarf facing hook Sharp hook with clean angles Bend the needle guard slightly out of the way, or remove it temporarily Set the stitch length to whatever you use most often Loosen the hook saddle Move the hook closer to the needle, until the interference with the needle is approx 0.5mm - 1mm Tighten the hook saddle into position Adjust the needle bar height such that the hook point attempts to bisect the needle at the black mark you made on the needle scarf. (This height is important because it affects how much of the needle rubs on the needle guard) Bend the needle guard so that the needle guard deflects the needle such that the hook point just kisses the needle, or is VERY CLOSE to kissing. (0mm - 0.05mm away) Set hook to needle timing (also known as "needle bar rise"). You'll probably have to reset the needle bar height in the process Reference: https://leatherworker.net/forum/topic/47477-211g155-do-i-have-the-wrong-machine/page/6/#findComment-304044 -
Thank you . I am ok with the spit by the way.
-
Great eye. I messed up a little here. I skived the edges of the yellow middle layers at a very sharp angle, and didn't use enough glue. So, they were splitting a little after stitching. Then I filled that with some extra glue hoping they would stick now, but they didn't. Next time, I will pay more attention to the skiving angle. I am struggling to sharpen my French style 12mm skiver. Once I figure it out, I guess I will practice some more.
-
Singer 211 U166A walking foot problem
NowhereMan01 replied to NowhereMan01's topic in Leather Sewing Machines
I've been trying to adjust the distance between the hook and the needle, and in spite of at least 25 attempts, I have not been able to get it to sew yet. Either the hook is too far away, and does not catch the thread, or the thread immediately breaks, and I get a mess of thread wrapped around the outside of the bobbin case. Any suggestions would be appreciated! -
Kitchen Scale for Measuring Thread Tension
friquant replied to friquant's topic in Leather Sewing Machines
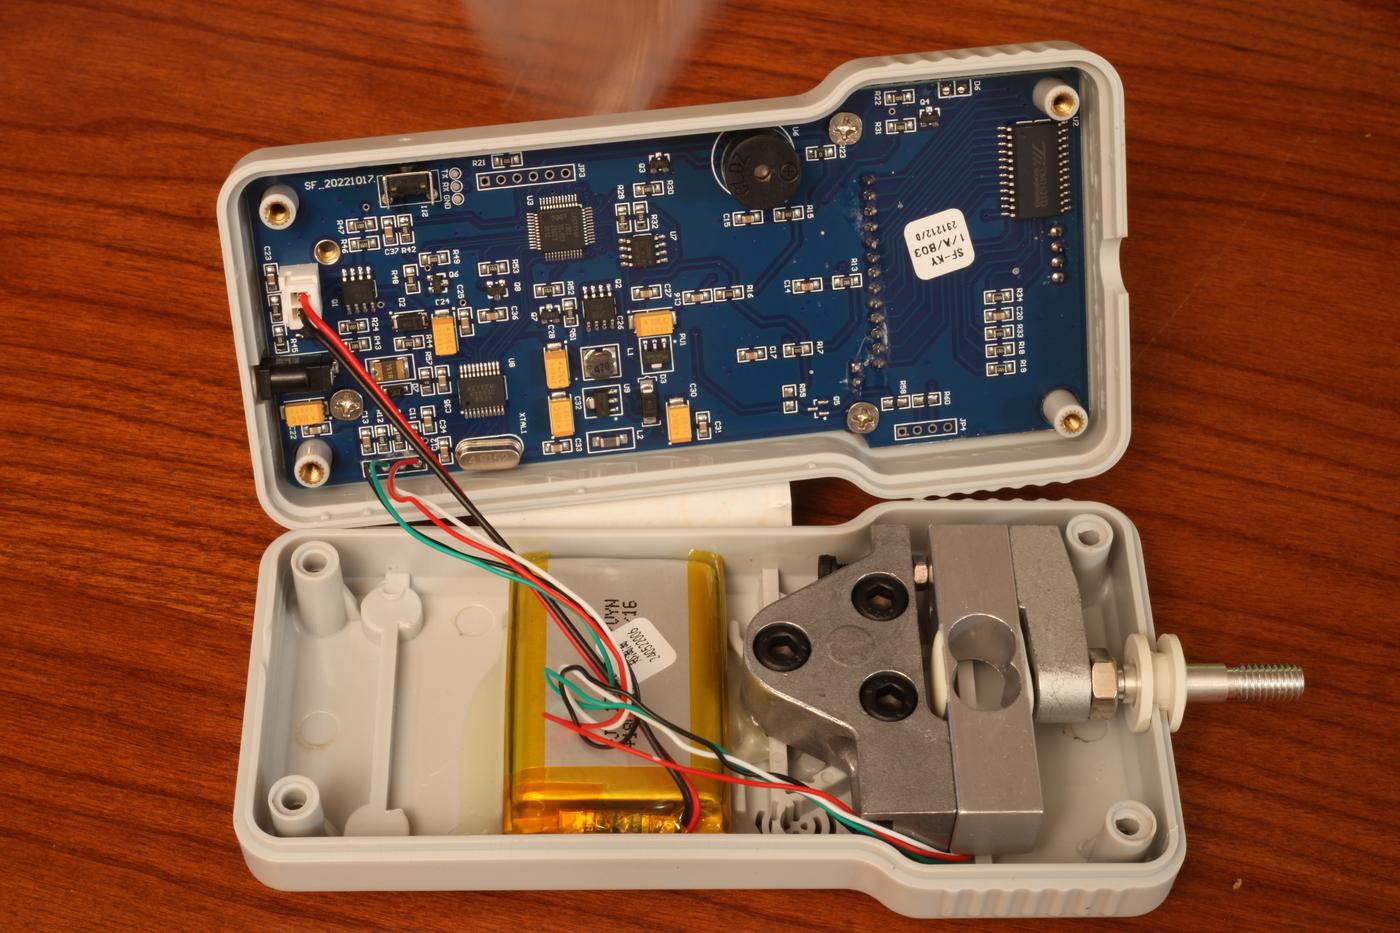
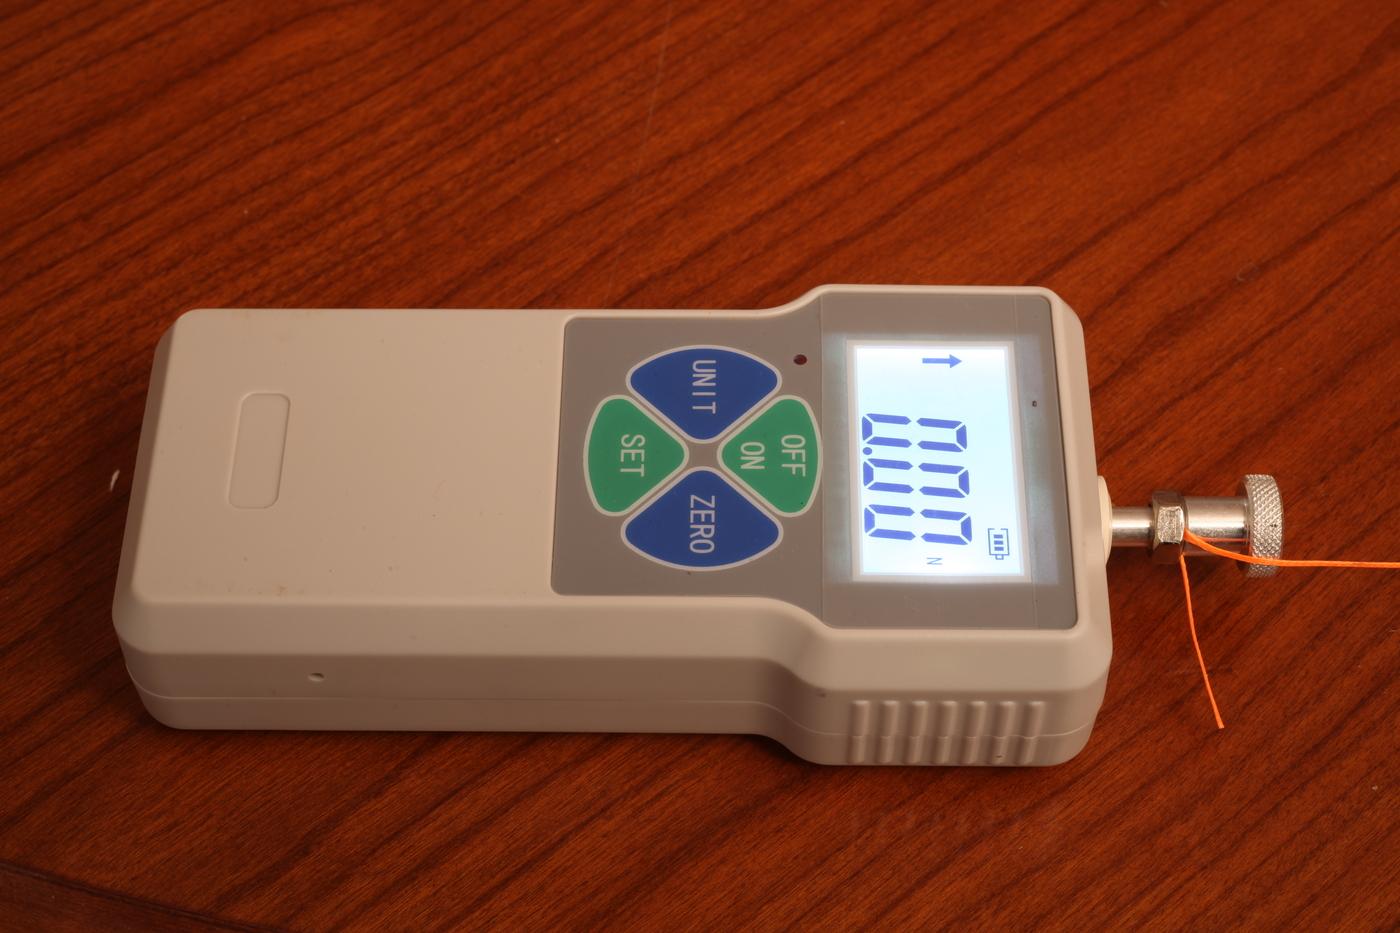
I like the adapted kitchen scale from my original post, but I found myself wanting to be able to measure both bobbin tension and top tension, and the kitchen scale maxed out at 500g. A couple days ago this digital force meter arrived, and I'm using that now to measure thread tension. It has a broader range (50g minimum, 10kg maximum) so I can measure both bobbin tension and top tension with the same tool. It cost $16 from amazon: https://www.amazon.com/dp/B0CYCHKJ75 The 50 gram minimum load is unfortunate. It registers 0 grams until you pull/push hard enough on it to get above 50g. But most of the time I'm running more than 50g in the bobbin anyway. And way more than 50g in the top thread. For reference, with TEX 135 in my Jianglong 341, the bobbin tension can be adjusted from 25g (screw 1.2 or more turns out) up to 370g (screw all the way in.) With the same thread the top thread tension (measured coming out of the thread check spring) can be adjusted from 6g up to 2700g. Notable "features": - defaults to Newtons every time you power up, but you can change to kg or lb - rechargeable! - Startup is slow (5 seconds to power on) - Very fast updates between readings compared to other kitchen scales and fish scales I've used - Buzzer is loud but can be de-soldered from circuit board for peas and quiet - goes all the way up to 10 kg (even though advertised only to 5kg) - It comes with some end attachments and a nut, so I clamp the thread between them which is easier than tying a knot Here is a photo of the insides. The load cell looks quite dramatic. It even comes with a "do not disassemble" sticker which I wish I had kept for nostalgia.
-
Yes, the everyone is an expert mentality is particularly annoying to me with regards to science and medicine. Google/AI turns up random facts (and outright lies) without any context and these are amplified in the echo chamber of social media. Think I'll stick to leathercraft at this stage of my life.
-
Thank you, @BlackDragon. Got some positive comments about the bridle as well, so all is good. Had to look up the quote. I'm stuck in the 70s-90s with my musical selections, but I have an abiding interest in pop culture/Americana.
-
Very impressive work. What a great thing to have in your shop!
-
I'll suggest calling Toledo Industrial at 866-362-7397. I needed some peculiar bed hinges for a machine out of production since 1948. They were in stock for $2.50 each. $9.00 got me 2 hinges and the 4 screws.
-
Hello, I have a Singer 96k12 industrial sewing machine. Stitch lenght numerator is not working. As I read from the 96K12 pdf, stitch length numerator is defined as "thumb screw" "D",and reverse lever is defined as "E". as can be seen from the photo. I demount thumb screw part but I couldnt assemble again.😢(I have spring, lock pin and numerator disc) Reverse Lever E is connected with fork type metal at the inner side (neck )of machine My question is; What will be the key points for this assembling? Is there any correct position of "D" and "E"while assembling.(D at max or min) Or any other important thing like this. Thanks

-
What is the total thickness (including folds) of all the material you need to stitch for the collar? You can measure the width of the needle right above the scarf to see what size it is. I use calipers to measure. If you want to improve your sewing game with your Activa 230, I suggest getting some size 100 and size 110 needles, and buy some TEX 70 thread. Here are the needles I bought, which includes both 100 and 110 sizes: https://www.amazon.com/dp/B09V136BDJ And here is the thread I commonly buy: https://www.amazon.com/dp/B06Y5V3W25 The TEX 70 we use in both industrial and domestic sewing machines. Larger thread we use only with the industrials.
-
Yes Jonas I used evapor Rust Extra strength but I'm having trouble remembering where some of the things go
-
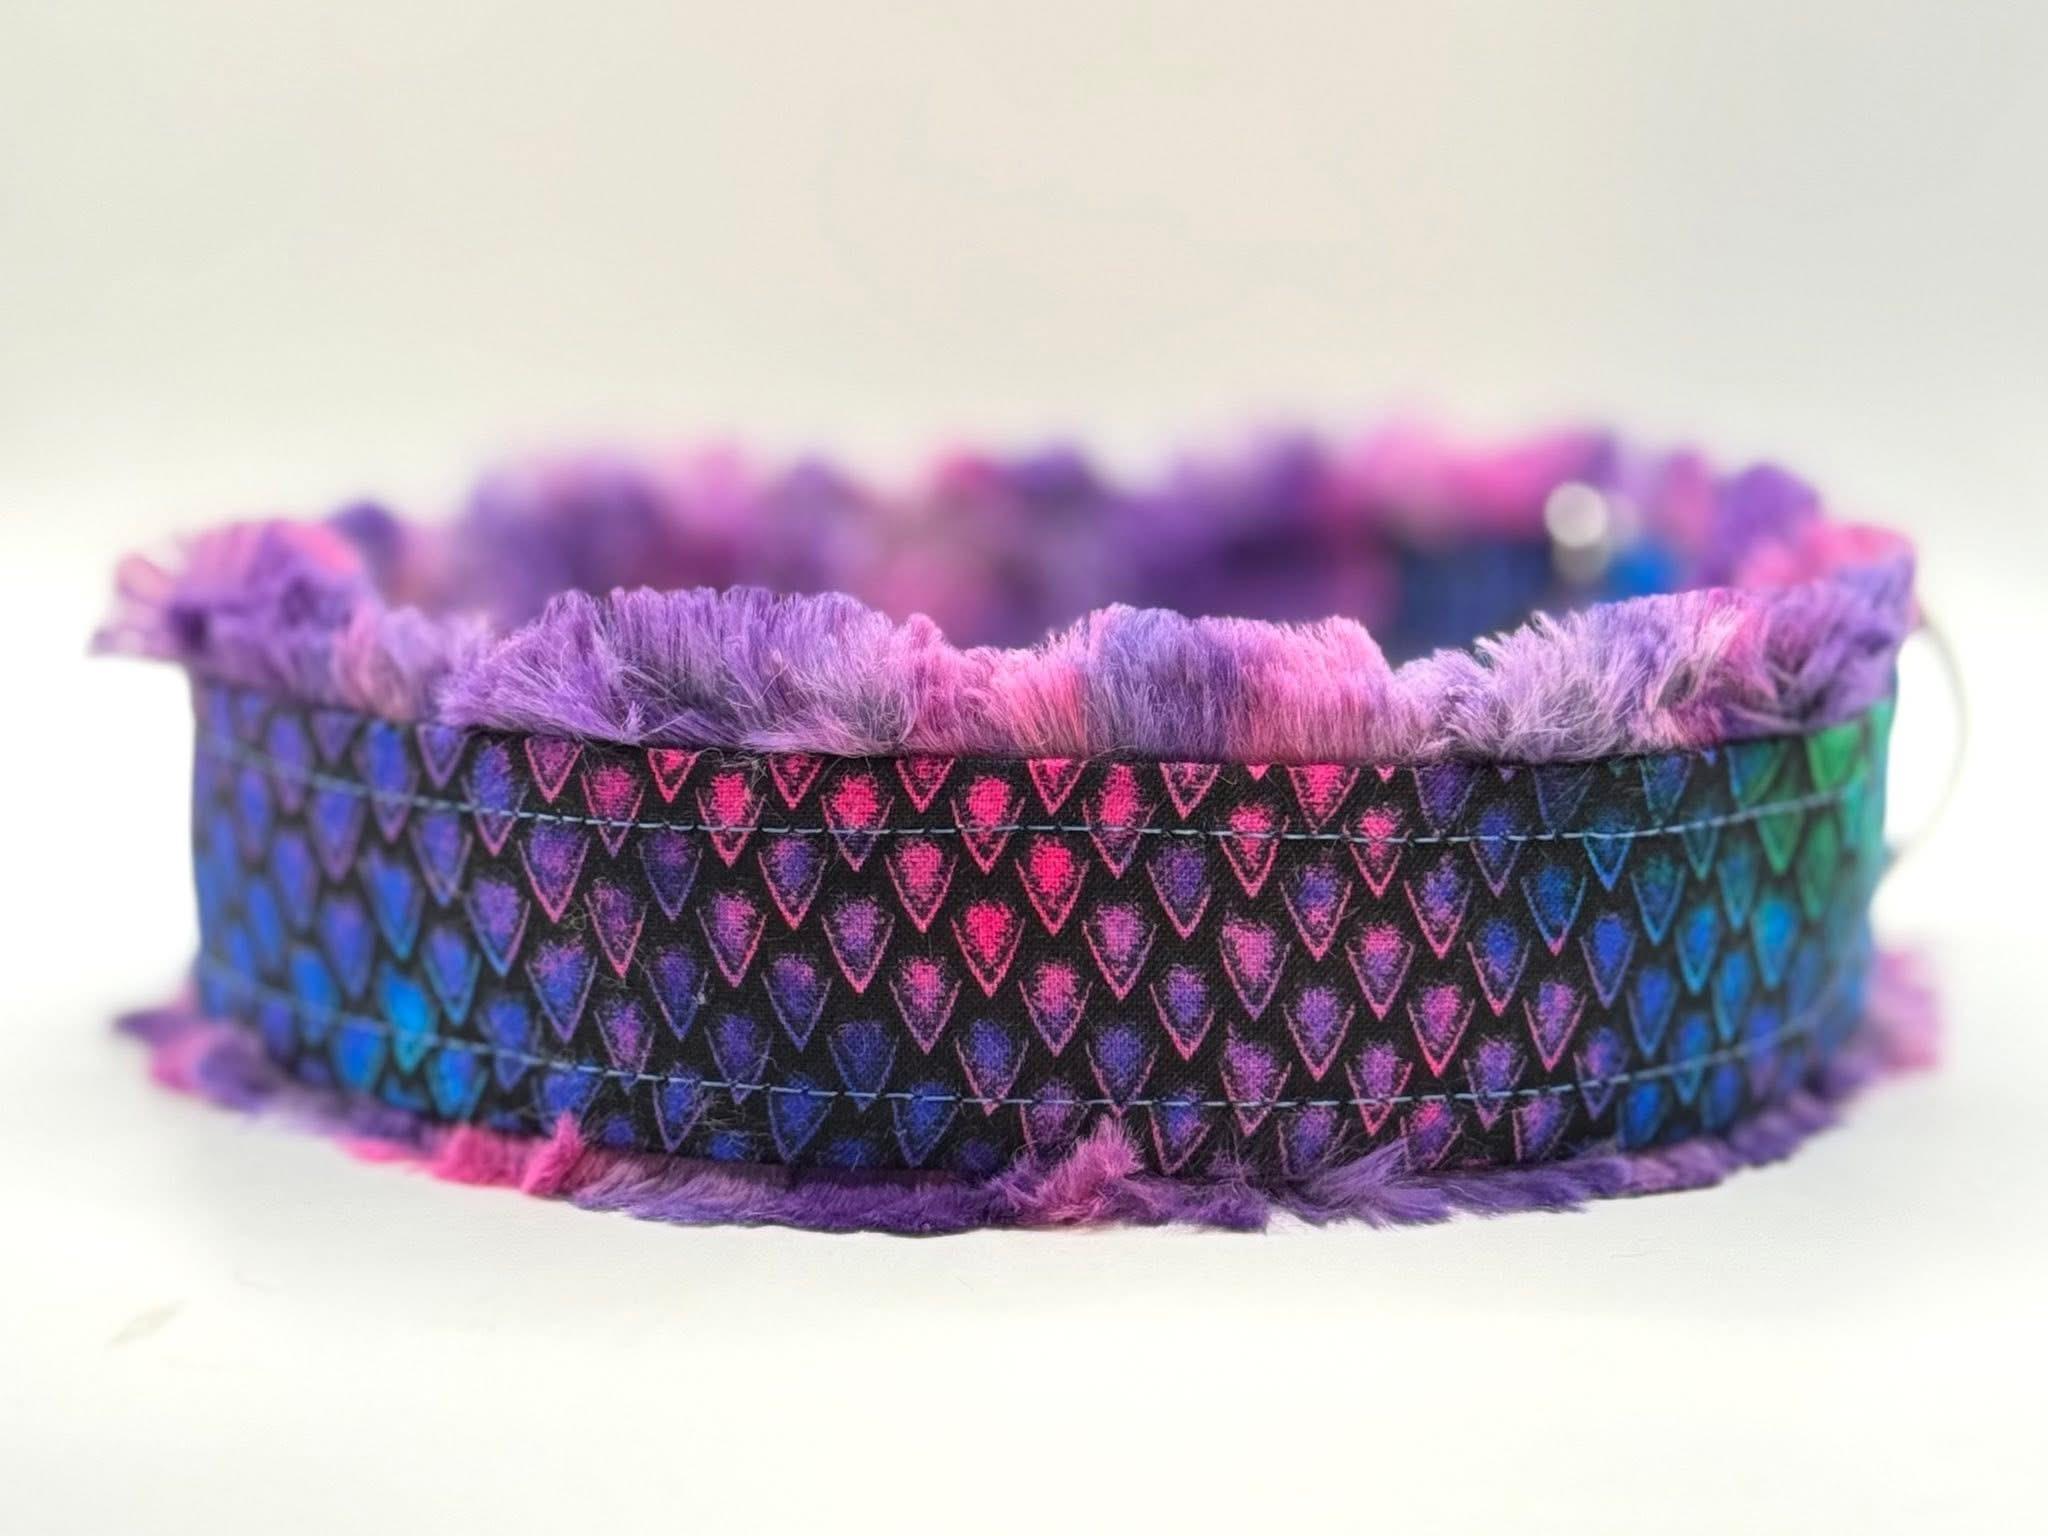
My budget is under 800 so the collar is using webbing (about .6inches thick, fabric and minky not sure if of the exact thickness. I would like to use a thicker thread but my machine now can’t take a thicker thread also the photo is not my work but a picture of what I’m going for. I’m using a BERNINA activa 230. Not sure what needle but I went to a local quilting store and she gave me a better needle to try to go through everything.
-

Repair of leather edge on Louis Vuitton bag
PrePro replied to Mulesaw's topic in Satchels, Luggage and Briefcases
wow no rush at all - just whenever - this is great thank you for being so helpful! -

Repair of leather edge on Louis Vuitton bag
Mulesaw replied to Mulesaw's topic in Satchels, Luggage and Briefcases
Hi PrePro I can't remember the thread colour/brand, but I'll sign off the ship tomorrow and go home, so if you can wait one more day, I can tell you the brand/colour. Regarding the pig skin, it was something that came from my dads collection after he dies, so I have no idea whatsoever of the brand. I would look for a colour in the whiskey/cognac range (depending on what the store will call it) Like this: https://www.laederiet.dk/shop/81-foerskind/4030-svineskind/?variantId=20968 I used some double sided tape to hold the edge in place during sewing. It is not messy like contact glue can be, and it is plenty strong to hold the pieces in place while you sew, and if you mess up a bit when placing it in the first attempt, it can be removed without making a mark etc. Brgds Jonas (who will be back with more info tomorrow) -

Dummy gun
wizard of tragacanth replied to KillDevilBill's topic in Gun Holsters, Rifle Slings and Knife Sheathes
Hey Dwight, Thanks for the hot tip on those ebay dummy guns. They are actually affordable... and you can choose your favorite color. They don't have very many models available at this time (not even a standard P365) but this is one of the very few S&W BG 2.0 that I have seen anywhere. -
What machine make and model are you currently using? What size needle and thread?
-
Nice find and great job so far. What method did you use to remove the rust? Brgds Jonas


