All Activity
- Past hour
-

Help! Singer 111w155 stripped / stuck screw
friquant replied to matthew123's topic in Leather Sewing Machines
This is normal. The extra work is going into compressing the presser foot spring. The effect goes away if you lift the presser feet. Mine does not lift as far when the inner toe is down. Maybe you aren't getting enough lift. Try pressing down with your hand on the far end of the foot lift bar and see if the feet will come up.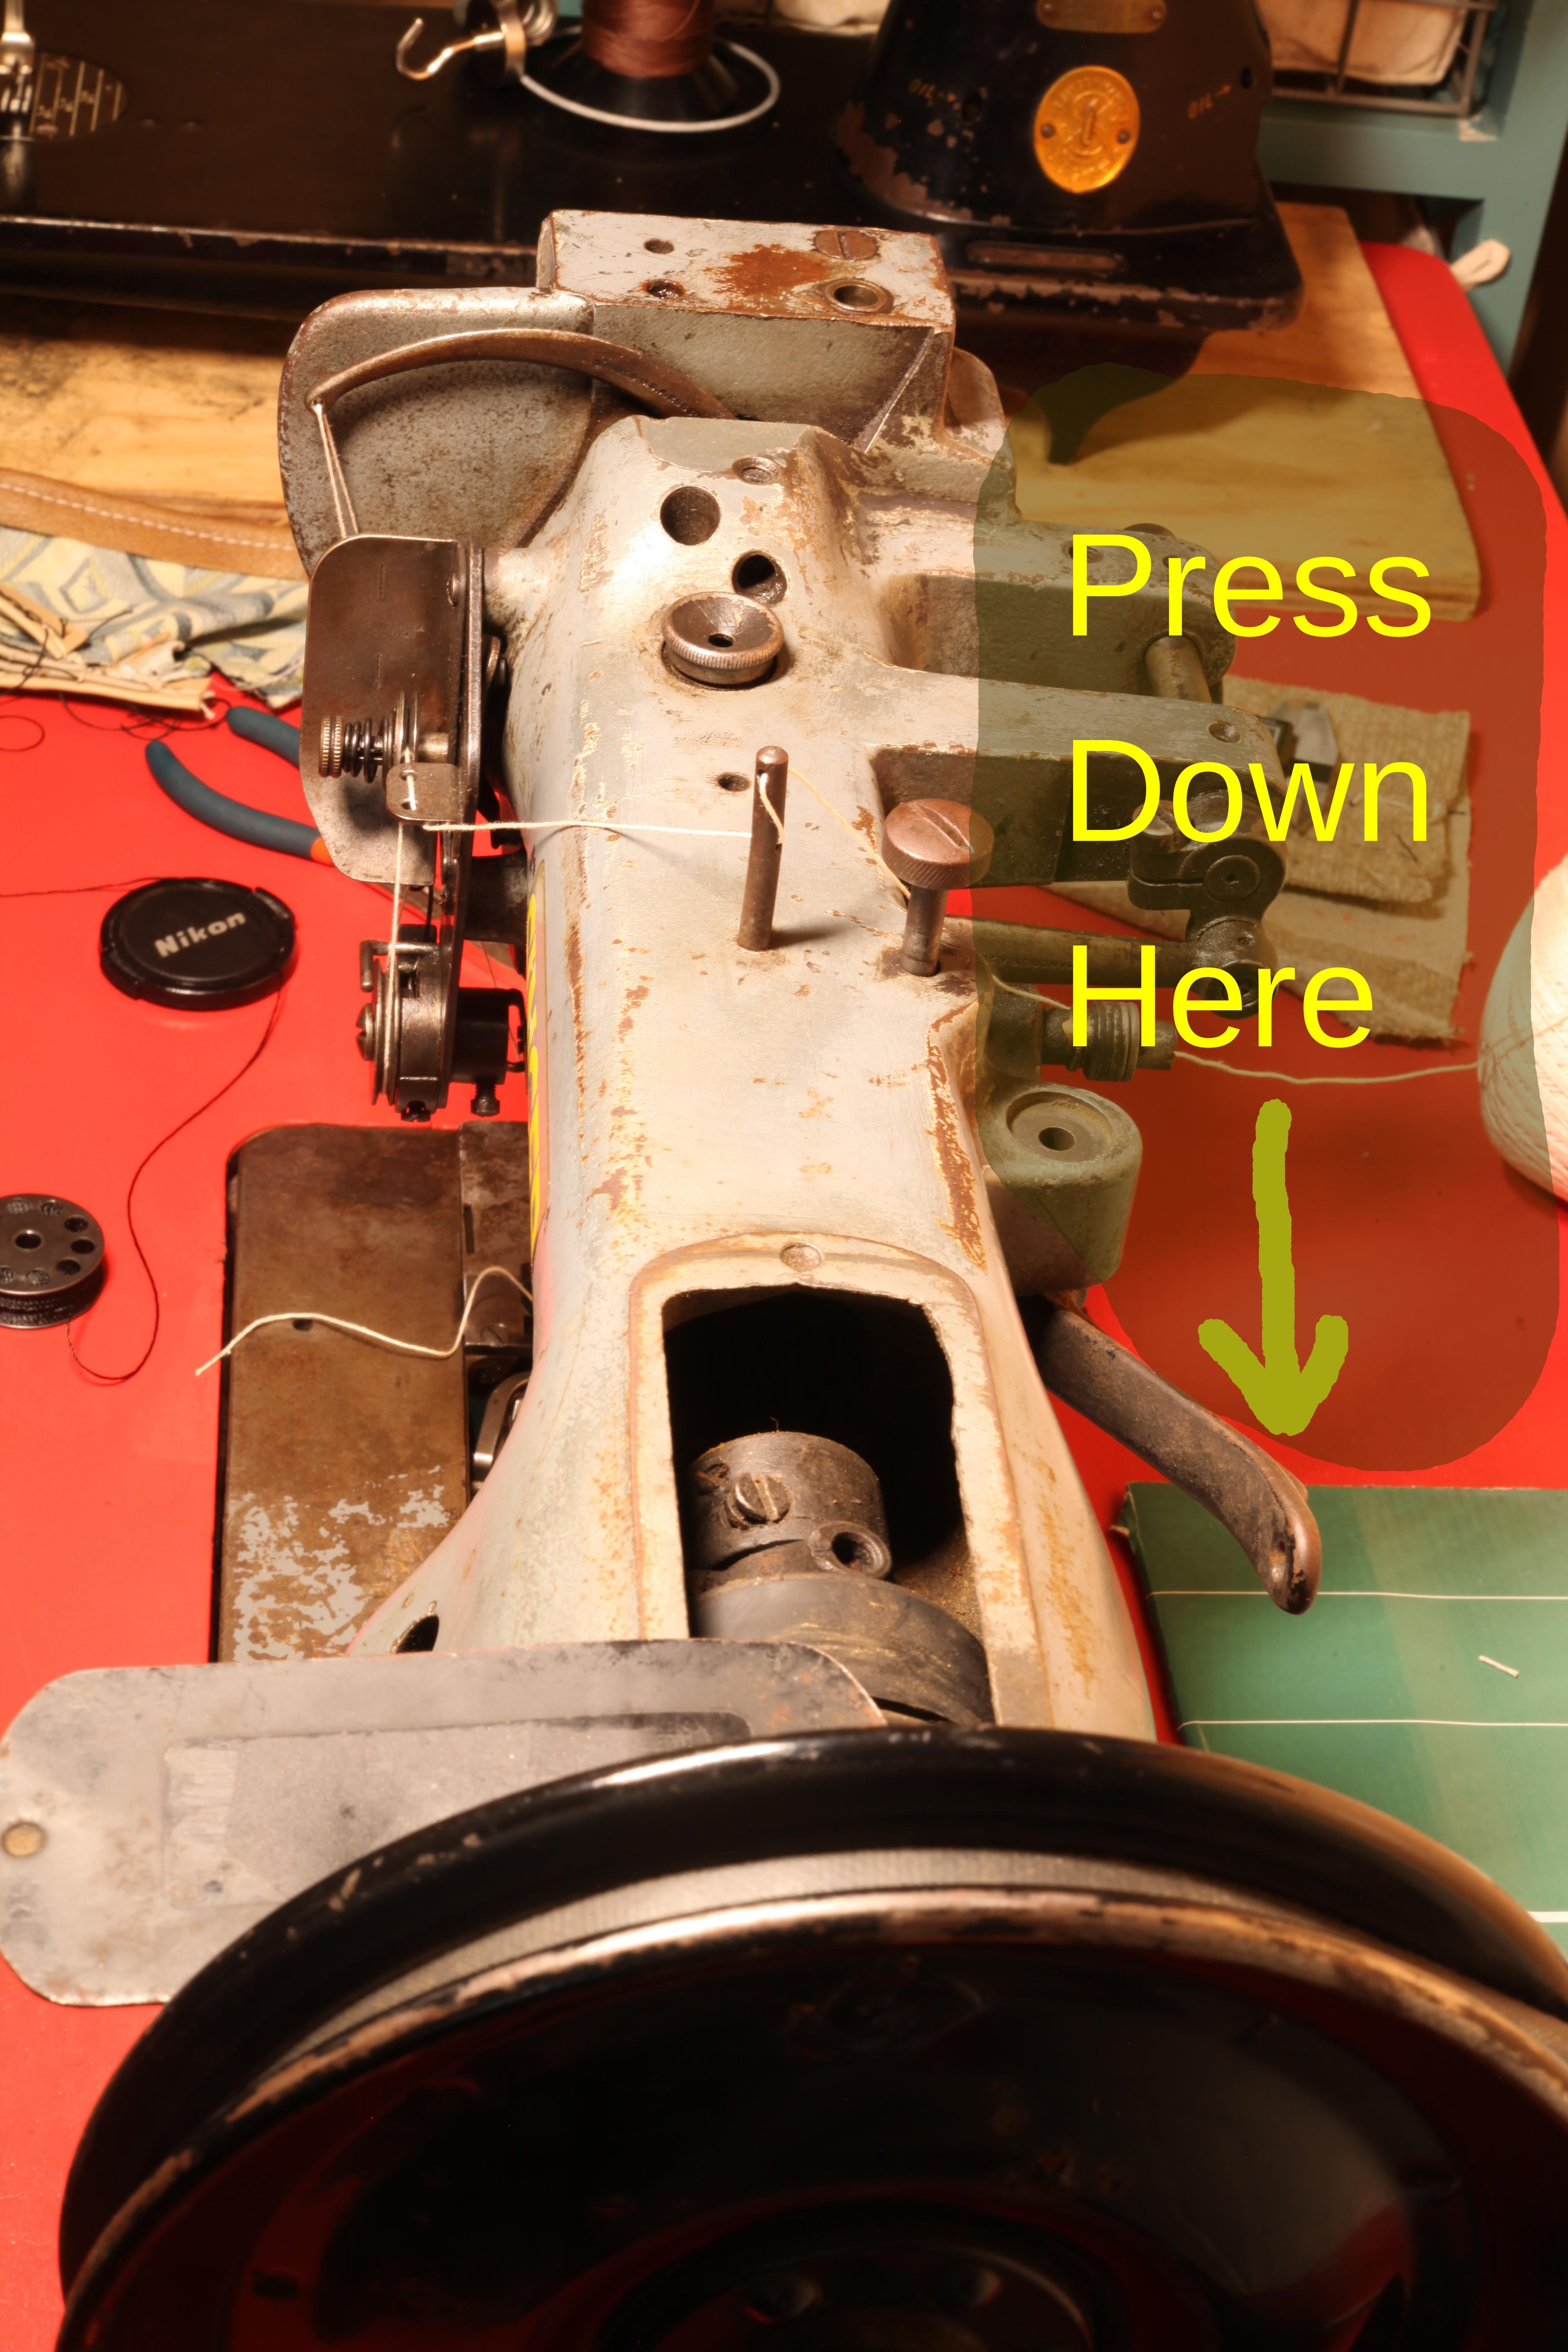
-
Help! Singer 111w155 stripped / stuck screw
friquant replied to matthew123's topic in Leather Sewing Machines
Missing lock nut? My singer 144 has a lock nut on that stud.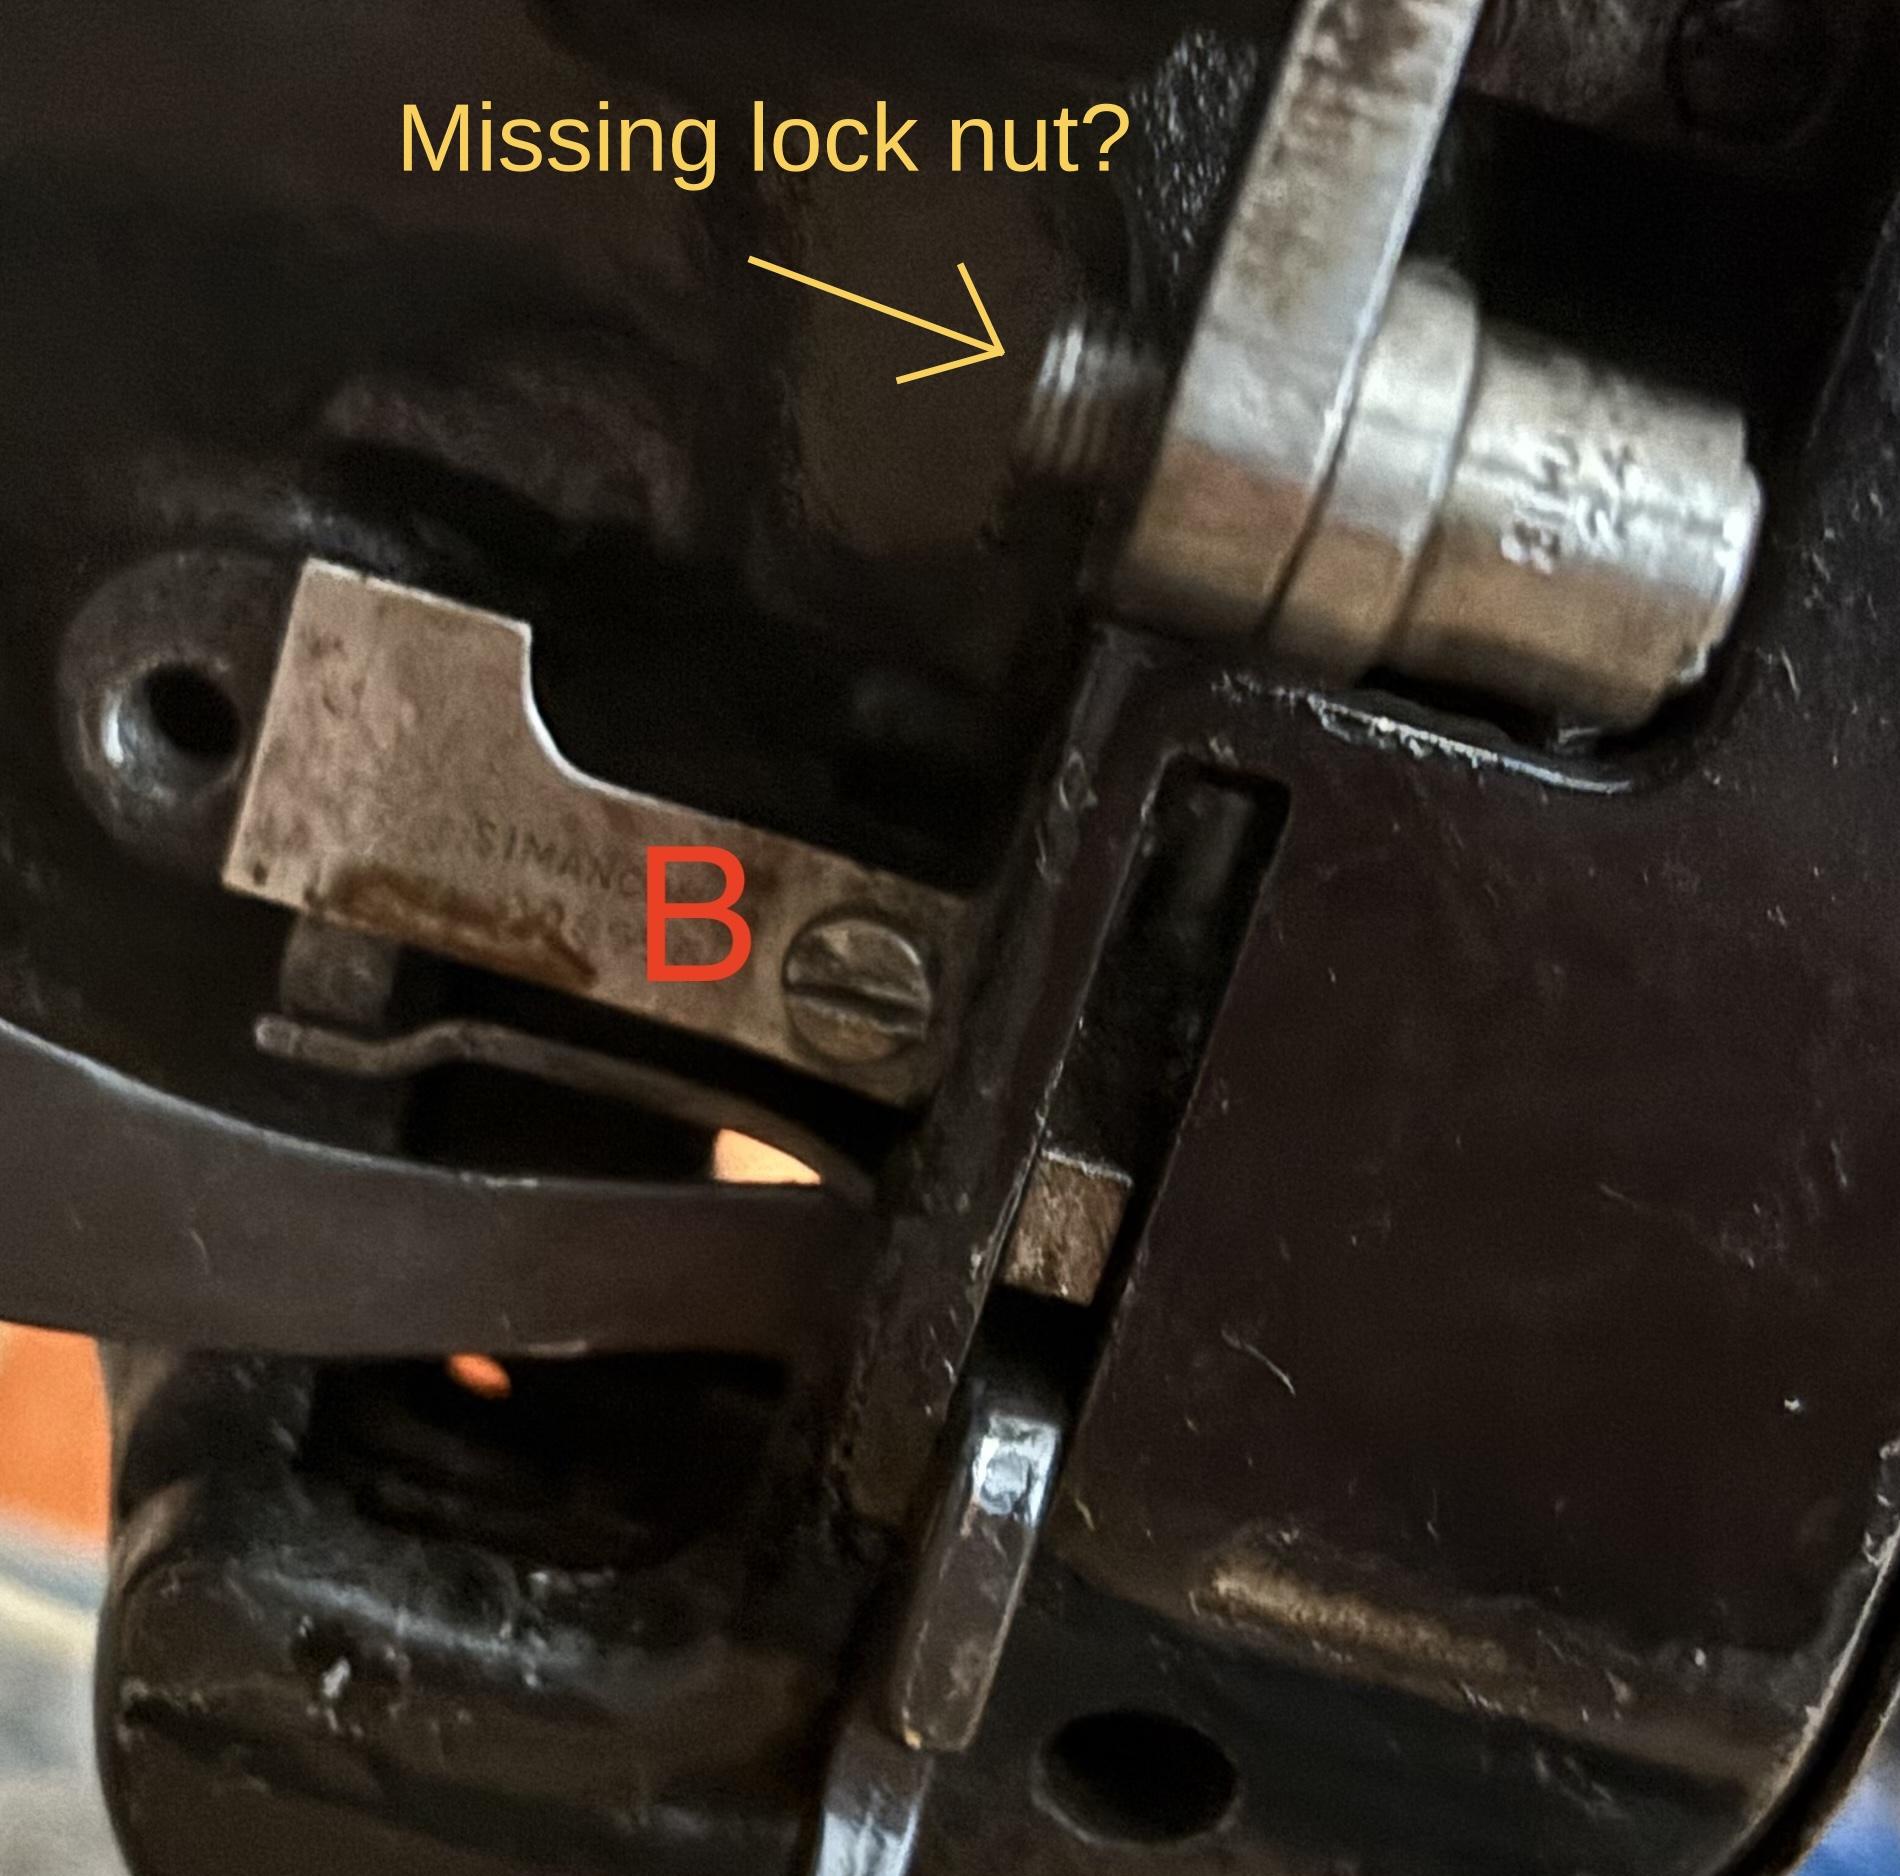
-
Help! Singer 111w155 stripped / stuck screw
friquant replied to matthew123's topic in Leather Sewing Machines
Genius! -
That was good help, thanks! Found the online manuals - parts, owners, and adjusters. All I needed!
- Today
-
Beautiful work
-
 Beautiful!
 -
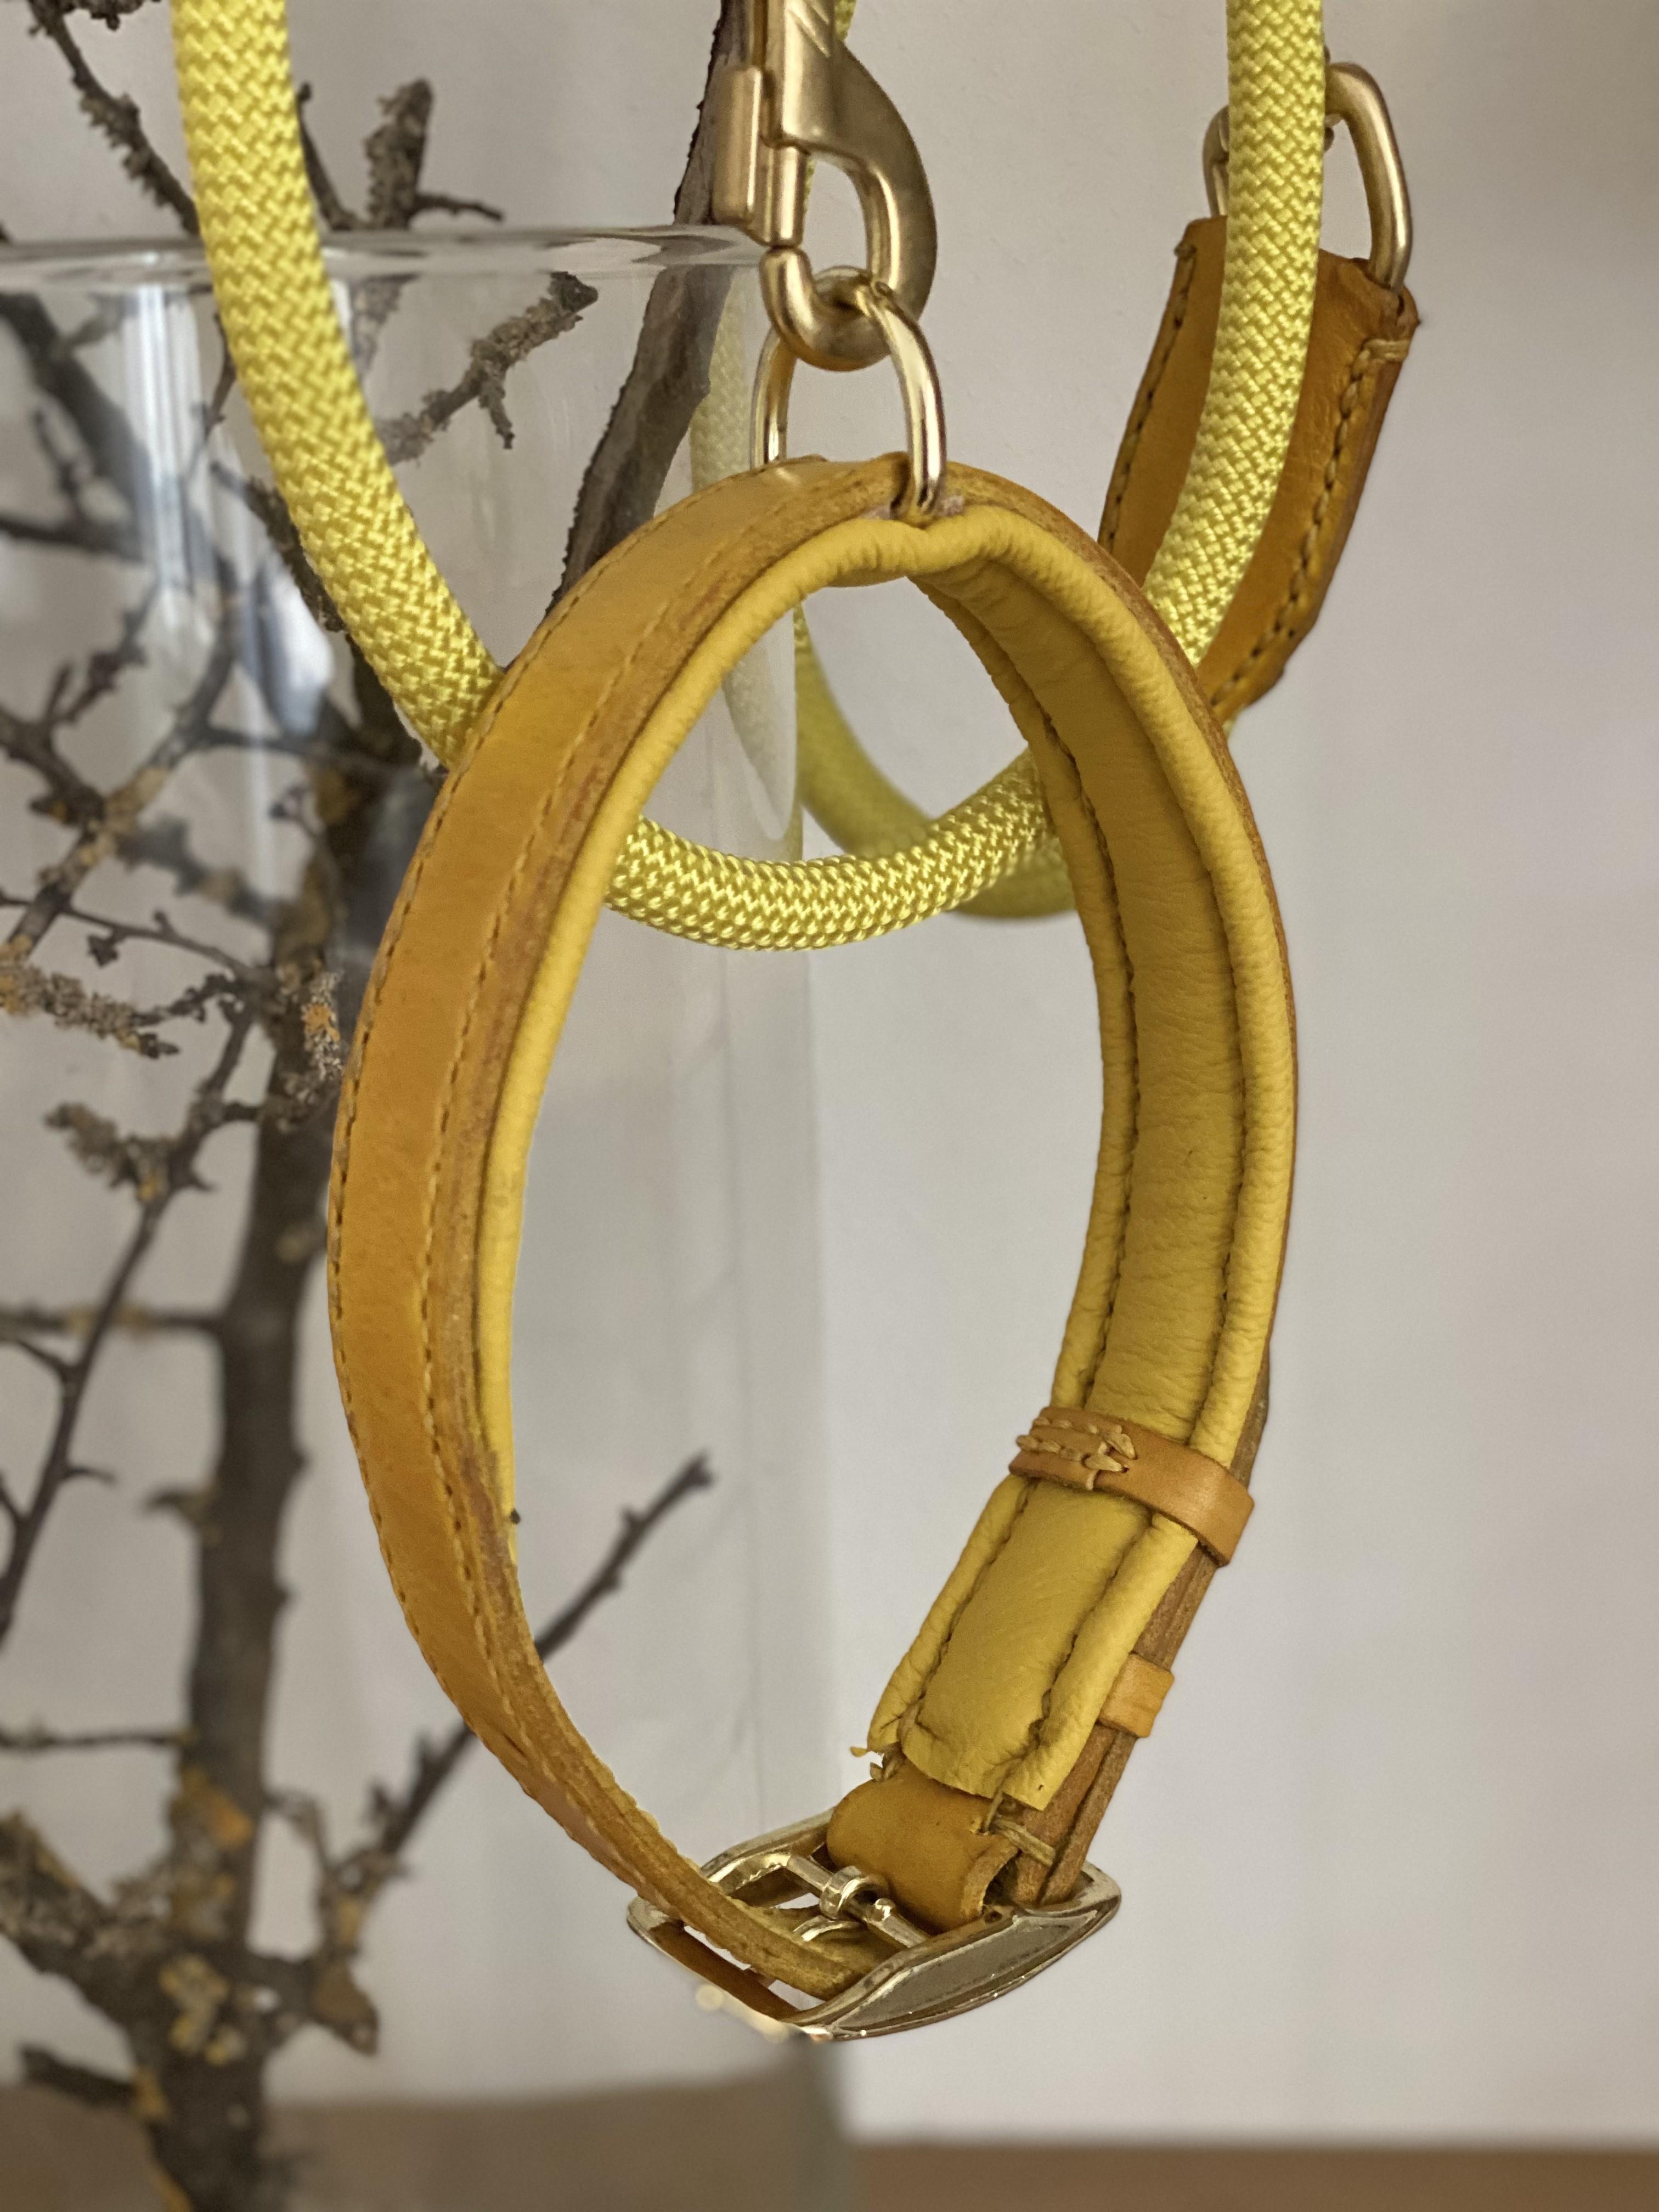
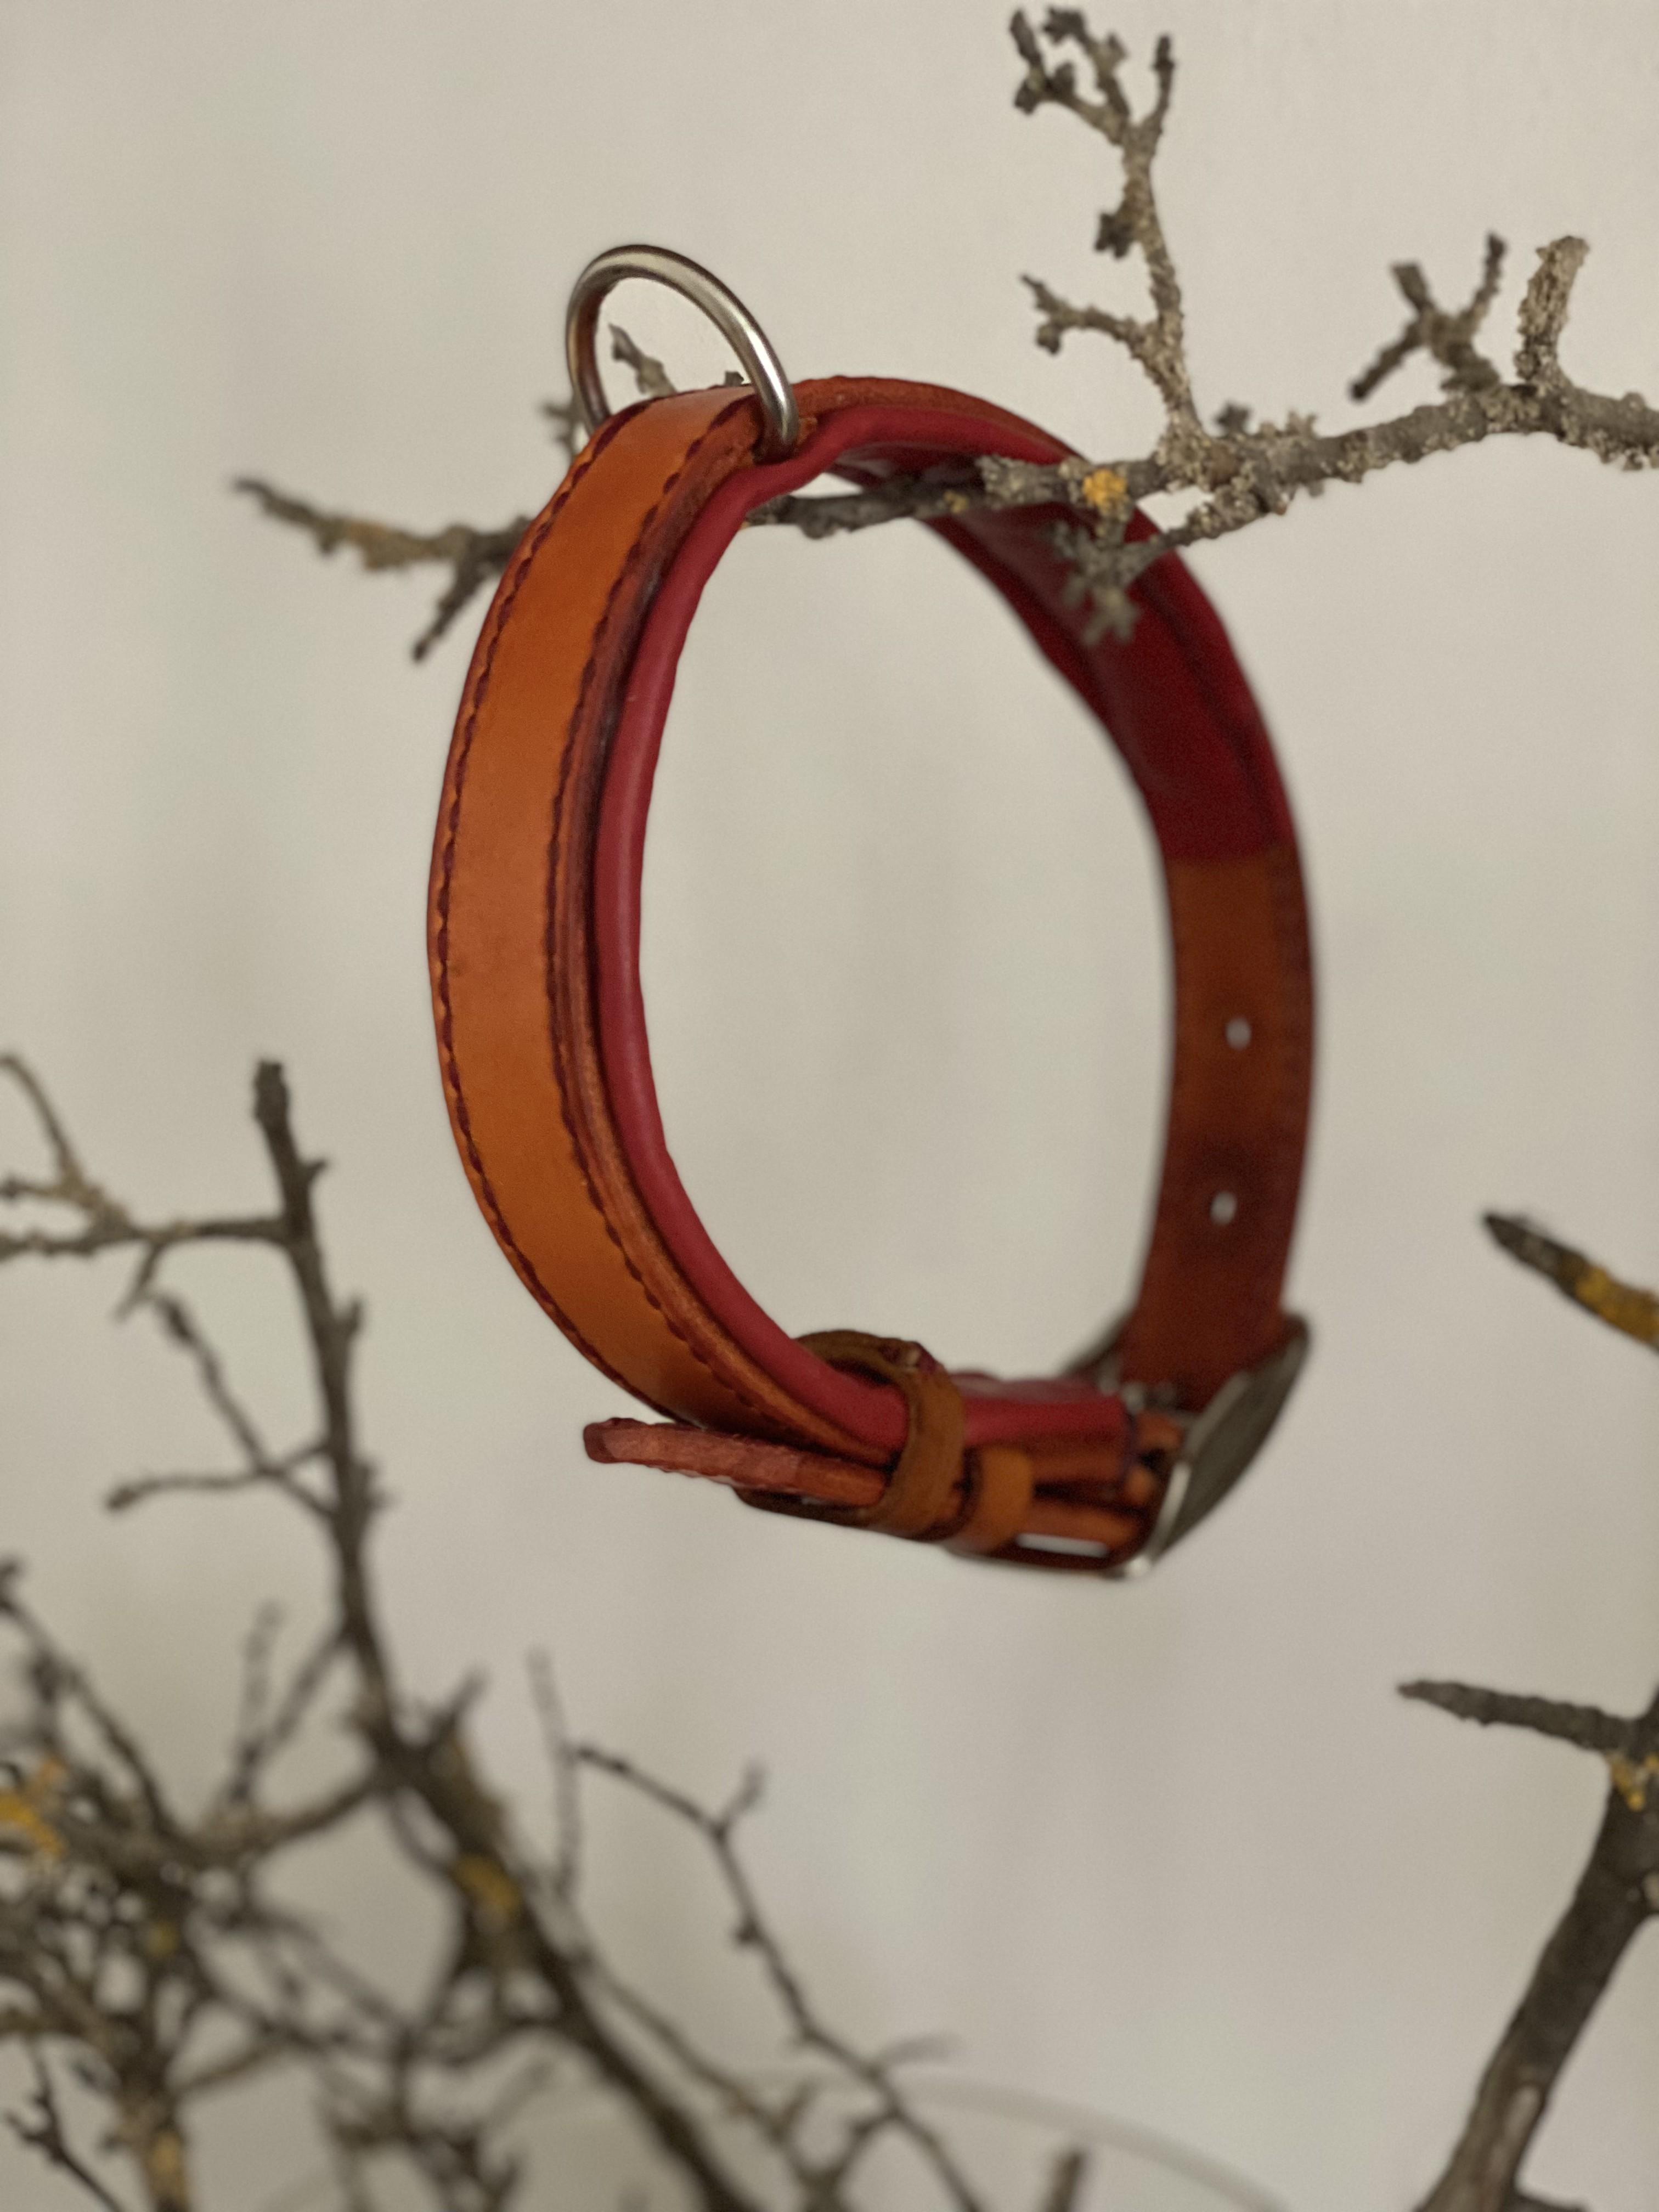
It that's not THE excuse to make a new collar, then I don't know XD Have a lot of fun with your new family member! My little setter-cross, who is a rescue from Italy, also taught my mums puppy all the nasty things and now he is teaching her how to behave like a little retard again. And I thought that phase was behind us. Thank you for your feedback and for sharing your experience! I know what you mean, I’ve also seen some cheaper leads fail at that point. That’s exactly why I used Italian dorsal leather, not skived at any point, cut from the best end, and sew everything with strong polyester thread in saddle stitch. The rope itself is made for dog leashes, so I feel good about the stability. But it’s always interesting to hear how others approach it — your rivet and shrink tube method definitely sounds very sturdy! Best, Tove
-
 It's machine stitched with a singer 3150. Thank you for the compliment.
 -

Help! Singer 111w155 stripped / stuck screw
matthew123 replied to matthew123's topic in Leather Sewing Machines
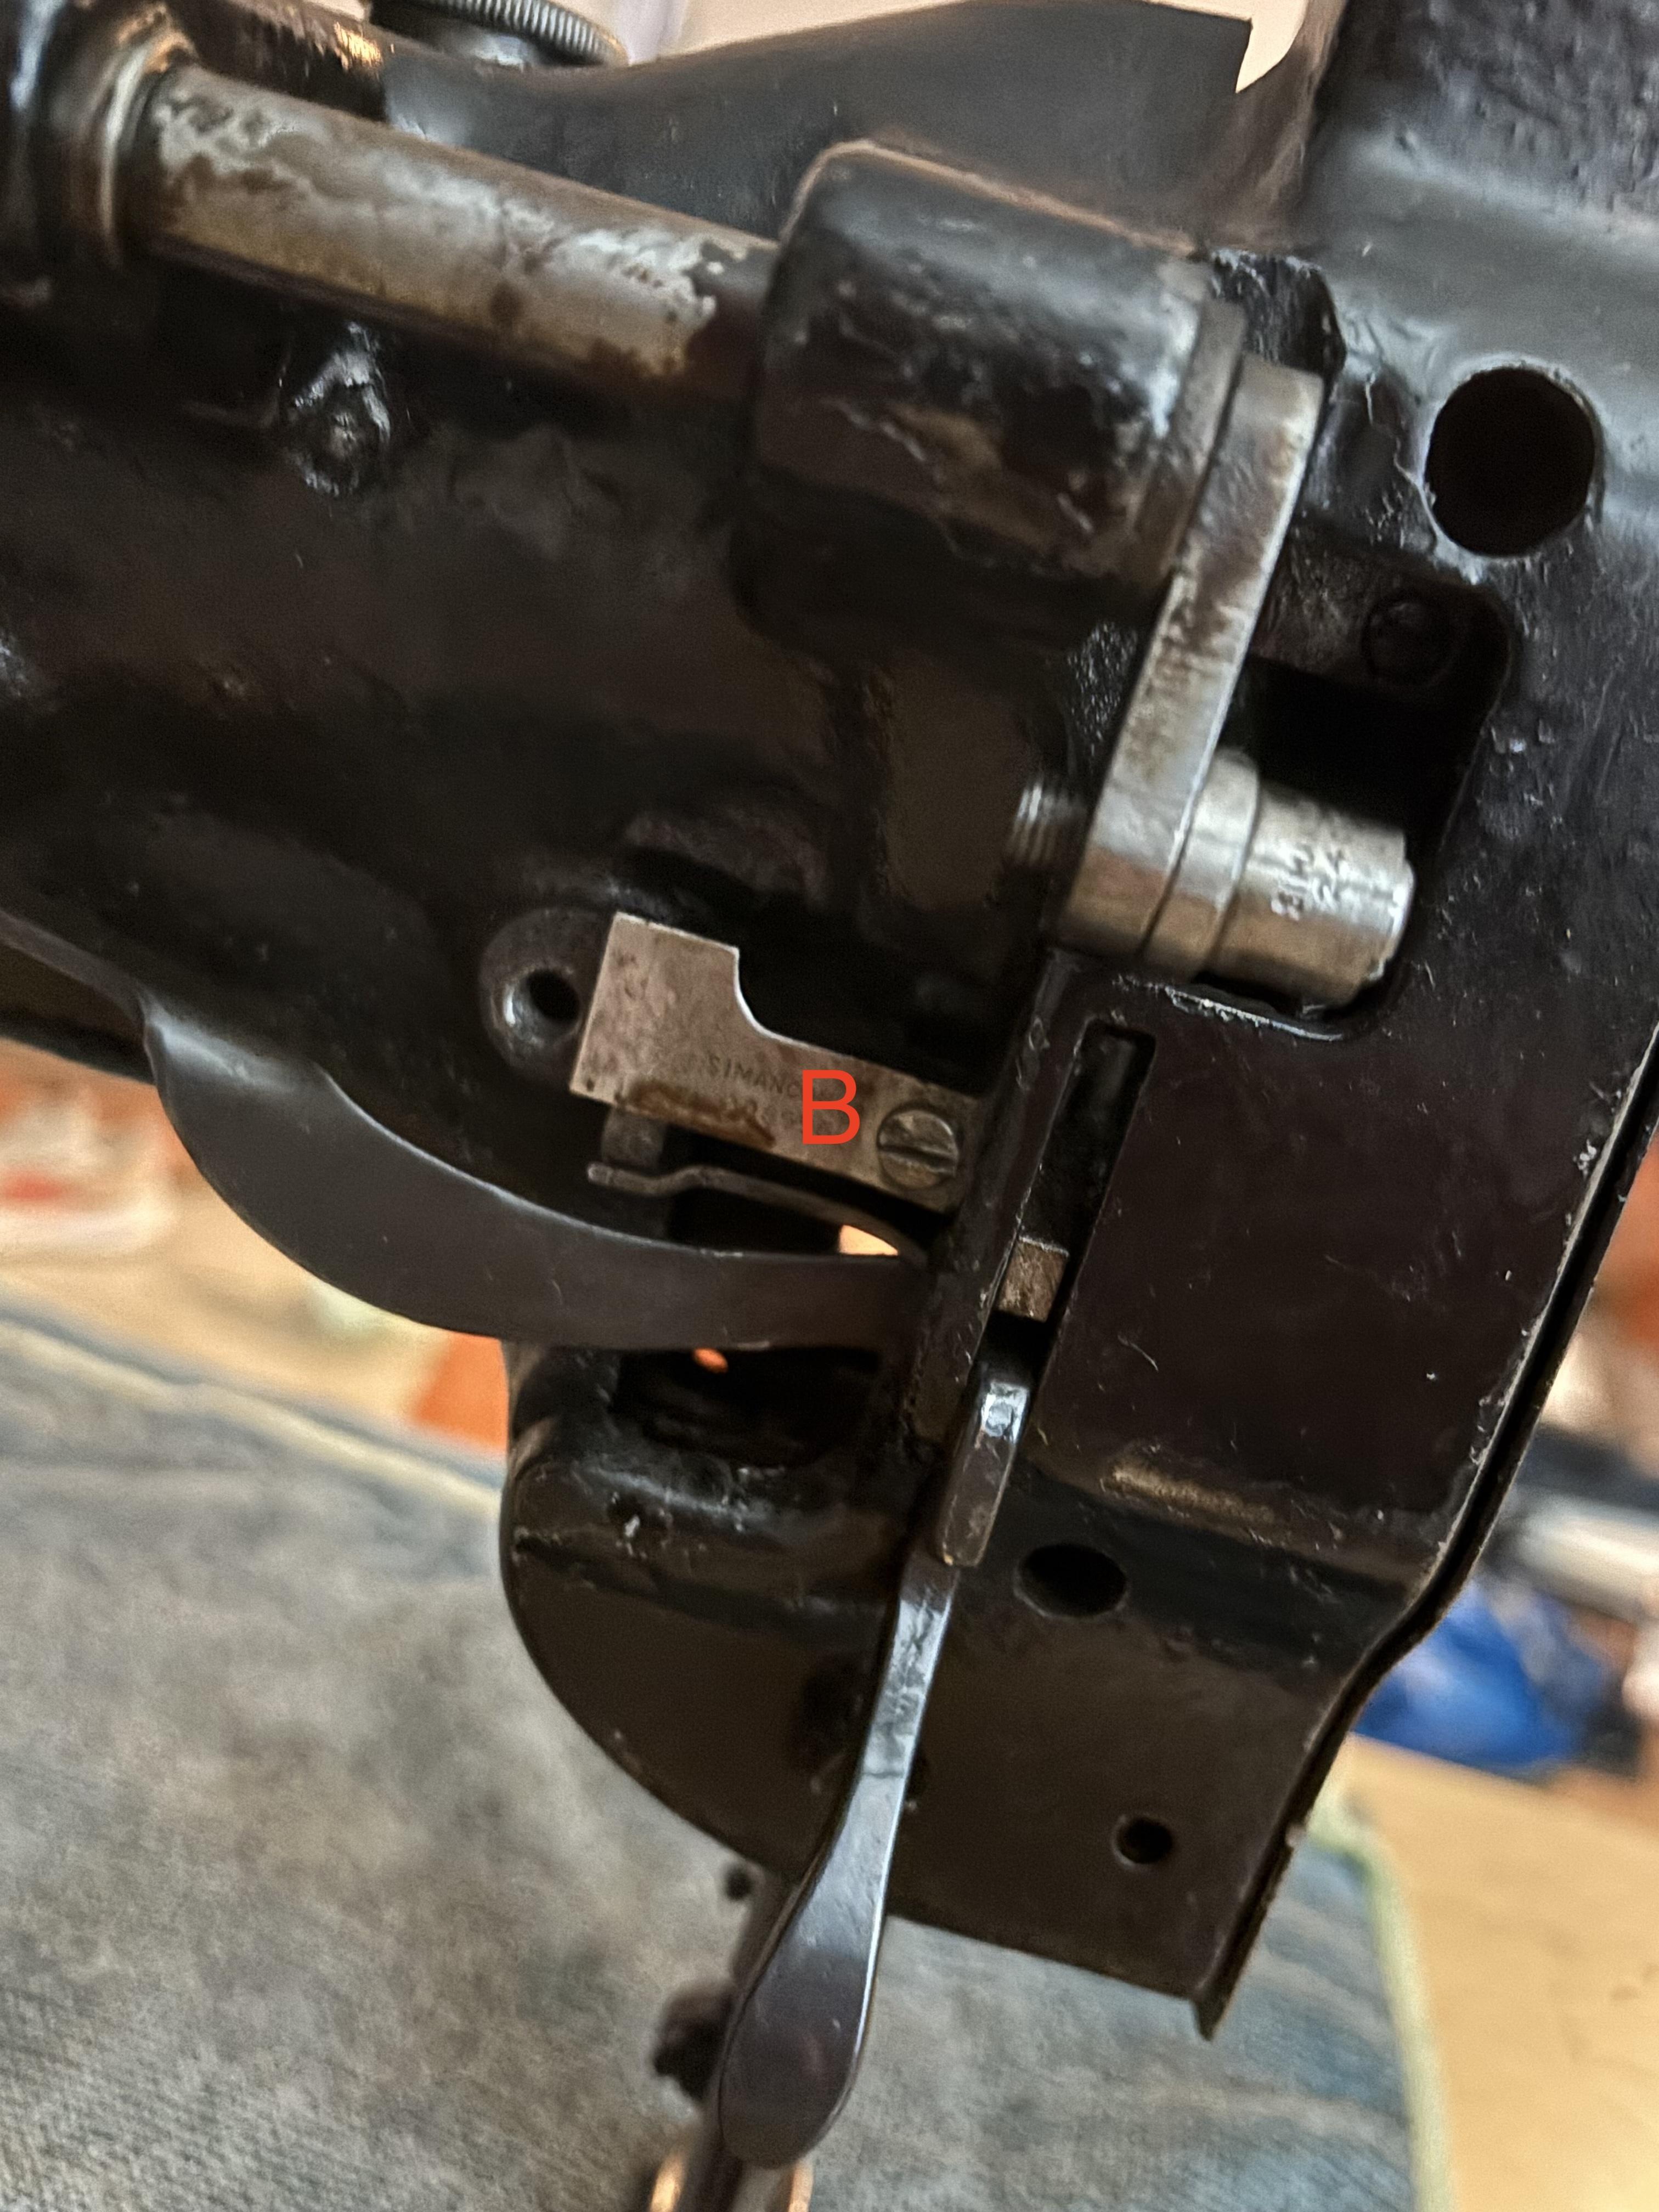
Thank you all for your help! I ended up cheating a little bit and took the machine to a machine shop. The machinist got the screw out in minutes and didn't charge me. I asked him how he did it, and he said I had already done all the work for him 😆 I think it was likely a case of having the right selection of screwdrivers to fit the deformed slot, just like you all advised me. He also is 94 years old and probably has about 85 years of experience. What a legend! Since he didn't need to drill the screw, I still have it. I cut a new slot in the head perpendicular to the old one, cleaned the threads on the screw and on the machine side, and so far I'm reusing the screw and it seems to be fine. I got the feet lifting equally now, too. The only things that seem wrong still are: 1. Cranking the machine takes a bit more effort during the part of the cycle when the inner foot is making contact with the work and the needle is down. I don't see anything binding, it just doesn't feel as loose and smooth as the part of the cycle when the needle is up. Is that normal? 2. The pressure foot lift releasing lever (the lever you'd use to raise the feet when beginning and ending your stitch) will lift the feet when the needle is up (and the outside feet are down) but won't lift the feet when the needle is in the work and the inner foot is down. Any ideas? I think it's something with either screw A or screw B in the pics I've attached. The lifting lever isn't contacting the whole assembly it needs to lift when the needle is in the down position. THANK YOU all again for your advice and guidance. You guys rock!!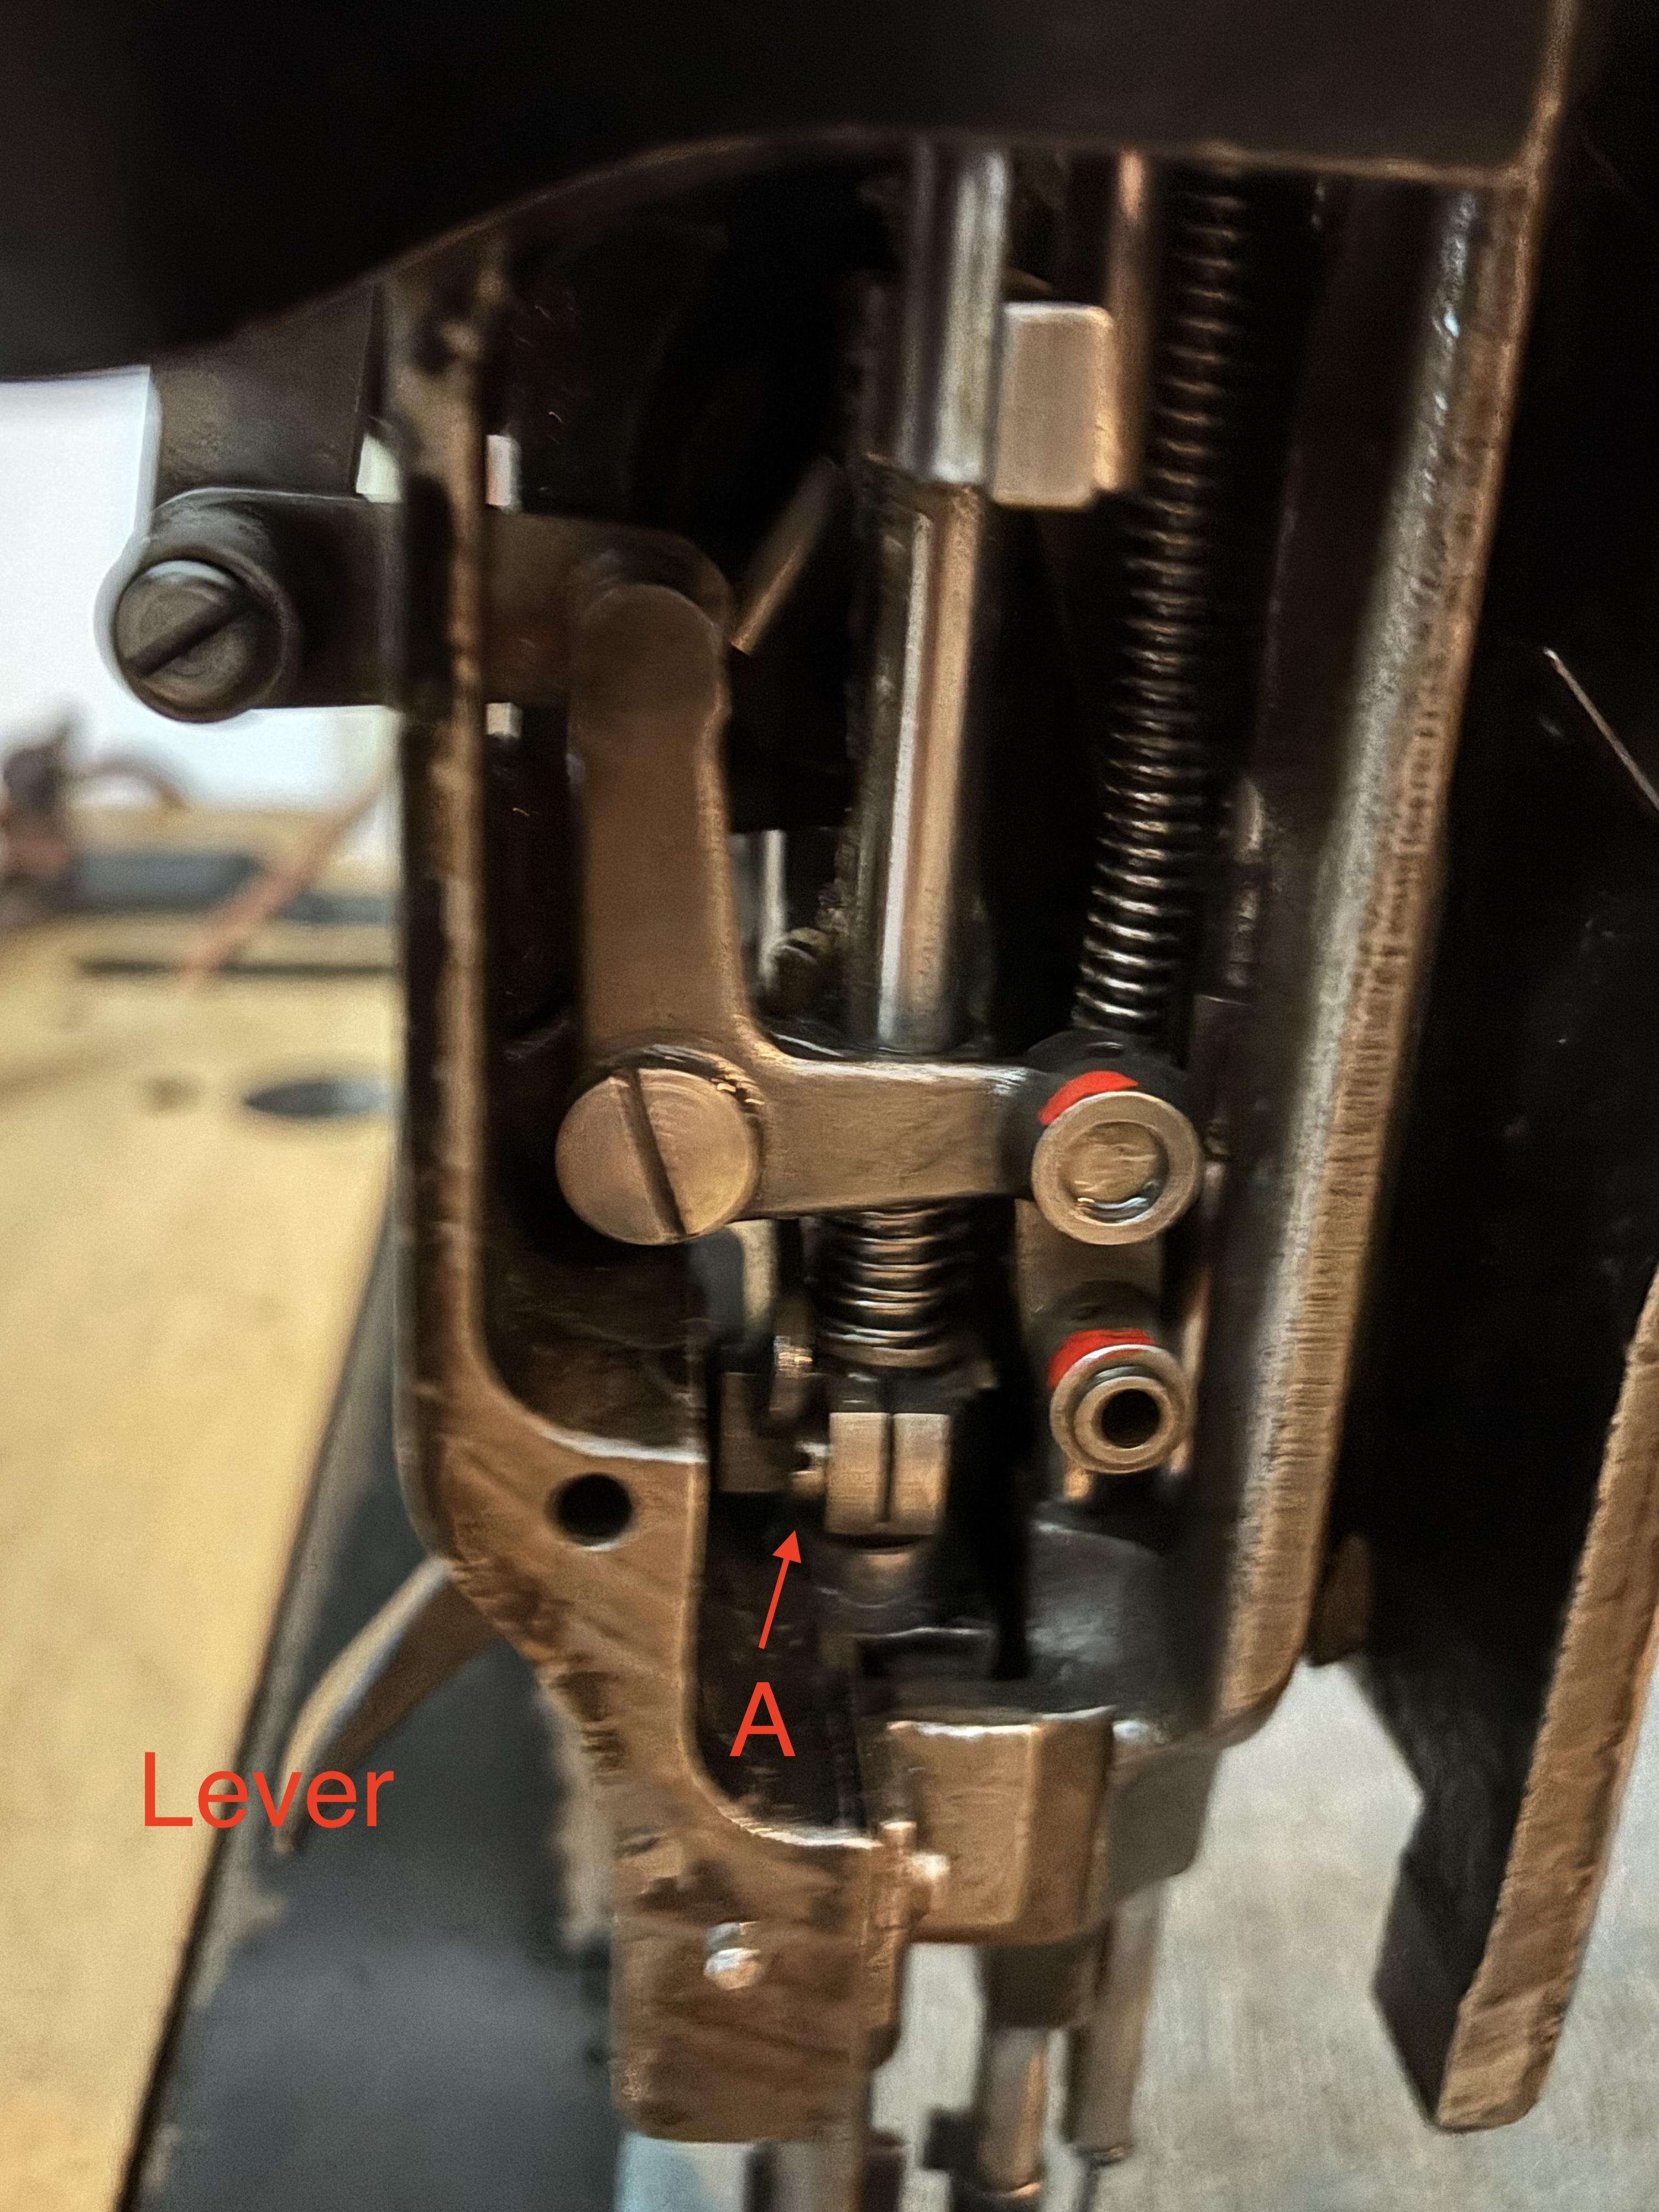
-

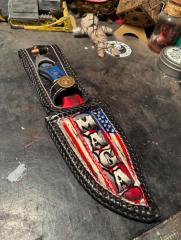
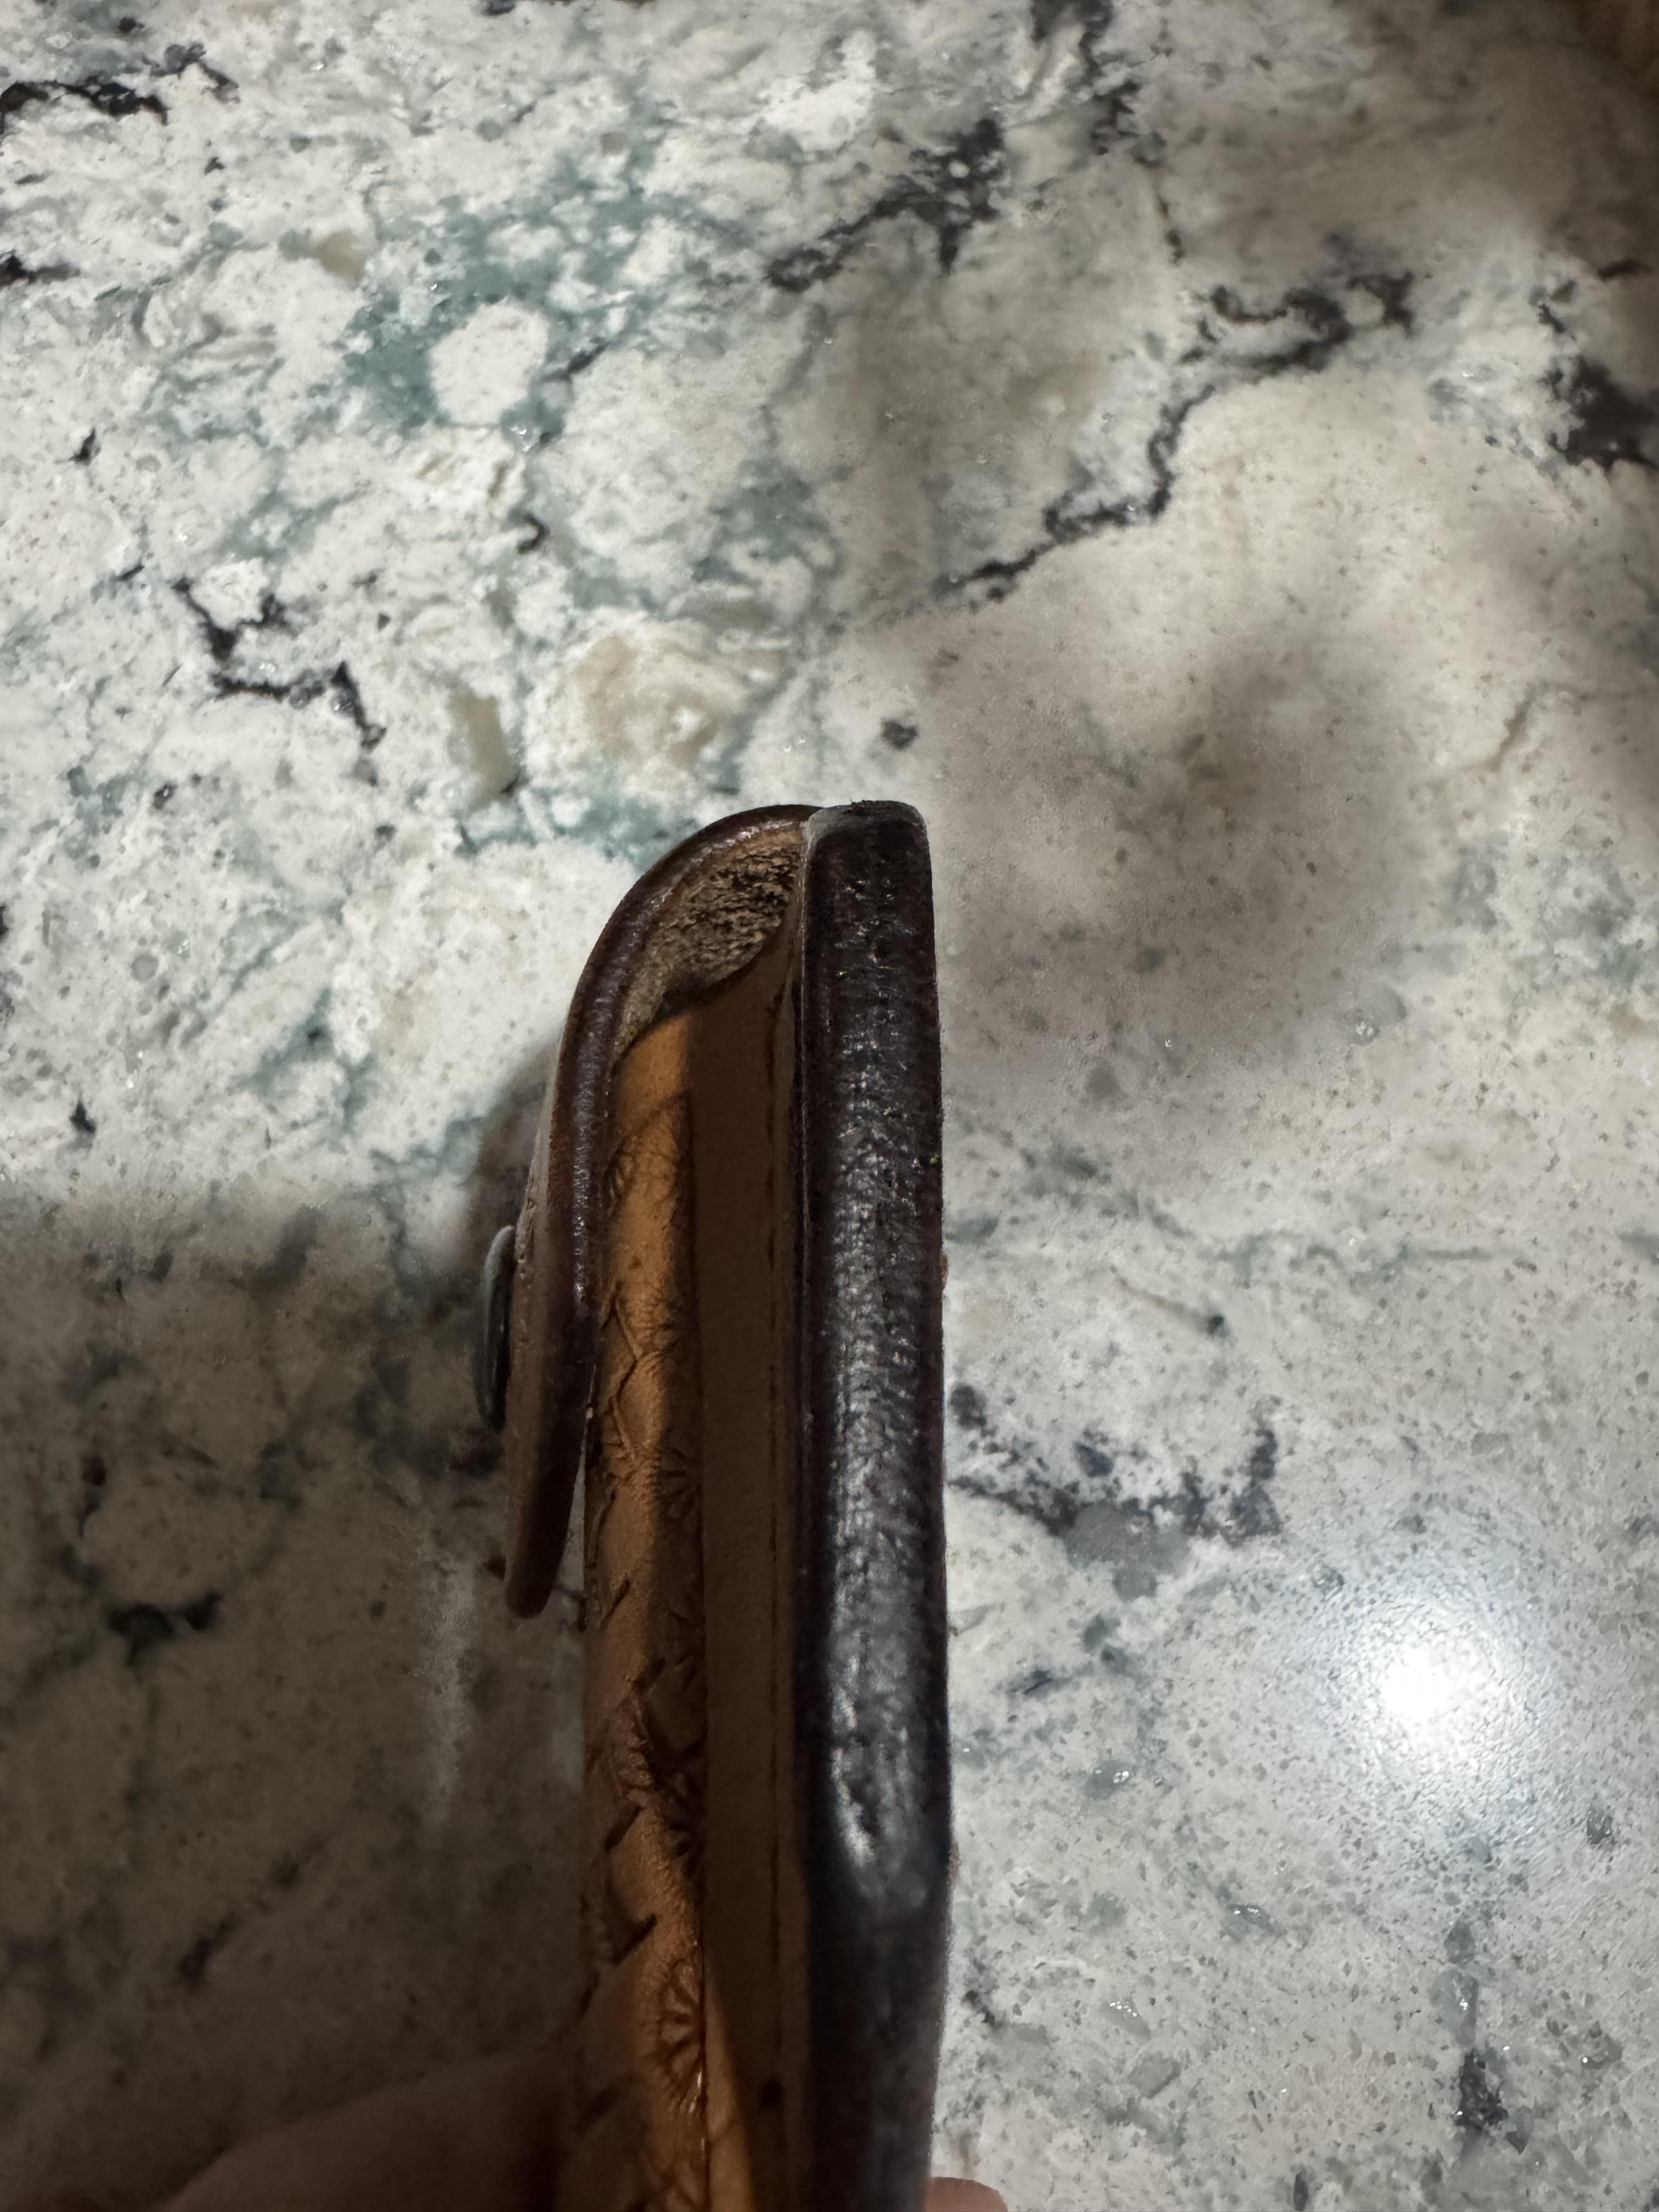
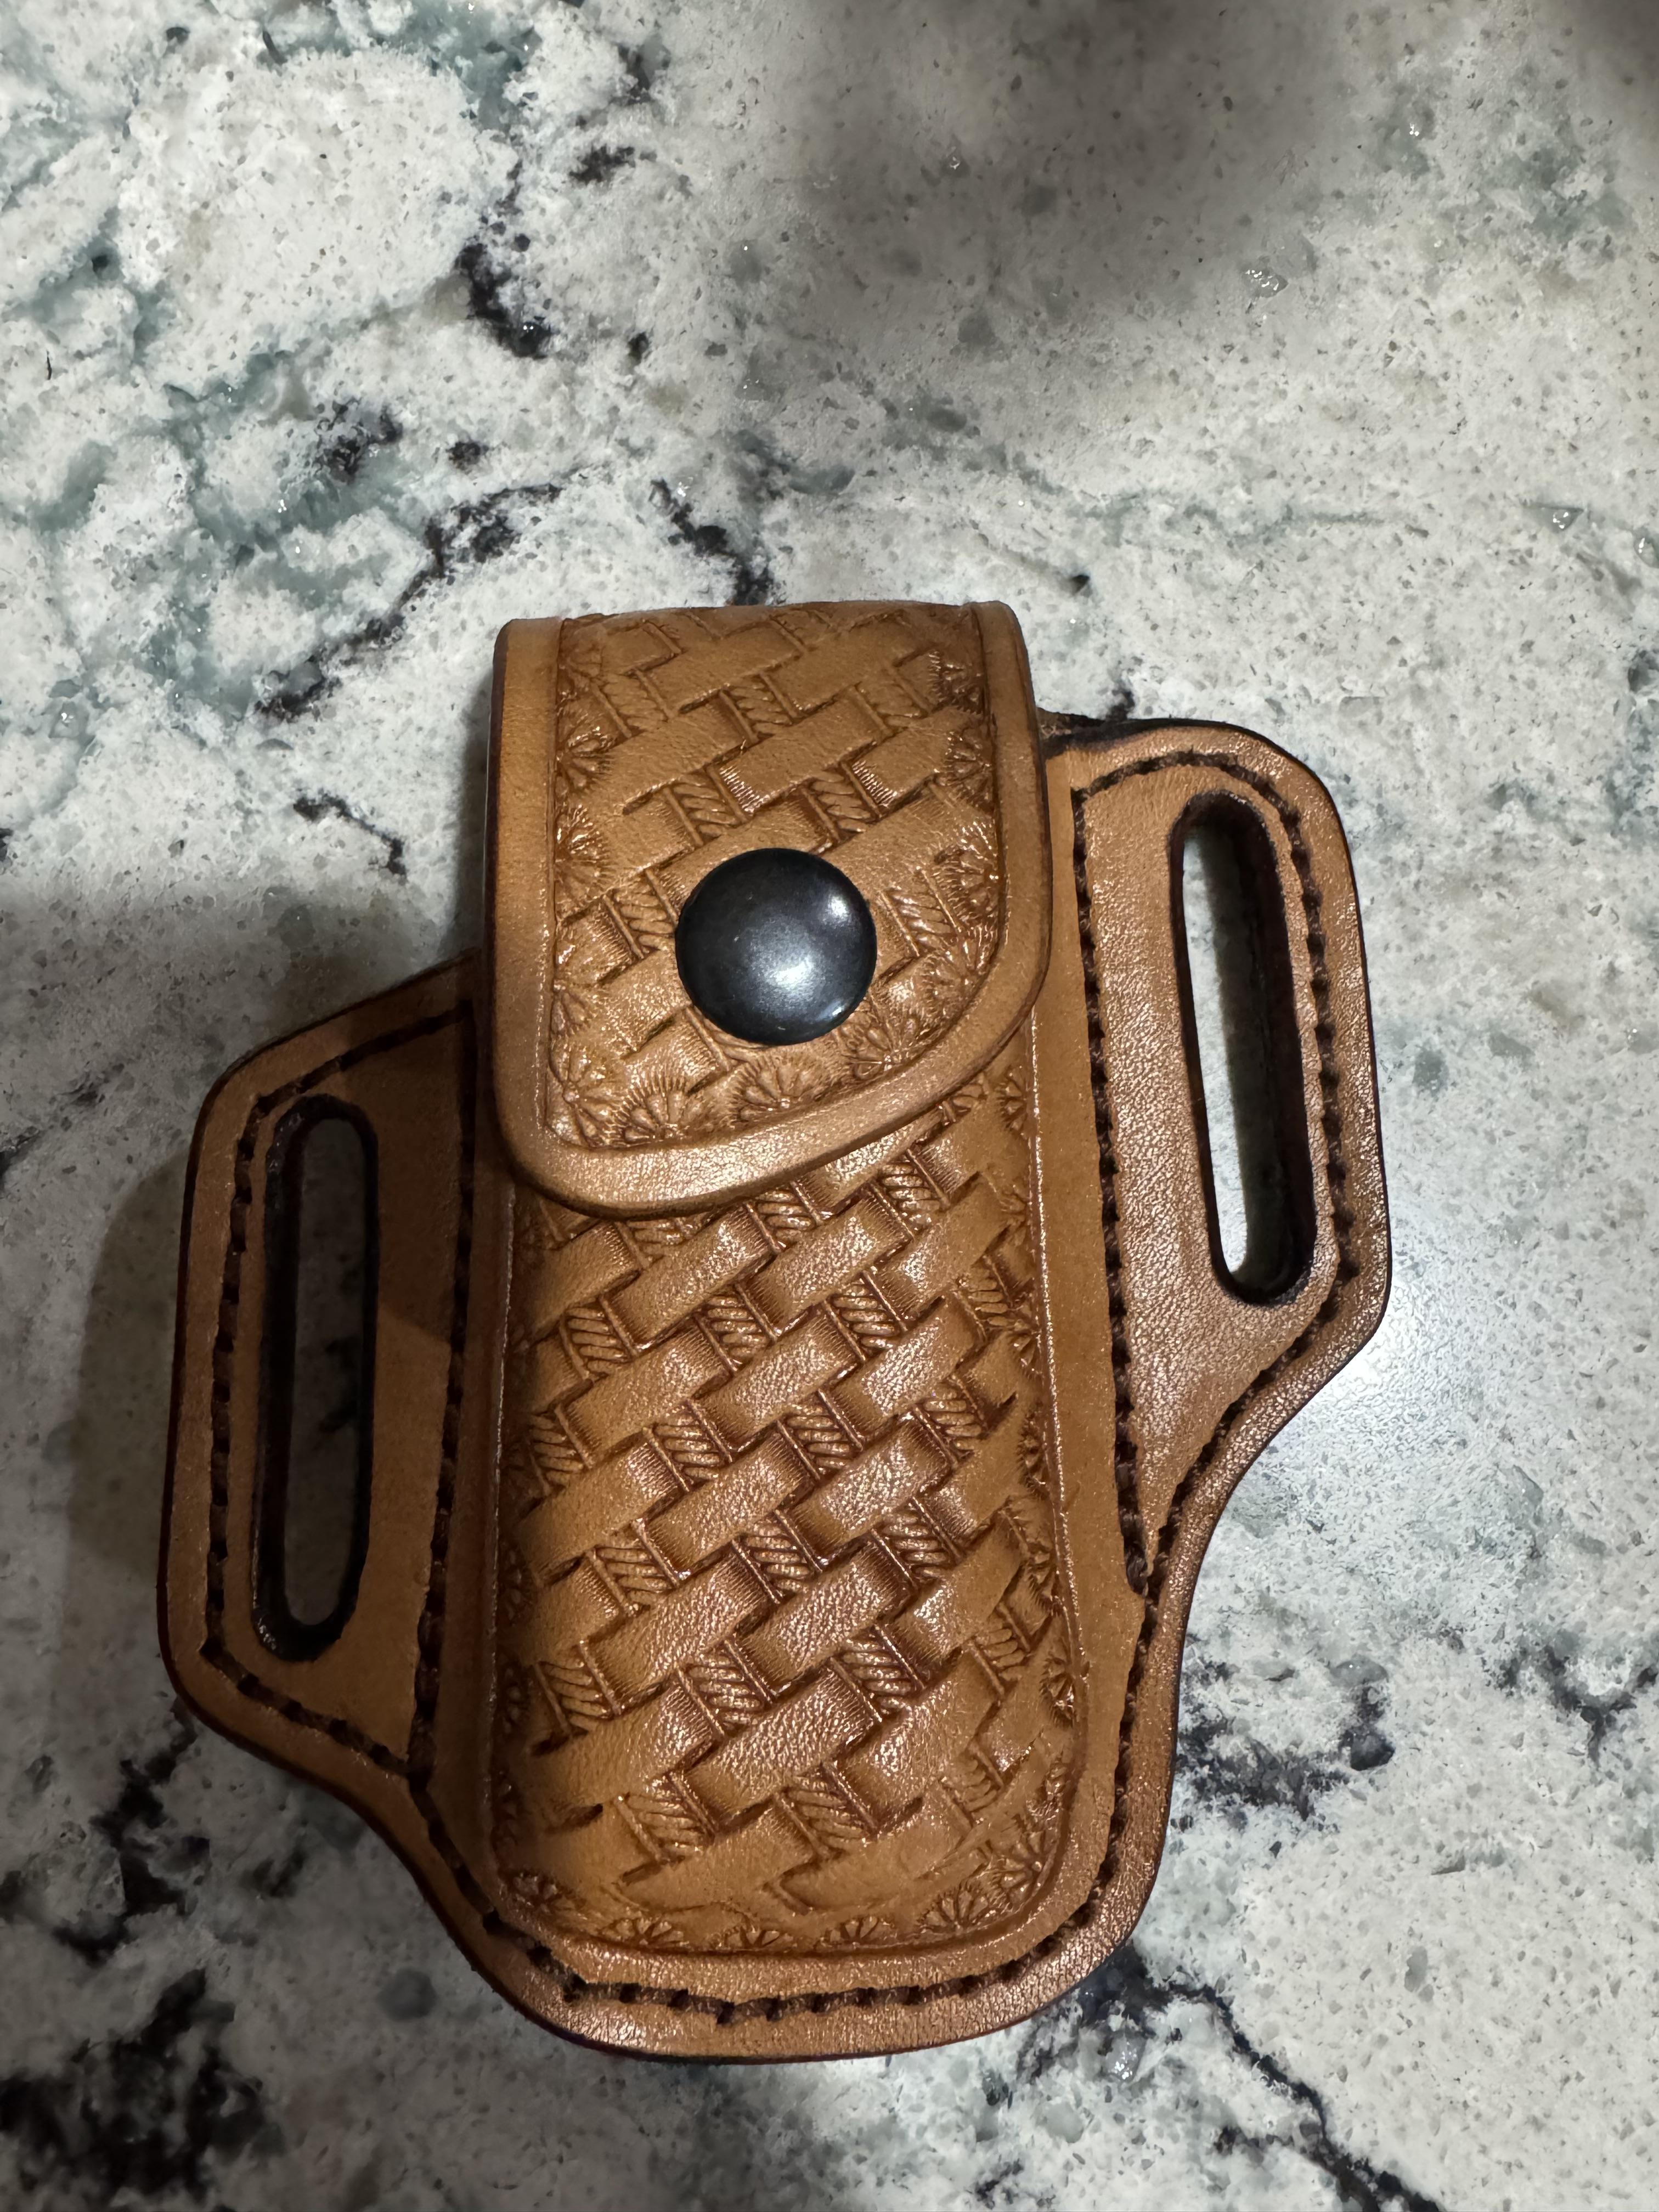
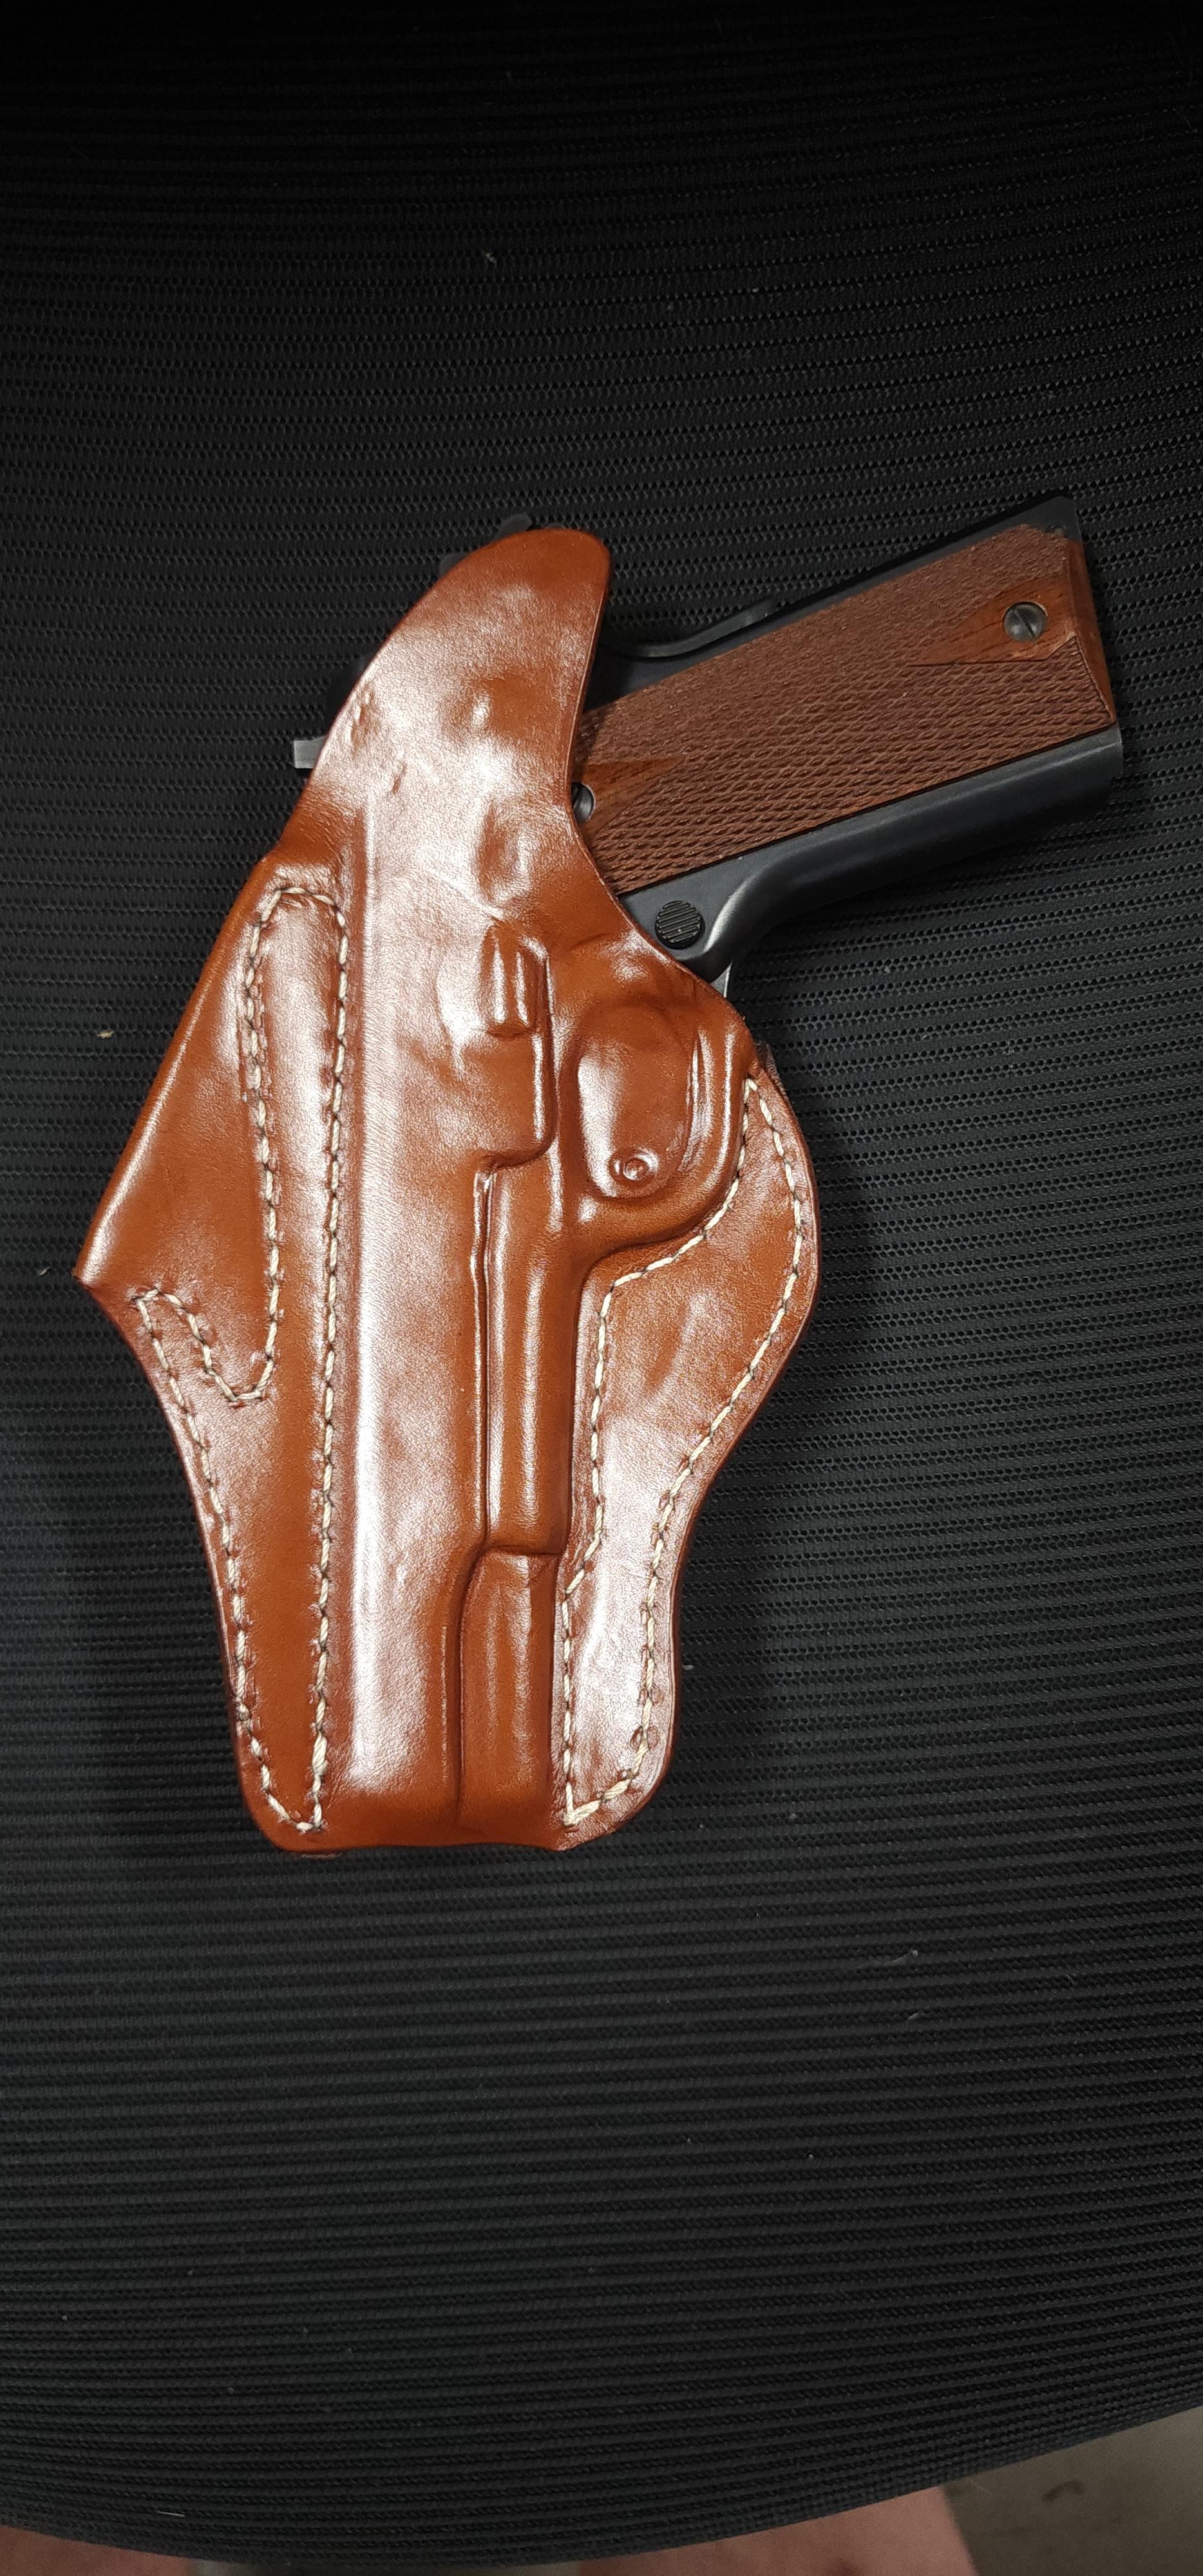
Leatherman sheath
Stetson912 replied to Stetson912's topic in Gun Holsters, Rifle Slings and Knife Sheathes
@Hildebrand looks good to me man. I like basketweave. Looks like it'll work great! I use mine every day -

Leatherman sheath
Hildebrand replied to Stetson912's topic in Gun Holsters, Rifle Slings and Knife Sheathes
Saw the beautiful work by @Stetson912and decided to give the pattern a try, I am not a floral carver so I went with a basket stamp. I really like the pattern it is a great fit for the weatherman tools. Todd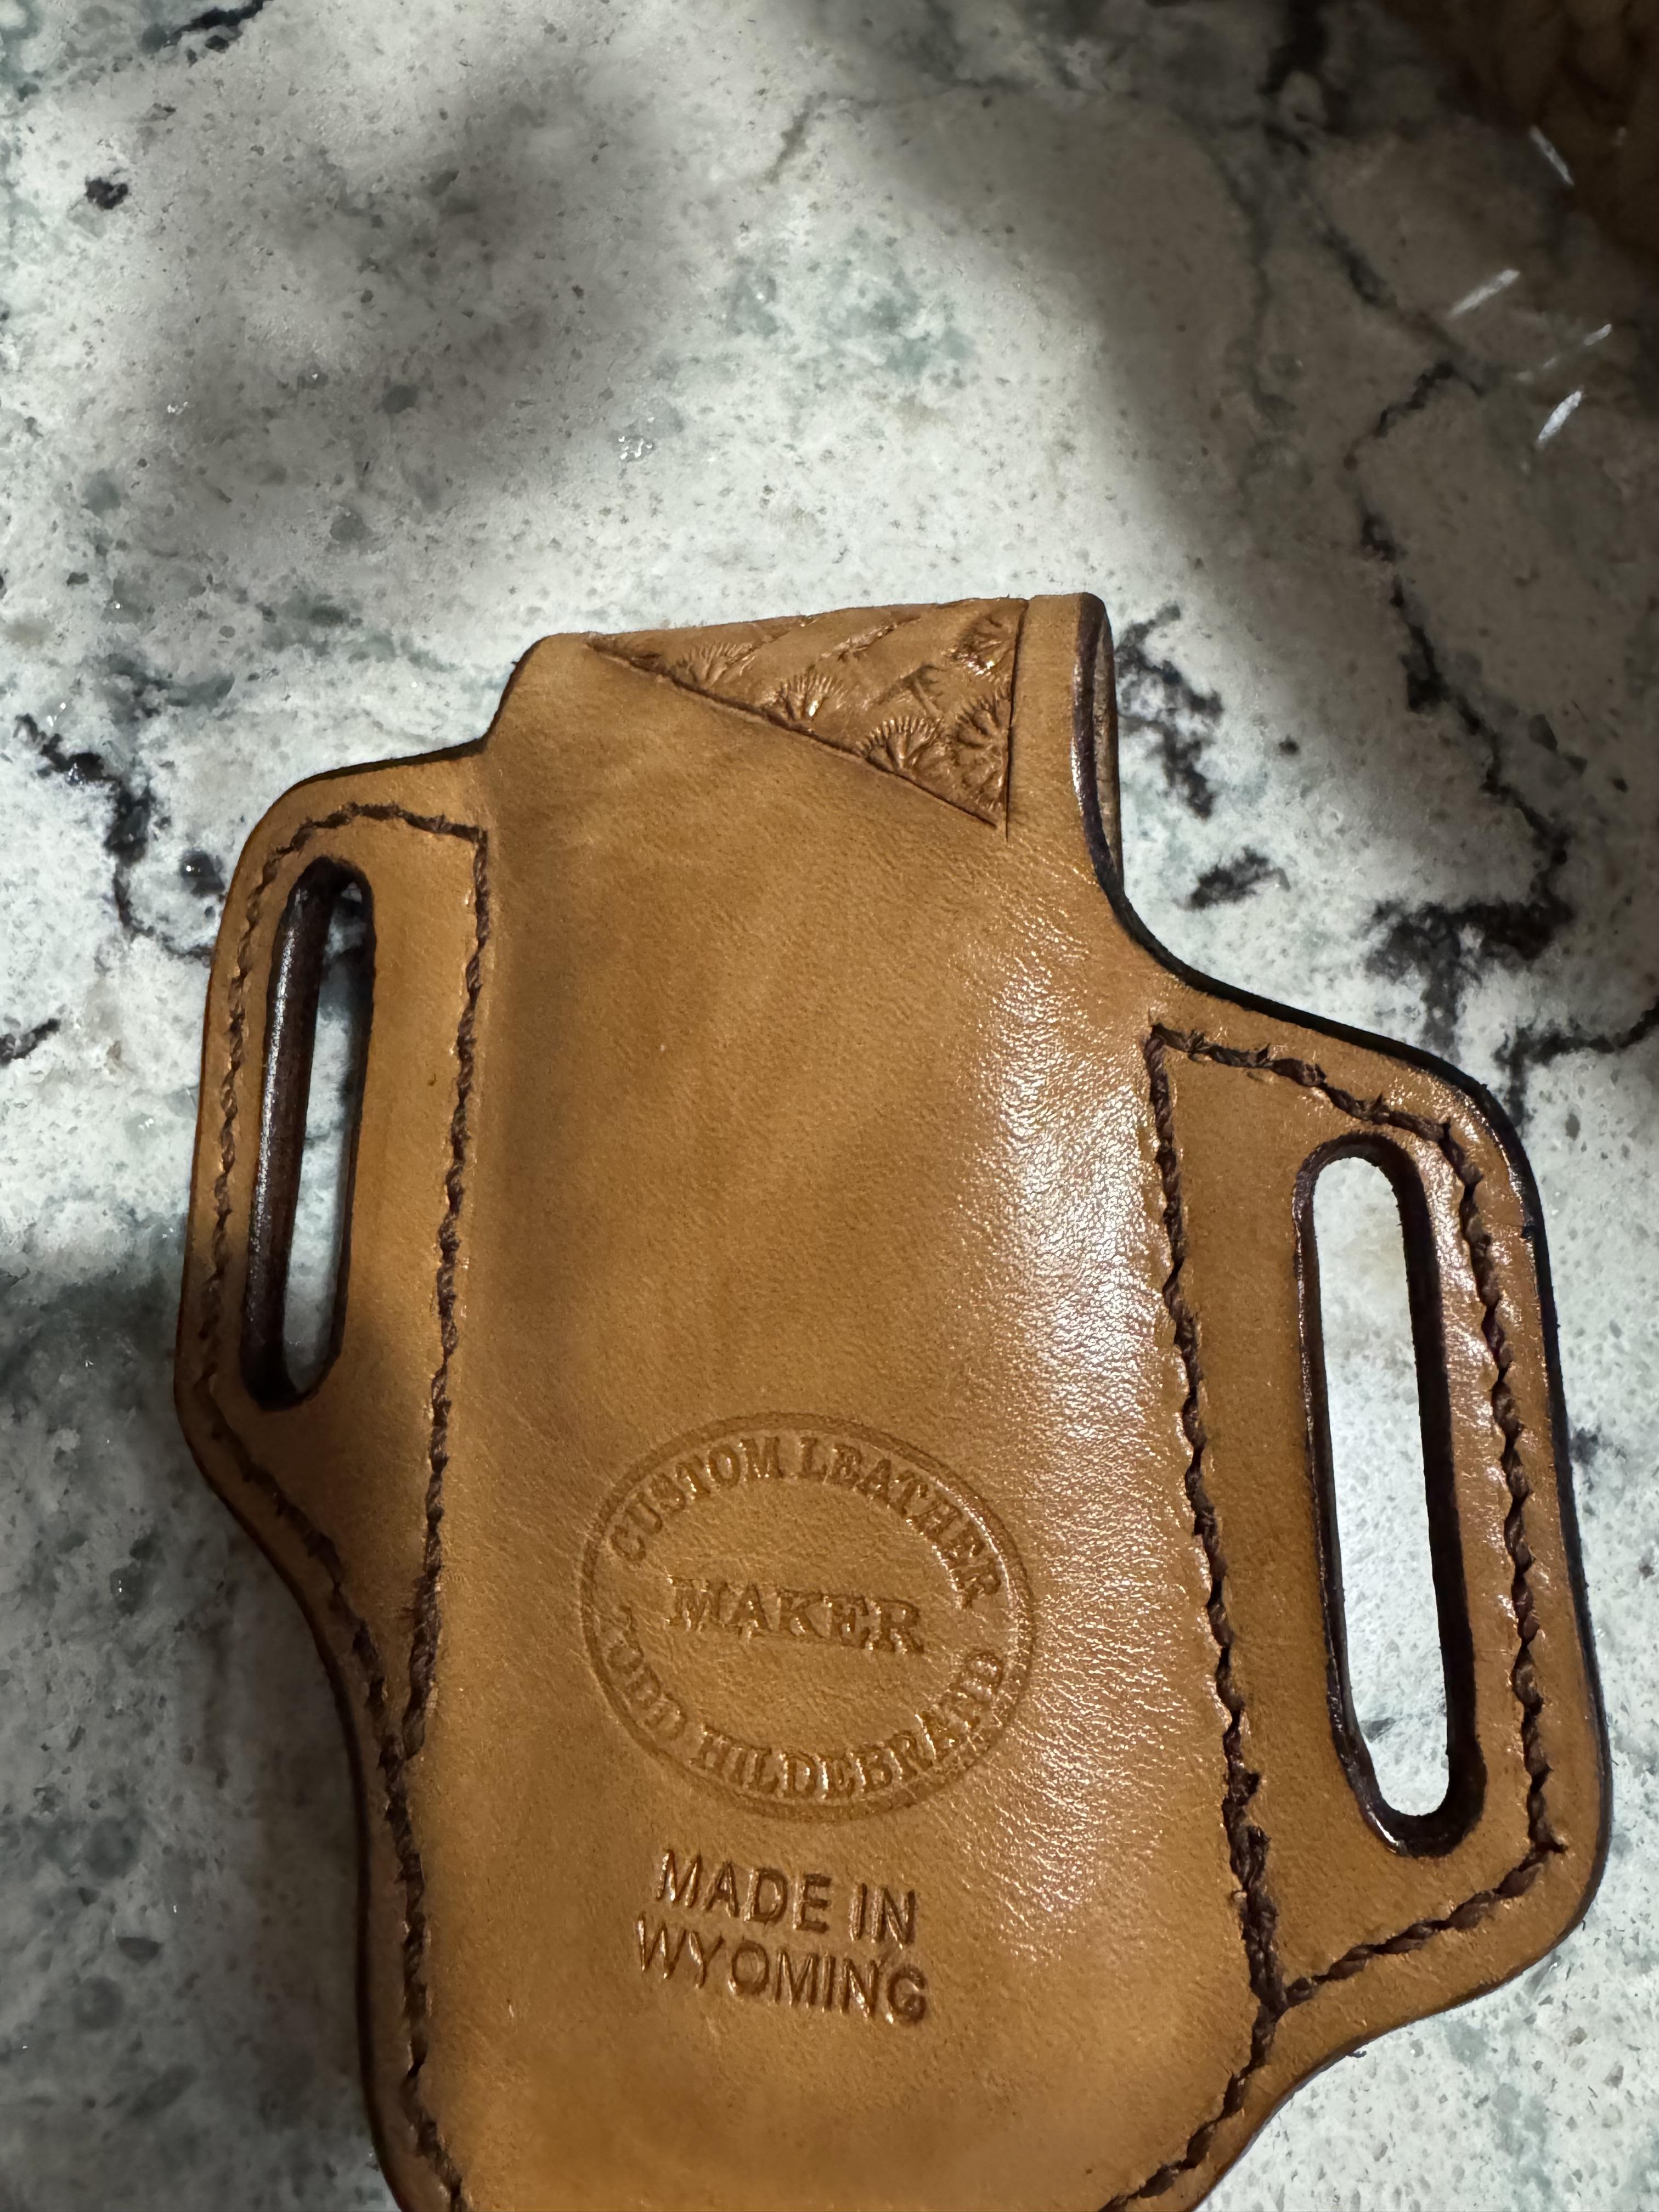
-
Thought so, I have seen them made full leather backs in one piece also from two pieces spliced together just make the join is not in the part that will be sliding through the bit ring as is will wear on the stitching. Also seen them made with webbing and leather. The ones I do not like are the ones made from Biothane because they become very tatty very quickly with wear and the other thing with certain pieces of tack made from Biothane if the gets loose the reins can some times can get wrapped around the horses legs resulting with a badly injured horse at times as the Biothane will not break first the horse will, that's why I like leather for tack over anything else, having said that Biothane can be useful for areas of safety in tack. Once it was held up as a cheap alternative to leather tack but I have noticed how the prices have crept up and are a par price wise to leather tack and for certain pieces of tack or in some cases more expensive, how did that happen especially as with all plastic it will not break down once thrown away like leather tack stitched with linen thread.Sorry not wishing to sound like some hippie eco warrior or something, good leather tack looked after well will last a very long time I have seen this, Biothane will crack and look very untidy eventually and then just gets thrown in the bin not worth repairing. Regards JCUK
-
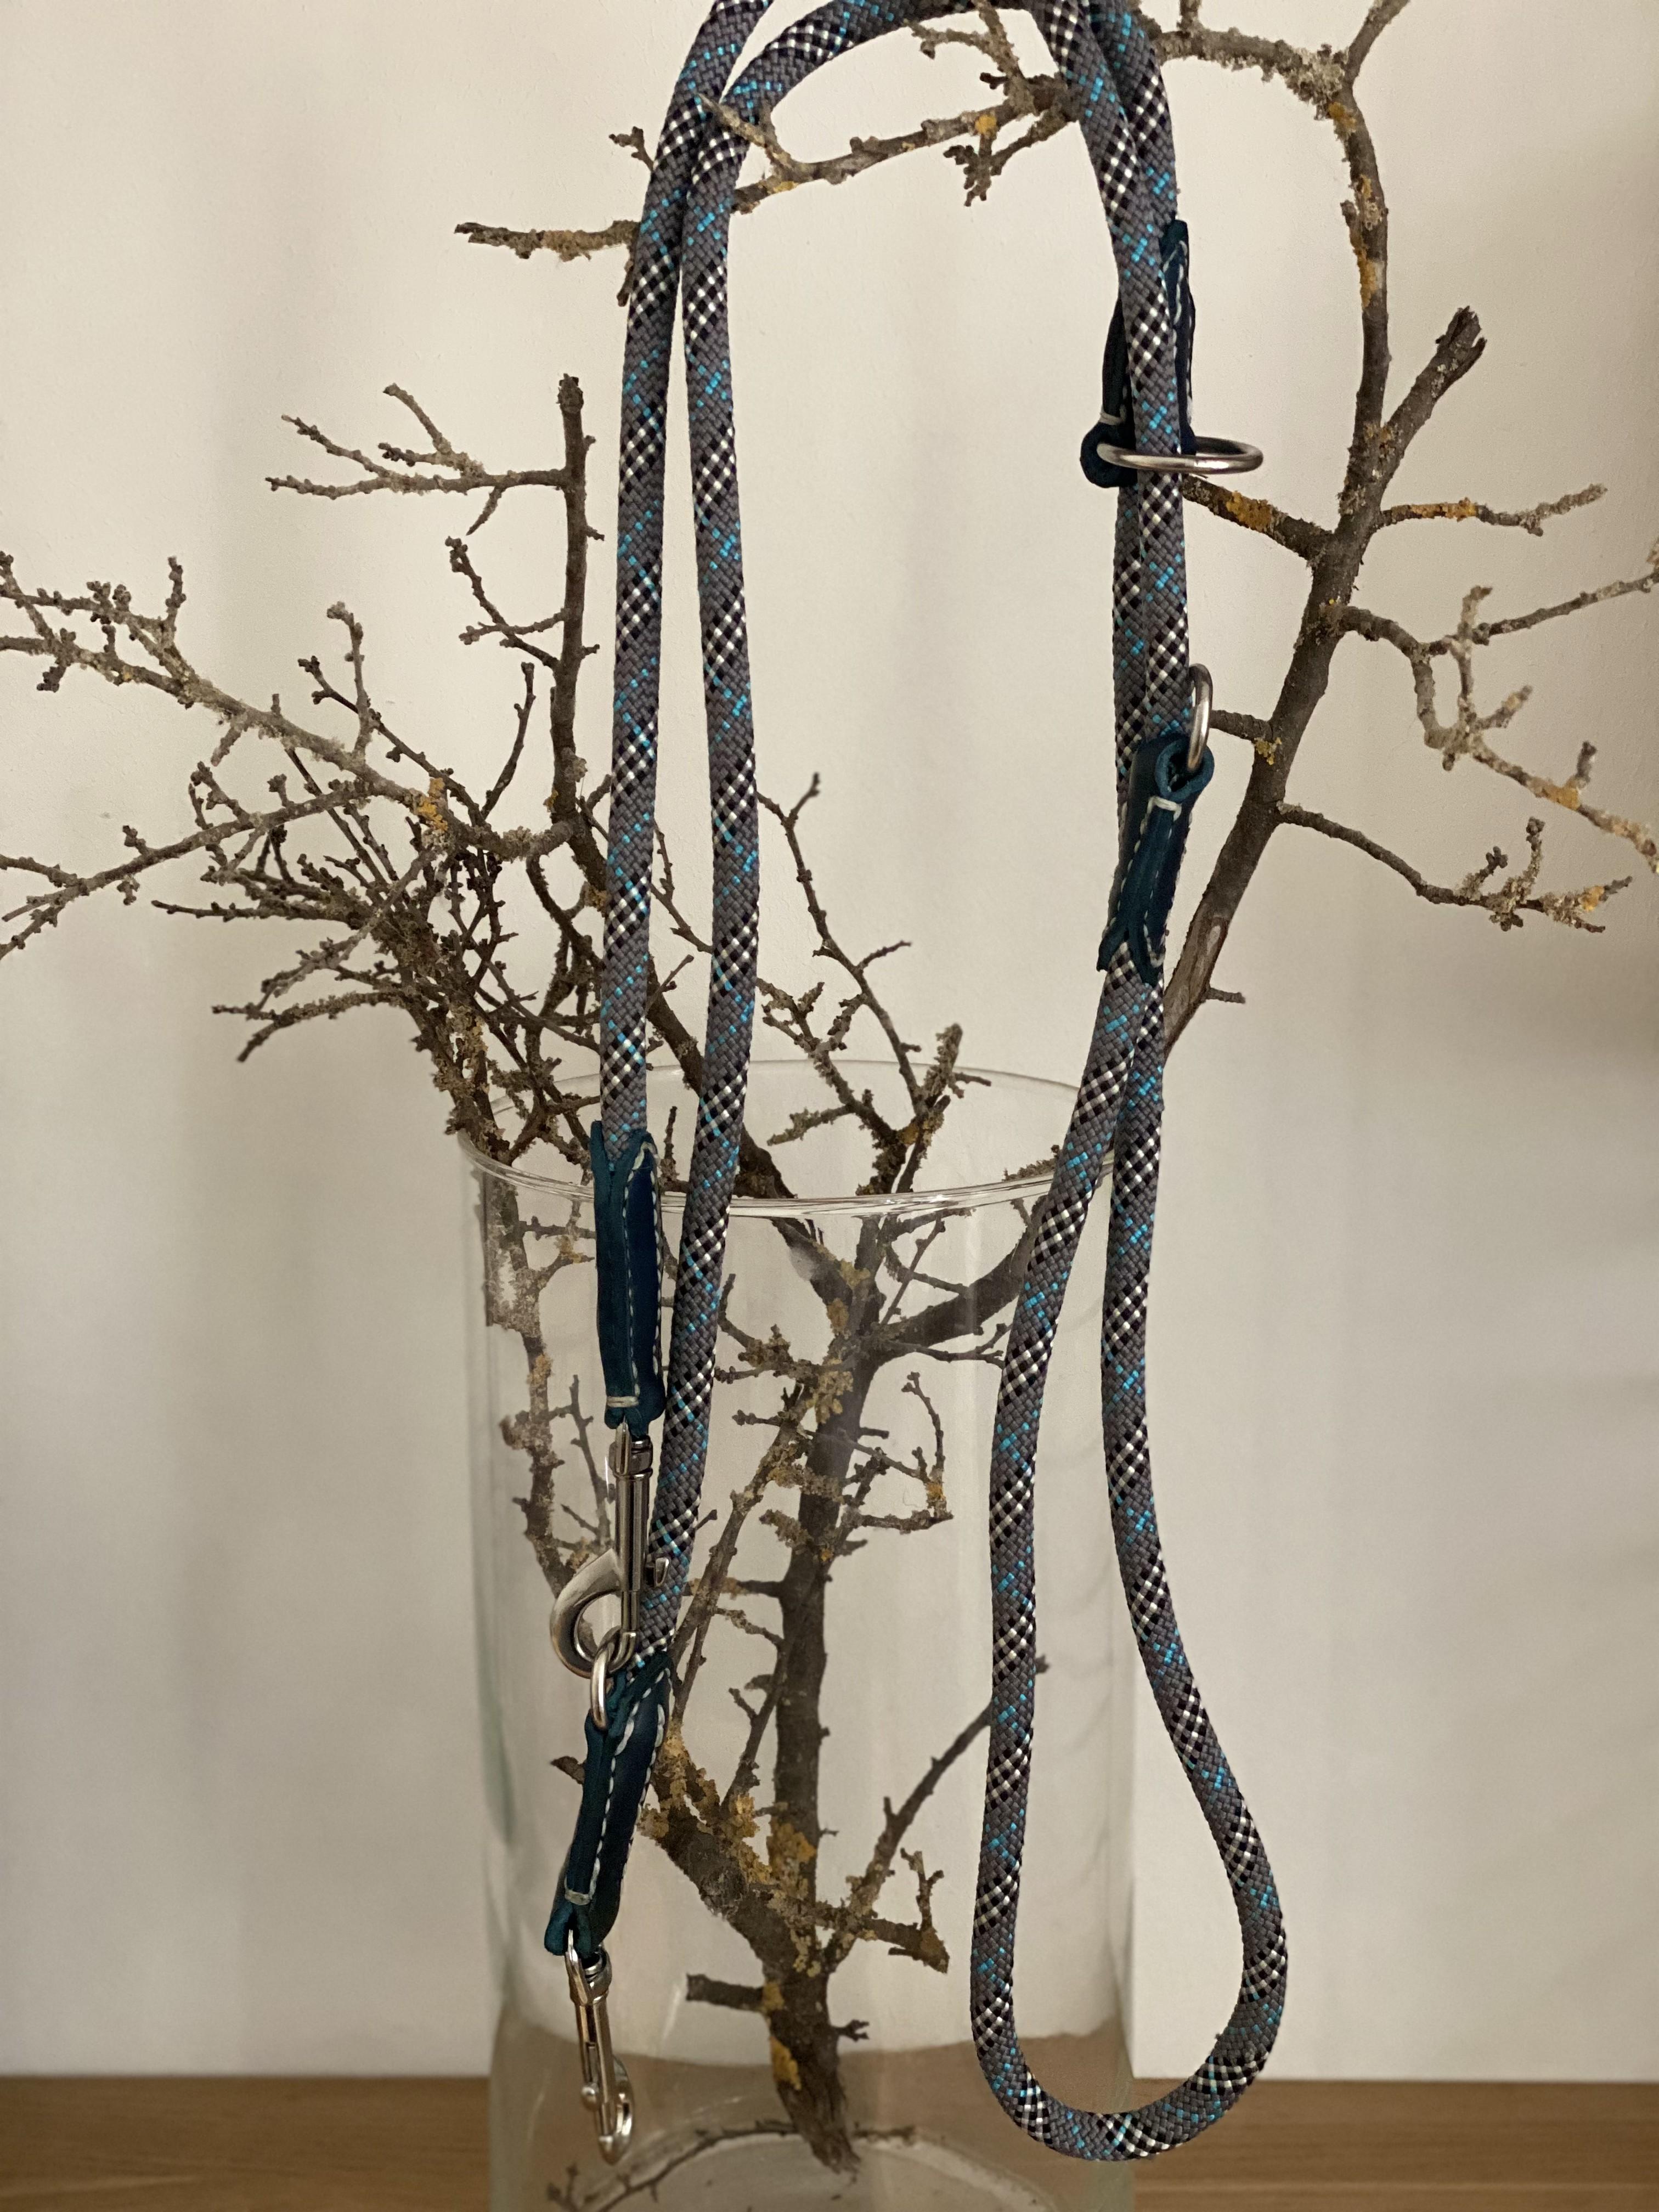
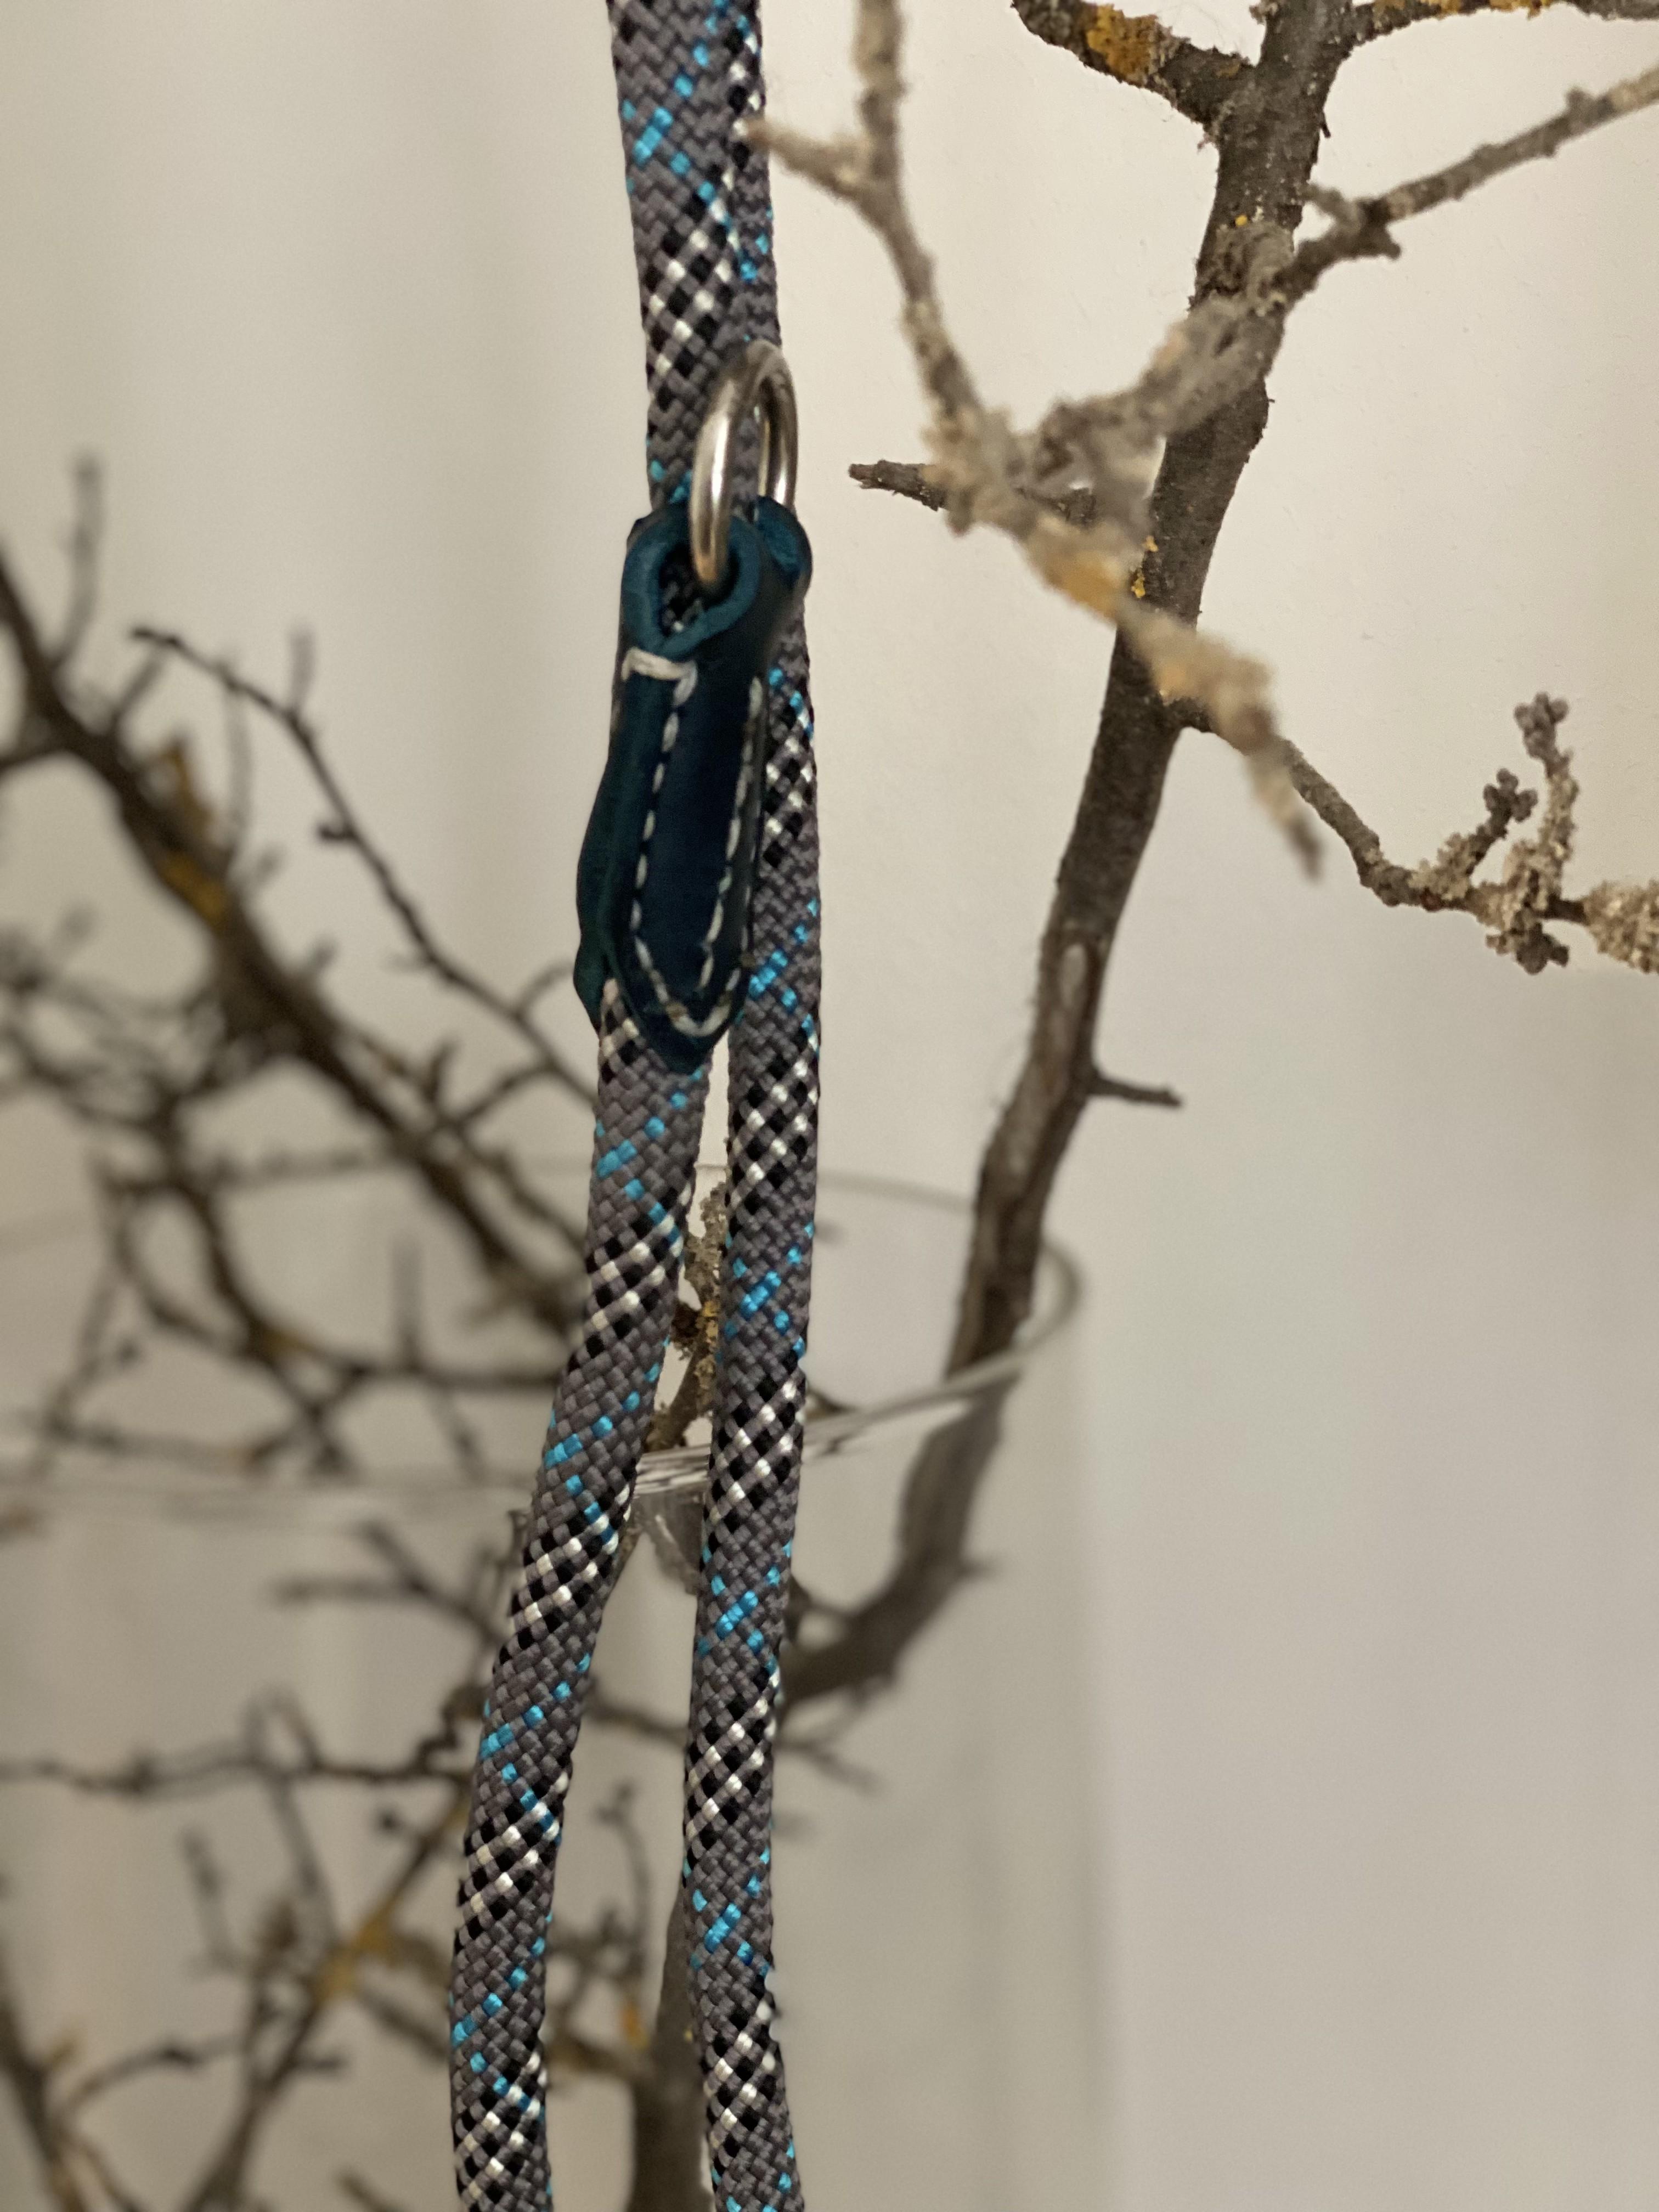
Nicely done I like the collars a real labour of love. The only word of caution is for the more powerful dogs that the dead ending of the rope lead at the clip where the leather folds through the ring of the clip and being secured to the lead by thread is a real weak point. I have seen a lot of that style fail due the leather weakness, wear of the leather, leather rot and thread failure particularly the inexpensive leads. Nothing worst then pulling back on the lead and the dog is gone leaving the owner holding a pretty lead. Since I deal with a wide range of customer breeds I have to be sure that no matter the breed the lead will not fail. To that end for nylon / polyester leads I pull back a couple internal core strands of the rope for about 4-6" (100-150mm), thread the end through the "O" ring, heat compress and melt two #9 copper rivets through. Then I install burrs and cover the end using shrink tubing to cover the end. The shrink tubing helps protect the rope from the dogs that like to chew at the clip. I do the same thing for kennel quick leads ranging in length from 4' to 8' (1.2m to 2.4m). The funny thing is I have a husband and wife who I made a 6' (1.8m) rope lead for the husband and a 4' (1.2m) leather lead for the lady. The dog loves to chew on the point where the clip attaches to the rope and never touches the leather lead. I had to install a extra layer of shrink wrap to protect the rope lead. kgg
-
That's a fact! I like playing with some of the old formulas. When I was handsewing a bunch, I made up coad (handsewing thread wax) with pine pitch and beeswax. Cook it all together and knead it underwater when hot and shape into balls. Fun stuff to use. The old timers had summer and winter formulas that varied the ingredients to make a softer wax for winter and harder wax for summer, since those old shop temperatures varied with the season. My leather edge wax for years was 50:50 beeswax/paraffin. Melt it together and pour into muffin wrappers. I cooked down dark brown spirit dye to make a thick concentrated dye-pigment additive for some cakes to color it. My handle treatment for hammers and tool handles is an old time boiled linseed oil/beeswax/mineral spirits mix to make a paste. It is also good for a rust preventative on knife blades that aren't used much or before storage for the season (filet and hunting knives). In the last couple years I have made a turpentine mix that substitutes for the mineral spirits also. That smells amazing while it cooks and good for handles. The big shop smells great for days. I also make a "finishing wax" with BLO/carnauba wax/turpentine for the final treatment on tight grain exotic wood handles. I pour those pastes into 4 oz balm tins to set up and store. The old guy that taught me a bunch about tools had the saying "Beeswax to stick/paraffin to slide". Old men are generally wise and I follow that advice.
-
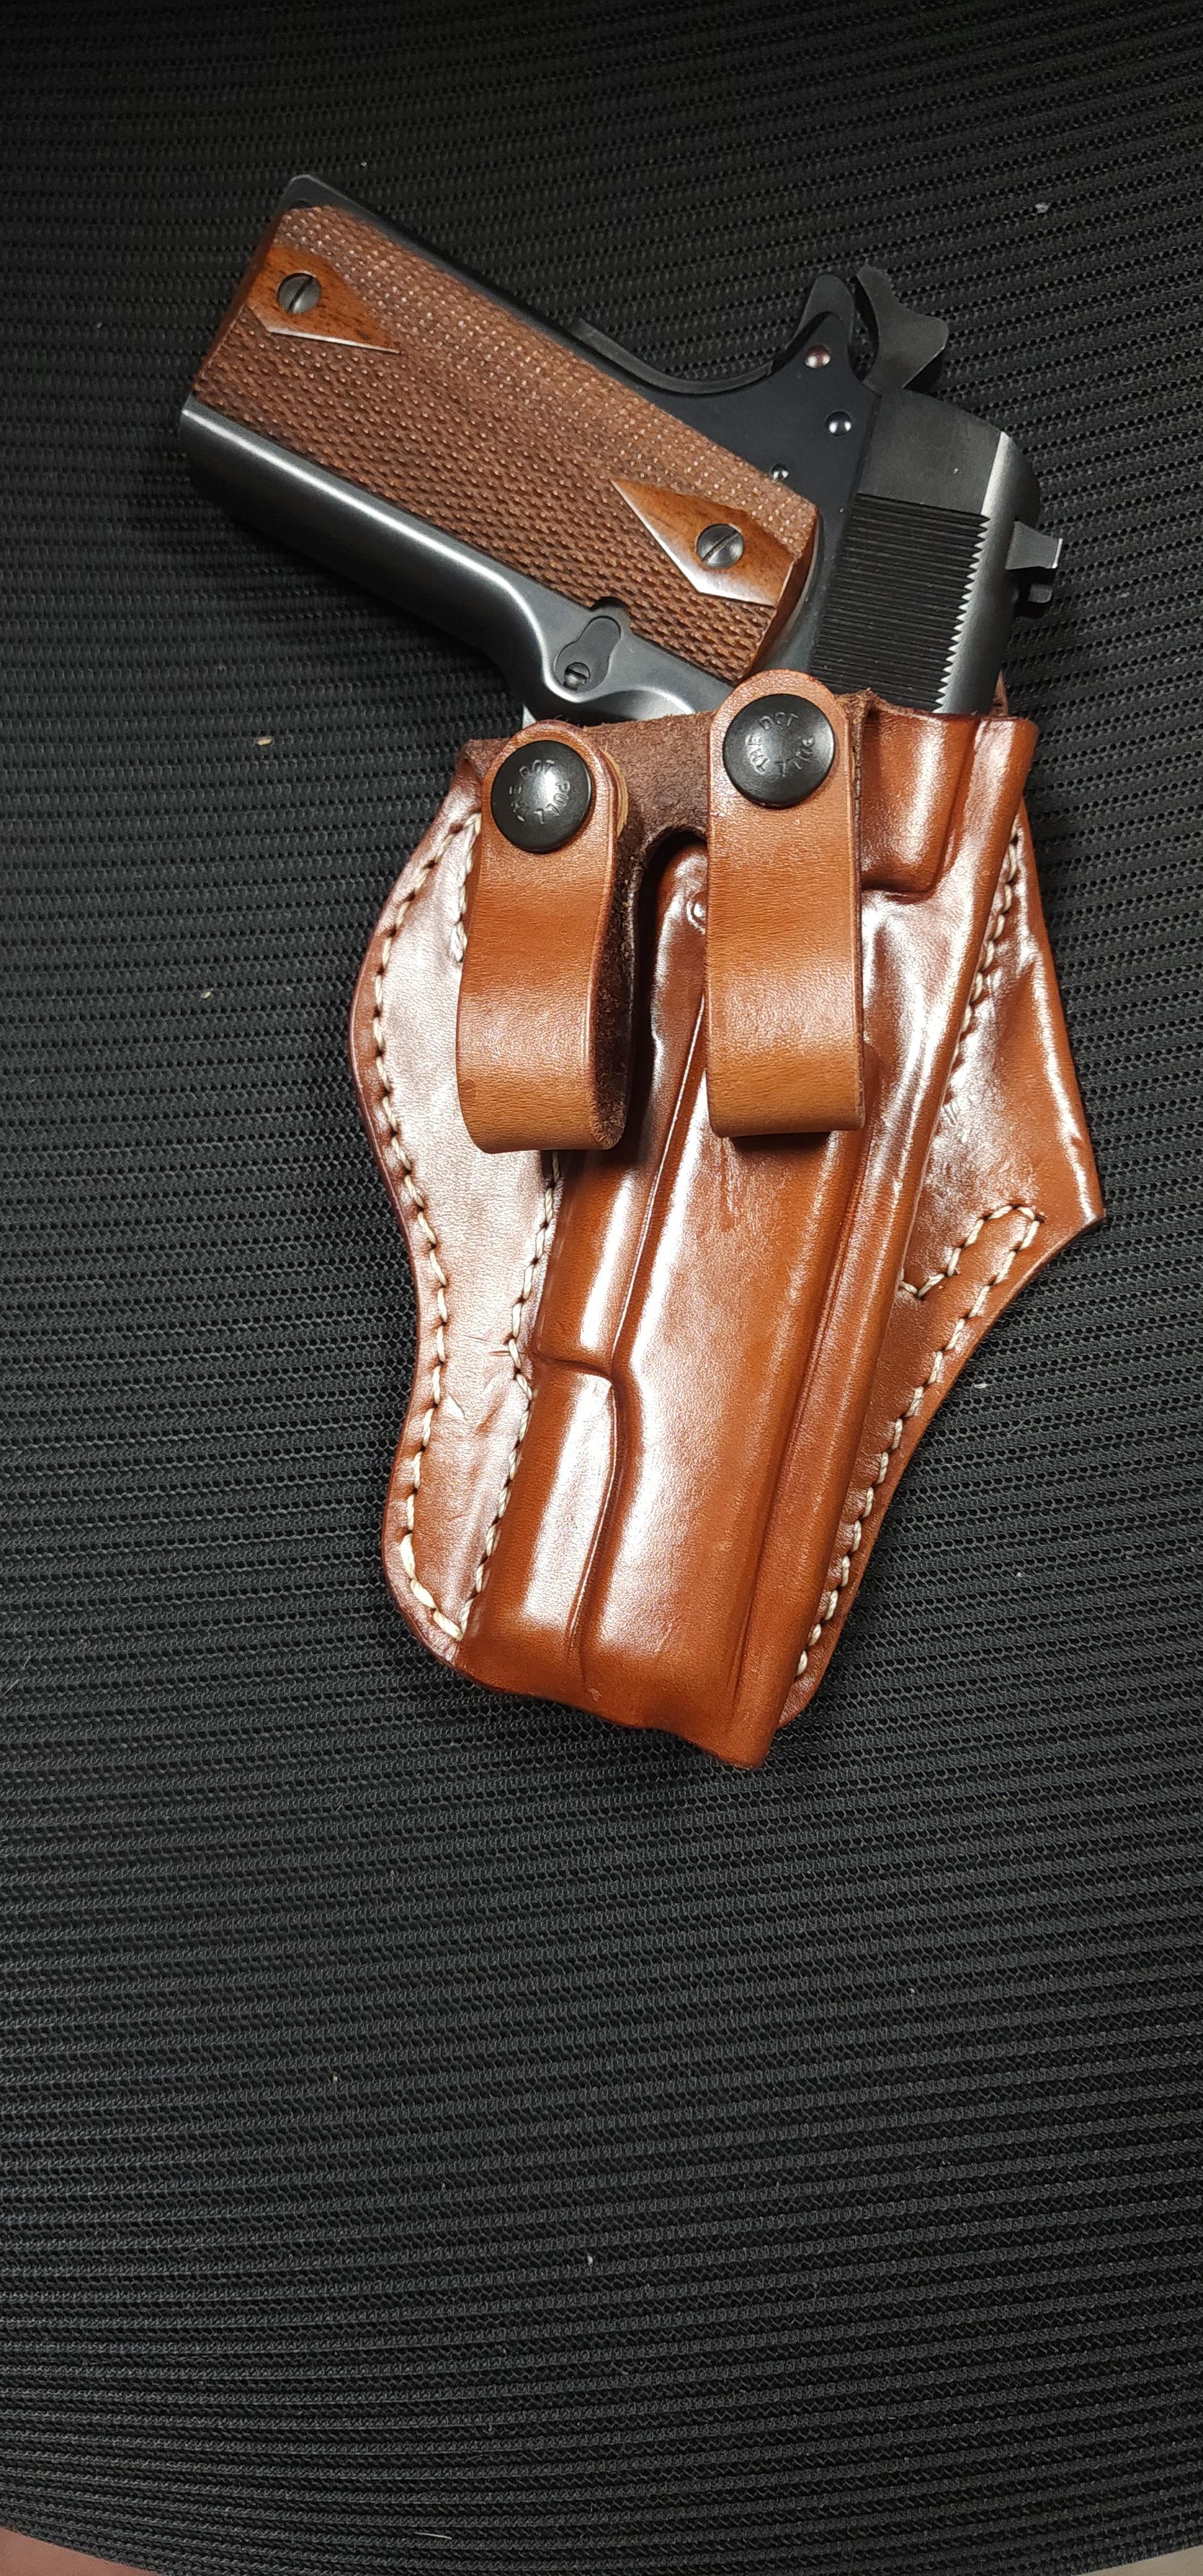
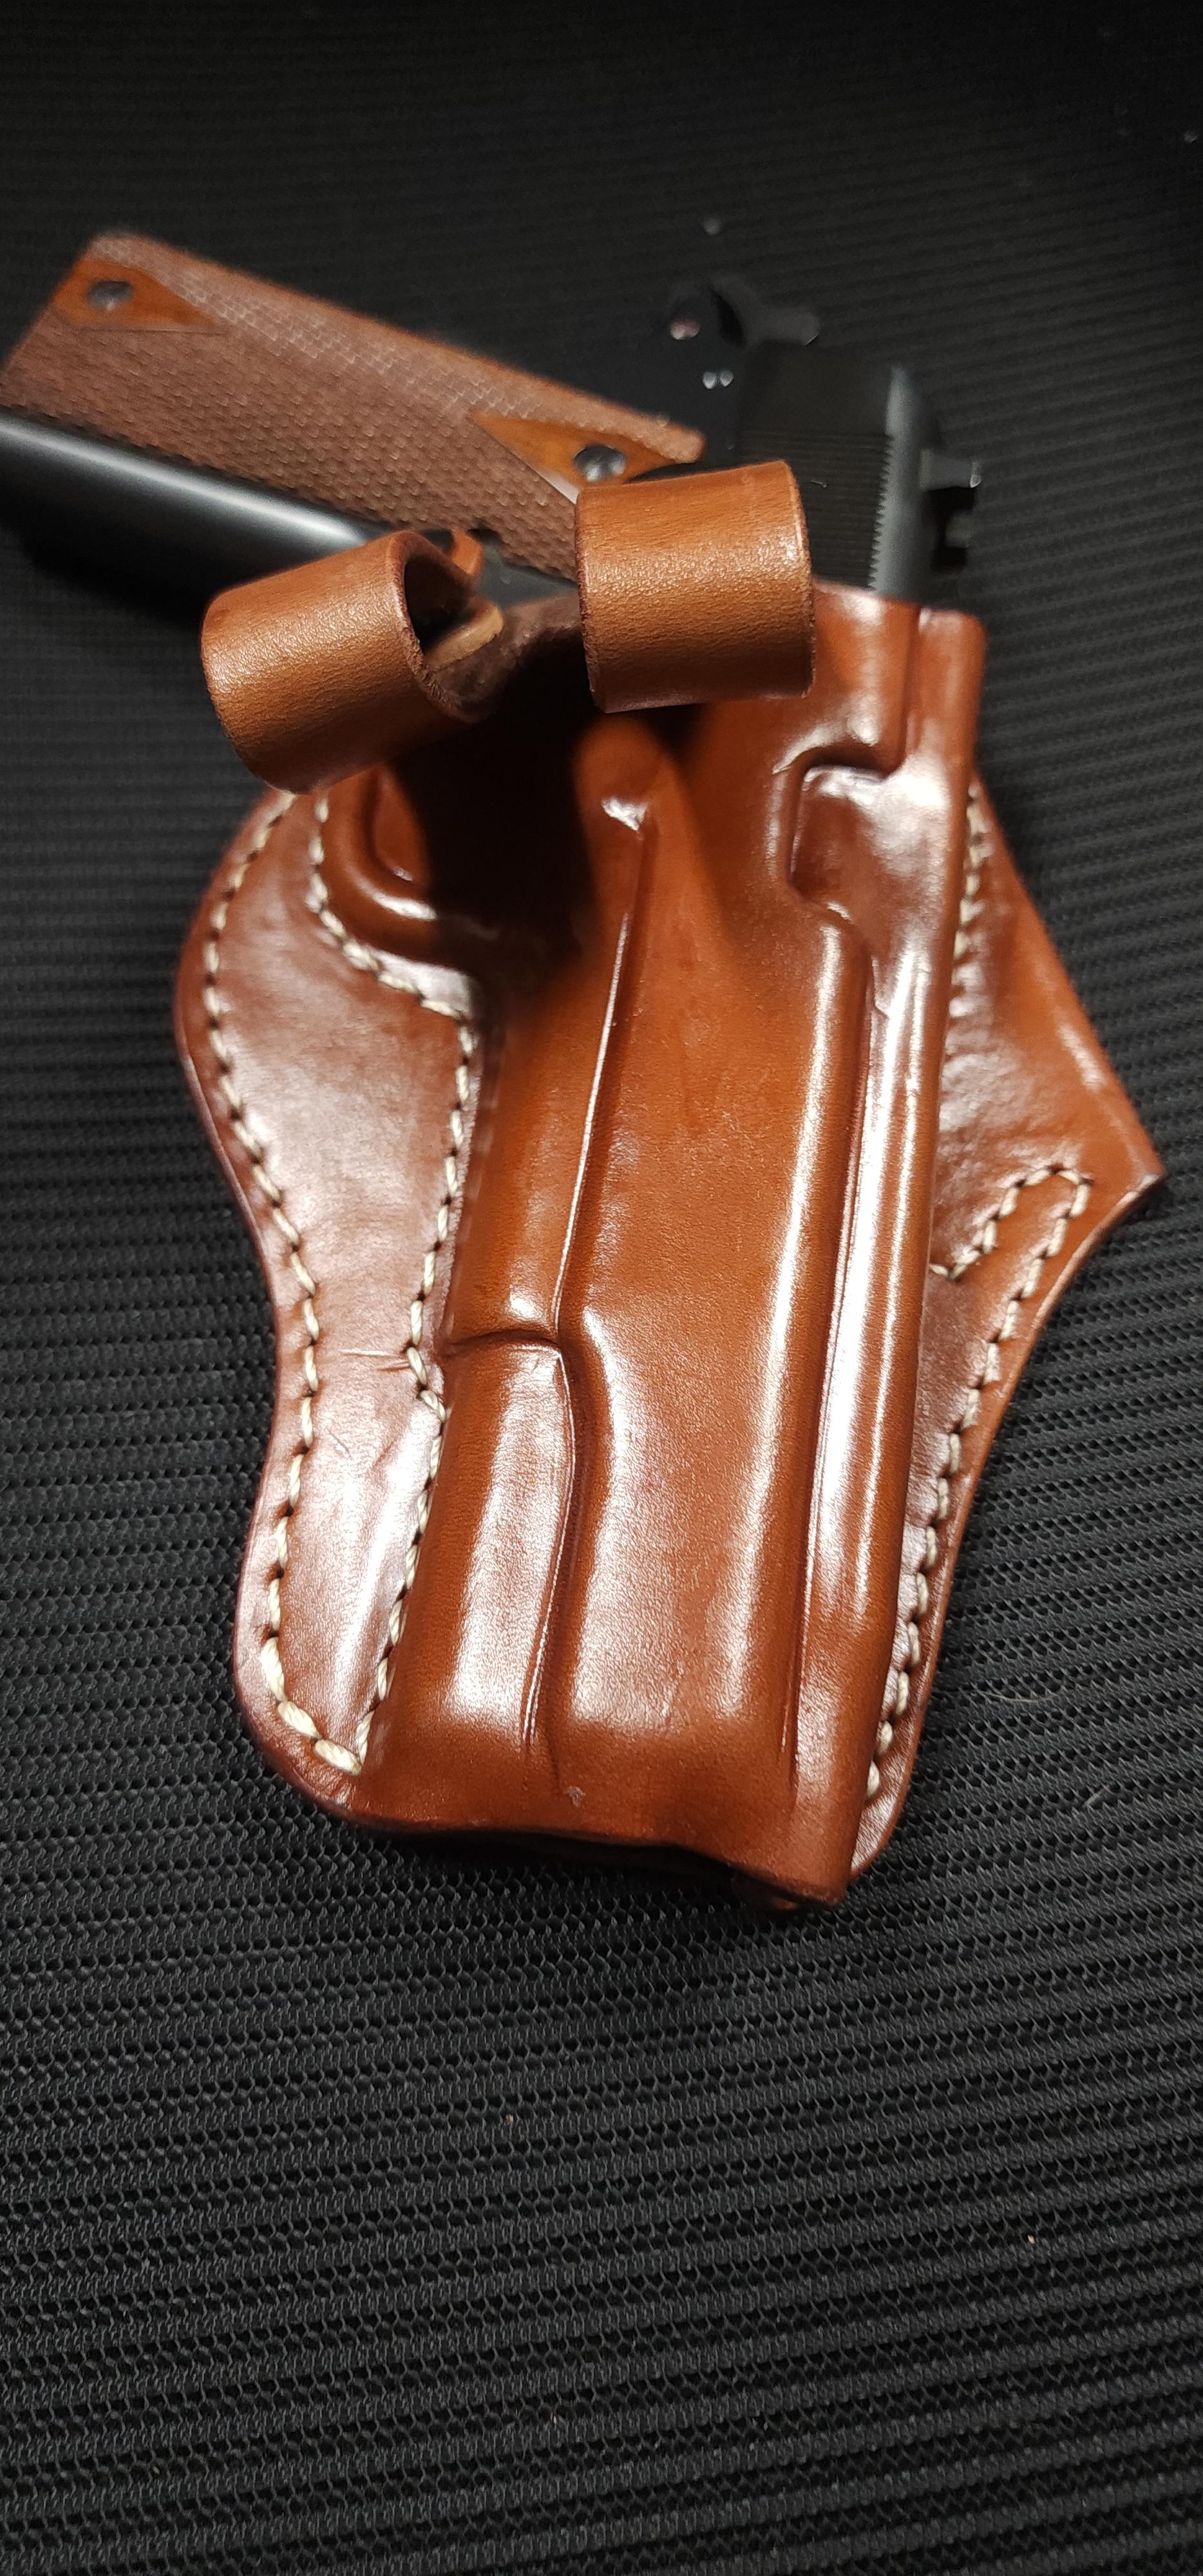
I revised my pattern and came up with this. It is based on Lou Alessi's design but i created the pattern based on photos. It is made from a single piece of leather.
-
Yes, I just googled it, and draw reins are what I am talking about. I just gambled with a direct translation from Danish :-) Here they are called: glidetøjler. glide = slip or slide, tøjler = reins. Brgds Jonas
-
Good looking leads and collars! I like the way you sewed the chapes on the ends of the rope leads. You are motivating me to make a leather collar for our new border collie rescue. He arrived a week ago and we've been his foster home until today when the mandatory hold on adoption is over and we can officially claim him as our own. We have another border collie who is teaching him how to (mis)behave around the farm.
-
 Nice work! Welcome to the forum!
 -
Google image search says it's a Singer 7-33. https://www.google.com/search?vsrid=CMGasciNpZWkahACGAEiJDA3ZDlkMGM2LTVlMDMtNGRiYS04NThjLTA3NDMzYjljNzZhYTIGIgJnaCgKOIz6m8nV9o8D&vsint=CAIqDAoCCAcSAggKGAEgATojChYNAAAAPxUAAAA_HQAAgD8lAACAPzABEIAIGIAGJQAAgD8&udm=26&lns_mode=un&source=lns.web.gisbubb&vsdim=1024,768&gsessionid=24dj2mh4nfiLTSphHqJfHudhqACKQKBxlDVm2yspEKbM25XhmrRn0A&lsessionid=U9iFFpQDbhz8KncIZ7XjX8c_1DDP_O5CbKsLDwO4GzJa1yPHkLRbRA&lns_surface=26&authuser=0&lns_vfs=e&qsubts=1758897977399&biw=1920&bih=903&hl=en#vhid=v6WRbHUhptf8PM&vssid=mosaic Here's the pdf for it. The 7-31 is similar to the 7-33 and uses the same manual. http://hensewfiles.com/PDFs/SINGER 7-31.pdf
-
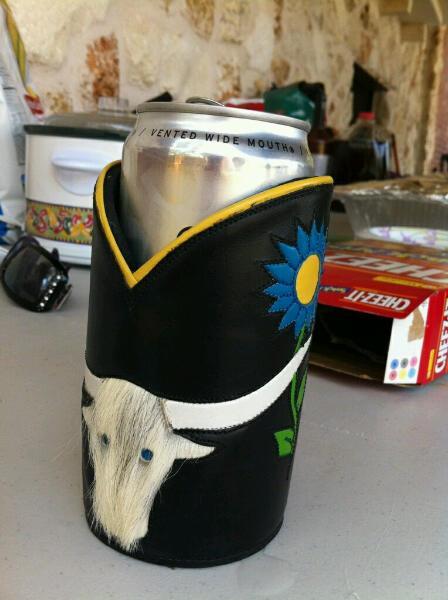
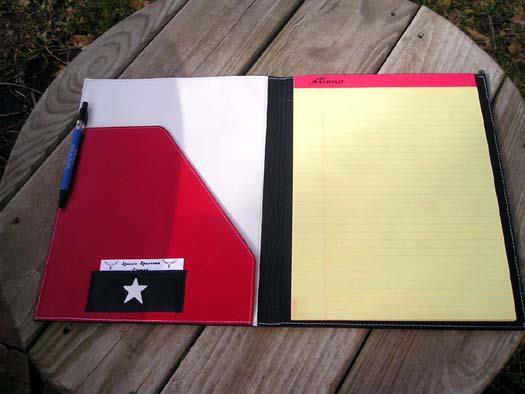
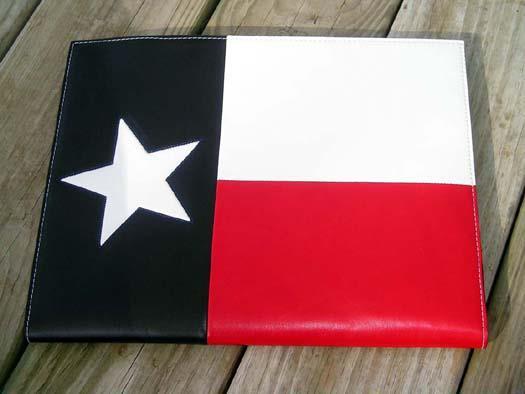
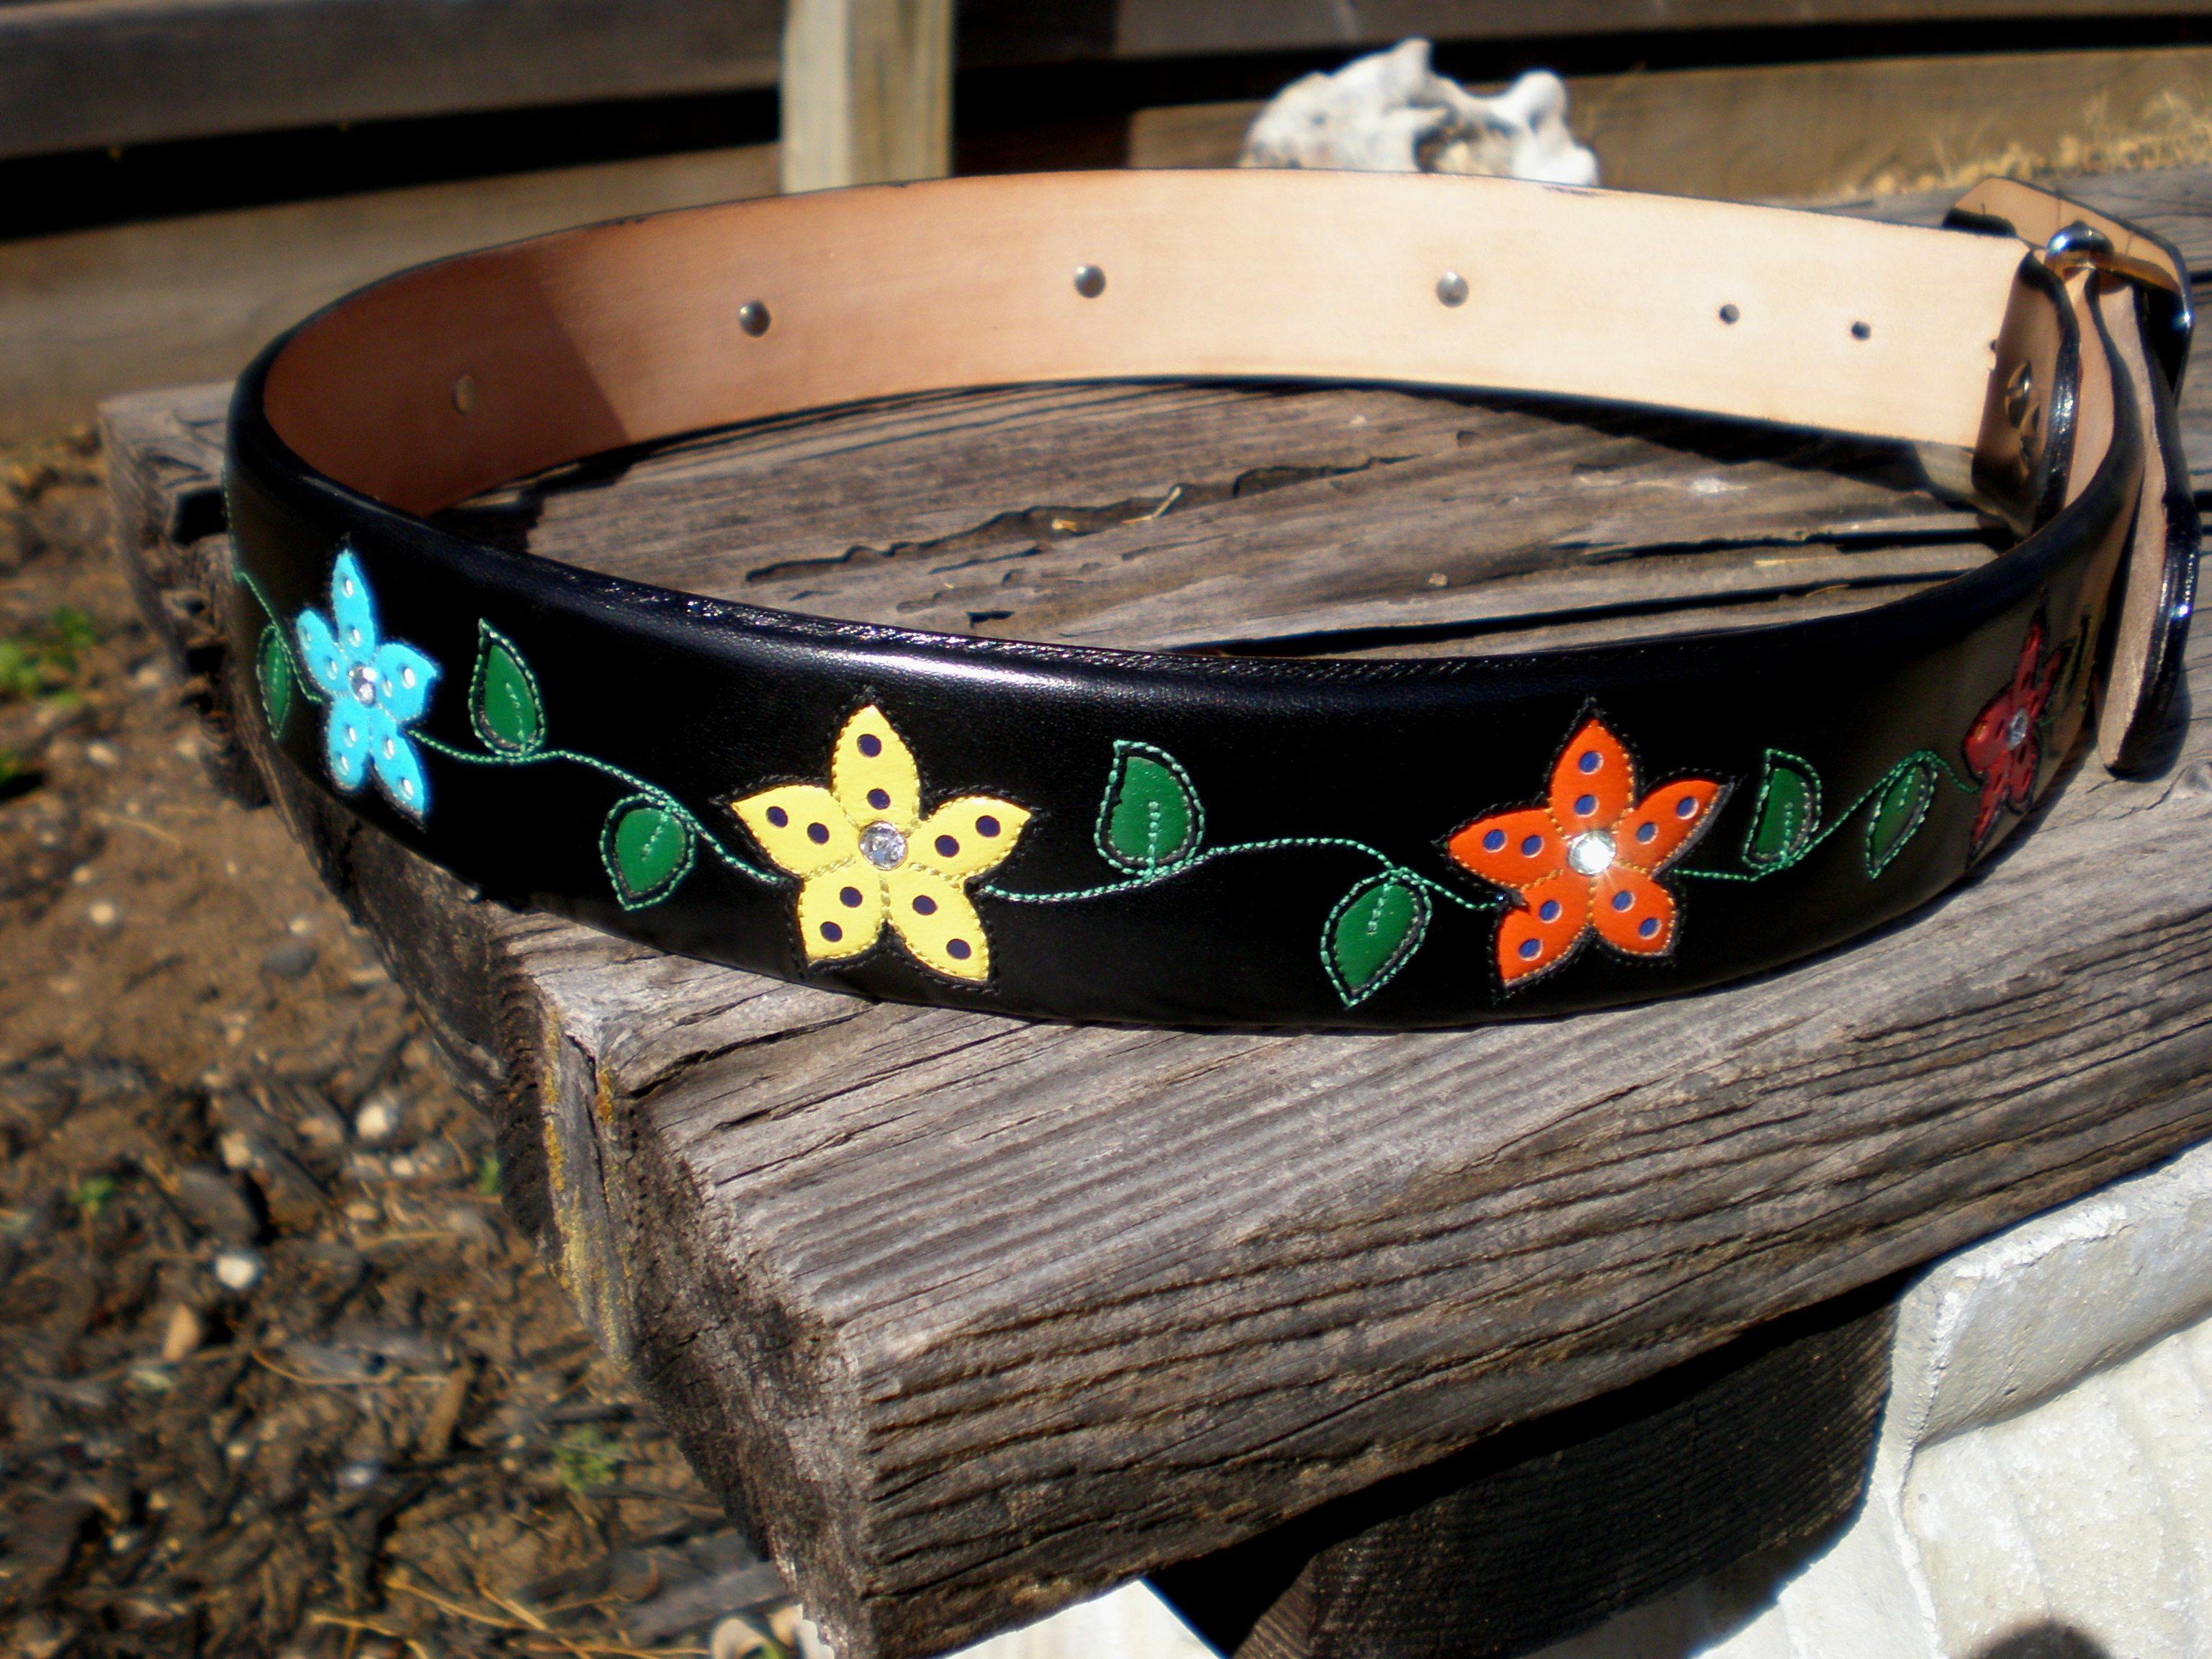
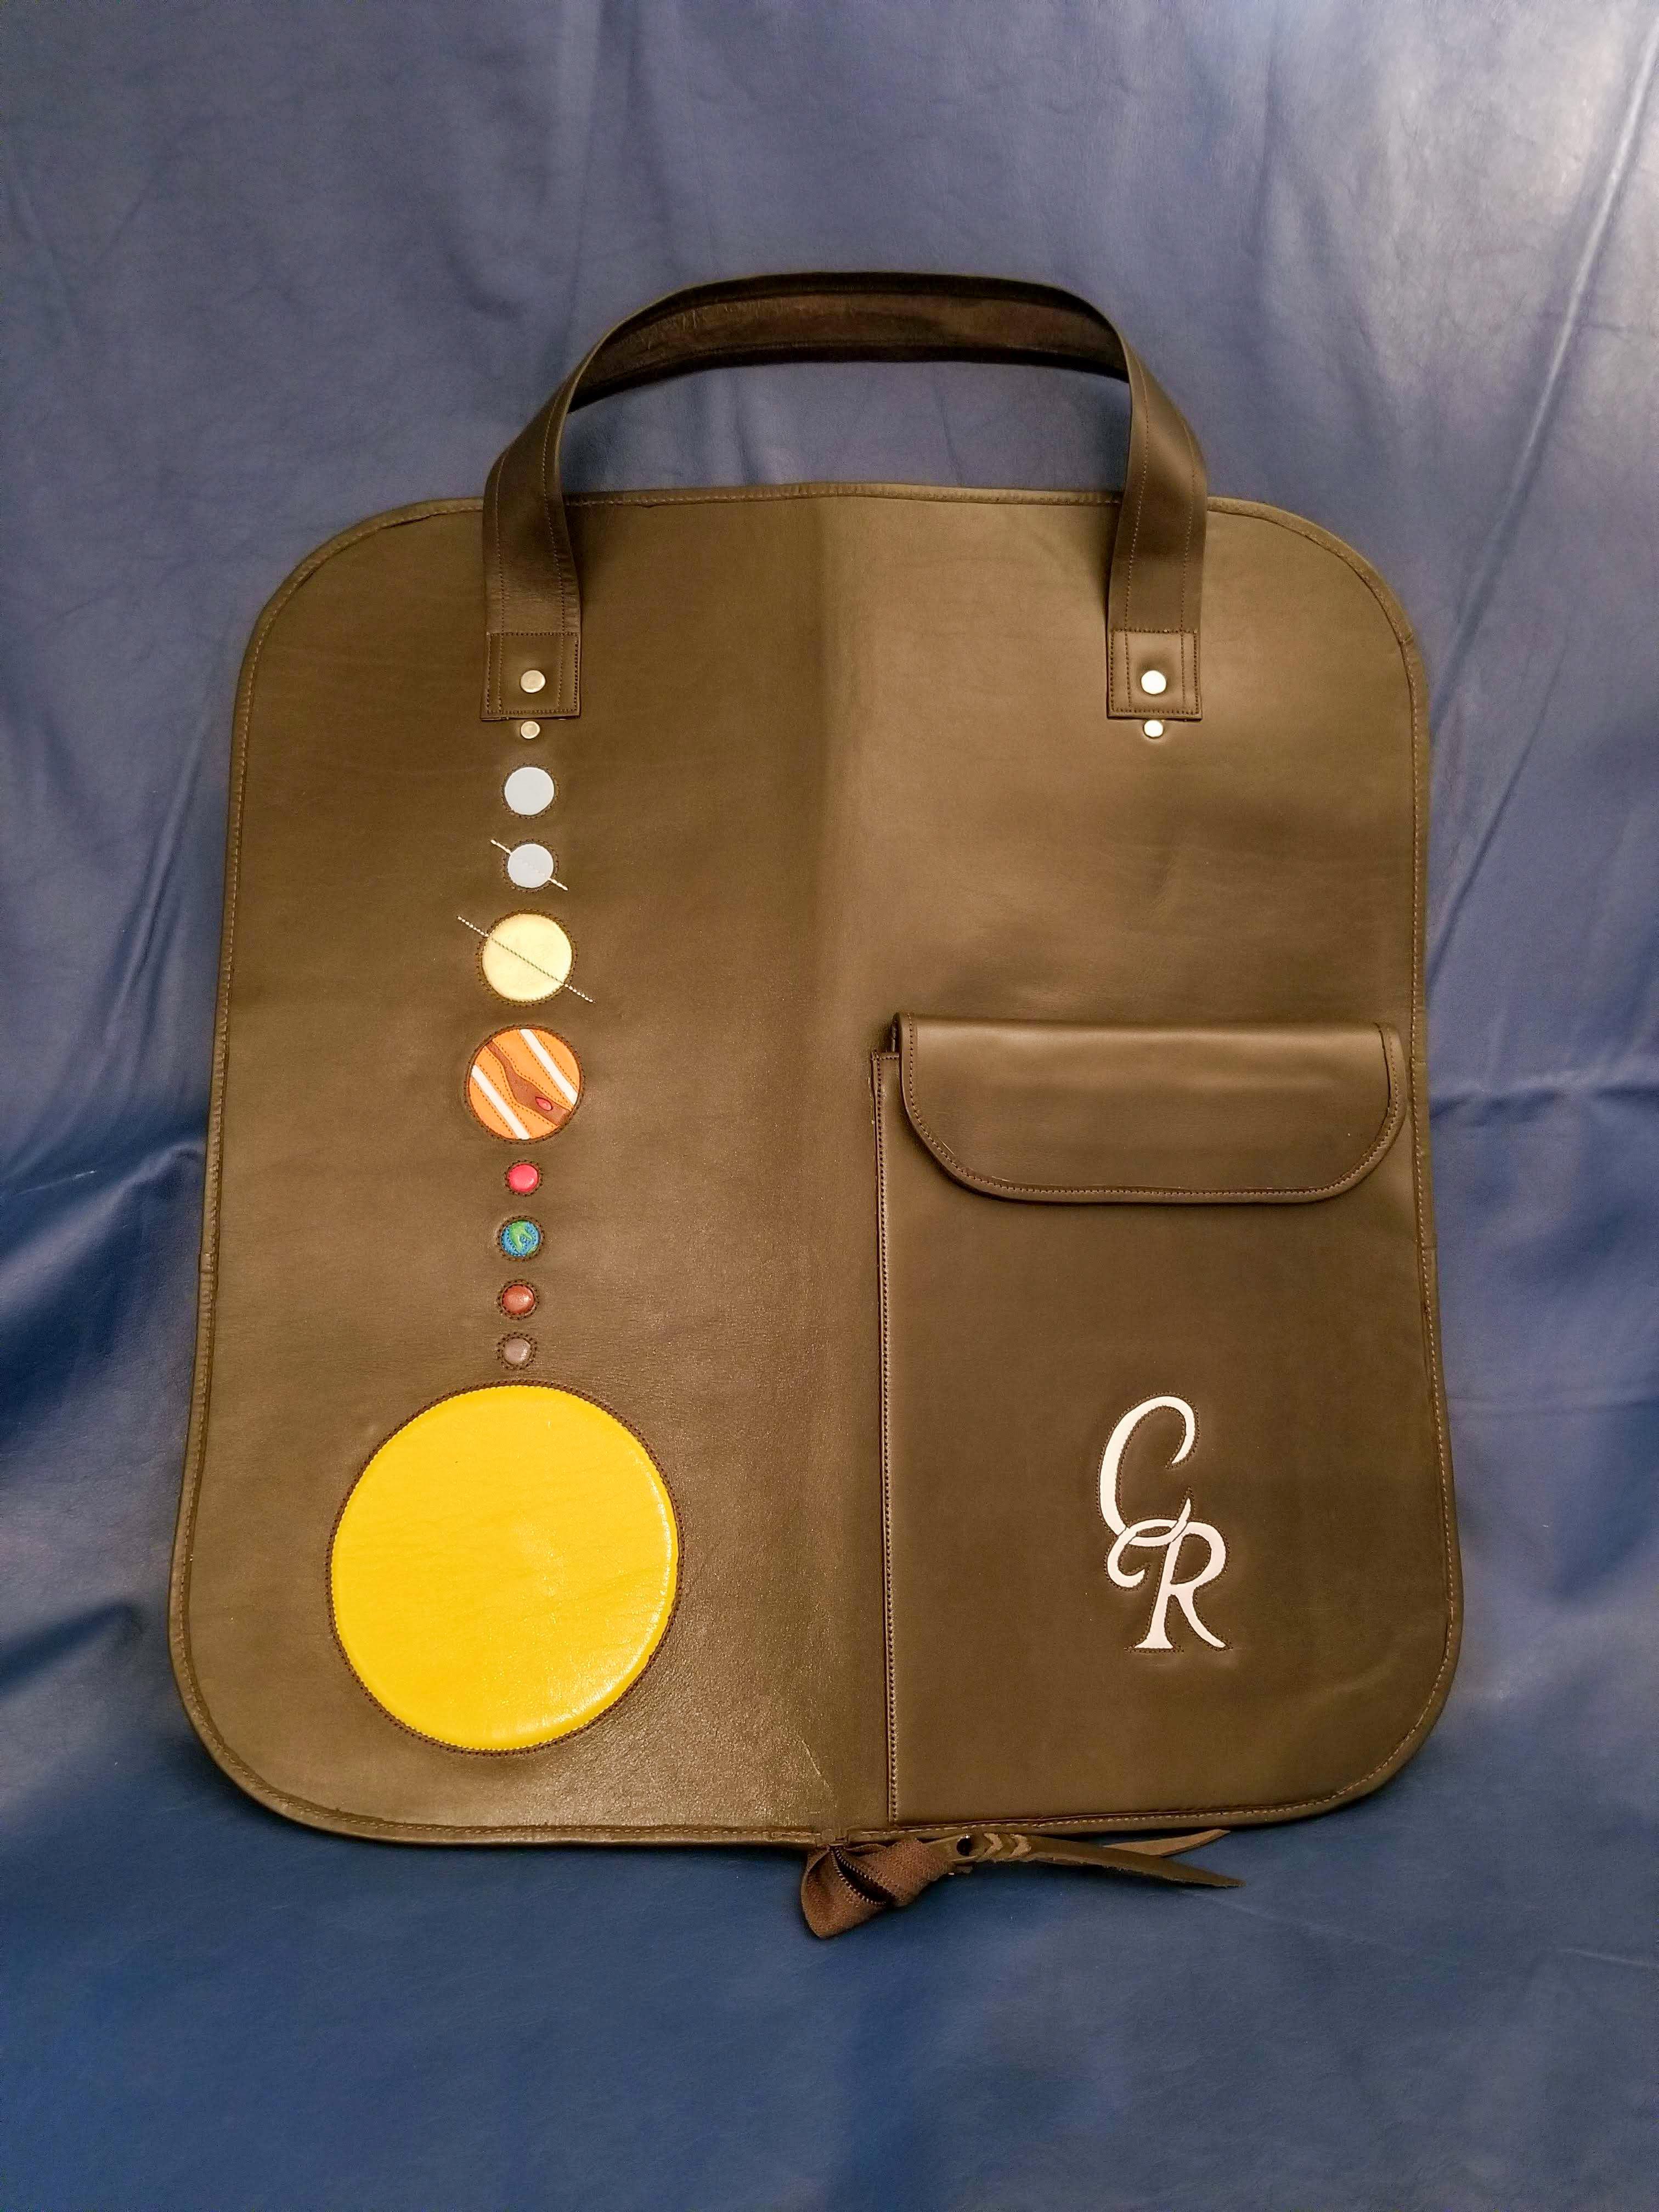
 Thanks for posting! Your original artwork is superb. I especially like the belt. OK, it's a tossup between the belt and the satchel with the planets. Beautiful work.
 -
The Chicago screws are a good idea - for the next one. This older client's saddle was in good shape, and I am guessing that she had taken a break from riding and was returning to it.
-
I've been asked to come look at this machine. They say they think it is "out of time". I can time almost anything, if that is the problem. Can anyone tell me the model? Any suggestions or resources? Thanks!

-
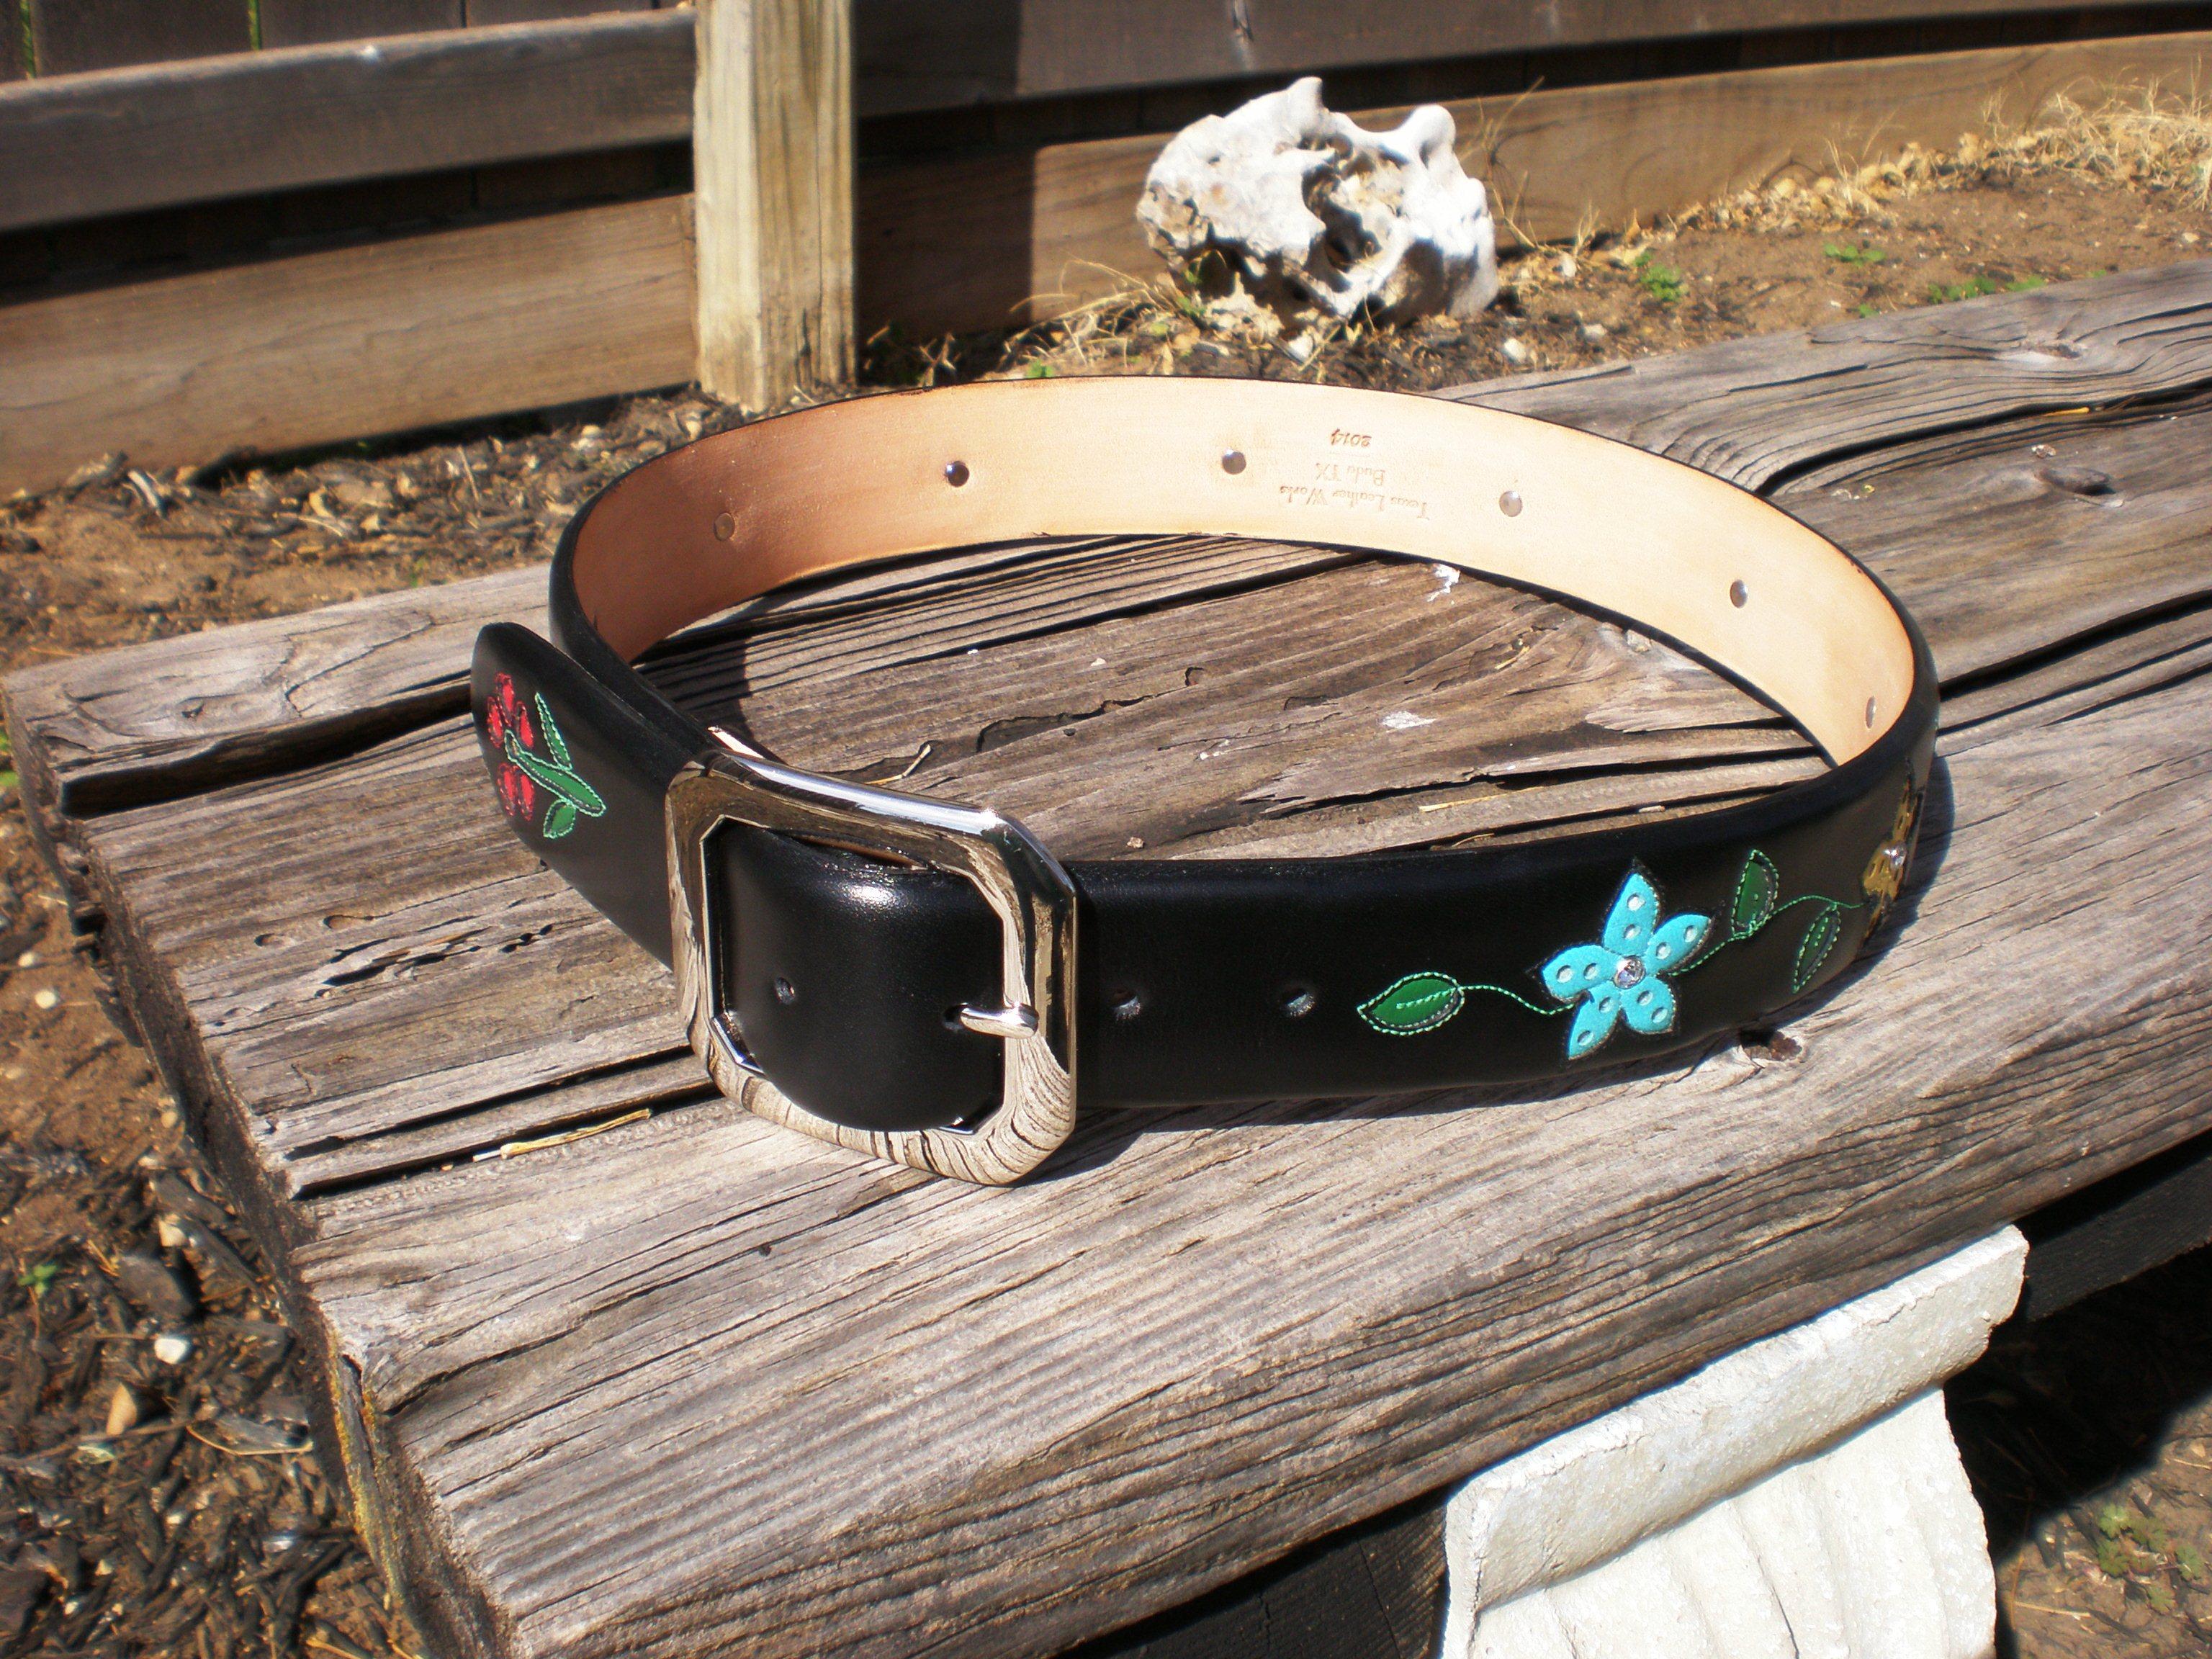
 Really nice work! And welcome to this forum. The belt is stunning! Is it machine or hand-sewn? Best, Tove
 -
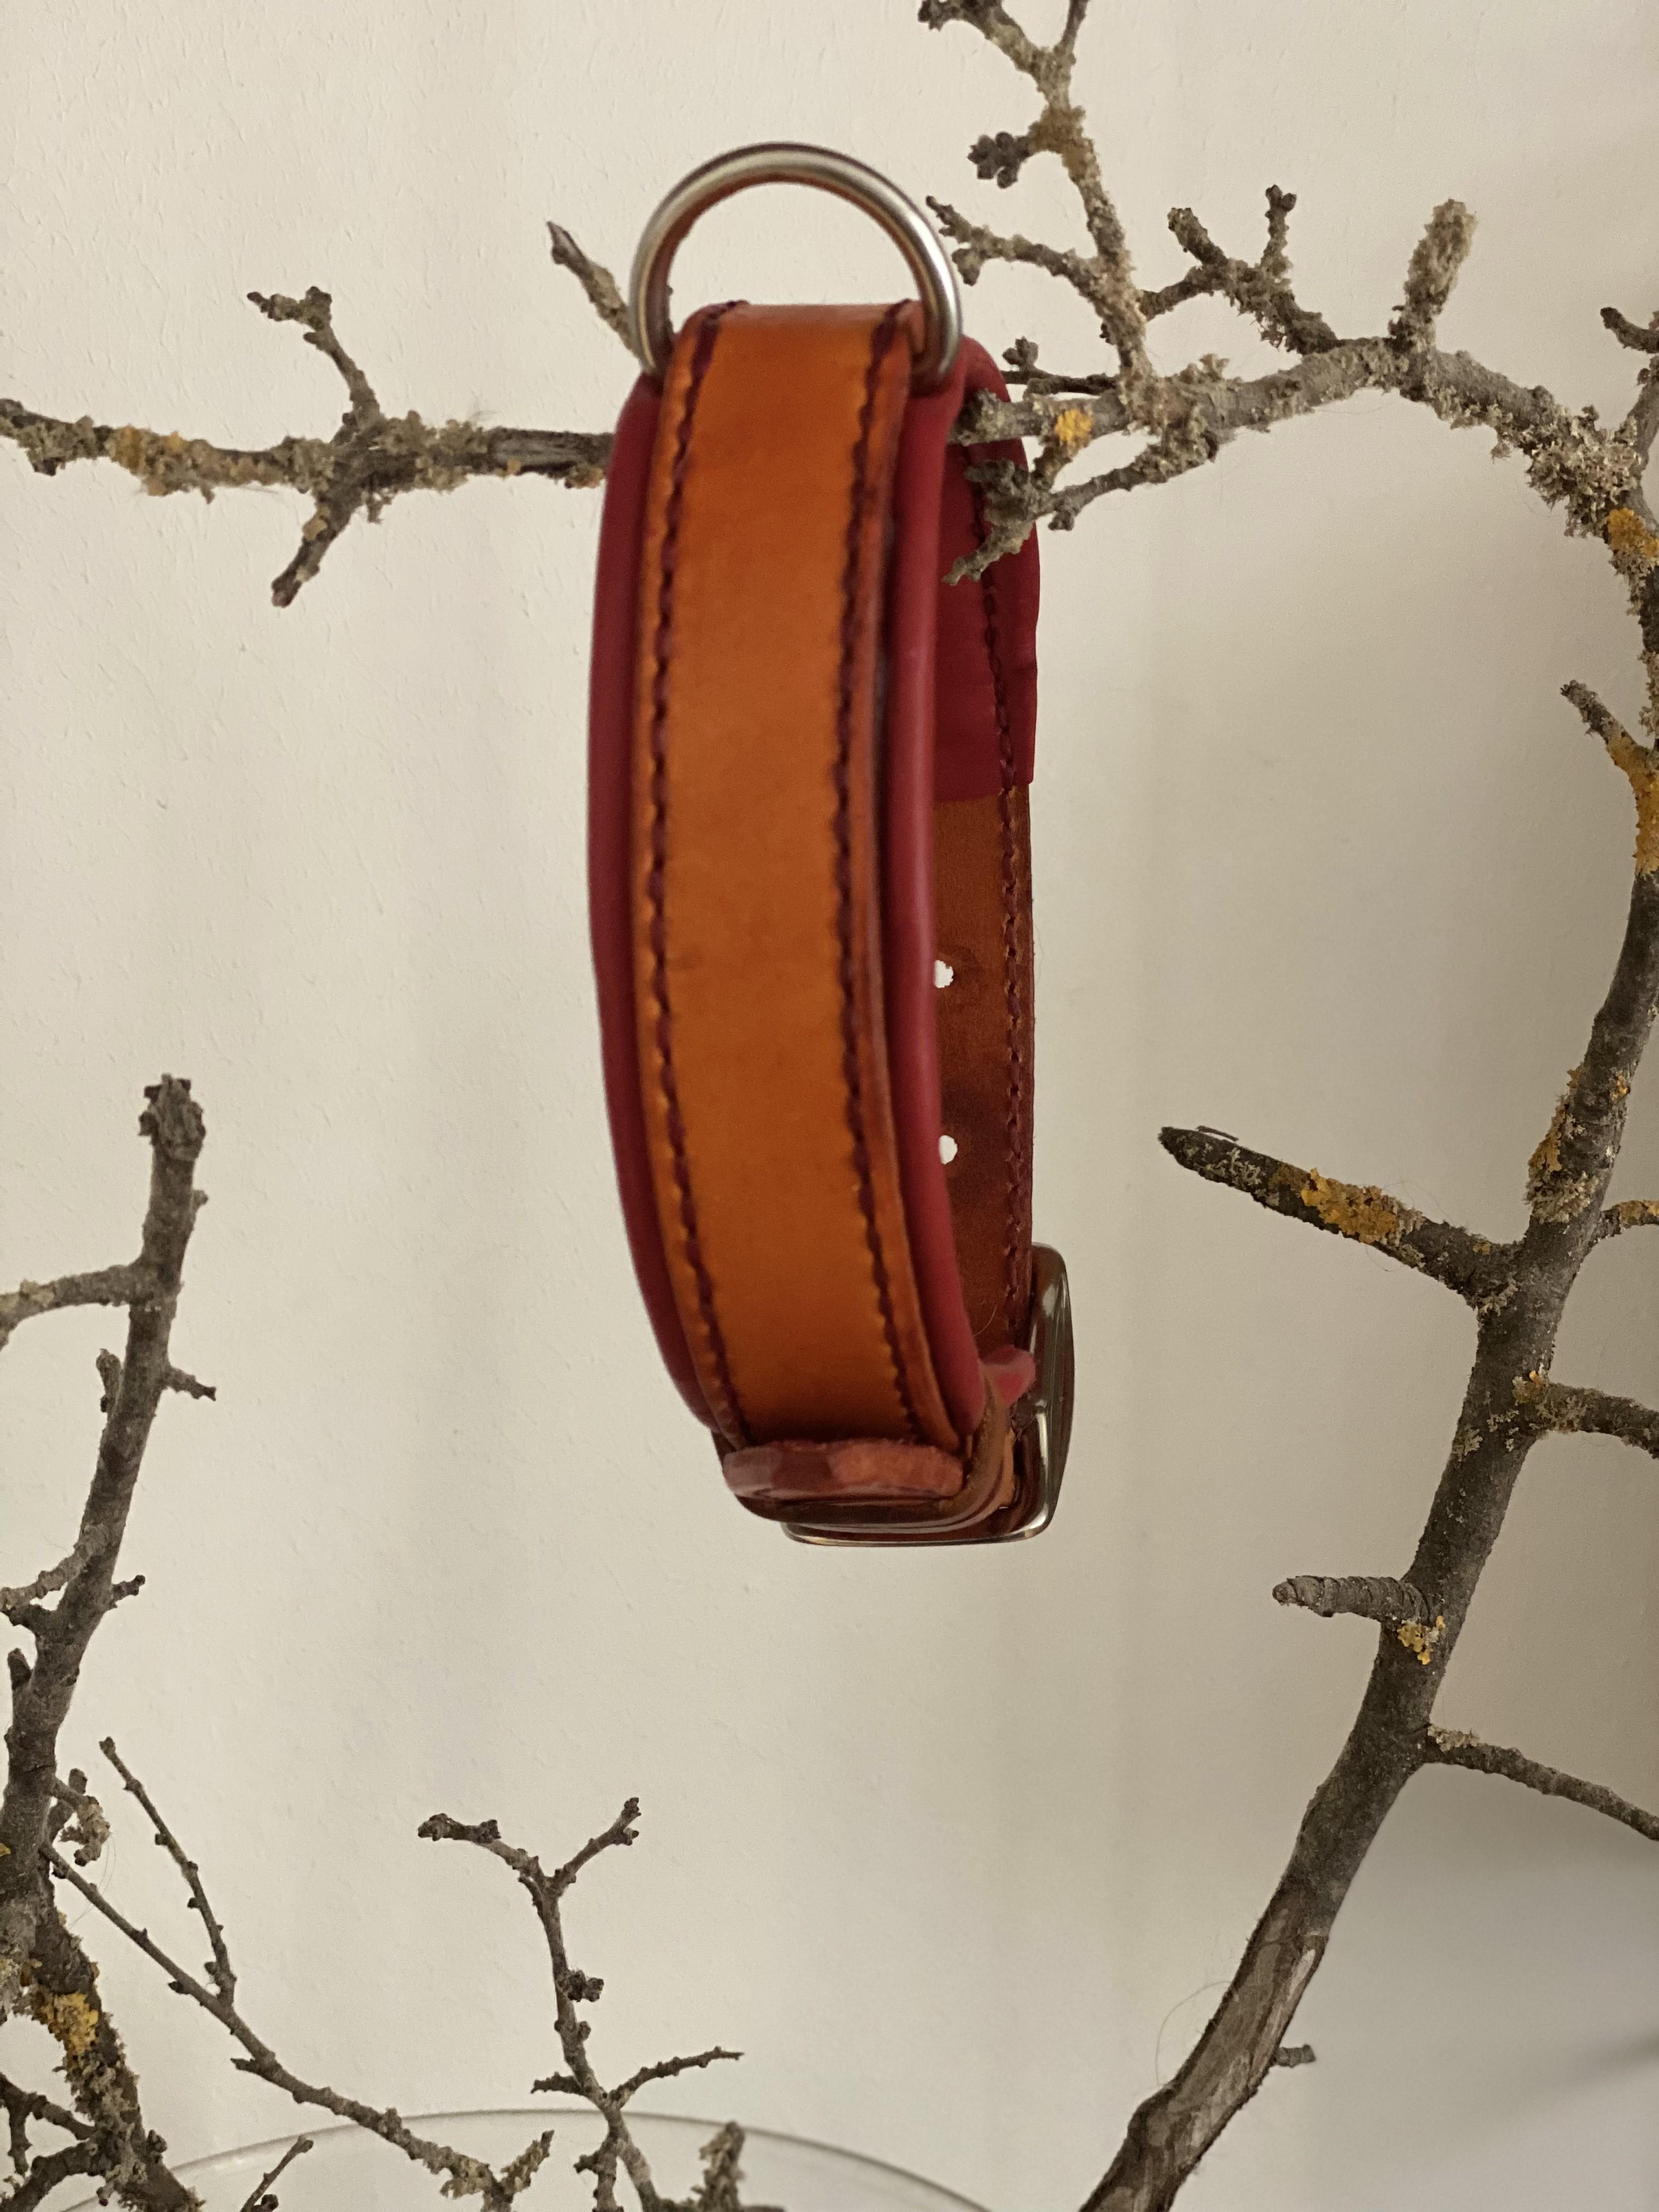
Well, my mum called again and asked for a new collar. Planned was only the yellow one with a matching leash, but as her Spinone Italiono grew out of his old orange collar and I still have a little of this lovely red sheepskin plus some orange dye, she got two. I'm very happy with the collars as they turned out beautifully. The lashes, let's say they are part of a learning process. The blue one is for my dog, therefore the hardware is smaller. I always use the rule of thumb of the dogs weight times 4 as the minimum breakage point of the hardware. The yellow one is solid brass and about 1,70m (custom measure) and the blue one standard length with steel hardware. She already has such a set, entirely hand sewn, in green, that holds up lovely despite being used almost everyday. The orange collar, will for now on be his dog-training collar for when he has professional training. I'm feeling a bit nostalgic as I made his first collar as well as the last ones of our deceased dog. Her last collar was green, her first handmade one orange. This colour become something special therefore, and If I should ever sell collars one type, only available in green and orange, will be named Tilda!

-
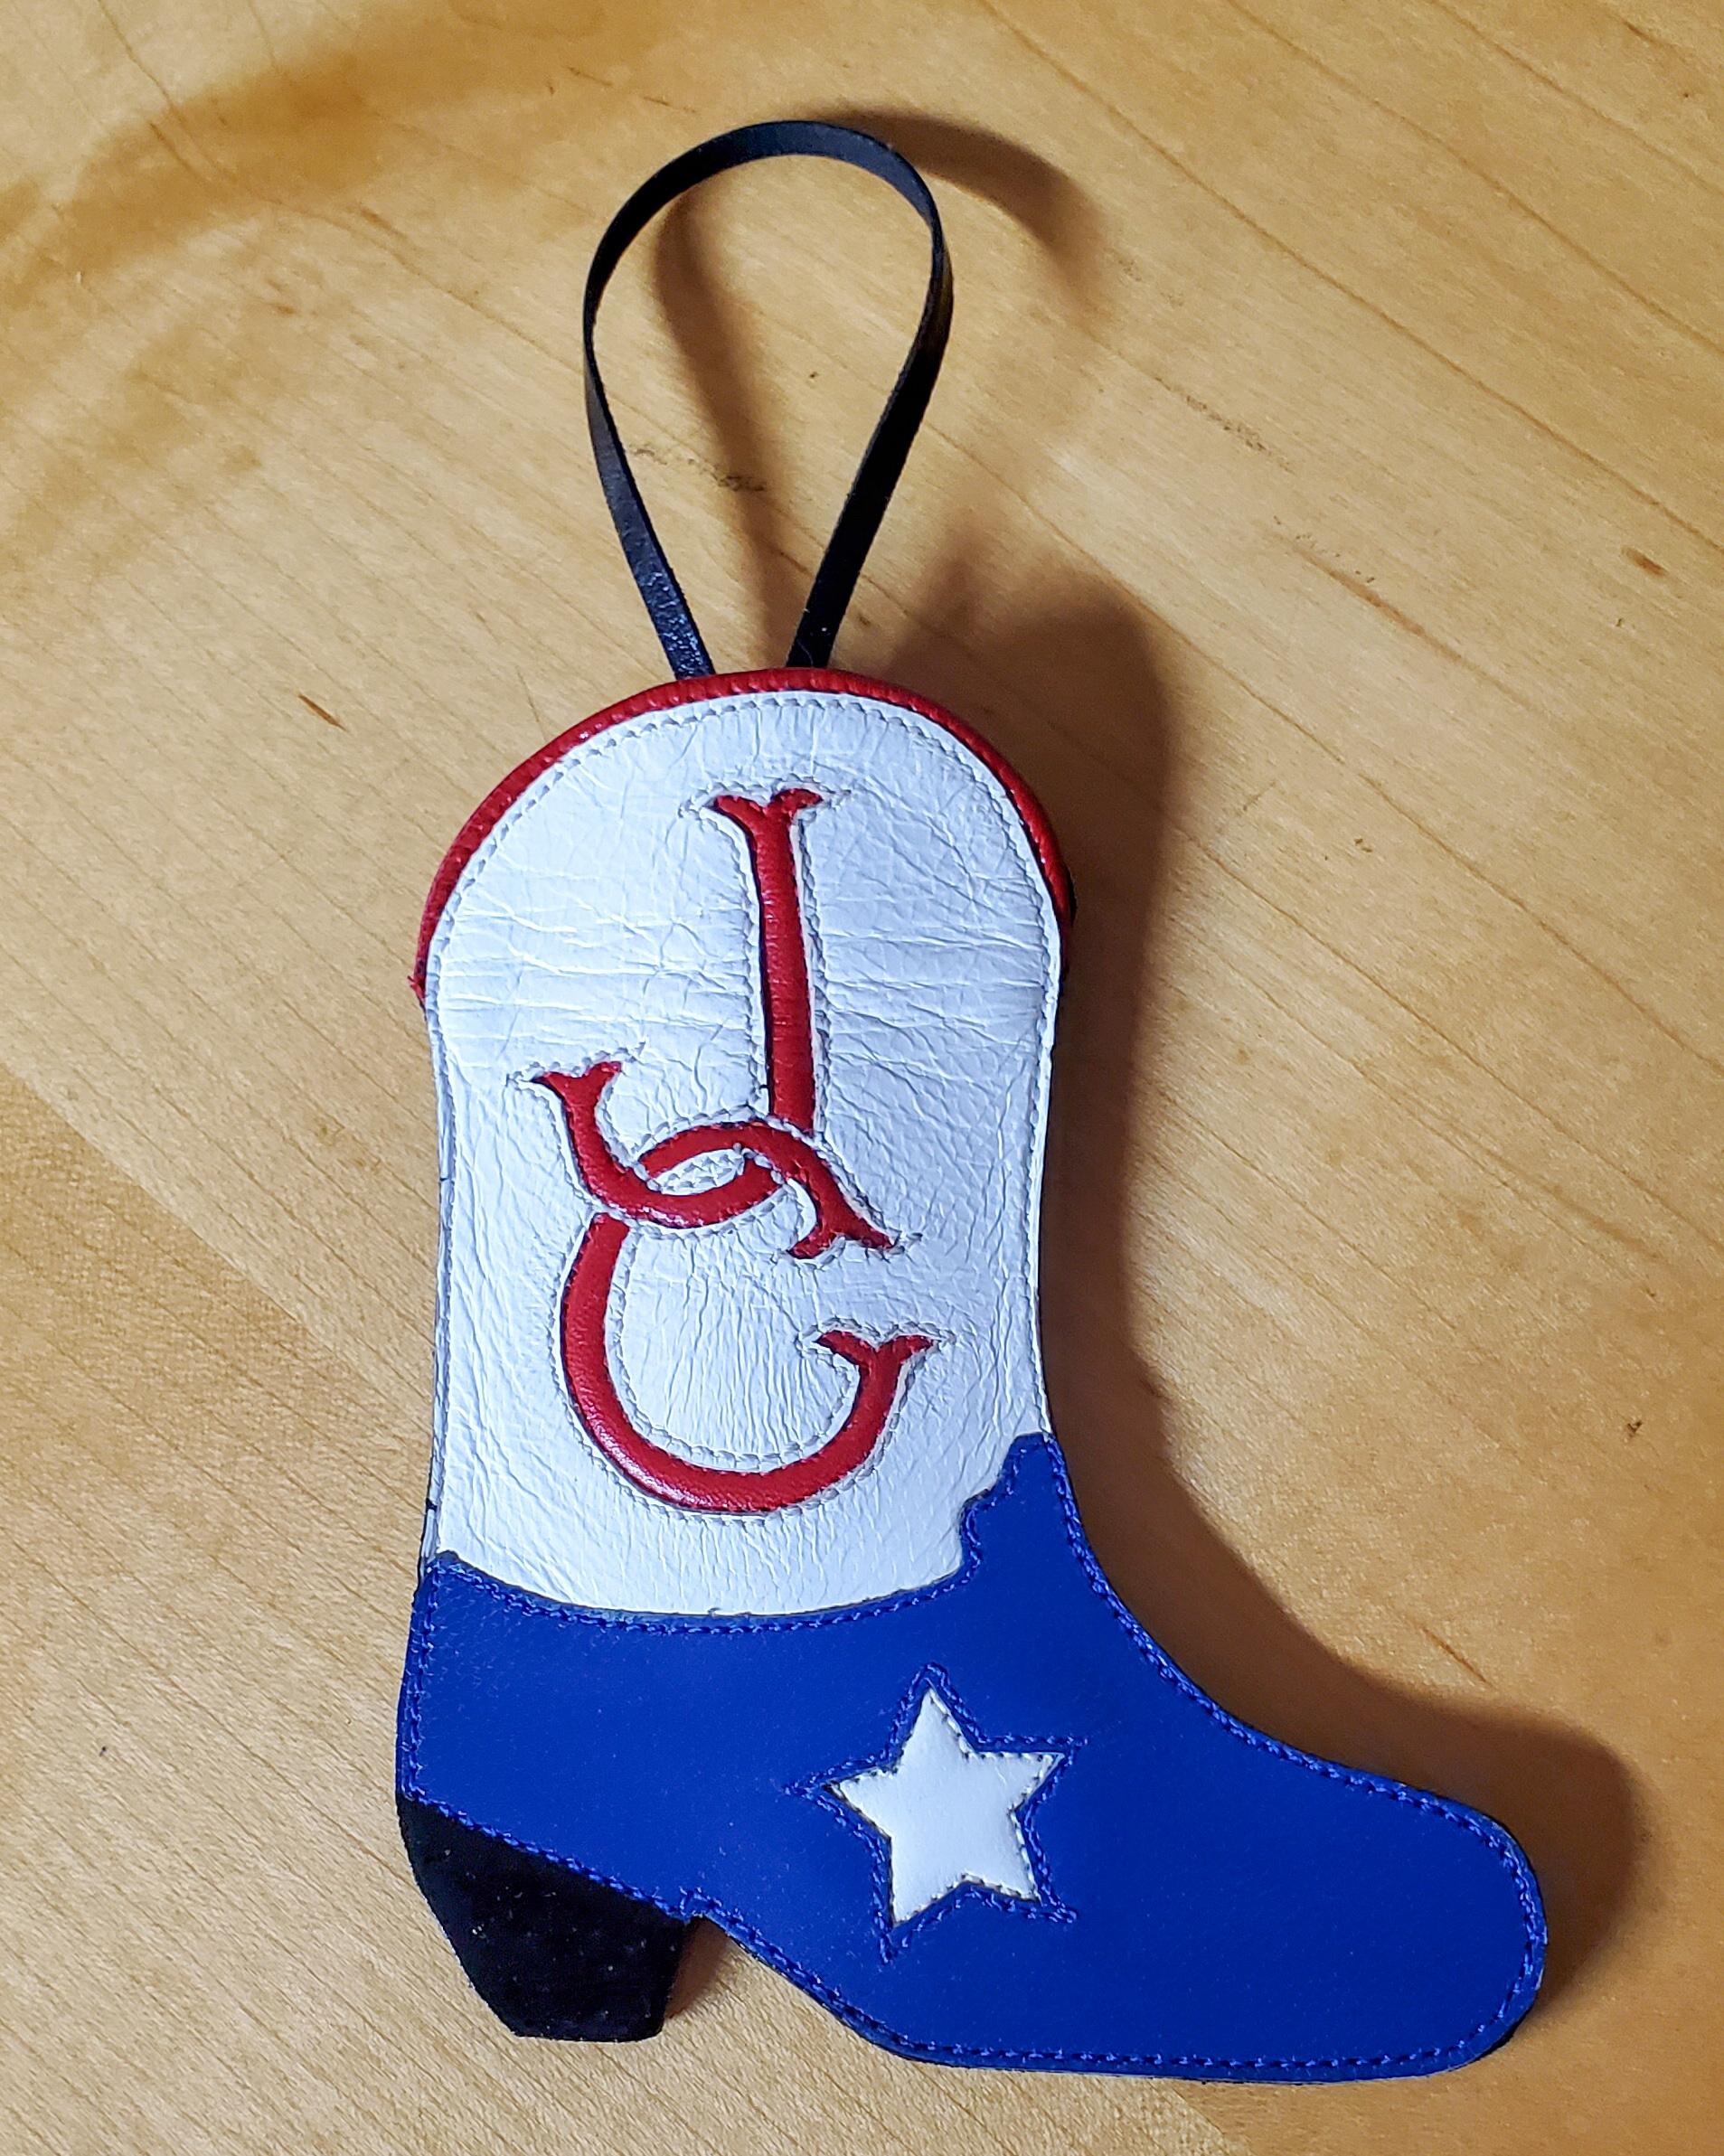
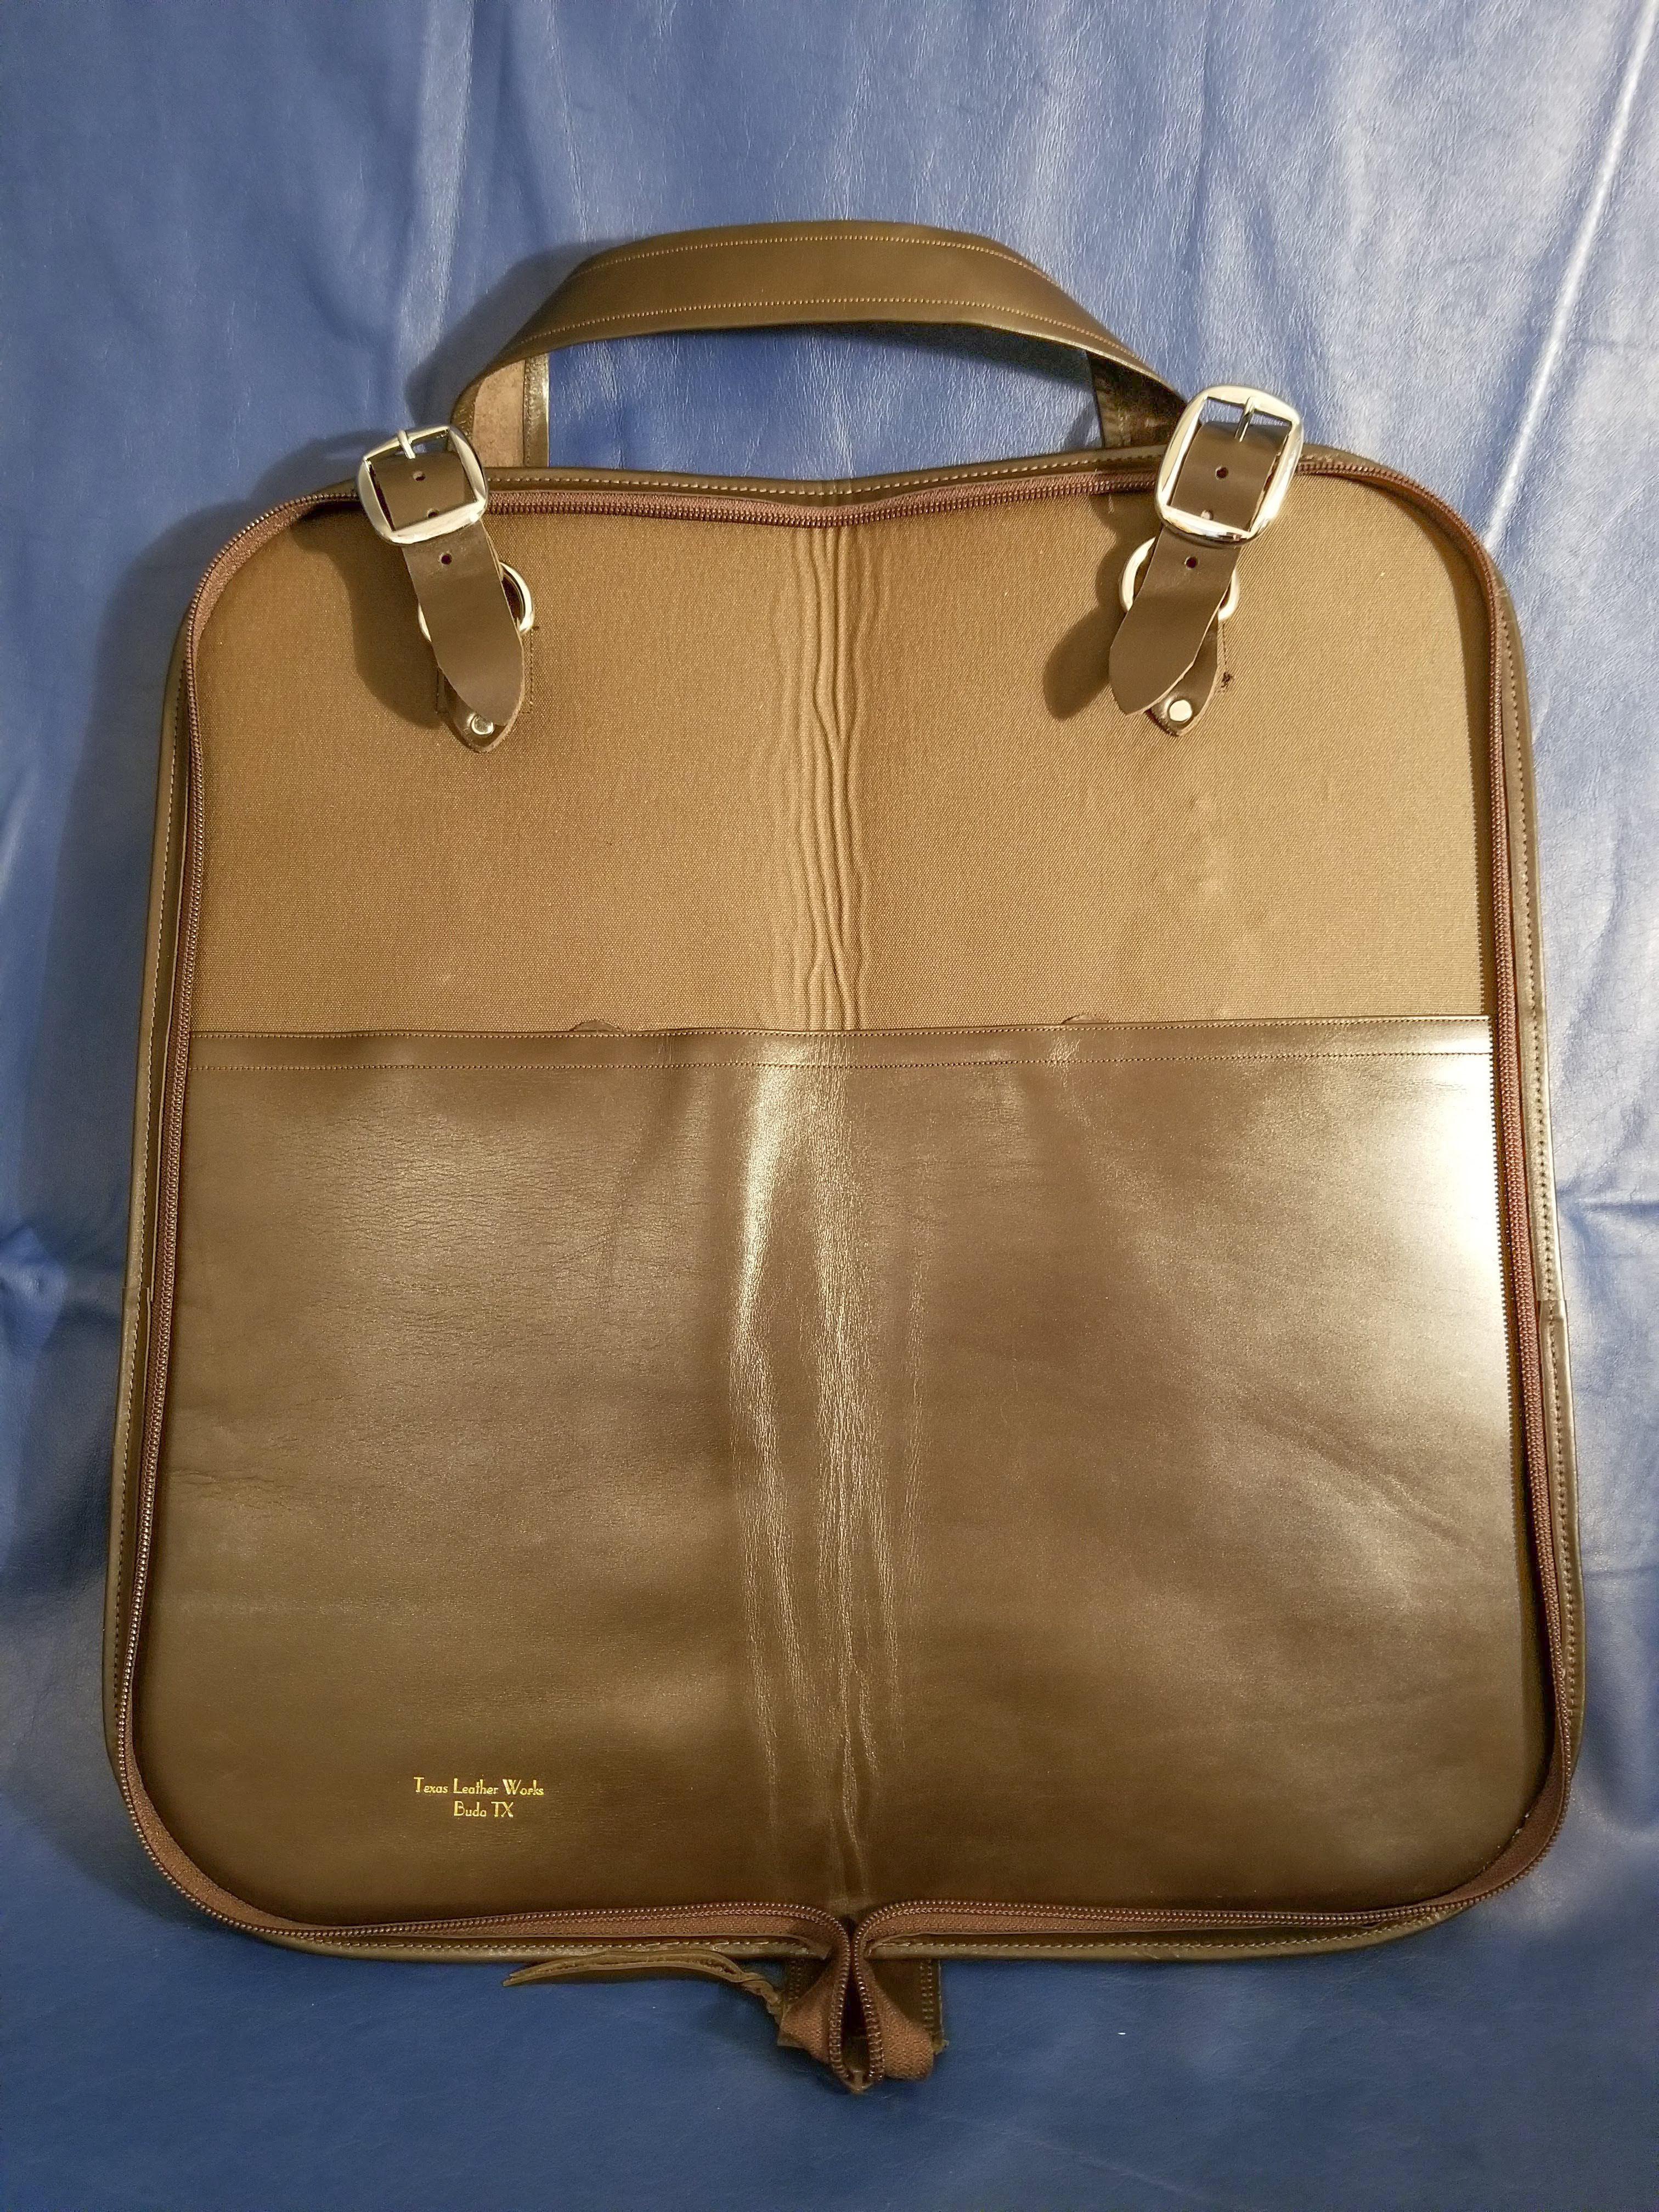
My shop is in Buda Texas just outside of Austin. I have been leather crafting for about 27 years and totally enjoy making new things. Here are a few things I have made in the past.