-
Posts
155 -
Joined
-
Last visited
Contact Methods
-
Website URL
N/A
Profile Information
-
Location
Montana
-
Interests
Hunting, fishing, leatherwork, wrenching, wood working.
LW Info
-
Leatherwork Specialty
Holsters, belts, knife sheaths
-
Interested in learning about
Anything to make life easier
-
How did you find leatherworker.net?
Looking for information on snapping turtle inlays
Recent Profile Visitors
DoubleKCustomLeathercraft's Achievements

Member (2/4)
-
.thumb.jpg.327685d8c1787fa894323fed9a6b2dac.jpg)
Happy Christmas 2025
DoubleKCustomLeathercraft replied to Handstitched's topic in All About Us and Off Topic
Merry Christmas to you and yours, and everyone here. -
.thumb.jpg.327685d8c1787fa894323fed9a6b2dac.jpg)
Desert bighorn holster is finished
DoubleKCustomLeathercraft replied to DoubleKCustomLeathercraft's topic in Show Off!!
Thanks chuck. I'm happy, the client is even happier. It's a win- 15 replies
-
- desert bighorn
- holster
-
(and 1 more)
Tagged with:
-
The frame completes it.
-
.thumb.jpg.327685d8c1787fa894323fed9a6b2dac.jpg)
Desert bighorn holster is finished
DoubleKCustomLeathercraft replied to DoubleKCustomLeathercraft's topic in Show Off!!
Mclark Thanks. Yes the knot is for the hammer spur strap. I don't have a picture of the back and the pattern is from "the hand of God" pack, (3:10 to yuma) but modified a little to fit a regular belt instead of a gun fighter belt. It's stitched instead of folding over and into a "Mexican style" loop. My client has no desire to have a full rig, he just wanted the holster. So I trimmed some of the extra bulk off to make it more comfortable on a standard belt.- 15 replies
-
- desert bighorn
- holster
-
(and 1 more)
Tagged with:
-
Wow. Thanks for all the advice here. I still have to process everything I just read, but I've got and ideas of what to do from everyone.
- 4 replies
-
- marketing
- social media
-
(and 3 more)
Tagged with:
-
.thumb.jpg.327685d8c1787fa894323fed9a6b2dac.jpg)
Tandy gun holster pattern wanted
DoubleKCustomLeathercraft replied to Wildwest2029leathercraft's topic in Resources
Have you tried Tandy's website under recourses? They have a lot of their patterns available for free download. Along with so many other things. -
I know I'm way behind on this because I'm stubborn and have been opposed to social media since the days of MySpace. I do use YouTube as a learning source (how I learned this craft) and some entertainment of course. The local market is a little stale right now and highly dependent on tourists. Tourist season is pretty much wrapped up and all the snow birds are flocking south for the winter (FL, AZ, TX). I've come to realize that I am missing out on free advertising to 2 (IG) to 2.5 (YT) billion people. I really have no clue what to do or how to present my work on platforms such as Instagram. Ican make short videos on the process like I see everyone else doing, but what would stand out? Does anyone have any tips, tricks or techniques to build an IG page that would attract more business? What kind of posts or reels work best for leathercraft? And the algorithm? My IG page @doublekcustomleather I've been signed up to LinkedIn forever it seems, and have grown a decent sized network. So I decided to start writing weekly posts with images to hopefully promote my brand. I can't seem to keep them short and engaging. Although I did get more interest from my second post. These two, and maybe YouTube are all I would consider using. My problem is I really don't know how to engage these platforms, or how to utilize the algorithm for selling custom leather products. There are plenty of YouTube videos on business, selling and building a following on IG, but it's all premade products. I am a made to order business and don't have an inventory of products. I'm just hoping some of y'all might have some advise to share See.... I'm long winded.
- 4 replies
-
- marketing
- social media
-
(and 3 more)
Tagged with:
-
Fancy rims on a pinto, with a banging stereo system! Haha Nice work.
-
.thumb.jpg.327685d8c1787fa894323fed9a6b2dac.jpg)
Desert bighorn holster is finished
DoubleKCustomLeathercraft replied to DoubleKCustomLeathercraft's topic in Show Off!!
Doesn't bother me at all. The line art for the holster is in my previous post in showoff. I put a watermark on it, but not to where it distorts the image. Respect for asking. Thanks Thank you everyone. I appreciate the kind words, it helps keep me motivated to create more.- 15 replies
-
- desert bighorn
- holster
-
(and 1 more)
Tagged with:
-
.thumb.jpg.327685d8c1787fa894323fed9a6b2dac.jpg)
Desert bighorn holster
DoubleKCustomLeathercraft replied to DoubleKCustomLeathercraft's topic in Show Off!!
-
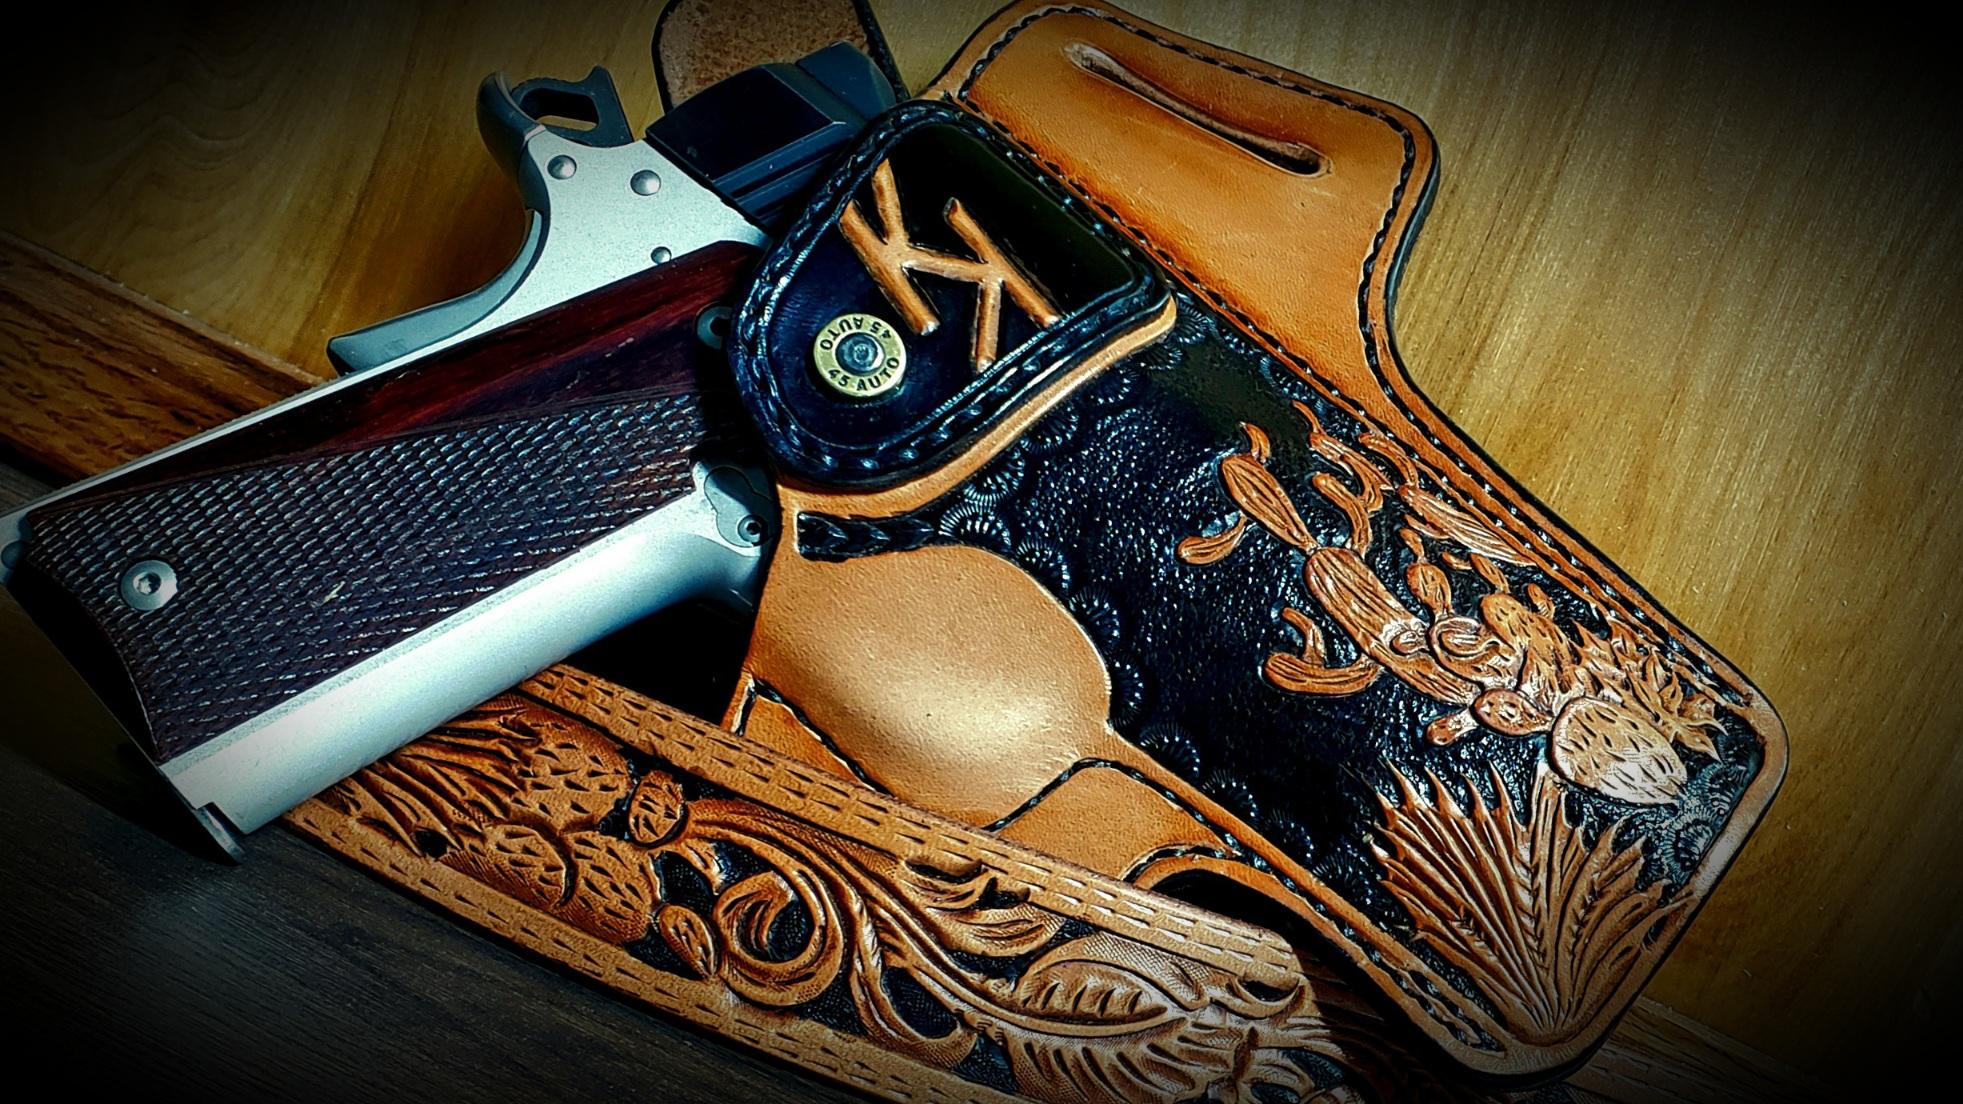
This is a follow up to my previous post explaining how I drew the pattern for this carving. And a few other things. I did add a toe plug on this to help retain its shape for years. My client specifically said, "I would like you to have artistic freedom on this, and I would like to be surprised" direct quote. I chose the bighorn because of their resilience and strength. They live a rugged lifestyle that represents the wild west. I chose the desert bighorn because it's headed to CA and they're one of two native species too the state. Hermann oak holster tan 9/10 from weaver. Feibings pro dye light brown Feibings antique finish dark brown, with no resist to darken the leather a bit for a more medium brown Feibings leather balm atom wax finish Ritza tiger thread 1.0 cream saddle stitched Tokenol edge burnish Weaver's Water Buffalo lining, and hammer spur strap (for strand round braid)
- 15 replies
-
- desert bighorn
- holster
-
(and 1 more)
Tagged with:
-
.thumb.jpg.327685d8c1787fa894323fed9a6b2dac.jpg)
Desert bighorn holster
DoubleKCustomLeathercraft replied to DoubleKCustomLeathercraft's topic in Show Off!!
I literally just put the final coat of leather balm on it. I'll take some pictures tomorrow before it gets shipped out so I can get em posted. Ya, I'm pretty happy with this one. The bighorn sheep is one of those animals. They're big, bold, strong animals that seem to demand respect with just a side eyed glance. They way they survive defines what rugged really means. -
.thumb.jpg.327685d8c1787fa894323fed9a6b2dac.jpg)
Removing double sided tape glue residue?
DoubleKCustomLeathercraft replied to memhave's topic in How Do I Do That?
Get some deglazer. But I don't think anything will work. It's not really a residue issue but a slight pulling of the grain. If you can't find anything that works, and this would be my last choice. You could sand the whole face with fine sandpaper, 600-1000grit, very lightly. Then take some tokenol and burnish the surface smooth. I've never had any success remove the tape marks, but I've never had them right in the middle of the piece either. Good luck, and let us know if anything worked. -
.thumb.jpg.327685d8c1787fa894323fed9a6b2dac.jpg)
Desert bighorn holster
DoubleKCustomLeathercraft replied to DoubleKCustomLeathercraft's topic in Show Off!!
Thanks guys. I'm just about done with it, but had to put things in hold so I could get things done at home before this show storm showed up. It's killing pretty sweet though. -
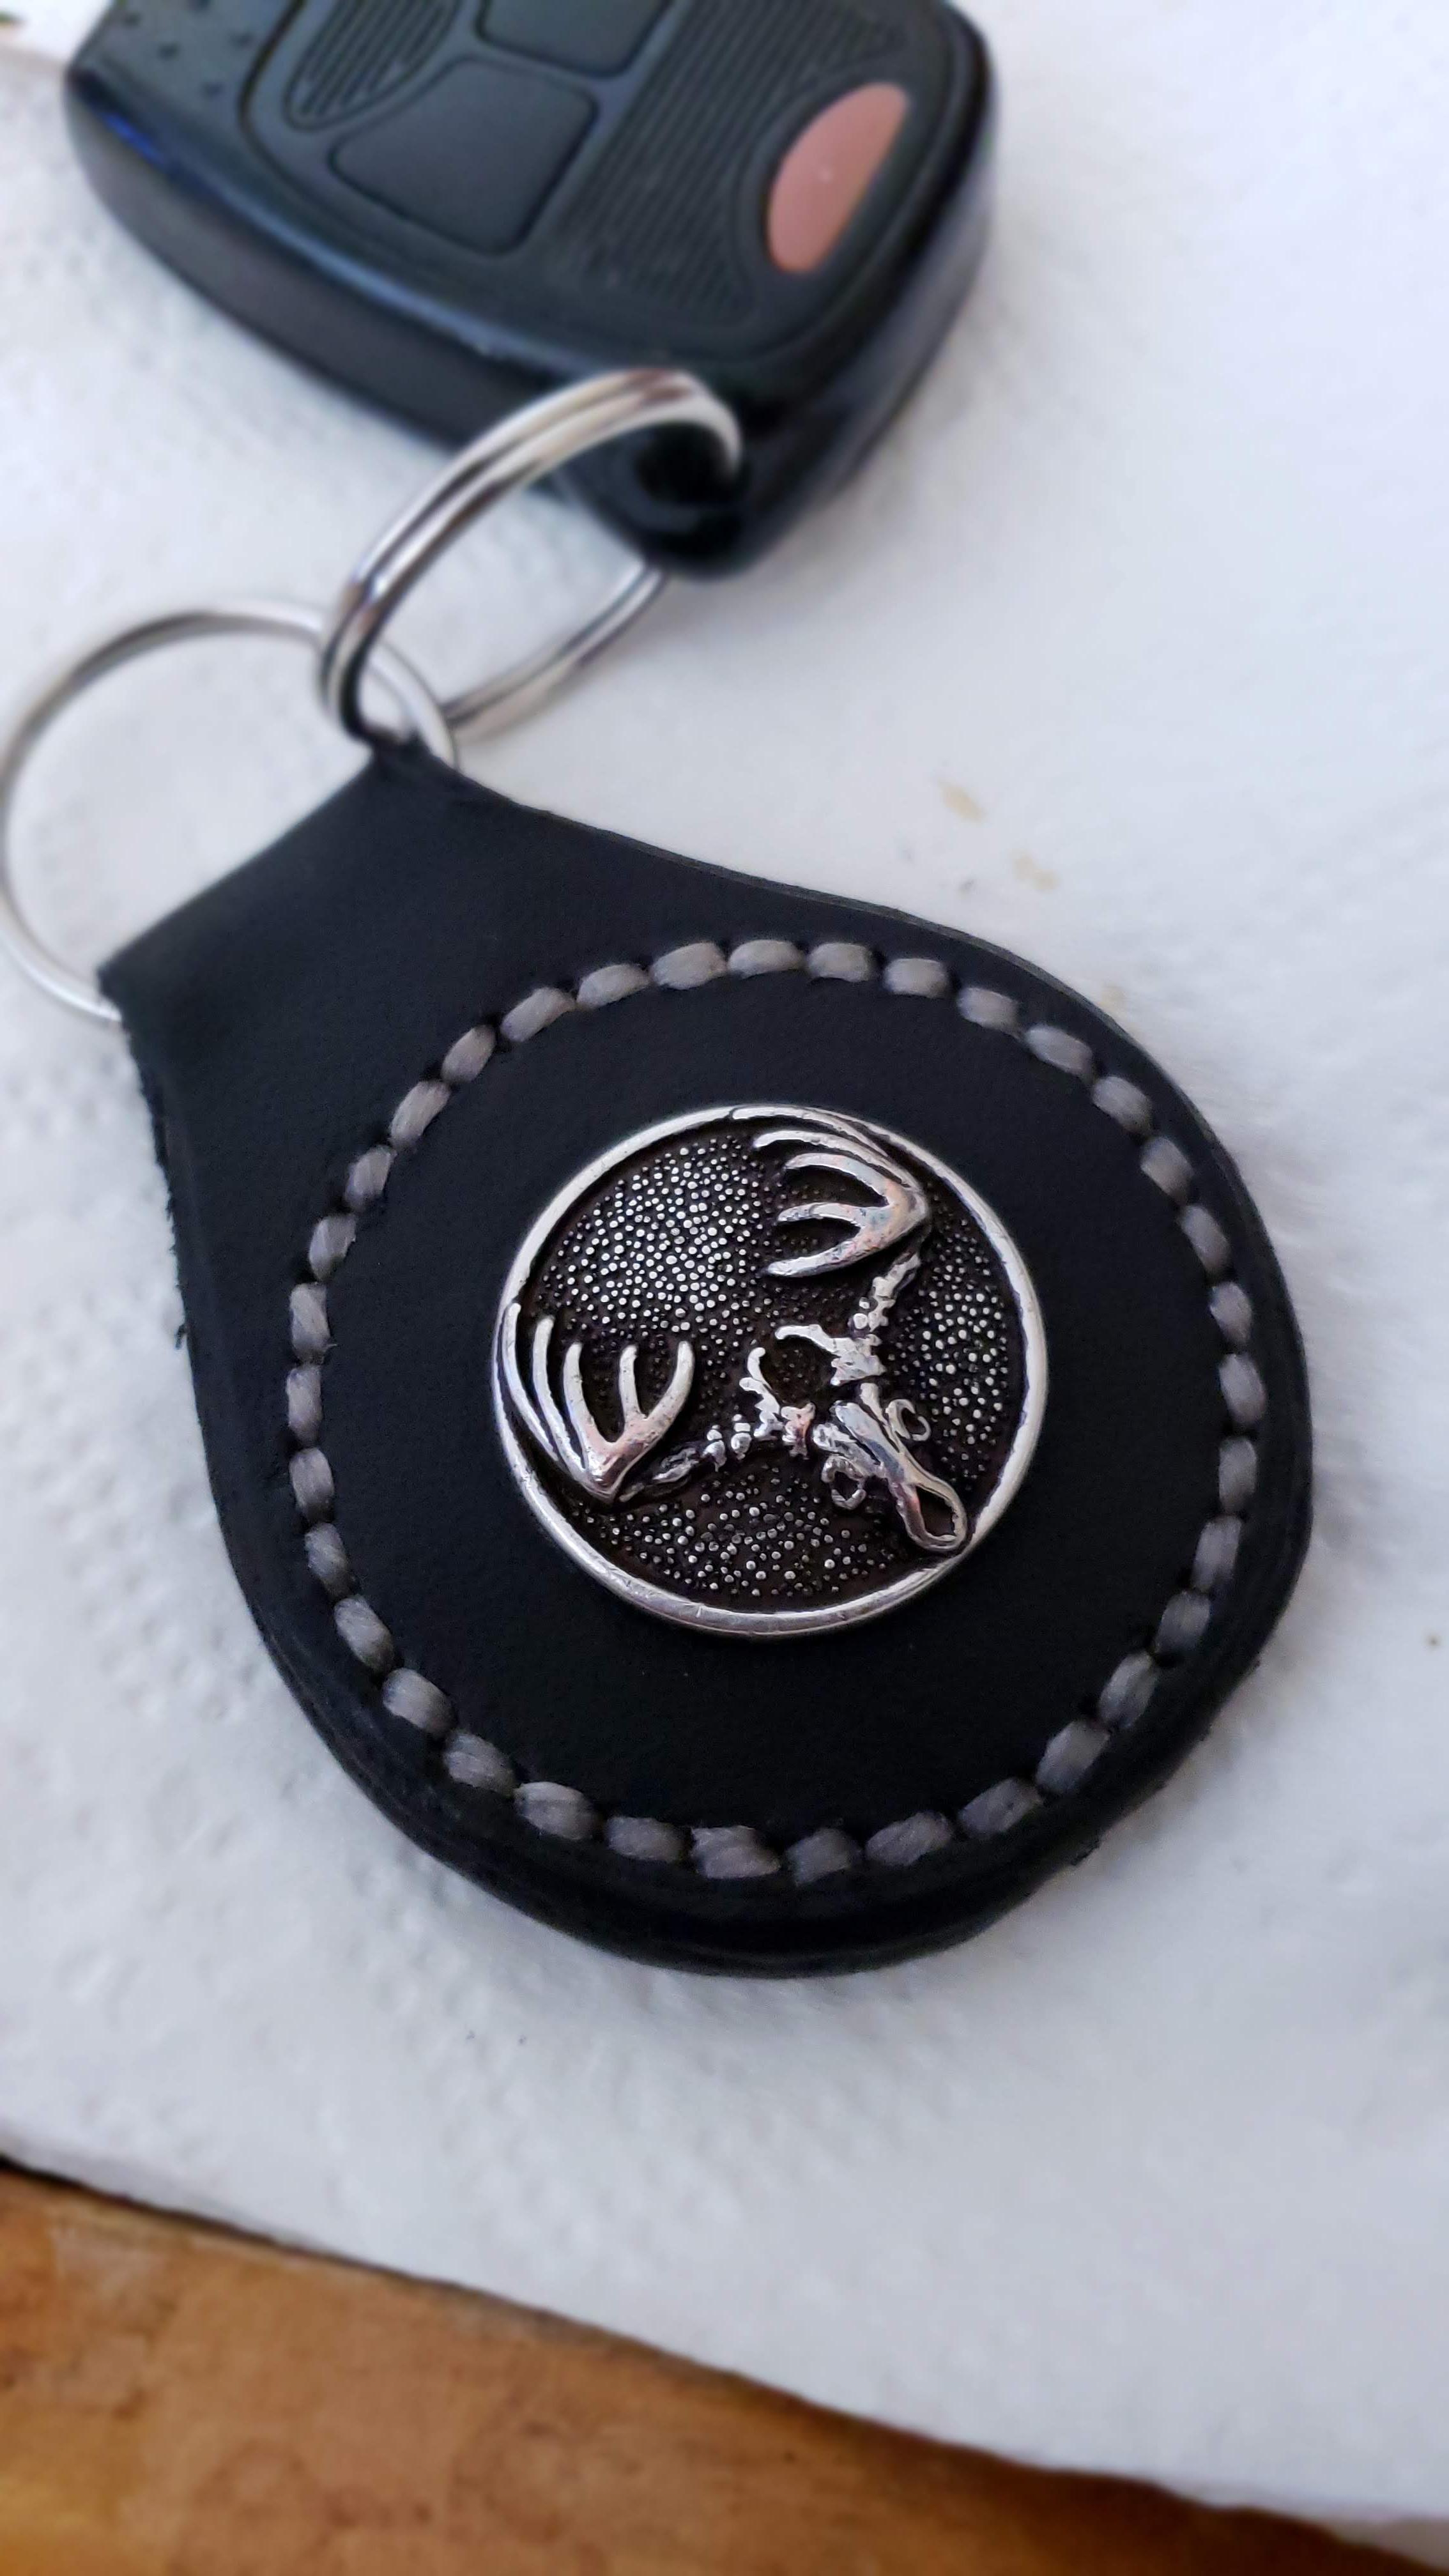
I had a belt from Nacona leather.... maybe 20 years ago. It was leather with camo inlay and these 2 deer skull conchos. I kept them. Base this Keychain for my best friend and intended to make one for myself, but somehow my dad got it, and lost it. I really like the concho. I have a bit of a concho collection fetish and want to add this back into it. I have spent countless hours looking, tried contacting nacona and have come up completely empty handed. If anyone knows where, or if they're available I would appreciate the information. Thanks


.jpg.e30292f14b8a64a861abcd7e87228004.jpg)
.jpg.584905d51756fc9d9712f46add3a74c9.jpg)
.jpg.66a3d1aab4701b2cca2157c76b80ab93.jpg)
.jpg.daaaf2a8ad2966160cb9a081070fcf57.jpg)
