Deno
-
Posts
154 -
Joined
-
Last visited
Content Type
Profiles
Forums
Events
Blogs
Gallery
Store
Everything posted by Deno
-

Second Time in 20 Years
Deno replied to Deno's topic in Purses, Wallets, Belts and Miscellaneous Pocket Items
Thanks for the comments guy's, I really appreciate it. And King, looking forward to what you've done. Can't wait to see it. My best. -
King you did a great job. Very, very excellent. Your just like me, too hard on your self. The couple of projects I done recently are the first one's I've done I many many years, and I picked each one of them apart. To everyone I showed them too, they say the same thing, you got to be kidding, they look fantastic. I take what I have done and try and learn where I need to improve. I know I need a lot more practice, but I am now committed to going on and getting back to where I was and where I would like to be, as good as my father. I have set a very high bar for myself, more then most people, cause I had a mentor, a mentor that meant so very much to me and I hope that he can see my determination even now that he is not here anymore, and be proud of me. And I am proud of you, and your work is definitely one of heart and sole. Don't ever stop, you definitely have what it takes and the talent to do it. My very best to you, Dennis.
-
Second Time in 20 Years
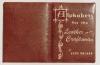
Deno posted a topic in Purses, Wallets, Belts and Miscellaneous Pocket Items
Ok, here is the second project I've done in over 20 years. Still need a lot of work. My main area's needing work I think are Pear Shading, and Decorative cuts. Died it with a Tan color and Dark Brown for the Background and than Super Shene'd. I'll post another picture when I'm done lacing it up. My best to all.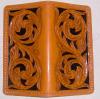
-
Filigree belt
Deno replied to Rawhide's topic in Purses, Wallets, Belts and Miscellaneous Pocket Items
Rawhide, please let Peter I think his work is very beautiful. True leather craftsman. My best, Dennis. -
Thanks a lot King, you know I'm going to have to make a dozen of those now myself. Looks great, and I like the idea. Lucky for me I still have the original art work to go by. Maybe I'll lay the pattern and design out and give it out to anyone that would like it. Thanks for doing it, I've been hoping to see someone do one of my dad's designs. My best to you, Dennis.
-
I'm glad my father left me his complete set, in binders with his name on the front of the binders.
-
Those are the ones my father used in this Doodle Page. Wish I still had them.
-
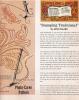
I didn't think we still had this, but I found it last week. It's the original portrait for the Game News Magazine I showed earlier. I am so glad we still have it.
-
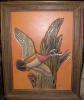
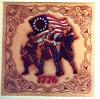
To celebrate the 4th of July, here is a portrait my father did for the Bi-Centennial, in 1976. Enjoy.
-
King, I've started a thread here: http://leatherworker.net/forum/index.php?showtopic=17704, following the step's that my father showed me, as best as I can remember. Swivel cuts were always the first, and if I didn't get that right he always said, ( Here is another piece of leather, start over). Next he always, always, did the beveling. Beveling always sets the depth and flow of a project. If I didn't get the right depth and smoothness by walking the beveler he always said, ( Here is another piece of leather, start over). Next was putting in the Stops and Seeders. Next was Pear Shading. This was the next critical step as it set not just more depth, but contour and flow of the piece. If I didn't get the right depth and flow from walking the Shader he always said, (Go away and stop bothering me and come back in a few days when you can focus on what your doing) lol. Next was Camouflage (which he used the most) then Veinering, then Mulefoot, then Background (cause if you had a lot of it it took a lot of time and if you messed up anything else you had to start over), then anyother tid bits like flower centers, foliage, etc. Always last was Decorative cuts, which make or break all of your final work (and which is the hardest of everything to get good at). Hope this helps. My best, Dennis.
-
Thank you Johanna, I'm glad that so many remember my Dad. It's helpful for me also, cause it brings back so many wonderful memories, and I'm the type that chooses to remember the good ones and not dwell on the painful ones.
-
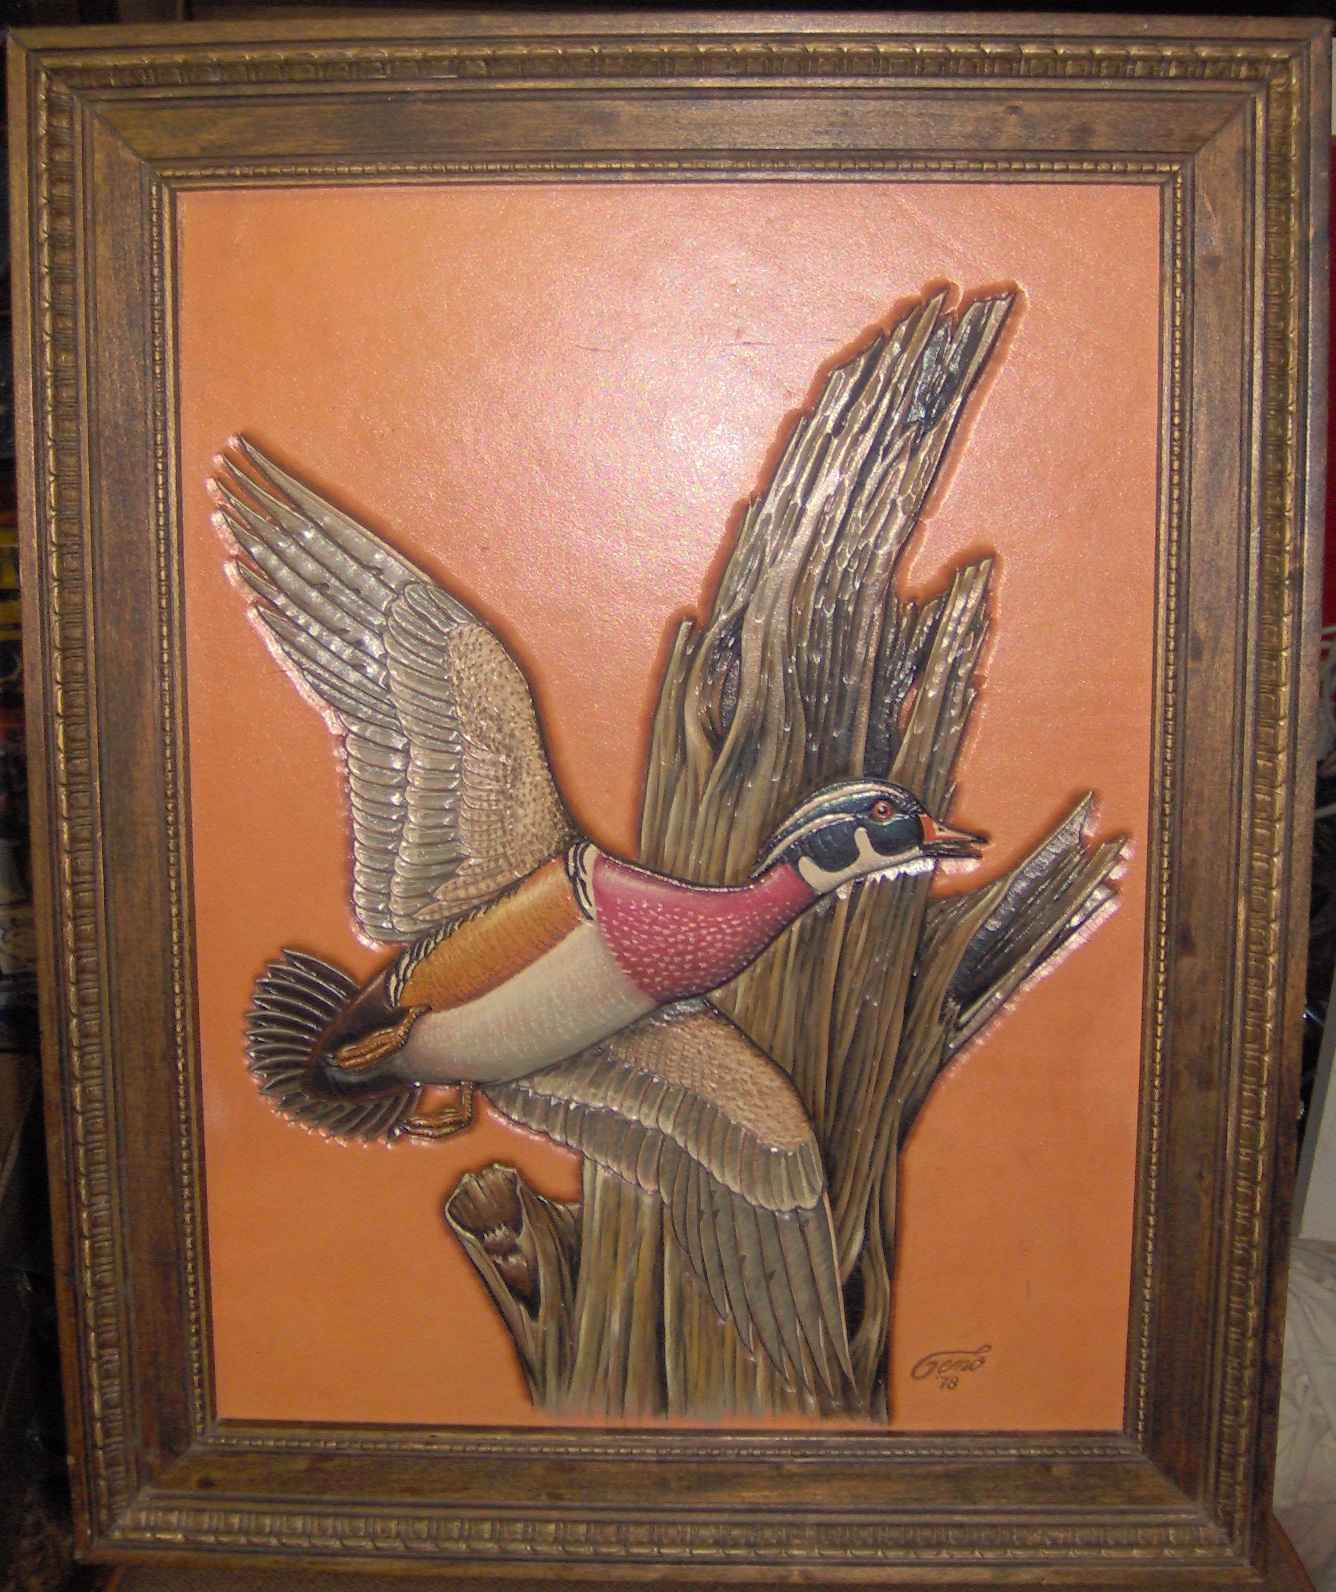
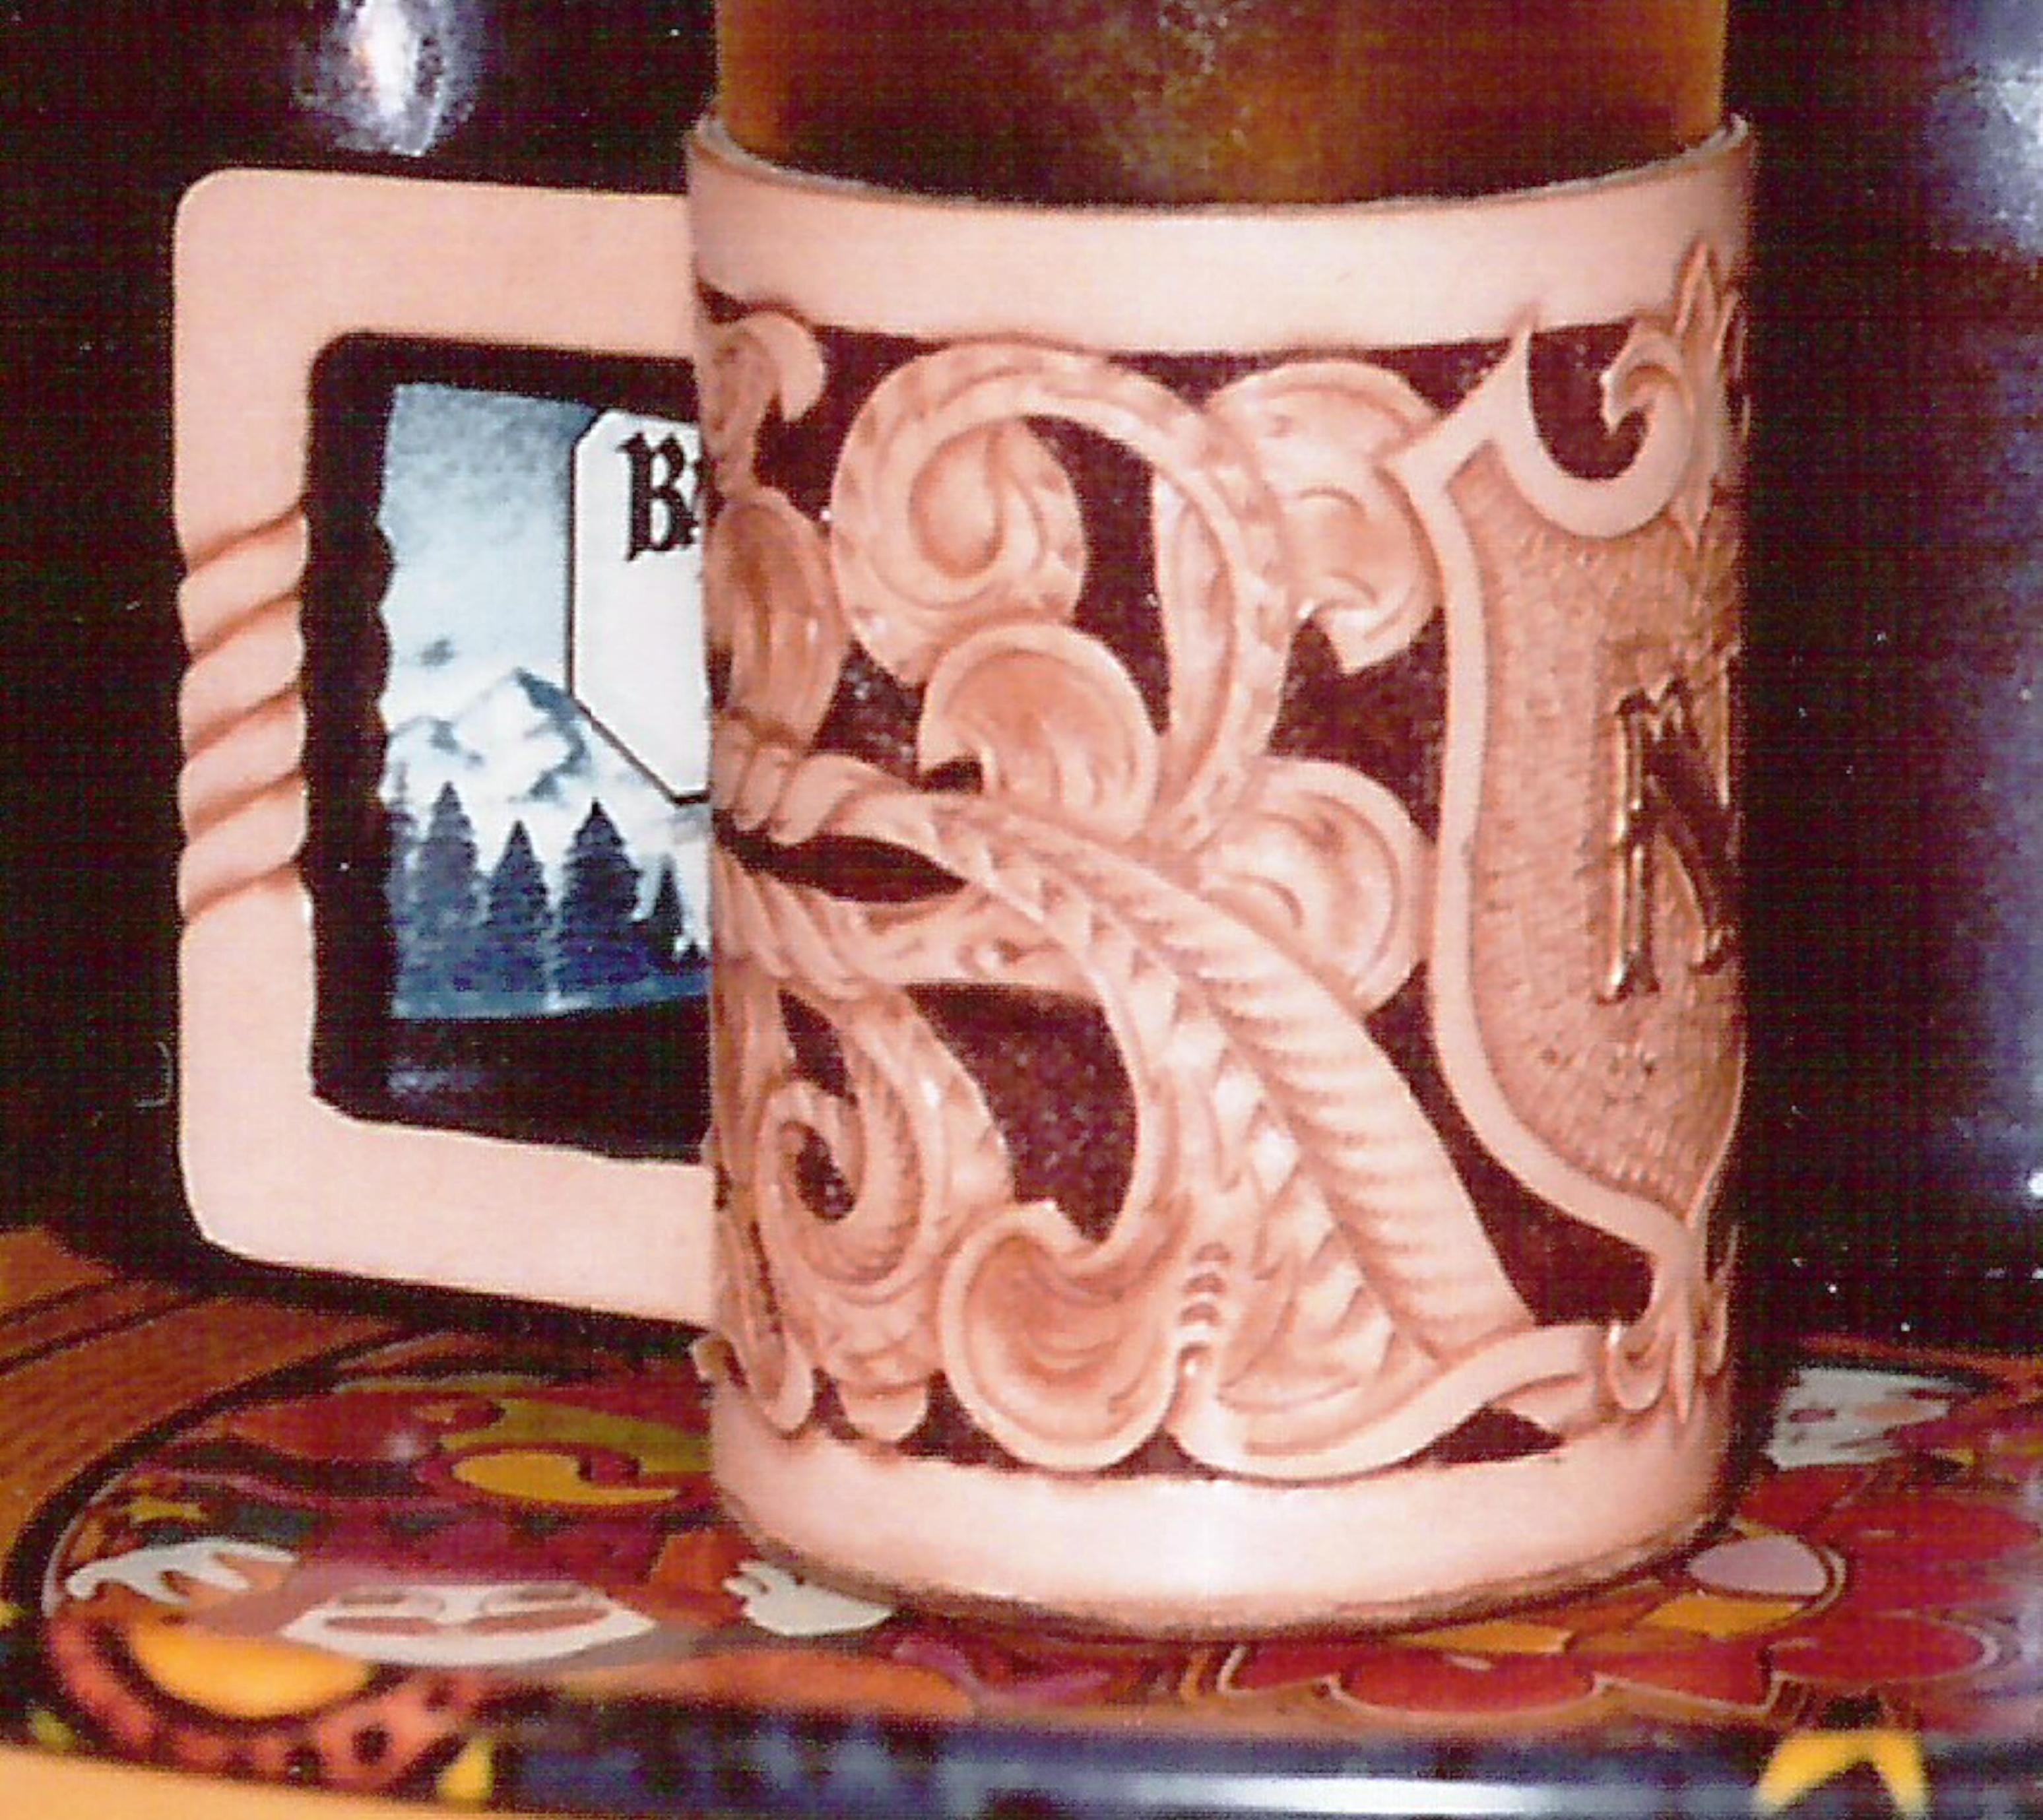
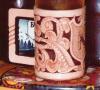
His style was a combo of Stohlman / Baird and a GREAT deal of his own nuances. My father, after all, was an artist. His full time job was a Graphic Artist, and what many people did not know was that all the projects that he did for Tandy he did the complete layouts and sent them the final copy and the completed projects. Tandy kept all finished works so I don't have any of the original projects to reference too. The third picture is some of the artwork for the Beer Stein that I still have. The first picture is of the completed project, and the second I enlarged it to try and get you a better look at his tooling techniques. Hope this helps you out. My Best.

-
I'll be back at this soon. Sorry for the delay. When this is all done, I will put it together into a PDF file so everyone can download it. My best to all.
-
That's great Mike. When number 6 was one the way it was time for me to get the cut too, lol. Oldest 27 youngest 17. 5 Boy's and the last was a girl. And I'm only 46-1/2.
-
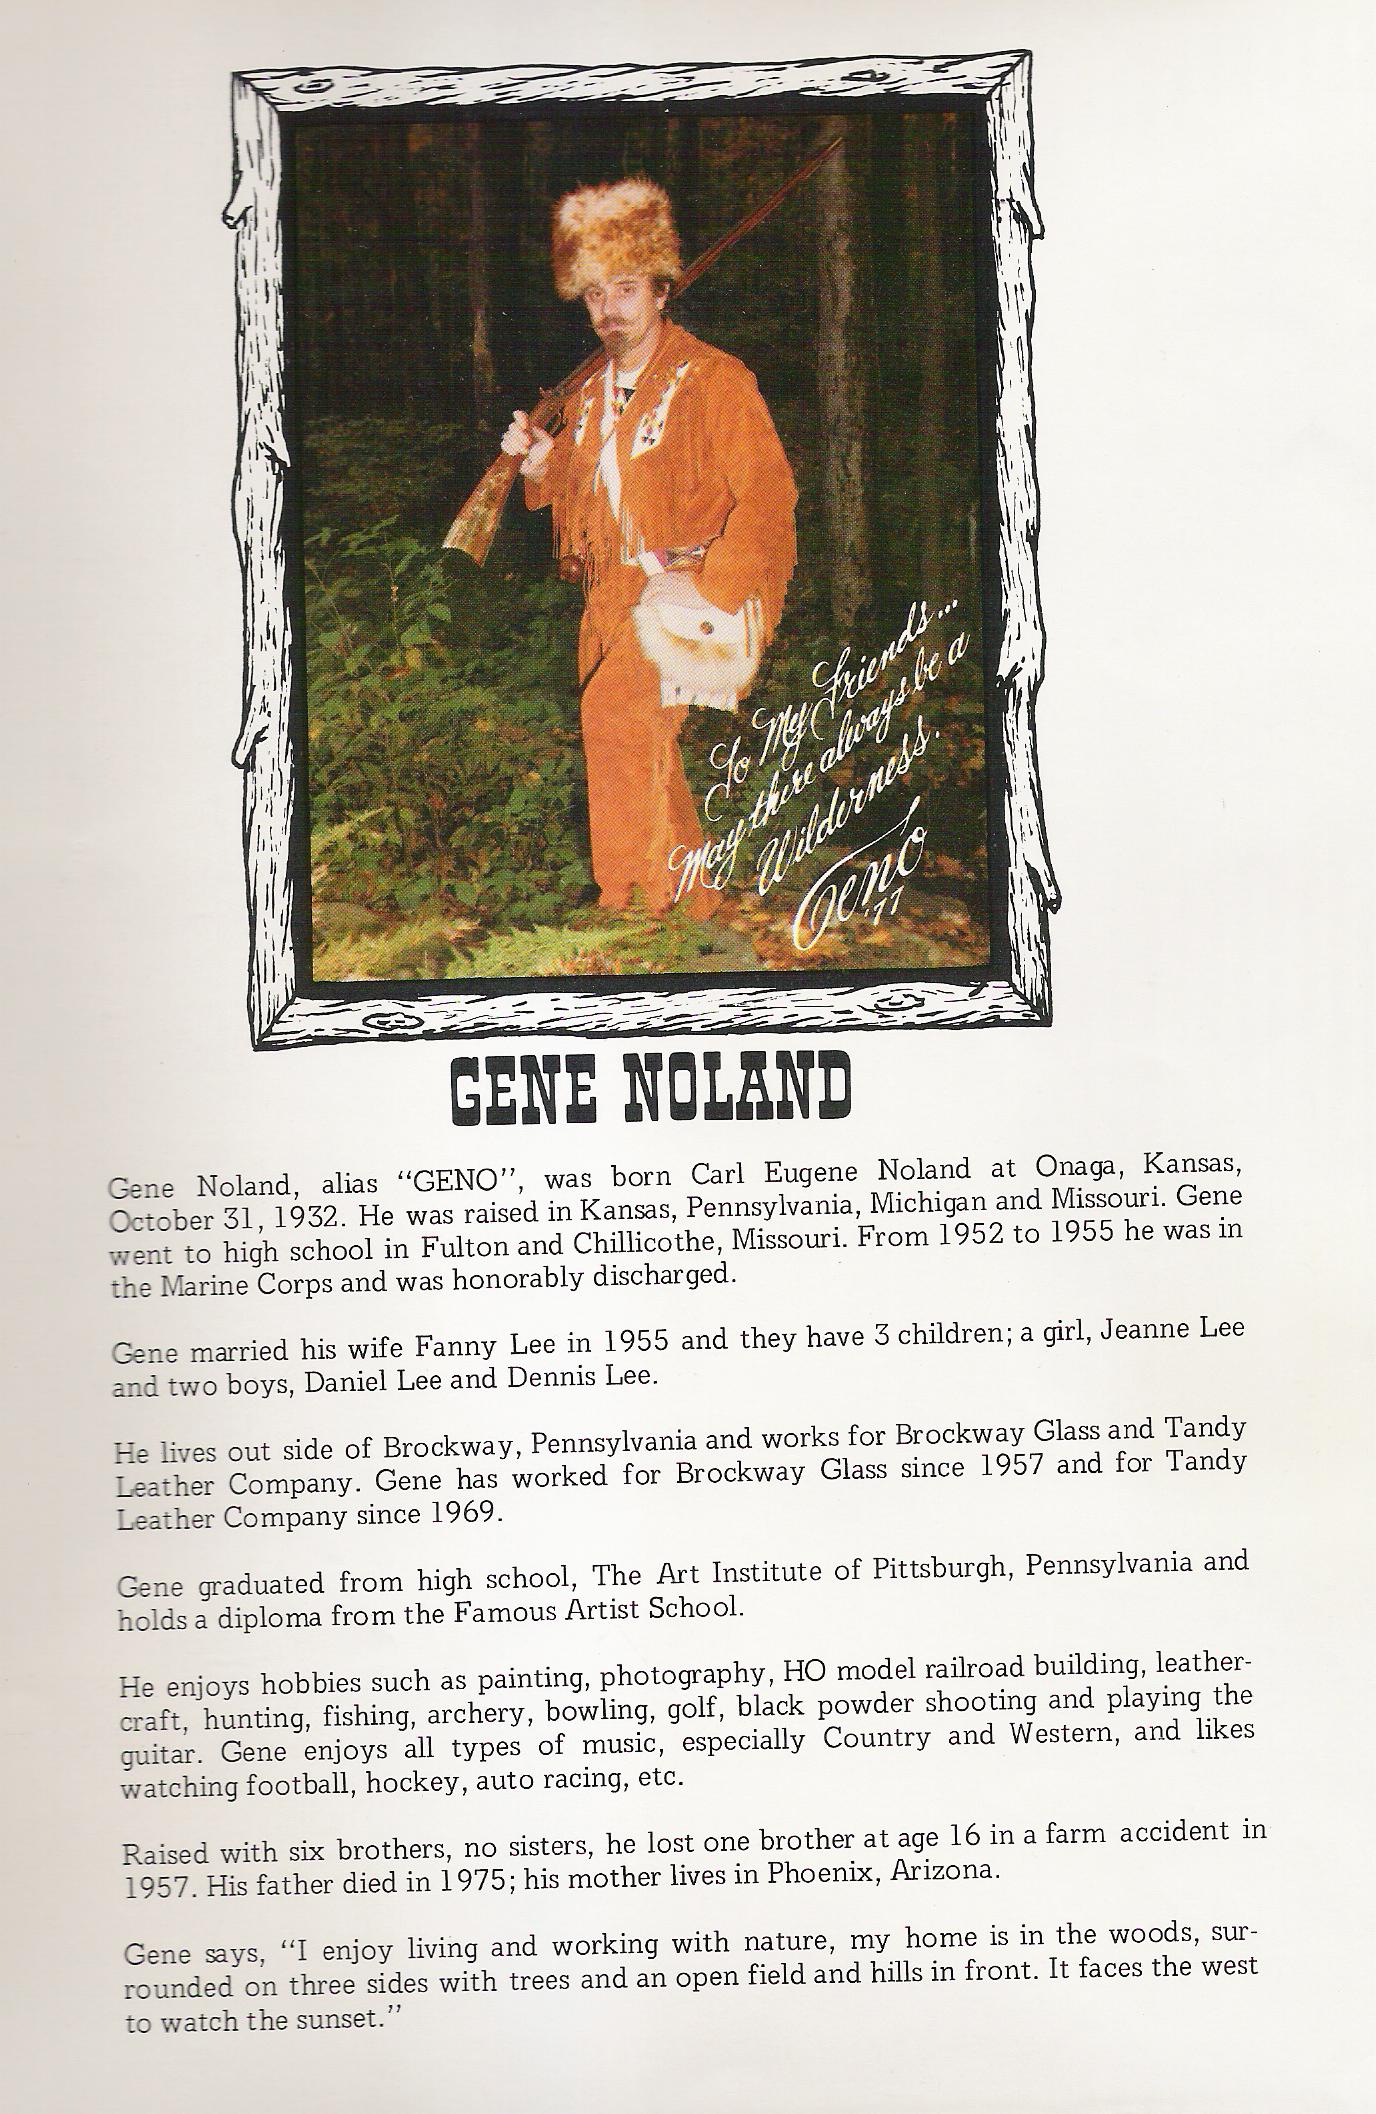
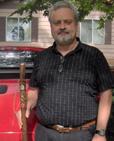
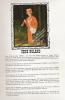
Here is the inside cover of his Black Powder Book. The picture was taken in 1977, so he would have been just shy of 45 years old at the time. He is wearing his custom made outfit and sporting his somewhat famous Goatee and Handel Bar Mustache. The Goatee and Handel Bar Mustache he started in the mid to late 1960's, and except for the Handel Bar's he remained the same till the day he passed on. Sure am missing him right now.
-
Hey Johanna, guess you could say this is when he started on rock's, lol.
-
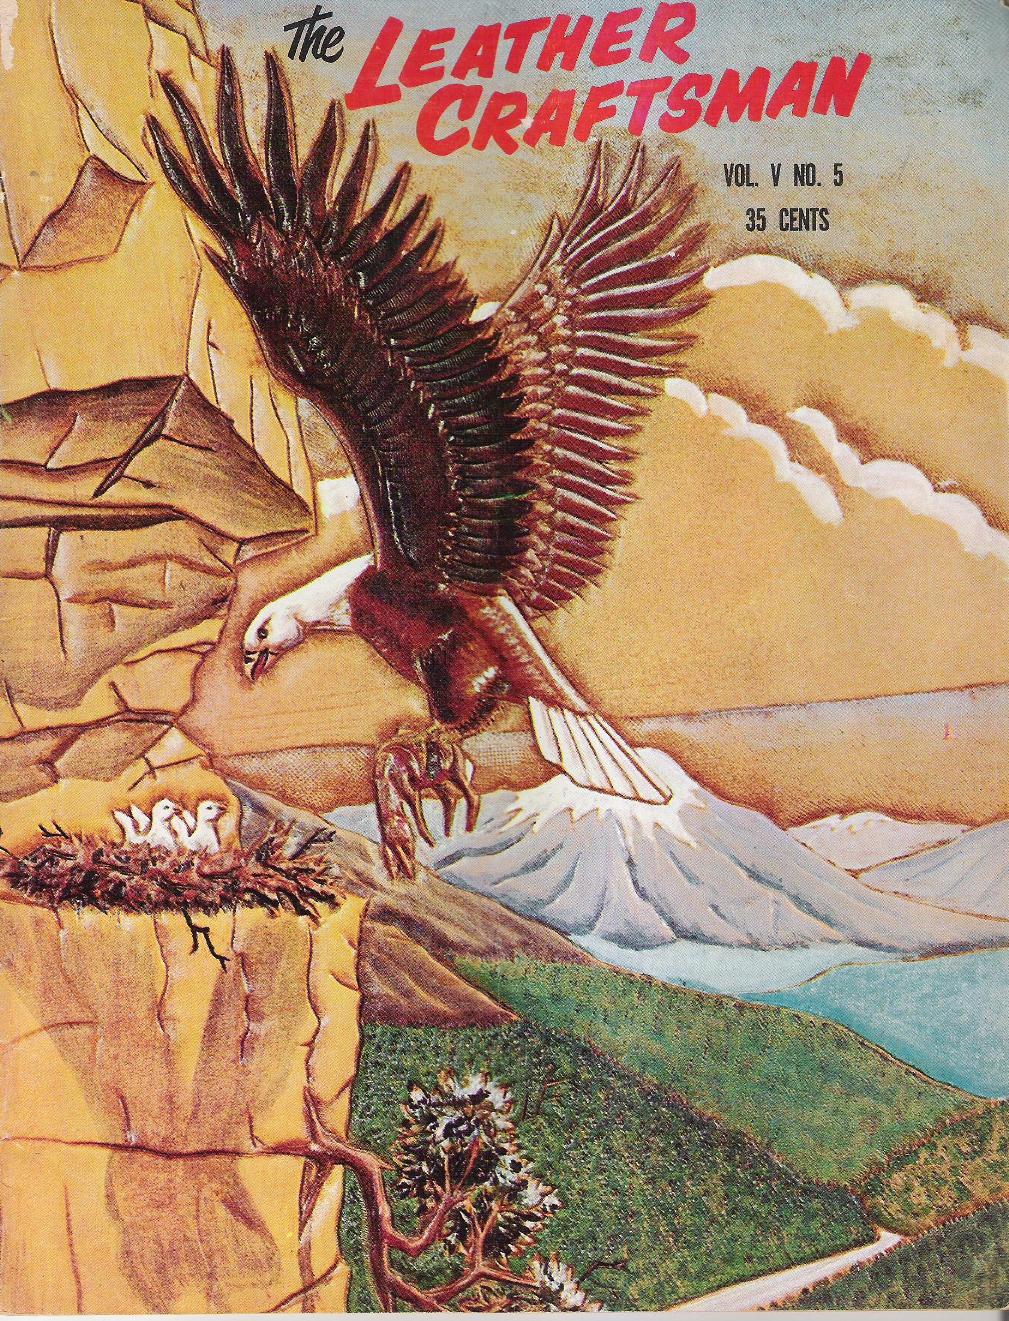
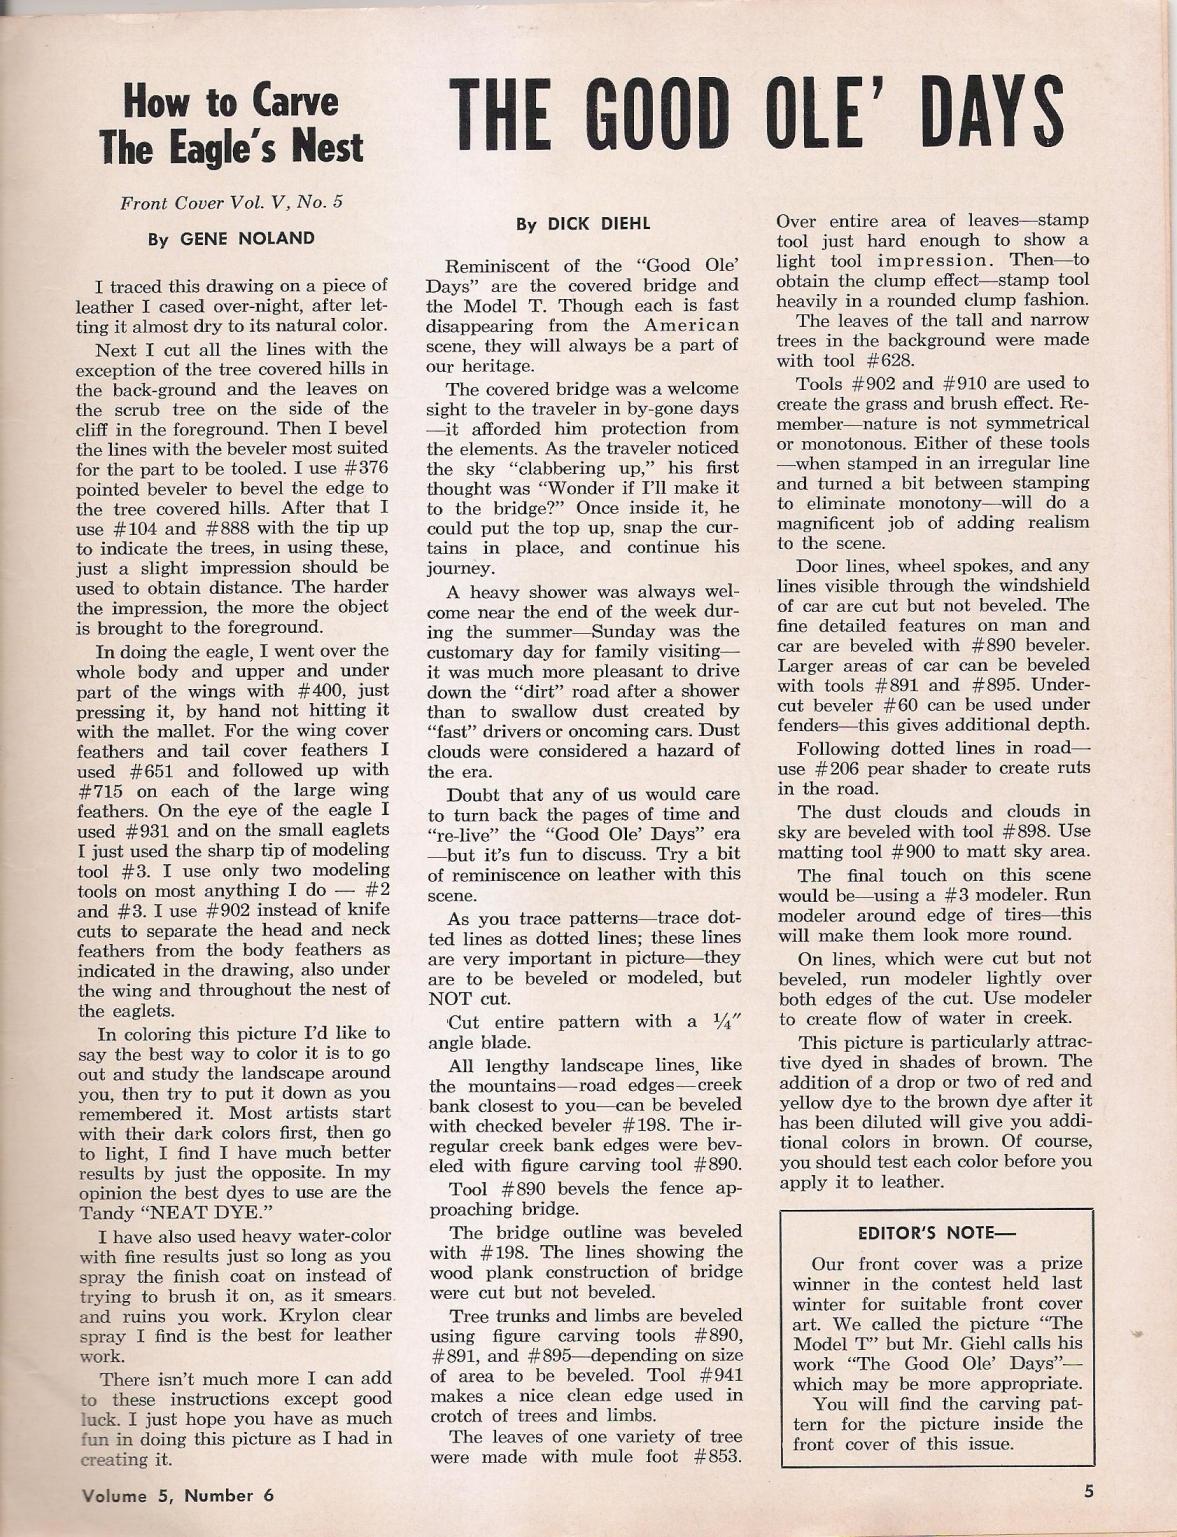
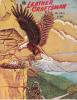
Talked with my mom yesterday, and we believe that this was his first published portrait. It's called The Eagle's Nest. It was on the front cover of The Leather Craftsman, July-August 1961 addition, Vol. 5, No. 5. The tracing pattern and his writeup were in September-October 1961 addition Vol. 5, No. 6. Page 4 had the tracing pattern and page 5 was his writeup. This was over a year before I was born. I asked her when he started working with leather, and she said the he already was doing it when they go married in 1955. So we both think he got started when he was in the Marine's between 1952 and 1955.

-
Oh, BTW, PM me your contact info and we can talk more. My best to you, Dennis.
-
I can cut Titanium if you want. I've been a cutting tool engineer for 29 years.
-
Would you be supplying the brass? What font would you like to have? What time frame for having them done? Might be able to help out. Have a machine shop at my disposal. Also is it flat brass, curved, special shape? Let me know.
-
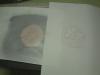
I always like thinking up new ways of doing things, so here is a new tip. Instead of using velum or tracing paper, I just printed out the layout on plane paper. Next I sprayed both sides with 2 coats of Krylon triple-thick clear glaze, clear coat. As you can see the paper becomes semi-transparent, you can see the leather coaster underneath. As I have not tried this yet, but I think it should keep from getting soaked with water when I transfer it to the leather. You may be able to use it a few times, or make more very easily.
-
I'm laying this out in CAD software and will be showing each step of the process. Here I am laying out the Beveling steps and I will show which ones to do first, second, etc. I will be adding pictures of the actual tooling piece as I go. It may be a few day's before I get to that point yet. Does anyone think this will be helpful?

-
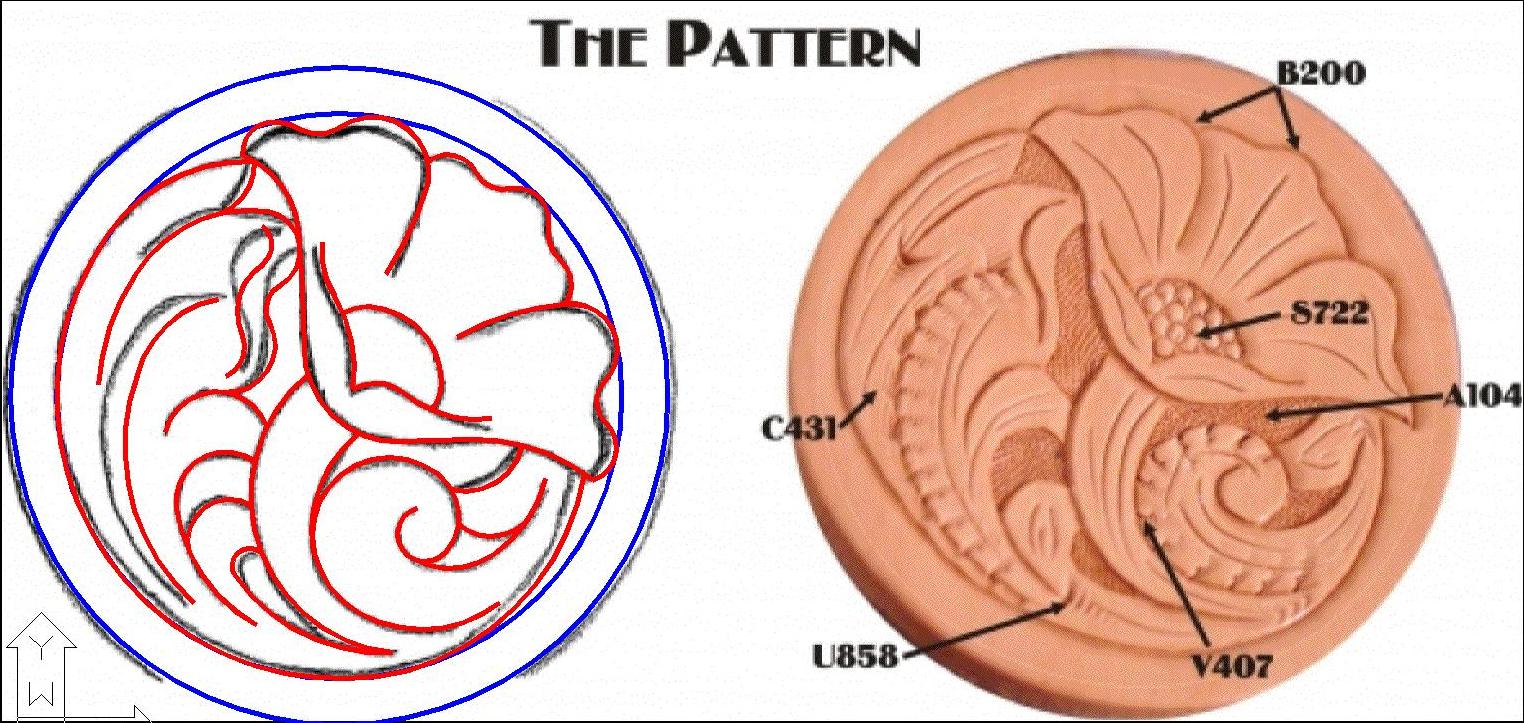
Here is Major's layout. The Blue lines represent the outside of the coaster and a diameter offset inside. The first thing I did was pull the form out to reach the inside line giving it more symmetry, see red lines. The stem at the bottom and the outside flower pedals. Next I tweaked the stem lines to give it better flow and adjusted the shapes a bit. At the bottom of the flower I pulled up the lines under the seeds to allow more room for pear shading. Those lines represent the flower pedals as they are facing you exposing the seeds. Let me know what you think of the adjustments.

-
Hello all. I talked to The Major about tweaking his coaster design more like my father would have done it, and he said go for it. So what I am going to show is what changes I made and why. Also, I think over time I will build this into a tutorial showing step by step each process in making. That way anyone can follow and give it a try.
-
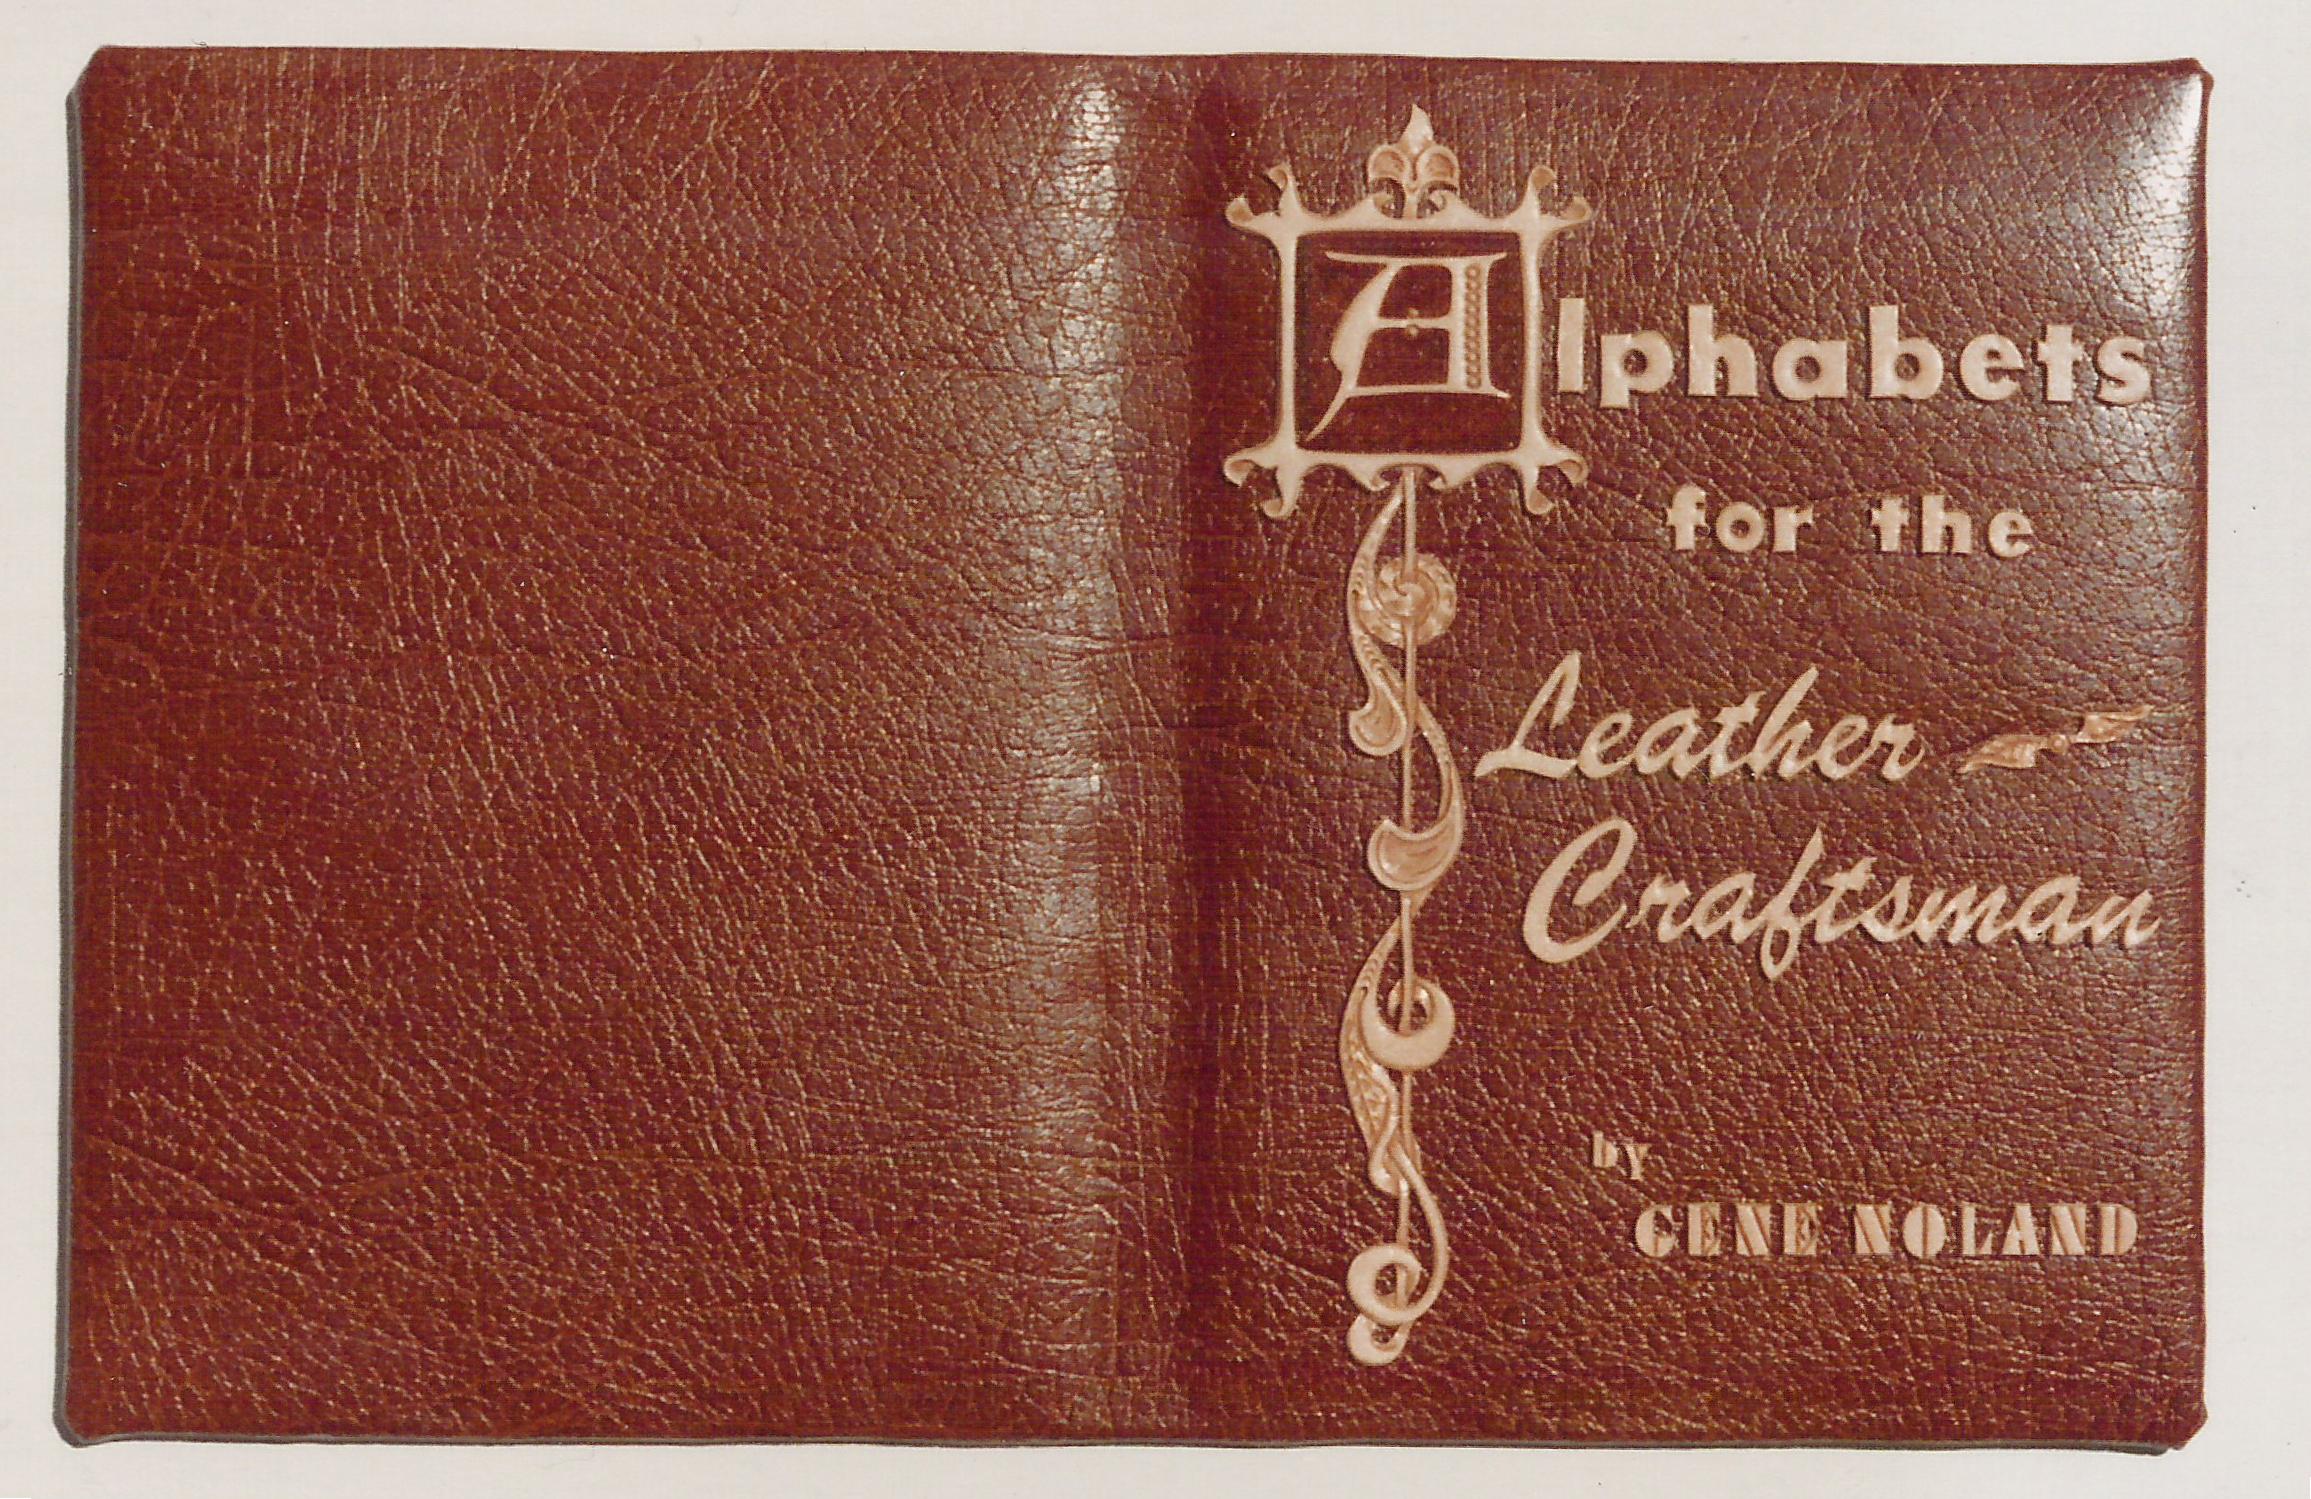
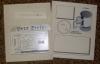
Johann, see post number 6 of this thread, there is the picture of the original portrait for Season's End. king's X, I beleave you are refering to this book. Here is a Pic of the original Book that he made, leather bound and embossed.