


Wizcrafts
-
Posts
7,806 -
Joined
-
Last visited
Content Type
Profiles
Forums
Events
Blogs
Gallery
Store
Everything posted by Wizcrafts
-
A lot of standard size industrial sewing machine beds measure 7" x 19". If your machine has that size bed and you buy a table with a 7" x 19" cutout, other similar size machines will fit into the cutout. However, that is not the end of the story. The knee lever may not line up or engage the machine at all if the make and lift system are different. The height and diameter of the machine pulleys will vary, requiring different drive belts and motor height adjustments. I have two machines now that could share the same cutout. But the knee lever and motor position would need to be changed. It is simpler to have each one on its own table.
-
Yes. according to the specs for the CB3200 it comes with a high torque servo motor, with front panel speed control knob. It also sports a 3:1 speed reducer/torque converter.
-
The Techsew 3650 is a heavy duty machine with just bottom feed. It may struggle to sew and hold down 1/2 inch of veg-tan leather. The Cowboy CB3200 is a triple feed walking foot machine. It is made to sew and hold down 1/2 inch and possibly a little more. Both can tension heavy thread, like #346 and even #415, depending on the thickness and toughness of the leather. They cost about the same money. Better yet, are the Cowboy CB4500, Techsew 5100 and Cobra Class 4, all of which sew over 3/4 inch. My CB4500 has sewn 7/8 inch of belt leather, which I made into a pattern to block a shaped case. Expect to pay from $500 to $1000 more, depending on which accessories you purchase up front.
-
Have you tried contacting Artisan, the owner of the brand name? They have manuals, parts and accessories. Surely, somebody there can assist you, especially if you bought the machine from them.
-
You are going to find this out on almost every straight stitch machine you see. Few were designed with enough clearance to pass #138 thread around the bobbin case and shuttle. Have you looked for any nearby industrial sewing machine dealerships? They often have refurbished machines, and sometimes as-is but working machines for sale, one of which may be just what you want. The dealer could set-up a machine to use #138 exclusively, with the proper tensions, needle, clearances, etc. Try to confine your search to a triple feed walking foot machine (that is not shot).
-
No problem buddy. I shouldn't have put it the way I did. But, for background, read through the most current topics and you'll see all kinds of people who bought older used machines privately and couldn't get them to sew. Often, parts are missing or worn out. I can't recommend that another member puts themselves through this if there are any options at all. If you must buy on a budget, search for a true industrial, "compound feed walking foot machine." It is better to look at models that use a larger than standard bobbin. There are two very common oversize bobbins in use today: M style (1.5x) and Juki LU style (2x). I paid for a walking foot machine sewing rifle slings for a friend. Without the larger bobbins, I would have had to stop and swap bobbins after about 8 or 9 slings. With the M bobbins, I was able to sew about 14 slings (with variance in the thickness of the leather and suede and the tightness and density I wound the bobbins to). All these straps were sewn exclusively with #138 bonded nylon thread and a #23 Schmetz leather point needle. I even posted a video of me sewing them to YouTube. Search for Wiz Feinberg, or Wizcrafts on Y.T. The machine, a National 300N, was a triple (compound) feed, walking foot machine I bought used, but not abused, from a local custom blinds manufacturer that dabbled in some small upholstery jobs. Machines like mine can sew 3/8 inches with #138 thread, top and bottom, all day long. Occasionally, I would use #207 on top only, for some pancake holsters. But, this was false economy, because the #138 thread on the bottom was the weak link in the construction. I also have a 1921 Singer straight stitch 31-15 industrial machine. It is lucky if it sews with #92 thread. It performs best with #69 thread only. The machine is basically based on the design of your 15-88 and uses a standard class 15 bobbin. I had to replace the entire shuttle system to keep it sewing at all. It only "likes" certain bobbin cases, popping others out at the worst time, when I am sewing. This is the kind of old junk I was referring to.
-
Try altering the travel of your check spring, which is mounted on the lower disk set. Note the current position, then raise it an 8th of an inch and test. If no happy happy, lower it an 8th below the starting point. If no happy happy, return it to zero. See if the needle is being pulled to the outside on the take-up stroke. If so, move the hook closer to the needle by a gazillionth of an inch. Try again. If nothing you alter improves the problem, assume bad thread and try a different spool.
-
There is a certain fascination about buying an old machine and getting it to work like when it was new. But, unless one is almost broke, one is better off buying something either new or rebuilt professionally. DavidL; A typical 45k25 that is not all rusted shut, will continue sewing for a long long time. But, parts will wear out and some of them are either hard to find or are expensive. There are new machines that are clones of the 45k21. One is the Cowboy CB2500. It is a modern build of the old design, which sews 7/16 inches of leather, with #346 thread. Needles, bobbins and a roller foot and an edge guide are available. I think it sells for about $1100 or so, depending on options.
-
I wasn't trying to put down your future machine. Just stating what I have found to be a fact many times over. If you don't mind fixing up old iron machines, the 111w155 will be one to watch for. A lot of them went to upholstery shops. The sewers in these shops consider time as money. So, they equip their walking foot machines with clutch motors having 4" pulleys. Since many Singer machines also have a 4" pulley (and even smaller), the machines spins at 1:1 with the motor (or faster). For the average 110 volt clutch motor that equals 1725 rpm (hence, spm). Divide that by 60 and you get almost 29 stitches per second! At 5 stitches per inch (typical for a Singer 111), you can sew about 6 inches per second. In case you were wondering, these machines were built to max out at about 2,000 rpm. Running them at 90% for 20 years or more tends to wear out the moving parts and bearings and the drive belt inside the 111 machines. You may get such a machine for a great cash price, then find it necessary to spend possibly a couple hundred or more to replace worn out parts. If you do buy a machine with a clutch motor with a big pulley and have trouble controlling it, you'll want to swap it out for new servo motor, which is usually very easy to control at a wide range of speeds. There goes another $125 to $150. So, if you are able to find a good, used walking foot machine locally, if it comes from an upholstery shop, you'll probably be looking for a servo motor really soon. That has been my experience in buying sewing machines locally. Have you thought about contacting our member-dealers to see what they can offer you that will sew the thickness and thread size you prefer? It might be a better option. BTW: I have a 15-91 and consider it to be an expensive toy.
-
Are you just looking for old junk? I guess a Singer 111w155 will handle #138 thread, top and bottom. Be aware that they have small bobbins, no reverse and very strange stitch length adjusters.
-
Shine a light into the open bobbin case and see if the beehive shaped spring has been compressed by something. Or, perhaps it popped right out of the case. Look for it. The bottom of the coil would be just large enough to fit tightly inside the barrel of the bobbin case and extend in narrowing coils about 1/2 inch tall.
-
No. This is a garment class machine. It will not handle/tension #138 thread without great difficulty and inconsistency in the stitches.
-
Needle And Awl Machine Recommendation
Wizcrafts replied to Andrew Chee's topic in Leather Sewing Machines
I was able to sew fairly thin leather on my Union Lockstitch machines. What I did was to use a #1 needle, #1.5 or #2 awl and #138 bonded thread. It was easy to bury the knots in 7 - 8 ounces of leather. Wilson sews footballs with a Union Lockstitch machine, specifically setup for that thickness and thread. Tiny needles and awls are very hard to find now and expensive if you find them. I managed to acquire some while I owned two ULS machines, but they are long gone. If the bottom appearance is that important, you should probably just hand sew the work. It's cheaper than buying and learning to use and customize a needle and awl machine. -
Don't let the Artisan 3200 machine confuse you regarding the Cowboy 3200. They are different animals. The CB3200 has a maximum unaltered thickness of 1/2 inch. If you reduce the lift of the presser feet to minimum, you may be able to eek out 5/8 inch under the feet. But, it may leave some ugly tracks, as you will be at the top most alternating position of the feet. If 3/4 inch is a requirement, the CB3500, 4500 and 5500 all exceed this, sewing up to 7/8 inch. I have sewn almost 1 inch on my CB4500 by minimizing the lift of the feet and sewing one stitch at a time, with the pressure spring all the way down.
-
I use the patcher every day. Maybe this Sunday I can sneak into the shop and disassemble the darning unit. I just bought a 29K71 that has a bar bent to 90 degrees on top. It is spring loaded and rotates in or out of line with the knuckle on the needle bar.
-
Yes, the T-rod is mounted inside a spring loaded barrel, which is secured to the foot lifting block both over and under. That is how it releases the thread tension when "T-lifted." Unbeknownst to some owners of these machines, one can re-route the top thread through the fixed front tension disks to do darning with no loss of tension on the upstroke. Normally, those disks hold the bobbin loader thread.
-
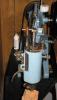
Okay. The photo in the OP is of my 29k172. I posted it on LWN the day I got it home, in 2010. Let me post a close-up of the head, showing the darning attachment in good detail. The way the darning works is when you rotate the T handle sideways - (there are full and half steps on the ends) - the take-up action of the needle bar forcibly raises the presser foot off the material. This allows you to move the leather freehand to place stitches where you want them. If you use the half cutout side, the foot is only lifted a small amount, whereas the full rounded side lifts it way up. You can pull the leather a longer distance with the full lift side, like for skipping a dee ring. When the foot bar lifts up, the top tension is released.
-
CowboySew makes a transverse feed machine capable of sewing heavy stuff up and down the arm. Perhaps you can convince Cowboy Bob to import a couple (so I can get one!).
-
Consew 206Rb - Is This A Hook Problem?
Wizcrafts replied to georgeandgracie's topic in Leather Sewing Machines
The specs for the Consew 206RB-3 show that it does indeed feature a safety clutch to protect the hook. That clutch has a push button on the flat bed, which is used in conjunction with reverse wheeling the handwheel to reengage a popped clutch. -
Consew 206Rb - Is This A Hook Problem?
Wizcrafts replied to georgeandgracie's topic in Leather Sewing Machines
The button would be visible in the bed of the machine, somewhere to the right of the bobbin cover plate. Do you have any pushable buttons on the bed of the machine? If not, the hook has no automatic protection and it has been knocked out of time. -
Consew 206Rb - Is This A Hook Problem?
Wizcrafts replied to georgeandgracie's topic in Leather Sewing Machines
Yes, you popped the safety clutch. Clear out all of the jamming thread and cloth. Hold down the button in the body, closest to the bobbin case cover. Rotate the handwheel backwards until you hear a click, at which time the mechanism should have re-engaged. Test the timing and continue sewing, holding the starting threads back for a few stitches. If your machine doesn't have the safety clutch, disregard this tip. Either the needle bar has been knocked out of time, or the hook has been dragged into a retarded position. Either will require retiming the machine. -
Darren; Cantman might be referring to the original Singer designation for its walking foot machines, which they referred to as "alternating pressers." In the specs I often see an alternating presser foot and vibrating foot listed in the parts.
-
I would buy the actual Juki in this case, if it was me.
-
I have a buddy with a Cobra Class 4 and it is every bit as smooth and easy to sew on as my own Cowboy CB4500. Additionally, "Cobra Steve" has other machinery for sale, including the variable speed MP Burnisher, which I own. I use it to sand the edges of holsters, then burnish them to a high sealed gloss. It is great for finishing the edges of double leather belts and knife sheathes. When it comes to the major brands of what we call 441 clones, the dealer makes a world of difference. These machines do not arrive ready to sew out of the box. They need a lot of time invested to get them into proper sewing condition for leather. It is the attention to small, but necessary details that make one brand stand out over its competitor. Small dealerships invest a lot of hours into making their machines work as good as they can, often when sewing over 3/4 inches of hard veg-tan, with #277 or #246 bonded thread.
-
Hey Bob, how's it going? I actually bought a Fortuna skiver from Bruce last year. What I'm looking for isn't a skiver, but a splitter.
