KnotHead
-
Posts
934 -
Joined
-
Last visited
Content Type
Profiles
Forums
Events
Blogs
Gallery
Store
Everything posted by KnotHead
-
Here's an update on one of the tools I made. I am now doing some fid work on the handle. B...

-
It is a matter of preference to the braider on this matter. Me I don't like to use stopper knots in the way that has been done on that lead in your post above. This, I believe will cause problems later on no matter what kind of support you use as the core. To me, this way of braiding a lead compromises the braids integrity, not to mention I just plain don't like the way it looks. This is just my opinion and I am not speaking for others on that issue. Some prefer to do this simply because the beads hole is not large enough. Another big improvement would be the choice in your leather. I don't know if you are using spool bought kangaroo, or some other leather. But I do have this to say. " There's nothing like using beveled lace to give that finished and professional look to your lead." Based on what I do see in your braid itself, I would say that the braid is tight enough. The thing with braiding is consistently doing the braid the same all the way through the braid. Same tension equals a nice straight braid. You back braiding looks good from the photo. You will have to cover that with some type of knot in order to give a finished look. The best way that I have found to braid show leads is to braid out the 36 inches with core or not with core. Depends on the braider. Then do your loops for the handle and snap end. Brian...
-
Nice work Enrique. Thanks very much mi amigo. B...
-
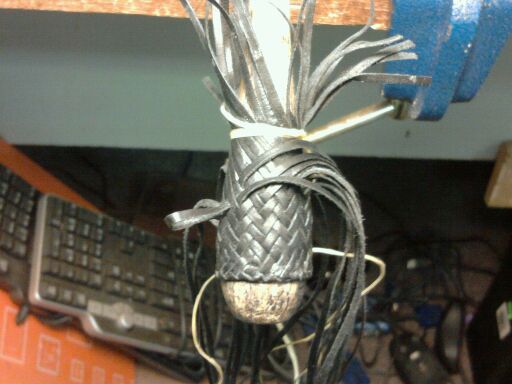
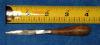
I got a new grinder and decided to give it go. I used some stainless steel from an old printer that no longer works and would cost more to repair it than to buy a new one. So the printer went to the grave yard and I took the steel. ehehehe... The wood is a very dense and hard wood handle. I don't know what wood it is. But it took me over an hour to grind it down and sand the handle to shape. I used my grinder, a couple of files, my dremel. Not too bad for home made. It saves me a bundle of money anyway. Hope you all enjoy. Rough out. Finish work. Brian...

-
Yes. If no one else does I would like to have some photos of it being done. If just for archiving the instructions. B...
-
I know which one you're talking about. TIAT did a vid on it. Māori Hei Toki Lashing Had to dig it out to find it. LOL... B....
-
Hey Russ. You might try the Turks Head section in the Abook. You'll find some interesting patterns in there. B...
-
Nice work. Brian...
-
Yes... I know that all to well also. The trenza de doce braid is the same way depending on if you're doing an over 2, under 2 sequence and how small your lace is. B...
-
Very nice work Enrique. B...
-
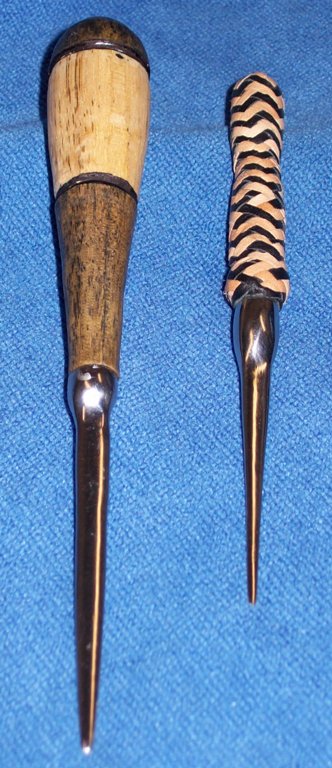
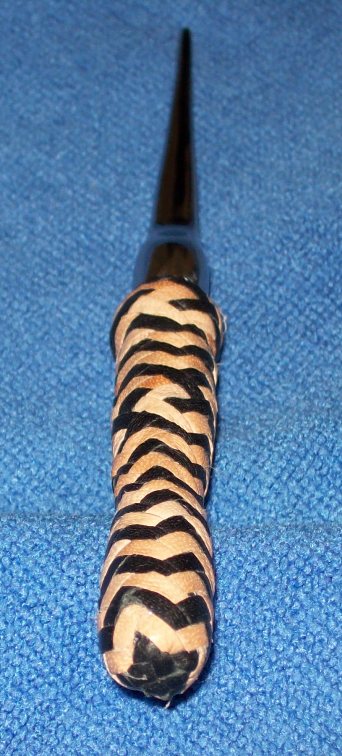
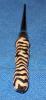
Almost all done with both of them. Got the one on the right done. Not the prettiest thing. But it will serve its purpose well. The one of the left is for doing regular size lace projects. Like stuff I do in 1/8th inch and up. The one on the right is for working with micro lace. It has a much thinner tip profile and smaller tip than the one on the left. The one on the left is going to get some micro-fid work done on that blank space you see at the top end of the wood handle. Micro-Fid B...

-
Hi Joe. That stainless steel is from an old broke down printer I had laying around here at work. The steel was very good on the grinding wheel. I know that the steel is hard enough to handle the medium duty fid work. I don't have a way to harden steel yet. But the finish is coming later today as I finish dressing the knot work on the handle. ehehehe... I don't like a naked tool that much. LOL... B...
-
Thanks Enrique. B....
-
Click on the Buy Now Button Rawhide & Leather Braiding
-
I don't know too much about horse gear. But from the looks of those reins, you did a good job. Nice work Aggie. B...
-
You're welcome. B...
-
The foundation work is paramount to a successful knot. In your shoo fly the foundation for your knot is shaped different than that of your 2nd one. Maybe the one with the raw hide has a different material and different shape at the top and bottom ends that will hold the knot much better than the one with kangaroo hide. I don't know what your foundation work material is for either one. But this could be the case where your material used made the difference between the two projects. What I have had to do to solve the issue I describe above is to take the knot off the foundation work. Then fix the foundation work so that it will be a little rougher on the surface and if I have to reshape the top and bottom ends of the foundation work. Then I re-tie a new knot on to the foundation work. B...
-
Photo's would help greatly in helping you. B...
-
Wow! Super nice. I like... B...
-
Thanks CW. I forgot to mention that both are duck bill tips making it much easier to get under the lace. Both are for micro braiding which is what I needed for the really small stuff that I use. B...
-
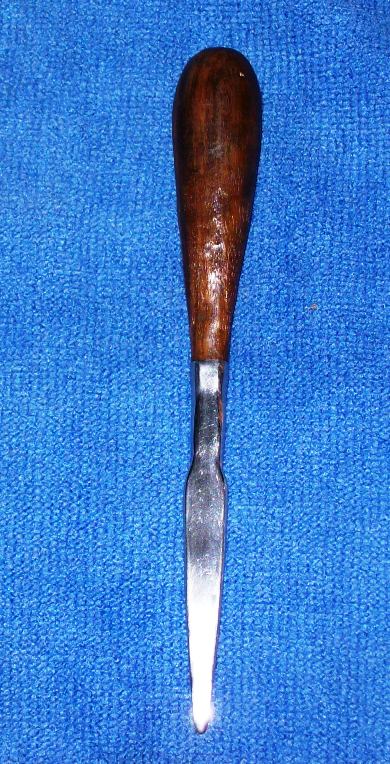
Last weekend I spent some time with my buddy in his shop. Well he had this grinder and I had some stainless steel rod that I had pulled from a few old printers that were beyond repair. I made this one with a grinder, a file and a dremel to do the finishing smooth out and polishing. The handle end is naked right now. But will get some knot work done on it later this week. Below are a couple of photos of the tools I made. This is what I started out with. On the right you will see the stock rod from an old printer and on the left you will see the rough out of tool number 2 which is on the right hand side in the above photo. That one will get a wooden handle on it. While they may not be turned and done on a CNC machine, I think that they turned out quite well for eye balling the whole thing. I will be making me a few more tools like these for my shop. I had fun making these. B...
-
Thanks entiendo. B...
-
LOL... You go right ahead Mike. Thanks for the kind comment. B...