Deanimator
-
Posts
138 -
Joined
-
Last visited
Content Type
Profiles
Forums
Events
Blogs
Gallery
Store
Everything posted by Deanimator
-
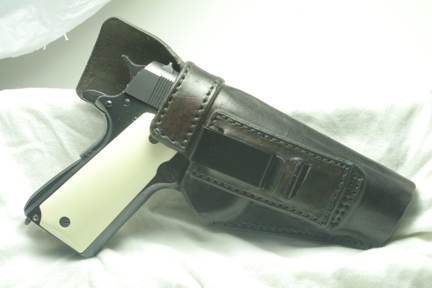
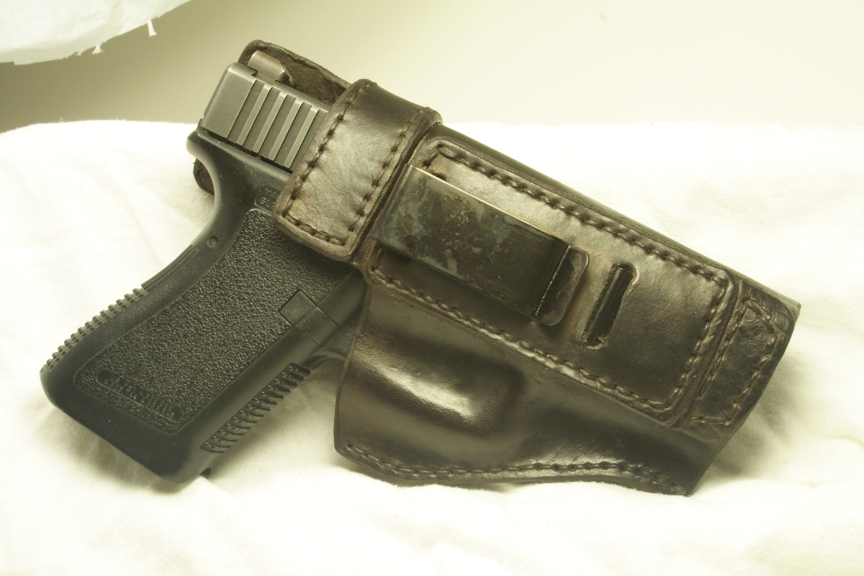
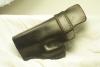
 I get my holsters damp by running them under warm tap water until thoroughly moist. I then use my fingers and the butt end of my awl and free hand stitch groover to mold around the frame and trigger guard. Most of the retention quality is in the inside of the front of the trigger guard. If the holster isn't tight enough once it starts to dry, I simply re-wet it and fix the areas needing tightening. As pointed out by someone else, getting in tight with your stitch lines makes a big difference. I don't use any secondary stitch lines because I design all of my IWB patterns to be as tight to the outline of the gun as possible. This makes the molding easier. My molding isn't as pronounced as some others', but the holsters are quite secure. I don't consider the holster done until the gun won't move when the holster is inverted with the gun in it. Regarding the practice gun used, I had a BUNCH of those Japanese zinc models when I was in grade school and highschool in the late '60s and early '70s. I knew how to strip an M1911 when I was in the 7th grade! My M1911 tuckable IWB:
-
Pocket Holster Question
Deanimator replied to steelhawk's topic in Gun Holsters, Rifle Slings and Knife Sheathes
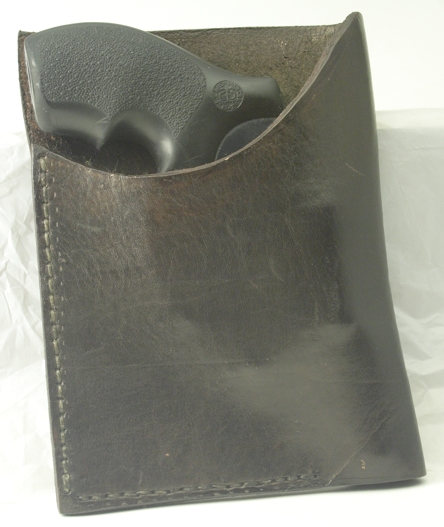
I don't do any forming on mine. They're rectangular like a wallet to conceal the outline. I've had no retention problems in using one nearly every day for months.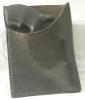
-
Decent looking holster, especially for a first effort.
-
Iwb For Larger Folk
Deanimator replied to vahillbilly's topic in Gun Holsters, Rifle Slings and Knife Sheathes
The size and shape of the body shield is going to vary with the firearm for which the holster is designed. On my M1911 holster, it's quite big, because it's got to protect the body from the hammer at full cock, the tang of the grip safety and a reasonable array of adjustable sights, including fairly large ones. On the other hand, my 2" J-Frame Smith holster has no shield at all. The hammer and any rear sight sit below the mouth of the holster. My Glock holsters are in the middle. The Glock 22 holsters I make have a little longer body shield than those for the Glock 19. This is because I have a set of Pachmayr adjustable sights on my Glock 22. They project backward over the end of the slide. I didn't do this on the Glock 19 holster, since my Glock 19 has fixed sights and those guns are far less likely to have adjustable sights, especially ones the size of the Pachmayr. -
Dyeing Holsters
Deanimator replied to rccolt45's topic in Gun Holsters, Rifle Slings and Knife Sheathes
I don't dye until the holster is totally assembled. It works well for me. -
I'm currently unemployed and can't possibly afford an appropriate machine at this time. All of my holsters are hand sewn. I'm starting out small and slow, hoping to at least make a partial living from doing this eventually. I'd like to eventually buy a machine, but it's going to have to be paid for from my hand sewn holsters.
-
First Holster Ever
Deanimator replied to Chevota's topic in Gun Holsters, Rifle Slings and Knife Sheathes
It's a nice looking holster. You have far more talent and patience than I do to do the tooling. My holsters are all plain. I'm not a fan of exposed trigger guards, but as was pointed out by others, they used to be EXTREMELY common. Look at the Stohlman book that Tandy sells. Your design is neither fully covered nor uncovered. I'd go one way or the other, with my preference being for covered. -
Iwb For Larger Folk
Deanimator replied to vahillbilly's topic in Gun Holsters, Rifle Slings and Knife Sheathes
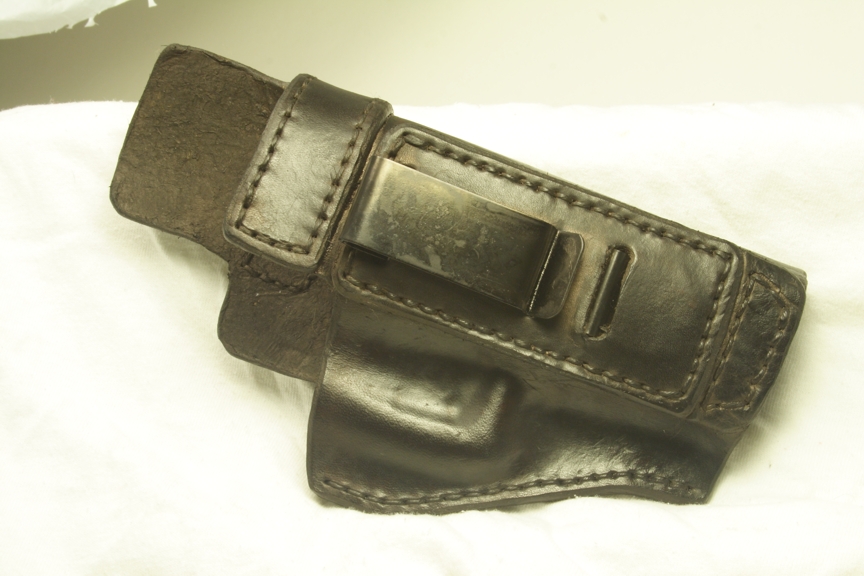
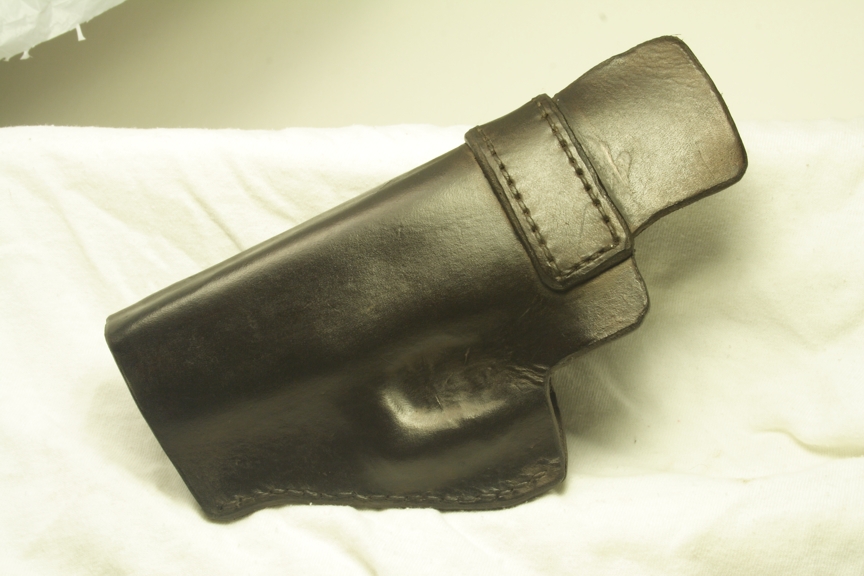
My strong inclination would be that it has something to do with the buyer wearing or drawing in some odd way. I'm by no means anorexic and use ONLY IWBs for larger guns, up to a 5" M1911 in length and a 3" S&W Model 65 in width. I have NO problems drawing, other than in tight confines like in an automobile. That's a well known issue. I never wear extra cover garments in warm weather and have a personal distaste for untucked shirts. That leaves me with tuckable IWBs or pocket holsters, both of which I make and use. As stated above, the belt is EXTREMELY important. With an IWB, lousy belt, lousy carry. Also every one of my IWBs has a reinforced mouth. I haven't found metal to be at all necessary. A strip of the same material used to make the holster body sewn at the top of the holster works just fine. My first IWB was one of the cheap Bianchis. I pitched it in a drawer after two days. It was EXTREMELY difficult to get the gun in the holster while on my body, so much so that I was afraid of the soft holster material near the trigger guard snagging the trigger and causing an ND. The clip was SO aggressive that I could barely get the holster over my belt and pants with my pants OFF. Attaching the holster with the gun in it while I was wearing my pants was a lost cause. I've had none of those problems with my Don Hume 715Ms or my own tuckable IWBs. Some things just aren't for some people. -
Adding Black Border
Deanimator replied to paulc's topic in Gun Holsters, Rifle Slings and Knife Sheathes
You're painting something, just like painting a car. Why not masking tape, perhaps combined with an airbrush? -
Ecoflo Dye
Deanimator replied to Deanimator's topic in Gun Holsters, Rifle Slings and Knife Sheathes
Here are the results with the Bison Brown after the last coat.

-
Ecoflo Dye
Deanimator replied to Deanimator's topic in Gun Holsters, Rifle Slings and Knife Sheathes
No rush, at this point, I'm very low volume. Thanks. -
Ecoflo Dye
Deanimator replied to Deanimator's topic in Gun Holsters, Rifle Slings and Knife Sheathes
Yeah, that's the stuff. I like the color, but it sure is tricky to apply. Maybe I'll try another one of their colors. I need to buy some black too. -
Ecoflo Dye
Deanimator replied to Deanimator's topic in Gun Holsters, Rifle Slings and Knife Sheathes
When it DOES finally come out right, I like the results. It just that I find myself applying more coats than I thought would be necessary. I BOTH shake and stir it, and have gotten MUCH better results. I'm not going for any particular effect, just a nice even finish. I'm using the "Buffalo Brown", which I really like, shadewise. How many coats do you actually use? -
Anybody else use the EcoFlo dye? When I first started using it, I didn't realize how much it needed to be shaken to get it even. Since I learned that, I've gotten much better results, but I still have some streaking and show-through issues. Does anybody have similar problems? My current plan is to use up what I've got and switch to the Fiebing's (oil based?) product.
-
I do my patterns in Corel Draw. I download a bitmap of the gun in profile from Google Images. I then take two selected height and length dimensions from a real gun (or have somebody measure theirs). I trace the bitmap to a vector object and drop it onto the same drawing as the holster pattern. I can then scale the holster to match the gun. On my holsters, I keep very tight to the gun, so extra stitching around the gun hasn't been necessary. I first print the pattern for the holster body on paper and cut it out. I then fold it around the gun. If there's not enough distance between the stitch line and the gun, I stretch it a little in Corel Draw. I stretch and print until I get a pattern that's got enough room for the gun, but still as tight as possible. Once this is done, I then print the pattern onto card stock. I again fold the pattern over the gun as a final check. If it's right, I lay out the pattern on the leather. If not, I make final adjustments, and print the final pattern. I don't mark the actual stitch lines on the leather, just the start and end points. I then use my adjustable groover to make the stitch line between those points, followed up with the overstitcher to mark the stitch holes. Right now I make nothing but tuckable IWBs and pocket holsters and this technique has worked out very well for me.
-
Laying Out Pattern On Leather?
Deanimator replied to Deanimator's topic in Gun Holsters, Rifle Slings and Knife Sheathes
Likewise. I do mark the clip holes on the clip covers for my tuckable IWBs, since those have to be accurately located and cut out. -
The first holster I made has never had a firearm in it. It's sitting on my dresser. A guy who was allegedly going to get into the holster business with me was supposed to loan me a Walther PPK/S to use to make some patterns. Waiting for him to show up, I made a belt slide for the gun out of scrap, just to learn grooving, stitch holes and stitching. Instead of bringing the gun to see if it fit, he spent the summer sailing. It's pretty crude, but you could carry an LCP or a Walther in it. I'll probably give it away to somebody who has a small gun.
-
My First Custom Order
Deanimator replied to Deanimator's topic in Gun Holsters, Rifle Slings and Knife Sheathes
Thanks. I think I'm going to make a similar holster for my 3" S&W Model 65 (stainless version of Jodie Foster's FBI gun in "Silence of the Lambs"). I'll just need to redimension the pattern a little in Corel Draw. I wonder how big I can go with an IWB for a revolver. Maybe an IWB for my 4" Model 29. -
Laying Out Pattern On Leather?
Deanimator replied to Deanimator's topic in Gun Holsters, Rifle Slings and Knife Sheathes
How much of an impression does it leave, and how hard is it to follow with a knife/shears? I print my patterns on card stock. How hard would it be to follow a card stock thickness pattern with a stylus? Thanks. -
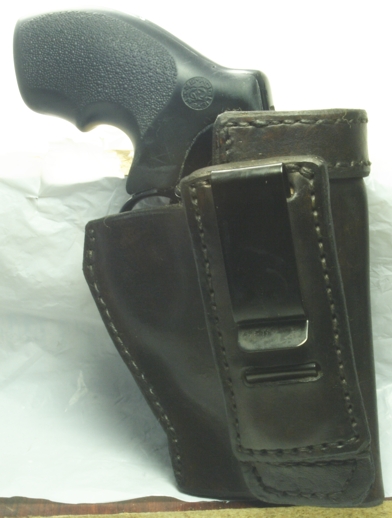
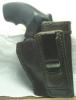
Here's my first custom holster. I made it for a guy in our club for his father's 2" J-Frame. I got the order on Wednesday night and finished it yesterday. That included designing the pattern. This one has the best finish so far. I noted that somebody else here said that you really have to shake up the EcoFlo dye. I did so this time and got a much more consistent finish.
-
Laying Out Pattern On Leather?
Deanimator replied to Deanimator's topic in Gun Holsters, Rifle Slings and Knife Sheathes
I saw you refer to that somewhere else. I was wondering if you actually didn't use ink. Thanks. -
Laying Out Pattern On Leather?
Deanimator replied to Deanimator's topic in Gun Holsters, Rifle Slings and Knife Sheathes
Yes, no marks. I use three coats because that's what gives me a proper finish. It has nothing to do with ink. -
Laying Out Pattern On Leather?
Deanimator replied to Deanimator's topic in Gun Holsters, Rifle Slings and Knife Sheathes
I wonder what he used to dye it and how. I use the EcoFlo Buffalo Brown and no pen marks are visible. Of course I don't lean on the pen. I also use a minimum of three coats. -
Laying Out Pattern On Leather?
Deanimator replied to Deanimator's topic in Gun Holsters, Rifle Slings and Knife Sheathes
I try to do it on the back, but every once in a while and forget and do it on the front. I dye all of my holsters so it doesn't really matter. I tried using a mechanical pencil, but the lead just broke off on the back side. I may try to use something like a regular wooden HB pencil and see how that works. Thanks. -
How do people lay out their pattern on the leather? I just use a ballpoint pen on the back side. Does anyone do something different?