Art
-
Posts
4,138 -
Joined
-
Last visited
Content Type
Profiles
Forums
Events
Blogs
Gallery
Store
Everything posted by Art
-
If you want hand selected leather, you better go someplace where you can hand select it yourself. Nobody will be as picky as the end user. Even at that, you need to have places where you can use the "less than your desires and specifications" parts that come with even the highest grade hide. This gets to the point of buying leather by the piece. Where do you think those pieces come from? They are the parts that the seller didn't want to use in his own production, or for small pieces, they may be perfectly fine but not big enough to make something out of. So either you TALK to the owner and let him know you gotta have the good stuff and holes, tears, cuts, barb wire marks, and insect bites just won't do, or you buy whole hides and reject anything that doesn't meet your criteria. You have to trust your supplier to give you what you need (and cut him just the tiniest bit of slack), or you need to go to a show, and buy a whole years supply, that you select, and best of all, there are multiple dealers there who don't want to pack anything home. Many are the $20 full hides (chrome tan mostly and often 2 sides) that really are looking for a home. I know guys who buy a whole years worth this way because they live in the boonies, literally, and like to pick hides themselves. As to sharpness of tools as provided by the factory; they do sharp to the level they think is sufficient for the job, or they don't put much other than a bevel on the tool, if at all. Of all the tools from C.S. Osborne I have either bought for myself or received to sharpen (most new in the box), nothing (including the knives for ghod sake) vaguely resembled sharp. My theory is that they were old school, and the apprentices at the end user's shop did all the sharpening, so why bother having a line worker do it. The tool and often the edge are designed to take abuse, and the lack of apprenticing and training raise the level of abuse. On machinery, there is no excuse for a dull blade. Most of the time, the blade is away from the operator and is only presented to the work by the machine. Sometimes the selection of blade steel defines how sharp blades can get. Stainless will not attain, and hold an edge like O-1 or O-6 tool steel, which will rust while you are looking at it. Everything is a tradeoff, but sharpening is a skill AND an artform, you can't just pass an abrasive over it and declare it done, finished, put it in a box and sell it. In fact careful appraisal in every step of the sharpening process is required to attain and maintain a superior edge. Why go to all that trouble and COST when the customer is very likely to buy with a large emphasis on the price of the product. Since I have retired, I have been doing a lot of scissors (barber, stylist, but I'll do anything) and the quality control and out of the box sharpness is the best I have seen in any industry. Sharpening these things is not for the uneducated or under equipped. The technology employed in the sharpening phase of manufacture is comparable or higher quality than the finest surgical instruments. Some companies actually vary the angle of a convex edge over the length of the blade, think about that. But their reputation depends on that technology much more than a head knife that the end user is going to put on a grinder before they do any serious cutting. Art
-
Ebay Chinese Tools Vs Tandy Basic Crafttool For Beginner
Art replied to Geebe's topic in Getting Started
I agree with Thor. Even the Tandy tools are kind of iffy. Bends and breaks are not uncommon, and the impressions are rather muddy if you compare them to older Craftools. Better to buy older (should I say ancient) Craftool Co. stamps with just a number and no letter designation. These were made from decent steel and were hand carved. They will be marked Craftool Co. or RBS (you won't see many RBS stamps). There are folks on eBay that sell only these stamps in singles. They are worth the $9 they sometimes ask, but I wouldn't pay above that. If you are patient, you can buy groups or collections of these stamps for the $3-$5 range. You want the highest quality in basketweave stamps, and here the makers like Bob Beard and Barry King provide the best product, but the Craftool Co. basketweave stamps are in there a little behind. Basketweave stamps and border stamps take a real beating (heavy strikes and a lot of them) and need to be of quality steel or they bend and/or break. The Tandy and Chinese stamps appear to be cast from base metal (pot metal) including the business end (that makes the impression). After the first generation of stamps, they degrade rapidly into what they have today. Art -
That is the same AK-20 strap cutter that almost everybody sells. It works. It is heavier than hell. Art
-
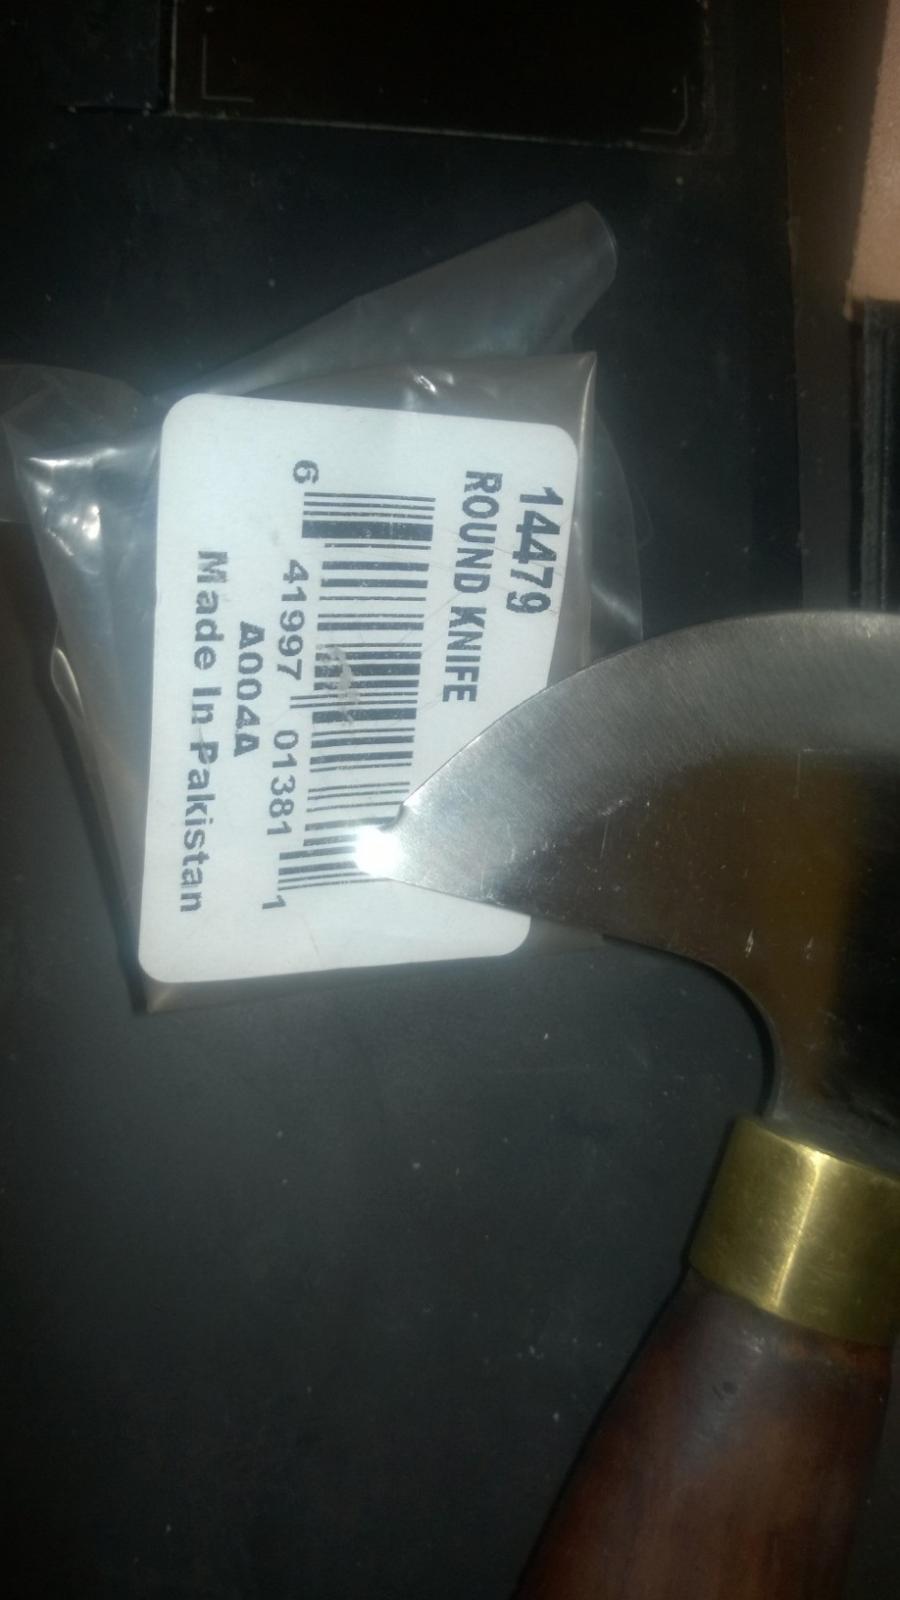
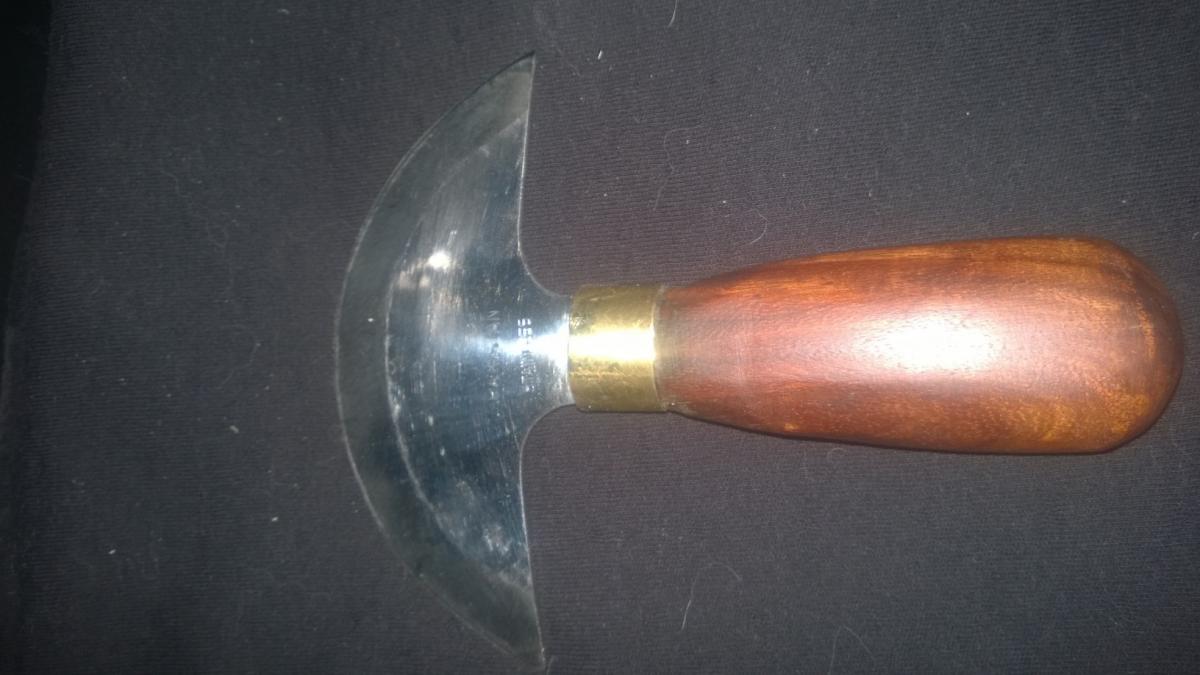
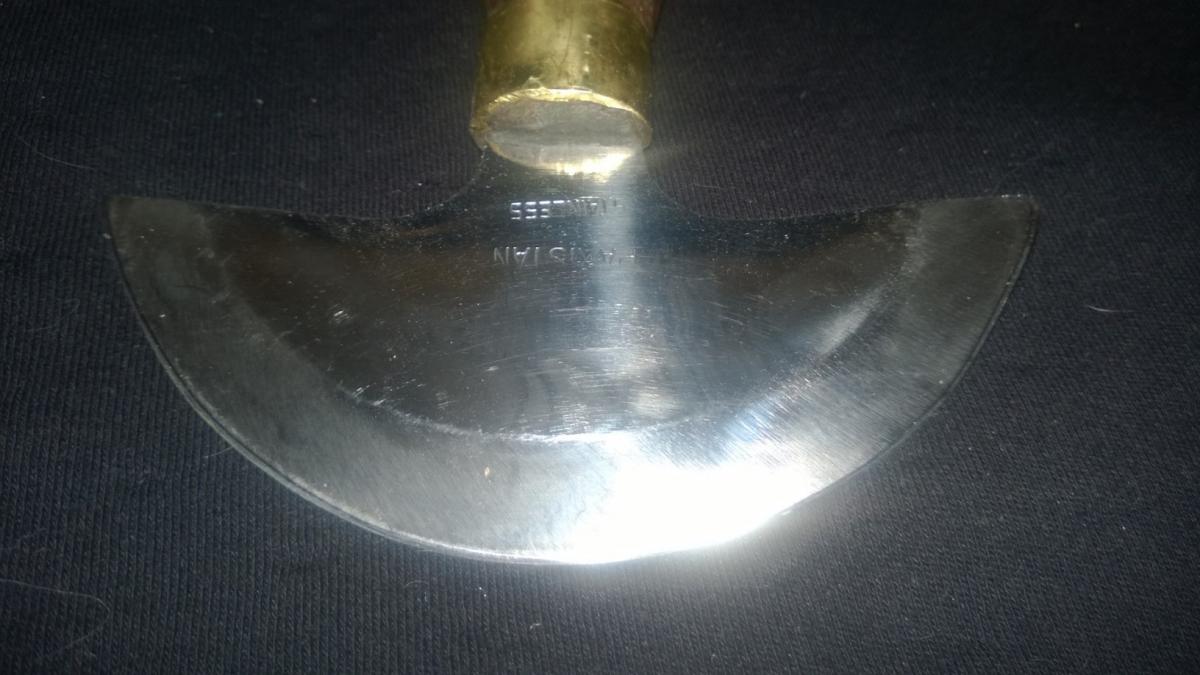
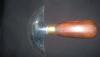
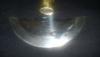
So you can't afford much for a Head Knife? Don't worry, get an Abetta for $11 or so shipped. Or don't. I saw this and said, "I gotta see this!", and I did. This is what I received. Please note the rather large ding around the tip. Because of the way the metal crinkled, it took a pretty good wack. The black marks could have been generated by what it ran into or vice versa. HorseLoverZ was good about it and another is on it's way, they didn't want the damaged one back, so I decided to repair it. The handle is a little big, but is fine for my Hulk Hands (they are not green though). A lot of folks would want that trimmed down, and there is plenty of wood to sand down. Looking at the blade, we see the ding of the century on the edge near the tip. Another important factor are the words Pakistan and Stainless rolled into the blade. They (whoever they are) are obviously proud of that. Pakistan and stainless are usually synonymous with (often) a 300 series steel, so I pulled out the magnet, and voila, it is Martensitic, which is a plus, probably 420, they have been using that stuff for years, either theirs or the Chinese stuff. Now, on a very good day, with the best 420 (even 420J2), the best technician, using the best furnaces, will only be able to get this steel up to HRc 55. I've ground J2, and this ain't J2. Realizing this steel is going to be in the neighborhood of HRc 52 or below, I decide to tread lightly. I passed-up a P120 belt as being too aggressive, and boy was I right. I put-on a P220 belt and proceeded to grind new bevels that eliminated the ding and a little more using a 10° bevel angle for each bevel (this gives a 20° included angle), which is kind of my standard head knife grind; screaming sharp. I pulled up a burr on the first pass. Surprisingly, it took about 3 minutes to do the full grind back at the slowest speed, no sparks; this is 420, Boy Howdy. The way things were going, if I ran up through the grits, I wouldn't have any knife left. So I put-on a 6000 finishing belt, made a few passes and stopped. I got out the trusty strop (the very one I made in another DIY) and worked for a minute on that with .5 micron green compound. No cleanup on the blade, just treated like a user. Here is the result. Not great, but not bad for $11 and a few minutes time. But does it cut?????? Yea, it cuts, keep the strop handy and it will last a little while before a re-honing. All in all, it's $11 delivered and a little time, even with the ding. Is this a good head knife, not by some margin. But this knife can and should be used to teach you to sharpen, hone, and strop. Out of the bag, it won't cut leather or darned near anything else for that matter. You can buy one of these, and learn. If in the learning process, you destroy it, or grind it all the way down, what are you out. Try some new sharpening technique, or just practice your skills. If you are not having fun and learning, try something else. Art
-
Sure, you will want to use a 25 or 26 round point needle. Art
-
Ok, I really have sewn a dollar bill with a 441 clone at a show. The trick is don't change anything. Take a setup to sew 2 pieces of 8 oz together, and do it. The thread looks like a log chain, and you can see the knots on BOTH sides, but hey, it did it. This is not possible once the customer gets it home and over-tensions the bobbin and has to compensate with the top tensioned like the e string on a guitar. Now this doesn't mean you can make it sew with 69 thread and corresponding needles without a little (or a lot) of adjustment. The current crop of 441 machines are really quite good (I speak of dealers and machines we refer to often on leatherworker.net). Art
-
Source For 206Rb5? (Should I Consider A Different Machine?)
Art replied to Dougster's topic in Leather Sewing Machines
Doug, I really want you to think seriously before pushing a moderator's buttons. The 67 (167 et al) machines are great, and a good one will serve the medium category very well. Parts will be expensive. I don't certify dealers, but there are probably less than 10-15 who deal in machines and set them up for heavier leather sewing. If you are new to this stuff, there is only so much we or anyone can do for you here or over the Internet or telephone; that is why a dealer is a good idea. Since you know it all, there is little we can do for you here. Art -
Hey Doodle, That's what that big can of Acetone is for. Art
-
I use the Tormek for Knives, and lathe tools. I need it for lathe tools, because by the time I get the tool and figure out what it used to be, the Tormek is the only way to put a new bevel on the tool. The tormek book, mine is old, it is actually hardbacked, gives me a good of what the tool used to was. But then again, I have made a completely different tools than what they brought in. For really high grade knifework, you need a belt grinder or stones, there is just no other way to get the finer grits you need. Art
-
Hi TT, It is amazing what the guy who has been sharpening scissors (stylist) for years can do to a good pair of Japanese hair shears. The German scissors are starting to copy some of the attributes of the Japanese ones. Many hair shears are cut on a radius and have convex edge profiles. If you don't realize this and have a machine and the knowledge to address it, well, the tips won't meet, they will fold and/or push hair, not close properly and who knows what else. It takes over an hour to get a pair like that fixed, and it hurts to tell them their $300 baby may not be repairable. Art
-
Hi Randy, Keep in mind that the watchmaker's loupes can't really comfortably be kept in the eye socket like they do in the movies, well maybe if you have small eye sockets. When you hold them up to your eye, they work perfectly, not like the pocket loupes where you have to hunt for the "sweet spot". Art
-
Hi Randy, The question is visor type or hand held type. When I really get going, I wear the Optivisor or the QED headlamp with magnifiers. My handhelds are a bunch of different ones, the ones that I like the most are 5x and 10x Bausch & Lomb Watchmaker loupes. Don't pay a lot for these, under $20. The three lens loupe/magnifier is also a good pocket piece, but pricey. Art
-
Hi Paul, The Japanese water stones started showing up 35 or so years ago. Before that we pretty much had Arkansas and Carborundum. At first, it was mystical hype and then we figured out you really could get a better edge with them. The downside was they cost an arm and a leg (but then a good black Arkansas wasn't cheap), and they would wear quickly, often in the form of a trough in the middle of the stone. Not a problem, DMT came out with the diamond lap, and troughs were eliminated in all stones throughout the land. They work very well, and you learn to use the stone in an allover fashion to minimize the grooving, still, they must be dressed frequently. Over time, most stones will wear, it is the nature of the beast to be friable so as to expose new cutting surfaces. The water stones seem to wear faster than others. Shortly thereafter came DMT with diamond stones which are still the best in my estimation. As far as pulling, pushing, or sawing, I don't think it matters. I'm sure someone can argue to the contrary, but I just haven't seen it. We pretty much use Diamond stones for most applications, both wet and dry, power and hand. The only waterstones we use are on the Makita 9820 grinders, and the occasional use of a Silicone Carbide stone on the Makita for carbide tools. The general tool sharpening theory is that the grind marks (be they ever so miniscule) should run in the direction of cutting. The old timers (oops, I think I are one) would tell us to sharpen a tool like you use it. There is a new stone that is gaining popularity, the Shapton Ceramic Water Stone. They are a tad expensive, but so are Diamond Stones. Use them like a Japanese water stone, but they hold up better and are supposed to make superior edges. Ok...till the next great thing comes along. Art
-
We kind of use (and abuse) the Weaver Little Wonder for setting #104 tubular rivets. You don't even have to punch the hole, just set them. We also have a full set of tools from Brett at Brettunsvilliage (Blue tools) for setting stuff that is too deep in the piece for the press. The Little Wonder is a bit pricy, even at wholesale prices, but honestly, it pays for itself, and allows you to go decorative as hell with rivets. You can also put caps and/or (I don't know why you would use both) washers/burrs, just make sure you have about 1/8" stickup for the crimp. We don't bend many of the #104s as I have a lot of different sizes and as long as we don't let more than the diameter of the rivet (less even works) stick up, they don't bend very often. That doesn't mean one doesn't get made wrong along the way, but that's what the Dremel (or Foredom) was designed for. The thing about the press is that it applies a more constant and even pressure, not just the wham, bam, thank you mam of the hammer. The small sizes, aka #14, of burr rivets however, bend like spaghetti (al dente). You have to be extremely careful with them, so we try not to use them. Art
-
Collecting Tools -Antique, New -Need Em All! ;)
Art replied to Erystawi's topic in Leatherwork Conversation
Way cool, love the patina, the wood screw is, of course, priceless. -
If you can get the Ferdco from a local dealer, there really is no choice. Get the Ferdco. While I haven't been into a dealer in decades, they are essential lifeline for the person new to heavy stitchers. To have a dealer in your area is worth many hundreds of dollars in time, frustration, and ultimate satisfaction. All those accessories are cool, but truth to be told, 90% of them never get installed on a machine. Art
-
Yep. Here. Pucker-up on the shipping though. Art
-
For a 14 inch blade....crikey! What do they charge for a new blade? Art
-
Doodler, It is much easier to sharpen any curved blade on a moving stone as you can pay more attention to your angle. Another trick you learn is that the curved portion of the blade (called the belly) can be manipulated to the proper angle by raising the opposite end of the blade. The French Head Knife (we call them a linoleum knife over here) cuts mostly on the belly, so learning to sharpen that part and presenting that part to the stone at the desired angle is most important. The other important thing is to use the same angle as you go up through the grits. Unfortunately this is all practice, but keep a felt tip or magic marker handy and mark your edges before you stone to keep a check on doing it right. Also get a 10x glass (loupe), even a cheap one will show you any inconsistencies. Buy the magic marker before the loupe. Art
-
Proper honing should work to keep the edge sharp for quite a while, but eventually, and this depends on the hardness of the steel, the edge angle will tend to increase as the edge is replaced by the steel underneath. When we hone, we do remove metal and actually create a new edge, so the included angle increases unless we actually hone the whole primary bevel and move that back. Moving the primary bevel back is actually sharpening. Every blade that I do gets a new primary and secondary. On head knives, we do a flat primary only, it just works better that way as the user can find a flat primary easier than a secondary. If you ask real nice, I'll put a secondary bevel on a head knife, but I don't recommend it as it is very hard to find that secondary when hand sharpening. Head knives can be sharpened with a jig, but I do them freehand on a 6x48 laid down flat if it is a real basket case, or on a Makita 9820 rotary flat waterstone or a diamond rotary lap. To make a jig for head knives (which are practically round), make a base that will present the knife at the desired angle to the abrasive. Put a pin in it that a top piece will rotate upon. You can make the top piece of delrin with holes in the bottom for the approximate radius that you want. Make a cutout in the top of the delrin piece to let the handle stick out and let the knife lay flat. Countersink and glue a couple of Neodymium magnets (eBay) to hold the wings of the blade. You'll have to work it out from there. A Pecard's or Vaseline treated strop with .5 micron green compound (we however use 3 micron diamond paste on our rotary strops, and .5 compound on our felt wheels) will keep a knife very sharp between honing sessions. Of course, everything can be done with stone grades extra coarse to extra fine and a strop and some compound. Art
-
Hi Roy, Planes are a whole different ball of sharpening. It is really necessary to understand the geometry of the plane bed, the blade, and the cap iron to get it sharpened properly. A lot of planes really need a little back angle (on the back of the blade) to function properly. I like to get the whole plane when someone wants one sharpened, not just the blade. Scrapers are another animal too, too many guys have planes up the wazoo but not a scraper in the house. A good scraper like a Stanley 80 (properly sharpened and hooked of course) can save a ton of planing (with risk of tearout) and sanding. It is hard to refuse when someone brings you a sorry tool that just needs a little TLC. Art
-
The Ferdco 2000 may not be in current production although Hoffman Brothers may be producing it. The 2000 was based on the Taiwan made Taking 441 last I knew, which was a very high quality clone and more expensive than the Chinese mainland 441s. If I could get one of them used, I would buy it before the others. Make sure you know from where your machine came, or was made. The Highlead machines are the next level of quality in my opinion tougher and beefier than the Cowboy and Cobra, and they cost a little more to go with that. The Cowboy and the Cobra are, last I knew, made in the same factory. Cowboy has a few things Cobra doesn't have but the guts are the same, paint is different. All the accessories for these machines are dirt cheap to the dealers, you and everyone else would be really surprised. Demand a deal on accessories and be ready to walk if they don't give you something you like. Cobra being closer to you is a plus that should be evaluated. Art
-
Keep the feet in mind, especially for a designer where you won't have six different machines for six different functions. Pfaff and Adler feet are EXPENSIVE if you can find what you want at all. Juki feet are cheap and there are a bazillion different ones. Art
-
Beautiful work. The question is, collect them or use them. I just love Top Chef and all the others where the "Chefs" bring in their knife rolls with about 10 knives in them. I have only seen that once in a commercial kitchen, and those knives went home that night, never to return. I have never seen a cook or chef treat a knife well enough to have that kind of fit and finish. The dishwasher, throws them in a tray and runs them through the machine. I couldn't bring something as pretty as that to work. Art
-
Sniper, How about a name to go with "Beaver from Iowa" Avatar. I know a few guys who do scissors. They go from shop to shop with a Wolf or even just a grinder with some aftermarket jig and that's all they do, run out of the back of a van usually. The Wolf works fine for most scissors, but then you get the occasional hairdresser oops, stylist from Rodeo Drive who just has to use $1000 scissors where $150 would do. The Wolf will not do these well, I have seen the results, or maybe it was the guy running it. I have found the Edge-Pro to do a good job on any of these things, even the uber expensive ones. I got my Edge-Pro back when he first marketed it and it has worked from kitchen to salon. It now stays setup for scissors. Till you get used to the way to do scissors, you will bleed over everything, those thin little cuts hurt after a while. On the really good scissors (the $100-$200 kind not the $1000, as that's just too much for anybody to pay for scissors) you can get an 80° or 90° edge sharp enough to cut skin on touch. I really didn't believe that till I did it, and I bled. I have a roll of alligator skin tape that IF I remember to put it on, helps to keep me from getting cut-up. Art