


Go2Tex
-
Posts
726 -
Joined
-
Last visited
Content Type
Profiles
Forums
Events
Blogs
Gallery
Store
Everything posted by Go2Tex
-
Thank you for the lead. I called and ordered a pair. Sweet! By the way, they are priced very competively. thanks again.
-
Blevins buckles with the leather covered slide are a real pain and the overall quality has really gone down hill. They invariably have burrs on the edges of the slide which scratch the hell out of stirrup leathers, so you must take time to file them down smooth. The leather they use is not always the best quality and it almost always is marked up with some kind of crud that comes off the metal and reacts with the leather. It looks like crap, so I try to remove it. Apparently, they put some kind of finish or something on the leather, so cleaning it is difficult, requires deglazer and then staining it to match the color of a saddle is almost impossible to get good results. Normally, deglazer works fairly well to clean them up, but not this time! I had to replace a set of broken blevins because one of the posts just broke off. Well, the leather covered slides I got with the new set I ordered were really dirty, so I hit them with oxolic acid but it didn't remove the stains. OK, so I try adhesive remover, which removed the metal staining, but it seemed to react with something in the leather and formed a hard, shiny blotchy appearance. Then I tried lacquer thinner and that just went from bad to worse. The leather was all blotchy and still had some kind of hard finish in areas. Maybe in my haste, I put too many chemicals on the leather at once and it turned parts of the leather a reddish brown, almost like baking soda burning. Next I try the last tiny bit of deglazer I had and it just formed a dried out whitish appearance. So, as a last resort, I oil them up and they still look like crap. Well, so now I have to order new slides. This repair job is now costing more money than I am making, all because of a crappy product. I did read a thread where some suggest replacing blevins with superiors. That might be a hard sell to some old-timers, since the Blevins are an industry standard, and just about every saddle out there has them. If they only knew how crappy they have become. Hopefully this will get back to them at Blevins and they will respond with some improvments. First of all, DEBURR the damn edges!!! And secondly, don't pack them together so that the aluminum metal reacts with the leather, and for krissakes, stop putting whatever it is you put on the leather, because it makes it impossible to dye them evenly!!! Either that, or stop using that cheap import leather because it has a finish on it, probably put there to hide the defects.
-
I would like to echo the other sentiments and suggestions. I have gotten away from tacking the binding, however. I find that it messes up my stitch line and is really not necessary on the backside. I figured out through trial and error that part of the trouble with shaping the binding was that I was not giving myself enough room underneath in the fold of the back cantle piece. Obviously, the more I layed the cantle back, the more trouble I had shaping the binding in the fold, wrinkles were harder to deal with and my fingers hurt like hell. The key seems to be in shaping the fold area of the back cantle to allow enough room to work. This requires laying it back off the top of cantle quite a bit, which, of course, causes a wide gap between the cantle top rim and the back cantle piece. If you use a cantle filler, it will span the gap but not really fill it in and will leave a depression or crease. The gap is still there and that seems to make for a floppy roll, or potentially so. The gap can be filled in with a wedge shaped piece of leather cut from the edge of a thick piece of skirting. Once glued into the gap, it adds a bit of rigidity and also, I believe, makes stitching a bit easier since there is less opportunity for the needles to get off their path between the front and back. So, first off, I use an arched pattern. I cut the binding from the middle of the side, down low where the grain is not real fleshy but has some stretch to it and try to get the edge that will show on the front into the firmer leather. I want a nice edge, so this is important. I case it as normal and then try to pull it through my Heritage lap skiver splitter without totally distroying it and my workbench it is attached to and the workshop wall the bench is attached to. Then, if it is still in useable shape, and about 7/8 oz., I start shaping it over my roll and working out the wrinkles underneath as described. Usually, it needs a bit more skiving in the critical areas if it's a firm piece of leather. I use the saddler's hammer flat end to push the leather into the fold and up under the roll at the ear cut area. I shape it as best I can and let it dry. I don't tack it at all. (rawhide is another story). Sometimes I'll tack it on the sides at the ear cut but that's just to keep it from slipping around as I shape it. Once dry, if it needs tooling, I'll mark it, rewet, flatten it out and tool it, then reshape it and let it dry again. Then slick and dye the front edge, and glue it down. I prefer to stitch it dry. I might rewet the back fold area if need, but wet leather will not pull up as tight without tearing through the stitches. I use Jeremiah Watt's cantle binding trimming tool. It costs an arm and a leg, but that baby is worth every penny.
-
 Yeah well.... when it comes to black holsters or black anything, (and I know the paying customer is always right), my motto is: If you want it bad, you get it bad... or, black. The nice thing about black is, it hides really crappy stitching. You might have something with this Eco-flotsam stuff. I just wish they would change the name to something a little less politically correct. I just about refuse to buy anything with the word 'green' or environment in the name or on the label.
 -
Which W&C leather are you using? Their Oak is lighter, and possibly softer temper, though I haven't used it enough to know how consistently softer it is. Frankly, I didn't like it. It reminded me of import leather. I have used their drum dyed stuff for years and it is definitely softer. It is a pain to carve due to the dye. You must constantly strop your knife as you carve to remove the buildup on the knife, which causes the chatter. It all takes up water with no problem. Hermann Oak russet is a superior tannage overall, no question. The biggest problem with Hermann Oak is the consistency and uniformity. It is a crapshoot every time I order some. Of course, I don't buy direct from HO because of the capital outlay and wait time, and market uncertainty makes that risky. I use distributors, usually a couple sides at a time, and that means I am at the mercy of their pick. If they get crap, I get crap. Otherwise, I have to pay through the nose for a side of leather if I want a shot at getting an actual no.1 grade. I ordered 10 no. 1 sides from HO once, and it took forever to get it, and I got no better than if I had ordered tannery run from a distributor. One side had a 4" butcher cut right through the back/butt where I take my stirrup leathers! The cost of return shipping means you generally have to eat the crap. I have noticed a reduction in overall quality and consistency of W&C over the past few years. I always order their top grade and sometimes there is grain damage, rawhide untanned areas, lots and lots of fat wrinkles throughout, and narrow sides, but the thickness is always quite good and uniform. I order heavy and I get heavy. With Hermann Oak, sometimes I order heavy and get medium, and sometimes I get extra heavy. (18 oz in the neck!!) And, it is like sole leather - dry as hell and impossible to cut. I know I could order it leveled, buffed, etc, but that adds to the cost which is already driving my hourly wage side of the equation into the; "would you like fries with that?", and, "Welcome to Walmart", price range. I'm thinking about going Mexican. Like they say, once you go Mexican, eh... you're stuck on the other side of the fence. I have to say, the Chahin tanned stuff is generally pretty decent. Plus, I notice they have drum dyed brown and chestnut skirting. For the price I'm paying for W&C these days, I could probably just buy 3 side of Chahin and work around the problems.
-
The EPA, eh? I say it's time to get rid of the freakin' EPA! Nothing but a bunch of eco-nazi ideologues. It's totally out of control and unaccountable. As for the topic of water based dye and rub-off.... If you put a good sealer on any dye it won't rub off.... well, not under normal wear. I guess if you get your butt drug across the pavement trying to make an arrest or something, eh, you might scuff your holster, but I recommend against being drug across the pavement for a lot a reasons, scuffing one's holster being the least of them. As for the dye being applied to wet leather.... usually, when I have done this, I get a diluted, lighter application. But, the test does indicate a better penetration. Thanks for the demo. Oh yeah, one more thought..... the holster in question looked a lot better before you dyed it black. I recommend against dying anything black. I think it should be banned along with the EPA.
-
Yeah, considering the price of leather and more importantly, the cost of SHIPPING, being able to use all my scrap will save me a bundle in the long run. I should have this new splitter paid for in, eh.... oh, about 10 years. Considering the convenience factor, lowered stress factor.... which equates to lowered whiskey costs and fewer hangovers, hell, I think it already paid for itself.
-
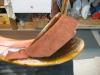
Hey, great idea! Looks perfect. Strong, yet flexible and no doubt comfortable due to the thinner weight. Horse hide is the one leather that I have not yet tried, but looking at this harness, I might just have to give it a whirl.
-
Yep, got my check in the mail to hold mine. 14" should handle just about any pattern I need to split. I can't think of anything wider on the saddle except the seat. It has a crank and a motor and a table. This will allow me to level all my parts and use up a lot of that scrap for holsters that are too big to fit through my Landis. And, finally cantle bindings! Whoo hoo! And skirt plugs! No more worrying about matching up the thickness! Just run 'em through and slap 'em on. Only problem is, I'm running out of space in my shop! Thanks for the tip on this.
-
Oooo.... sounds interesting. What are they asking for them?
-
I use the hard rubber poundo stuff at my hole punching station. It doubles as my dye station. The cutting board stuff would work as a hole punching surface except that it gets really rough with a lot of such use and it will tear up your leather.
-
How does it compare to the Artisan splitter? I need it to be easy to adjust the thickness, at least as easy as my Landis 30.
-
AARRHG!!!! After using my little wooden Tandy strap cutter for about 11 years with little or no problems, except the hard leather previously mentioned, now all of a sudden the @#$%^& thing starts going the other way. I'm just trying to cut some 5/8" straps out of heavy harness and for some weird unexplainable reason, the strap cutter keeps angling away from the leather and giving me a tapered cut. I try pushing the leather firmly against the cutter to no avail. It starts doing it almost as soon as I start the cut. I flip the leather over, and viola', a perfect cut. So, I think, the straight edge cut is not vertical and thus, it is being forced out from the cutter, thinning the cut. I can't imagine that this is the problem because I've never had this happen before. I'm beginning to think that there is a different problem with the cutter, perhaps the part that holds the blade is worn and is allowing it to go wacky.... I think I'll try my other cutters and see if I can duplicate the problem. Not like I have time to waste on this. Why does stuff like this always happen when your are in a hurry?
-
Well, that's not good news. The band splitters are great but way out of my price range, I think. I can buy a whole lot of leveled skirting for what I would pay for one of those. Probably never pay it off except in terms of convenience. I appreciate the info, though. I think I just saved myself a bunch of Obama-bucks....
-
Ah, too bad. Yeah, a sales spiel can leave a bad taste. I could sure use a wide spitter, though.
-
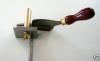
Those are some beautiful tools. The 10cm would probably be large enough for my needs. I'll have to take out a second on my house and get back to ya. But, seriously, I will keep it in mind. What I need more than a plough gauge is an Artisan 20" splitter..... You ready to part with yours?
-
Anyone want to trade a good plough gauge for a nice, well cared for Boss Stitcher?
-
Ah yes, draw gauge. That's what I have, and I don't trust it. Like you say, for anything more than a couple inches, it's no better than the wooden one. Thanks for clearing up that misconception. Here is a plough gauge for sale on the Internet. http://www.bonanza.com/listings/Plough-Gauge-BEAUTIFUL-Barnsley-Sheffield-England/21773362 It looks like an accurate device to hold and control the knife as it is pushed through the leather, rather than into the table surface. Makes sense.
-
Well yeah, you can stop the razor blades and they will work better until you can buy new ones. The problem I have is, on occasion they break while trying to cut through really hard veg tan. For some reason, every once in a while I'll get some skirting from Hermann Oak that is more like sole leather. Trying to cut it with anything is a struggle. The cutter starts getting wider, which messes up the width of the cut and then it gets to a point where, if I pull any harder, it breaks the blade. For some reason it binds up in the hard leather. I literally have gone through 4-5 blades trying to get it cut. I finally just cut by hand. I've tried the plough gauge. Either I can't put a good edge on it or I just don't have the talent and guts to use it. With that sharp blade sticking out there next to my thumb trying to hold down a 3" strap, pulling through some thick skirting..... eh, no way. All my instincts are telling me it is a stupid risky method to cut a strap. I guess if I had started out using it and nothing else, and learned the proper way to use it, I'd be fine with it, but frankly, the thing is looks like an accident looking for an idiot to happen.
-
Dusty Johnson's book has a good list of tools that you need. Basic stuff. No need to spend a fortune. Main thing is, you need to be able to sharpen them and use them correctly. Weaver Leather sells a round knife that comes scary sharp and it will hold that edge long enough for you to learn. Then, you will need to learn how to keep it sharp. Best advise I can give you. This is exactly how I got started building saddles. Crap saddle. Rebuilt it. Learned a lot doing it. Forget the cost for now. Your knowlege gained and fun doing it will be worth the cost. The tree is most likely not worth a pile of firewood. Don't put your name on it and resell it. You will regret it. Keep the saddle and ride it. Hope your horse is forgiving. Then take it apart again. Hang the tree on the wall with a sign that says: "typical junk factory made saddle tree".
-
Latest Bag
Go2Tex replied to tatehunt's topic in Purses, Wallets, Belts and Miscellaneous Pocket Items
Incredible artwork! Very inspiring stuff. -
It could be the leather is a bit too wet when you are forming it. But, the general rule is you shape, dry, then trim.
-
For what its worth, I recently used a batch of vinegaroon that I had made up, oh gosh, a year ago, maybe longer. Very strong batch. Very dark. Very stinky. Used it on a couple of holsters. Worked great but they did smell like vinegar. Very strong smell. Don't know if the smell went away yet. Haven't heard back. I suspect it did. Didn't seal it up. Just oil and TanKote. I didn't soak them in the batch as the piece was too big to get into the container, so I used a wool swab to apply it, liberally. Didn't use baking soda or rince water. I'm pretty sure that would help, though. Probably a good idea. Definitely don't soak in baking soad. It will burn.
-
Well, it sounds like you are doing everything right. I move my drawdown strap forward at that step to get more stretch and smooth things down. Depending on the ground seat, leather thickness, casing condition and tree, there could be more or less slack remaining. It just takes practice to know what is acceptible and what to worry about. Once it's dry, it might not be as tight as when you were fitting it. That's a fact. It shrinks a bit, but mainly it looses thickness, or volume and that is what gives you the loosness. It's the same effect that causes the horn wrap to get slack after it dries. It's not that is stretches out, but everything gets thinner under it. That's why I try to let it dry for a couple days before putting the swell cover on. It invariably gets a tiny bit of slack, no matter how tight I get it, even when I think it's dry. Actually, I'm beginning to think this is caused by evil spirits in my shop just messin' with me. So, you may want to let your seat dry out completely before you make those final trim cuts, so you can then spike it down real tight and determine where it needs to be trimmed, or not. If in doubt, cut it less than you think is right. As for those ear cuts, I'll tell you what was told to me. Ya just have to build more saddles. Of course, that's easy to say, but it's the simple truth. There are so many variables involved that trying to come up with a sure fire, easy, fool proof methodology is darn near impossible. It just takes a lot of practice, trial and error and good deal of luck..... not to mention one's ability to hide mistakes. Or, to adapt and adjust to miscalculations.
-
Yeah, been there done that. Always does. My processes and designs are constantly evolving as I try to make things come together easier and better. It might. I use the Stolhman design drawdown and pretty much the process described in the book, with a few of my own and other's ideas thrown in. I don't use that elaborate ear cut deal with the nails to find the cut location. It never worked. I always had so many marks I had no idea which one to use. We may be using the term "spike" differently. I'm having a hard time visualizing all those points spiked at the same time on fit-up and having any slack anywhere. I don't "spike" the ears or front jocks at all on fit-up in the normal sense of the term, as in leveraging. I tack them and then apply the drawdown to remove any wrinkles or bulges and smooth it down. This makes it real tight across the top of seat at the hand hole. And when I spike under the swells or at the base on a slick fork, it's mainly to establish a registration point. I don't really have to leverage it much with the spike by that time. On final assembly, when I am ready to lay the seat cover down and pull the strings through, that is when I spike it down, or leverage it under the swell to get the seat tight over the hand hole. You might have to move the spike hole or angle slightly, and that is something to keep in mind when you are making those seat cuts around the swell. You want to have some leeway and not have to worry about covering up something underneath, like tacks or boo-boos.

