thenrie
-
Posts
95 -
Joined
-
Last visited
Content Type
Profiles
Forums
Events
Blogs
Gallery
Everything posted by thenrie
-
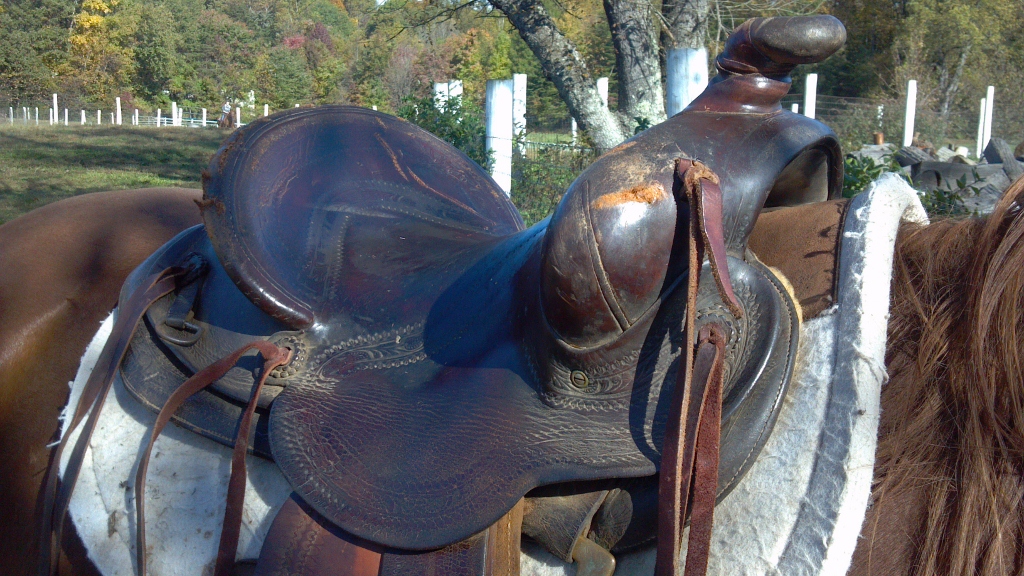
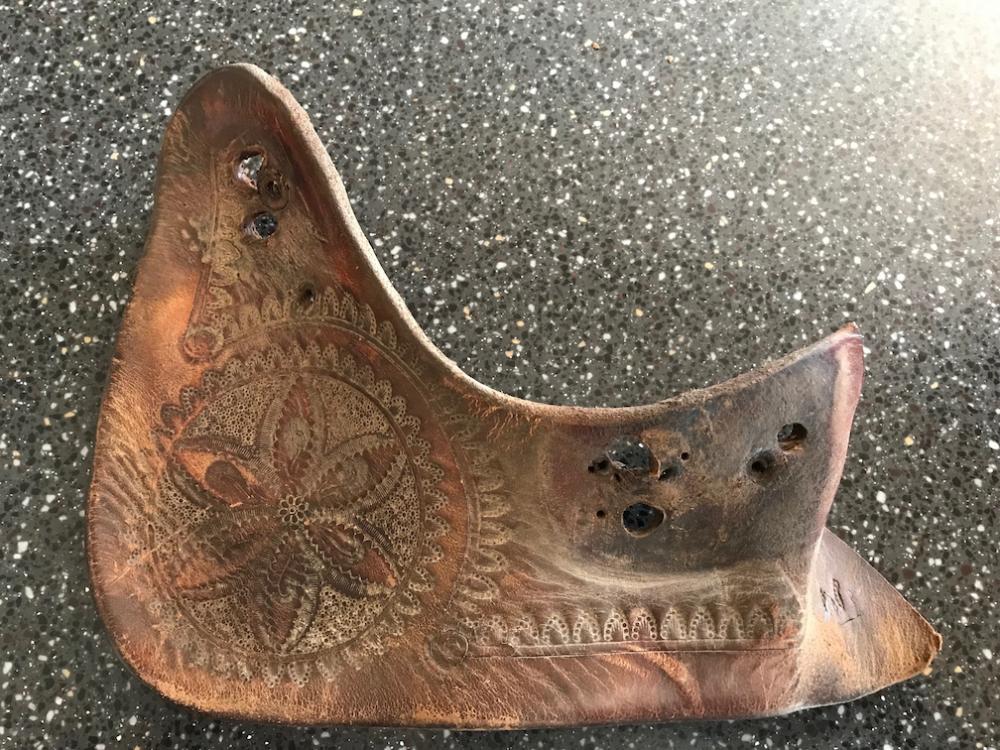
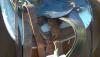
Hey folks, I am repairing an old saddle a fellow had it in his garage and let a dog chew on it. So, I am replacing a the seat and the right front jockey and I am hoping to duplicate the stamping. It's not too complicated, but I need a veiner that measures 1.25" X .25" (1-1/4" X 1/4"). I also needed a border stamp that I can't find, but I was able to make a passable stamp to duplicate it. I have attached a photo of the stamping I'm trying to duplicate. The flower petals are made using a veiner. I would also like to find the flower center used in this stamping, as well as the rose stamp used on the pattern corners.
-
Help To Identify Two Antique Saddles
thenrie replied to John22's topic in Saddle Identification, Restoration & Repair
Not an expert here, but they look like what is commonly called Hope saddles. If I recall correctly, they were used in and around Texas in the late 1800s, likely in the 1860-80 time frame. Don't quote me on that, but I think that is close. One is a "half-seat" that had Sam Stagg rigging and the other looks more like the traditional Hope saddle. If you'll google that info you might find out more. At least it's a place to start. As for value, I wouldn't presume to try to give you any accurate appraisal. To tell the truth, the leather doesn't look like it's in all that bad of condition for the age of the saddles. I would recommend that you clean them well with saddle soap and a brush, then give them a good coat of 100% pure neatsfoot oil, before you start talking to appraisers about them. As for your last question, no way to tell from the pictures or the measurements you gave whether they are pony saddles. People back in those days were smaller anyway. You can give us a good idea of their size by measuring from the back of the base of the horn to the top of the cantle (seat). If it's 12" or less, I'd say they are pony saddles and may be a little later vintage than what I stated. 13" or larger, I'd say they were horse saddles. Edit: After taking a second look, judging by the small stirrup leathers, I'm leaning more toward pony saddles now, and maybe a bit later vintage than I said. Still, googling Hope Saddles might produce some images that may help you. -
How To Repair A Torn Seat Jockey?
thenrie replied to thenrie's topic in Saddle Identification, Restoration & Repair
Got it! Thanks! -
How To Repair A Torn Seat Jockey?
thenrie replied to thenrie's topic in Saddle Identification, Restoration & Repair
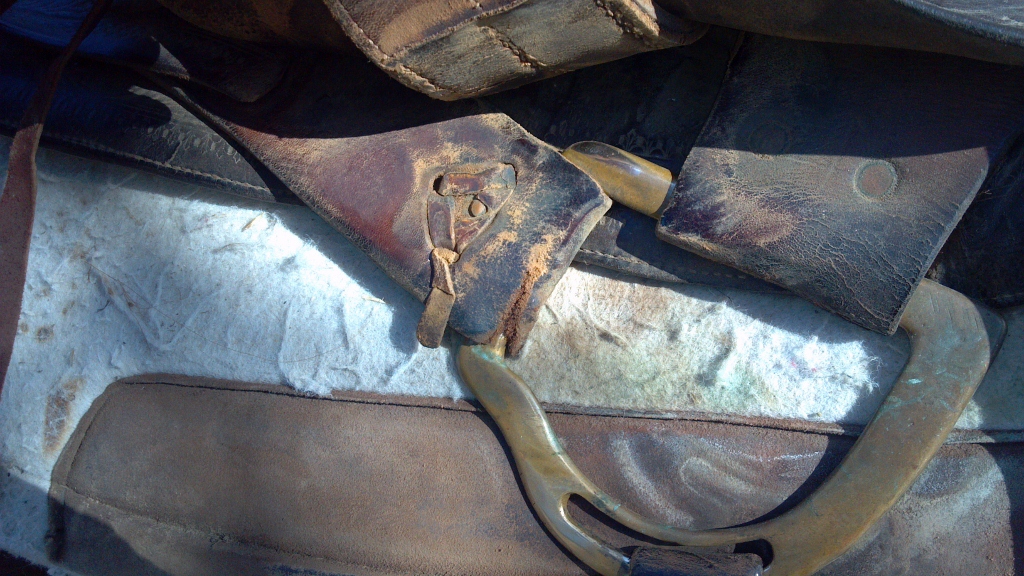
Did my photo not show up on the original post? I'm just getting a link address when I look at it now. Oltoot, I'm trying to visualize what you described. What I'm seeing is that you are recommending starting with skirting leather, skiving the patch around the edges and skiving the tear on the edges of the tear, such that the thick part of the patch will fit into the skived area of the tear, making the patched area only slightly thicker than the original leather. Yes? Then, stitching a double row all the way around the tear (I will be hand-stitching). So, no stitching across the tear, like I so often see? I am assuming the patch will be stuck to the back of the jockey with contact cement before stitching. dbusarow, it wasn't really a bad wreck. She got a little nuts and went down. I stepped off her back when she hit the ground, but my spur caught the jockey as I unloaded. The saddle is a 1947 Hamley Ranch Saddle and the leather on the jockey is a bit old and brittle. It left a tear about 4" long from the front of the jockey. Thanks for the replies, fellas. -
I am working on repairs on an old Hamley ranch saddle I have. Learning as I go. Don't fret, though, it was in pretty bad shape and wasn't worth sending it to Hamley for repair. I inherited it from my wife's family and have been using it for several years. My last horse beat it all to heck, so I'm working on putting it back into usable condition. Anyway, on one occasion I came off the mare and hooked the seat jockey with a spur, tearing it. Now I'm trying to figure out an effective way to repair the tear without it looking like an abomination. I plan to put a patch in the backside a little bigger than the tear, and stitching around it. Should I use 7/8 oz leather, skived around the edges? I would glue it on with contact cement, then stitch around the tear. I also have some 3 oz veg tan that I have for linings. Would that be substantial enough for the patch? Wouldn't need to skive it and it wouldn't make a lump. I'd appreciate advice and photos of similar repairs if you have any. Thanks.
-
Way ahead of you. Already bought the "Improved Blevins" with the vertical studs. In fact, I've about convinced my self to replace the seat, stirrup leathers, and rear jockeys with roughout and do a rawhide cantle binding to match the horn binding. Sort of make the saddle "my own". That way I don't have to worry about trying to match the original tooling. I have thought about just lacing the stirrup leathers as well, being as this saddle will likely never be ridden by anybody but me...at least until I'm pushing up daisies and no longer worried about it. I may do that. No lumps, lighter, and I always did like traditional.
-
What Size Hole Is Best For 3/8" Lacing?
thenrie replied to thenrie's topic in Clothing, Jackets, Vests and Chaps
Hmmm. Tried making the lace out of 5/6 chap leather. Tried lacing it on a test piece. Didn't like the look of it. I even beveled the edges, but it wanted to curl the wrong direction, so it looked pretty poor. Any recommendations for type of leather and weight for 3/8" lacing? -
What Size Hole Is Best For 3/8" Lacing?
thenrie posted a topic in Clothing, Jackets, Vests and Chaps
Quick question, guys. Tried searching, but.... I'm lacing the belt onto a pair of chinks and wondering what size hole is best for 3/8" lacing? I'm planning to use 5/6 oz chap leather for the lacing, with beveled edges. Is there a standard size, or just whatever the lacing will fit through? Is a round hole good, or should I use an oval? By the way, the chinks are Bob Klenda's Red Rock pattern. All done except for the belt. Pictures coming soon. -
Chink Makers: Question About Cutting Fringe...
thenrie replied to thenrie's topic in Clothing, Jackets, Vests and Chaps
LOL. Thanks, Dwight. -
Chink Makers: Question About Cutting Fringe...
thenrie replied to thenrie's topic in Clothing, Jackets, Vests and Chaps
Hmmm. I like template idea. Looks like I'll be buying a rotary cutter, too. Do you set the angle of the fringe and keep that same angle all the way around, or do you make corrections along the way by taking a small wedge out here and there? I guess what I'm asking is whether the goal is to keep the same angle, or do you plan for correcting the angle along the way? Do you have a method of starting your fringe cuts with the right angle, or is it just eyeball and experience? -
Chink Makers: Question About Cutting Fringe...
thenrie replied to thenrie's topic in Clothing, Jackets, Vests and Chaps
Thanks to you both. -
Thanks for those replies. Answered all my questions. Big Sioux, I agree fully with what you said. This saddle is a family heirloom from my wife's side. Nobody in the family wanted it, so it came to me. I never had much use for decorative saddles, so I use it. Best and most comfortable saddle I ever had. Howsoever, it has had quite a bit of "restorative" work done on it in the past. Neither of the fenders is original, the stirrup straps have both been spliced at least once. The last horse I had had a few minor blowouts, which resulted in more damage to the saddle. You can see where I hung a spur on the front of the seat jockey as I unloaded once, and another time I found a 1" diameter stick poking out of the cantle binding. There are a number of other scrapes and gouges, tears in the rigging leathers, as well as some deep cracking in the leather that occurred before the saddle came to me. By this time I'm not sure there is any value in having Hamley, or any good saddlemaker, "restore" it. About all that would be left of it would be the tree, the monogram on the back of the cantle, and the horn wrap. Figured that since the saddle is still going to be used, and since I am an aspiring saddlemaker, I might as well take on the stirrup leathers, rigging, cantle binding, and re-fleece. I'll just put a patch under the tear on the seat jockey and go with that. Lesson learned: Don't use your best saddle to start a green horse!
-
I'm sorry for this. I know this must get asked a lot, but I have looked back 25 pages and found nothing. I need to replace the stirrup leathers on an old Hamley ranch saddle (it needs other repairs as well). They are full 3" width, but I'm not sure about the weight. I'm planning on buying a side of leather pretty soon for the other repairs on the saddle, as well as work on other things, and thought I might as well make my own leathers. Do I need 13/15 oz leather? Will 12/14 do, since they are full 3" width? I assume 13/15 is standard, since most makers make their own out of the sides they cut saddle parts from, but I'm not sure the original saddle leather is 13/15 oz. This saddle was made in 1947, if that makes a difference.
-
Restoring Dad's Old Chaps; Blood, Beer & Whiskey Stained
thenrie replied to Cogs's topic in How Do I Do That?
I tend to like old things left with some "patina". I figure if you clean them too well, you might clean off all the "dad" in them. Might as well buy a pair of used ones off ebay! -
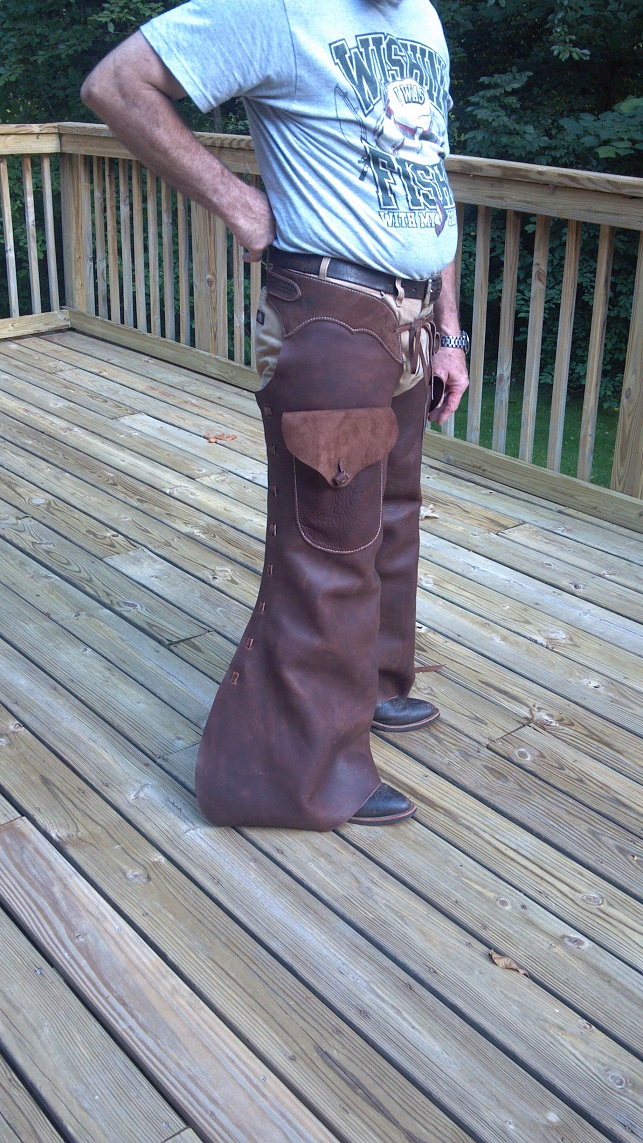
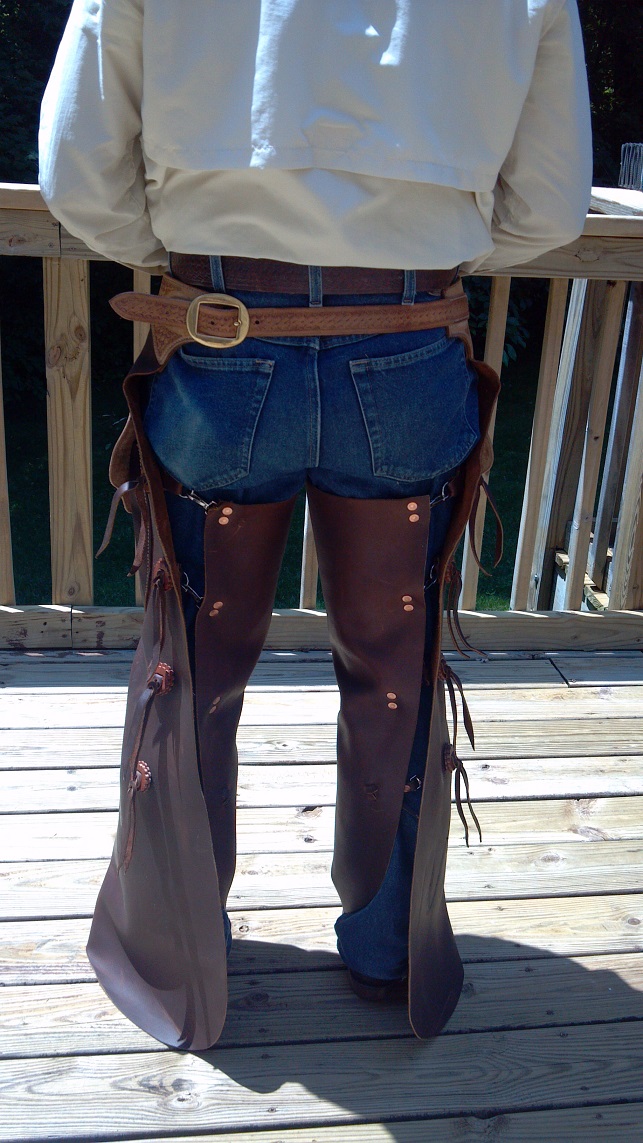
Finished my second pair of chaps last week. They are Arizona Shotguns, based on Bob Klenda's plans. They require no hardware, other than a 1-1/4" cart buckle for the belt. The leggings are laced together with a 1/2" lace cut from the chap leather. I am planning to use these for horse packing trips, so I didn't want a zipper that might rust or freeze up, get stuck, or otherwise break. I like these a lot. You put them on by turning the legs backwards and sticking your boot down into them, so that the toe comes out at the bottom of the lacing, then turn them around and slide them up. Quite comfortable. They are made of 5/6 oz oil tanned chap leather I bought from "The Leather Guy" (theleatherguy.org). The leather he lists is pretty much #2 leather, which has some blemish or other, but his descriptions are good and he shows plenty of photographs of the specific piece of leather you are buying. I'm pleased with it. These aren't for show. The pattern was a little small for me, so I adjusted it by extending the width of the upper thigh measurement by about an inch. They're still a little snug for my taste, but I'm starting to get a handle on how to measure for chaps now. There is a little adjustment possible by loosening the lace a bit. All hand stitched. Easy to make, and didn't take much time at all. I highly recommend these chaps. They are the Arizona Shotgun chaps, patterns by Bob Klenda, Klenda Custom Saddlery (www.klendasaddlery.com). Working on my first pair of chinks now, patterns also by Bob Klenda.


-
I was just getting ready to start stitching on my first pair of chinks, when it occurred to me that it might be easier to cut the fringe before getting every thing sewed together. On these chinks, the fringe is cut from the outer part of the legging, rather than being a separate piece sewed on. I had been thinking I would cut the fringe last thing, but decided to wait and see how experienced folks do it before I get started. Do you cut your fringe before you start stitching or after everything else is done? Second question: Has anyone tried cutting fringe with an Australian lace cutter? I thought I might give that a try. Seems like it would be easier, and less chance of messing things up, than me, in my inexperience, trying to do it with a round knife. Thoughts? Thanks.
-
Questions About Chap Leather Finish
thenrie replied to thenrie's topic in Clothing, Jackets, Vests and Chaps
Thanks for that suggestion, Tom. I had thought about cat litter and floor-dry, but don't have any at hand. I think we'll give the corn starch a try. Hadn't thought of that one. -
Just Finished My First Pair Of Chaps
thenrie replied to thenrie's topic in Clothing, Jackets, Vests and Chaps
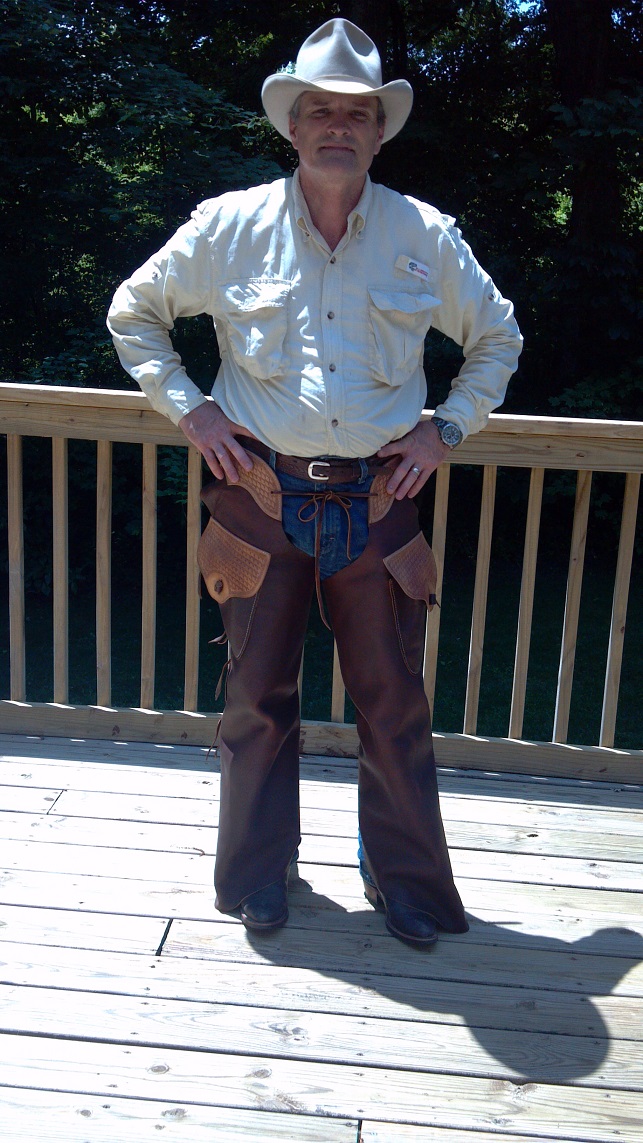
Thanks for the responses. I finished the tooled parts with Tan Kote and I like the look. That's the first time I've ever put any kind of finish on leather, other than neatsfoot oil (except for on my boots, of course). I still have a lot to learn about tooling the leather. Getting a basket stamp pattern right isn't nearly as easy as it first appears! I keep looking at the work of others and trying to make my stuff look as nice as theirs. Slowly, but surely, I'm learning. Got a chance to give them a test-ride. I'm currently horseless, so I had to borrow one. They were pretty comfortable. I might shorten them just a tad, to keep them from dragging so much when I walk. Also, I think I might have made them a little loose in the legs. I might adjust that a mite. I have never used chaps before, so I wasn't sure about the fit. I'll just have to use them a while and see. Nice chaps, Dwight. He'll like those.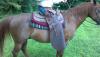

-
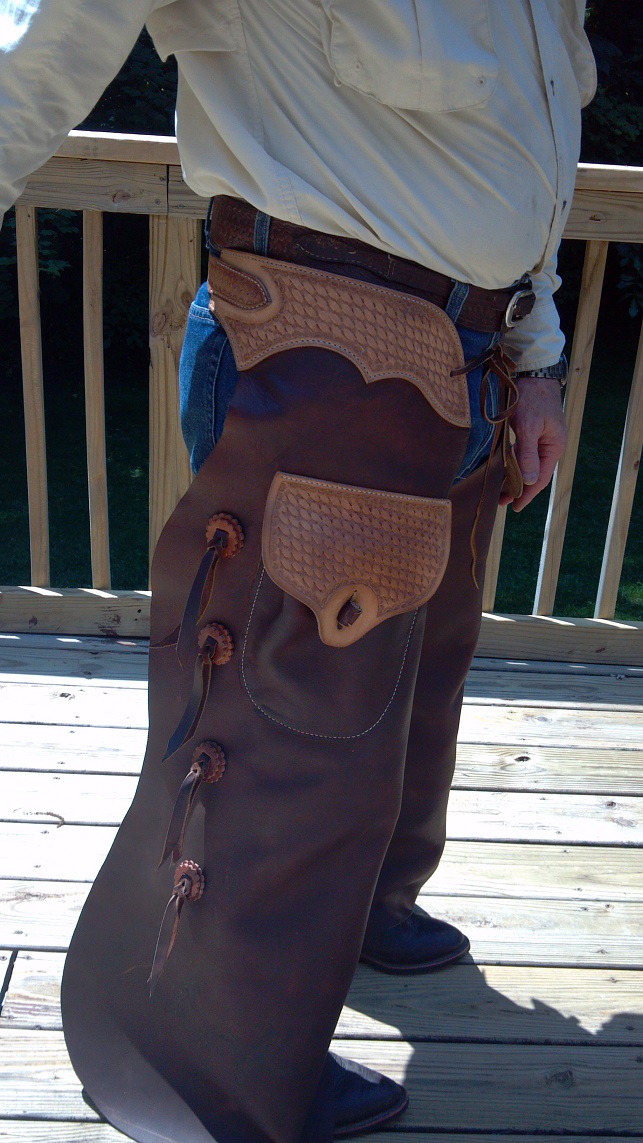
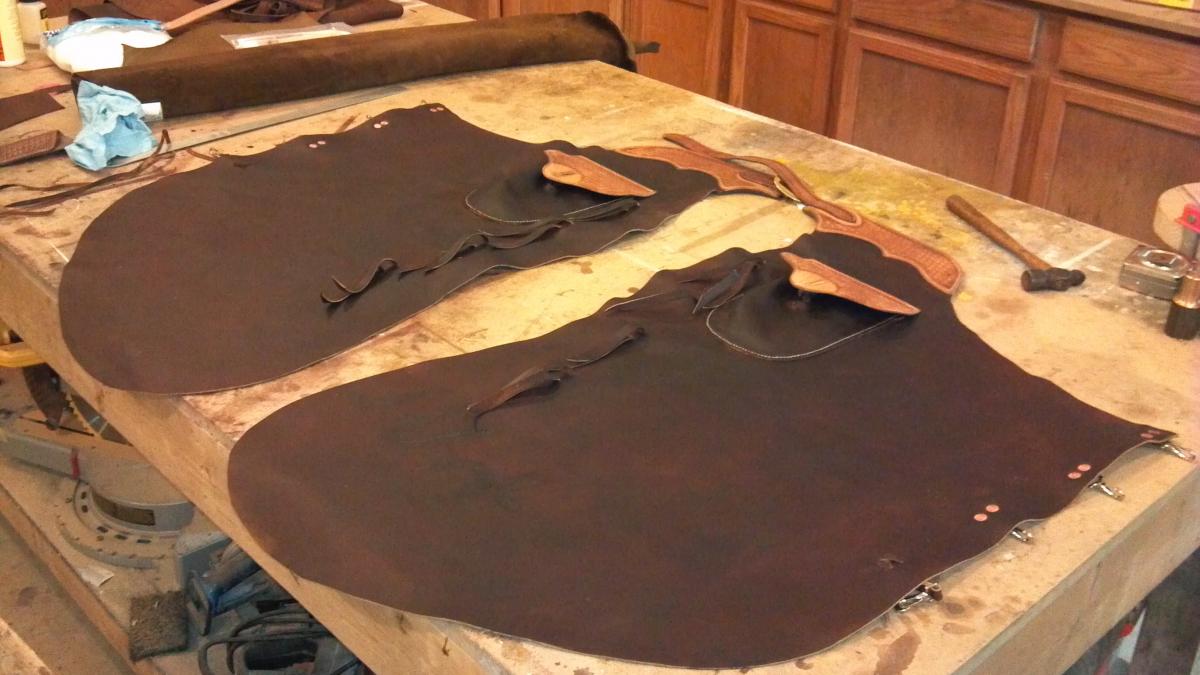
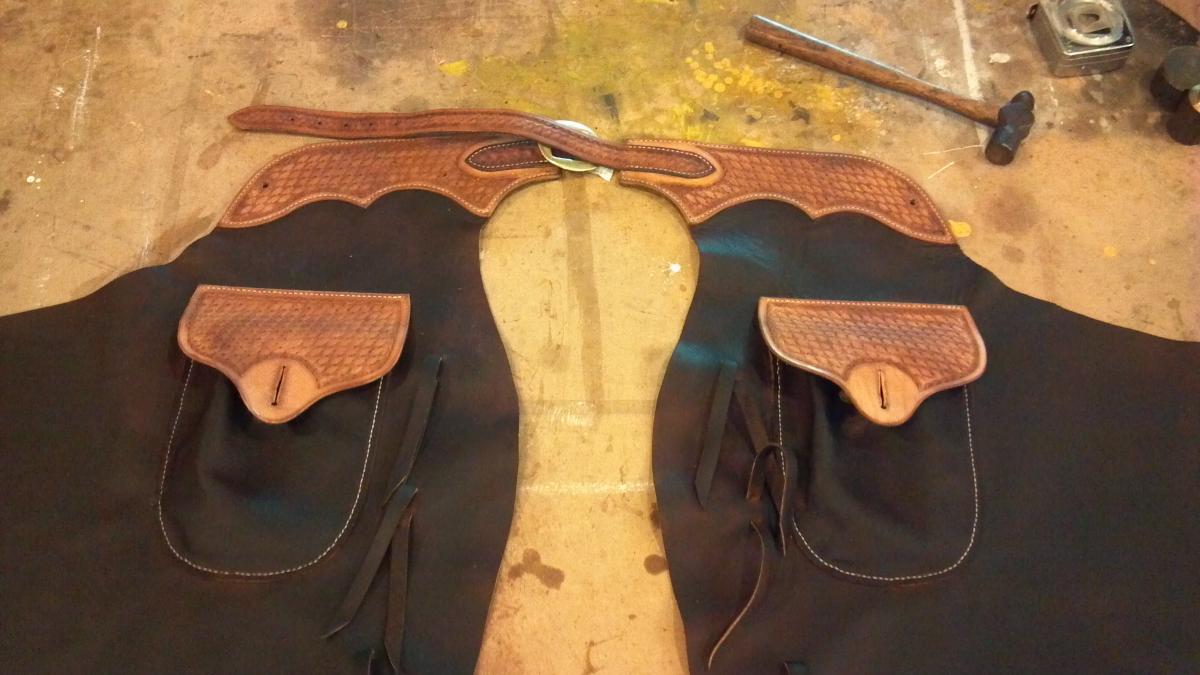
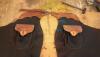
I made these based on patterns from Bob Klenda. The leather is 5/6 oz pebble-grain finish chrome-tanned chap leather, with 7/8 oz skirting leather for the yokes, and pocket flaps, 10/11 oz for the belts. It was not only my first effort at making chaps, but also my first effort at stamping. I learned more in the couple of hours of decorating those yokes and pocket flaps than all the time I have spent reading about it and watching videos combined. I made some rookie mistakes, but I learned a ton. Finished them with neatsfoot oil. Question, should I finish the whole shebang with Tan Kote, or just the tooled leather? I'm looking for weather resistance and durability. They will be working chaps for pack trips. I've already started my next pair, which will be a pair of Arizona Shotgun chaps, again, from patterns from Bob Klenda.


-
Need A Tutorial For Making Leather Buttons For A Pair Of Chaps
thenrie replied to thenrie's topic in Hardware and Accessories
Thanks! I've already started my second pair. They will be Arizona Shotgun chaps, based on patterns from Bob Klenda. By the way, I should credit Bob also for the batwings. They were built on his patterns. -
Questions About Chap Leather Finish
thenrie replied to thenrie's topic in Clothing, Jackets, Vests and Chaps
Hey, Admins. I just found the chaps forum. Could somebody move this to that forum, please? Okay, Moved. -
Need A Tutorial For Making Leather Buttons For A Pair Of Chaps
thenrie replied to thenrie's topic in Hardware and Accessories
Got them finished. I still need to apply a couple more coats of neatsfoot oil, then a finish, but you can see how they look, cowboy buttons and all. Looking forward to trying them out and seeing how they feel in a saddle.


-
Questions About Chap Leather Finish
thenrie replied to thenrie's topic in Clothing, Jackets, Vests and Chaps
That saddle is actually one that was up for auction out of Albuquerque, NM in 2009, during the recession. There wasn't much information posted about it. I wish I had bought it, because it went for under $500 and it was in very good condition for its age. I thought it would go higher, so I quit watching it and was surprised after the auction ended. Oh well, you win some, you lose some. I keep it there on my signature to remind me how much I want to build a saddle something like it. I have an old Visalia tree that I'm restoring and duplicating, that I hope to eventually cover with some leatherwork that will be presentable. -
I looked around and couldn't decide which would be the best forum to post this question in, but I figure most saddlemakers have, at one time or another, made chaps. Do you apply a finish to chap leather, like you would for tooling leather? I just completed my first pair of chaps, and suddenly I'm faced with this question that had never occurred to be before. If so, what is the best finish for chaps? The chaps in question are batwings, made of 5/6 chrome-tanned. The leather is somewhat stiff, which is what I wanted, with a pebbled-finish. I rubbed on a light coat of neatsfoot oil when I oiled the yokes and pocket flaps, to remove the marks I made during the process of making the chaps. These chaps are intended for pack trips and work use, so I am looking for toughness and weather resistance. This was my first venture into decorative stamping and any leatherwork that wasn't simply making some utilitarian sheath or cover for something. I learned a lot. You'll see some pretty glaring rookie mistakes, but I'm pleased with them. Second question, has nothing to do with chaps. I over-oiled a knife sheath with neatsfoot oil. I dipped it to make sure the inside was oiled as well as the outside, but left it under too long. Is there a way to leach out some of the oil before I apply a finish, so it won't stain clothing?
-
Need A Tutorial For Making Leather Buttons For A Pair Of Chaps
thenrie replied to thenrie's topic in Hardware and Accessories
Yep! The ones on the chaps are what I was looking for. Looks like they are all made pretty much the same way. Thanks for the help. I kinda like the way those chaps are done. Might try that on my next ones.