thenrie
-
Posts
95 -
Joined
-
Last visited
Content Type
Profiles
Forums
Events
Blogs
Gallery
Everything posted by thenrie
-
Need A Tutorial For Making Leather Buttons For A Pair Of Chaps
thenrie replied to thenrie's topic in Hardware and Accessories
Thanks for the replies. I've seen that video, but was hoping for something on a rolled button as well as the fold-type he shows. I'll probably just end up doing it the way Richard shows. -
I am about to finish up my first pair of chaps. I have been trying to decide what to do about the buttons for the pockets. Finally decided to go with leather rolled buttons, but can't find anything that tells how to make or attach them. I would appreciate some help...and maybe a couple photos. Thanks.
-
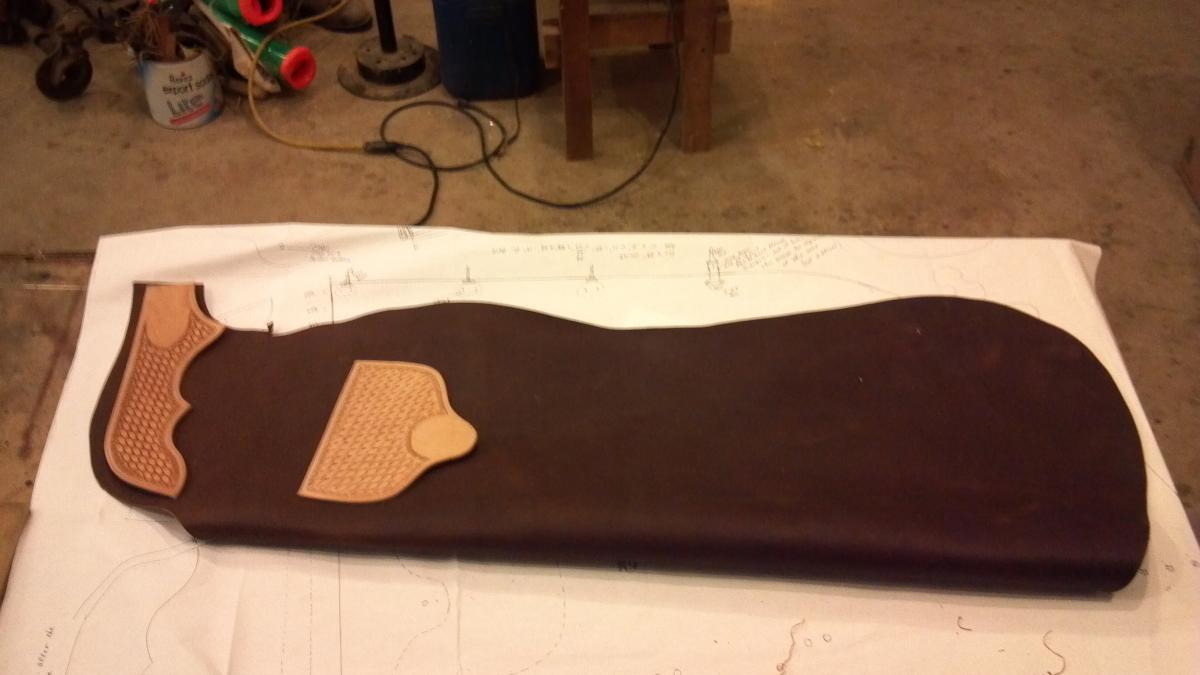
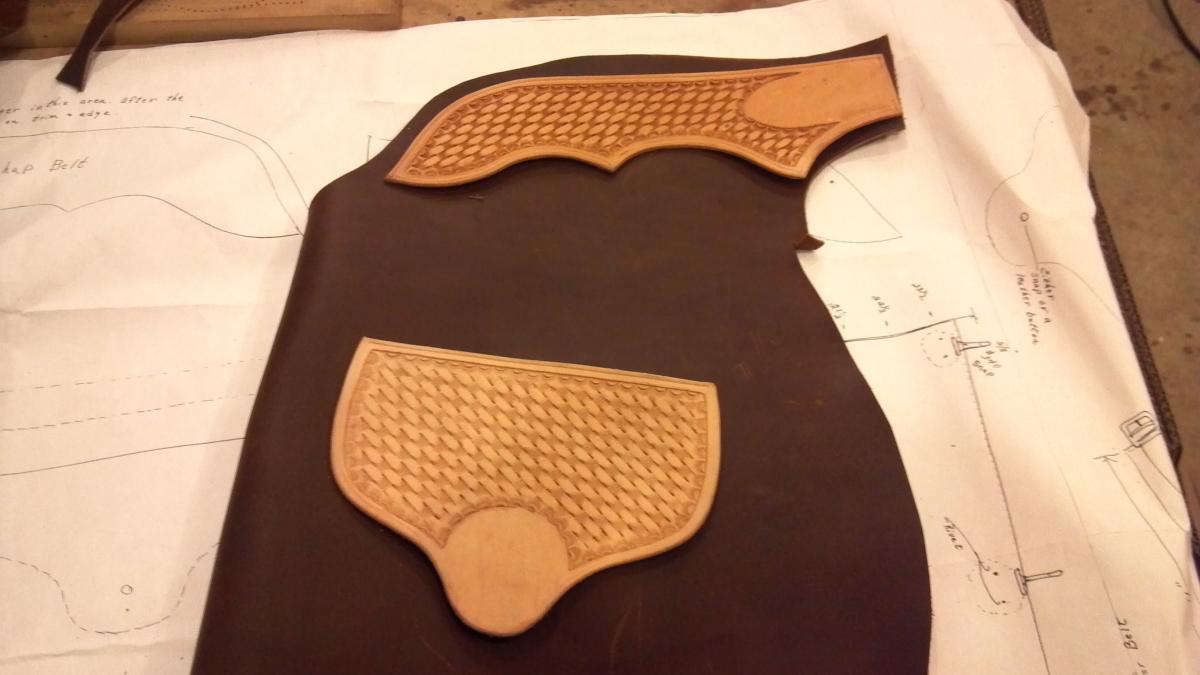
I just finished my first efforts at basketweave stamping. I decorated the pocket flaps and belt for a pair of batwing chaps I'm making for myself. While nobody is going to accuse me of being a professional leatherworker in rookie clothing, I'm not displeased with my first effort. I learned more in that hour or so of actually doing it, than all the time I've spent poring over books, magazine articles, and forum posts! A lot of what I have read finally makes sense to me. I recognize that with time and practice I'll get the feel of how to keep the leather at the right moisture content (I understand now why saddlers let the leather case overnight now), and how to strike with the right weight - every time. I also learned that there is more to laying out the basketweave at a pleasing angle than just picking an angle (you can see my pattern running out at the top). It was also my first ever try with a swivel knife. It's not as difficult to do as I had imagined. I guess the difficulty is not so much doing it, as in doing it well. Overall, I'm excited that I finally dove in and just did it. I've put together a pretty good assortment of tools, and pretty good ones for the most part, in anticipation of learning saddlery, but I'm starting out with things like chaps, spur straps, sheaths, etc, in order to get myself competent to make a saddle that won't look like a waste of good money when I'm done!
-
Thanks. I wanted to hear from some folks who might have used both, and particularly from those who have really used them. Seems like so often I see things written by people who just want to be authoritative, without the experience behind it. Take the "breathing" issue I mentioned, for instance. I've been riding a long time and I have yet to have a cinch or rigging die of suffocation on me. I just didn't want to assume without getting a couple good opinions on it. I think my first effort is going to be a light weight roughout pony saddle for my nieces and nephews. I got their dad's old pony saddle that was in poor condition and unrestorable, and stripped it. I'm making a duplicate of the tree and will wrap it with a layer of fiberglass, rather than trying to rawhide it myself. I think I'll make it with in-skirt rigging according to Davy Jones' ideas and see how it turns out. My second effort will likely be the pony saddle I learned to ride on many, many years ago. I have rebuild the tree and plan to wrap it in fiberglass as well. While the original leather is in bad shape, it's good enough for patterns. I think I'll try making that one close to original. It will be for my first granddaughter, who's still a bit too young to ride. Looking forward to getting started. Still have a couple fixtures to complete in my shop before I can work on the saddles. Thanks again.
-
I am doing the study part in preparation for my first saddle. Looked around the forums, but didn't find much comparing the utility of in-skirt rigging vs regular rigging with full skirts. I have books by various saddlemakers, each of whom has their own way of doing things and obviously they all work, or they wouldn't be selling saddles. I am particularly interested in Davy Jones' way of doing in-skirt rigging. I plan to start by making a couple of pony saddles for nieces and nephews, then on to saddles for myself and my father. Dad and I spend most of our saddle time packing or on long day rides, putting lots of miles in the saddle, but seldom doing anything like working cattle. Seems like reducing the weight of the saddle would be reasonable for our needs, however, I prefer my heavy old Hamley ranch saddle over any other saddle I've ever ridden. I've read complaints about in-skirt rigging, that it doesn't allow the saddle rigging to "breathe" like regular rigging and full-skirts do. Others like in-skirt rigging, saying it keeps the saddle in place better and is more comfortable for the horse. I'd like to hear some opinions from saddle makers on the subject, before I make up my mind about it. Do you like in-skirt rigging? Why or why not? Thanks in advance.
-
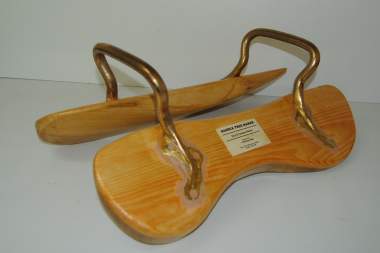
I guess you're still looking, so I'll chime in. I've been researching for quite some time as well, trying to find a plan for a decent pack saddle, since I'm planning a horse pack trip from the Mexican Border to the Canadian Border on the Great Western Trail (approximately). I plan to make most of my own gear. The trip is planned for 2015. I have found nothing that tells much about making a pack saddle. However, if you are decently skilled at woodworking, or even if you're just a decent do-it-yourselfer, there is nothing about a crossbuck pack saddle tree that should present any problems to you. There is nothing magic or technical about the way they're made. A few points I've picked up: - Most of the packsaddles I've seen have the cross-buck part made of a good hardwood, such as oak, maple, or hickory. However, having used crossbuck packsaddles for years, there's no reason you couldn't use something like yellow pine or even poplar, except that they would begin to show wear pretty quickly, and they would be less likely to survive a "wreck". Hardwood is expensive, but for the amount you would need for the crossbucks, it's negligible. Use oak or something similar. - For the bars, use pine or poplar. My choice would be poplar. It's classified as a hardwood, but has a very fibrous and tough grain that is a bit flexible, yet very hard to break. Old timers say the best bars are made from cottonwood, but that's hard to get, since it's not a popular wood for any kind of woodwork. Poplar is very similar to cottonwood in grain and hardness. You can get poplar at any Home Depot or Lowes, or any other lumber place. With the glues we have nowadays, you can glue-up three 3/4" boards to a thickness of 2-1/4" and make a pretty good set of bars from that. Still, there's no reason that bars made from construction grade #2 hem-fir or pine from the local lumber yard wouldn't do as well. The wood is softer, so the joints might give up a little sooner than with poplar. Might not last 150 years, but then neither will you. Again, a few board feet of poplar is not that expensive. - I have seen some saddle makers who use regular riding saddle bars for their packsaddles, figuring, I suppose, that regular saddle bars are better fitted to the animal's back. Not necessarily so. Riding saddle bars have a cutout in them to allow for the rider's leg to comfortably rest over the bar. No need for that on a pack saddle. Also, most pack saddles I have seen have fairly narrow bars. I have looked into the reason for this, having seen older crossbuck pack saddles with very wide bars, and have come to the conclusion that some pack saddle makers use 6" wide lumber ( which is actually 5-1/2" wide) for their bars simply because it is less expensive than wider lumber. The wider the bars (within reason) the more surface area carries the weight on the animal's back, and the less chance you have of pressure points (provided the bars are fitted well). I would recommend making your bars from 1 X 8 poplar, glued-up to the desired thickness (2-1/4" should do it, but you might want to start with 3"). They seem to be generally between 20 and 22" long for a full-sized horse or mule. - Most riding saddles have the bars set between 92 and 88 degrees or so to fit the horse's back (90* being about average for most QHs). The bars are also carved with some twist and arch to fit the curvatures of the horse's back from withers to flanks. They are also carved convex to settle into the muscle structure of the horse's back and resist moving around without causing pressure points. Most crossbucks I have handled seem to be cut to 90 degrees or a bit less, and are cut on the lower ends to fit to whatever bar angle you choose for your particular pack animal. However, since you are going to fit the bars to the animal anyway, the exact crossbuck angle really doesn't matter much, as long as it's not greater than the bar angle (you want the lower legs of the crossbucks to fade into the bars, rather than stick out away from them). Mules' backs normally have less withers and a flatter back, so the twist and arch is a bit flatter than with most horses, however, some mules' backs are close enough to a horse's conformation that they use horse gear without problems. In the book "Packer's Field Manual" by Bob Hoverson, he shows how to take a raw pack saddle and fit it to the particular animal it will be used on. He puts chalk on the animal's back, then puts the saddle in place, then carves away everything that touches chalk until the bars touch chalk equally along their entire length and width. He uses a simple wood rasp and does it by hand. One could easily shorten the process by roughing-out the bars with a body grinder and a coarse disc, and then going to the rasp for fine-tuning. - The best made crossbuck pack saddles are put together with glues and copper or steel rivets, rather than screws or nails. Some also wrap the wood joints on the cross-bucks with rawhide. I'm sure the rawhide helped on the old-time saddles and it looks really nice, but with modern glues and rivets or bolts, the rawhide becomes superfluous. The only good I could see for it might be to ease the rigging and panier straps from wearing on the wood crossbucks. Make your wood joints tight and precise and you won't have problems. - Some makers angle their crossbucks away from each other, such that the lower ends are angled toward each other on the bars. The only functionality for this that I can figure is to give them a longer contact surface with the bars. I don't believe it makes much difference if the crossbucks are attached will to the bars with glues and rivets. Crossbucks seem to commonly be about 12" apart, but I don't think there's a particular standard or specification. - Crossbuck packsaddles are still used extensively in the southwestern US, but in the northern parts, Decker-style packsaddles have been the standard since the early 1900s. After doing my research I decided to go with Deckers, because of the versatility. You can purchase arches from suppliers such as Bork Saddlery Hardware (beautifully cast in bronze for $80 per pair) or you can easily make your own set by heating and bending 5/8" steel rod (well, easy for some) to your own specs and welding tabs to the ends. The arches are commonly set 12" apart on the bars. Just like crossbucks, some makers angle the arches away from each other, but it seems to be more of a "taste" thing than functional. For a Decker, a cover called an aparajo will go over the pack saddle and the arches will protrude up through slots made for them, so unless you plan to make your own aparajo as well, you will need to purchase one and make sure you make your saddle to fit it. - As for rigging, I'm planning on borrowing a pack saddle and simply duplicating what's there. You can also find the old U.S. military specs for Decker-style saddles and rigging in various places on the Internet. - You can visit my website at westerntrailrider.com and check out my blog post about pack saddles. It's not about construction, but about deciding which style to go with, but I put quite a few pictures on it that might help. I do not claim to be any sort of authority on packsaddles or their construction, however, the above are some things I have concluded from my research and experience. Attached photos: The decker is from the Nikkels' website (rodnikkel.com), who is a member here, using the arches from Bork Saddlery Hardware. The crossbuck photo I got from google images a while back, so I don't know whom to credit.
-
Thanks for your expert assessment, Bruce. I was hoping you'd offer an opinion. I think I'll let this one pass. I really think one of the smaller Osbornes, or clones thereof, would be better for what I want. I just thought it looked like a chance to have a pretty heavy-duty machine for not too much invested.
-
Great thread, thanks much. Answers a lot of questions for me. I have been saving my old blades for just such a purpose. As for the cost/benefit ratio, there are those of us who just get a kick out of making stuff. I've never tried it, but I have read that a regular kitchen oven will get 1080 steel to the proper 430 degrees or so for heat treating the blade to proper temper. Maybe some of you who actually know could comment on that process. Switzforge, that little hole in the blade is for inserting a nail or screwdriver to lock the blade in place so you can loosen the spindle nut while changing the blade. Some grinders and saws don't have a locking mechanism.
-
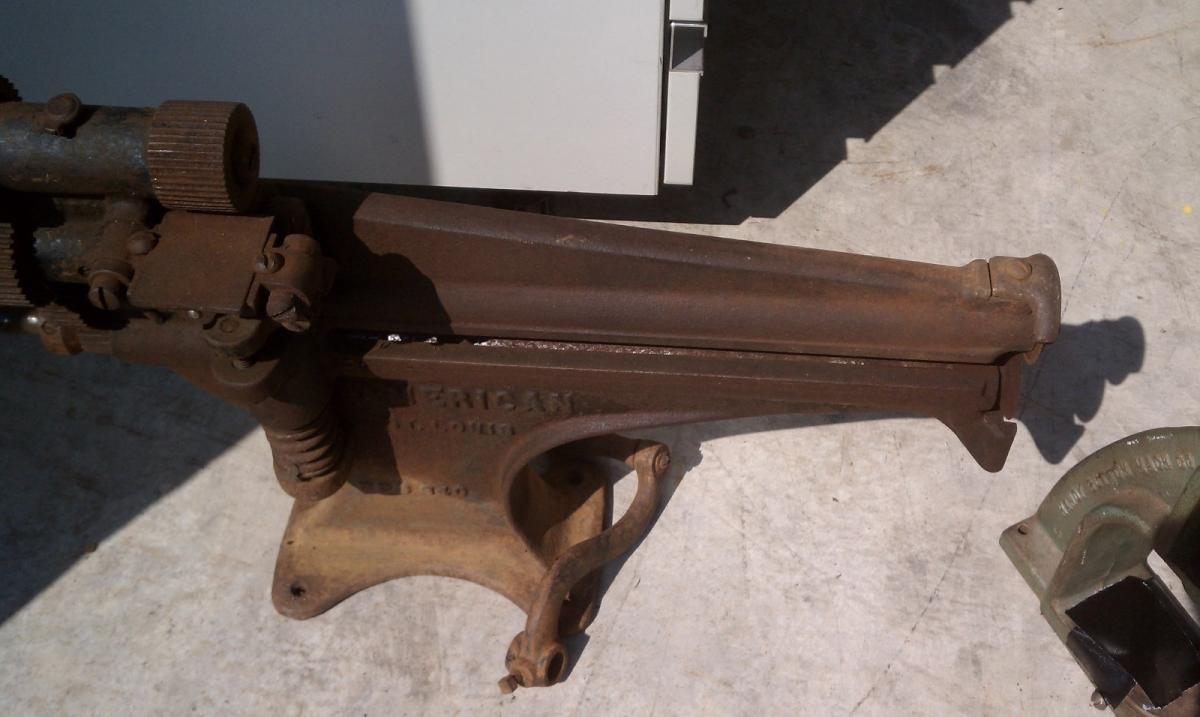
I am getting started in saddlery and other leather work and have been looking for a leather splitter. I came across a 3-in-1 crank splitter/skiver/cutter on ebay and was wondering whether anyone could shed some light on the quality and capabilities of this machine. I would have to restore it, but I'm just not sure it will do the things I would need it to do. I actually get a kick out of restoring old stuff, especially since I can get things cheaper when they need restoration work. Couldn't read the model numbers on it, so I attached a photo. Wondering whether a machine like this will be a good addition to my shop, or whether I should just look for a smaller pull-through Osborne or similar machine.

-
Best Leather For Work Shotgun Chaps
thenrie replied to thenrie's topic in Clothing, Jackets, Vests and Chaps
Went ahead and ordered patterns from Klenda Saddlery. Ordered #26 chinks, #34 Arizona shotguns, and his batwings. I'll just make all three and see what I end up using the most. Mr. Klenda kindly chatted with me a few minutes and made recommendations to me that I will follow. He said 5/6 oz oil-tanned leather will probably be what I want, but that for the batwings I might ask the supplier for a stiffer leather in the same weight. I look forward to getting them done and try them out. Thanks for the replies. -
Best Leather For Work Shotgun Chaps
thenrie replied to thenrie's topic in Clothing, Jackets, Vests and Chaps
Thanks for the Klenda link. I knew I had seen those patterns and couldn't remember where. I'll be ordering patterns for chinks and the Arizona shotguns. They show leather as 5-6oz. oil-tan. I've also heard mention of chrome-tan. Don't know much about either. Is 6-7 oz oil-tan getting too heavy for shotguns? Would I be better off with 5-6 oz and wear patches? I also see "buffed" leather offered as chap leather. What is the best for weather-resistance? @oltoot, I think I'll give both a try. I like the idea of chinks and figure I'll likely use them for most of my "other" riding. As for my big trip, I'm hoping to make it from Mexico to Canada on the Great Western Trail in 2015, so I'll have plenty of time to break the shotguns in before I actually embark on "the big one". My big concern for that trip, with regard to chaps, is weather. I'll have to start in mid-spring to make it by the end of summer at the Canada border. I'm likely to hit some winter-type weather in the higher up elevations even in the middle of summer. I just figured shotguns would handle wind, rain, and cold better than chinks. The fact that it's a loooong trip (about 3,000 miles) is why I want heavy chaps, but I don't want them so heavy I'm uncomfortable in them for 8-10 hours a day, both in the saddle and on the ground. I've done plenty of packing, just haven't ever worn chaps. Thanks, -
I'm getting ready to try my first set of shotgun chaps. I'm getting ready for a long horse pack trip, so I want a pair of work chaps that are pretty weather and wear resistant. I'm thinking along the lines of Arizona chaps, step-ins, no zipper, in about 5-6 oz oil-tanned leather. I'd like them heavy and weather-resistant, but I don't know how heavy is too heavy, since I've never worn chaps. Any recommendations would be helpful. Good pattern recommendations would be helpful, as well. Thanks.
-
 Didn't work. I'll try to find the thread on the forum.
 -
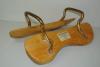
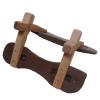
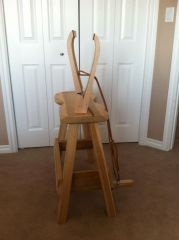
I recently started making a stitching pony, just off what I had seen on pictures on the Internet. After gluing up some oak and cutting it out, I started looking around to figure out how to configure the bench. I found your photo, and, as it turns out, my clamp looks just about like yours. After having time to use yours, is there anything you would have changed? Is the space between the clamp bars sufficient to allow your project to hang while clamped in the vise? It appears your clamp may be able to swivel. Does that work well for you? Going by what I had seen from photos of some antique ones, I made my clamp to mount to the bench with a tenon. It is set at an angle similar to yours, but will be mounted solid. At this point I could change it, if I want to . My clamp will stand 17" from the top of the bench, which ends up a comfortable distance from my eyes (within my reading glasses focal length...this getting old stuff...). Anyway, I would appreciate some of your comments, now that you have been able to use your stitching pony. Not sure whether this comment will post on the forum, since I came upon it from google images, so I'll leave you my email address: tony.henrie@westerntrailrider.com. I can't find any way to attach an image to this, so I've tried to put the url of a picture of my clamp-in-progress. We'll see if it works. <img>http://wp.me/a33SNi-4I</img> [/CODE] Thanks, Tony.
-
Old Visalia Saddle
thenrie replied to thenrie's topic in Saddle Identification, Restoration & Repair
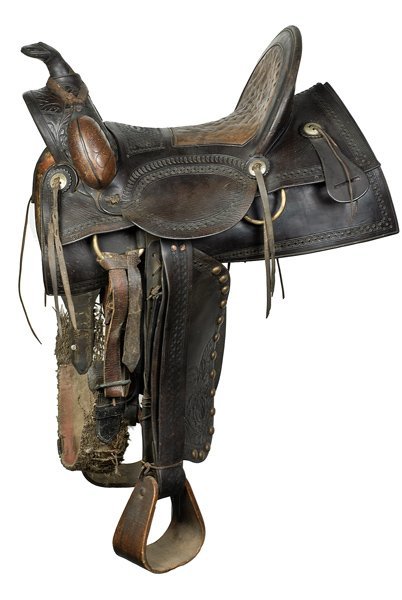
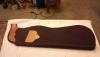
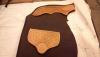
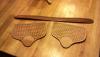
I just uploaded to a gallery a bunch of photos of the tear-down of the "Cactus Saddle" I mentioned above with the Visalia tree. I guess the album must first be approved, so it should show up later. I thought it best to put the photos in a gallery rather than to take up a lot of space on the forum. The album is entitiled "Teardown of a Visalia saddle, Tony Henrie (or something like that). I will add photos to the album as I progress through the rebuild. I have not been able to spend a lot of time on it yet, but so far I have completely disassembled the tree, repaired the cantle, bars, and swells with modern wood glues and begun re-fairing them with auto body filler. I have recut the angles on the swells and cantle to reset the bar angle to fit a modern horse. I temporarily assembled the tree and tried it on my QH mare, but it was still a little narrow in the gullet and there was not quite enough twist, or wash-out, in the tails of the bars. My mare has low withers and a flat back. I tried it on an older QH gelding with taller withers and it fit him like it was custom made for him. I have decided to duplicate all the parts and reset the angles and reshape the bars a little to fit my mare. I'll recover both trees with rawhide (or maybe have it done for me) and build new saddles on them, based on some photos I have found of saddles that appear to have similar trees, such as the one attached. I will update with photos as I progress. I expect I'll need lots of advice as I go. As a side note, I bought Volume One of the Stohlman's set of saddlery books as a Christmas gift to myself. My birthday is this month and I intend to get the other two volumes.
-
I have been looking for ideas for an old saddle rebuild. I like the look of square skirts. As I have looked around the forum, I get the impression they are also known as "pointed" skirts. I suppose that indicates that square skirts aren't really cut square. What are the "rules of thumb" for cutting square skirts, as far as angles and lines?
-
Old Visalia Saddle
thenrie replied to thenrie's topic in Saddle Identification, Restoration & Repair
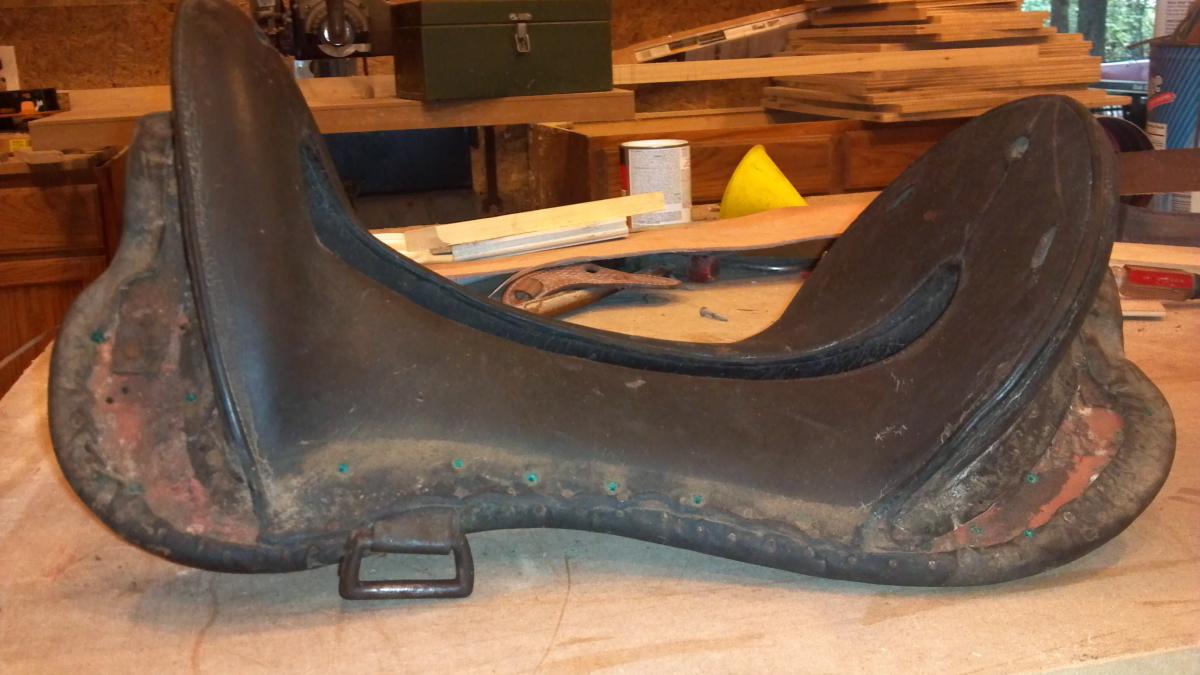
I took the tree and set it on a small Quarter Horse I have. Since he's only about 13.5 hands, I decided to just see whether it would fit him, since saddles with regular QH bars are a bit wide on him. It seems to fit, or can be adjusted easily to fit, so I decided to rebuild the tree and build an old-style saddle for that particular horse. The tree currently has bars that have about a 88-89 degree angle, but the pommel was build with a joint in the middle, which is loose. I can spread the pommel enough to get a 90 degree angle without too much bar width for the above-mentioned horse, so I may just do that and re-glue it with epoxy at that angle. I think I'll reconstruct the tree and strengthen it with a layer or two of bi-directional f-glass cloth, then reapply a rawhide cover. Not sure yet whether I'll try the rawhide myself or have it done. The Nikkels have a pretty nice article on their website about it, so I may try it myself as a learning project. Attached are a couple pics as I took the saddle apart. I'm doing this from my tablet, since I'm away from home. It takes forever to upload the pics and I can't resize them, so the forum limits the number I can upload. I'll post more as I progress, once I get back home.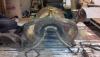

-
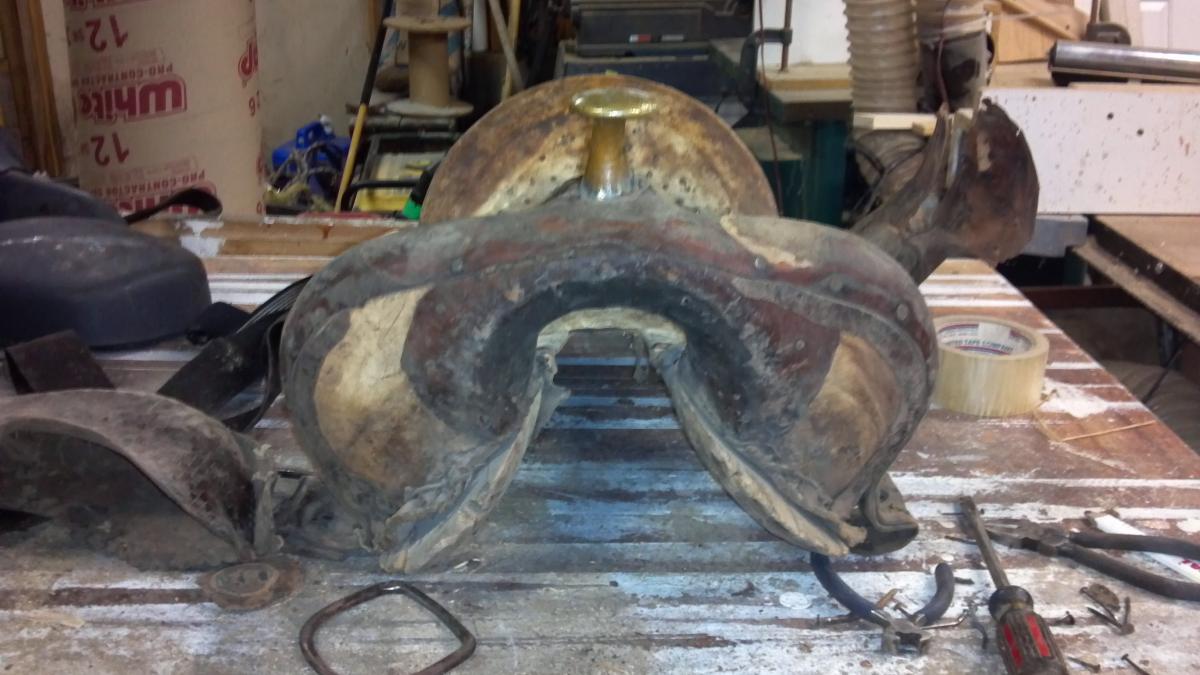
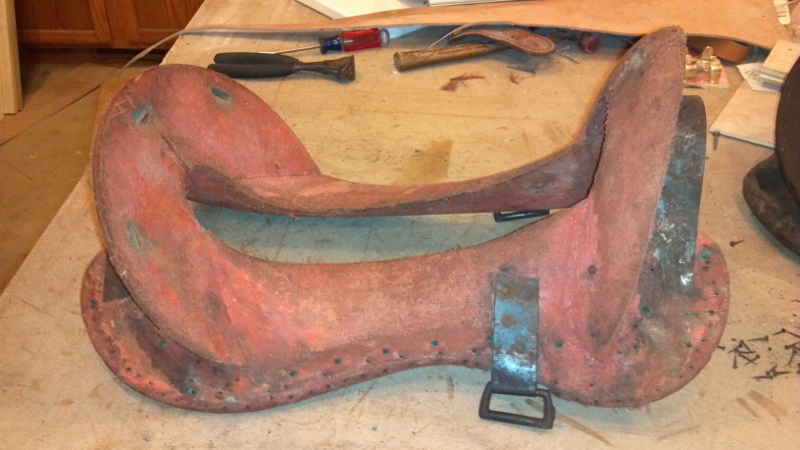
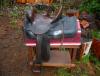
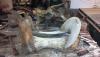
This evening I dissected an old saddle my dad has had for years in his workshop. It was just an old saddle and was missing all the leather except the pommel cover. It had obviously had several repairs to the rigging and tree before they finally gave up on the saddle. The cantle had been broken and one bar had been reattached. The pommel was loose. The rawhide had been cut away in several places to effect the tree repairs. It was obviously beyond help as a reasonable restoration candidate, so I used it as a learning project. I was surprised, as I removed the rawhide, to find a paper label on the cantle that says, "Visalia". Apparently was a nice saddle in its day. The pommel cover has the remnants of nice basket-weave stamping and the horn has the remnants of a braided rawhide horn cover. It was interesting to me how much leather was used in fairing the pommel to the bars and in the ground seat. It was a great learning experience for me. I took lots of photos, so I could remember what I saw.
-
Old Saddles Fitting New Horses...why Not?
thenrie replied to thenrie's topic in Saddle Identification, Restoration & Repair
Thank you, Rod and Denise, for that explanation. That clears up a lot. -
Old Saddles Fitting New Horses...why Not?
thenrie replied to thenrie's topic in Saddle Identification, Restoration & Repair
So do they just not fit Quarter Horses, or horses in general? Will they still fit a Thoroughbred, Standardbred, or Walker? All of those generally have taller withers and narrower shoulders than a QH. Are the old saddles even narrower than semi-QH bars? Do they have more rocker in the bars? Different angles? Sure would like some technical info. -
Old Saddles Fitting New Horses...why Not?
thenrie replied to thenrie's topic in Saddle Identification, Restoration & Repair
Here's a sample of what I'm asking about.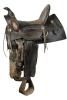
-
I have read a lot about old saddles from the late 1800s to early 1900s won't fit modern horses, but I haven't yet figured out exactly why. I'm assuming it's because modern horses are broader in the shoulders and flatter in the back, but I don't know. I would appreciate a knowledgeable person explaining in more technical terms, bar angles, etc. I have a real hankering to buy and restore an old saddle, but I want to be able to use it. I see saddles offered all the time on ebay that would be good starters for such a project, but if I'm going to do it, I have to be able to use it, because wifey won't let me have a saddle display in the house. Not her style of decor.
-
By auto putty, I'm guessing you are referring to auto body filler. You can use it for smoothing, but it will not add strength. There are fillers that have fiberglass fibers in them, but the strength they add is minimal, and certainly not enough to do a saddle tree any good. You'd be better off going with fiberglass, but I'm not sure it would stick to the Ralide tree. You might have some luck with something like PC-7 epoxy. There's not much it won't stick to.
-
Thing about electronic communication is you can't always see what's behind it. No apology necessary, I didn't take it wrong. I appreciated your response. Mine must have come across poorly as well. I got the answers I was looking for. Thanks.
-
I disassembled the saddle this evening. I attached some pics. Does the saddle tree give anybody any new ideas as to it's origin? The leather appears to be of several weights. The bar covers are the lightest, the seat the next heavier. The front and rear jockeys appear to be maybe 10/12 weight, while the sweat flaps appear to be maybe 10/12 ounce skirting leather from the neck area (stiff and heavy). I'm guessing the seat may be something like the 6/7 suggested above, or maybe 8/9. The bar covers appear to be something like 5/6. Problem is that I'm just guessing here. The only leather I'm familiar with at present is a side of skirting leather I bought several years ago and I can't recall whether it is 10/12 or 13/15. The leather appears to have been hand-dyed black, as the back sides are all natural-colored leather. All the leather came apart well and intact. I soaked it this evening and will let it case overnight. Tomorrow I'll press it all between pieces of plywood and let it sit for a couple days to flatten it. All the pieces are there and will make excellent patterns. The tree is still solid, although there is a tiny bit of movement of the cantle and swells from the bars. The tree is covered with something like cheesecloth and some sort of hide glue, giving it a pink hue. I'm thinking I'll strip off the cheesecloth and sand the tree smooth, filling any gaps with epoxy, then cover the tree with a layer or two of light fiberglass for strength, before I try to recover it. Some of the metal hardware is brass. Only one escutcheon for the strap holes is left. The strap hardware and saddle rings are iron. I can see the remnants of a Japanned finish on them. I expect I'll use brass instead. As for the leather, I guess I can't go far wrong as long as I'm in the ballpark with the weights. This isn't a restoration for a museum piece. I plan to use it. So, questions I could use answers for are the following: 1) Should I use black harness leather, black skirting leather, or just dye it myself, for the saddle parts? 2) Where can I get brass hardware to replace the missing parts (escutcheons, rings, etc) and are Japanned parts available anywhere? 3) Any advice on fiberglassing the tree would be appreciated 4) What size thread would be recommended for hand-stitching this saddle?