


thenrie
-
Posts
95 -
Joined
-
Last visited
Content Type
Profiles
Forums
Events
Blogs
Gallery
Everything posted by thenrie
-
Hey Wizcrafts, thought I'd let you know that the links on this thread for the needle and thread size charts are linking to car insurance ads and "page not found" messages.
-
Tipmann Boss, Cowboy Outlaw, Weaver Cub
thenrie replied to thenrie's topic in Leather Sewing Machines
Thanks for all the input folks. I decided to go with a Tipmann Boss. I feel like it will handle anything I will need it to and it has the smallest footprint for my cramped shop. After watching a bunch of videos and reading a bunch of threads on it, I have come to the conclusion that most of the folks who have trouble with it don't have a full grasp of how it functions, the wear items, and correct adjustment and lubrication procedures for the unit. I'm sure that's not always the case, but by and large the folks who are happy with it seem to have a long-term relationship with it. At the current price points and my use case, the Boss will pay for itself much quicker than either of the other two. The current price, new from Tipmann with the full accessory pack comes to $1251 with free shipping and no sales tax. -
Tipmann Boss, Cowboy Outlaw, Weaver Cub
thenrie replied to thenrie's topic in Leather Sewing Machines
I am hoping for input from anyone who has extensive experience on any of the three machines. Sorry if that was unclear. Thanks for the responses. Sounds like, for my use case, the Boss has moved into the lead. I have always liked the machine, but have only had opportunity to fiddle with it at a Tandy shop awhile back. I think I'll give them a call next week. Interestingly, I just saw from one website that Cowboy machines have their parts manufactured in the US, but they are assembled in China. @sinbad39, the price I showed for the Cowboy Outlaw at was from the Tandy website and the accessories are listed and priced separately. There are other places to purchase from at varying prices, so I guess the accessories may come with it from different sites. I went with Tandy, as I have a store located not far from me and can see the machine hands-on and get a discount with my business account, although the 10% sales tax negates that. -
I'm trying to make a final decision on one of these three machines. My primary use will be stitching saddle skirts, bridles, belts, chaps, spur straps, and other horse-related gear, mostly for my use, gifts, and occasionally to sell. I sometimes refurbish older saddles, as well. My main reason for looking for a stitcher is that, while I enjoy hand stitching, it takes me around 8 hours of hand stitching to complete a pair of saddle skirts. That would come down to a matter of 30 minutes with a stitching machine, and I just have too many projects to spend that much time on saddle skirts. I have searched the forum and not yet found anything comparing the first two machines to the Cub. If this machine ever "pays for itself" I will be very happy, but I'm not in this for the money. This is not a business decision. I want a manual stitcher that is easy to use, gives me the least amount of trouble over the long haul, and can sit quietly in a back corner of my workbench until needed. I am quite mechanically inclined and have refurbished a Singer 111W155, so the mechanics, threading, adjustment will not be a problem unless the machine itself has problems. I have long wished for a Tipmann Boss, but I have read many posts and threads about problems with them, although I have seen pretty good reviews about their customer service. One thing I really like about the Boss is the new kit to give it a reverse stitch, which neither of the other two machines has. That is the one thing I wish my Singer had, but as far as saddle skirts, it really doesn't make a difference. The current price of a Tipmann Boss is $1000, but that doesn't include a guide or some other accessories I will likely need. The kit for most of that runs $280, so I'm still coming in around $1,500 with shipping, etc. I don't know what the reverse kit costs. The Cowboy Outlaw seems to be a very similar machine, with a little longer throat. I like that the body is made of cast iron, as opposed to the case aluminum of the Boss, but frankly, with the pressures involved, cast aluminum is fully adequate to the task. Cowboy is well know for quality machines, so no worry there. Base price is $1500, another $105 for the material guide. No mention about shipping on their website, so I expect that with shipping, I'm edging closer to the price of the Weaver Cub. The Weaver Cub uses a flywheel crank for operation, rather than a pull crank. From what I have read, while not quite as easy to locate that first stitch as the other two machines, the smooth operation of the flywheel does, in fact, make the stitches a little more even and fair. Not a big deal on saddle skirts, but on bridles and belts, might make a difference. Operation can also be a little faster, which will make a difference on saddle skirts. The Cub basic price is $2000, but that includes the material guide and shipping is free. Weaver is known for excellent customer service and I have read, seen, nothing but good reviews on them. Seems all three use the same kind of needles and their thread size and material thickness on all three are adequate to my needs, although the Cub advertises it will handle 3/4", while the Outlaw will handle 5/8" and the Boss 7/16". I would really like to hear from folks who have used these three machines extensively and have a good feel for them. Thanks.
-
Thread/needle size saddle skirting - Tipmann Boss
thenrie replied to thenrie's topic in Saddle Supplies, Tools & Trees
The Tipmann uses different needle size numbers: 794x200 for 207 and 277, 794x250 for 346 and 415, chisel point for leather. I just didn't know which size thread I should order. I appreciate the helpful responses. Looks like I'll get my stitcher ordered this week. -
Thread/needle size saddle skirting - Tipmann Boss
thenrie replied to thenrie's topic in Saddle Supplies, Tools & Trees
The Boss handles up to 415, from what I read. Thanks for your input. -
After spending the last hour trying to find what I need, I decided to just ask where the saddlers are. I'm getting ready to order a Tipmann Boss specifically for doing saddle skirts. Can't figure out what thread and needle sizes approximate the heavy thread I've been using for hand stitching saddle skirts. Need to get it ordered with the unit. Suggestions, please. 277? 346? 415?
-
Any accessories with that Tipmann? Such as the stirrup guide or material guide? How much for shipping to Utah?
-
I just ordered a speed reduction unit for the machine. I also ordered a new set of feet, as the ones on the machine are for sewing piping. I have thread in sizes #138 and #207. I bought needles in sizes 140, 160, and 180 (135/16 and 17). The #69 thread I bought came with the base crushed and was unusable, so have to reorder that. Looking forward to being able to start stitching! From what I read in a couple places, the 111W155 is capable of handling #207 thread on a #24 needle, but I have read on this forum that it doesn't do well with it. Will the 155 do 207 on leather? What's your experience?
-
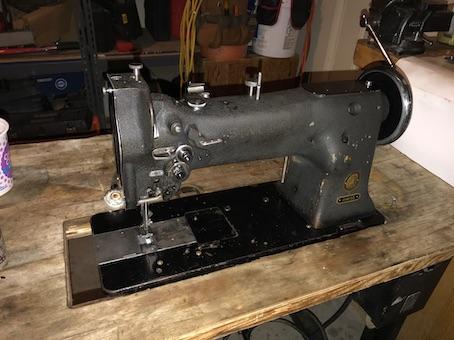
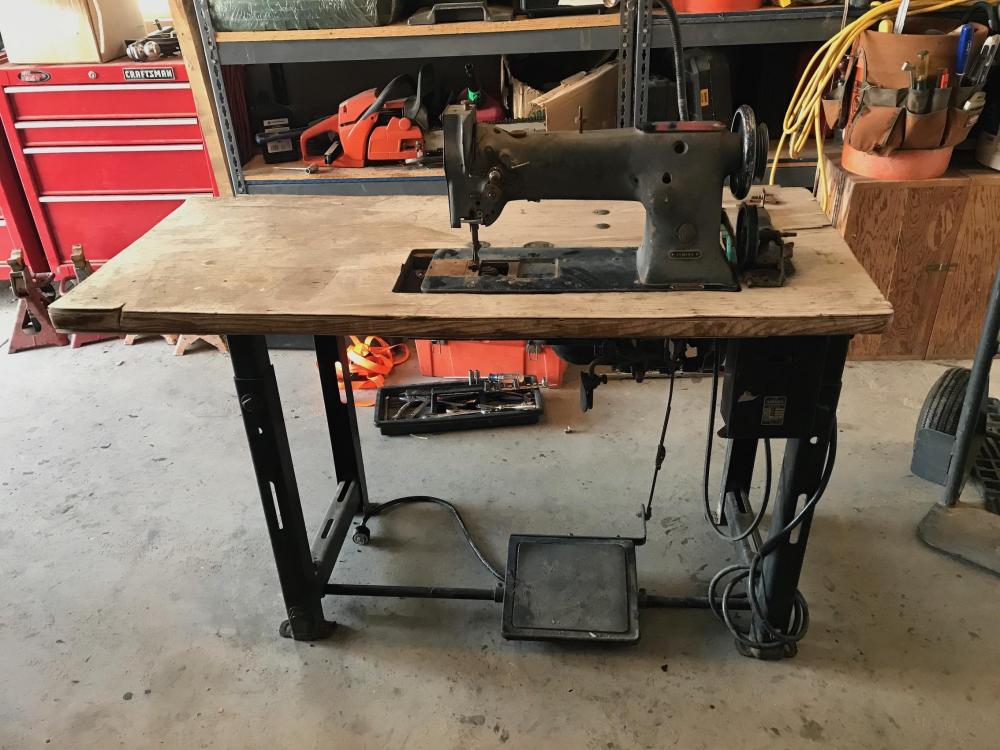
Got it all refurbed and properly set up. Here's a shot of it. I still need to go through the motor and build a table for it. The motor actually sounds pretty good, after running it a few times. I expect it could use a set of bearings, though. So far, I'm into this machine for $293, including a couple spools of thread, several sizes of needles, and a different set of feet. I'll have a bit more into it once I build a table and buy new bearings for the motor. I realize I probably could have found one for about the same amount I'll have into this one, but working on it and learning how it works has been fun. I get real satisfaction from taking a tool that doesn't work anymore and restoring it to working order. Does everybody have the trouble I have uploading photos to this forum? Seems like they would update things to have an automatic photo downsizer for uploads. Even my free Wordpress website does that.
-
Thanks. Found it the video. Should do the trick. I'll post a few pics once I get things finished and tested. Now on to refurbing the motor!
-
I have the needle height set, the feed dog set, the needle centered in the dog hole, and the needle timed to the hook. However, both the inside and outside feet are out of adjustment. I can't find anything that tells me how to set the timing on the feet. The inside foot is close, but the outside foot is not lifting high enough. It's just barely releasing pressure. I figure it's just going to be a matter of fiddling with the cam on the arm shaft until I get it right. One thing that concerns me, though, is that the machine felt smooth until I installed the new belt. Now it feels way tighter than I expected. I replaced the ball bearings and they are smooth, so that's not the problem. I expected it to be tight, but not like this. It was a cheap $12 belt. Could it be too small? Will it wear-in and loosen up a bit with use or is that normal?
-
Well, I have the machine back together. Now to get everything properly set up and timed. I can tell this is going to take some time and a lot of trial and error. So, I have some questions for some of you who are familiar with the 111W machines or similar industrial triple-feed machines. - Is there a proper order-of-operations for setting up and timing these machines? Again, I completely disassembled the entire machine, cleaned all the parts, and reassembled it. The military manual linked on another thread details how to set the individual processes, but no order-of-operations. - My hook basket assembly has a little up-down movement in it. Should I tighten it up by moving the lower bushing up to reduce clearance between the hook gear and the bushings to remove said slop or is a little slop allowable? - How do the hook assembly and bobbin case function? I have to replace the bobbin opener, so I need to make sure the replacement fits properly. I have a good description on how to time the hook to the needle. - Is there a proper parts diagram, showing how all the parts relate, such as a blowup, available for the 111W155? I have the one linked on one of the threads here, but it is not clear on some parts and the photocopy quality is poor. I also have the military manual linked on one of the threads. It's much better.
-
I was able to find a supplier on eBay that had two new-old stock Federal 1202SA bearings. Just received them today. Got the machine completely disassembled, all the parts de-rusted and cleaned up, and ready to reassemble. I'm quite pleased with the way everything came out. No serious pitting and no appreciable wear that I can find in the shafts and bushings. The bobbin cup and saddle cleaned up and polished nicely. Ordered a new tensioner assembly and bobbin winder, should be here tomorrow. I ordered a package each of 135/16 and 135/17 needles. After reading a bunch of different threads on the forum, I am thinking I'll be using #69 and #138 thread for most of my projects, but also read that my machine will handle #207 with a #24 needle if I am careful. What is your take on this? I'm getting ready to make an order for thread and needles and wondering whether I would be wasting money/time messing with the #207 on my 111W155. My leatherwork includes items like custom bridles, spur straps, knife sheaths, holsters, chaps, etc, and saddlery, up to now all hand-stitched, but with this machine I hope also to get a little into garments, such as vests. I know the machine is light for heavy saddle skirts, but I was hoping that with the #207 thread it might work. I am not a heavy volume shop and saddle skirts take me forever. Just can't afford a Tippman Boss yet.
-
Thanks for the reply, Cowboy Bob. I guess I'll put this one back together with the small bobbin and just look around for a Juki large basket and maybe do the mod later on...if I decide it would be useful. Any info re the ball bearings?
-
Sorry to do this, but I'm going to revive this thread again. Question: The McClellan I am going to rebuild did not have fleece on the bars, but I thought I'd add the fleece. Seems to keep the saddle from wandering on the horse's back. I see the guys in the vintage photos fleeced theirs. Any advice on that? MilitaryHorse, are you still watching this thread?
-
-
Hey folks. I picked up a 111W155 yesterday for $25. Couldn't pass it up. As you can guess, it needs a refurb, as it has been stored outside for quite some time. I've refurbished a couple machine lathes, so I didn't shy away from a little surface rust on this machine. I have completely disassembled the machine and am getting ready to soak everything in Evap-O-Rust, before I polish up the shafts and pretty parts. I need to replace the two ball bearings on the arm shaft. The number on the bearings is Federal 12022A. I haven't been able to find that bearing or a crossover number for any other manufacturer . Anybody know what replacement bearing works? I haven't taken actual measurements on them yet, but thought I'd ask and see if somebody already knows what works. Also, I have quite a bit of felt for oil wicks leftover from the metal lathe refurbs. The sewing machine seems to have some sort of fiber wicks and cloth string wicks. Anybody see any problem with me replacing those wicks with felt? I need to replace the tensioner and hook assembly. Will the 111W155 take the large bobbin modification I've seen done on the Consew? Figured that while I have the machine apart, and since I have to buy a new hook assembly anyway, it wouldn't be much of a problem to do the mod...if it will work on the Singer. Seems like the Singer bobbins are pretty small for the larger thread for leatherwork. Cowboy Bob, I hope you are still watching the forum. I'm pretty sure I'll be calling on you for a couple other parts. Once I start reassembling everything, I'm sure I'll need some coaching on the setup and tuning. Sorry, no photo. I still haven't figured out how to post photos on this forum. I'll try again later.
-
I know this thread is a little old...but then so am I. From where do you source your brass parts? What weight of leather did you use? What type of leather (skirting, harness, etc) I have a late 1800s McClellan knock-off I'd like to rebuild/restore to usable condition. I've been told a 7-8oz skirting leather, but that feels heavier than what was originally on it. The original leather is suitable for patterns, but most of the seams were ripping out. Any handy hints and suggestions would be welcome. I'll be hand-stitching.
-
Repairs to an old ranch saddle
thenrie replied to thenrie's topic in Saddle Identification, Restoration & Repair
Thanks, guys for the nice comments. I enjoyed rebuilding that saddle. I have an old McClellan, a pony saddle, and three old high-back saddles in dire need of work as well. I'll post about those as I get them done. Dwight and Josh, you might want to start your own thread, so people can search and comment. -
Sorry I didn't keep up with this thread. I forgot I even started it. Anyway, I found most of the stamps I needed at Tandy, or close approximations. I bought a set of Chinese-made veiners, but wasn't real happy with them. I made the one stamp I could not find and it actually worked pretty well. I can't seem to get photos to upload to this site, so here's a link where I wrote the saddle repairs up on my blog: https://westerntrailrider.com/wordpress/blog/finished-my-repairs-on-another-old-saddle/
-
Need help identifying Pack Saddle
thenrie replied to Outakuntrol's topic in Saddle Identification, Restoration & Repair
I know most admins hate folks who revive old threads, but this forum seems to have gotten very little use in the past year and this question is still on the first page, so I'll hit it. There is no way you are going to be able to identify the make on an old crossbuck like that. They were so easy to make that most saddle shops made them and a lot of packers made their own, back in the day. I can see this one is put together with rivets, rather than bolts or screws, and the wood is pretty dried out, so it is easy to say it is likely more than 30 or so years old. Depending on where it was used, it could be as far back as the Gold Rush days. Crossbuck trees just don't wear out. Sometimes they break, but they don't wear out. The leather wears out, but it is easy to replace, again, making the crossbuck difficult to age. The green paint with the white name label indicates it was used at one time by a packer with a pack string of mules (Tilly just sounds like a mule name). Crossbucks were often fitted to the back of the individual mule by rasping it to fit, so they would label it with that mule's name, so as not to get it inadvertently place on a different mule and making a sore-backed mule. The crossbucks (there's another word for them, but I can't recall it right now) were typically made of oak or hickory, sometimes maple, because it is very hard and nearly indestructible. The bars were typically made of cottonwood, because it is somewhat flexible, yet strong and easy to work and form. Looking at the wood on that one, seeing you are from California, and looking at the leather and imagining it as original, I'd venture a guess that particular saddle saw use in a pack string as far back as the 1930-40s, but then that's just a hairbrained guess. No real way to know. -
This saddle has got me a liitle stumped
thenrie replied to PaulHill's topic in Saddle Identification, Restoration & Repair
That large horn was typical of Mexican-made saddles back in the day. My totally uneducated guess would be that you are right about your time frame. I'd say 1960s and that it is Mexican-made. Also, Mexican leather from that era tended to be lighter and not as well tanned as American-made leather, so that may be a telltale. Can't really tell from the photos. -
Repairs to an old ranch saddle
thenrie posted a topic in Saddle Identification, Restoration & Repair
It's been awhile since I last posted anything, but I recently finished repairs on an old ranch saddle I picked up a couple years back. Thought I'd post the results. However, I have an extraordinarily difficult time posting photos to this forum, so I'll just post the URL to my blog, where I posted photos and information about the repairs. https://westerntrailrider.com/wordpress/blog/finished-my-repairs-on-another-old-saddle/ Sorry admins, but getting all the photos resized and all that fiddly stuff isn't worth the trouble. Nobody takes 3mp photos anymore. Have you thought about an extension that automatically resizes uploaded photos? 1.46mb is waaaay small nowadays. -
How To Repair A Torn Seat Jockey?
thenrie replied to thenrie's topic in Saddle Identification, Restoration & Repair
It really has been awhile. I was just watching a saddlery video (Agar France) on Youtube and thought about this forum. I finally finished repairs on that old Hamley a few months ago and forgot to ever post the results. In the long run, the saddle needed a lot of repair. Not only that, but there had been previous repairs of varying quality, all of which brought the saddle's value down to where I felt justified in trying the repairs myself. Here's what it needed: Both stirrup leathers were worn out. One strap was original, the other was a replacement. Both sweat flaps had been replaced and had been tooled with a different pattern and tooling than the original. The cantle binding was destroyed when my horse went down with the saddle on. The seat jockey was torn by my spur when I came off the horse. Several saddle strings and conchos had been replaced. The rear rigging straps on both sides were splitting and needed to be replaced. The skirts had been poorly refleeced a long time ago and were curled at the edges, needed to be re-done. I did all those repairs and used the original rolled tooling on the saddle skirts to create a pattern I carved into the new stirrup straps. The end result was pleasing to me and brought the old saddle back to life for another 75 years or so. The only repair I was not pleased with was the repair of the tear in the seat jockey. I used a waxed nylon thread that would not take a stain. I wish I had used a linen thread or a dark brown thread and the repair would have been hardly noticeable. Oh well. Chalk it up to experience. I hate adding photos to this forum, because of all the resizing and fiddly work, so here is the URL to my web blog on the repairs: https://westerntrailrider.com/wordpress/blog/finally-finshed-the-repairs-to-the-hamley/
