Camerius
-
Posts
78 -
Joined
-
Last visited
Content Type
Profiles
Forums
Events
Blogs
Gallery
Store
Everything posted by Camerius
-
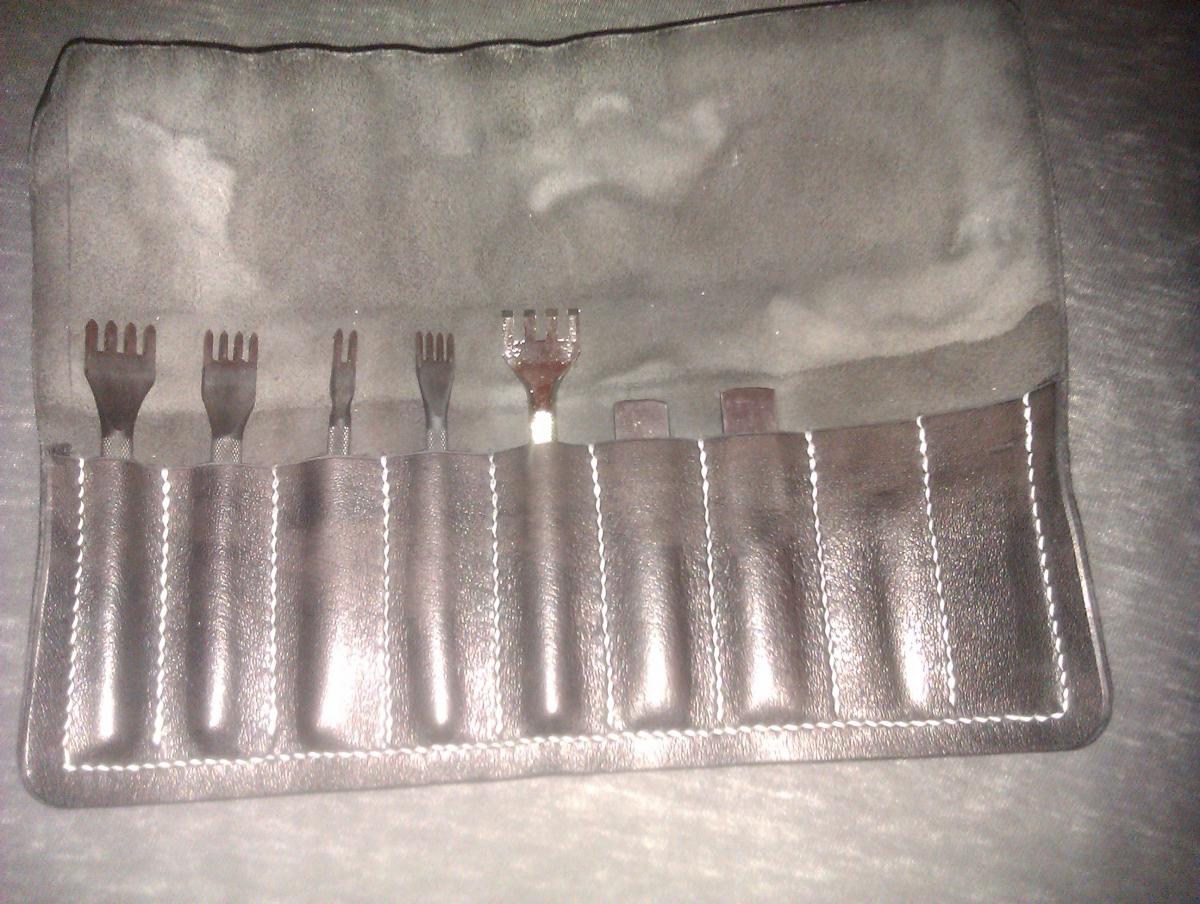
How Do You Store Your Pricking Irons?
Camerius replied to 3wunder's topic in Leatherwork Conversation
This is how I keep my pricking irons. Not much but it works and it was simple to do besides I got some more need practice on a few things. C.
-
Denmark.
-
Consistent Way To Punch Sewing Holes In Leather
Camerius replied to NewYorkerInSydney's topic in How Do I Do That?
Running a groove when using a diamond shaped pricking iron will be detrimental to what what the stitching (in this case saddle stitching) is to be like. A groove is fine for normal non-slanted stitches, but will kill the effect of the angle of the saddle stitch in making it lay down and look flat. A sewing machine could be the answer, but will depend on how big the quantity is to be stitched. In if it is just small hobbyist projects or bigger amounts of manufacturing that has to be done. Still worth looking at, I suppose. C. -
Consistent Way To Punch Sewing Holes In Leather
Camerius replied to NewYorkerInSydney's topic in How Do I Do That?
I use a wing divider to mark the stitching line first. Then I take my pricking iron, put it on to of the line, and then make sure that the iron is standing straight before I punch it through with a mallet. What you can do is get a piece of metal, have it bent in a vice to 90 degrees, to be sure that it is at a perfect angle to your stitching line when you lean the iron up against it. As for the noise, I use my granite slab then topped with one of my smaller self healing cutting mats and then my poly punch board. Sometimes I even have a thick piece of scrap leather on top of the poly board to save the points of my pricking irons. All this is killing the noise besides the whacking on the iron. However, there is another solution that is very quiet, and that is getting a set of pricking pliers. These work in the same way as with a pricking iron, just with the teeth set on a set of pliers so you make the holes by squeezing instead of punching. https://www.youtube.com/watch?v=HgNaR_Sz6rU Hope this helps, C. -
Adult area on Leatherworker.net
Camerius replied to Johanna's topic in Announcements and Administrivia
Awesome! Thank you. -
-
I let edge kote dry for 24 hours, and then top it with a wax and oil mix of my own that is rubbed vigorously with a canvas cloth. I then follow it up with a burnishing stick until the edges looks like I want them to.
-
Adult area on Leatherworker.net
Camerius replied to Johanna's topic in Announcements and Administrivia
Could I be added to the Adult area as well? Thanks, C. -
I got my Saiwa pricking irons from goodsjapan.jp and have been very satisfied with them so far.
-
Awesome! Thanks for getting back to me.
-
Going to try my hands on this one, when I get some time. Just a quick question, what weight of leather do you use for it? Thanks for putting it up here.
-
This looks like sometihng that I will be able to do as my first wallet project, when I have gotten a few more things under my belt. Thank you for the template, and the directions.
-
Hello, Being first post and all, but here goes. You do so by using the right size wheel for the piece that you're in the process of marking up. In that way, you'll be sure to end up with a corner dot. What I do is that i take a piece of scrap leather, measure out the length of the original that needs to be marked, and then run an fitting size overstiching wheel over it that I think might fit the stitching I want on the original. I'm too new to this, but that's how I do it till I have gotten used to what stitching length goes to what leather thickness and so on. Hope it helps. C