rufusjames
-
Posts
76 -
Joined
-
Last visited
Content Type
Profiles
Forums
Events
Blogs
Gallery
Store
Everything posted by rufusjames
-
Skeleton Rig Saddle - What Tree
rufusjames replied to JinxedDream's topic in Saddle Supplies, Tools & Trees
CSST makes a cable rigged endurance tree. Try them again. I am sure Heath just missed the call/message. -
Thanks for the responses. I am very frustrated. I have been a little scared of over oiling as I did that once to a new saddle I had just finished. The glue broke down and the seat separated... I have been asked "is it more to use good leather?" "Dont you think you find the best leather youu can and use that?". As far as I know there is two tanneries making leather suitable for a "good" saddle. HO and W&C. Iam using HO. What more can I do? Thanks.
-
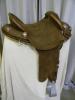
I have built afew saddles using Hermann Oak 13-15oz skirting. I have been really pleased with the leather, however I had a potential customer looking one over and told me the leather feels like "cardboard" . I oiled it with two light coats of neetsfoot oil. what do I do to get that "butter" feel. He was comparing my just finished saddle feel to a saddle that was over twenty years old. Not really apples to apples. But they were both made of Hermann Oak. As far as I can figure twenty years of use is why the leather has a different hand to it. But if there is something I can do soften it up I would love to hear it. Thanks, RufusJames
-
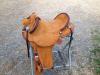
Latest Australian Half Breed
rufusjames replied to rufusjames's topic in Saddle & Tack Maker Gallery
Thanks for the link. Interesting. Another supplier is awesome! -
Techniques For Screwing A Concho In Straight
rufusjames replied to JAM's topic in Saddle Construction
I pre drill the holes after I have made sure I have layed it out exactly where I want it. Start by center punching the leather to your layout marks down to the tree with a scratch awl. Straight/square as possible . Then drill a pilot hole with a small diameter bit. I put a nail in the hole after I drill the depth a little into the tree. Check with the nail in the hole to see that your hole is going as square/perpendicular (all the way around) every 1/4" of depth. Once I am satisfied that it is pre drilled perfect then I step up to bigger bits until the final size bit. Then I drill an oversized hole through the all of the leather to the tree so the screw post does not touch the leather at all. Finally if the concho sits a little high anywhere(usually very little, if at all) then I place a piece of scrap 13-15 oz.leather over the problem part of the concho and tap it down flat. Sometimes backing out the concho a little and tapping it behind the problem and screw it back in to meet it This is a time consuming process, I know but it works for me. By starting with a smaller bit and using a nail or screw to check for square/perpendicular you have the chance to ream the hole sides and change the angle of the bit to square it up before you are totally comitted. Take your time it is faster in the long run. Usually takes me a couple hours to install conchos, rosettes,clip n dees... It is also a good idea to make sure the screws on the conchos are square to the concho before installing them. Most need a little adjusting. I have a pair of pliers with tape "soft jaws" on them for holding the concho. I use needle nose to grab the whole lenghth of the crew to bend it square. I also have a small leather "speed square" I made for checking them. Hope this helps. Rufus -
Latest Australian Half Breed
rufusjames replied to rufusjames's topic in Saddle & Tack Maker Gallery
I have been asked to share my binding process with a photo tutorial. I will do just that as soon as I start the next saddle. In a week or so. Right now, I am going to take a little break and ride my horse. -
Latest Australian Half Breed
rufusjames replied to rufusjames's topic in Saddle & Tack Maker Gallery
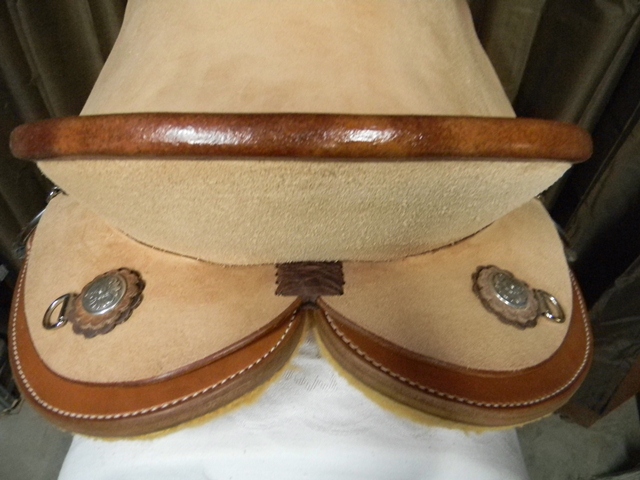
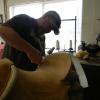
I sew through rawhide,seat,filler,cantle back.not through rawhide on the back. Sew rawhide face down to seat and fold over stitching to conceal it. -
Latest Australian Half Breed
rufusjames replied to rufusjames's topic in Saddle & Tack Maker Gallery
Rick, thanks for the great compliments! I really appreciate it. -
Latest Australian Half Breed
rufusjames replied to rufusjames's topic in Saddle & Tack Maker Gallery
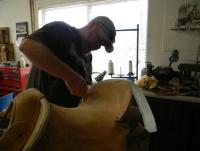
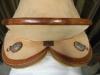
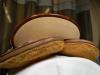
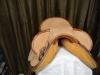
Thank you Josh,I dyed it. I will use drum dyed next time. The bindings I stitch face down, pull/stretch/cuss them over to the back ( at this point I am sure I cut it too narrow and it will show the stitches on the back, it won't, keep pulling/pushing it over), screw it tight and accurate on the backside concealed under the ears,pull the ears over and screw them down to shape the wet rawhide cleanly( I put a small piece of plastic here between the rawhide and ears to avoid water staining the ears), push it close to shape by hand on the seat side, put a fan on the back to start the shrinking on the back first, go do something else, come back and tuck the backside with my fingers, shape the seat side radius, adjust screws if needed to fit the rawhide in tight at the ears top and bottom (Important to do at this point),tuck the shrinking backside tight to the cantle back, put a fan on it, let the fan work, as it starts to shrink tight on the backside start hammering/ rubbing down the crease to get it flat as possible to the seat, massage it as needed while shrinking,the next morning I hammer the crease hard and get it as flat to the seat as possible. It is "hard" but still workable with the hammer at this point. I usually start this first thing in the morning. That way I have all day to go back and forth working it. There is a lot of strategic fan time. There is more to it of coarse... -
Latest Australian Half Breed
rufusjames replied to rufusjames's topic in Saddle & Tack Maker Gallery
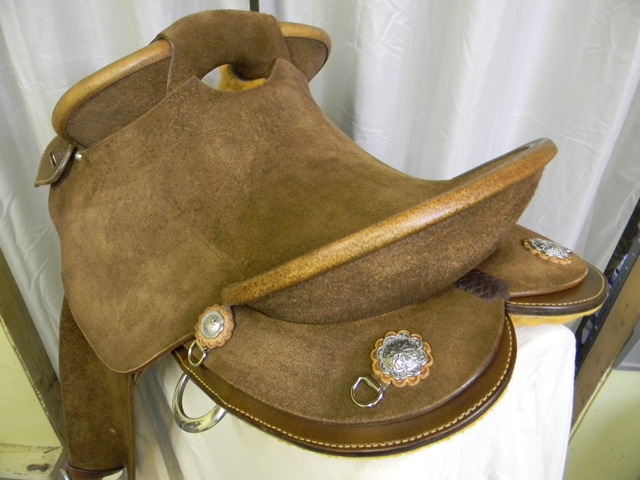
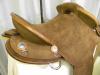
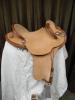
A couple more...
-
Thanks.
-
You could make a rear jockey to cover the bulge. I do rear pockets and a jockey.
-
Thanks Josh. fastest response I have received yet on this site. I really appreciate it. I just got an order for a new saddle. He wants chocolate/dk brown color. After spray dying the last one i was nopt happy with the days of rubbing the rough out and still getting some rub off. Maybe it was me. Maybe my technique. Not happy just the same.
-
Is drum dyed leather going to have less rub off of the color than spray dying?
-
Rubbed and rubbed... 10 old t-shirts later it still showed a little rub off. I just decided it was acceptable. Guess it was all good as I received another saddle order over the weekend.
-
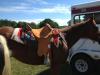
I have spray dyed my latest rough out saddle, saddle tan . I am getting a lot of dye rubbing off. I have rubbed and rubbed the seat with t shirts and after what seems like forever I am still getting some dye residue on the t-shirt. What else can I do to "set" the dye. My customer will be wearing white pants as required for Polocrosse. I have to deliver it Friday at my tournament. She will be riding it Saturday and Sunday and I dont want her to have a saddle tan arse...
-
Very nice work!! beautiful.
-
Looks great! I like the pattern, different, and interesting. I like it. Looks like you are western Texas. cedar pole round pen,prickly pear cactus, juniper "trees". Looks just like my place In New Mexico.... ready to burn.
-
Do you have any pics of your leather oiled with the peanut oil?
-
Latest Australian Half Breed
rufusjames replied to rufusjames's topic in Saddle & Tack Maker Gallery
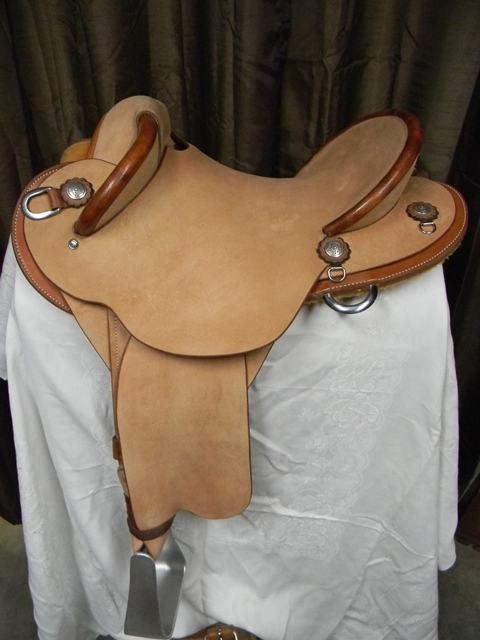
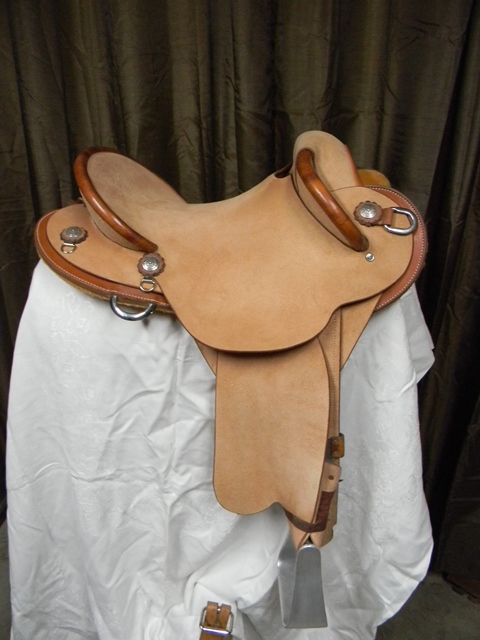
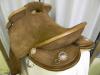
Latest half breed finished and shipping out in the morning.
-
You have the needed dimensions... Now just get creative (with posterboard first) your imagination is all you need now. Look around and take inspiration from other headstalls you like. Inspiration is just a fancy word for theivery. Rufus
-
Nice! Rufus
-
I do 2 1/2" except at the bottom of the fender I go to 3".for the twist and stirrup axle. More stirrup choices with a 3" axle. Best of both worlds. I also line and stitch webbing as reinforcement. No stretch that way. I paint a light coat of spar eurathane on the edges of the webbing to help with the little bit of friction fraying that can happen. May be overkill... Rufus
-
I broke my only one in the middle of stiching a cantle. Tandy does not carry them anymore here in Albuquerque. I did not want to wait for shipping either. i ended up thinking maybe a shoe repair shop could at least tell me if there was any place local that had them. He ended up having 10 and was more than happy to sell me two for a dollar over his cost. Made my day. Check with your local shoe guy, you may get lucky. Rufus
-
Placement Of Dees ( Breast Collar Dees)
rufusjames replied to Aurelie's topic in Saddle Construction
I prefer mine to be up higher. I like to free up the shoulders as much as possible depending on the type of breast collar. I feel the lower mounted dees can be a little restrictive at the scapula. I want full unrestricted range of motion for what i do with my horses. I think it really depends on what you do on your horse. I put mine in under the front rosettes, two screws into the tree. If there is ever a wreck involving the collar it is an easy repair too. Rufus