SandSquid
-
Posts
158 -
Joined
-
Last visited
Content Type
Profiles
Forums
Events
Blogs
Gallery
Store
Everything posted by SandSquid
-
NICE!
-
Background; For the past 3 years my family has been volunteering at a "faith based youth summer camp"Lakeshore UMA . We provide all the equipment, and run the archery range. (We are all NFAA / USA Archery coaches, and current or former State & Regional Champions. etc...) My wife was a school teacher and had summers off, my parent command allowed me to bank all my leave and use it to take every other week off during the summer. Now she has a better paying job but has to work summers, and I'm an unemployed, returning combat Vet, so guess who gets to spend all 12 weeks at summer camp!!!!! Should be great for helping me "reattach to polite society" as well and stop being so hyper-vigilant. So, someone heard I've been pounding on leather and suggested that, when I had time, I could help out in the Craft Hut and teach some kids how to pound leather as well. Sounds great in theory, but I barely know what the heck I'm doing!!!! Now, many years ago I has a Sensei who used to always say "teaching is learning twice", but really I want the kids to have an enjoyable experience and be able to give mom or dad a nice looking key fob or wrist band instead of a mangle hunk of leather or show them a smashed thumb, know what I mean? If I'm going to do it, I insist that I do it RIGHT. On top of that I have no idea what the Craft Hut actually has for tools, in years past it has not a point of interest for me. I'll find out this weekend when we get there, but we are about 130 miles from the nearest Tandy store, and being unemployed well... Luckily I have been blessed by WinterBear, Bruce Johnson, Elliot, etc. and I have at least one complete set of the basics so as long as I don't have more than one or two kids at a time we should be good for now. I also just got a barely used arbor press which could be useful for setting snaps, etc. OK so, suggestion on what to teach and how to teach it and how to do it frugally. (I already sent our 501c3 to Zack White and Springfield Leather Co, so we can get "wholesale" pricing.) I'm thinking of getting a pile of the ubiquitous pre-cut wrist bands and key fobs. Maybe a pre-cut & punched coin purse, or some buckskin or suede trinket bags, but I really want to stay away from having kids use an awl.
-
I'm packing up the family mini-vans this week to head out to Lakeshore UMA for a few months... My family and I volunteer our summers there to run the Archery Range. Anyway, I know we are in for a long hot sunny summer here in TN, normally I just wear one of my many desert boonie covers, but I was pondering making myself some fashion of a nice leather hat that would protect my skin from burns and my noggin from the brain fever. Any suggestions on patterns/designs?
-
The Hugger pattern first attempt: http://leatherworker...attach_id=61542
-

1911 Leather Grips
SandSquid replied to BigDoug's topic in Gun Holsters, Rifle Slings and Knife Sheathes
They look like it would be awesome furniture for the safe-queen 1911's, such as the über-dollar Caspian in Damascus steel, whihc someday I will own.... Being a tactical type from too many years of being a LEO and Mil, I have serious doubts about how they will perform once your hands get wet with sweat, slime, mud, etc. I want deep sharp checkering, and lots of it. -
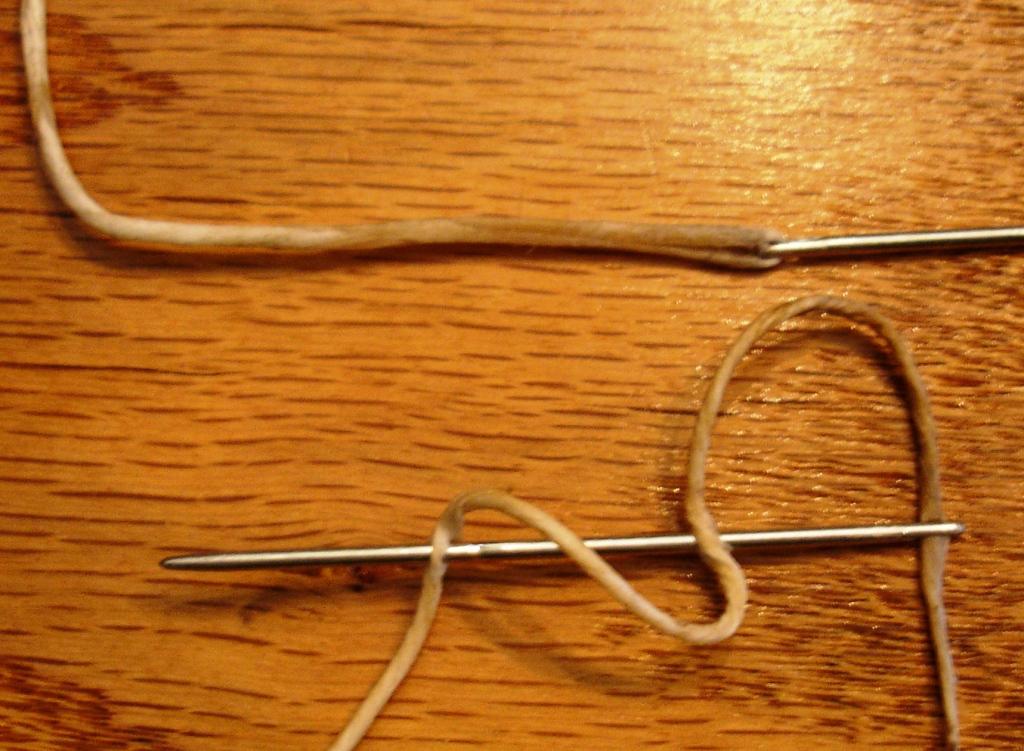
A wise leather-worker turned me on to these pre-waxed, pre-tapered poly threads: White 60" HandsewingThreads - $12 per gross. The tapered ends make a world of difference, and unlike Tandy thread I have not had a single break. Being pre-cut to 60" and pre-tapered I can't see myself ever making my own threads, unless I'm doing a 100% historically accurate piece which requires me top start by picking the cotton boles and ends with a spinning wheel... It total rocks, especially using the tapered threads I pimped above. Though, I should note that my mentor has be piercing the tail twice instead of only once, it really gets a nice firm lock. Peirce, loop needle around once, pierce again: Sure, threads get dirty as seen above, but being ahem, "frugal"... I keep any piece longer than a foot to re-use as illustrated on page 17 of Stohlman's hand sewing book. Since I'm leather-working purely for it's therapeutic values for my frayed sanity, and living off military pay, I can do that.

-
I'm VERY FAR from being an expert, heck I barely qualify as an Apprentice. but I believe this may be a contributing factor: I try and use my (4 prong) 3/32" diamond hole punch as much as possible, but recently I've had to do a LOT of awl work to supplement it, the tines simply will not reach through 3 layers of 9oz leather, and without waxing them every second punch they get seriously stuck. So, what I do is punch two layers and follow the procedure I outline below. A properly sharpened and waxed awl will glide right through 3 or even 4 layers of 9oz with total ease. The way my mentor instructed me is to : place the work in a pony. This gave the single biggest improvement to my hand-stitching. Prior to that, and even now in the pony, hold the fingers of the left hand against the leather on each side of the intended exit hole to support the leather. a light coat of beeswax on the awl helps immensely always hold the awl at a right angle do not wriggle the awl back and forth make the smallest hole possible for needle clearence use lineman pliers to pull the needle through tight holes Something else I found is that it is not always advantageous to pre-stab holes, in fact when I'm working with purely an awl (no hole punch) I stab only one hole at a time. I found they will close up on their own after some time, and they will definitely close up from the force of the needle going through the adjacent hole, and have to be reopened. Plus if the spacing gets a bit wonky you can cheat it back without too much bother.
-
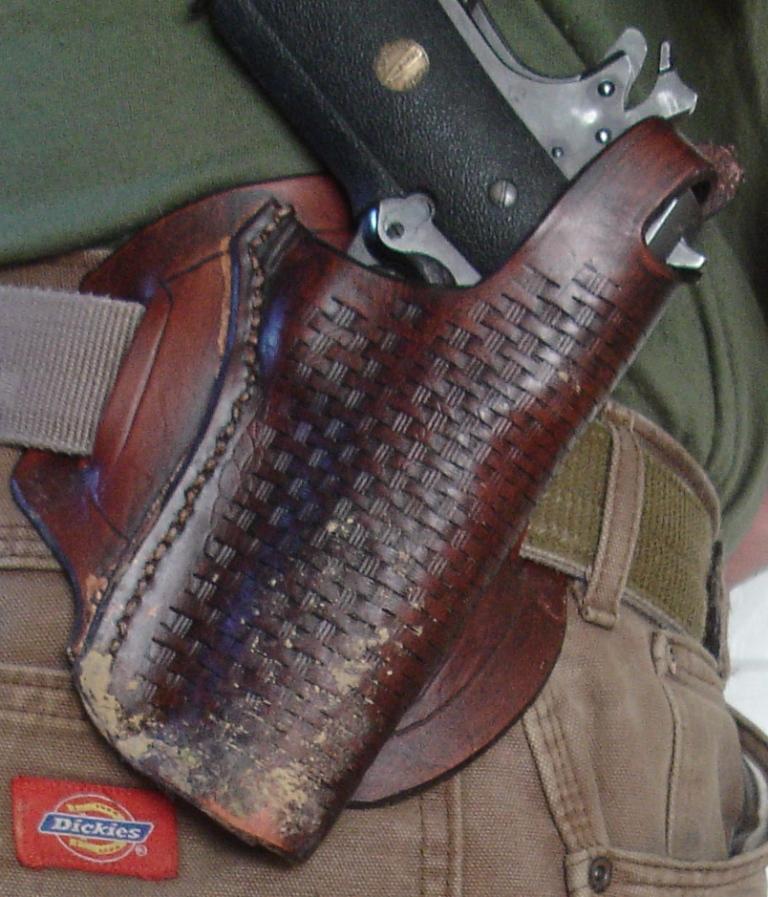
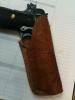
wear test progressing well: No failures after: Gardening and landscaping yard. Napping on couch Trip to Starbucks for whole beans. Trip to local Middle Easter market for fresh pita. Finishing the perimeter Zombie_Proof© fence around the castle. Napping in the recliner. I do see the obvious need for the toe-plug, if you are going to be sitting and weeding the grapevines while wearing your weapon: Thought the strap stays in place just fine without it, I may just go ahead and install the snap hardware on the thumb break and continue using this one while I work on SWMBO's lefty model.

-
Been slowly working my way through the Will Ghormley 100 year 1911 pattern pack, and one thing I really DON'T like is that all his triggers are exposed. So for my "Hugger" pattern I decided to use his pattern as a base and branch out on my own. Wills: My changes: I plan to use it for my EDC over the next few days/weeks and see how it works out before committing to the final design. but so far, I like it.


-
Update: utensil basket of the dishwasher worked great, no plating flaking off.
-
Think it'd be safe to run them through the dishwasher in the utensil basket? Really need to get the garage cleaned up so I can work out there!
-
We accidentally got some cooking oil on a bunch of stamps. (I was working on the far end of the kitchen table, with my daughter and my Little-Buddy.) What would be the best way to clean the oil off so it does not contaminate the leather workpiece, and then treat then so they don't rust.
-
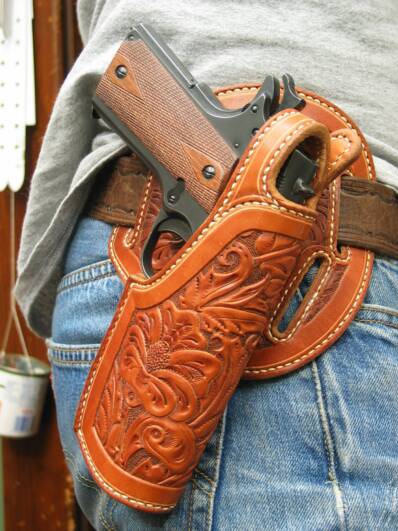
I have the pattern set and have already made the "Weeping Heart Bikini" for my youngest daughter, and two "3Persons" in forward cant, a right handed for myself, and a left handed for my wife. I've had several request from fellow 1911 carriers for the 3Persons, but I deferred them until my skills improve. Right now I'm working my way through a "Hugger" pattern. I'm modifying it so the trigger is not exposed, I just don't like having an exposed trigger. I very much wish there was an IWB concealment holster pattern in the pack. I can't ever see myself making the Calvary, Fraizier, Pancho or cross-draws. Just not my style.

-
So the consensus thus far seems to be NOT to glue it down to a backer. I'm still working on a proper slab, I foresee a field-trip to the local head-stone/grave-marker to see if they have any broken hunks... or a granite counter-top installer for sink cut-outs or again broken stock. Just need to wait until payday before I go ;-( It was used in a warehouse application. And then re-used as a backstop for our competitive air-pistol leagues' pellet traps. I figured if it'll stop a 25gr .22 pellet traveling at 900FPS with only a slight smudge, it'll hold up to a few years of cutting and pounding. It has been sprayed white on one side, and is still "raw" on the back side, which will now become the front side. I've cleaned up (squared) the crooked cuts, scrubbed the down w/ Lestoil and a stiff brush on both sides. I'll talk to some of my friends in the construction trades and ask them to BOLO for some. Will do, thanks for the tip!
-
I got some nylon reinforced conveyor belt material which I think would make an outstanding for placing under leather to protect knives and punches when cutting or punching holes, and quiet stamping and reduce vibration, Just wondering what would be the best hard backing material to back it up with??
-
I'm curious about the resoning for flesh-side-out. I've seen a few hand-mades done this way, but all the comercial holsters I have (mostly Done Hume) are all flesh side in.
-
Second Attempt At Embellishment.
SandSquid replied to SandSquid's topic in Gun Holsters, Rifle Slings and Knife Sheathes
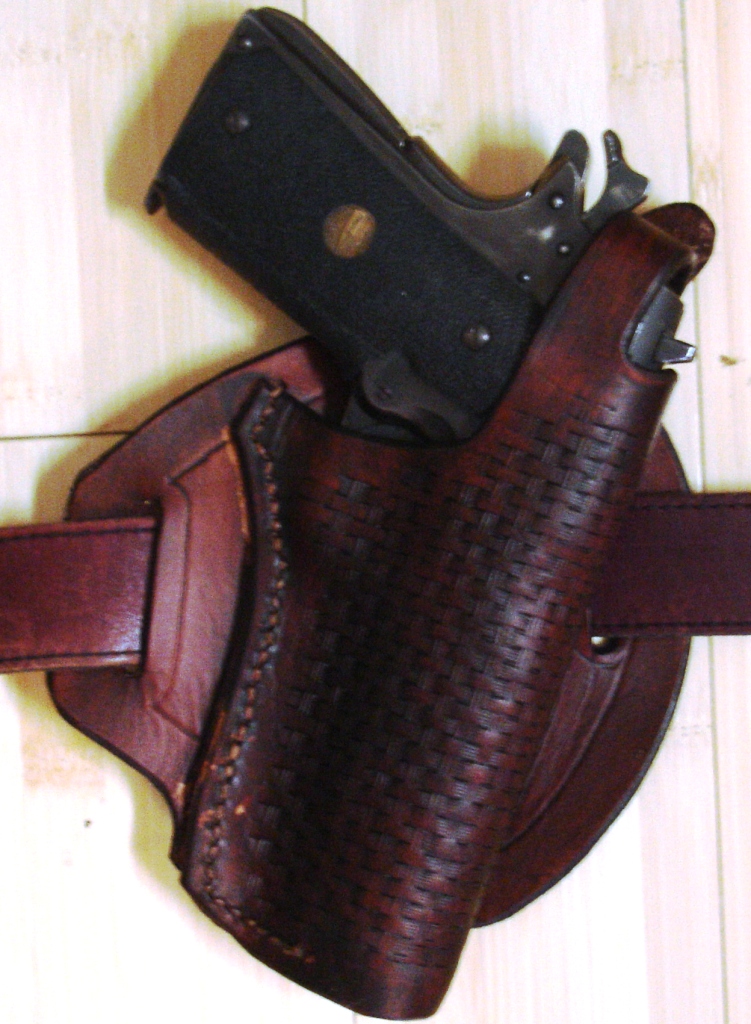
Lil' Bud is a patient at St.Judes', and has all the patience in the world to take his time... I on the other hand get all in a tizzy to get it finished and make silly mistakes. But, Mom's left hand holster if finally finished!!!! Yes, Sir. BTW, the lady up at Tandy said that this Saturday and Next they are having the beginner leather carving class from 1000 to 1200. I'm thinking of bringing my daughters and Lil'Bud to it. My oldest girl is pounding away on a coin purse kit right now...... -
Took my wing-man down to Tandy today and got him the E-Z to Do Leathercraft Kit and a few stamps such as the Craftool Tri Weave Stamp and a seeder and some backgrounders... The tri-weave proved to be a bit harder to keep lined up than I had thought, and I went a bit crazy doing the edges of the holster, but I had lots of flaws it helped hide. I put a single dimple in the center of each tr-weave using a seeder and I really like the look. Meanwhile little-bud made a key-fob and a bookmark.

-
So, there are many (many) mistakes but for the most part my mentor (Luke) helped pull me out of a heap pf mess.... It's amazing what a good backgrounder will hide!-) Once it's thoroughly dried and formed to the weapon I'll add some color to it and seal it up...
-
First Pancake Holster For 1911
SandSquid replied to Madadh's topic in Gun Holsters, Rifle Slings and Knife Sheathes
I would say that for working without a pattern, it is a very good first holster. You are braver than I am! I'm currently fumbling my way though 2 right hand and 1 left hand 1911 holsters, but I copped out and purchased the 100 year anniversary pattern set. (As a few others here have done: http://leatherworker.net/forum/index.php?showtopic=37769) -
I was thinking more of leather tubes I could slip my pinkies into... once they start to mold/form to my finger they should stay in place.
-
Any ideas on how to make a stall / sleeve to keep my pinky finger from being chafed raw while stitching?
-
After a few hours with this swivel knife, I've already got questions.... and hand cramps!!! But that part is done, and I'm going to start with the veiner work tomorrow.
-
Turned out that Luke Hatley and I live about 5 miles apart, and he invited me over for a meet and greet. WOW I cannot express how grateful I am for the invite and for how many mistakes I have been making that he corrected, and future mistakes I would have made, that he adverted by a few hours of question, answers and tutelage. It helped me recall when I was doing the same thing 15 years ago teaching traditional woodworking techniques to adult education students ant the VoTech on Saturdays. Not many came but the ones who did were there because they really had a passion for it. There really is no way to learn these manual handcrafts than under the watchful eye of a seasoned Master.... That is why the Trade Guilds were so successful. Regardless of which trade it was, they had a very strict regimented learning process of an Apprentice under a Master. Apprentice, Journeyman, Craftsman, someday perhaps; Master. And so the cycle goes. I truly lament the loss of such guilds and especially the Master Craftsmen in them. I challenge (beseech, even) everyone to seek out these Masters and learn everything you can from them! Today I played Apprentice under a true Master. (And I have a lot of homework to do!-) Thank you, Luke!
-
I'll bring the beans and my knee mill.