DavidL
-
Posts
1,516 -
Joined
-
Last visited
Content Type
Profiles
Forums
Events
Blogs
Gallery
Store
Everything posted by DavidL
-
ok..? thanks for being open minded I guess.
-
If the end of the clasp is 10mm and you have a 6mm bolo cord you may be able to get away with squeezing the 12mm combined cord into the clasp. If its too tight sand the edges and add some hot glue. You could use the leather part to hold the card ID, instead of the clasp, but I don't think there should be any issues with weight. If you are looking to make wallets or card holders visit Johnny at atelier lodge, he has a few classes. Btw I used to live in Ang Mo kio many years ago. Its nice to see another singaporean on this site.
-
Can One Of You Guess The Stich Length Of These Images?
DavidL replied to leetpuma's topic in How Do I Do That?
higher spi will be more delicate and can actually rip in some cases. Some people say to stitch the same mm as the thickness, say 4mm thick stitch 4mm wide, I don't think thats actually necessary and don't see a reason why 7 SPI can't be stitched on thick or thin leather. 7 spi or 9spi is okay structurally, but 10 and up can rip if the holes are too large or they are misplaced by a bit. -
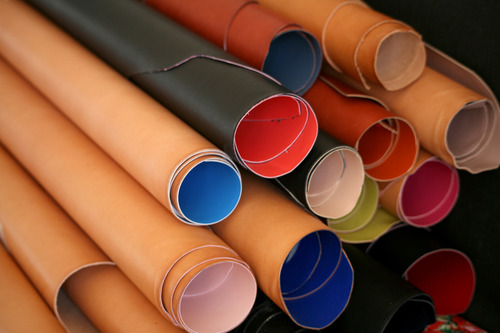
I understand that to make 2000 square foot of this type of leather a week, that expensive machinery is used and is unattainable for the small amount I'm doing. Im almost positive that theres a way to produce similar effect at a slower rate with screen printing or heat presses on smaller pieces, but just don't know it yet. If heat, pressure and plastisol type paints are the things necessary. Then a t shirt heat press set to low to compact the fibers, plus the plastisol/ angelus acrylic ink spread from a screen print + the heat press one more time to create that new finish. It would give a reasonable finish if the fibers from the piece was already finished properly. Making the flesh side smooth is my concern as Horweens are the only leather that I found to have consistent flesh - they put some paste and finish it, which is the bit I'm trying to figure out how to do.
-
On smaller pieces like 15 inch by 15 inch using a screen printing screen, airbrush w/ fan tip or a spray gun could get an even coverage. Only thing that is an issue is with some veg tan and even high end leathers the flesh has some very small flaws that aren't even. With the picture above the flesh is suede looking almost like it was sanded and went through a heat roller. It could maybe be done with a heat press on 15 by 15 inch piece and then rolled with a tube and compressed again by the heat press.
-
Can One Of You Guess The Stich Length Of These Images?
DavidL replied to leetpuma's topic in How Do I Do That?
I don't think the thickness is a big issue. Some people who stitch saddles go as thin as 14 SPI on thick leathers. 6-7 or 7-8 could still work. 5-6 you could still do but any lower is a bit thin, unless its meant to drape. Id like to see what you come up with. Good luck. -
Can One Of You Guess The Stich Length Of These Images?
DavidL replied to leetpuma's topic in How Do I Do That?
7-8 spi. I use 7 as the standard. 9 is fine stitching for me. It depends what you prefer personally, some like to go smaller than 9 others like 5 or 6 as standard. -
How would I get the flesh side to: 1. Level out the fleshy bits on the back for a velvet suede feel? Sanding belt/ sanding disk? How would they do it in factory? Is this just a regular split piece? 2. Airbrushing/ screen print the backside with acrylic to get the back to that consistent colour? 3. Was this a process that only dyed the flesh through some way of tanning? It looks like it is dyed all the way through the flesh looking from the side edge of the leather.

-
Could this not be done with a sponge (different textured - easily found at any craft store) loaded with blue acrylics and on the second pass lighter blue was added to the very tip of the sponge. It could be the marbling technique though. What makes me suspect it wasn't was because it was doubled up specifically around the circle so it had to be done with a sponge or something similar.

-
http://leatherworker.net/forum/index.php?showtopic=57985 first one is harder to make - skiving, stitching inside out, keeping the right shape is also challenging. Much harder to do than a square gusset. But if your able to do a U gusset there are options like piping and stitching on either end of the seam that aren't available with a square gusset.
-
The japanese awls are made with lesser quality steel or at least the one I got from goods japan. I don't know what type of steel , but not very good at polishing up.It was incredibly sharp to begin with though. The cheap japanese utility knife was made of the same steel as the awl (felt the same and looked the same), and cut nearly as sharp as my custom clicker knife, only downside to the utility knife was it didn't hold its edge because the steel wasn't nearly as hard. Knipknives is where I got the knife and want to give a plug for a nicely crafted knife. I would pick up an awl from him if he offered one in a second.
-
I go through a lot of ideas at once until I whittle it down to something that could work. Im getting a headache just thinking about it now. Its a wallet but I'm only printing on the grain side. Not to confuse things but I also want to print a solid colour on the flesh side and have the fibers perfectly smooth like the pic below, but it may be a complete stretch. 1. screen printing with angelus paint and screen printing medium 50/50 (no machine cut acrylic other than the guides). On a regular screen printing press. I don't see why it wouldn't work like it would on a cotton tee the same way as veg tan, but idk. 2. sublimination - is an option but I know little about it, I already have a pretty decent printer. Don't really know what type of printer will make a good print and what the clear plastic is. Im leaning towards 1. because it has less steps just screen print and air dry?

-
Folding Bag Gussets In Vs Sewing On The Outside.
DavidL replied to mrtreat32's topic in How Do I Do That?
turned edges in general to the end user are more finished, much like the edges of the jeans are turned in, most high end bags have a turned in edge, if not all. Edges on the outside look nice if they have edge paint + heat or burnished, raw looks more natural/vintage. More of the extra touch than a main selling point, but can make the product look nicer with edge paint (outside) or inside. Trim can also be added like a bias tape inside or outside and is fun to sew imo. In general gusset on the inside works well on most women bags and some mens bag, gusset edge on the outside is more manly and takes the attention away from the other parts. More of a design choice I would think. Most people stitch gusset on the outside since its a lot easier and takes less calculations and planning, stitching the bag turned in can be annoying. Some things to consider with the: Gusset on the outside is that it can be burnished or coloured by edge paint, and match the interior. You can add leather bias tape. More manly/ aggressive rather than feminine. If your really good you can make it look distressed. Gusset on inside is more polished in most cases, piping can be used for this too, which is a good look. You can also add bias tape on the inside (leather or not). With piping is harder and even just regularly is pretty hard since you have to flip it inside out. Also add skiving which is another reason some people go for outside gusset because of lack of machinery and lack of knowledge on how thin to skive, how wide to skive, taper, non taper, how to prevent it from bulging out and touching the lining interior (still don't understand this fully) and when hand sewing inside curves sometimes the leather reacts differently and is a harder skill set (hard to explain, but first hand its apparent) and marking on curves are different since the outside piece should have a slightly longer curve. In other words Inside gusset is another beast on its own. May be helpful, maybe not, but is my opinion on gusset in vs out. -
I was looking for screen printing supplies and I saw a t shirt heat press that would work on leathers with waxes and oils or adding them onto vegtan. Could we worth a chance but may not work. Around 230 on amazon.com.
-
nvm.. I found a product that is made specifically to turn acrylics into screen printing ink.
-
thanks for your help. Il check out Ryonet on youtube for a better idea. The way I want to create the acrylic template is now - get the laser cut stencil cut out the outline of the design, create a screen printed designed on a screen, cut and align it to the acrylic outline. The hinge you are saying would create alignment issues, can you explain how it would create alignment issue if it is made like a screen printing press machine. I may create a 3 side raised border on the alignment piece to drop the acrylic template/screen print onto the pieces to align.
-
So really I have 4 options: Any opinions would be greatly appreciated. 1. Screen print with the inks and use the other machinery to cure it. It could be cured without the forced air or the extra heating, but I'm unfamiliar with the different inks and procedures. 2. Screen print w/ angelus paint in an airbrush and do multiple layers preferably has the smaller number mesh 120 or lower if the wires are the small and the emulsion can stick. 3. Hard stencil made of CNC cut acrylic and assembled like a custom "airbrush screen printing station" May need some foam padding to push the leather flush onto the stencil. Don't know how well stencils work on leather to prevent bleed. 4. Get some one w/ proper machinery and get charged per item. Wish I had the money to test all these out but don't have such a large budget to be testing something that may not work and be left with machinery and an expensive airbrush and compressor.
-
I'm looking to get a starter kit press thats one screen and one wood base, the different colours will be all on one screen(1 screen per design w/ different layers), being that the wallets are so small. Could I set the screen to sit flush onto the leather? I think the air brush overspray would cover up where the fine mesh is or I could cut that bit off carefully with a knife? Maybe at this point a laser cut stencil might as well be used and tightened to the press somehow or just two large laser cut stencils and one blank piece and a hinge ( stencil on top, leather alignment piece in the middle and a solid base on the bottom, spray and unhinge then repeat. I don't know how well these stencils will prevent bleeding past the stencil though. I seen videos of people using hard stencils on skin (similar to leather) and there wasn't any overspray, any one with experience with airbrushing speak up if you had experience with this. Designs wouldn't be complex 3 colours max. Something like camoflauge, native american type designs, and solid patterns. My idea is to get the reverse of the pattern made with holes for screws and for magnets. Magnets will be placed around the screen to pull the screen downwards onto the leather. can you explain what farm it out means? I have a decent office printer can that be used to print black ink on transparent film? or does the process to make the screen use special inks? Is a pad printer used to print direct on the leather or used to print the transparent film?
-
If you do choose to go into expensive leather, saffiano leather($8-9) and premium calf skin or box calf can be had for close to 10 and upwards of 15 depending on the tannery. There are retailers with stock within USA. A bag would look interesting with half and half, like a hybrid of vintage and high end. Either on the trims you could use high end calf skin or on select parts like loops, interior, handles, strap or bias tape style trim on the inside to bind invisible seam grain side stitched to grain side. Sanding, distressing(pulling and stretching) some mid level premium calf skin can give it a vintage look. Horween leather on that style of bag would look great too. the inside would hold up with 1/8th inch with extreme pressure like laptop bags and whatnot it could be an issue. Its not as important when its done this way but if its done like an invisible seam then more pressure will be on the seams and if its any smaller than 1/8th it could have some problems. Also if its a bit longer like .7mm or larger on the inside (invisible seam both pieces stitched together and the excess glued) you can cover it up with trim. The thicker the leather the more pull( exposing the invisible stitch) it will have with the invisible stitch on tighter curves, not usually seen in bags that are this size. If you do try out piping on the side of the bag send me a message, I'm still trying to figure out how to do it properly. As a side note going to the dollar store and finding things like toiletry bags, and pencil cases (with piping, zippers,invisible seams and snaps) is a good way to learn new ways of assembly for not a lot of money and is faster because the items are so small, requiring less stitching. I draw my patterns from disassembling the cases, taping the entire piece, cutting the excess off (the tape) and transferring the pattern to paper and re assembling from the cut out patterns. Each piece I learn a little more and get a feel for what areas need to be thinned, which areas require extra attention, ect. Good practice for all around, sewing different seams, pattern cutting different shapes, understanding the leathers better and assembly (glueing, cutting, placement).
-
Preventing Stretch When Cutting Out Chrome Leather?
DavidL replied to DavidL's topic in How Do I Do That?
makes sense. U cut the turns with heavy duty scissors? -
Would you think it would be possible to put a clamp or just hold down down the frame and airbrush with angelus paint. I don't see why it wouldn't work since the screen is more stable than a stencil and prevent overspray. Id like to try to avoid forced air and any other stuff afterwards. What would be the correct way to do precision screens ? should I just take it to a screen printer?
-
your right Joe. I have trouble with keeping both edges flush when its doubled up. Either one side matches, I trim the excess and my clicker blade doesnt stay straight on the backside and its hard to sand by hand on something so long. Or I try to but both pieces to size and have so sand an entire edge flush. I need an automated sanded I suppose and find out which way works best or invest in a head knife for that job.
-
black river laser
-
That looks killer! I have two questions. 1. The edges. Are the pieces of the strap cut out and another larger piece is glued and you trim the excess or do you cut both pieces the same size glue and then sand? 2. How much extra leather did you leave inside the bag for the gusset turned in? P.S - the people from the purse blogs , hermes blogs or fashion blogs and magazine would be all over a bag like this made in "swift" leather, Box calf or any other high end leather, provided it was sold from an online webpage rather than etsy. Would need some good marketing and online coverage though to get it off the ground. The price per square foot would be $13-18 and a clutch or a small bag could go easily in the 400 range. Crocodile leather clutch or whatever those small bags are called would fetch close to 1k or even more. Would be worth a shot to launch a site with 2-3 different designs per style of bag, some you already have created. Square space is a good place for template ready website building if your interested.
-
Selling Items - Duties To Usa Or International From Canada?
DavidL replied to DavidL's topic in Marketing and Advertising
Good advice. Pointing more towards USPS/ Canada post now. I wonder if UPS is more geared towards sellers from say Singapore, Malaysia, Vietnam, countries where their post office is slow or can't send certain stuff out. Bigger companies usually use UPS as their carrier I find for letters or sending documents.