-
Posts
173 -
Joined
-
Last visited
Content Type
Profiles
Forums
Events
Blogs
Gallery
Store
Everything posted by ikewineb
-
How Do I Print A Logo Like Hermes And Other High End Leather Products
ikewineb replied to span65's topic in How Do I Do That?
I got my stamp from lwleathers.com. It does a good job. They are sponsors here on the site. They were nice to work with and very helpful. It does come from China though. I wasn't aware of that at the time, but still, pleased with my mark. -
Why not just use buckles? I would think that is the most widely used hardware. It allows for adjustments, and It's farily simple. I get the benefit of the slider by providing infinite adjustments, but i would think it would wear the strap quciker. I know If I were wearing it I would constantly be pulling on the straps.
-
You could always cut a small strip of leather and place behind the seam. Glue and sew. The stitch you choose to use, might depend on where you put the seam, but I feel it should cross the seam so the leather doesn't pucker. Do a search on here for blanket stitch. It might be a good choice.
-
I was thinking of the Kydex merely for the stability of it. Personally, I am not a big paddle fan. They never feel very stable to me. I thought the introduction of the kydex would firm it up quite a bit. On the paddle, I wasn't thinking of the entire paddle. In my head, I was thinking a cross. With the horizontal part at the "hinge". The rest of the paddle would just be leather so it would form. I had another idea too. What if you used a belt clip to connect the two pieces together. On side of the clip attached to the back of the holster and the other inside the paddle. I could weld a small strip on the paddle side of the clip to make it easier to take off. I would have to open the clip up a bit though, I'm sure. I don't know if that makes sense like it does in my head. Anyone have any thoughts? Camano Ridge, I'd appreciate the pictures and any and all advice. Thanks!
-
I need a little advice. I have an order from a guy that wants a paddle holster. My plan is to reenforce the back side of the holster with a piece of kydex and cover with leather. Then reenforce the paddle with kydex and cover both sides in leather. So, this leads me to my question...what is the best way to attach the holster to the paddle? My first thought was chicago screws. My concern is that both ends of the screws would be covered by leather. If it ever worked loose, you would never get it back together without cutting stitches. I also have concerns about the inside piece spinning on the kydex. My next thought, rivets. I doubt they would be strong enough, long term. If anyone has any ideas/input, it would be greatly appreciated.
-
I think the thickness of the leather depends on the style of wallet you are making and if you are going to tool it. I can't seem to get good deep tooling out of 4 oz. For my biker style wallets, I use 8oz for the outside and make my interiors from 2oz. It is thick and hard when new. After you carry it for a week or two, it softens up nicely and really has a rugged look to it. My personal wallet, I made square corners. The points will eat your pants up. Now, I will either cut a bevel on the corners or round them. I also make a thin wallet. I use 4oz for the outside there and normally do not do any tooling, though I have. Again, I use 2oz for the interior. I like to cut a U shape out of the center of the wallet, so where it folds, it is only the outside piece of leather. It cuts down on the bluk and makes it easer to put bills in and take them out.
-
Welcome to the forum! Those look great! How long have you been working with leather? I'm not a fan of plastic parts on leather, but that's a prefrence. On the satchel, I might suggest another row of stitches. It they will be carrying anything heavy in the satchel, that single row may not hold up as well. When I attach straps, I like to sew a box and then cross through the center.
-
I've been trolling around in the shoe forum. Wow, there is a lot more to making shoes than I might of thought. I was curious, has anyone made lace up motorcycle boots? I'd love to see a picture of some. I've read through a lot of the topics, but haven't seen anything like that. I can't wrap my head around how you make the top of the boot, when the last is only the foot? How would you attach a rubber sole?
-
Thanks for the input guys. I got all of my purses done. After you do several, it does get easier. Here's what I found worked best for me. I rounded the corners, per your suggestion. I used small binder clips to hold it all in place. I did three different stitch lines, opposed from trying to sew all the way around the bag. I sewed straight down the side as far as I could go without it binding on the fold. Then I moved to the bottom of the bag. I sewed backwards in a straight line until i made it to my previous stitch line. I did not double stitch the rest of the bags, but I did backtrack about 8 stitches at the bag opening and in the corners. I lined the bag for my mom and added a pocket for a cell phone and a hook for her keys on a 4 strand braided cord. (Mom's has to be different, or she'd be upset). In lining the bag, I used contact cement to glue the med. weight fabric to each piece and then sewed the bag as normal. Here's my question. In lining the bag with fabric in this manner, what do you do to clean up the interior edges? I think it looks good the way I did it, but I'm sure it can look better. The fabric obviously frays at the edges and you see the inside edge of the leather.
-

How To Keep Things Clean When Dyeing Leather?
ikewineb replied to HC009's topic in How Do I Do That?
That's a great idea Ramrod. I always wind up having to cut the little plastic out anyway. I never thought of just leaving it. I think I'll try that next new bottle I open. -
Thanks for the response. I was hoping there was a trick or something obvious I was missing. This is an oily leather that doesn't glue very well. I can see where tilting the bag up might make it easier to more around the corner. I would think clips would get in the way? Another question...Do you see any need or benefit in double stitching the inside of the bag? On the bag above, I ran two stitch lines on the inside. I put them close. My inside seam is probably a touch over 1/4".
-

How To Keep Things Clean When Dyeing Leather?
ikewineb replied to HC009's topic in How Do I Do That?
I use the same paper I use for packing to cover my bench. I don't wear gloves. I get a little dye on my hands every now and then. I figure it's a good conversation starter about leather work. -
I'm making my first purse / handbag. It is a christmas gift...actually, I'm going to make ten of them. Yeah, I know it's the 16 and I've got nine days left. I got my first one nearly finished last night, and figured out a lot by making some mistakes. The biggest issue I had was sewing around the corners of the gussets. There has to be an easier way, or a trick or something. I tried it a couple of different ways, and I'm not sure any of them are the best option. First, I cut a notch to allow the leather to fold around. Then I just tried to force it into place and sew around. then, I just sewed a straight line across the corner and made it a seperate stitch. Any advice on the best way to accomplish this? As you can see in the pictures, I'm sewing the bags inside out then flipping them to leave the seam on the inside of the bag. This one does not have a liner. On other bags, I'm going to roll the front of the bag, like I did the sides...much better look.
-
From the album: Southbound Leather
-
From the album: Southbound Leather
-
Congrats Seth! That's a really good idea about the thread. I never thought of that. I think I've got the threading down, for now.
- 27 replies
-
- sewing
- sewing machine
-
(and 2 more)
Tagged with:
-

Credit Card Holder
ikewineb replied to PcCowboy's topic in Purses, Wallets, Belts and Miscellaneous Pocket Items
Old post, sorry..I know. I really like your card holder. I think it would be cool to have a belt slot on the back of it. Just a thought. -
From the album: Southbound Leather
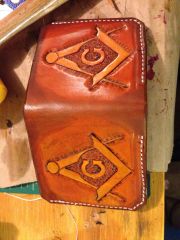
Christmas gift. 8oz leather with 2oz interior. -
From the album: Southbound Leather
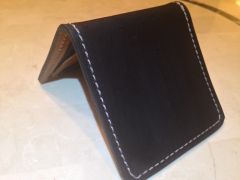
This is a thin wallet. Outside done in 4oz veg. Colored with roon. -
From the album: Southbound Leather
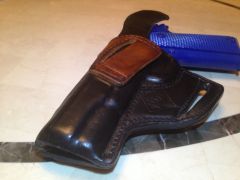
the back of two tone holster -
From the album: Southbound Leather
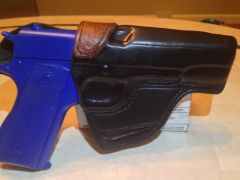
This is an avenger holster for 1911. All 8oz veg tanned. Two tone w/oil dye -
From the album: Southbound Leather
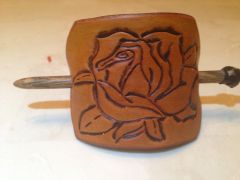
8oz Veg tan. Rose design with oak Hair stick. -

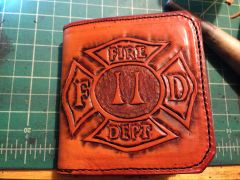
Fire Department Wallet - Captain's bugles
ikewineb posted a gallery image in Gallery- Our Leatherwork
From the album: Southbound Leather
This is a wallet that I'm giving as a christmas gift. 8oz leather. Interior of Wallet is 2oz. -

New Handbag
ikewineb replied to dentat2's topic in Purses, Wallets, Belts and Miscellaneous Pocket Items
That is a really cool bag. -
I really don't know. Anyone that's had a machine before, I'm sure would of caught it right off the bat. I'm guessing it was like that all along. I do know the presser foot lift pedal was sticking. I'm not sure what caused it, but I'm glad it got resolved. Machine is running and sewing great now.
- 27 replies
-
- sewing
- sewing machine
-
(and 2 more)
Tagged with:


![IMG 1422[1]](https://leatherworker.net/forum/uploads/gallery/album_2001/sml_gallery_38133_2001_1658781.jpg)
![IMG 1421[1]](https://leatherworker.net/forum/uploads/gallery/album_2001/sml_gallery_38133_2001_409076.jpg)
