chriscraft
-
Posts
300 -
Joined
-
Last visited
Content Type
Profiles
Forums
Events
Blogs
Gallery
Store
Everything posted by chriscraft
-
 I like the color. Did you use an airbrush for the purple color?
 -
Thank you and thanks to all that have commented. I’m currently working on one of these covers but need to get back at building more stuff. It’s been over a year since I last made something out of leather.
-
I diluted the Dark Brown dye using alcohol, so my airbrushing dye is a 50/50 mix. I just feather in the dark brown color and get heavier towards the edges.
-
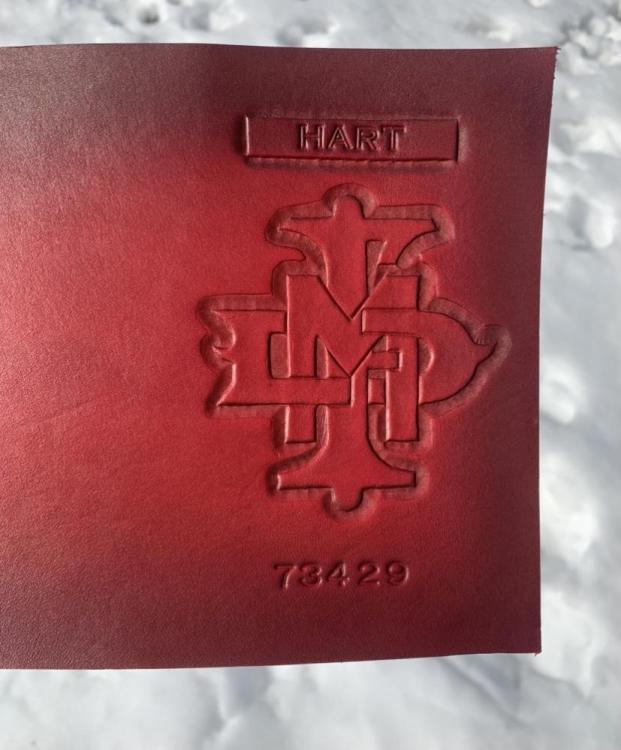
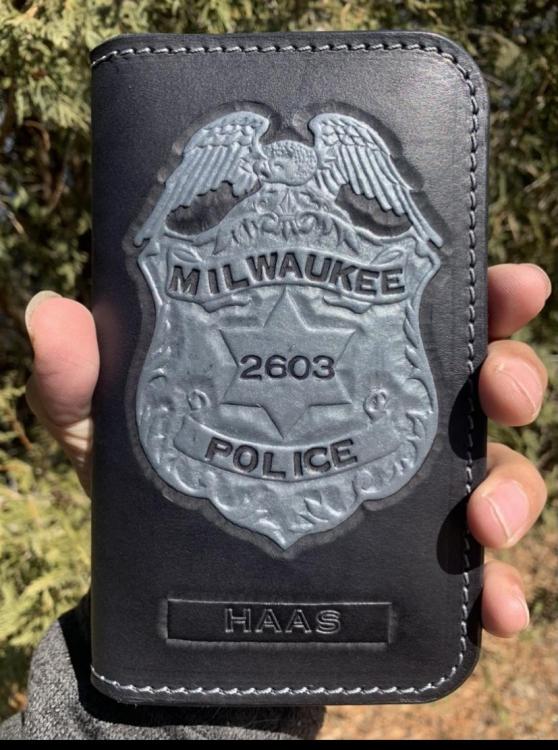
Sorry for the late reply. I’m not on here much. I used Fiebings Pro Dye RED, once dry and buffed I airbrushed Fiebings Pro Oil Dark Brown around the edges.
-
Yes for a field notes pad.. 4”x6 3/4” this is an old thread I started in 2019. Thanks for the memories, it was a fun project to hand tool
-
You know fredk, I hadn’t thought about using anything like that. I did not use anything. Along my swivel cuts where the clay squeezes in, it just gets jammed in there and breaks off when I pull the clay away. Had I used talc or something like that I’m sure it would still squeeze in there.
-
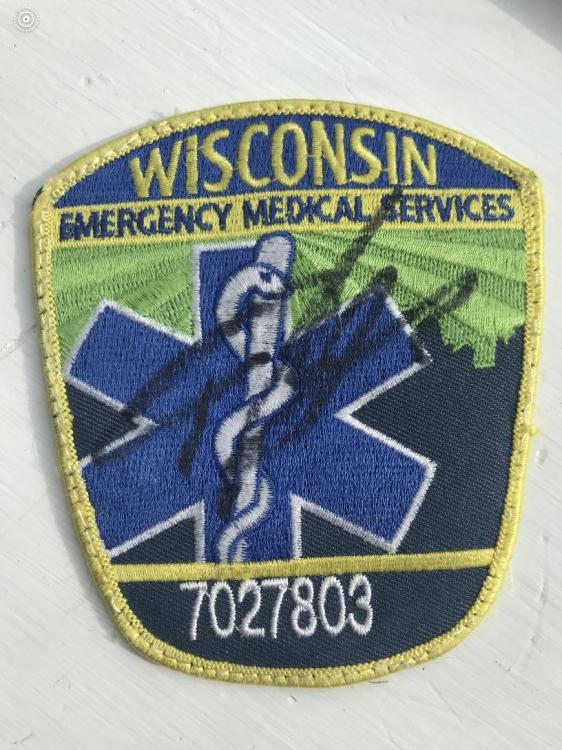
Yes I’m lucky. I wasn’t a Bucks fan till I took a Paramedic Job at the Bradley Center where the Bucks play. Job was transporting fans out of the center that needed medical assistance. I was promoted to tending the talent (All NBA players) before, during and after games. That’s when I met Giannis and found out who he was. He is very humble and just an amazing person to be around. Listening to him having conversations and interacting with his brother or teammates, You would never think he was someone famous. My first few games sitting courtside alongside the player entrance/exit tunnel, I was Star Struck. It’s the same entrance that all the VIP’s use too. Soon after I became accustomed to this. Then they built the new stadium, Fiserv Forum, the house that Giannis built. I worked there alongside the NBA players till February 2021. We were never allowed to take any photos or obtain autographs. Before my last day, Giannis signed my Paramedic patch, I’ve since removed it from my uniform and it’s now something I can stuff inside an old shoebox with other memorable items.
-
You would think but one issue is that you can find a basic black leather memo book cover for $20 at any police supply shop. I can’t complete with that and I really don’t think that I am or even in the same class. I’m offering a custom made to order product that is constructed from the best materials I can find. I want it to last your entire carrier and many more. I don’t sell many of these, mostly word of mouth, and that’s just fine as this is just a hobby. I just wanted to share what I’ve learned. This site has taught me a lot and it’s my way of returning the favor. If my process helps out someone here. That’s great!
-
Bert, no offense taken and I appreciate any criticism. It’s how we learn
-
I guess I didn’t word that correctly. It’s not that it took so much out of me to make it, just took me so long before I actually got started on it. lol I didn’t get into leatherwork because I had a bunch of extra time on my hands and didn’t know what to do with it. I’m slowly starting to dive into this hobby while I’m still working full time and still have kids at home. The idea is to slowly get better at my craft and purchase more tools as I need them so that I can become more efficient at building stuff. When the time comes that I end up with a lot of time on my hands, I can build stuff in a timely manner with the skills I’ve learned.
-
I hear ya, I’m almost 50 years old and do appreciate these kinds of builds. I’m definitely not trying to make stuff that will end up in a landfill. I have a pattern since I was young, I’m either full on board when I make stuff or not onboard at all. My leatherwork has suffered because of this. I don’t make a lot of items anymore. No offense to those that do, I just simply don’t have the energy anymore like when I was in my 20’s. I’ve found that I like to be in a comfort zone and building random items for the first time takes me out of that zone. I need to be fully determined in order to get things done. Something that I never used to think about when I was younger and just came naturally. thanks for the compliments on this build. It does make me feel better about my craft and makes me want to put more of myself into each product.
-
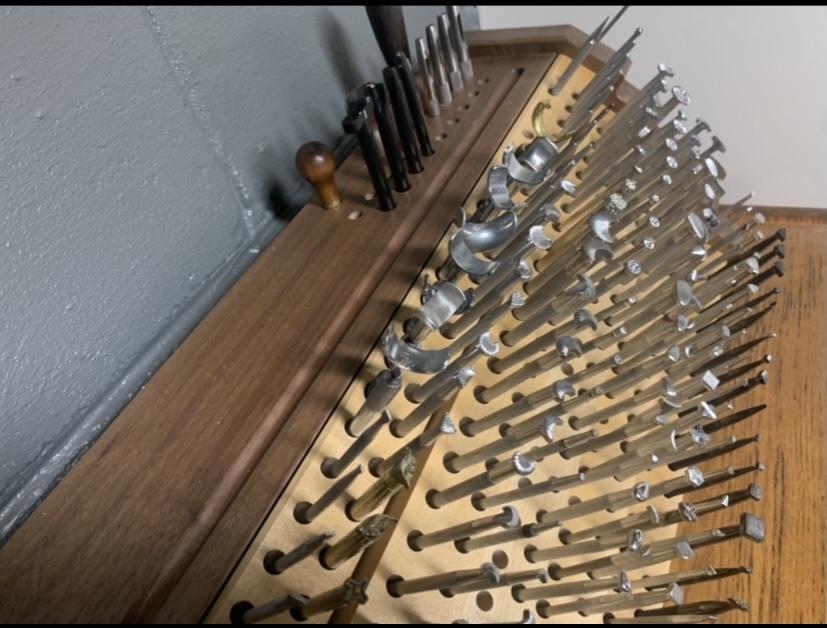
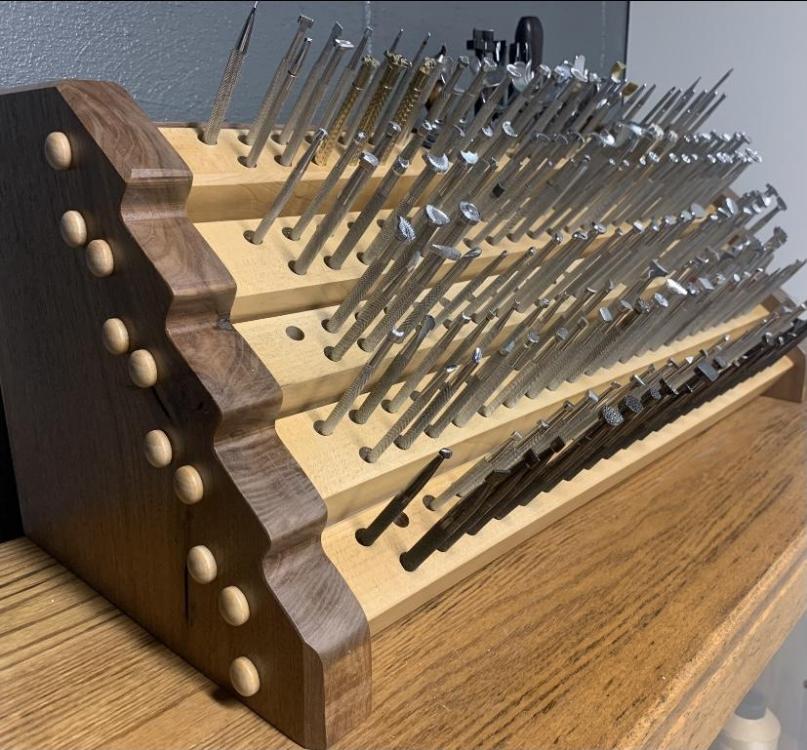
The design belongs to Dave Swallow. He uses all new construction and has different dimensions and a variety of sizes he offers these tooling stamp holders in. He is on Facebook if anyone is interested in purchasing one. I just simply wanted to share that a similar one could be built. I already had a drill press, scroll saw and the basic hand tools around. Want to share that you can source wood materials from local woodworkers as most have plenty of scrap wood laying around. I paid $15 for the solid Walnut, it would have cost a fortune had I gone to a lumberyard. The old used cutting board was $8 at the estate sale. I probably spent more on sandpaper, glue and screws. I was just determined to make myself something for my stamps. My wife was surprised on how nice it came out. Now she thinks I can build anything out of wood but I’m no woodworker. So be careful if you decide to tackle one of these on as you’ll also be expected to remodel a kitchen.
-
Thanks PastorBob. I also like the two different colors of the wood together. Before I built this I was storing most of my saddle stamps in a drawer. This makes it easier to find the stamps I plan to use. It’s been a year since I built this tool rack and only wish I had built it sooner.
-
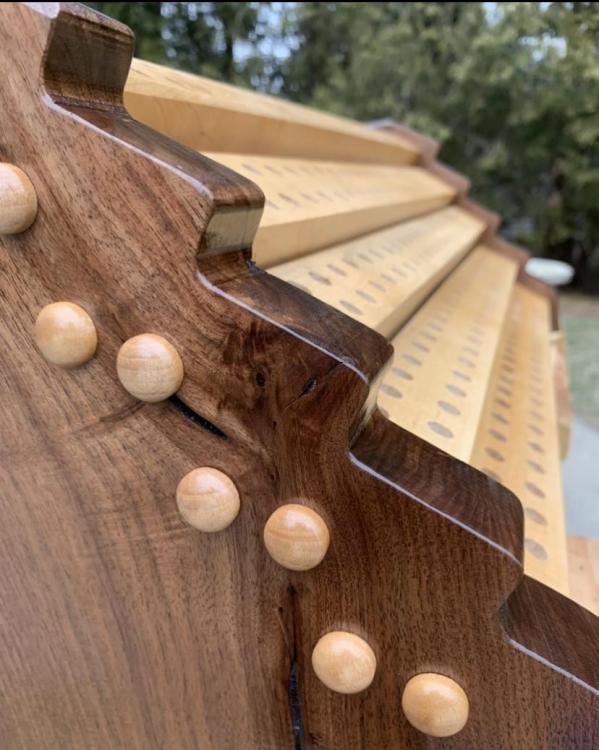
I used Minwax spray urethane satin finish on this project.
-
I used cabinet screws to secure the sides to the maple blocks. I capped the screw holes with wooden caps.


-
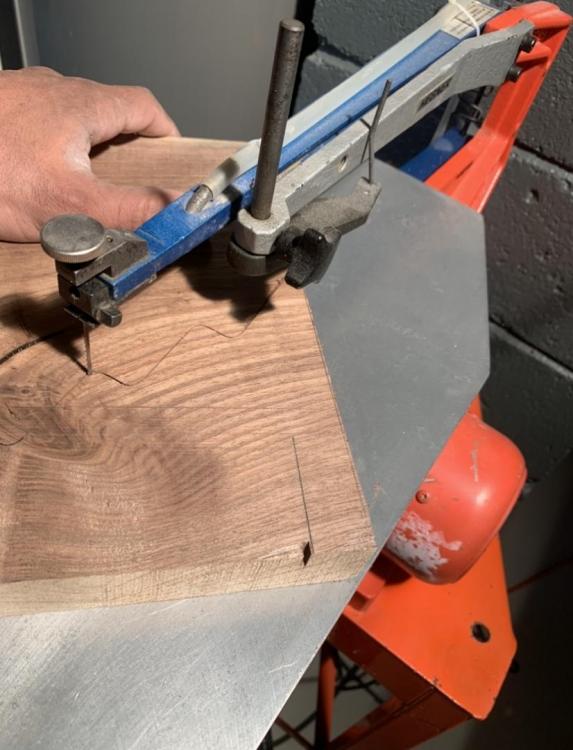
For my sides, I found a local woodworker that had 1 1/4” thick Walnut for sale. This was easily cut on my scroll saw.

-
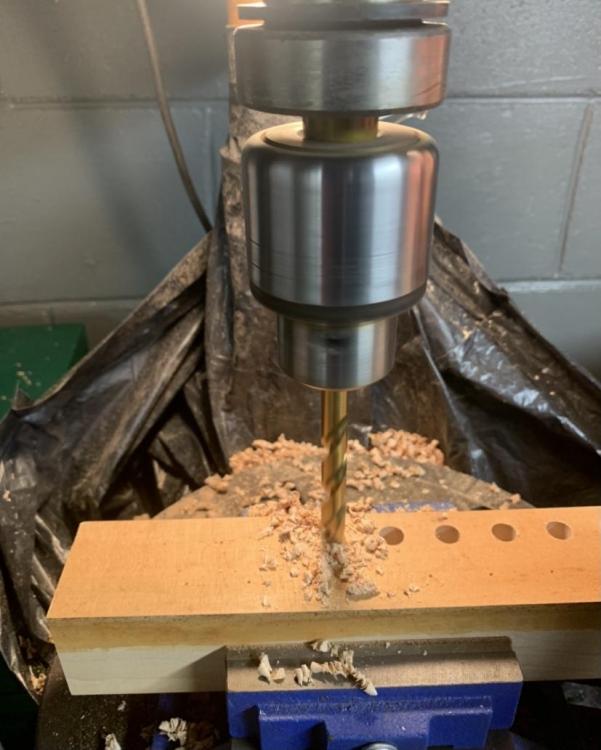
I decided on building it 5 levels high with a top shelf. Having only 1 3/4” thickness to play with I drilled my holes 1 1/2” deep.

-
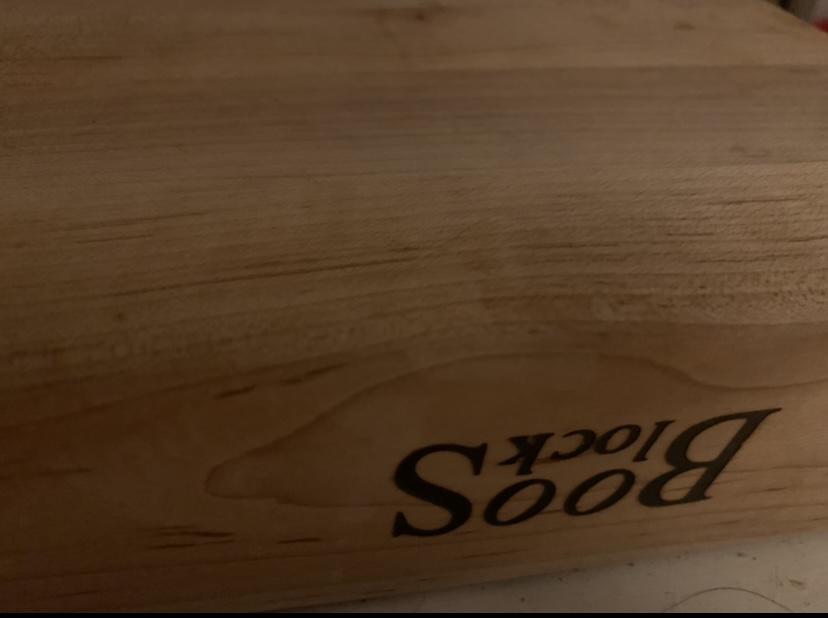
I had found an 1 3/4” thick BooS Block cutting board at an estate sale for a reasonable price. I thought it would make a nice tool holder after I unglued it apart. That was some work using a chisel to break it apart and I just had to sand down the glue residue to get to bare clean maple wood. These solid wooden blocks now measured 1 3/4” by 1 3/4” square by 24” long that I cut down to 22” long. I had seen the beautiful wood work that Dave Swallow produces and wanted to create something close to what he builds. I didn’t have any measurements or plans to build one and just guessed on what would work with the supplies I had in hand. I spaced my tool holes 7/8” apart and made a template so I could mark out my 3/8” holes.

-
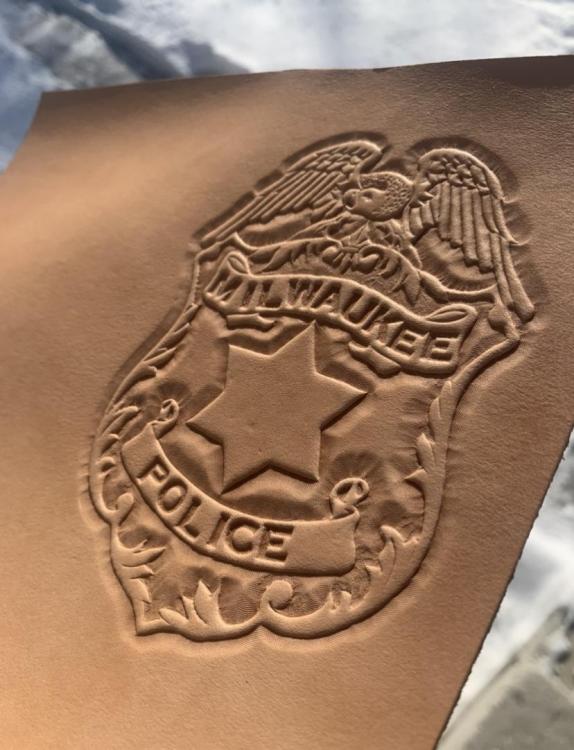
My first 10 leather covers were all hand tooled one by one. I don’t sell many of these to really justify having a stamp but decided to make my own in case someone ordered another leather cover. I’m glad I made these stamps cause I’ve used them on about 40 different covers now. Every once in a while someone inquires about making them one and it doesn’t take me too long to build one.

-
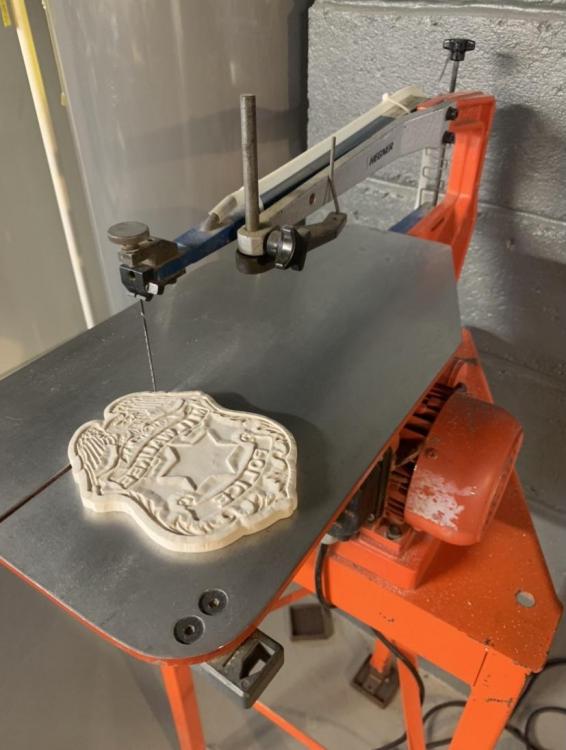
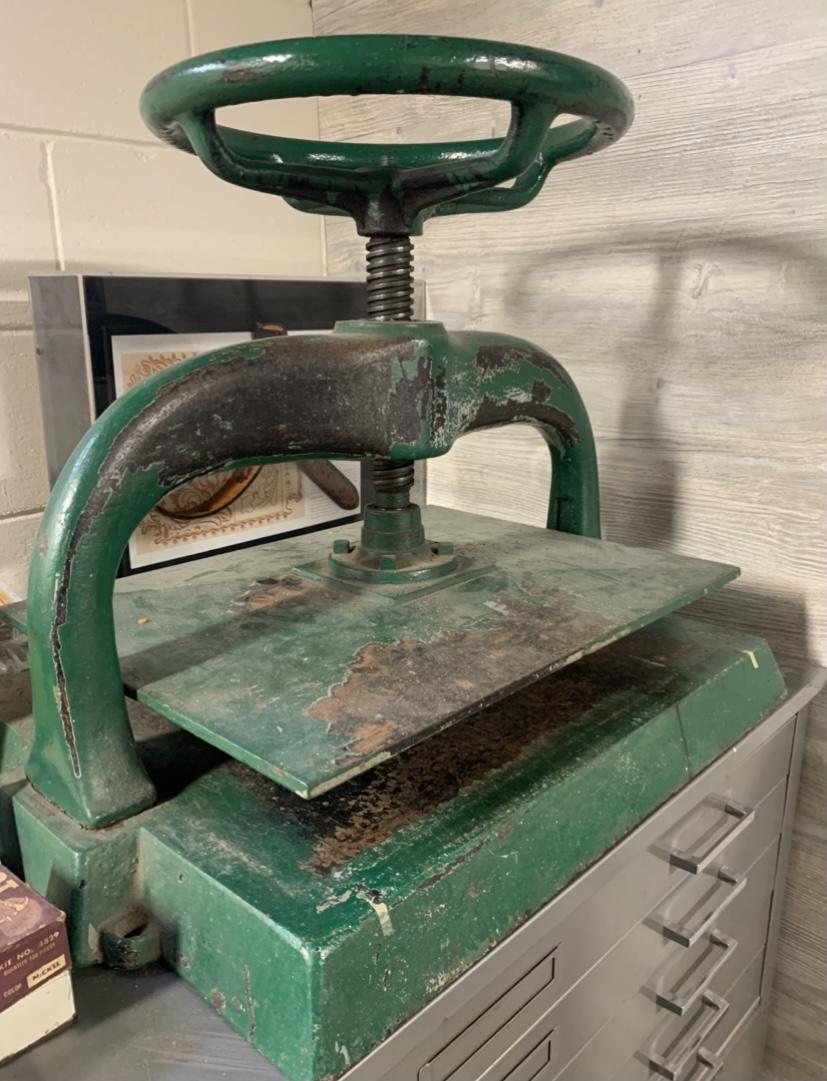
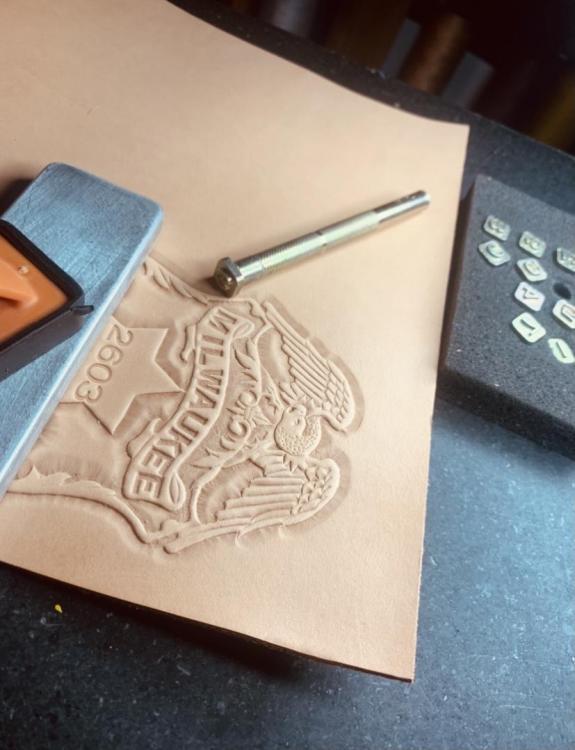
These stamps I made are big, about 3 3/4” by 5 inches and you’ll need a lot of pressure to make the impression. If you are making small stamps (about 1/2” square) then you don’t need that much force to apply the impression. My antique book binding press is heavy, about 70 pounds and large with a working surface of 15”x20”. I have seen some of the hydraulic press setups ppl use to click patters, those would work. As long as you have two (top and bottom) flat surfaces that can be pressed down evenly. the key is to keep your tooled leather pattern that will be copied nice and flat. I glued my pattern onto a piece of 6”x6” 1/4” hardboard. I place my polymer clay that’s attached to the 1/4” aluminum plate on the bottom surface of my press. The tooled leather pattern goes on top the clay and will be sandwiched down by my tooled pattern making my polymer clay mold. Then remove the top tooled leather pattern from the clay. Your clay won’t come off the aluminum plate as it’s somehow suctioned there by the soft playable clay. This process of making the large polymer stamp isn’t too difficult and if you make a mistake by the clay coming out uneven, just start over again.

-
yes FIMO works the same. I bought what was on sale. You can make the stamps thicker, I made some 1/2” and had to Just bake a small sample first to ensure it came out good. Not enough time in the oven and it will be rubbery. Makes the scroll saw cuts melt and bond back together. I found that baking it a bit longer then quenching it in cool water hardens it a bit. Makes the scroll saw cuts cleaner like you are sawing threw hard plastic and won’t melt/bond back while sawing. I forgot to mention that I’m pressing the polymer clay flat onto 1/4” plate aluminum. The clay stays attached to my flat plate even when pressing it on my leather form. Even when lifting it away from the leather form, the clay stays flat and attached to my aluminum plate. Then my plate goes in the oven with the polymer clay attached. Once baked, a thin putty knife easily removes it off the aluminum plate.
-
and that’s how I’ve been building these. I use HO 5oz. and end up with a good looking product that I’m proud of.

-
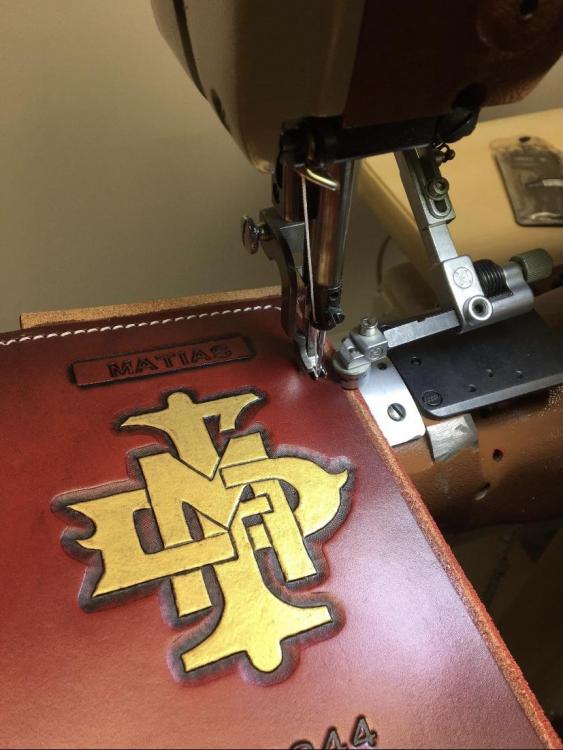
Then it’s just dye, glue, stitch, paint and finish

-
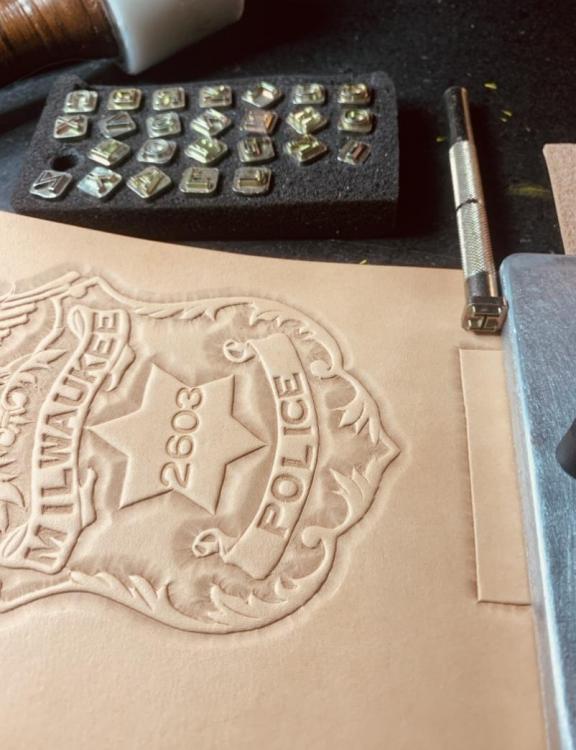
I then stamp in the personal badge numbers and name using a 1/4” aluminum guide line.

-
I’ve been using this homemade stamp for a couple years now. I have to say that it’s the best thing I’ve ran across since I started tooling leather. I read about how to make these polyform stamps on another site and would like to share here. First, I’m a stickler when it comes to tooling leather by hand and try to use the best tools I can afford. At first, I contemplated over having a stamp made for me since the end product wasn’t going to be made (tooled) by me. I’m not a purist when it comes to calling my stuff “hand made” since I use a sewing machine anyway. But by building my own stamp, this made it feel like it’s coming from my personal skills which lead me to continue on this short journey on making my own stamp mold. First,, I hand tooled my original leather mold that will be used to produce my polyformed stamp. Once dried it was used to press on the sculpy polyform clay to transfer my form. I made it 1/4” thick and baked it at 275 degrees in my kitchen oven for 30 minutes. Then removed it from the oven and dipped it in cold water to quickly cool it down. Not sure if my cooling process helps harden it more but I think it helps make it stiffer. I used my scroll saw to remove excess material and used an antique book binding press to stamp this onto 5oz. Leather. The stamp impression results are remarkable, looks like it was all done by hand but in only 5 seconds. Amazing