chriscraft
-
Posts
300 -
Joined
-
Last visited
Content Type
Profiles
Forums
Events
Blogs
Gallery
Store
Everything posted by chriscraft
-
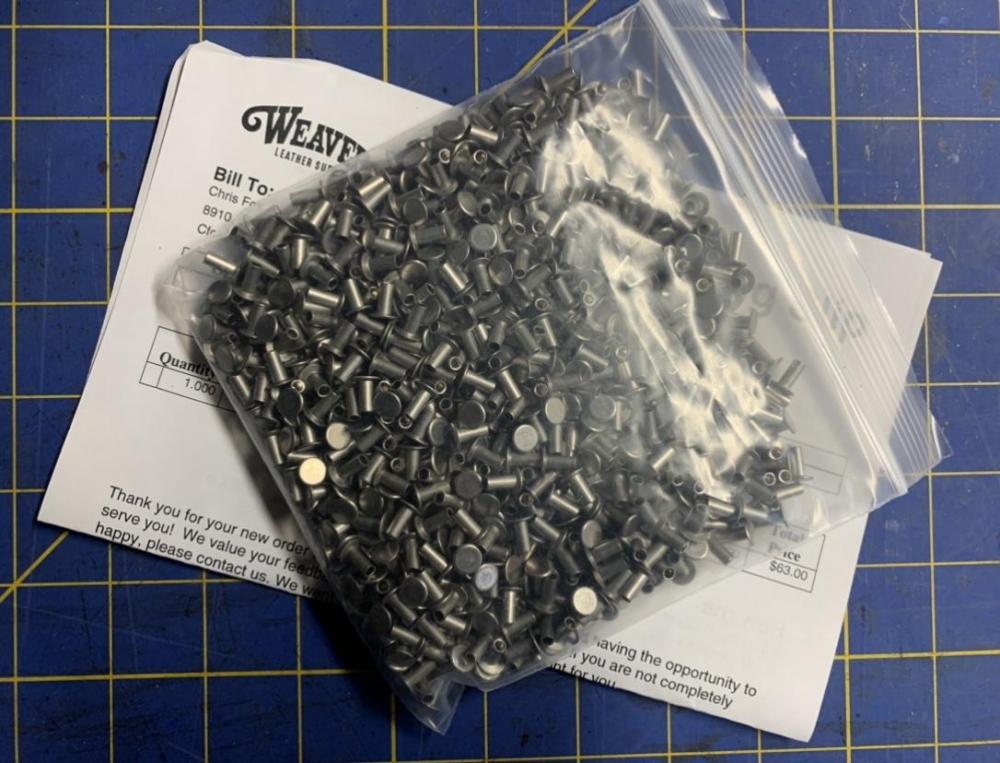
These just arrived in the mail. Let me know if you’ll need some
-
Weaver Leather Supply has SS tubular rivets in stock but in 1,000 count quantities. I’ll be placing an order soon. Let me know if you’re interested in splitting the order with me.
-
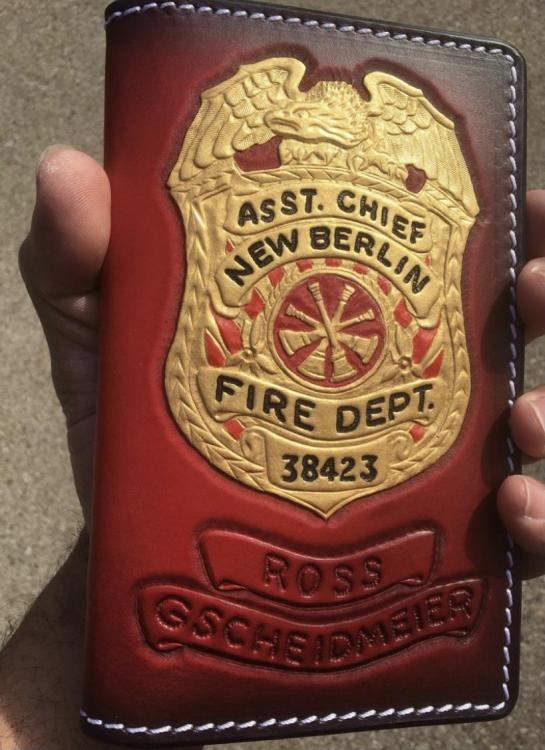
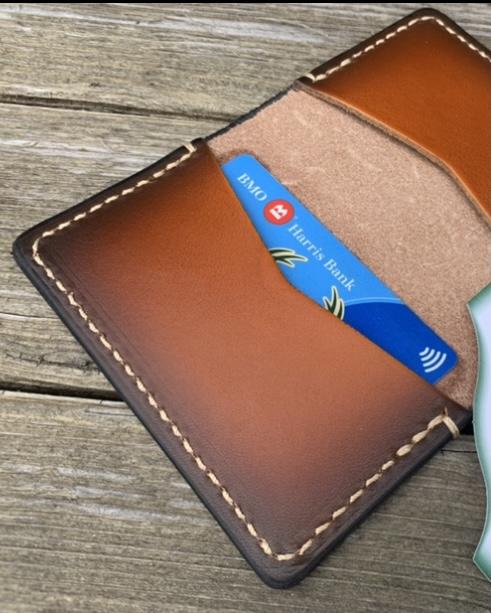
Thanks alpha2. Here is the other side of that CC holder I made. Originally was going to paint the schnauzer in color but after showing this photo update to the customer he decided to leave it as is. Btw, my air compressor is set to 120psi which makes fading in colors better. If you run with a low psi (under 25) you risk getting a splattered effect. I used to be a T-shirt airbrush artist and ran with 80 psi on fabric and metal. Just had to move fast

-
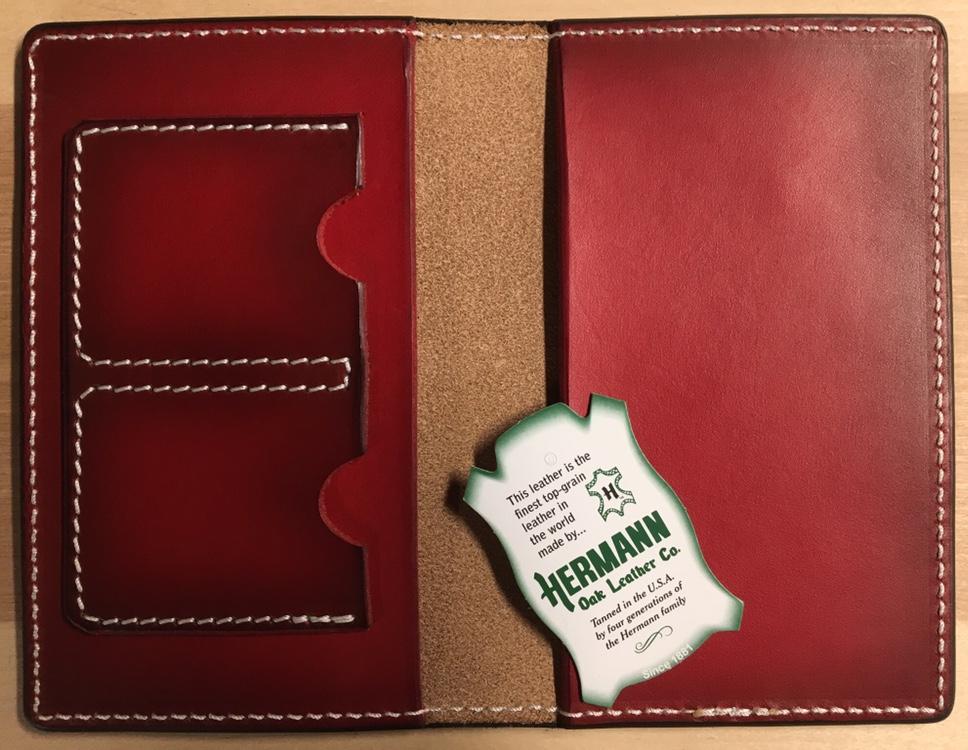
If you are applying your base color with just an airbrush… then a few even light coats are needed to get good penetration. Otherwise you’ll only be dying the top grain only. If you have some veg tan that looks clean and even to the eye when natural but after sponge dying, it turns out uneven like a camo job. Then applying dye with an airbrush to this type of leather like I mentioned (few even coat) will result in a much even color. On this red leather cover, I mopped on the red pro oil dye with a wool pad. When dried, I airbrushed (faded) dark brown pro oil dye. I too angle my airbrush in towards the direction I intend to fade. Along my edges I apply it in a 90 degree. I do this simultaneously keeping the dye flowing, not in steps stopping as it will leave a hard line. Hope that makes sense.
-

Sunburst!!!!! Who is doing it right. I need some advice
chriscraft replied to chriscraft's topic in Leatherwork Conversation
I know exactly what you mean by a yellow color not showing up when diluting honey or even saddle tan. One would think yellow was used to create these colors but it doesn’t separate back to a solid when diluted. I began airbrushing t-shirts in 1989. There just wasn’t much information on how to do it back then and most of the printed info would explain in what order to apply colors or even how much. I used transparent paints on a white background and I would always start with my warm colors first primarily due to only having one airbrush and cleaning it in between spaying colors was a pain.. so I would start with yellow, then swap to orange, red and so on all the way to black as my last color. it was very easy to overshoot (go overboard) when using the cool colors in this order because you just couldn’t see just how much color you were applying till it was a tad bit too late. the transparent colors were actually blending on the surface, my earlier work tended to be a little bit on the darker side of the color spectrum. Too much use of cool colors and too much black blending would be called “muddy”. Once I acquired a few more airbrushes and no longer had to clean between color changes, I began experimenting with how I laid down my colors. What I found was by applying my colors backwards... from darkest to lightest I could now see just how much pigment I was spraying on the surface and could stop before going overboard. It was weird at first looking at my work without the warm colors added but it would come together nicely once I was finished adding the warm colors and it stopped looking muddy from this point on. I just picked up some yellow and purple dye to practice laying down a traditional sunburst. A long winded explanation but I’ll experiment by following my old process of T-shirt painting and spray the yellow dye as my last color. -
I’m pretty sure I’m using the wrong colors as I’m not getting the results I’m after. I need to find a yellow dye to experiment with. I’m airbrushing in my base color, Angelus Honey as my center. Then using a diluted Fiebings Dark Brown that I fade in from the outer edge in towards center but not quite all the way in. Then using Fiebings Black lightly feathered around the outer edges. I am liking the way my brown and black turn out but just not liking that my “Honey” color isn’t looking so honey colored. I am airbrushing the honey color in heavy so that could be my issue. If this wasn’t on leather.. I’d start with a yellow center then fading in the honey color in followed by brown and black outer edges.
-
I know Weaver offers the stainless steel tubular rivets but only in 1000 count packs. I’m only needing a handful ( about 40 to 50 pieces for a project) in 5/16” and 7/16” lengths. Also in need of about 20 Chicago Screws in stainless steel if anyone has any they would like to sell. chris
-
Thanks,,,,
-
finally had time to start on it
-
Ray Pohja Master Leather Carver Floral Belt Found
chriscraft replied to chriscraft's topic in Floral and Sheridan Carving
Thanks... it’s a nice presentation case that I picked up used and I really didn’t pay much for it. It does make the belt look like it’s part of an exhibit. The belt will remain enclosed in this case as I’ll never be able to use it. It measures out to be a size 28” -29” belt and way too small for me. Must have been made for a very slim person. -
Ray Pohja Master Leather Carver Floral Belt Found
chriscraft replied to chriscraft's topic in Floral and Sheridan Carving
I picked up another enclosed display case for the belt. You weren’t able to get a good view of the belt while it was in the shadow box case. This new clear plexiglass case shows it off better and you get a view of the entire belt. I added a Ray Pohja doodle page copy for the background.


-
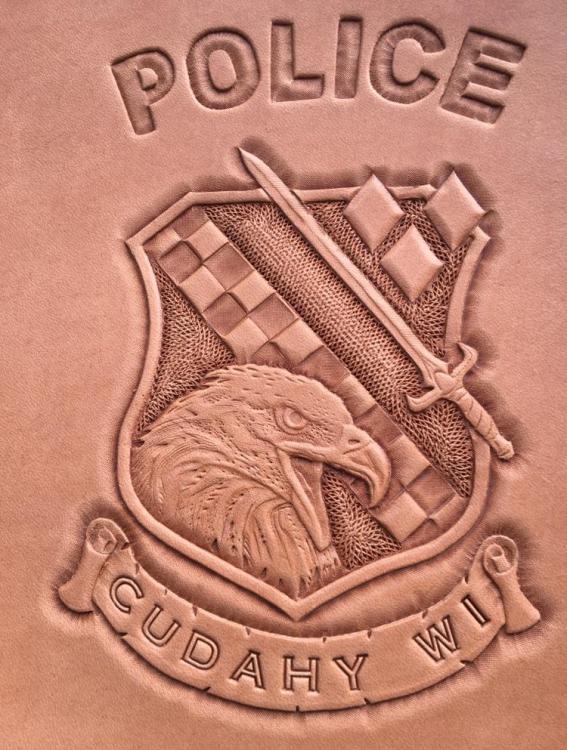
I made these for a friend. Each year his department hands out a yearly pocket calendar that has the different shifts scheduled. It’s about the size of the field notes covers I’ve been making. The calendar is paperback and usually ends up getting torn up after months of use. These leather covers should protect it and at the end of the year, he can just refill it with the new calendar.

-
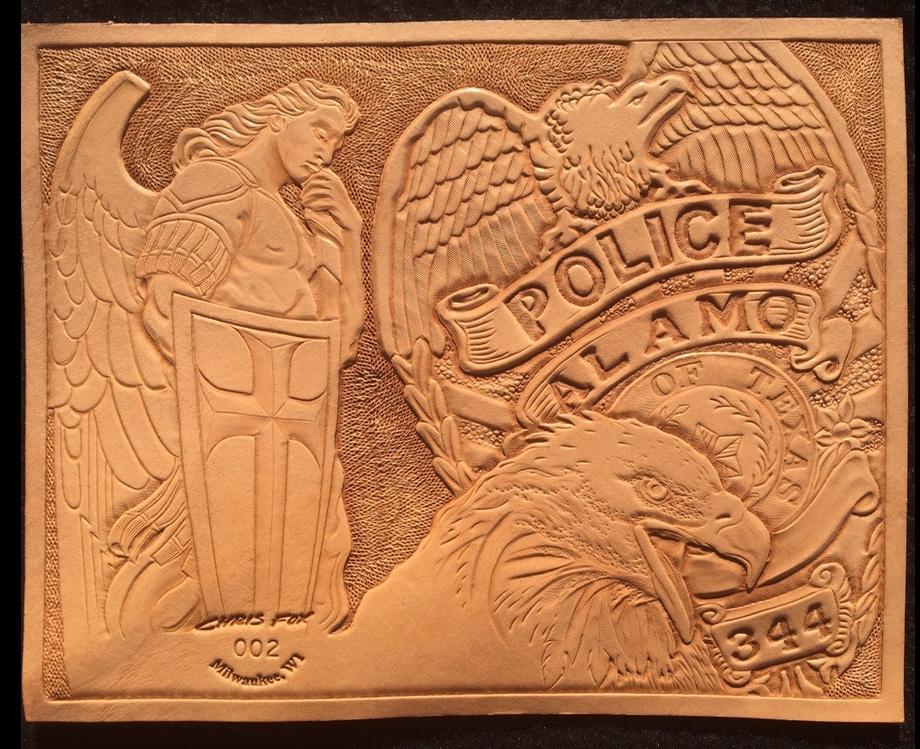
Tools needed to carve this image in leather?
chriscraft replied to Bransen111's topic in Figure Carving
Forgot to mention...... if I was giving this image to recreate on a field notes cover. I’d make work easier for myself by redesigning it so that it works with the few tools I have. I’d enlarge the badge so I can add a lot of detail since it’s the main focus. Somehow rearranging all the lettering so it fits inside the small space using 1/4” lettering. I understand no one wants their logo to be changed or messed with but you are only building a few small custom leather covers. You mentioned adding an eagle in there too. If redrawn and layed out correctly, it will look better than the original image. -
Tools needed to carve this image in leather?
chriscraft replied to Bransen111's topic in Figure Carving
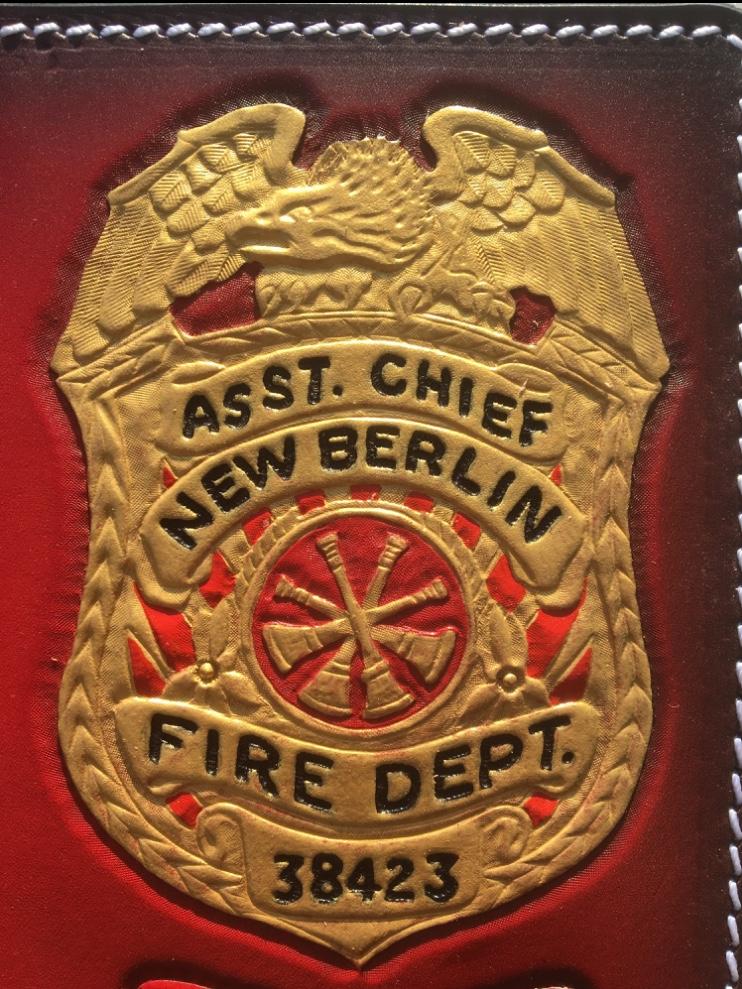
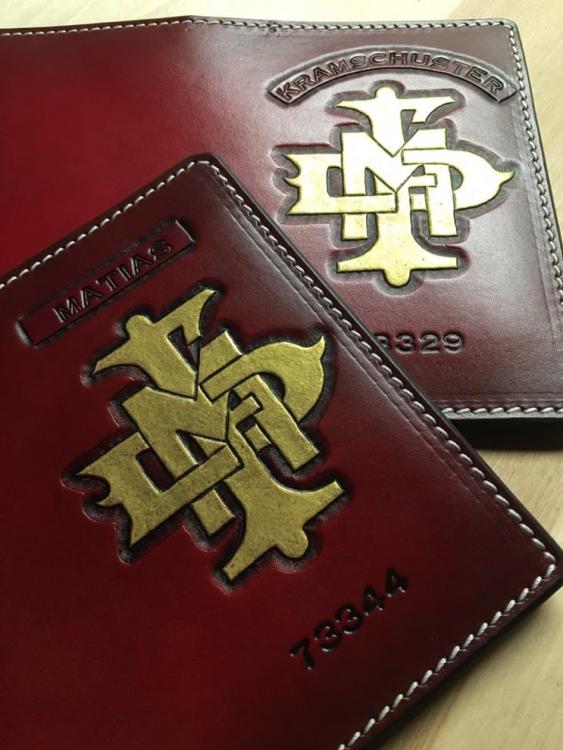
Brandsen, I replied to your pm about what tools I’m using and forgot to mention a swivel knife with hollow ground blade and hair blade. Your choice of going with Barry King for stamps and tools is good and even better once you figure out how to use them. I am making police and firefighter field note covers. I’m using about 12 stamps for most of my tooling along with modeling spoons. I use a 1/4” alphabet stamp set for most lettering and also hand stamp smaller lettering using a home made pointed SS rod with a 1mm flat point. This image you’ve provided will be challenging to hand tool it on a 4” wide cover. Will be even difficult for a beginner but not impossible. At this size, things are going to get pretty small so do it in steps to not get frustrated. my leather covers are 7.5” tall and fit a 4”x6 3/4” memo book/field note book. The standard thickness for leather covers is 4-5oz. I’ve used heavier 8oz. but makes for a thicker bulkier cover. Now I only use 5oz. for my covers and this includes the inside pockets too. It’s a preference on the officer as some want it built thinner. Have a paper copy printed with an actual size of your image on it. Study this and you’ll get an idea as to just how small of an area you have to work with. I’m assuming most or all of the lettering will need to be hand stamped using some small tool. Like I mentioned, I had to make a small 1mm tool and used it on this Fire badge lettering. Not impossible, just took a little figuring out. Chris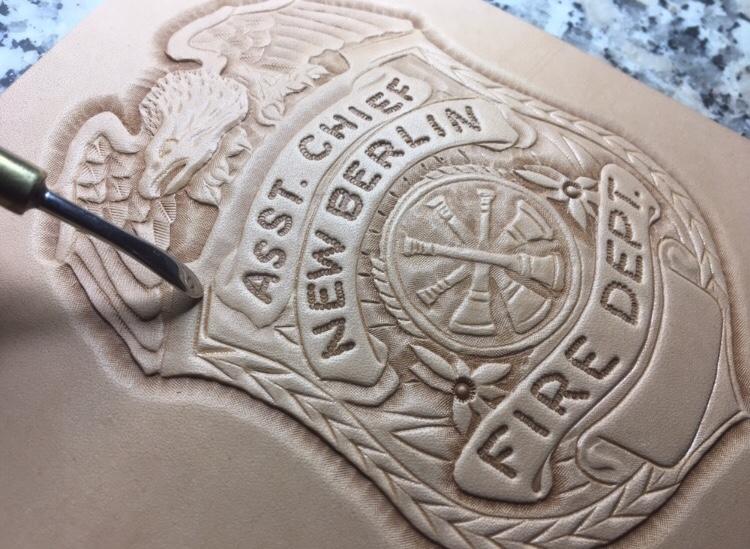
-
Ray Pohja Master Leather Carver Floral Belt Found
chriscraft replied to chriscraft's topic in Floral and Sheridan Carving
Chuck, the belt is lined. The front side of the belt is filegree cut and inlayed with a dark colored lizard skin I believe. -
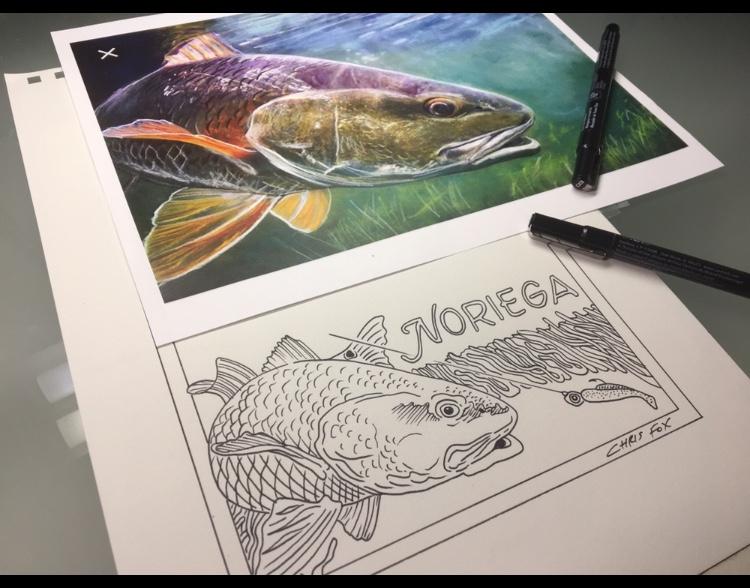
Finished my line drawing. Can’t wait to start tooling this project. I’m going to paint this one.
-
For your use in building a firefighter radio strap, English Bridal takes alphabet stamps well. I found it hard to take a good impression when using a swivel knife and tooling saddle stamps. Much of the inner lighter color shows when doing this. At least it did for me and I wasn’t happy with my results. Some say it’s possible to tool bridal. i don’t buy English Bridal often and have only ordered a few straps from Zack White. I mostly tool and work with H.O tooling leather
-
I was commissioned to build this cover for an Assistant Fire Chief. Hopefully he will like it as much as I did making it.


-
Thanks for all the compliments. I’m really enjoying building these day book covers. There is something special about building a basic stationary item and using a little bit of my artistic ability to make these standard items stand out. Each piece will be unique and serve many years alongside the individual that owns it. I think I’ve found my new niche market.


-
I was able to finish the cover today. This was a fun build.
-
Hand Tooling question concerning time frame
chriscraft replied to chriscraft's topic in Leatherwork Conversation
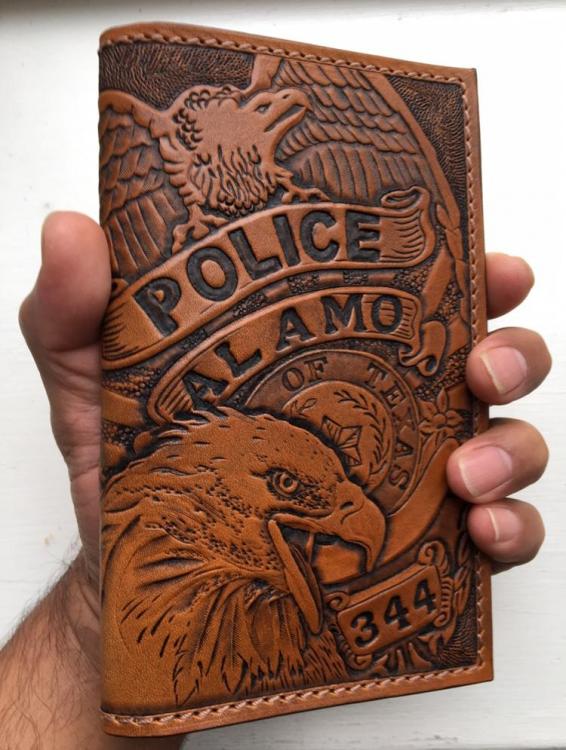
chrisash, I am thinking in that direction just starting slow keeping it local first. That way I can meet up with clients face to face. Here is a photo of one I made as a gift to a Police Chief. I gave this to him. This is my second time tooling this same logo. My first time took me 3 hours. This second try, I was able to tool it in under 2 hours. I should have matted to outer beveling to get rid of the halo like JLS suggests or inverted my beveling. I personally don’t mind that halo effect but realize some may view it as a beginners mistake. So I’ll work on eliminating it to produce cleaner lines. It’s all a learning process.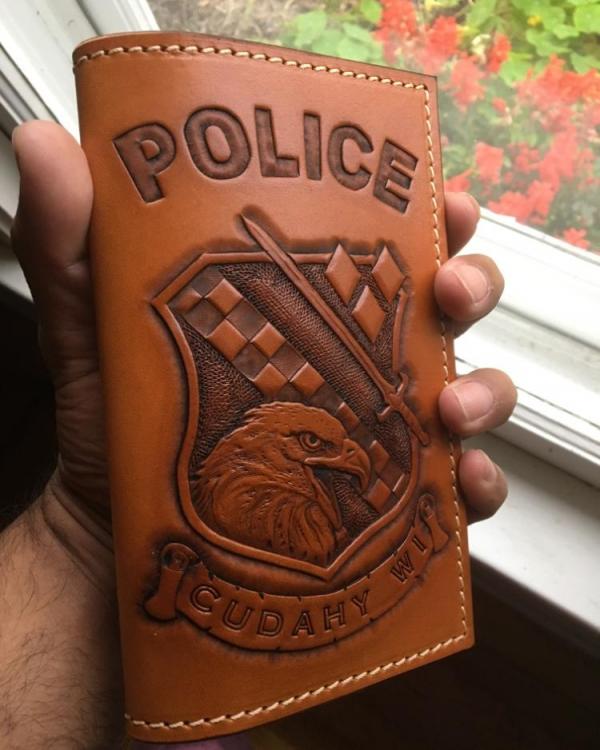
-
Hand Tooling question concerning time frame
chriscraft replied to chriscraft's topic in Leatherwork Conversation
I now you are right. I’m a Paramedic making paramedic wage and too would not spend more than $50 on a leather cover for myself. It’s nice work I’m making, but not $250 nice. At least not for me. that higher price range was a suggestion I was given and I’m not sure I’ll ever use it. My gut says to charge police officers $125-$150 max and if they get crazy and want it two sided then charge a few bucks more. I see these tooled police covers selling as gifts and maybe retirement gifts where many ppl can pass a hat raising money to order one. Like when I used to airbrush those few custom shirts. I don’t see myself quitting my day job to keep up with demand. These covers won’t go fast at $150 each. JLS has lots of good points too. My tooling isn’t traditional and I still have a lot to learn. I have no interest in building a saddle or building gun holsters. They are plenty of places one can order a quality item like that from. I’ll always be a one-man-operation working from home so that means I don’t have any overhead. This topic started with me trying to figure out how fast or slow my tooling is and what I’ve gathered is that it just doesn’t matter. I’ll get faster over time. Price stuff accordingly based on the item, not time. Thanks -
Hand Tooling question concerning time frame
chriscraft replied to chriscraft's topic in Leatherwork Conversation
I was a t-shirt airbrush artist for many years. Most of my bread and butter was painting shirts for kids that were priced $8 to $16 Painting these kid designs didn’t make me feel like an artist. I did offer custom portraits and hot rods designs shirts. Prices for those custom T’s started at $60 and climbed up to $150. Once in a while I’d get a customer who appreciated the work and would place an order. I know that was a lot to spend on a five dollar t-shirt but a lot of time would go into painting such designs. From my airbrushing experience, I do understand that my customer base wasn’t into high end artwork. I wasn’t setting up in locations trying to appeal to the high end market and I mostly sold $10 t-shirts. I do believe there is a market for custom quality made leather goods. I’ve been teaching myself and trying to advance my tooling skills so I can produce quality leather heirloom items. My only experience is selling to the average working class worker such as myself. Thanks for helping me get my head straight and try to figure this out. My wife and I are lucky to live in the north shore of Milwaukee. I need to sell to this clientele. Recently I met an artist that paints wildlife on canvas. She told me that it’s common for artist to struggle with pricing. That I should start by applying the amount I feel comfortable selling it at and multiply it by two. So if I think my Milwaukee police cover should sell for $125, then price it at $250 and not negotiate or haggle. I just don’t know if I can stomach that higher price range. Yesterday my wife and I visited a local art gallery. While there I met the owner and we chatted about his sculptures. He then asked me if I did any art myself. I showed him photos of my work that were on my phone. He was impressed and asked if I would accept a commission from him. He would like me to make a field notes cover for his father. His father served in the Navy as a Navy Seal and would like the logo tooled on the cover. When he asked for price, I just couldn’t say $250, rather $170 came out. He didn’t hesitate and would like it completed before Christmas. When we left, my wife said he would have paid any amount. That he was really impressed with my craftsmanship and appreciates quality items. That’s why he wants one for his dad. I look forward to build this new cover. I’m excited to be able to hand tool the Navy Seal logo for someone special. This is what I’ve been training for all my life and I’m ready. I just need to work on pricing my new art form. Chris -
Hand Tooling question concerning time frame
chriscraft replied to chriscraft's topic in Leatherwork Conversation
Thanks for the reply. I don’t mind spending a ton of time on items I’m gifting away to friends and family. My issue has been on pricing my work. Am I spending a rediculous amount of time on a $60 item. I just don’t know how to go about it and have ended up just stopping trying to sell stuff over that issue. I haven’t tried to sell anything over the past few years. Which has lead me to just stop tooling leather all together. Yeah, I’m not into making standard production leather goods. It’s just not for me. I like and enjoy the challenge of drawing and tooling unique designs. I just need to charge a price that I’ll be comfortable when making stuff so I can get back into tooling leather again. I do miss it. -
Hand Tooling question concerning time frame
chriscraft replied to chriscraft's topic in Leatherwork Conversation
Here is another example of my recent tooling. I have 8 hours into this piece. I originally thought I’d be able to complete it in about 4-5 hours. I was wrong like with the first pic I posted.