


CoreyChiev
-
Posts
35 -
Joined
-
Last visited
Content Type
Profiles
Forums
Events
Blogs
Gallery
Store
Everything posted by CoreyChiev
-
Thanks Mike! I'm gonna give it my best shot, and post the finished work here. (just incase others want to give this route a try) Hopefully I get to find a cool stool with a base like yours, and then try your method too! But for now, I'm just experimenting with something to sit on in my workshop, so it doesn't matter if it's not perfect. lol Thanks again for the help! Corey
-
I guess I was way off then. Not sure I have the tools to create a physical stand. Do you think it would be possible for me to skip the straight sides? If I bought 2 inches of foam cut to a circle and just made one solid leather cover that stretched over the foam and stapled to the bottom of the seat, would that work? Or would that be awful? Hmm. I'm out of my comfort zone on this project, but I really want to try. Thanks for the guidance! Corey
-
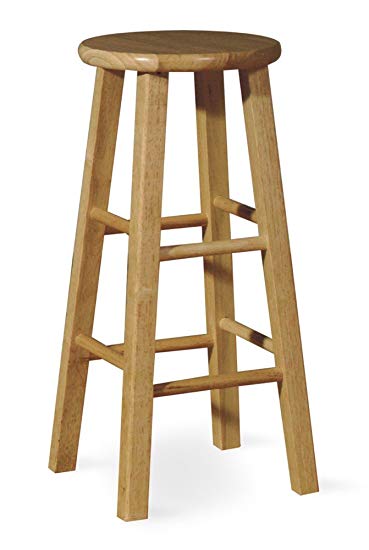
Hi All! I've been scouring the forum for quite a while, and I found some beautiful bar stools tooled and upholstered by members. What I can't seem to find is any description of how the sides of the padded cushion are attached to the base of the stool. I'm planning to cut out a circle for the top of the stool, tool the heck out of it, and sew it to about 2-3 inches of soft upholstery leather (or is vegtan also usable???) so it squishes when you sit down on it. But I can't seem to find a video or description of how you attach the sides of the leather to the wooden top of the round stool. Tacks? Staples?? No clue. The wooden stool I have looks like the attached photo. I'm hoping to make a leather seat constructed like the one pictured (but without the braid) that will attach to the wooden stool. Any guidance and photos of the underside of a finished stool would be greatly appreciated. Thanks, Corey C. www.theleathergeek.com
-
Thanks! Much appreciated
-

Loki Themed Hip Quiver and guard
CoreyChiev replied to CoreyChiev's topic in Archery Quivers and Bow Cases
Yeah, the gold is hand painted acrylic. Sometimes I like to use the Rub-and - buff gold, but not for this one. -
Does anyone know how to contact Bob? I met him at the Prescott show, and I lost his number. Thanks
-
Loki Themed Hip Quiver and guard
CoreyChiev replied to CoreyChiev's topic in Archery Quivers and Bow Cases
Thanks. I'm a fan of the color combo myself. -
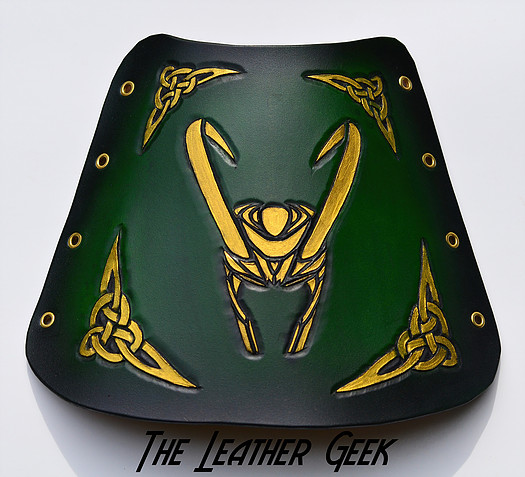
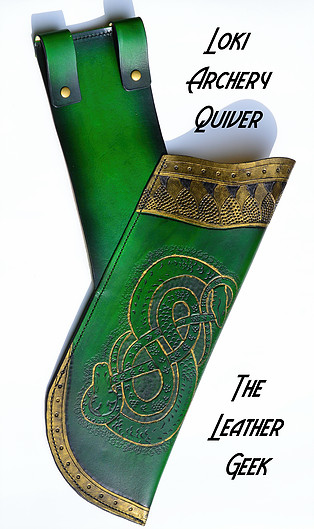
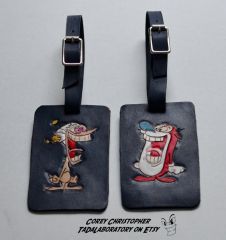
My friend commissioned me to make him a hip quiver and arm guard with a Loki theme. This is my first attempt at a quiver, I can't wait to see it in action. Any recommendations/comments on these pieces? I'd love to hear what I can improve on. Thanks! Corey www.theleathergeek.com
-
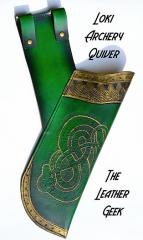
From the album: The Leather Geek
Loki themed hip quiver. part of a set with an archery arm guard. Tooled and painted by TheLeatherGeek -
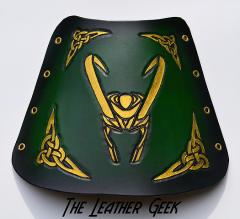
From the album: The Leather Geek
Loki archery arm guard, part of a set with a quiver. Tooled and hand painted by TheLeatherGeek -
Hello all! I'm taking a trip over to the UK soon, and I would love to see some of the local leatherworking shops, and their supplies. I will mostly be near London, so if anyone can point me to a supplier near there, I would be extremely grateful. (and also if anyone knows a shop in Paris worth checking out, I will attempt to see that as well.) Thanks for your help everyone!
-
Cam, Sent you an email. Thanks, Corey
-
Thor, yes I meant one of those electrical ones with a bin that fills with water that you dump out periodically. Troy, thanks for the tip. I hadn't stored them on the concrete floor yet, so that's good. I keep a couple stored in the long cardboard boxes I get from the tannery. I hope that keeps them relatively safe. (Unless they need air, not sure.)
-
My workshop is in the basement of my home, and now since the summertime humidity is back I have to run my dehumidifier. Does anyone know if humidity, or lack there of, affects veg tan leather? I don't want to dry out the leather too much by keeping my basement at a lower humidity. But at the same time I can't let my basement be too humid, or it will really start to stink. Is there a better way to store leather than rolled up on a shelf so it won't get ruined? Thanks! Corey
-
Wow, now that is ART! "Well done!" doesn't even begin to cover it.
-
I like the top "unfinished" picture as well. The dark bones on the light natural leather makes it look like a actual dig site. Basically like you just brushed the sand off the bones and there they are.
-
That is amazing, and so realistic! If it were me, I would resist over the bones and then put some black antique to highlight the amazing tooling you've got there. Maybe a stone grey for the background? Truly awesome job!
-
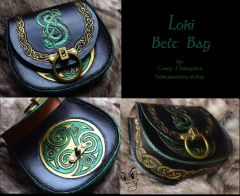
From the album: TaDaLaboratory CoreyChiev
better view of the tooling of my little bag -
I squared it up the first time, but something clearly went wrong. Here's the completed version of the bag. And here's a picture where you can actually see the nice part, the tooling. (Don't look at my stitching, I'm such a sewing noob.) http://leatherworker.net/forum/index.php?app=galleryℑ=28624
-
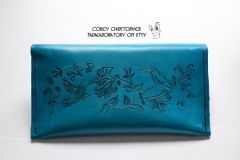
From the album: TaDaLaboratory CoreyChiev
-
From the album: TaDaLaboratory CoreyChiev
-
Jack Skellington Pumpkin King Barrettes
CoreyChiev posted a gallery image in Gallery- Our Leatherwork

From the album: TaDaLaboratory CoreyChiev
-
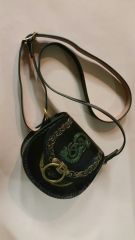
From the album: TaDaLaboratory CoreyChiev
Small leather round purse, with Norse Theme -
Walked into the local Tandy store and found their new product TerraFlex. Tandy's description is: "TerraFlex is a high quality, solvent-free processed thermoplastic material. It can be used in sheet form or molded and shaped by heat (heat gun or hair dryer). When heated, TerraFlex can be bonded onto itself for when multiple layers are needed. TerraFlex is fully recyclable. Scraps can be repurposed by heating them together and rolling out flat again." Uses for TerraFlex: -Bag Stiffener -Pattern Template -Lining for Sheaths and Holsters -Masks Has anyone had a chance to play around with this stuff? Anyone tried combining it with leather into a sheath, or a purse? Do's or Don'ts? I'm just curious if anyone found a fun use for this stuff, or if it's worth attempting to make something out of. (Can you paint it?) Thanks, Corey
-
Thanks to you both! I basically unstitched the whole thing, marked the middle like you said and worked out from there. It came out pretty good! I'm so happy I don't have to fight this little bag any more. I will try to snap a picture so you can see the finished product
