ToddB 68
-
Posts
147 -
Joined
-
Last visited
Content Type
Profiles
Forums
Events
Blogs
Gallery
Store
Everything posted by ToddB 68
-
Hi Everyone ! This Newbie could use some help with the following. I read a suggestion somewhere on this website that if you use black tea on leather it adds tannin which helps to make the Vinegaroon-dye blacker. I have some scraps of 12 oz. Veg.- tanned cowhide to practice dying the edges with Vinegaroon. The edges have been burnished. My Vinegaroon is ready to use and I have a cup of black tea brewed and cooled in a separate container. My questions are: #1... I assume the tea should be applied to the edges first, then the Vinegaroon; is that correct ? #2... Should I allow any drying time between the tea and the Vinegaroon ? Thanks, ToddB68
-
Ken, You are a lucky guy to have a press & die setup like that ! However, being a beginner and still working on my first project, I couldn't justify the cost and will have to stay with inexpensive tools . Thanks for posting the information though . Todd
-
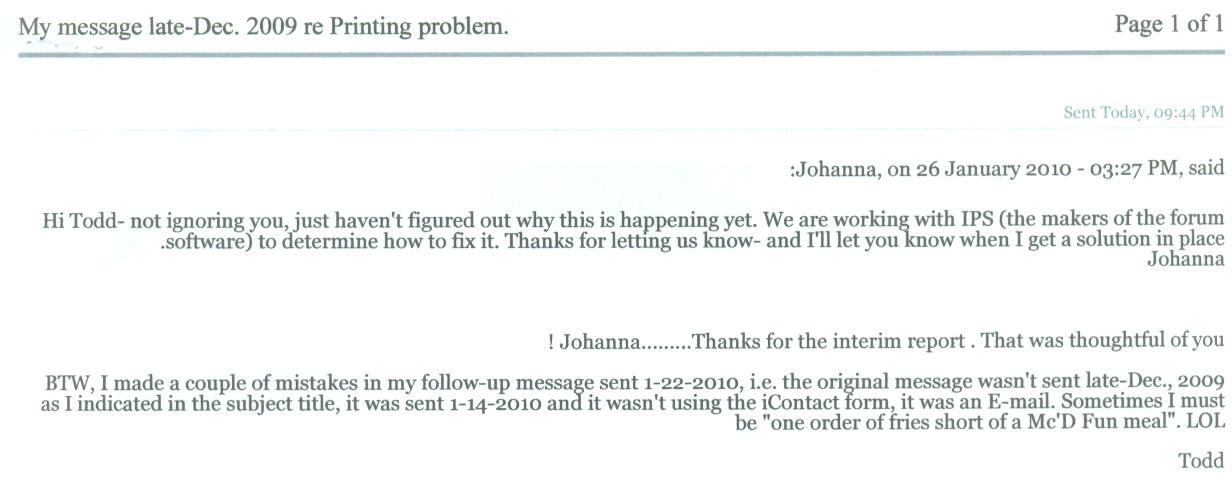
Johanna, wildrose and CitizenKate , Please review the two attached documents, both dated January, 2010, regarding the subject. The last interim report I received from Johanna on this issue was........... over seven months ago ! Have any other members reported having the same issue ? I know your staff is working hard to resolve and reply to members with problems and questions, so I'm sympathetic to your side of the equation, but wondering if IPS (maker of the website program) is being diligent in their efforts to diagnose and fix the issue. Please advise. Thanks. ToddB68
-
Billsotx, Thanks for the book recommendation "verlane's notes". Being a leatherworker newbie, I hadn't heard of Verlane Desgrange yet. I might like to buy a Leathercraft book that Verlane Desgrange produced alone, or co-authored, depending on what leathercraft subjects it covers. For instance, if it's mostly about saddle making, I am not interested in that. Does the index of the book you have in mind cover a good range of leathercrafting subjects ? I like to custom - design and make small projects, such as sheaths, belts and other items in that size-category. Having Google-searched several websites, i.e. AbeBooks, Amazon and Barnes & Noble, using " Verlane's notes " , " Verlane Desgrange " and several other search variations I created that included her name, all I could find was King of the Western Saddle: The Sheriden Saddle and the Art of Don King , by several co-authors, including Verlane Desgrange as illustrator , at Barnes & Noble. I found a website page that gave some history on Verlane and based on her achievements, I assume she was involved with producing many books beyond the one cited ainvolvedbove. So I was surprised that the above book companies didn't have more of a selection. What is the exact title of the book you had in mind ? Also, do you know who is selling it ? (Reminder, I wouldn't be interested in a book that focuses mainly on Saddle making, since I don't plan on getting into any long-term projects.) I appreciate your help ! ToddB68
-
Lobo, Billy P and Billsotx Thanks for the help ! As indicated in my earlier post, my son bought me the Al Stohlman Leathercraft Tools book and I've been reading it almost every day. A great book with wonderful illustrations showing how to use leather tools for various operations, along with accompaning text. This book is jam-packed with information and worth many times over the price ! On page 39 I found the sketch demonstrating how to skive around a snap hole with a French Edger to reduce the leather when it is too thick for the length of the snap post. Good Luck with your leather projects ! ToddB68
-
Vikefan, Thanks for your reply ! First I want to correct my first reply.........See the NOTE ! below. ToddB68 ___________________________________________________________________________________________________ ____________________________________________________________________________________________________ Vikefan, Good idea on using a Dremel tool for skiving around a snap hole ! Don't know why I didn't think of that before, since I have (4) Dremel kits. One kit I bought myself and later received three more from my father-in-laws estate........he was a professional Carpenter and, as a hobby during retirement, made lots of those wood puzzle-pictures in frames. Thanks ! ToddB68
-
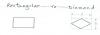
Mick, Here's a website address where you can see an illustration and definition of the "diamond" shape used for Awls. The name of the shape is called "Rhombus" and it also appears on page #8 of Al Stohlman's book titled The Art of Hand Sewing Leather .......................http://www.mathsisfu...rilaterals.html Also see the sketch attached to my above post #3. ToddB68
-
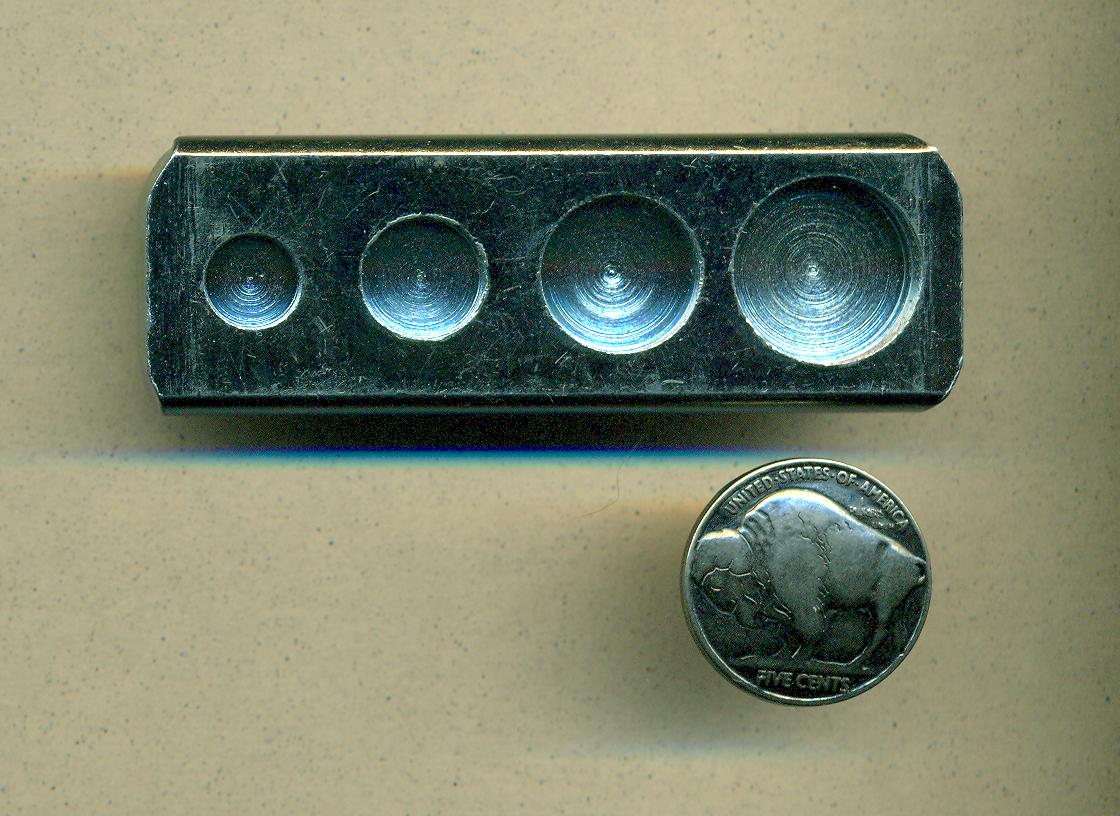
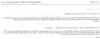
Thanks dirtclod ! In all fairness to you, my post was misleading. Modern day concrete "cut nails" are still commonly referred to as "square nails", but are actually rectangular cross-sectionally. I should have clarified that in my post. Sorry about that. Nevertheless, your basic concept is feasible. As you can see from the attached photo, distances "A" and "B" are not equal, so I'll just need to modify the angle to something less than 45 degrees. I was both surprised and pleased at the simplicity of your solution ! WTG ! I'll let you know how it works out. ToddB68
-
Thanks Bob ! I appreciate the thorough reply. ToddB68
-
Hi Bob ! With reference to your Finishing Edges process, in step 3) you rub Fiebings glycerin bar soap into the leather edges and then at step 4) you burnish with Fiebings yellow paste saddle soap. With all that rubbing and vigorous burnishing of two soap products on the edges, it seems there would be a good chance of now and then smearing a bit of the soaps onto the face of the leather adjacent to the edges. If that does happen, wouldn't that cause splotches or discoloration where the final finish is applied over top of the soap smears ? Or do you have to clean off any soap smears before adding the final finish ? If so, what cleaning chemical do you use ? Thanks, ToddB68
-
Howdy ! Trying to make my own diamond-shaped awl. ( have a haft with adjustable chuck.) I started with a "square-cut" concrete nail, because it's hard and already tapered lengthwise. Using my bench grinder, a flat file and a bucket of cool water, I worked the nail down to a more slender size while maintaining a lengthwise taper and cross sectional rectangular shape. Now I need to add the diamond shape. Does anyone have a design for a fixture to make an awl cross sectionally diamond shaped ? I am looking for something that could be made from hardwood and/or metal in my workshop. The fixture does not need to hold tight tolerances on the finished product (the awl). I would be satisfied with a close approximation of a diamond shape. In fact, what I mostly need is a design concept and then I can work out the construction details and fine-tune the fixture to hold my personal accuracy requirements. Thanks for whatever help you can offer. ToddB68
-
Hi Rawhide ! Thanks for your very helpful post ! I'm going to try my hand at making my own awl. ( I have a haft with an adjustable chuck.) Looking at your attached photo, the stabs are diamond-shaped of course, but it also appears that the awls were "hollow ground", rather than just flat ground on each side. I think a hollow ground blade would cut better with less resistance as the awl is pushed through leather, especially when working with thick leather. I will be hand stitching two pieces of 12oz Veg-tanned to make a tool sheath. I have been reading the Leather Tools forum topics here and have picked up a lot of information to aid my endeavor, such as putting a high polish on the awl, keeping the tip extremely sharp and sticking the tip into Bees wax to make insertion easier. I also have awl dimensions in mind, i.e. cross-sectionally the diamond will be approximately 1/16" x 1/8" and the length about 1-1/2". I have back-ground in metallurgy and heat treatment and also have the equipment needed, so feel prepared for the challenge ! Can you tell from looking at your awls if they were in fact hollow ground ? (Maybe laying a straight edge across the awls and holding up to a source of light would reveal this.) Thanks in advance for answering my question and for any comments or advice you care to give. Hope you enjoyed the Labor Day weekend ! ToddB64
-
Thanks Bob ! Yes, that helped a lot. ToddB68
-
Snap Cap Larger Than Anvil Cup......what Can I Do ?
ToddB 68 replied to ToddB 68's topic in How Do I Do That?
albane..........Thanks for the answer to my problem ! Worst that can happen ?....I ruin a Buffalo Nickel snap-set that cost only $1.89 and some very creative verbiage flies out of my mouth ! LOL ToddB68 -
Snap Cap Larger Than Anvil Cup......what Can I Do ?
ToddB 68 replied to ToddB 68's topic in How Do I Do That?
Hi Dwight ! Many thanks for the tip, but can't afford right now. Maybe "down the road" if I'm using more line 24 snaps. For now, I'll pad the anvil with a piece of thin leather as suggested by Al Bane and hope for the best. I am going to copy your suggestion for future reference though. Right back atcha on the God Bless ! ToddB68 -
Hi Bob ! I'm a beginner at leatherwork and making a tool sheath out of 12oz. Veg-tanned cowhide, following your "Finishing Edges" tutorial. After steps 3) Wet & Soap and 5) Dye, are there drying intervals before burnishing, or do you go right on to the next step ? Thanks for the help. ToddB68
-
Hi I will be getting a copy of Al Stohlman's book titled Leathercraft Tools in a couple of weeks and maybe the following question will be answered in that book, but in the meantime, I would appreciate some advice (Explained below and photo attached.) I'm new to leatherworking. Just bought a "Snap-All Tool Setter Set" #8108 and (2) line 24 Buffalo Nickel snap sets from ZW. The snap Cap diameter is the same as a US Nickel (.832") and is embossed with the Buffalo image. The Anvil has holes (or depressions) of the following sizes: Glove Cap, Line 16 Cap, Line 20 Cap and line 24. The line 24 Anvil hole is only .625 diameter, maybe a little less and has a sharp edge around the top of the hole. Generally speaking, should the outside diameter of a snap Cap be less than the inside diameter of the Anvil hole ? It would seem to me that, even if I were to remove the sharp edge mentioned, the embossed image of my Buffalo snap might get "ringed" by the top edge of the Anvil hole during the mallet strike. Therefore, should I lay something like a gun barrel cleaning patch over the Anvil hole as padding to prevent the Buffalo image from damage ? Or do I need a different Anvil to match the Buffalo Nickel snap cap ? Thanks for your suggestions. ToddB68

-
Billy, Real nice of you to offer, but not necessary, as one of my sons is going to buy the book for me ! He bought me a fancy Espressos/ Cappuccinos coffee maker for my B-D late-May of this year. After struggling through the operating manual, I decided it was too much trouble to make coffee and clean utensils with that machine, so returned it to the store where he bought it and the only option was to credit his charge account. When I mentioned it to him, he asked me what else I would prefer. Time went on and I let it slide. Then a few weeks ago I decided to drag out my leather sheath project and get it finished. I was looking for help on attaching a snap when I ran across this thread and the rest is history ! LOL Thanks Billy ! ToddB68
-
Thanks Billsotx ! I'll be adding that book to my library asap,but right now money is tight. Maybe I can find it USED on eBay or Amazon. Zack White has several of Al Stohlman's books listed on their website, but not the Leathercraft Tools book and that seems odd. I'll give them a phone call. I find their prices are usually lower than TLF. When I buy a book for information purposes, the condition isn't that important if I can buy it cheap. ToddB68
-
It would be nice if you could speed up replies to "Contact Us" messages. I am currently waiting for replies to messages sent August 29 and 30, 2010. Thanks, ToddB68 (999A)
-
Hi Billy P I'm interested in the trick you learned from the Tandy manager. I'm having just a wee bit of trouble visualizing the results of the two-step process. Any chance you could post a couple of photos or sketches ? That would remove any doubt........as they say "one picture is worth a thousand words.". Examples: #1..Photo or sketch showing the corner/edge in the hole for the snap post. #2..Photo or sketch showing the circle cut all the way around the hole. For my current needs I can't justify the cost of a special little snap setting tool. If I have trouble using a "freehand" setter and anvil , I have other options, i.e. a grommet press and drill press, albeit it may require some tinkering to make the setup with either of these, but I'm usually good at modifying things to make them do what I need. Thanks for your help ! ToddB68
-
Hi Lobo ! Your above post is "made-to-order" for me at this time. I'm a relative beginner and working on my first serious leather project..........a tool sheath. The sheath is of my own design and will have a retainer strap to hold the tool handle firmly in place and the retainer strap will have a Zack White line 24 "Buffalo Nickel" snap. The sheath design is composed of only two leather parts , FRONT and BACK. I have these parts cut out and the edges rounded. I just ordered an 8108 Snap-All Tool Setter Set and (2) of the Buffalo Nickel snaps (one extra snap in case I might goof up the first one.......don't expect to, but made good sense to let the shipping charge cover one more light weight item.....heh, heh.). I have some experience making a couple of things out of leather with rivets, but have never installed a snap using setter and anvil. It appears that when installing a snap I will have one chance and one only to make a good set. If I mess up, the snap parts will need to be removed and most likely destroyed in the process. So I want to get it right the first time ! My brother bought me a side of 12oz. Veg-tanned cowhide as a surprise B-D gift, as I had mentioned wanting to get started in Leatherwork. At the time, he didn't think about choosing the right thickness of leather for a project. Anyway, I could skive away the leather where the snap parts are to be installed, probably down to the range of 9 or 10 ounce leather, but would have to make a decision on the actual thickness that will work best with the post length, not too thin or too thick. Otherwise, after looking at the snap parts, actual post length versus leather thickness, etc., I might decide to try your above suggestion of using a ball-peen hammer. Can you suggest any tips I could use to improve the odds of success on the first try ? For example, should the post tip protrude a certain amount for proper attachment ? Since I've chosen a snap with an image (Buffalo), I wouldn't want the image to get deformed during the setting operation. For example, if the leather is skived too thin, would this allow the post to hit the "reverse" side of the coin image ? I've always been creative and skilled with my hands. My approach has always been to make a drawing with details and dimensions for all of my inventions and special projects before beginning work.. So feel confident I can follow instructions and be successful on the first try. I always try to stay one step ahead of "Murphy's Law" by study, planning and asking questions. Thanks in advance Lobo, for any additional help you can offer. ToddB68
-
Vikefan, I hadn't thought about the snap parts sliding until I read your post. Looking at the Osborne jig in your attached photo, it appears the purpose of the jig is to keep the setter and anvil perpendicular and in alignment as you strike the setter with a mallet. Unless I'm mistaken, the nose of the setter does the job of keeping the snap parts in alignment throughout the mallet strike. So, when using the setter and anvil "free-hand" there is always the possibility of not holding the setter exactly perpendicular to the snap parts, causing them to slide on impact. Perhaps this would help....... concentrate more on not tilting the setter and perhaps a dab of super glue on the appropriate snap parts to keep them from sliding on impact. Naturally, wait for the glue to dry before proceeding (make sure the parts are stuck good to the leather.) Not to be pushing this product, but Gorilla Super Glue (two small tubes in a card pack) says it is rubber-toughened , which should make it a little thicker and less runny than most super glues , and is advertised for bonding metal, wood, ceramics, most plastics and more. Having never actually attached a snap to leather, I'm trying to visualize the whole process and make suggestions. So please forgive me if none of this makes sense. LOL I'm new to leatherworking and currently on my very first project..........a tool sheath of my own design from 12oz. Veg-tanned cowhide. The sheath has only two leather parts, a Front and Back. The shape of the Back includes a retainer strap and mating tab for a line 24 Zack White "Buffalo Nickel" snap. According to my phone conversation with the Zack White office, the maximum leather thickness for a line 24 snap is somewhere around 9oz. to 10oz., so I'll have to reduce the leather thickness where the snap parts go with some judicious skiving . I just ordered a Snap-All Tool Setter Set # 8108 from ZW and (2) of the above mentioned snaps (one extra in case I goof-up.). So I'll be doing my first snap setting before too long ! Hope the first paragraph gives you some help ! Todd
-
Dear Admin., When I did my subject post on 08-29-2010, I forgot to click-on the little box titled "Enable email noticifations of replies?" in the post options. Can you correct my mistake so I can receive notifications ? Route to my post: Leatherworker board > How Do I Do That ? Thanks src="http://leatherworker.net/forum/public/style_emoticons/default/smile.gif"> Todd Name: Todd Brock (Username 999A) UserName: ToddB68 IP Address: 96.230.246.72 Email Address: toddbrock@verizon.net
-
Hey spur2009 ! Thanks much for the tips ! I'll re-make my Vinegaroon, using the apple cider vinegar ........ glad you spotted that in my post. Any thoughts on keeping the dye in a straight line ? Todd