-
Posts
159 -
Joined
-
Last visited
About AlexOstacchini
- Birthday 10/09/1994
Contact Methods
-
Website URL
www.alexostacchini.co.uk
Profile Information
-
Gender
Male
-
Location
UK
-
Interests
Traditional crafts, Historical armour and weapons
Recent Profile Visitors
5,702 profile views
AlexOstacchini's Achievements

Member (2/4)
-
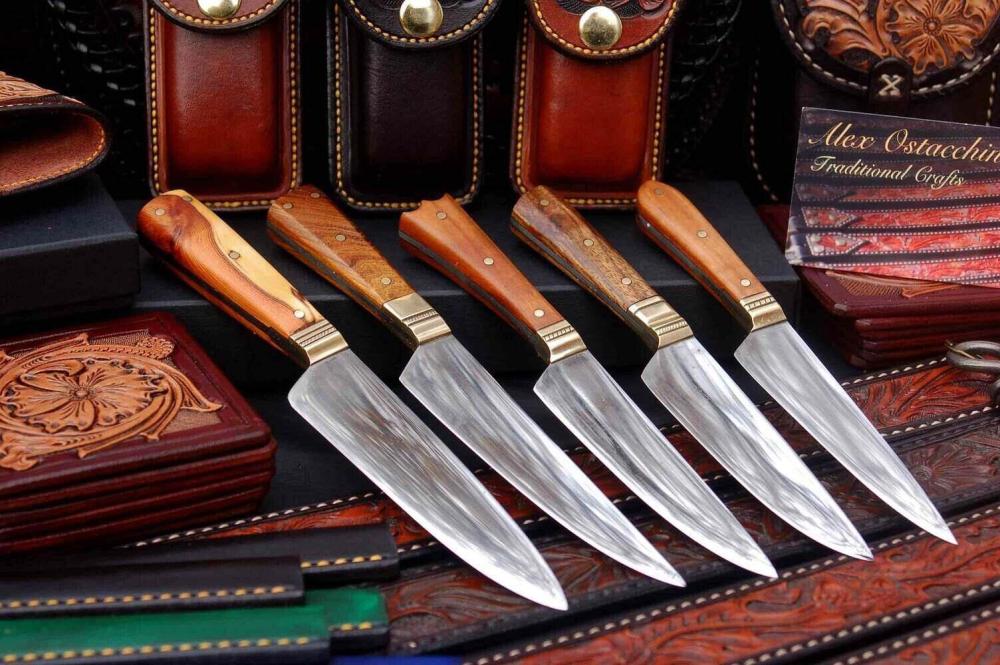
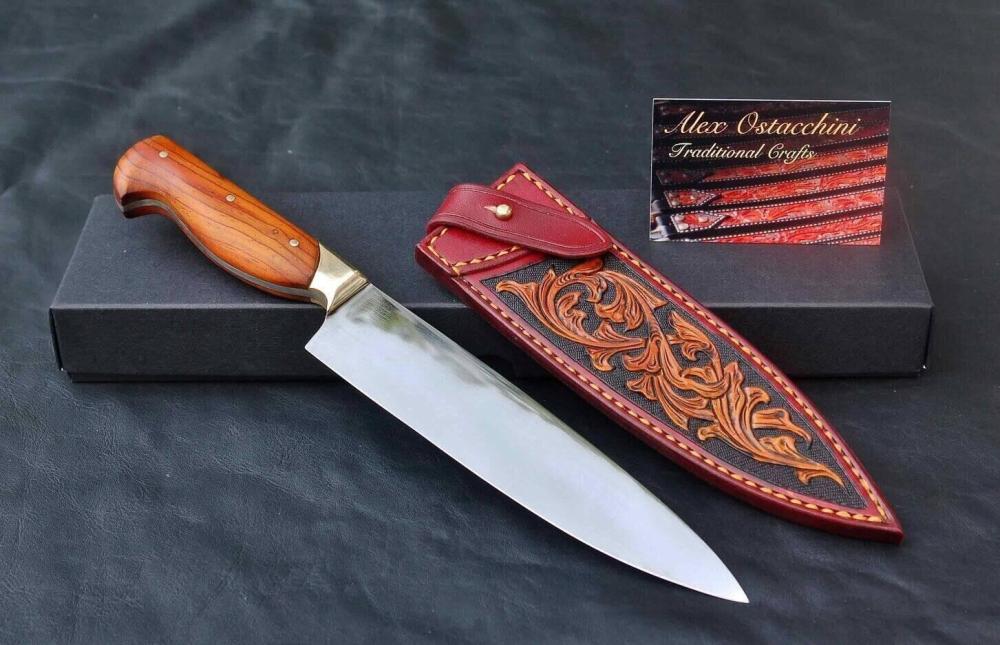
No worries, I recently finished a big batch of medieval knives and sheaths and this reminds me I should upload a few newer pictures, they have come on a bit since these two. In terms of who made them I don't have any of my references handy at present but I believe 'sheather' was its own separate profession- Googling this doesn't' bring up much but a bit of digging and you will find it mentioned. I have certainly read this somewhere in a breakdown of the various guilds involved in making a knife. As FredK mentions cutler seems to be the one that effectively commissioned the various components and assembled them into a finished product. There is a fantastic book called 'Covering the Blade' which deals purely with this subject, and 'Knives and scabbards' is another I would recommend. I suspect I would have read about specialist sheath makers in one of those.
-
Wow, very pretty!
-
-
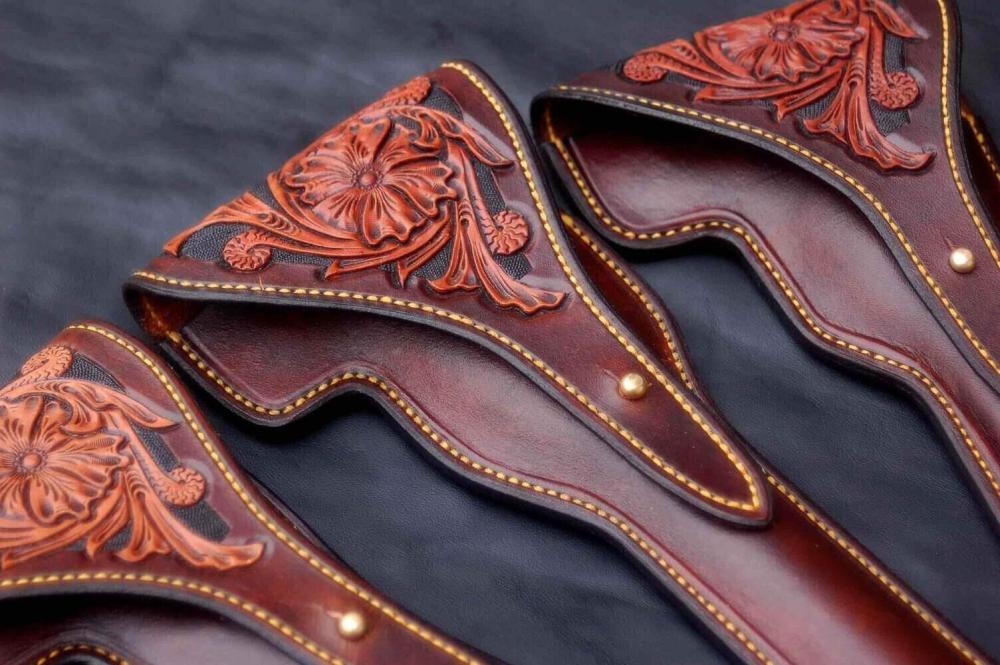
Super neat. Looks like you've managed to get a lot of depth in that front piece, did you make a former or mould directly around the shears?
-
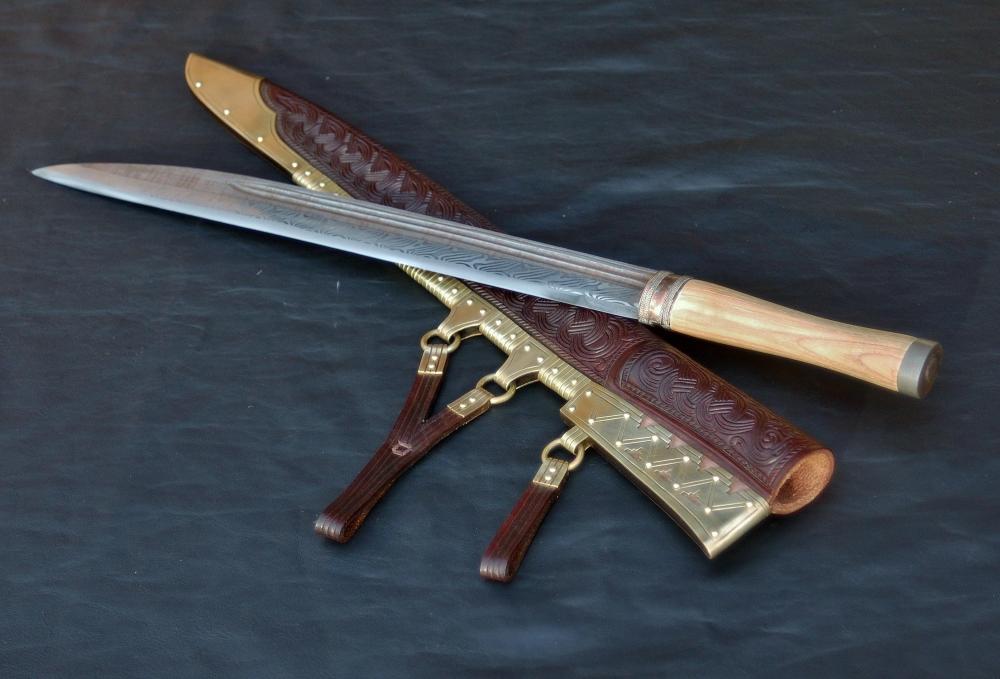
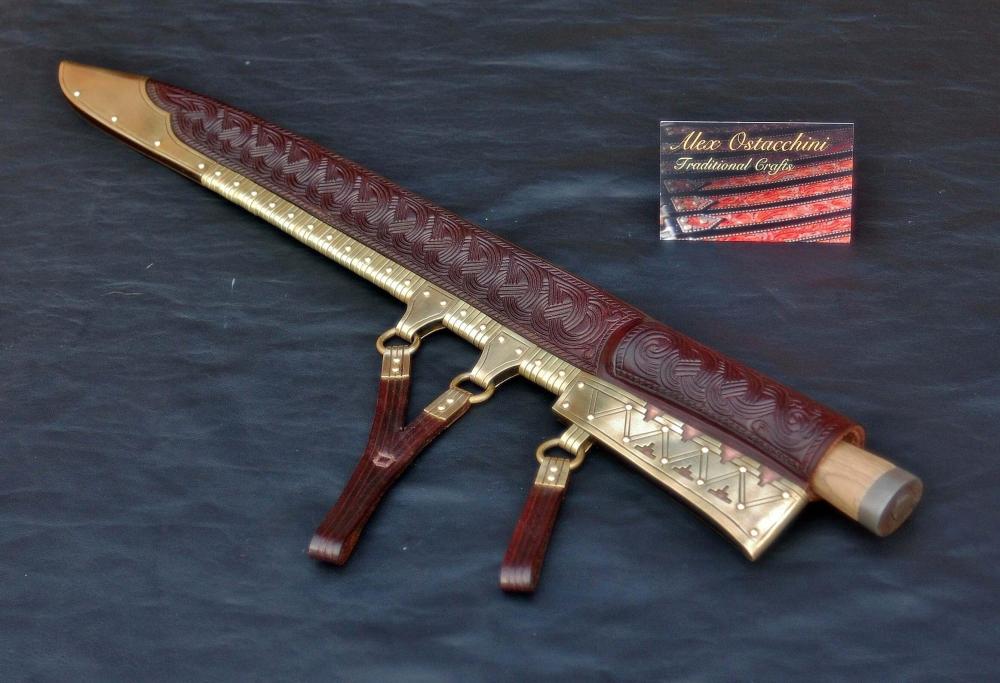
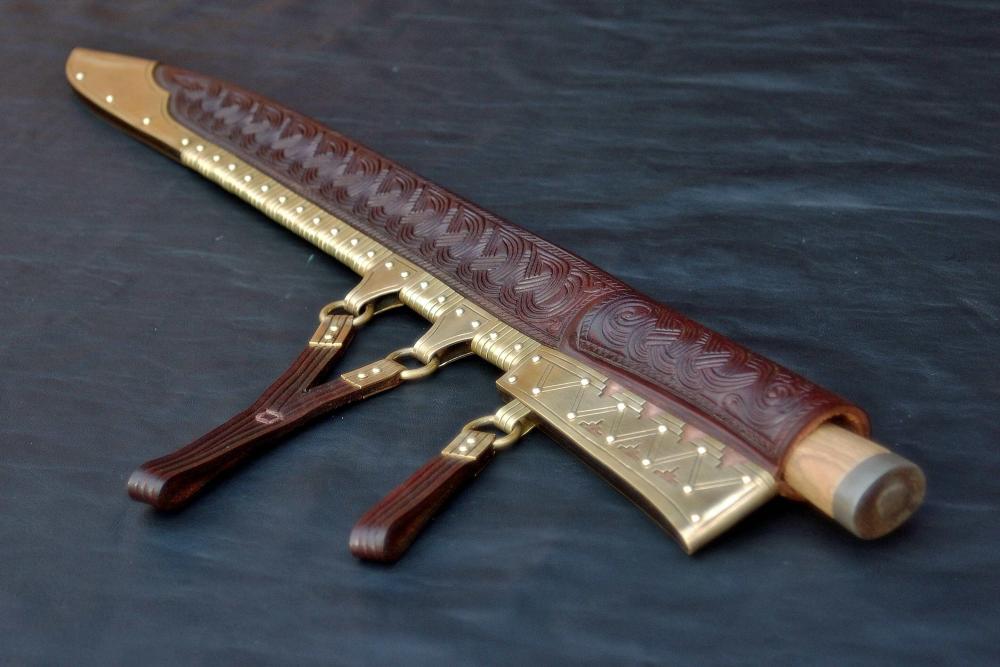
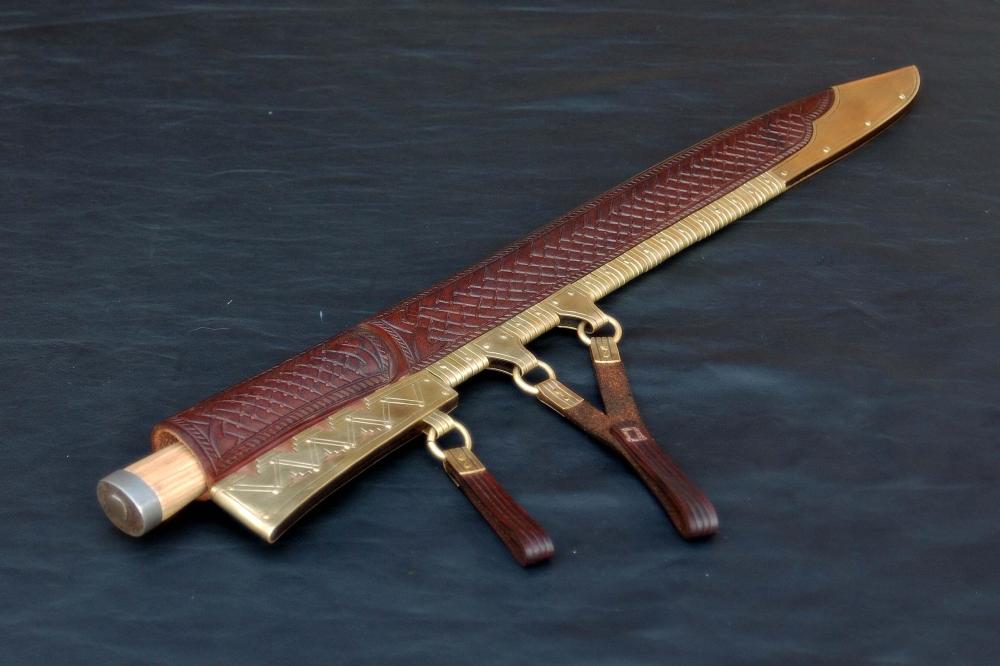
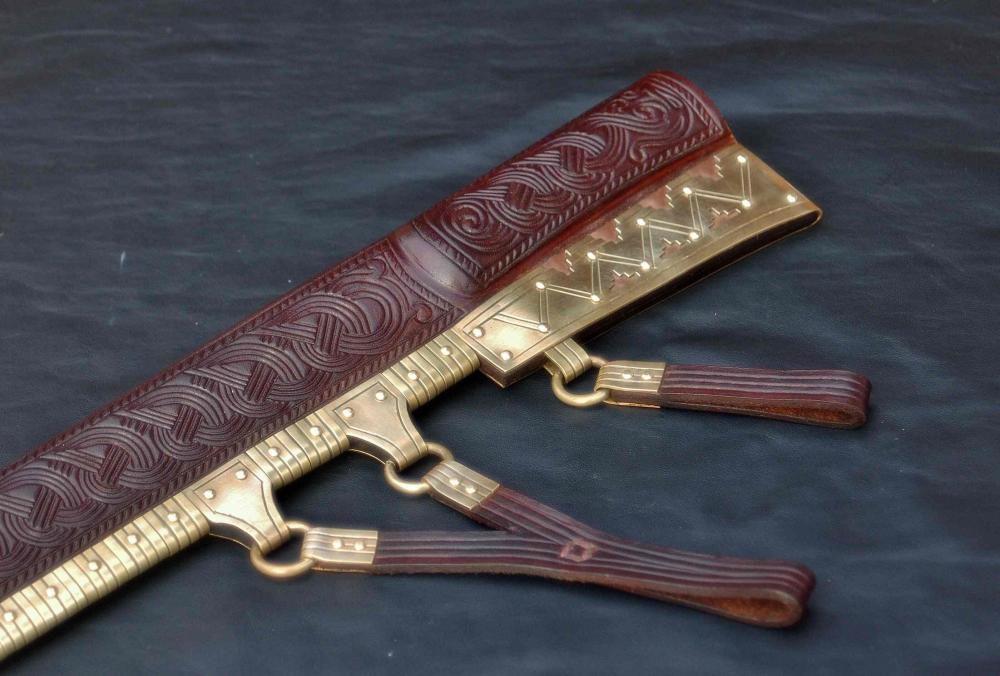
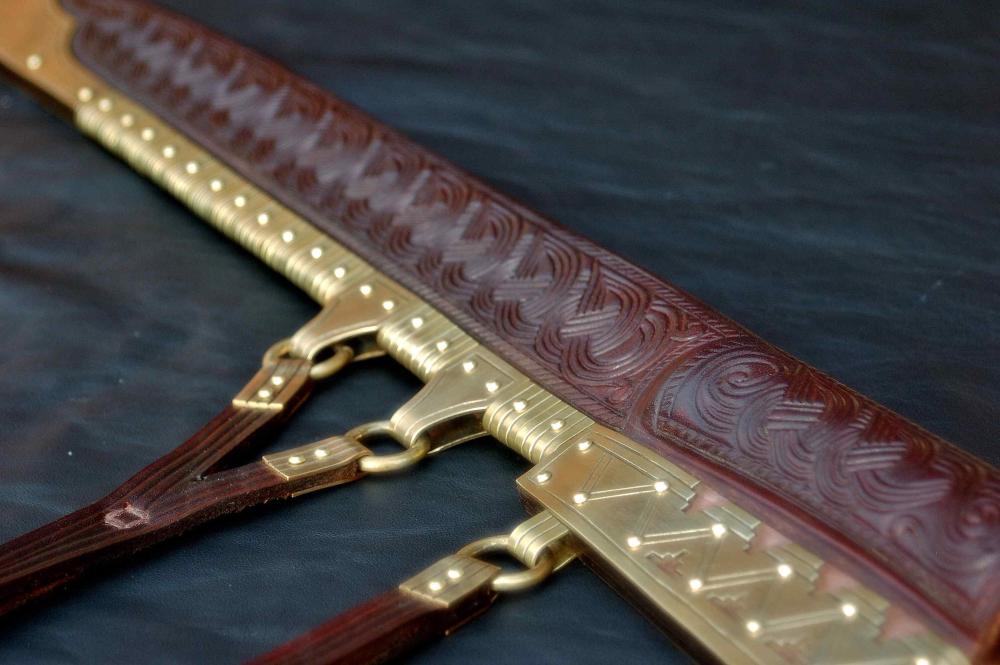
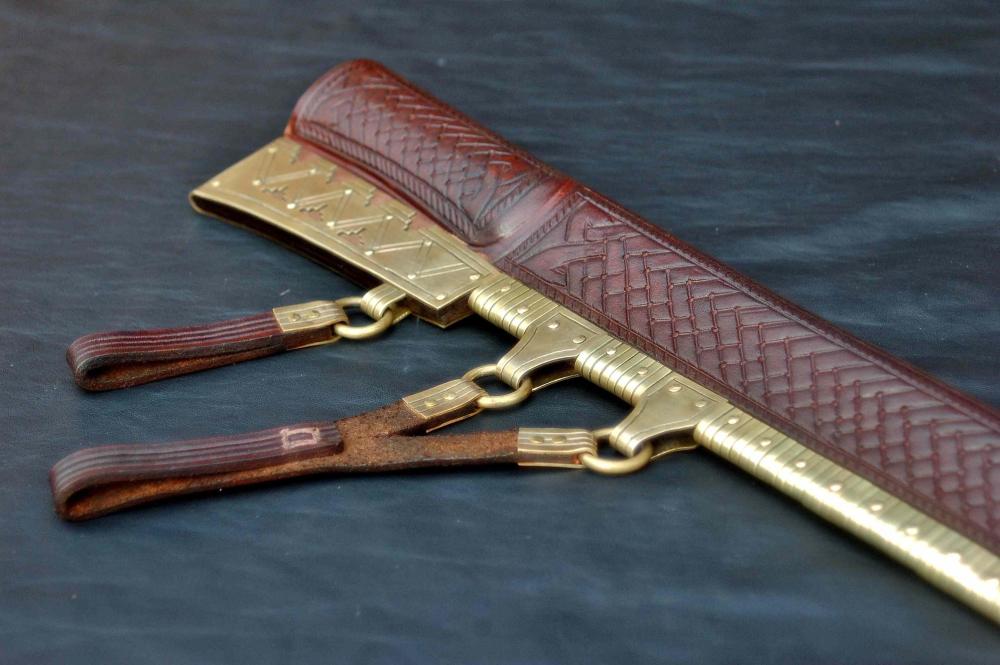
Hi all, here is a recently completed order which was a bit of a first for me. This is a 10th Century Baltic style sheath for a Viking seax. The knife itself is not one of mine, but made by my friend at pitstone forge who specialises in pattern welded stuff from this era. For the sheath the main reference was an original from the Valsgarde graves in Sweden, with tooling patterns adapted from another in Norway from the same period. The one I copied has different designs on both sides, with the fancier stuff on the front. I am a little ignorant about very early medieval knives so there was a big research phase involved, in which it turns out that tooling was done purely by impressing into the leather and not by cutting and bevelling like you see on later medieval and modern stuff. The patterns were therefore made using a scribe and defined with modelling tools, but the swivel knife stayed in its drawer for this one! The sheath is formed from 3mm veg tan, and is held together only by the riveted brass clasps along the edge. The metalwork on this actually took a lot longer than the leather did, with lots of punched/chiselled decoration and little stepped cut-outs. The straps are speculative as I couldn't find much on how they were worn, but is functional and makes use of the three hanging points that the original had. I hope you like it! Alex
-
Pruning shear sheath
AlexOstacchini replied to DwightT's topic in Gun Holsters, Rifle Slings and Knife Sheathes
Good work, tidy stamping on the basket weave and looks like a nice edge as well. Definitely better than a cloth piece of junk! To my mind 6-7 ounces is about right for this sort of thing and should hold its shape nicely. -
Thanks, much the same as you describe really. My process is as follows- 1. dye the base colours. For most of my background texturing I will paint the dye in with a paintbrush. 2. Neetsfoot oil, applied over the whole piece with a sponge, but focusing mainly on the natural areas. Be aware though that this darkens colours quite a lot. 3. Resist- I use fiebings tan kote for this. Quite often now I will give it a second coat after the first has dried. 4. Antique. Fiebings antique finish in this case, worked into the recesses with a sponge, then wipe off excess. 5. Once this has dried I give it a final polish with tan kote, which cleans off any antique that is still on the raised areas. I always try and give each stage a day of drying time. Maybe not necessary but it works for me and when I have tried to rush through things it never seems to come out very well. What product are you using for the antique? I used to use the eco flo gels and couldn't get the results I wanted, then switched to the fiebings finishes and it was problem solved. Hope this helps! Thanks, yes a very slow process, I certainly undercharged for how long it took, but I will know for next time!
-
Cheers YinTx, I admit I was a little thrown by the suggestion that it was not tooled but hopefully all cleared up now. To be fair though I may have added to the confusion by misunderstanding the initial embossing question.. In any case I have done my best now to clarify. Thanks for the kind words and well spotted on the pic, all of course traced from the same drawing but lots of small variations between these pieces. Alex
-
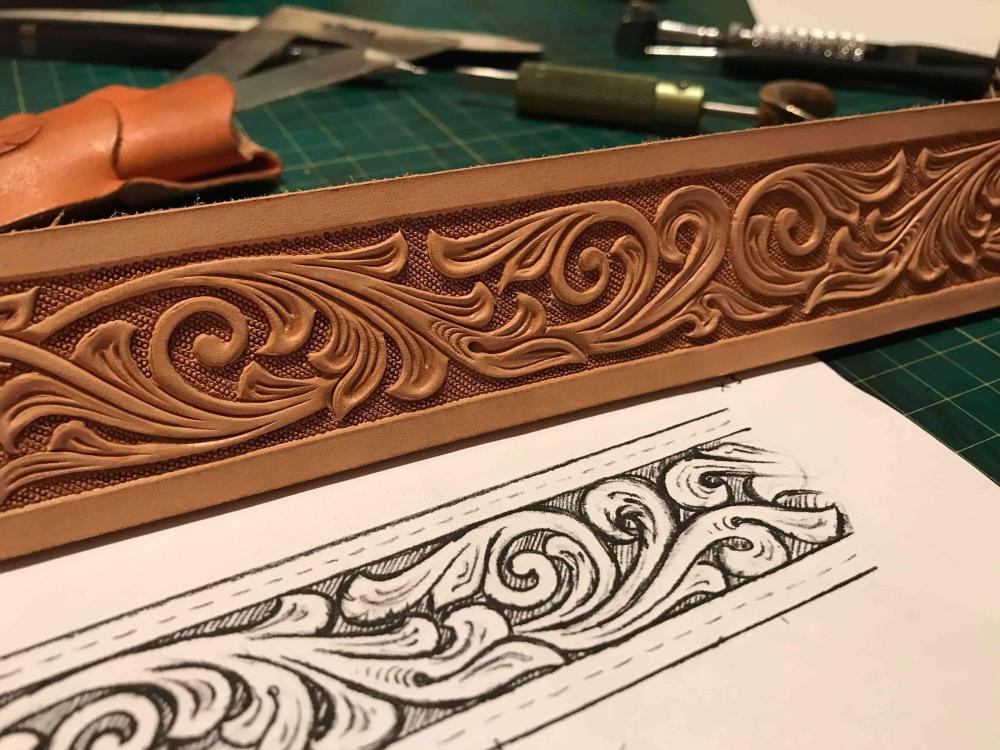
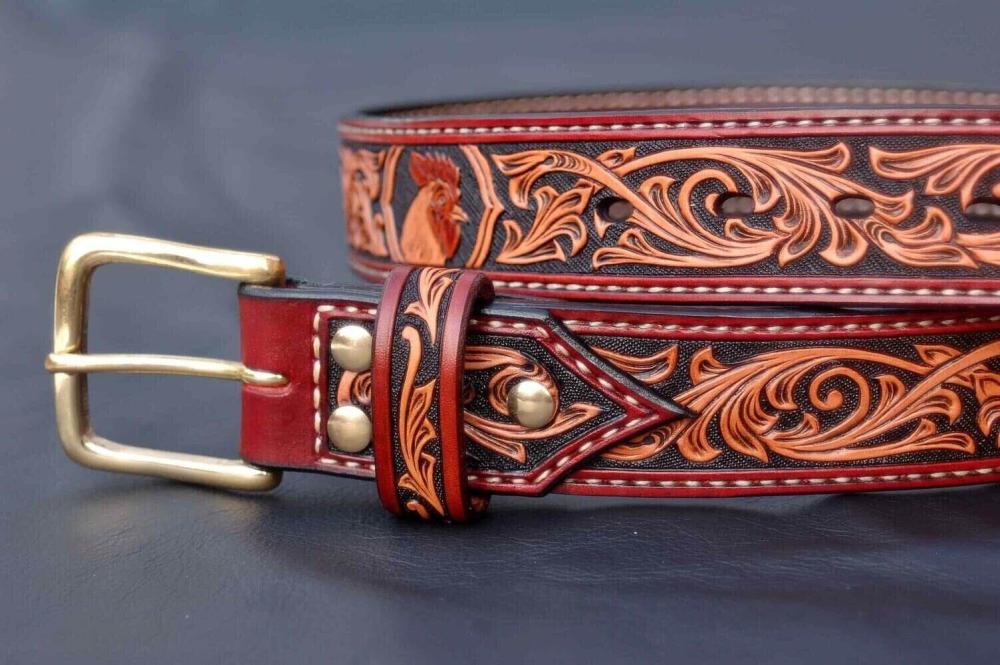
Many thanks and no worries, it was my own bad wording! I'm not sure if I have entirely convinced you, but I have dug up some WIP pics to hopefully alleviate any doubts about the process. So here you can see the initial swivel cuts on some of the pouches, and the scrollwork tooling on a belt, next to it's initial drawing. This was based on a design sent over by the client, so there is certainly no embossing plate involved! So yes, all hand tooled
-
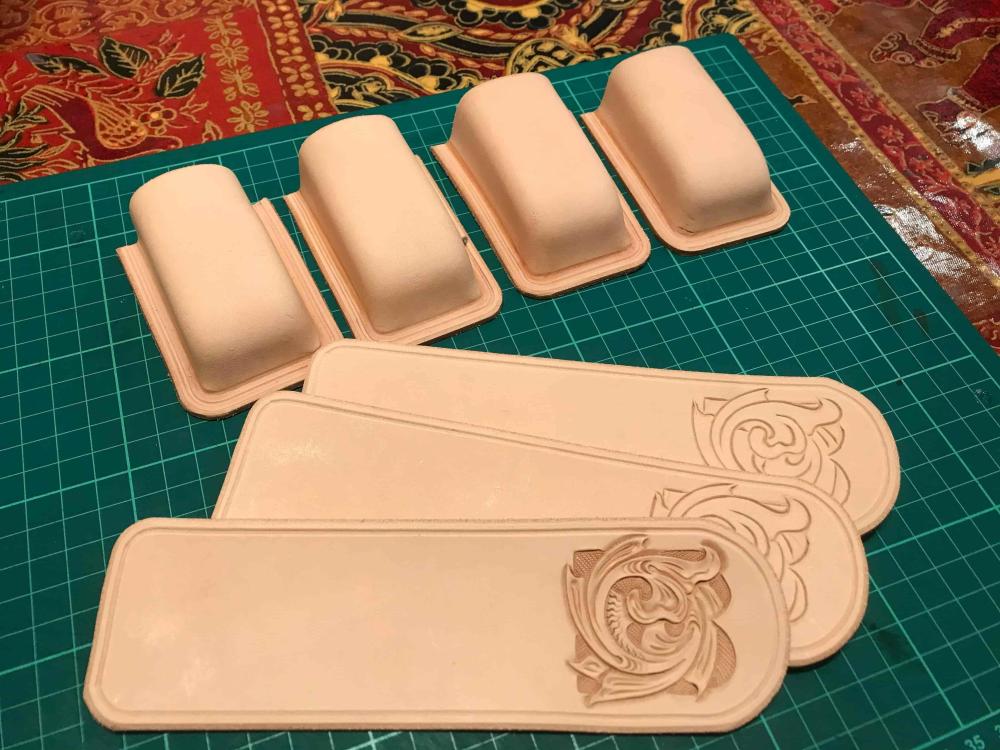
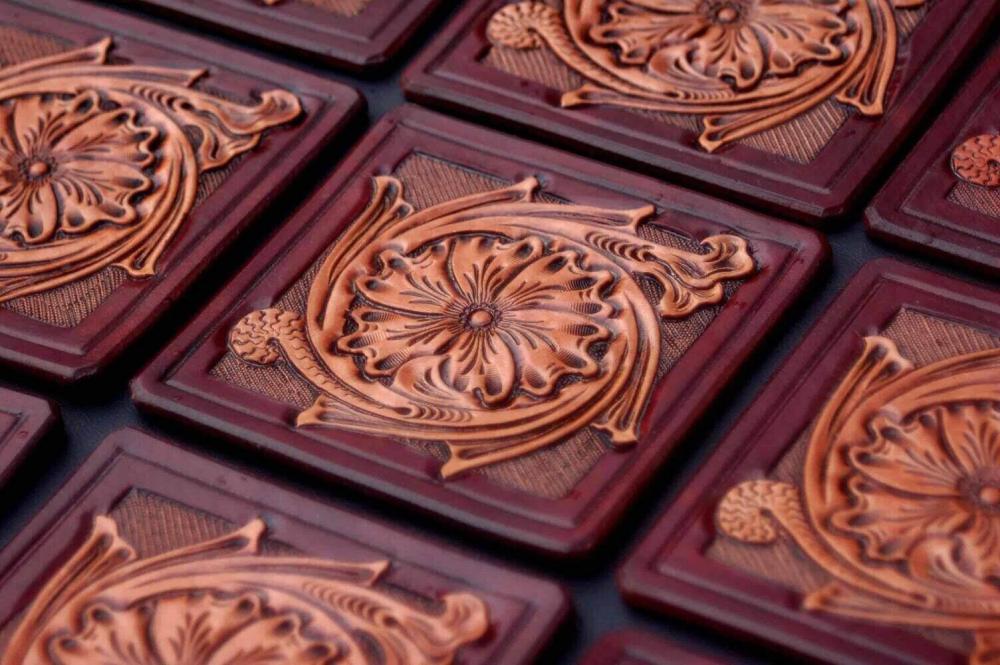
Sorry this is just a semantic misunderstanding on my part, I just read embossed as tooled. No there is no embossing in the sense of a big plate to do repeated designs or press in an outline, and no laser cutter etc to lay out patterns. I thought the original question was if everything I made was tooled. The 'tooled to some degree' comment I realise now implies vagueness in the context you desrcibe, but not trying to hide anything, I simply meant that I mostly make tooled items as opposed to plain/untooled! Everything here is 100% hand carved. I draw out all my tooling patterns either directly onto the leather, or for anything where I need repeats (ie the coasters or swiss army knife cases above) it is done on paper first so it can be traced on. So no, no embossing. Just swivel knife and bevelling stamps. You will see slight differences between all of the pieces above. I know what you mean, it is most telling on belts which use a rolling press, as the strap end can never be finished properly and the border and pattern will not taper down into the point. But yes a mirrored version of anything here would be no problem, and aside from the repeated items (which I sell frequently so keep a stock of), many of the items pictures are exactly the one off client designs you mention. Hope that clears things up! Alex
-
Thanks for the compliments all, glad you like it Yes, exactly that. The black dye tends to bleed but will naturally stop at the cuts as long as the brush isn't loaded up too heavily, so I always paint a few mm away from the carved lines and it will bleed up to them. Most of the stuff I make tends to be tooled to some degree, though not always and I often get asked for plain things too. As a process I really enjoy it but the look isn't for everyone. I'm sure you can! The tool upgrades for me made a big difference, but the bread and butter tooling techniques, eg bevelling and decorative cuts was picked up from youtube tutorials and lots of practice. Still plenty out there better than me! Thanks, that is a Barry King bar grounder, it's become my default pretty much. I've looked at lots of ways people orient these stamps and experimented a bit when I first got them, but quite liked the look of angled even rows so that's what I do most of the time now. Alex
-
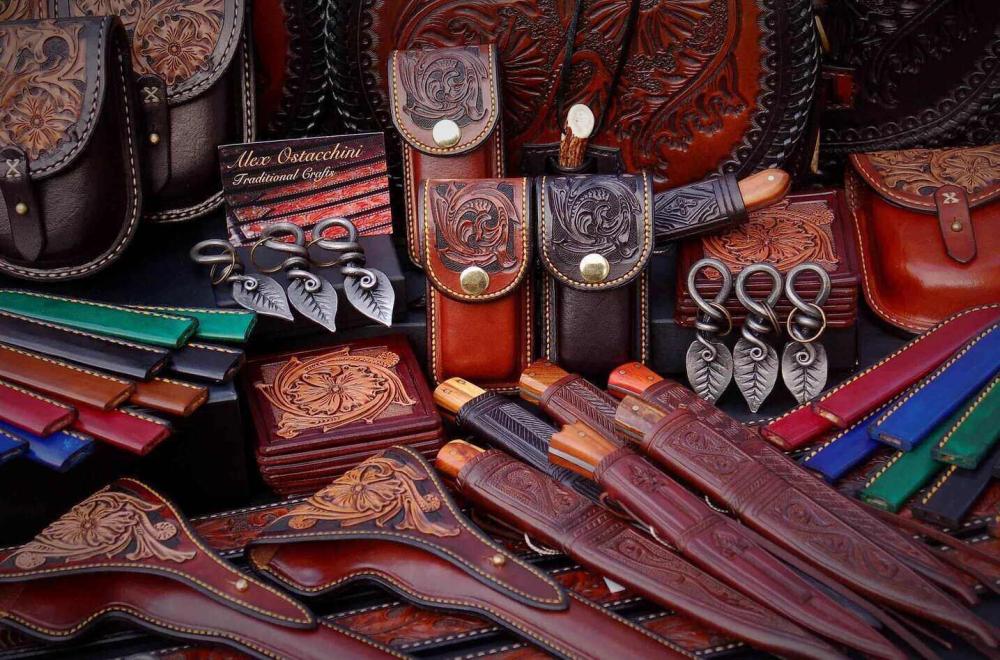
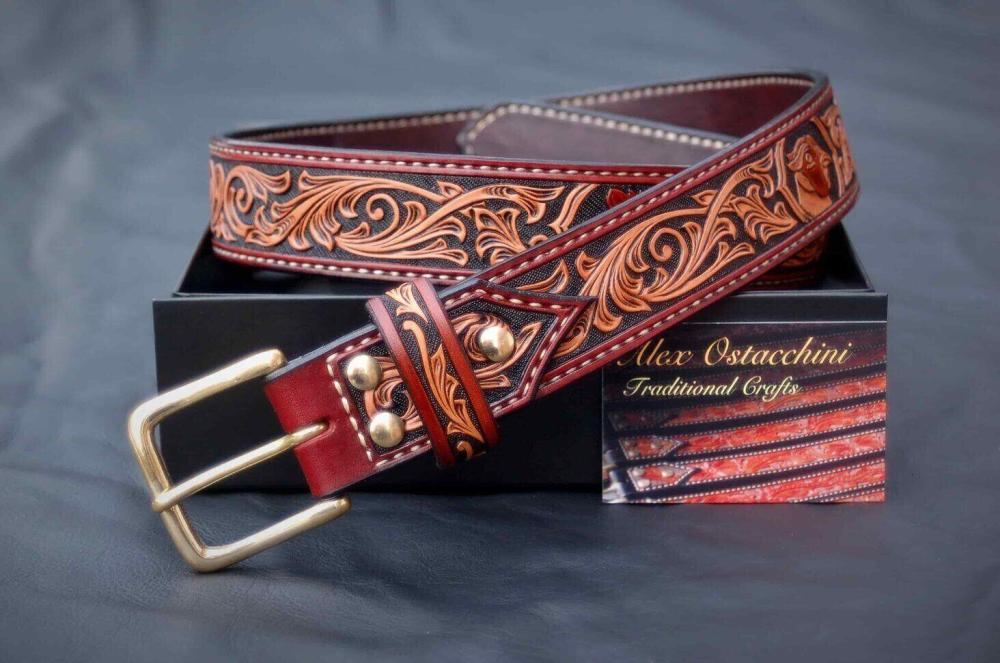
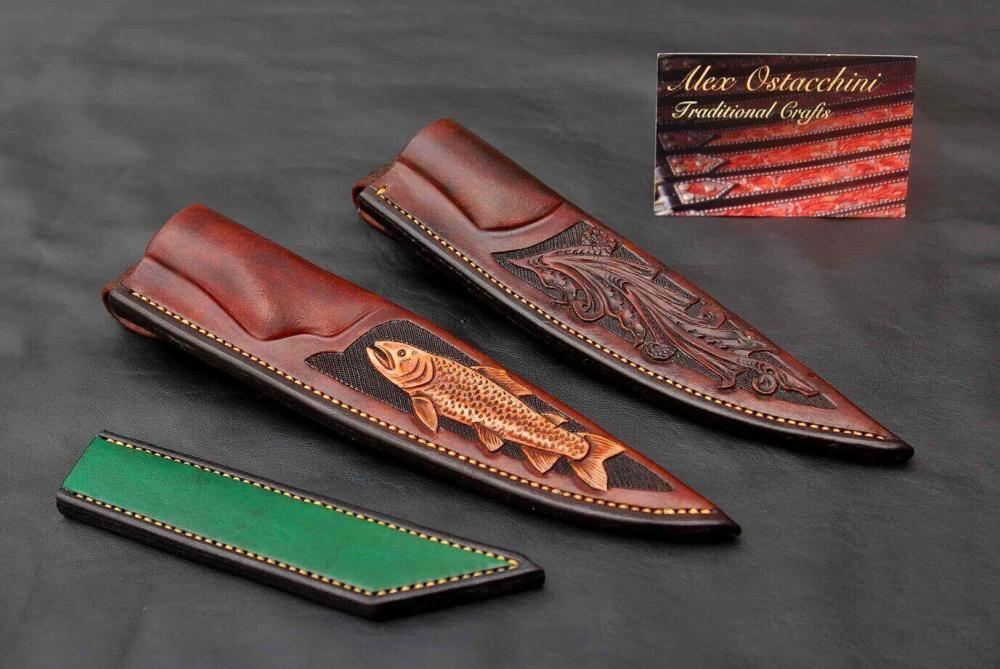
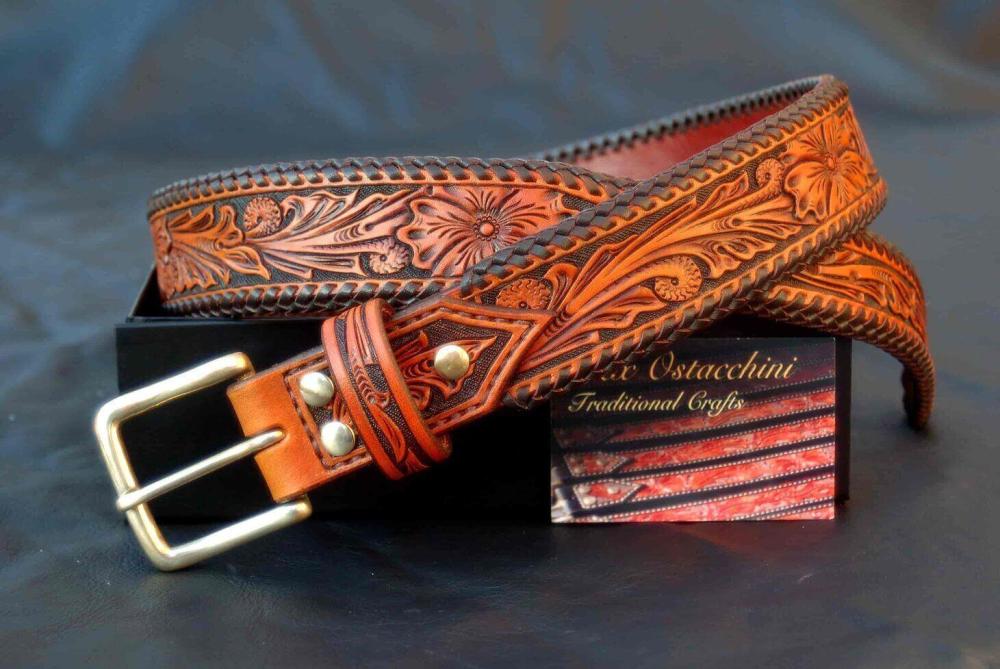
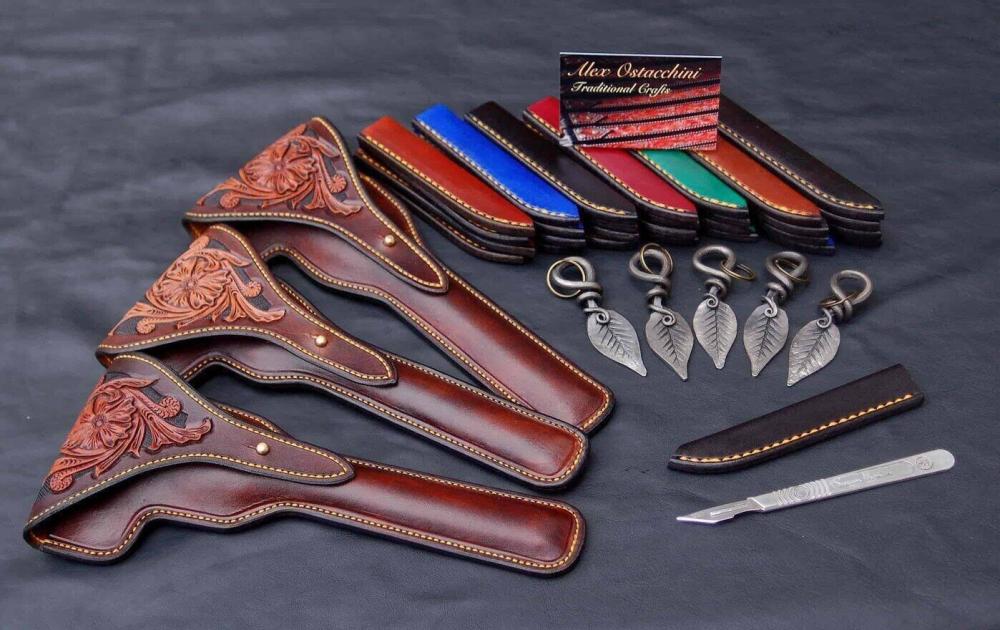
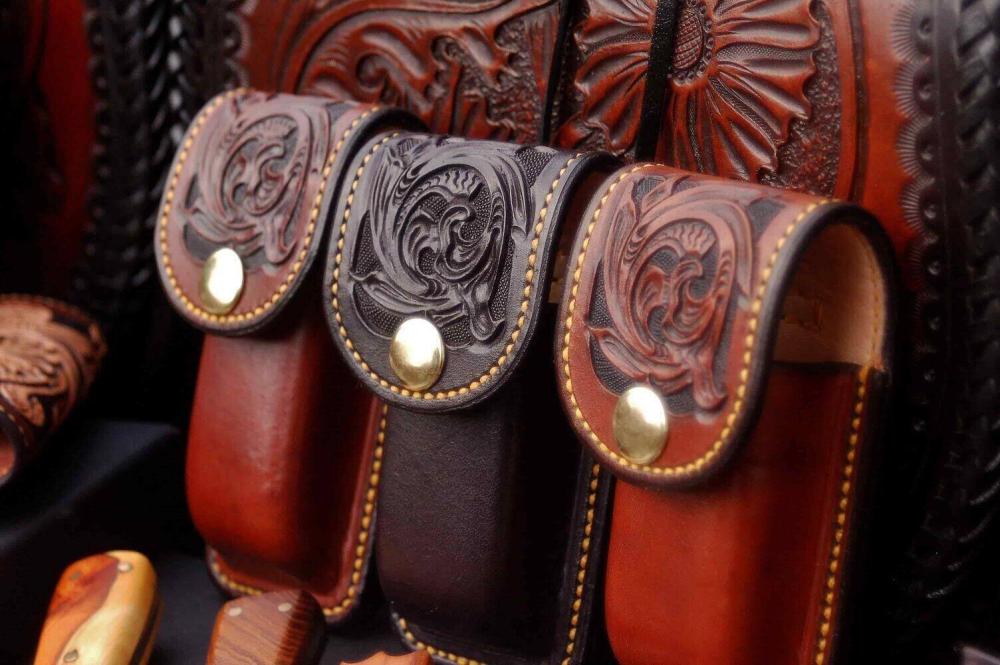
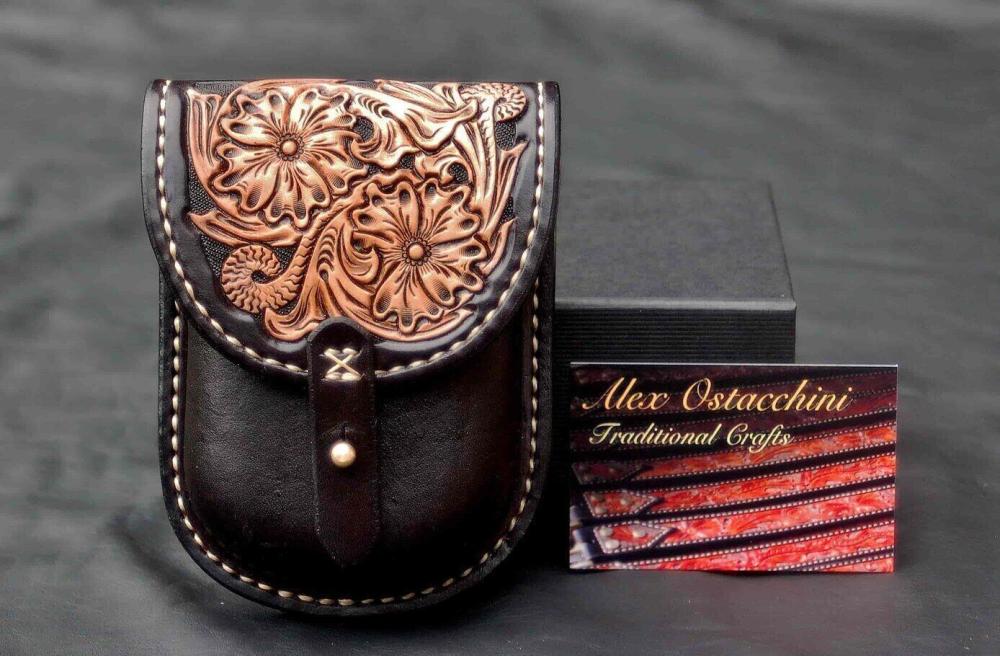
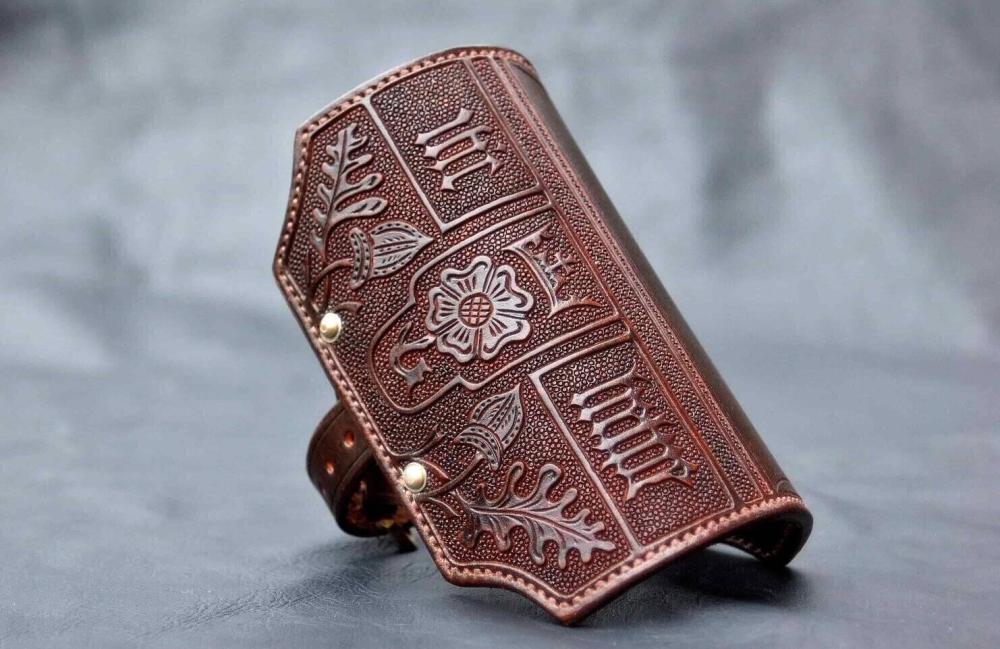
Hi all, A bit of a photo dump as I haven't posted anything here in a while. I've had to compress the pics to pretty lousy quality to get them all in but you get the idea. Here is a load of stuff from the past year or so, some of it stock things and some of it custom work built to client specs. One of my bestsellers since I started making them has been cases for vernier and digital callipers, so lots of those, as well as cases for scalpels. Then various belts, pouches, knives and sheaths. I upgraded my tandy swivel knife to one from leather wranglers, quite a big investment once you add UK customs fees but it is a big improvement, stays sharp for much longer. Ditto for Barry King stamps, I am a little jealous of the US for leather tools as shipping etc has cost me a fortune, but oh well, I doubt I'll have to buy them again. Stitching here is all by hand with waxed linen, and edge lacing is with kangaroo lace. I had never double loop edged a belt before the one here, did not realise quite how long that would take... My real interest and most of my day job is making historical things, and so there is also a replica here of a Tudor archer's bracer from the British Museum. I made quite a bad version of this years ago when I was just getting started so it was nice to give it a revisit with better tools and experience. It was asked for with a lining, which the original does not have, and mine has no gilding where the original probably did, but otherwise a fairly close copy. Hopefully more stuff like this to come. Anyway thanks for looking, any queries about particular pieces or tips for me to improve then fire away Cheers, Alex
-
Many Thanks Fiebings dyes for this. I pretty much always dilute them now with a little IPA which I find helps give an even coat. The border for this is mahogany, and the background is pro black, which is much much much better than the standard black. The tooled elements are just neetsfoot oil and the antique is fiebings dark brown with tan kote as the resist.
-
Thanks again all! Cheers! I am lucky enough to have a full time job in film, often as a leatherworker, so independent stuff like this is for evenings and weekends and thankfully I am not relying on it as my sole income! But it is nice to think that it could grow into something more further down the line. The brief for this project was include lots of gypsy imagery,- The scrollwork pattern, while virtually identical in style to Western stuff (but more scrolls, less flowers), was taken from a painted design on a vardo wagon, and the framed animal heads all have links as well.


