rdb
-
Posts
1,766 -
Joined
-
Last visited
Content Type
Profiles
Forums
Events
Blogs
Gallery
Store
Everything posted by rdb
-
Thanx Ray. Same as you, I get a kick out of a bucketful of things... I haven't got it down good yet, but when I'm making something nowadays, I try to make several at a time. It's a little slower at first, but it does help to build up the inventory. I was hoping this thread would generate some discussion on how to go out and hunt down work, as opposed to waiting for it, or doing shows. I've gotten some work by being just naive enough to go up and ask...lol. And other work, like these handles, by doing something for someone who knows somebody else. Around me, for instance, there is a BIG "buy local" kind of thing going on, and it's helping a whole variety of people I know. But, I suppose, this is all better off in more of an open thread.
-
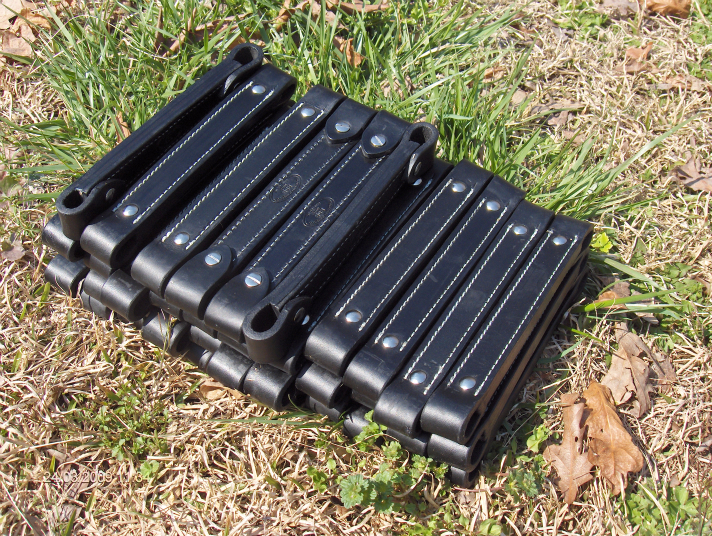
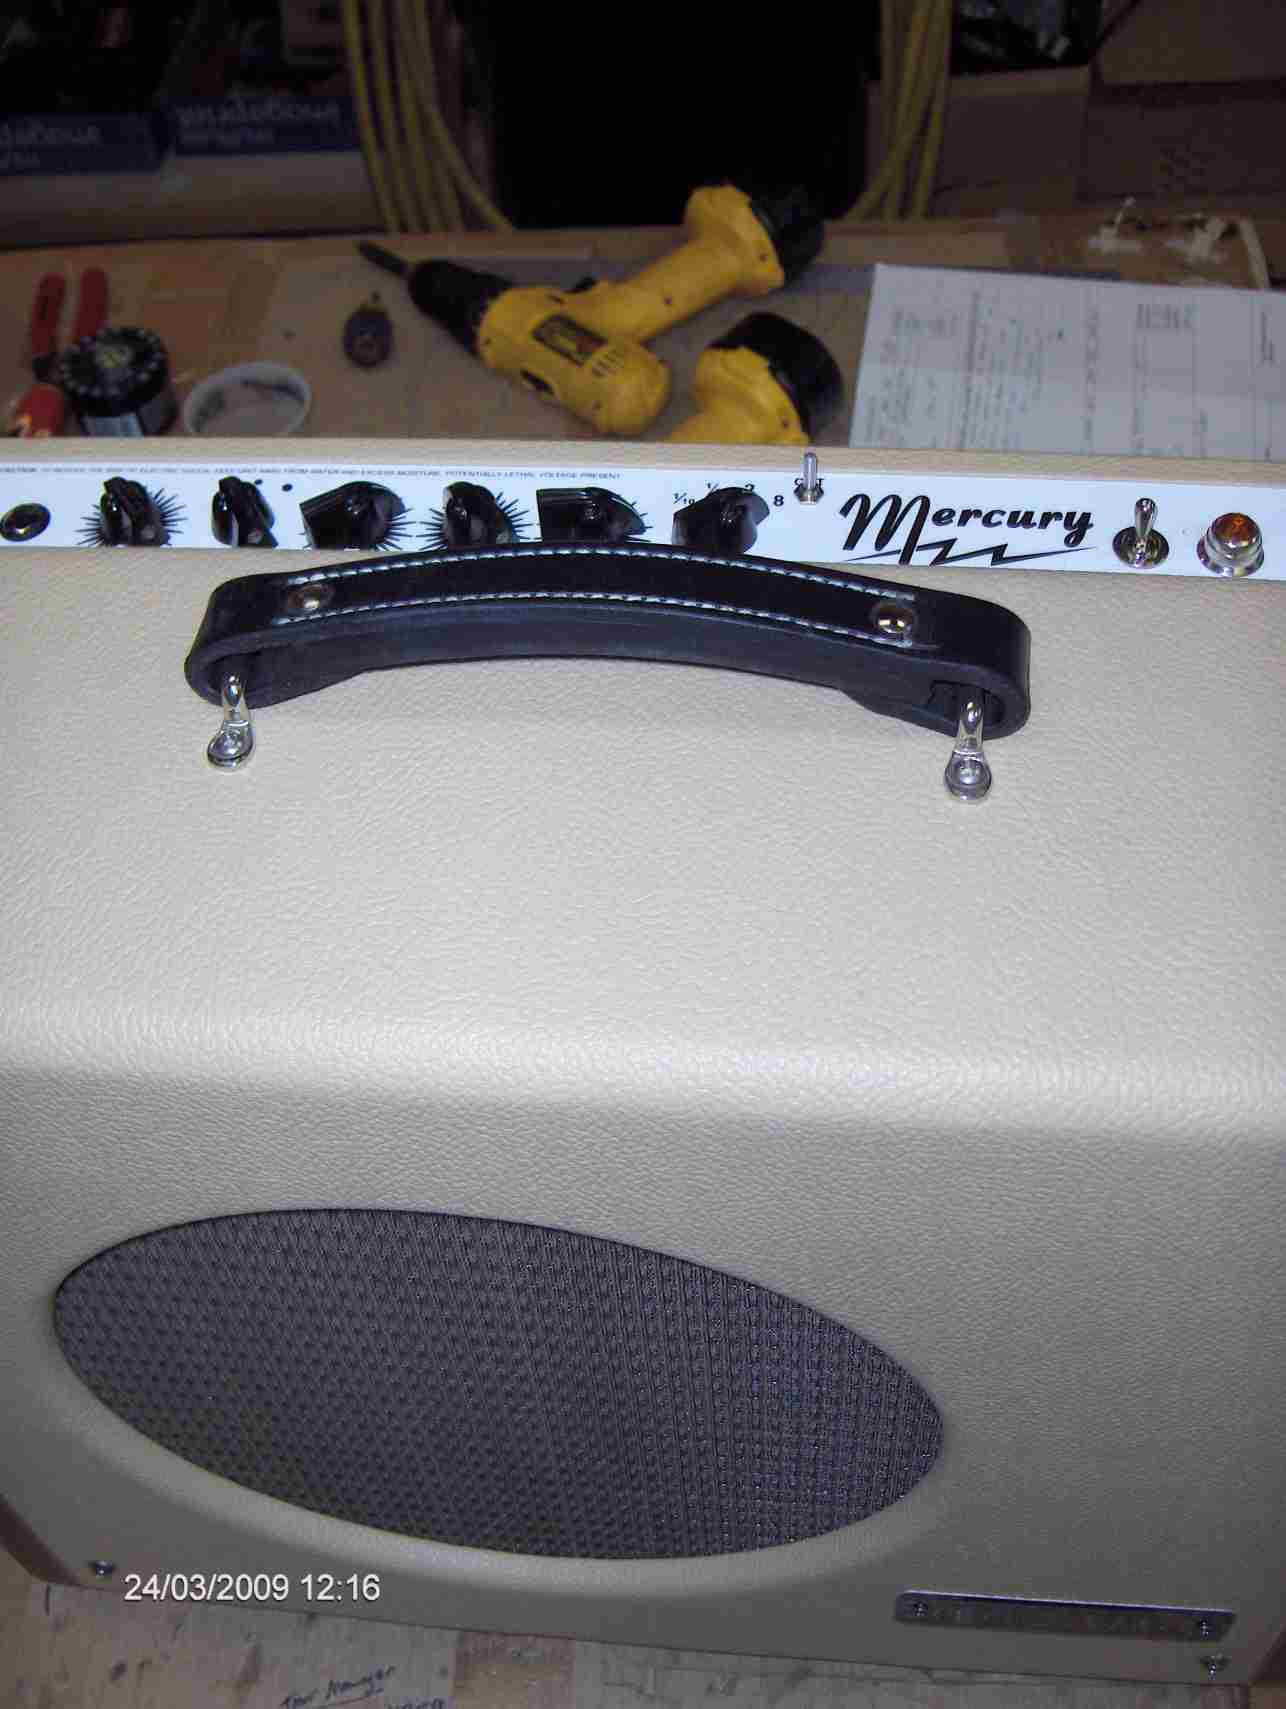
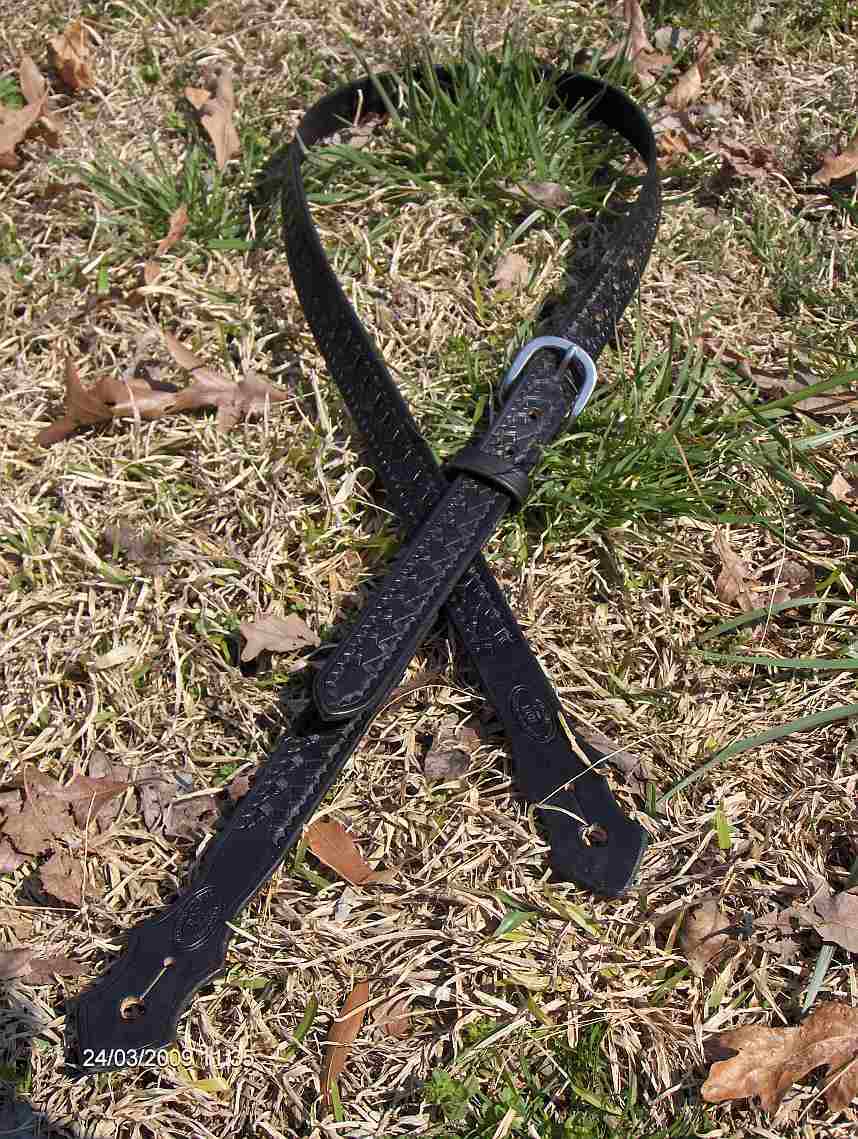
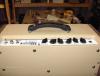
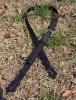
I don't remember if I posted these before, but they are new pictures anyways, so indulge me this once please.. I make these for a local Company here in Pittsboro, NC.. Carr Amplifiers makes Tubed Amplifiers for Guitars and other instruments. They had some problems with the standard handles being sold by many suppliers. The rock and roll of it all sets all the plastic inserts, and chain stitiches all akilter. They asked me to come up with designs that would eliminate the problems. I offered some samples, some impeccably burnished, some with no hardware, etc. They choose the look and feel of this style..a simple but hefty, 12oz bridle leather. It has become a dependable amount of hours each month, which gives me breathing room as I try and find my place in the Leather world. For the chance, I am truly thankful, and proud that my work is now part of theirs. For any of you musicians out there, you know that the true audiophile prefers the tubed sound, and understand the quality of these amps. It is a rare thing to see anything made of quality in the USA nowadays. So if you are looking for a special amplifier, you might have a look at these: http://www.carramps.com/ PS, I also made a vintage style guitar strap for one of the workers. Thanks for the eyeballs, and I hope this gives a few of the small guys, like me, to go out and try for some little jobs like this.

-
Harley Davidson,Ford,Chevy, and other name brand stamps
rdb replied to RMB Custom Leather's topic in Stamping
Not an Attorney here, but, IF they are manufactured stamps, and not hand made, then the manufacturer (in the 70s) probably paid a license fee to make the stamps. If Harley, etc licensed the maker, then I would say it is legitimate to use them. CAVEAT: If Harley, etc, in their licensing states that the designs cannot be used in making things for sale, that would mean they can only be used for personal use. BUT, if the seller of the stamps did not inform the buyers of this, then all bets are off. HOWEVER, Bree is right..ANY litigation by Harley, etc , win, lose, or draw, would be more than the average Joe/Joelene can handle financially. Look up the manufacturer, call them, call Harley, etc legal offices and ask...it can't hurt. -
Vinegaroon progress
rdb replied to mikeymoto's topic in Dyes, Antiques, Stains, Glues, Waxes, Finishes and Conditioners.
Tthe red cider vinegar gives me a blacker color, than the white distilled. Couldn't tell you if that's scientific or not, but for me it does. I use ungalvanized nails, cause I have a million of them. It's ready in a bout a week. -
Beautiful work. If this is your first, or one of your first few, you have found a calling! For the record, could you explain the scholarship, and the TCAA for those of us not in the Saddle trade? It's wonderful to know that there is real help out there for those wanting to join the trade. Made in the USA, Baby!
-
Stuff happens... I cut straps everyday, being too fussy gets in the way. Just take a straight edge, and line it up with the true part of the cut, and recut that last 6-12 inches straight. If it's off a little, use the strapcutter, and just cut a 1/2" strip...use that for belt keepers. Now you have a true edge to cut from again.
-
My halfpenny... First things first...Get Vendor input, Check with the manufacturers there to see if they might have interest in attending, i.e. Sedgwick, Adler/Pfaff, Cordwainers, toolmakers, you know the rest. Tell them of your preliminary plans. and see if they would be willing to do some level of sponsorship. You don't know what you have planned right yet, but they may offer some suggestions, and ballpark what they might be willing to spend on such a venture. The amount of money you may be able to garner is key to what type of event happens. On the low end, It maybe in a field somewhere, or if it grows out of control, a palatial auditorium/convention center, who knows.... Leatherworkers, Visitors and attendees can always be found through adverts, but the key is who will be there to show the trade aspect. From what I can tell, those from Europe are having a hard time finding the sources of suppliers and things there.`
-
Reaching for Help & Praying for Solace
rdb replied to JustWakinUp's topic in Leatherwork Conversation
I can't give any life advice, but if you need a place to store some tools, I should be able to squeeze them in here somewhere... Also, you can work in my shop, if need be, to make your wallets to earn a few bucks... Been there, done that... -
Treasure, I would think! The second pic of some domed type tools look like they would round over bevel cuts to make domed border lines. Pretty cool.
-
Sharp as a hoof pick! Nice job Ian. Now after the spring rains, if you don't have a horse, you can always clean off your boots before going in the house....lol
-
That just means Microsoft doesn't recognize the publisher's certificate. It doesn't necessarily mean bad. If you know the source, it's just up to you to say the final okay. In this case, if you downloaded the program from the link I gave, you will be fine...
-
Mould making basics for wet forming leather
rdb replied to UKRay's topic in Gun Holsters, Rifle Slings and Knife Sheathes
UK, don't worry bout my feelings, they're numb from old age anyways...lol I know wood patterns and mold/moulds have been used in Leathersmithing forever, but because I can't think normal, I often have alternative ideas. What seems like a long time ago, in a land far away...I was doing a lot of pottery. The one thing about wet clay, is its forgiveness. I have made many two, and more piece molds from it. It shapes up easier than wood, and can be altered quickly. You can let it dry, throw something over it, and then pack the negative space up with more clay...2 days or so later, you have a mold. Fire it up for a more permanent one. You can take the clay and mold over things for a shape you like...you get the picture. If you make a mistake in the mold, just add more clay. For certain projects, this type of thing is more suitable than spending a long time shaping wood. Matter of fact, I just might make one up later this week... Ps, you could use concrete, or paper mache in the same manner... And now, back to your regular programming... -
When suppliers do wrong, we let then know, but when they do right, we don't always let others see that good side too. Aubrin is the newer manager at the Raleigh location, and I've been in there only twice since he's taken over. Both times, the place was packed, but both times, he managed to help me out with my questions, and assist me. I know, in this day and age, imagine...service! I bought something on one of sales, but they were out of the complete package to go along with the sale ( "Wild West Collection"). Aubrin promised me he would send them when they came in. I had forgotten all about them, actually, but yesterday, they arrived at my mailbox. Now, some would say, "that's what they're supposed to do", but nowadays, it's a rarity. So....Thanks Aubrin.
-
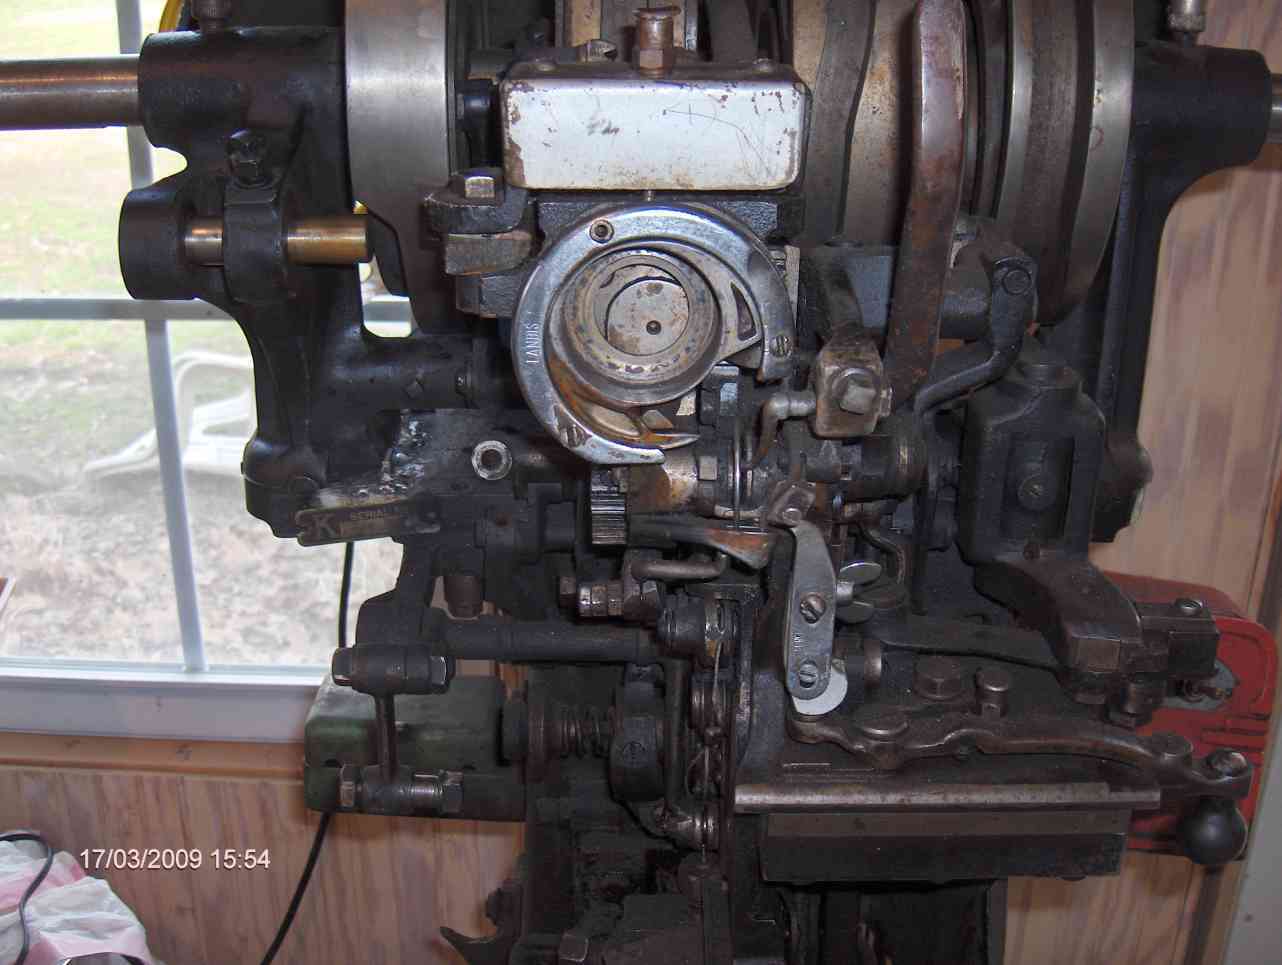
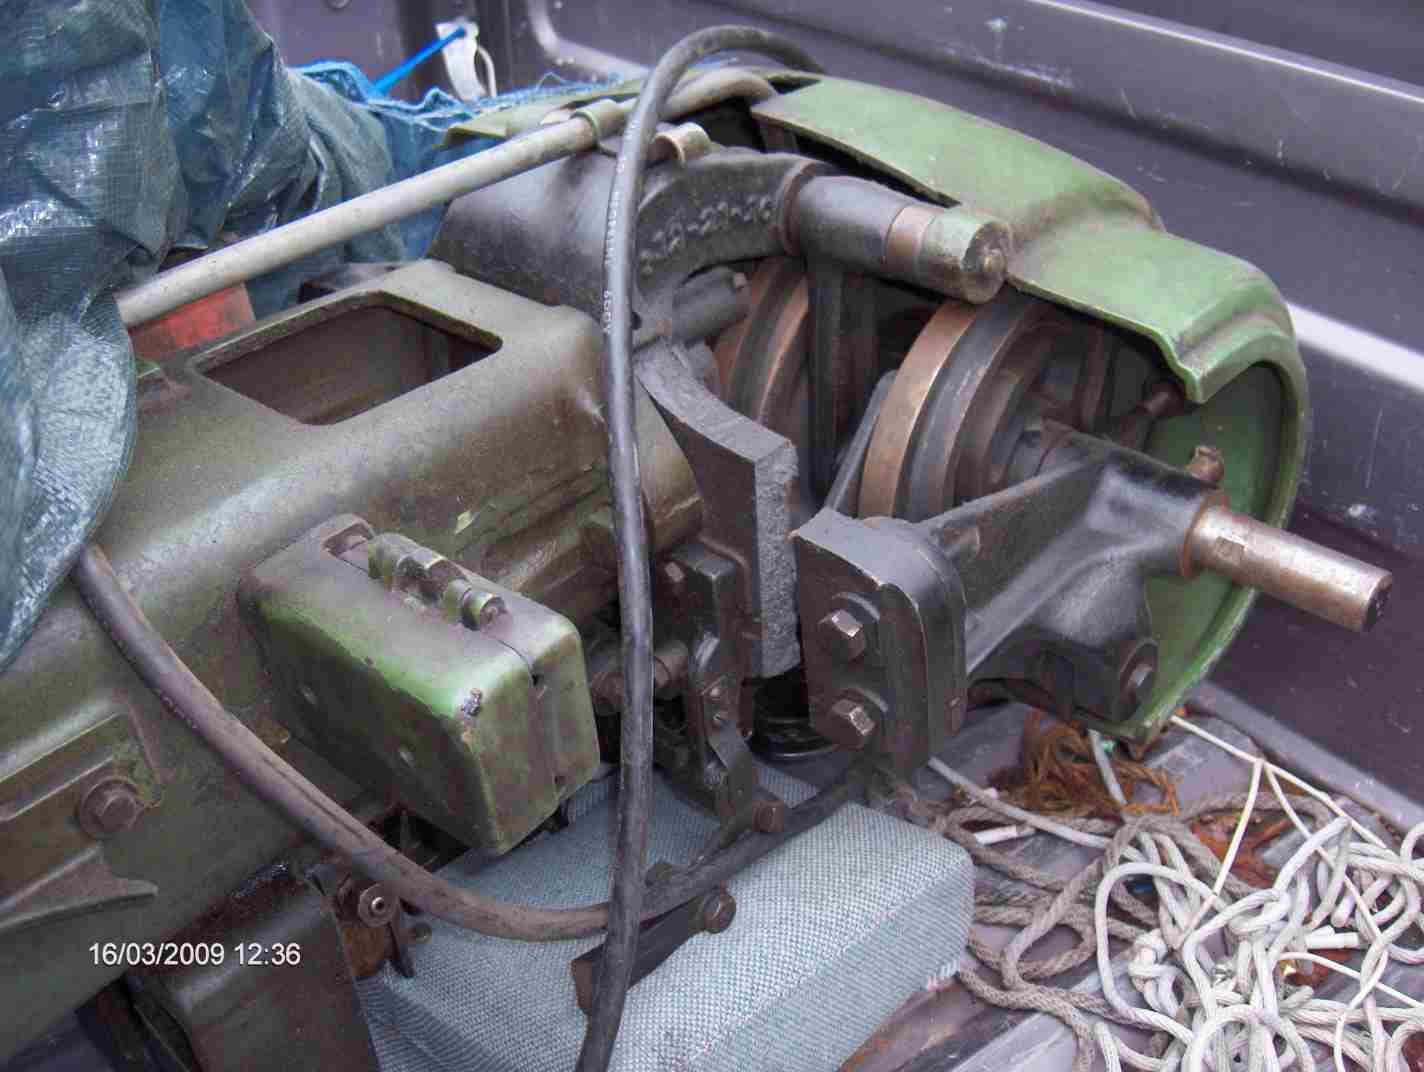
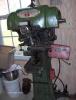
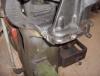
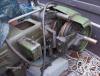
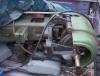
Well. I promised, so here are a few pix of the Landis 12K I picked up. I brought it over a friend's house last night, and we welded the base casting split. Nickel Cad welding rod did the trick. I still have to file/grind down the welds, etc. I contacted Pilgrim Shoe today, and they are sending the parts, and manual out. Parts, they say, will not be a problem. He was amazed at the $75 I paid for it, but did say there are quite a few out there functioning, that can be had for cheap, maybe $1000-2000, because so many shoe shops are/have gone out of business. He sells his reconditioned for $4500. He suggested getting one that runs, and using this for parts. I doubt I'll run into another one, so it looks like I'm going to try and restore it. For youse that don't know..this is an outsole stitcher, curved needle and awl, for stitching soles on shoes., or for that matter any heavy leather (like gunbelts).


-
I don't know what it's all about, with these unstained, basically unfinished "natural" leathergoods lately, and their prices...geez! $138 US for the simplest of belts, is just beyond my comprehension. $8 in material, including a buckle, and a quickly rubbed edge...For that money, I will come every other month, and refurbish it, for a year!...lol As far as the stitching, don't do it that way. Hidepounder is right, stitching around the edge will strengthen it, but at some point it will fail, sooner than a parallell stitch. The proper way to stitch this type of belt would be a handstitched row parallell to the edge, and sewing the keeper loop in with that line. The loop would not go all the way underneath, but just enough to hold 3-4 stitches along the edge ala Stohlman's old and proven method . Doing it this way, reduces bulk from the loop, and gives it a stitch line that will probably last longer than the owner (hope you understand what I mean).
-
Mould making basics for wet forming leather
rdb replied to UKRay's topic in Gun Holsters, Rifle Slings and Knife Sheathes
Crack me up! Admiring the way I work? I'm a slob! Somehow in the madness, I make a few things that work. Here's one of those "freeforms" finished up this morning... Vinegarooned, but no finish yet.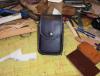
-
Nice job. It's hard to make carving stand out on black, but you done good.
-
Water repelling and resistant are basically the same. Outside of a plastic coating, which defeats any purpose for leather, there is nothing to make leather waterproof, oh sure, maybe for a little while, but the finishes will wear off, and so it gets wet. Mink oil is a good water resist, but periodically will have to be reapplied. The oils and waxes fill the leather pores, and don't allow water to seep in. But they dry out, or off in time. You don't say what you are using it on, so I can't be sure, but there are other products similar to mink oil, but less likely to darken the leather like mink does. There are products like Tan Kote, Leather Balm, Pecard's, Dr. Jackson, and Snow Proof. All of them work until worn off. Periodic redressing of all leathers definitely prolong its usefulness.
-
Okay, I ASSUME, i've gone and done another stupid thing. I'm looking at months of head scratching, and wallet outlays for this contraption. I was alerted by a friend yesterday of an old machine at the local flea market. I ran down, and I found this tripod Landis 12k. No pulleys, no lower motor, and the cracked casting you see in the pics. What a mess. But there was still thread in it, so I'm guessing, they dropped it moving it, and hoping it's still functional after I get it together. The $75 price tag, I couldn't resist, so there it is in my truck, this morning. I'm going to a welder friend's house tonight and see what he thinks can be done. He's a wizard, so if it can be done, he can do it. If all goes well, I'll show an upright picture tomorrow, or so. Then we can begin the restoration process. Please don't ask why I needed it, or why I bought it....I bring home stray mangy mutts too...lol. Somebody, Stop me!!!
-
Welcome rht! Those bags are great! You haven't lost much since you put away your tools, that's for sure! Just imagine after a few more months. Yikes....
-
Me too, I'm hoping for a wee bit bigger picture. I love history, and this shows a man with a lot of work on his hands, always a good thing, and shows how respected our work was back then...and all being done with a patcher...wow? I don't see any other machines, maybe they're off in another corner.
-
My Brothers B-Day gift
rdb replied to BearMan's topic in Purses, Wallets, Belts and Miscellaneous Pocket Items
It's kinda cool Bearman. I like how the wrench on the flap comes down to hold the sam brown post...clever. -
Mould making basics for wet forming leather
rdb replied to UKRay's topic in Gun Holsters, Rifle Slings and Knife Sheathes
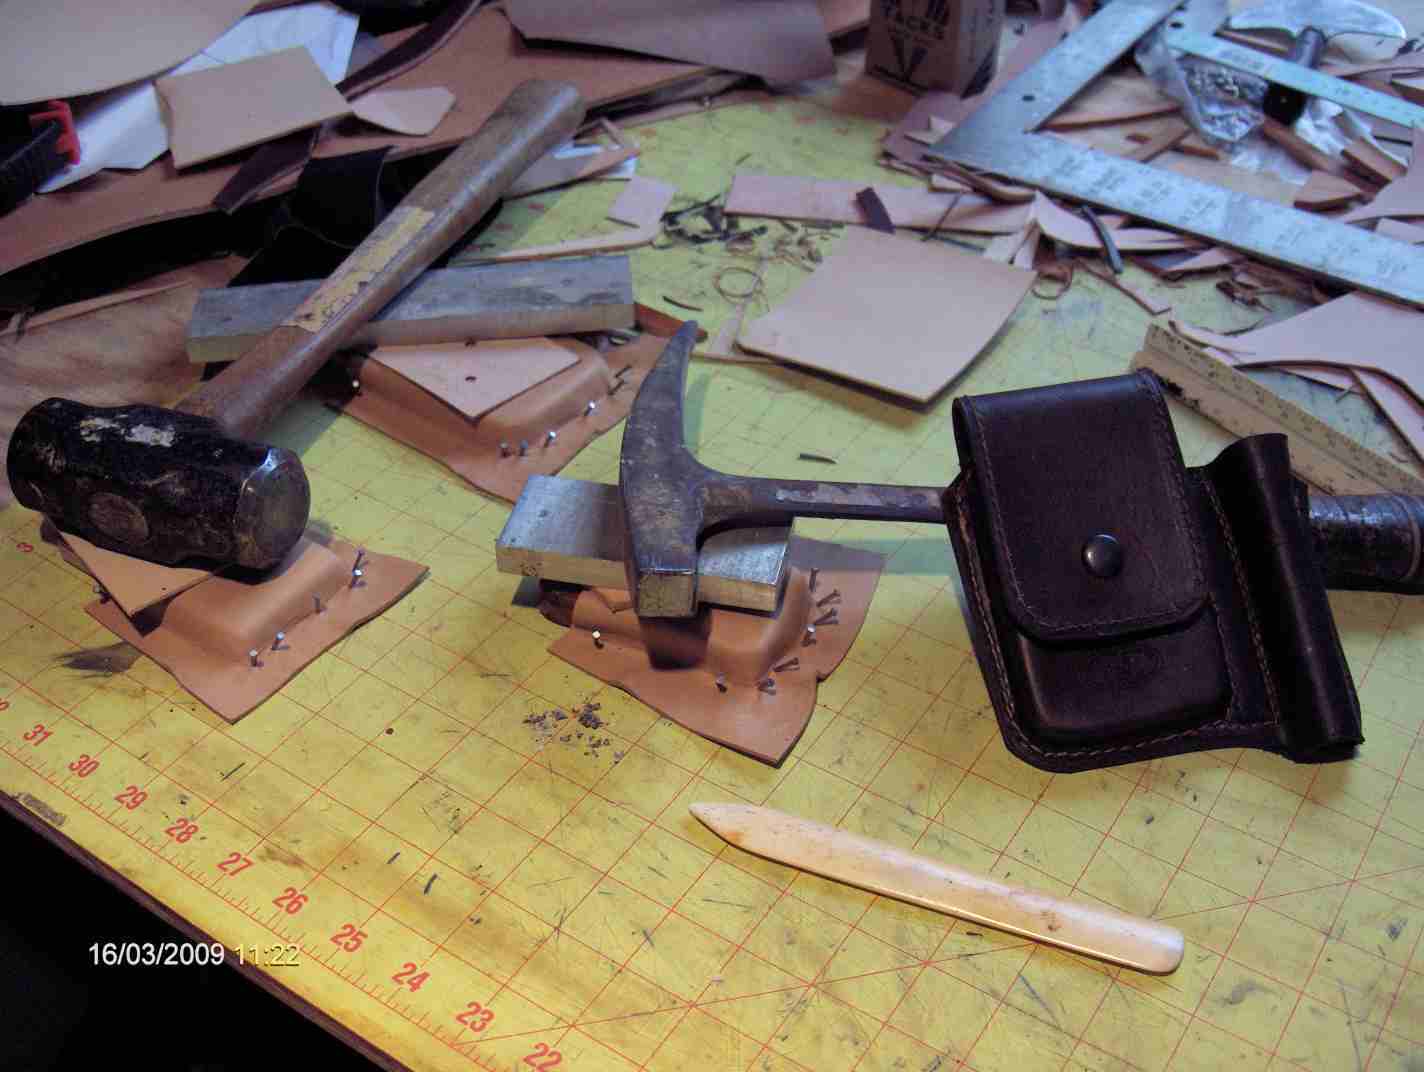
Not really related, more free form, but this is my bench this morning.....
-
Welcome to the board Beener. It should be interesting for all of us to see work and repairs related to skating and Hockey, eh. O Canada!
-
Mould making basics for wet forming leather
rdb replied to UKRay's topic in Gun Holsters, Rifle Slings and Knife Sheathes
There's a book called "The leatherworking handbook", by Valerie Michael, that has some good chapters on 2 piece moldmaking and methods. I'm not a master of anything, but I have to make molds once in awhile. I just use my bar clamps and sandwich boarding to hold any molds together. Sometimes I'll make a mold and screw the top right to my old workbench. If your molds, and leather pieces are consistent, the trimming off of the excess will also be consistent. As far as radius is concerned, it all depends on your equipment. How close can the foot get to the crease. Holstermakers use specific feet and plates for as close as possible sewing. I don't have those feet yet, so I make do by sewing on the opposite side of the presser foot, and just getting the needle foot as close as it can fit. It just about goes right into the crease. I don't trim until after sewing, so the walking foot still grabs. This works better on small projects, but larger ones show the mistoops. I'm sure those with the proper equipment will tell you the specific/correct plates, and method they use. Holstermakers also use their presses, and vacuum pumps over molds for larger production purposes. There's several Threads here on those discussions, as I'm sure you've read. I don't often mold anything much bigger than a holster, or cellphone case, and that's not everyday, so I still use the old fashioned Stohlman type method with just using tacks, for the most part. But I might have 3 or 4 of the project nailed to my working bench, while they dry. With a big enough bench/ tacking board, small production levels can add up quickly. I place the tack right in the crease, and my way of sewing covers the tack holes. I hope your questions open a big discussion on this. It could be useful to all...