bcurrier
Members-
Posts
223 -
Joined
-
Last visited
Content Type
Profiles
Forums
Events
Blogs
Gallery
Store
Everything posted by bcurrier
-
I also just read this (haven't been on the site for a while). Gregg was a terrific resource for all kinds of machine history, applications, repair, and more. Every contact I had with Gregg or with Keystone was prompt, courteous, and 100% accurate. I appreciated his expertise and contribution here. He'll be missed. 46 is very young indeed ... My heart goes out to his family on such a sudden and unexpected loss.
-
Ferdco Pro-2000 ... Which Machine Base?
bcurrier replied to bcurrier's topic in Leather Sewing Machines
When I first contacted the seller, I asked him about the (arbor and other) presses he had listed. He’s keeping those. He said he’d “definitely” deal on the Ferdco machine, though. I asked him the lowest price he’d take for it as it’s an oddball Ferdco. Never heard back. -
Ferdco Pro-2000 ... Which Machine Base?
bcurrier replied to bcurrier's topic in Leather Sewing Machines
Ken, it’s not a 900B. Uwe, I had also found the Thor machine, which is clearly the same, as is the Cowboy 7205. I’ve also looked through Singer history and can’t find a match. I’m beginning to suspect you’re right about Ferdo - at least in their later history. What makes this interesting is the Super Bull labeling, as that’s late in Ferdinand/Ferdco’s branding, and they were still using 441 machines for the Super Bull Pro 2000 branding. Keystone Sewing (keysew.com) has a short Ferdinand/Ferdco history that reads as though it came from Ferdco: ”The Pro 2000 was designed by Ferdinand JeanBlanc in 1991 using a Juki 441 frame from Juki USA. In 1995 we went to a Tiawan manufacturer and had the 441 changed to our new specifications which we use now. Once the casting is delivered to us, we convert the 441 into the Super Bull Pro 2000 that you see advertised today. You may be familiar with some of the other proceeding versions of the Bull or heavy stitchers Ferdinand has designed and built in the past. These would be: The Chandler 305 Bull - From 1964 to 1968 The Alder 105 Bull - From 1968 to 1979 The Adler 205 Bull - From 1980 to 1985 The Ferdinand 900 Bull - From 1985 to 1993 The Juki Pro 2000 - From 1993 to 1995 And the Ferdco Pro 2000 'Super Bull' - From 1995 to Present” In any event, it’s a machine I think I’ll pass on, as parts and maintenance are always a concern. That’s the beauty of the clone machine market, I guess ... keeps things alive. -
Ferdco Pro-2000 ... Which Machine Base?
bcurrier replied to bcurrier's topic in Leather Sewing Machines
The take-up arm on a 441 is on the end face of the machine. This one has it on the front. -
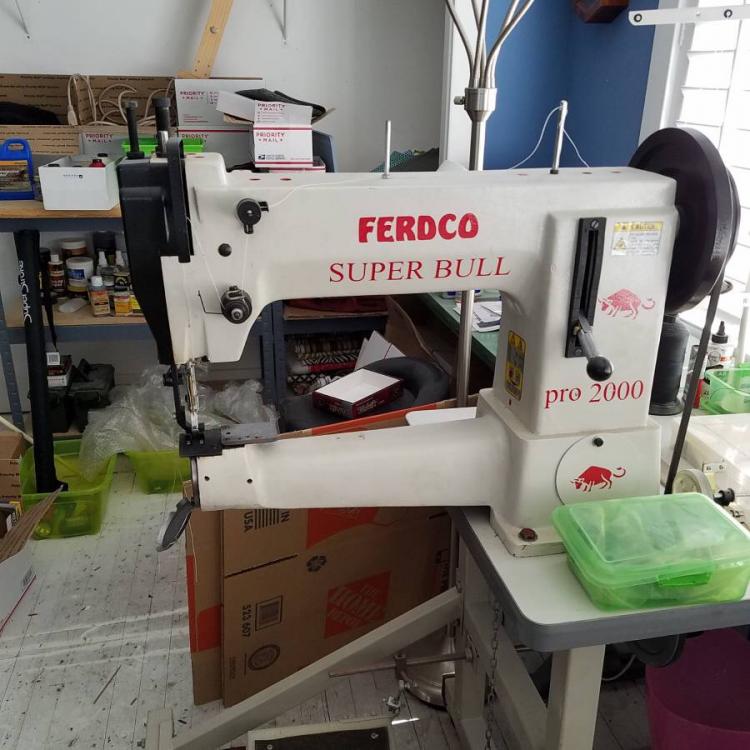
Anyone know what machine this Pro-2000 is based on? It looks mostly like an Adler 205 to me, but the front-mounted tension is atypical. Ferdinand built the Pro-1010 that looked almost exactly like this, but I haven’t seen this version of the Pro-2000.
-
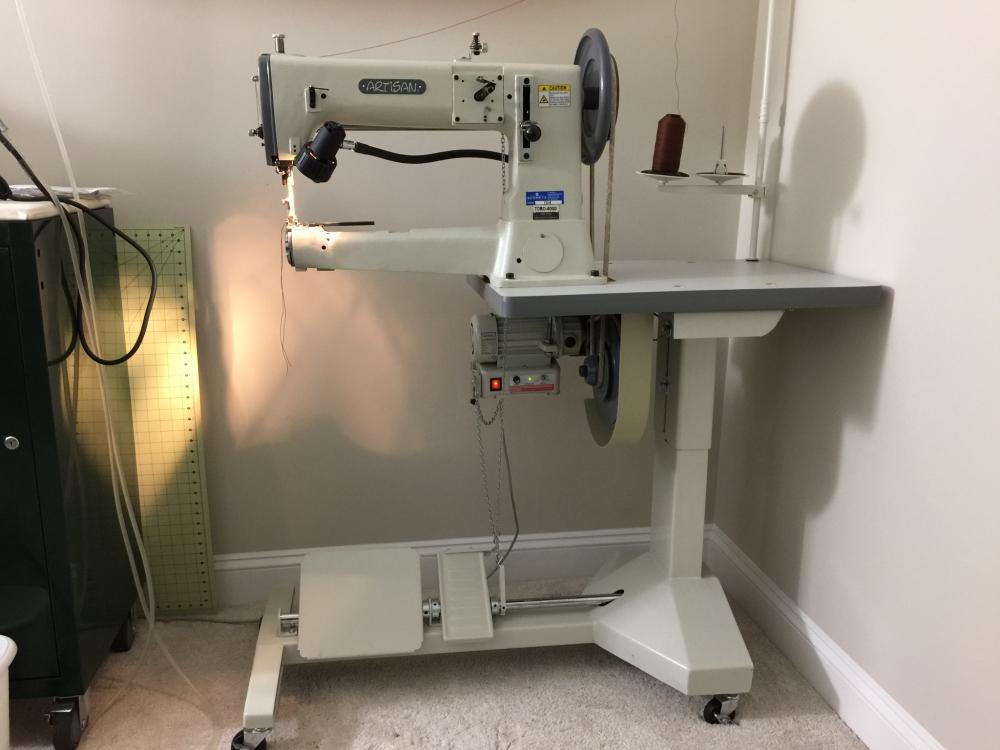
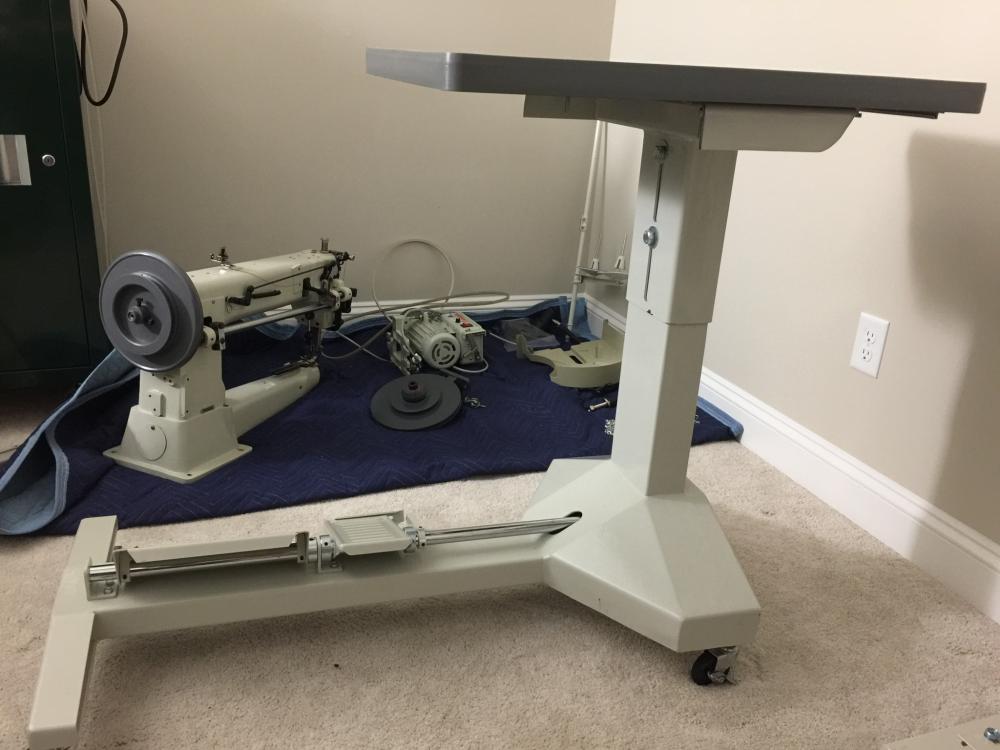
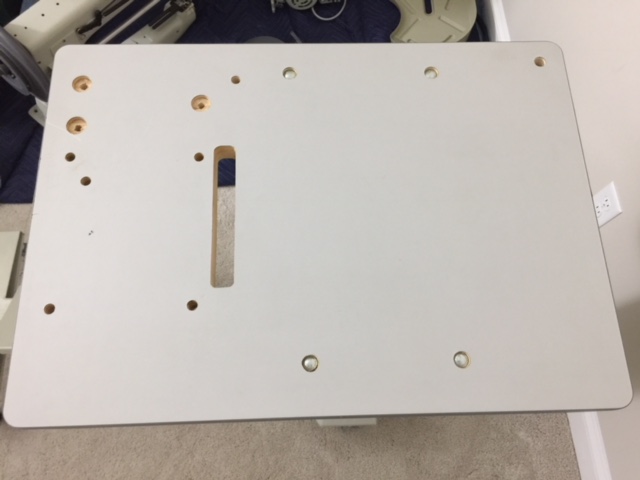
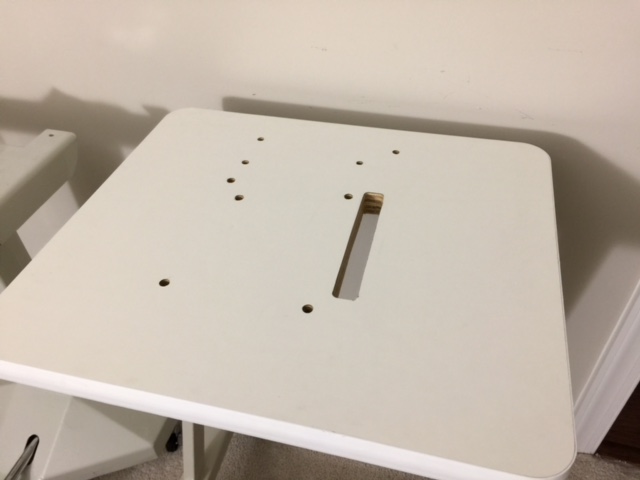
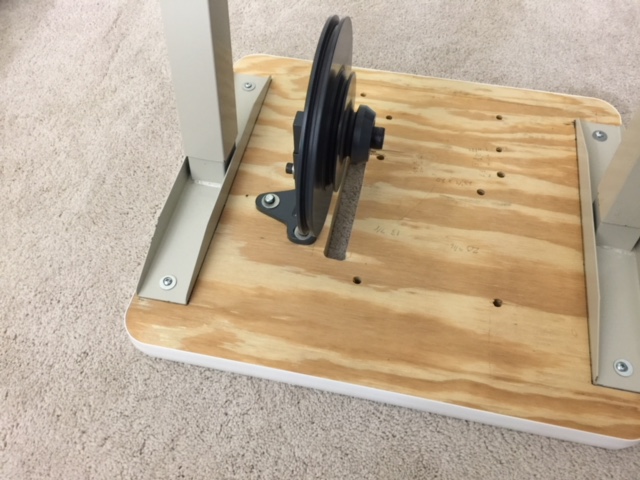
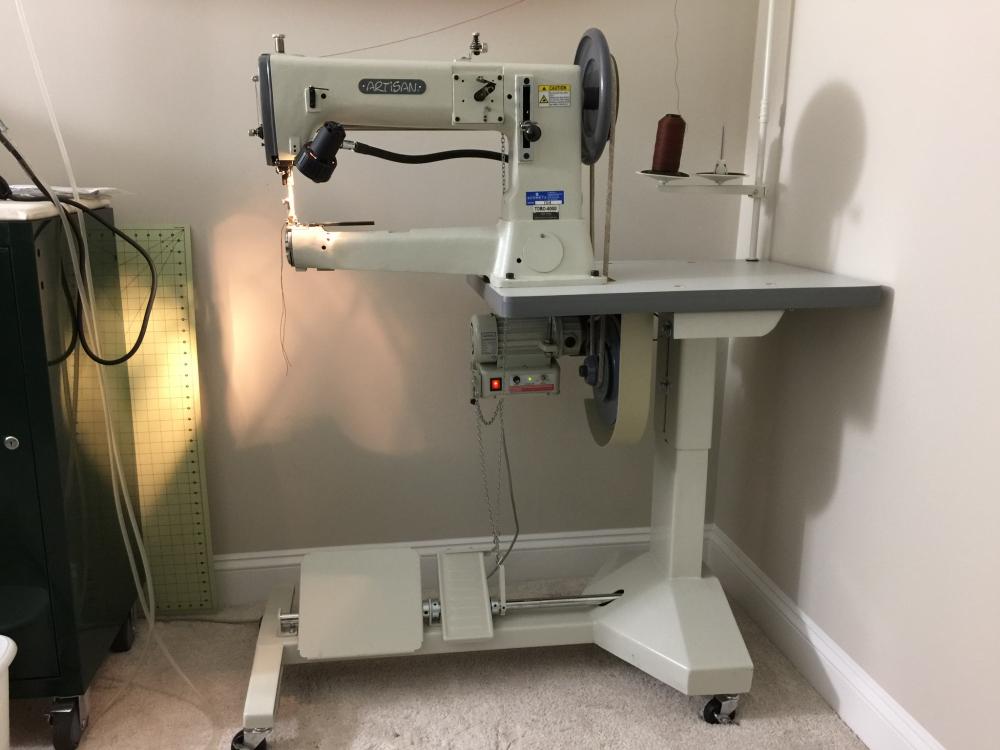
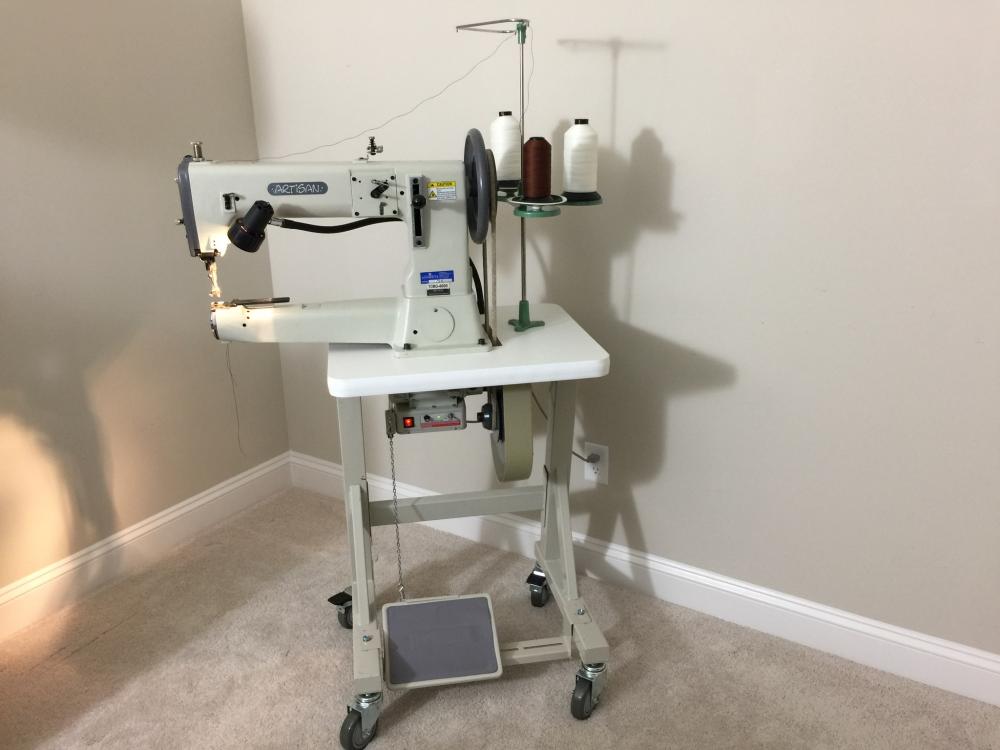
I recently moved my Artisan Toro 4000 to a small stand, as we moved into a much smaller house, and am selling the original heavy-duty pedestal stand it came on. Please see attached pictures, including one of the original setup with the head, motor, speed reducer, light, and thread stand in place. The second picture shows the bare stand as I’m selling it (machines etc. on the floor not included). The stand is height-adjustable, on casters, and made of very heavy steel. 2 pedals - one for the motor, the other for the foot lift. The top is drilled for the Artisan Toro 4000, which is a Juki 441 clone. $75 (which is a bargain). Pick-up only. I’m in the Jacksonville, FL area.
- 2 replies
-
- stand
- sewing machine
-
(and 3 more)
Tagged with:
-
It’s expensive, no doubt. I like it better than others I’ve seen, though. It’s heavy duty, made of substantial steel tube ... and a 441 clone is a heavy setup to put on a small table.
- 11 replies
-
- sewing machine
- 441
-
(and 1 more)
Tagged with:
-
It is indeed a nice table. It’s also available in colors (for extra $$). It’s not obvious from the picture, but it’s also height-adjustable. I have it set on its lowest position, which, on 4” casters (also extra) leaves it exactly the same height as my old table.
- 11 replies
-
- sewing machine
- 441
-
(and 1 more)
Tagged with:
-
Brmax - I’m a long way from Missouri. I’m in Northeast Florida (Jacksonville area). I thought I’d toss in a few progress pictures. Although this kind of machine move takes a bit of time, it’s not hard to do. In this case, I used the old tabletop as a template for the layout and drilling. 1) Blank (new) table in front of old setup 2) Disassembled! 3) Old Top 4) Old top clamped on new (with offset) 5) Drilled and marked 6) Slot cut 7) Speed reducer mounted 8) Motor mounted, guard installed. Ready to turn over.
- 11 replies
-
- sewing machine
- 441
-
(and 1 more)
Tagged with:
-
Thanks - I had something like that in mind. Problem is that the current knee lifts I see are all made to fit the bosses in oil pans. The Adler’s has a nice A-brace setup. I may end up fabbing something if I can’t find it.
- 11 replies
-
- sewing machine
- 441
-
(and 1 more)
Tagged with:
-
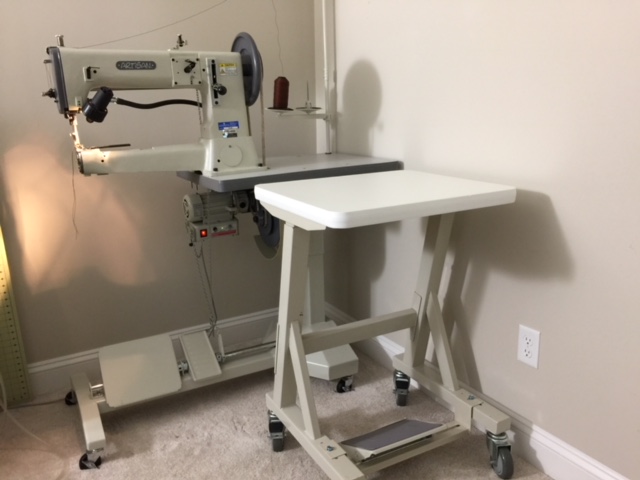
We moved from a much larger house, going from a 40’ x 24’ sewing and craft space to a spare bedroom ... 12.5’ x 11’. Saving inches is critical and moving my leather stitcher (Artisan Toro 4000) is part of that. I’ve been looking for a good, small table for a while now, finally finding it in a Merrow Machine Helmsman table. My wife already has a Merrow machine on one of these tables, so I was able to measure for feasibility first. It looked good, so I ordered another.The result? Very stable! I moved the head as inboard on the table as I could while still keeping a good amount of free space under the cylinder arm. The larger casters on the Helmsman actually roll better than the larger table (the room is carpeted). Although it might not seem to be the case, the pedal is completely comfortable to use. I haven’t figured out a solution for a convenient foot lift yet (knee lift perhaps), so am using the hand lever for now. Please see the before and after pictures. Also, the old table (in perfect condition) is for sale. I’ll post that separately in the classifieds.
- 11 replies
-
- sewing machine
- 441
-
(and 1 more)
Tagged with:
-
Airbrush acrylics <101
bcurrier replied to Regis's topic in Dyes, Antiques, Stains, Glues, Waxes, Finishes and Conditioners.
Disclaimer - I don't airbrush, but have been looking into it lately because of posts in this forum. One thing I found that I thought would be useful (or maybe not, given the comments here on Createx) is a paint buyers guide on the Airbrush Action site: http://www.airbrushaction.com/pdfs/aba_2007_PBG.pdf I don't see any pattern regarding paint types as it relates to leather in this guide (Createx "acrylic" is listed as usable for leather, for example, while several other acyrlics are not). Still, it has a lot of information. Bill -
Wow! And they say women don't like drawing attention to their, ahh ... saddles ... Bill
-
Jim, I'm glad you came back to the thread and posted your experience with the maul. I was wondering how the PVC would work out. I just might give it a try myself. Bill
-
Gun belt measurments
bcurrier replied to Rhome's topic in Gun Holsters, Rifle Slings and Knife Sheathes
I'm the only one who was flamed here. Nothing I said should be taken as a criticism of your posts, Erik. My post was a contribution to the general topic, nothing more. Bill -
Gun belt measurments
bcurrier replied to Rhome's topic in Gun Holsters, Rifle Slings and Knife Sheathes
I guess it depends on just how accurate you think you want to be. An accurate to the body, made-to-fit 100% belt, for example, wouldn't technically be cut on a radius at all, it would have a number of compound curves. Some of the techniques people use to create patterns (like the stick and steel rule approach that Bianchi teaches) don't result in a true radius either. Note also that you HAVE to develop a non-radius pattern for a decent fit on a slung gunbelt - one where it's carried high on one side of the body and low on the other. A belt cut on a radius will gap if worn this way. One way to get a good pattern is to use an approach similar to that used for women's hemlines. A piece of fabric or pattern material is wrapped around the hips or waist, then you mark lines (representing top and bottom of the belt) on the pattern material around the body with a marker held level to the floor. There is a marker holding device used in sewing for hemlines, but it's easy enough to rig up something high enough for belts. The pattern material is removed, cut out on the lines, and there's your starting pattern. Bill -
Synchronizers are used together with a motor control in order to provide needle positioning. Basically it gives you the option to automatically have the needle either up or down when you stop sewing. Down is useful when you do a lot of turns, as you want to pivot on the needle itself. The positioner not only lets you stop needle down, but at the proper point in the needle stoke so as not to drop a stitch when you turn the material. Needle up is useful in production situations as the material can removed immediately and the thread trimmed without the operator having to manually turn the handwheel or goose the motor to get the needle out of the way. Since you've acquired a production machine, you may find you also have an automatic thread trimmer installed as well. Bill
-
Compound feed just means that more than one feeding mechanism is used. In this case it's a combination of needle feed and drop feed. High-speed means whatever the manufacturer thinks the target market will like, frankly. Lockstitch just means the machine produces a two-thread (top and bobbin) ISO 301 stitch type - your garden-variety "normal" sewing machine stitch. Needle feed uses a mechanism to move the needle bar (the part that holds the needle) back and forth - the needle enters the material up front at the start of the stitch, pulls the material back as the needle descends then starts to rise, finally exiting the material at the back of the stroke when the stitch is complete. It actually uses the needle to move the material and control the stitch length. Needle feed works very well with leather, but needle feed alone starts becoming problematic when the material becomes very stiff or heavy, which is where combinations with additional feed mechanisms (like drop feed or walking feet) comes into play. Drop feed is a mechanism that uses ridged feed dogs below the bed of the machine that rise at the front at the start of the stitch, move backwards during the stitch stroke, carrying the material with them, then drop back below the bed again at the end of the stroke. Pressure from the foot keeps the material against the dogs. Generally, drop feed mechanisms aren't the best to use with leather as they mark the bottom of the leather - in the worst cases chewing it up. You can offset that in several ways: by removing the feed dogs entirely, by dulling their teeth, by replacing the dogs with ones with more and smaller teeth, and/or by minimizing their rise above the surface of the bed. Walking foot mechanisms - and there are several variants of them - are commonly used with needle feed for heavy leather stitching because it works in conjunction with the needle feed, moving in sync (usually) with the needle, and also - key point - helping to hold the material properly to get a good stitch. There are other ways to accomplish this, such as automated material positioning and pulling mechanisms, but for sheer flexibility, which is what's important in a machine used for handicraft work, nothing beats the combination of needle feed and alternating walking feet. Hope this helps. Bill
-
Presentation Desk Sheath
bcurrier replied to sheathmaker's topic in Gun Holsters, Rifle Slings and Knife Sheathes
I like it a lot. What's holding the sheath to the wood base? Bill -
Now those are some cool little anvils! Do you sell them? If so, how much? Bill
-
Cool mask, but it doesn't look there's much provision for breathing. Bill
-
I don't really have anything to add to what Art and Greg already said, other than at $100, you don't have a lot to lose. You'll find out in a hurry what its limitations are, but, on the other hand, it will be a useful light-duty machine if you don't push it (skirting would qualify). Bust it, and you may as well write it off. If you buy it, take Art's advice to heart on getting it set up with your thread and sewn off on the leather you will be using. Bill
-
Can I rescue an old leather top on a table?
bcurrier replied to LadyJ's topic in Furniture: Inlays and Upholstery
You might try moisturizing the leather. I was at an industrial woodworking machinery show last week and, of all things, there was a leather supplier there that specialized in leather for furniture tops. According to him, the best way to attach leather to a tabletop is with wallpaper paste, and - to the point of your current situation - most are actually done that way. If so, water will loosen the paste. The problem would be how to keep from spotting the leather. Bill -
Pfaff 130 sewing machine to repair saddles??
bcurrier replied to 3arrows's topic in Leather Sewing Machines
The differences between home and industrial machines have been unbelievably glaring for the last few decades. In fact, I'm surprised sometimes that anyone could confuse the two, at least if they have the opportunity to compare them physically. Unfortunately, the lines are going to blur again, at least from a design standpoint. More industrials are coming out that have direct drive motors (i.e., in the head), no-lube and semi-dry designs (no oil pan), more plastic in the build, and have electronics-driven components (stepping motors) and interfaces - like the home machines. You might think the high prices of the industrials of this type (e.g., the Juki 9000) would still make the difference clear, but you ought to price a top-of-the-line Bernina sometime! I know, and you know what the differences are. For now that still includes (for the industrial) heavy castings, much heavier shafting and components, better quality bearings, long-life components, industrial-quality motors, MUCH higher speed capability, etc. etc. It's still pretty hard to confuse a 70 or 80 pound industrial head on a k-leg stand with a 12 pound home machine in a case, no matter how much they may nominally work alike electronically. But I wonder just how much design for the industrial is going to move in 10 years or so? Maybe the home and industrial markets will overlap again in the future. Just thinking out loud. Bill


