


Dan28
-
Posts
295 -
Joined
-
Last visited
Content Type
Profiles
Forums
Events
Blogs
Gallery
Store
Everything posted by Dan28
-

Finished Another Project
Dan28 replied to Dan28's topic in Purses, Wallets, Belts and Miscellaneous Pocket Items
Thanks guys. That cherry leather stain, smells a lot like regular wood stain to me. It goes on probably easier than any of the dyes I've used, in that it didn't soak in to the leather as fast. It looks a lot like Fiebings Ox Blood dye which I have used a couple times. Other than figuring out what to make for my dad, I've got a few simple belts to make and my Christmas gifts will be done. Not sure what to make for my dad, though I'm kind of leaning towards a case for one of his rifles. -
Looks good to me. I've been at it about 4 or 5 months, but the only tooling I've really done is a few simple borders.
-
Nice.
-
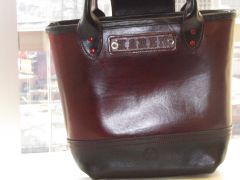
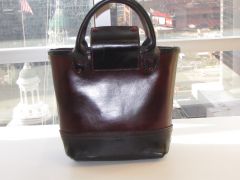
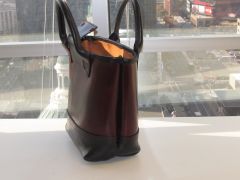
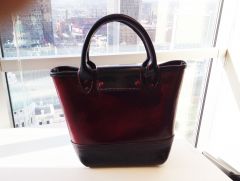
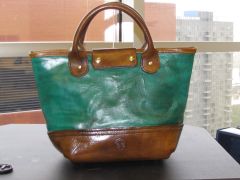
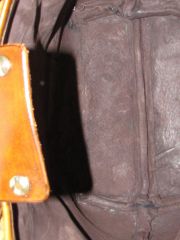
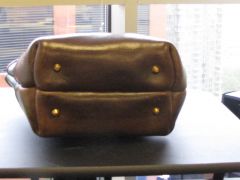
This is my second tote bag. It is for my sister. Mostly Herman Oak veg tan leather. The bottom is 10 oz., the side panels are 6 oz. The handles and closure are 9 oz from Tandy (it was more flexible than the Herman Oak). Trim at the top is calf skin, maybe 1 or 2 oz?. The lining is pig skin, and I took Monica's advice and sewed it up and stitched it in, instead of gluing it. I may have put a little extra in there, as I didn't want to er on the side of too little. Unlike my first tote, I did not stitch the entire bag while inside out. I sewed the handles and closure to the sides and the sides to the bottom pieces I did sew the bottom piece inside out but stopped a few stitches up the sides. I then only got the bottom (black part) wet and flipped it at that point. I had left my threaded needles ready on each side (four needles) during the flip, so I did have to retry getting them started, and then I sewed inside the bag. It was a bit of a pain, but I wanted no stress wrinkles on this one. When I got about an inch from the top, I stopped sewing the sides and stitched in the lining and the trim (trim had been glued down already on the face of the bag and stitch holes punched). I was going to use plain red dye for the sides, but had some Fiebings Cherry Stain and decided to use that instead. The rest as you can see is dyed black. Rivets, snap faces, and bag feet are powder coated red. That is just a loose piece of thread that fell in the bag, its not attached. My first tote (green and walnut) next to this one.
-
From the album: Dan's Leather stuff
-

From the album: Dan's Leather stuff
-
From the album: Dan's Leather stuff
-
From the album: Dan's Leather stuff
-
From the album: Dan's Leather stuff
-
From the album: Dan's Leather stuff
-
From the album: Dan's Leather stuff
-
I haven't tried to smack mine with a hammer/mallet, in fact I don't think I could do it cleanly that way. It is pretty easy with my one ton arbor press. I just have to position it within about 5 inches of an edge so I can fit the leather correctly. I actually use the press anytime I want a really deep indentation.
-
I like the way the small piece flares out and then to a point where it is sewed to the main strap. Its a nice accent instead of just one width going to a point. Eventually when I get through my current projects, I'm going to make myself a couple straps. I have an acoustic and an electric, but only one strap that I transfer between the two, and its just an old cheap canvas Gibson strap, with leather or maybe even vinyl tips.
-
My First Tote Bag
Dan28 replied to Dan28's topic in Purses, Wallets, Belts and Miscellaneous Pocket Items
Judging by the quality of your other items, I don't think you will have any problems with this style. -
Nice handle. Just a few weeks ago, I was looking all over for pics of various handles trying to get an idea for how I wanted to do one. Only after I ended up making the one I used, did I come across the single piece of leather design for them. I think I probably would have used that design.
-
My First Tote Bag
Dan28 replied to Dan28's topic in Purses, Wallets, Belts and Miscellaneous Pocket Items
Thanks Monica. Every time I do the turn inside out thing, I get those stress wrinkles in the leather. Some people like them, some don't. I'm neutral on them. That red purse I did a few months ago, I flipped without wetting it first and still got a few of those wrinkles in the leather. That was really hard to flip dry and I think it was only 6 oz. leather. As far as a fabric lining goes? A manly man can't use fabric! joking. I don't have any fabric. I guess I could treat the pig skin like fabric, but that was the last of my dark brown lining, and I didn't have a big enough portion to do a solid lining like that. I suppose I could have sewed the portions I have together. Though gluing the lining to the leather gave it a slight more rigidity. However, the red and black one I'm going to start in a few days, will get the tan pig skin lining I prefer and have a lot of. I think I will try this method on it. On this one, I actually wish I had put the top portion of the lining up under the calf skin trim, but I had already glued that whole trim piece down before I got to the lining. I thought of it right after I got the first side trim glued down, and didn't want to try and pull it up. -
My First Tote Bag
Dan28 replied to Dan28's topic in Purses, Wallets, Belts and Miscellaneous Pocket Items
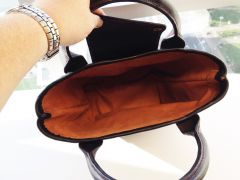
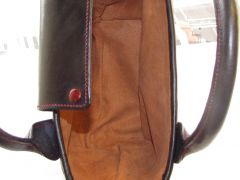
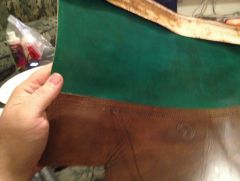
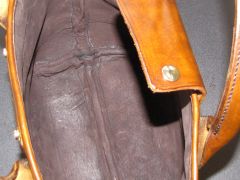
The interior. -
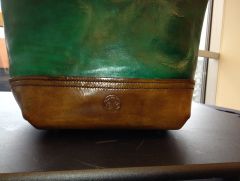
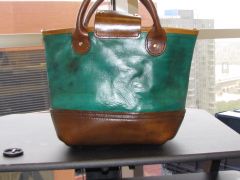
Made this for my aunt Judy. The brown portions (except for the trim around the opening) are just about the last portions I have left from the first side of leather I bought from Tandy. It was a pretty nice piece of 9 to 10 oz. veg tan (at least to my limited knowledge). It was pretty flexible compared to the Herman Oak stuff I have from Springfield. The trim along the opening is some calf skin, not sure of the weight but it is thin, maybe 1 or 2 oz. The green portion is about 5 oz Herman Oak from Springfield. The dye is Fiebings Pro green and Fiebings Pro Walnut. I barely had enough left of the Walnut to do it all all the brown portions as I only had a partial 4 oz bottle left. It has about three coats of a 50/50 water/resolene mix for the finish. It has a pig skin lining. The thread was 45mm waxed Poly cord from Maine Thread Co. For the handles (my first of this type), I filled them with old edge trim so they would keep their shape. Every time I make laminated straps, I cut them a quarter inch wider before I glue them together. After they are glued, I run it back twice though my strap cutter taking off an eighth of an inch on each side to get the desired width with clean edges. I learned that technique here. I have save all those old strap edges thinking I might use them and I did for those handles. I created each side separately, combining the upper and lowers, trim, adding the handles, the bag feet, and the closure. I also glued the large portions of the liner on each side right before hand sewing it up, inside out. once the entire thing was sewed together, I glued strips of pigskin over the exposed inner seams to hide them and give the inside a better look. Once the glue (Barges cement) dried on that last lining covering the seams, I filled the entire thing with hot water and let it soak a bit and then flipped it inside out. If there is a better method, please let me know. Up next is a black and red version for my older sister. I will probably change the dimensions a bit, and do bigger handles with an English strap point thing. I may make the lower portion out of a single piece of leather, not sure yet. Finally, I also may put an inside pocket in the next one too.
-
From the album: Dan's Leather stuff
-
From the album: Dan's Leather stuff
-
From the album: Dan's Leather stuff
-
From the album: Dan's Leather stuff
-
From the album: Dan's Leather stuff
-
From the album: Dan's Leather stuff
-
From the album: Dan's Leather stuff