gringobill
-
Posts
161 -
Joined
-
Last visited
Content Type
Profiles
Forums
Events
Blogs
Gallery
Store
Everything posted by gringobill
-
Thank you sir, you are very kind! I have admired your work as well! I was talking to another guy who had made a briefcase and he said, "the first one is always the hardest. It was definitely a learning experience, mainly the fabrication. I definitely learned some things to do on the next one! Bill
-
I draw all my own patterns for better or worse. Hell, I put small pix on here so you couldn't really see all my mistakes! As far as the basket weave goes, it's not as straight as I'd like either, and I did use some guidelines to start with. I don't think in reality it's quite as crooked as it looks in the photo, that panel is an outside pocket and I don't think it was laying perfectly flat when I took the photo. But again, I'm not really satisfied with the basket weave either.
-
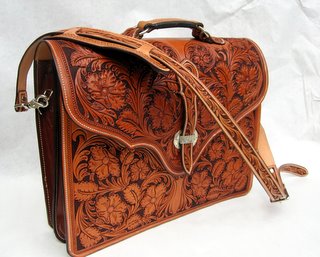
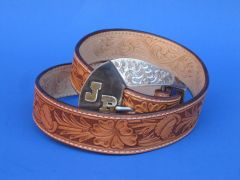
This is a briefcase that a man ordered for his daughter who just got her masters degree. I told him I was afraid it would be too big for a small lady but he was not to be confused by fact, his mind was made up. It was one of those deals where the more I chewed it the bigger it got. It took forever to complete, I kept making mistakes and had to tear stuff apart and redo it. I did the silverwork also which added some time to the job. Adding insult to injury I totally shot myself in the foot when I told him how much I would charge for it. I imagine I've lost money on the job. If I ever get an order for another one the customer better be sitting down when I give them the news! Anyway this sucker is fixin' to be outta here and man am I glad! Bill

-

My First Pair Of Woolys
gringobill replied to customcowboyleather's topic in Floral and Sheridan Carving
-
My First Pair Of Woolys
gringobill replied to customcowboyleather's topic in Floral and Sheridan Carving
Outstanding, They look way to pretty to wear out in the slop of winter! Maybe they need to be worn to the Saturday night dance? Your yokes look terrific. I really like the shading on your tooling, did you antique them. If you did I'm curious how you got it all to turn out light colored with just the accents in the stamping dark? Awesome piece of work! Bill -
Another Pad Folio
gringobill replied to hidepounder's topic in Purses, Wallets, Belts and Miscellaneous Pocket Items
Yep, that oughta work!!! Like clod said somebody is gonna really be proud to have that!! Bill -
What a simple and handy die!!!! I have made a couple myself and made it way more complicated and not nearly as user friendly as yours!! What a cool idea, thanks for sharing! Bill
-
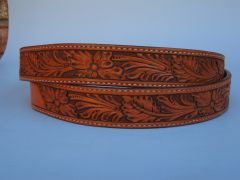
One way to make yourself a template is to take a piece of graph paper, figure out how wide you want your finished strap to be, draw those demsions on the graph paper then and fold it in half and draw your design along the outside edge (not where it's folded,) cut it out with scissors and then either make a better template or carefully use the graph paper. If you going to use it more than once it'll make your life easier if you make the finished product out of heavy paper, poster board, cardboard, manila folders are pretty good. Something that's stiff enough to trace around without it folding up on you.
-
 Welp, another masterpiece by the master!!! Gorgeous! You're darn sure keepin' the bar up there for the rest of us. Awesome work Bobby! Bill
 -
You're really making great progress, I czan see a lot of improvement in this sample of your work from the first one. Stay after it and keep practicing! I believe you are right that there is probably a pretty big difference between Spanish veg tanned leather and the US version. I have no experience with Spanish leather at all although Spanish leather in general enjoys a very good reputation! There is probably a difference in the tanning process. My hat is off to all of the people world wide, living in places where you don't have access to the resources and suppliers we have here in the US. It has to be huge challenge and expense trying to get the same supplies we take for granted and are trying to learn this US version of the craft. You have to really be motivated and committed to stay with it! As far as your tools go, that may have something to do with your work. The 1/4" swivel knife blade is normally used for small intricate designs but can work for larger work. The width of the blade is less important than the thickness. Most all blades are close to the same thickness it's the width that varies. I primarily use a 3/8" blade for most of my designs and use a 1/4" blade for very small intricare work. I have a couple of 1/2' blades and rarely every use them. I t hink a lot of that is what one is used to and personal preference. As far as your beveler goes, if you have one that is 1/4" wide or less you should be able to get by. If you had a 1/4" and a 1/8" bevelers they should allow you to do a good job on most designs. It doesn't look to me like the width of your beveler is causing you a problem. Hope some of this is helpful, keep working at it, you are making great progess! Felicidades, Bill
-
-
I've been buying some Uncle Mike's brand paddles from Midwest Shooter's Supply, Columbia, Mo. They are about $10 and they're "ok," but i'm not totally happy with them. They are really hard to get on and off and are not as sturdy as I'd like. One nice thing about them is they allow to adjust the height and angle of the holster. The service from Midwest is outstanding! IMHO Galco paddles are the best I've seen but they would not sell me just the paddles. Maybe someone on the list knows a source for their paddles. Bill
-
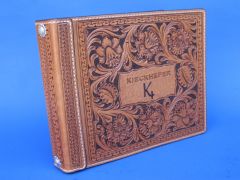
Feedback Wanted On Photo Album Design
gringobill replied to bison's topic in Floral and Sheridan Carving
Just a couple of general comments to build on what Kieth said. Your design is generally good, it just needs a little tweaking. All parts of a design need to be in proportion to each other, for example the stems and petals need to "match the size of your flowers," if that makes any sense. It looks to me like some of your stems and particularly your flower pods are a a little too small for the flower they are attached to. There is a chance they will look too "spindly," when finished they way they are now drawn. Also the lines of the petal should all flow smoothly from where they come off the flower (as Kieth described) and flow and fade to a point on the edge of an imaginary circle outside the edge of the flower. Most likely you will or can do this when you are cutting the petals with your swivel knife. All of my designs look better when they're cut in leather than on paper, The end of those cuts forming the petals should gradually taper off to nothing at the end and not end abruptly. That's what makes a pattern flow gracefully. Hopefully this makes some sense, it's kind of hard to describe. If I was a better hand with the computer I could put some graphics on your design to illustrate what Im saying but unfortunately that's over my head. Bill -
Personal Organizer
gringobill replied to hidepounder's topic in Purses, Wallets, Belts and Miscellaneous Pocket Items
Awesome job Bobby.....as usual!!!! Hope you have a great New Year! Bill -
Pancake - Glock 22
gringobill replied to JeffGC's topic in Gun Holsters, Rifle Slings and Knife Sheathes
To start off, I think your workmanship is excellent and so is your design. As far as the price, it's a handmade holster and I don't think a hunderd is too high. Building one is a lot of work takes a lot of time and you/we should get paid for it. Seems like I get more orders for holsters than anything and I really don't enjoy making them but I'm trying to learn to love it.....LOL! Yeah, there are a lot of less expensive holsters to be had out there but I don't thinkk they're custom made. I am not an expert on pancakes but I have made several and looked at a bunch and from what I have seen they are typically made from softer, thinner leather than a "normal holster. Some I have seen that are well used/worn by law enforcement types are actually really soft an pliable after years of use. Some of them are just barely a loop to slide on your belt and stick a pistol in. Maybe a little more comfortable than sticking the pistol in ones waistband or in your belt. It seems like the designs run from that idea to much more sophisticated like yours. One thing I did notice about yours that I think may defeat the idea of the pancake is that the middle seam looks like it runs pretty much down the center of the barrel. I think that the back of a pancake holster needs to lay flat against the hip and the wings curve around to fit the contour of the body for comfort. With the seam runnning the way it does on yours it looks to me like the backside of it might be uncomfortable if you have it cinched down on your belt all day. The "lump of the barrel is going to be pressing against the hip all the time when the holster is worn. I think others have made similar comments about the design and shape. I also think that if you build it so that the back is flat and the front is the part that is shaped to the contour of the pistol it will stay open with the pistol removed so doesn't need to be made out of thicker stiffer leather. On the ones I have made I use a thicker piece for the back and a thinner piece for the front. I know it's a drag when you bust your fanny trying to do a good job and "get it right," and then you get dog piled on for your best effort. But I guess unless some "expert," teaches us how it's supposed to be done we're just floundering around out there trying to figure it out on our own. Don't be discouraged, once you get your process figured out you're going to turn out some killer work! I'll attach a pic of one I made. Good luck, Bill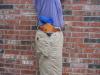
-
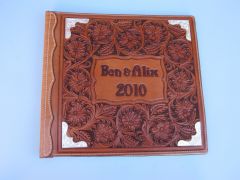
Thanks Bobby for the kind words.
I'll never get to your level but I'm still workin' at it.
John K and I got to be close friends in college and he, Linda and their boys really helped me a lot last year when my brother got killed so I wanted to do something for them and finally got around to it.
-
leatherworker aug 2010.jpg3.jpg
gringobill commented on gringobill's gallery image in Our Leatherwork Galleries
 Thanks for the kind words!!!
 -
-
-
From the album: Recent work
© © leatherworker.net
-

From the album: Recent work
© © leatherworker.net
-
From the album: Recent work
© © leatherworker.net
-
From the album: Recent work
© © leatherworker.net
-
From the album: Recent work
© © leatherworker.net
-
From the album: Recent work
© © leatherworker.net
-
As far as mixing the solution, I have never worried about being really "exact." I'm using some wood bleach crystals from Home Depot which is oxalic acid. I use about two rounded teaspoons in a quart of water. I have used warm tap water not "screaming hot." My understanding is the reason for using warm/hot water is just to speed up the disolving into solution process. When I have used these proportions there has been no settling out of excess crystals. I would be afraid that if excess crystals are settling out of the solution when you are mixing it you have a super saturated solution and I would be afraid that is too strong. A little of this stuff goes a long way. I always swish the solution around in the jar each time before I used it. Also in the proportions I use the solution works well in that it will clean off most all the spots and contamination that might end up on your project. I think it's wise too err on the side of conservatism and start out with a weaker solution and if it isn't getting the job done gradually increase the strength. I don't want the solution too strong. This stuff is not good for veg tanned leather and I consider it a "necessary evil," I think it takes out some of the natural oils in the leather. Too much will really dry to leather out and make it brittle. In a perfect world I would be able to keep my work piece perfectly clean and pristine and would never have any "stuff," to clean off. I apply it sparingly with a sheepskin patch. In the strength I'm using it takes a minute or two for black spots I'm wanting to remove to go away. So I apply some of the solution to the spots ( I don't drench or soak the leather,) then wait until the area dries out and see if that does the trick. If not I keep cautiously reapplying until things are cleaned up. I suppose it would be smart to put on a latex or vinyl glove to keep the solution off you fingers but I normally don't take the time to do that. After I have cleaned the piece to my satisfaction and it is dry I apply a light coat of olive oil or neatsfoot to replace the oils removed from the wetting/casing/stamping/cleaning. I hope this is helpful.