


TwinOaks
-
Content Count
4,513 -
Joined
-
Last visited
Posts posted by TwinOaks
-
-
I think it's because drum dyeing doesn't use ONLY dye, or at least not the same dye formula that we use. It also uses some oils which may carry the pigment further due to wicking between the fibers. Then there's the shear amount of dye/mix involved, so total saturation is possible. I'm pretty sure the hides don't just sit there; they're turned in the drum, so there is flexing of the fibers in the hide.
Next up is the humidity factor. At zero degrees (F) there's very little humidity in the air, so any leather exposed may simply not have as much moisture in it to keep the fibers expanded.
Interesting question!
-
There is a ratio that you need to follow, (Braiders, chime in here if this needs correcting). Basic instruction: Take the circumference of the size braid you want (or of the core if you have one), and divide by the number of strands you want to use, and that gives you the width of the strands. In this case, 1" x Pi (3.14) --> 3.14 / 4(strands)---> .785"....or 3/4 inch. 1/2" would work, but would not have the same diameter without some gaps.
Another thing to consider (since we cant' see what your strands are doing) is that you may need to taper the edges of the strands so that they lay down neatly. You can purchase or build one of several variants fairly inexpensively. -
Wiz, that's cheating!!!!
-
The issue with the really soft leathers is that unless supported, they can be pushed down into the slot of the needle plate, which boogers up the whole idea of the machine feeding the leather. The best thing to do is to just support the leather right where the slot is. Which gets interesting because the needle has to move through there. Some of our members, when sewing shearling, have put a piece of heavy duty duct tape across the slot, then slit it to allow the needle to move. I think something like that would work here as well. Since you're talking about using a patcher, you should realize that that is jump foot only (top only) feeding mechanism, and the needle only goes up and down through a small hole. That should help prevent the edge from collapsing, but hey.....it's time to test it, then let us know how it worked.
-
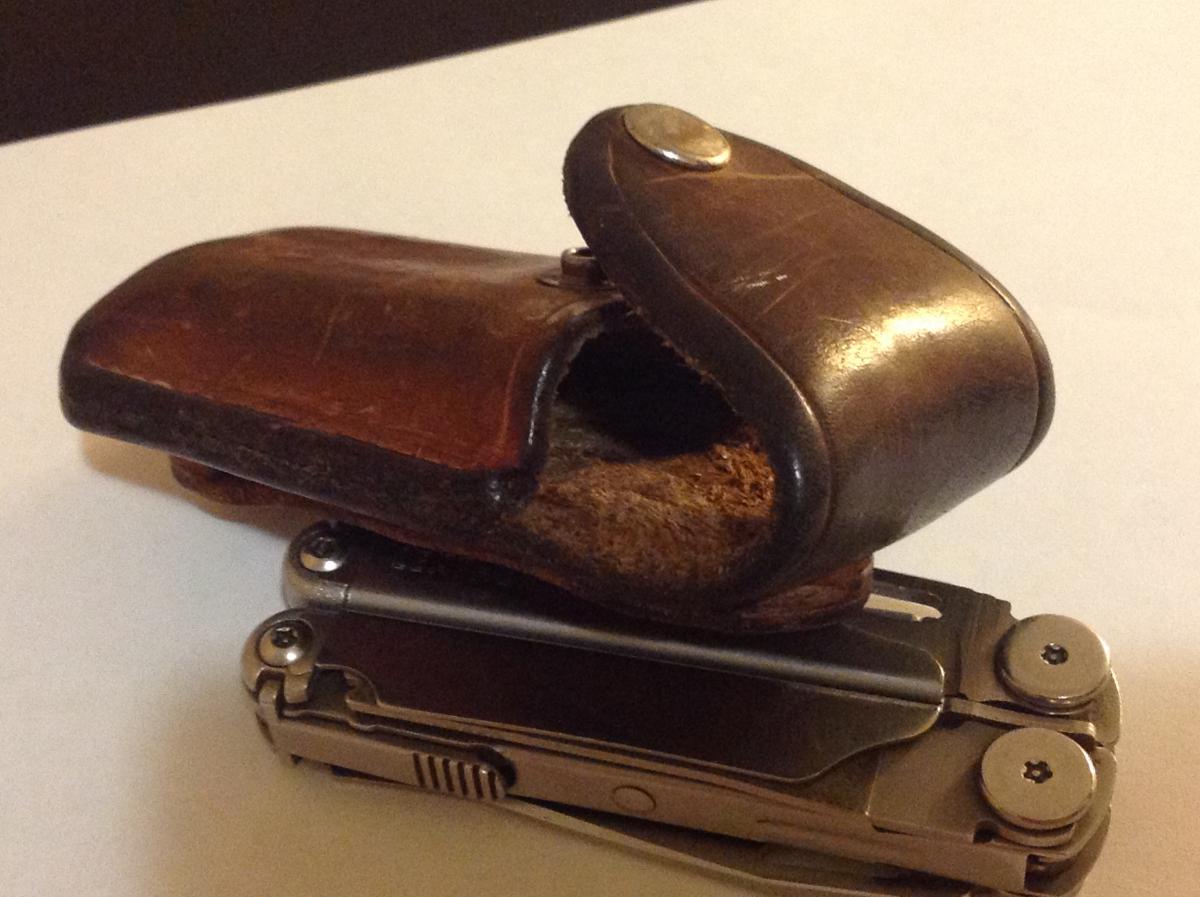
It sounds like you're putting on too thick of a layer. Resolene works best if applied by damp sponge or sprayed. Either way, it should be several very light coats, with drying time between them. One or two coats, with possibly a 3rd IF the item will see a lot of exposure to the elements. This pic is of my leatherman sheath that has been worn almost daily for close to 8 years. Yes, it has some dings and scratches, but the majority of the time I've used it has been climbing in and out of ceilings, and knocking it around on the inside of a fiberglass bucket on my work truck. That's a sprayed on resolene finish (two coats, sprayed with an airbrush), and once it 'cured' to the point of not being tacky, NOTHING has bothered the finish or the leather. It's seen summers on the South coast, lots of rain, and more very cold days than I would have liked to spend in the bucket. After all this time, water occasionally gets through the finish....but not much.
ETA: I have NOT refinished, nor redyed it. The only thing needed was a repair to the belt loop. Once.
-
You can certainly test for 'rub-off', and if you get any then buff until there's none. Then seal the leather. A note on the process- When you put any sealant on the leather, there should be enough that you aren't "rubbing it off". Saturate the applicator, and use gentle, light pressure to wipe on the sealant. In the case of any of the acrylic waxes, I prefer to spray them on. The best method (by far, IMO) is the use of an airbrush to apply the resolene in a light mist. If you have a good enough pump style sprayer, you could use that, but it needs to be a really fine atomization.
As far as sand paper??? NOOOOOOO! it will permanently damage the grain side of the leather. If you are working on the flesh side, or with a split, then it wouldn't really be noticeable. Just use some good solvents - acetone, denatured alcohol, etc.,.....AND LOTS OF VENTILATION! -
since that is a direct drive, how does it do for speed vs. torque?
-
First of all, Welcome to Leatherworker.net!
Leather sheen is supposed to be a sealant. However, you may need to apply more than one coat to get the leather properly sealed. Also, depending on the type of dye that you use, you may need to buff the dyed project to get any unabsorbed solids off the face of the leather. Black (in many forms) is one of the worst colors for rub-off, or bleeding. Once it's buffed....it's not nearly so bad. So...how much buffing? Until there's no more dye coming off the surface. THEN apply your sealer, and do a couple of test pieces to see just how much you need.
If you aren't happy with the 'Sheen....I also recommend Resolene. And if a trip to the leather store isn't in order, you can use Mop-n-glo.
-
Leather can be BOTH. In many instances, it is even more demanding than something like painting on canvas. We cut, stretch, bend, compress, and permanently deform our medium. In painting a picture if you get an "oops", you have the option to cover it. With leather, like sculpting in stone, once it's done, it's done. If you mess up, you have to start over on another piece
-
I think the amount of pressure you can apply is going to play a role in this. Every hot stamping machine I've seen (all two that I've seen at book stores, and the rest on google searches) has some sort of high pressure device. The stamp head is either gear driven, cammed, or pneumatic....which indicates that significant force is involved somewhere in the process.
-
Extremely well done, sir
-
It has been out of production, but is still being used in production...interesting twist. Parts are available through CampbellRandal, as are accessories. Needle/awl sets can be found through Pilgrim Sewing. I know because I have a narrow throat machine sitting in my friend's store down on the coast, and I looked up all the parts and pieces. The rollers for the cams on the back of the machine can be made from drill bit stop collars, and when the set screw is removed, it makes a nice little oiling port.
-
Yes, you can, but it will not be easy nor quick. You'll have to completely strip ALL the resolene, AND most of whatever color you used*. If you're going darker, then you may be able to just color over...but you can get hints of the other color showing through. The type of dye you used wil also be important. If it's spirit dye, then you have only the option to go darker. If it's ECO-dye, I'm not sure. If it's Eco- ALL-IN-ONE, then you probably won't be successful because that product also includes a finish.
Products to try for resolene removal: Acetone, denatured alcohol, etc.
Incidentally, you'll also need to recondition the leather after using harsh chemicals to strip it. -
I take a little bit different route than most. Even on pieces that are sewn with my Boss, I "back tack" by hand, and use a saddle stitch. I have had regular backstitching come loose due to very high stress...I guess it's either a statement on just how strong the thread is, or how week the back stitch was. Since I started hand sewing the last few stitches to lock everything down, I've had zero problems, even in similar situations. I always add a half stitch so that the threads end up on the back of the piece, and just heat the thread nubs with a lighter and mash them down into the other threads.
-
-
There is also the feel of the thread itself to consider. I've felt both bonded poly AND nylon that was stiff and coarse....and other samples that had a soft hand to them. In the case of garment work, I suspect it's the softer hand of nylon that keeps it on the spools, as well as color assortment.
-
Separate a small piece of it and see how many cords there are. I hand sew with 3-cord (approx. 207 size thread) linen and that seems quite a bit larger....perhaps the equivalent of 416 size thread. While that would work, you'll need to sew it at around 4-6 spi to avoid perforating the leather, and even then it's going to appear rather stout. That looks very similar to the thread used in harness machines and shoe machines.
-
A note on blade shapes: You mentioned the round awl...that is typically used for marking, not stitching. A proper stitching awl blade typically has a diamond shaped cross section. This shape is critical in being able to position the angle of the stitches. If a round awl is used, you'll only have a hole - no distinguishable top or bottom, and that WILL effect how the thread lies in the hole.
-
I haven't looked at those particular hides, so this may not apply...but, burnishing really only works on veg-tan leather. If it's bag side, or any other type of chrome tanned, tawed, or oil tanned leather, you might be able to slick it (sorta), but it likely won't ever take a true burnish.
ETA: I just took a look at them and they are almost certainly chrome tanned leather. You can sand, de-fuzz, smooth, burn, and paint them...but they won't take an actual burnish because they lack the oils, waxes, and fats (tallow) that veg-tan has preserved in it. You might be able to add something to them to make them lay down, but because the good stuff isn't IN the fibers, it won't be the same.
-
They're extremely rare, and worth THOUSANDS if you can get one in good condition!!!
Sorry, just kidding (I think). I too am interested in what it is, and am looking forward to learning more about it-----just from an "info" perspective.
-
Yes, there is. Make sure the edge is fully supported - either stitching, glue, or just something placed on top of it, then wrap a cloth around then end of a flat tool (like a creaser/folder). Then, moisten the edge and run your cloth covered tool across it to burnish. If it's already on another piece of leather, you'll need to slide something like a file folder under the edge before burnishing. This is to prevent additional burnishing on the leather under the file folder.
-
You could print out the letters and trace them to the leather. Then cut, cut and tool, just tool....etc. Given the fine lines of that font, you might consider using just cuts for the fine work, and inverted carving for the thicker areas of the letters.
-
Isn't this like asking who are the best guitar players in the world?
well, no, not really. That question has a single correct answer.....
-
If you're going to be posting the patterns you make from pics members send you, please make sure that the source image is neither ™ or ©.
Other than that, this is a very generous offer....thank you.
Beginner Wondering If Round Head Knife For Skiving Or Cutting?
in Leatherwork Conversation
Posted · Report reply
Nothing against Tandy, but if you're looking to get a head knife, avoid them. Osborne, Rose, Gomph, Blanchard, some English name, and one or two more are the "old standards", but don't overlook the newer makers on the block: Leatherwranglers makes several round/head knife versions, and there are two others I'll recommend: Terry Knipschield makes some awesome blades; also, Joshua Fields who makes some smaller blade designs.