-
Posts
45 -
Joined
-
Last visited
Profile Information
-
Gender
Male
-
Location
Minnesota
-
Interests
leather working, bushcraft, firearms, hunting, fishing
LW Info
-
Leatherwork Specialty
Holsters
-
Interested in learning about
carving leather
-
How did you find leatherworker.net?
web search
Recent Profile Visitors
2,632 profile views
srtolly's Achievements

Member (2/4)
-
I have this template set. It makes a nice case, there are two templates, one pistol shaped and the other is rectangular which I believe will work for a bible, I'm working on that one now.
-
With many of the holsters I work on you can see and feel the dirt between the layers of leather that abraded the thread causing it to break.
-
This is an 88 year old WW2 German holster that belongs to a collector, I need to keep my repairs as authentic as possible. I will be cleaning it with a saddle soap, while it's wet I can massage the leather a bit to decrease the size of the holes where needed. There are two different size threads on these holsters but I do wax them before stitching. No water barrier to speak of, I finish with Connolly's Hide Care which has Lanolin and Bees Wax in it, then it goes in a linen bag before being shipped back to my customer.
-
I'm sure the black is from the dye. Some of the spots the thread is gone from are wear areas while some are not, just an odd situation I haven't come across in dozens of these holsters I've worked on.
-
There's some pretty good information there. I like when companies actually put useful info out while promoting their products, I'll have to give them a try (maybe not on one of these vintage rigs yet). When I re-stitch these holsters I try to keep everything period correct as not to affect the value any more than necessary, but I do wax the cotton thread it replace it with.
-
Just kind of thinking out loud really, I did see some spots that looked like it could be some rancid vegetable type oil. At this point about all I can do is give it a good cleaning and re-assemble it.
-
I just came in from the shop, and after three hours of picking out the old thread, I pretty much came to the same conclusion. Someone, in this holsters lifetime, used something to care for it that they shouldn't have. As I was working on it, my mind drifted into the way back files of my days on the farm with my grandpa. We went to an auction once and saw a set of reigns for a horse drawn plow. Grandpa told all about how the leather hadn't been cared for well, and how it should have been done. I love memories like that, even if it was 50 years ago. Could have been veggie oil, motor oil or some other such thing, but those same signs are there. I'll give it a good cleaning, and see what comes of it. I had to completely disassemble it to get everything clean.
-
I appreciate the information, that's exactly what they did, re-dyed old stock holsters before they were dated and otherwise marked. To try to clarify, my question is: what happened to the thread to disintegrate the top of the thread? I've worked on quite a few of these old holsters, as far back as 1916, and never seen anything like this. The thread between the layers is black. I want to make sure the leather will be ok, it's in pretty good shape overall considering it's nearly 80 years old.
-
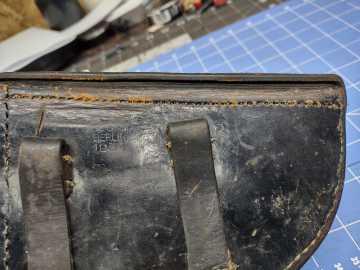
I do a fair bit of repair work on vintage holsters, mostly for German Luger pistols. They used a linen thread in the construction which will often break due to use, and dirt abrading the thread in the seams. I have a 1934 holster on my bench now that is a puzzler. The thread on the outside is gone, the places where it remains is in varies from in tact to thin and black. On the inside the thread looks as if nothing has happened to it. Originally the holster would have been brown, then dyed black later, not sure why they did that. I had thought that someone may have tried to remove the black dye since the top of the holster looks like that could have been the case, but most likely from a waist coat rubbing on it. I guess what I'm looking for are possibilities as to how this could happen so I can do my best to preserve this piece of history, any help is appreciated. Pictures show the same stitch line.
-
Where are you in MN, I may know some folks that could help with the learning curve a little.
-

A couple knife sheaths
srtolly replied to srtolly's topic in Gun Holsters, Rifle Slings and Knife Sheathes
I appreciate the comments. Any stitching on the inside where the belt loop is attached is grooved to recess the stitching and reduce those issues. The welt will protect the rest of the stitching. I didn't want to use any rivets to hold the belt loop, I've had them leave marks on the blades and handles and that makes an unhappy customer that purchased and expensive custom knife. -

A couple knife sheaths
srtolly replied to srtolly's topic in Gun Holsters, Rifle Slings and Knife Sheathes
Thanks, that's what I thought too. The first one didn't have it and looked very plain for a custom knife. -

Lot of 12 Singer 78-3 and Consew 28 mix
srtolly replied to Gregg From Keystone Sewing's topic in Old/Sold
If I knew some way to get what you don't want closer to Minnesota I'd split them with you and do some refurbishing after making one for me. -
If you're still looking I have a full size 1911 blue gun that I used once a few years ago that I can sell or trade.
- 3 replies
-
- blueguns
- training guns
-
(and 1 more)
Tagged with:
-
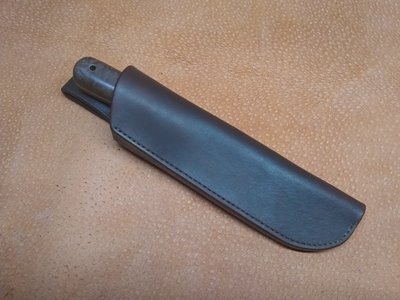
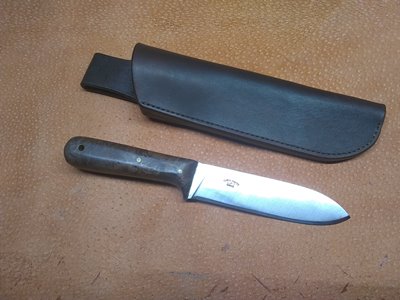
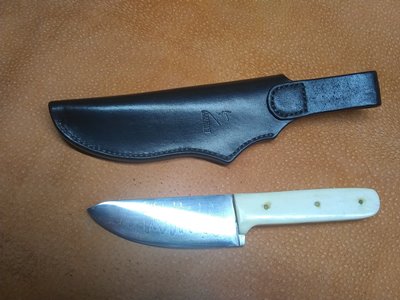
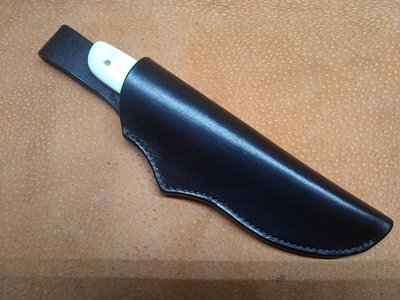
I've been getting more and more requests for knife sheaths so I figured I'd show a couple with the knives of course. First is a Kephart style camping knife I had made for myself. I kept the sheath very simple and finished it with Neatsfoot oil only. This one was for a customer, he wanted simple but I had to give it a little interest and he loved it. I never know what to charge for for these so any suggestions is helpful.


