BarryKing
-
Posts
31 -
Joined
-
Last visited
Content Type
Profiles
Forums
Events
Blogs
Gallery
Everything posted by BarryKing
-
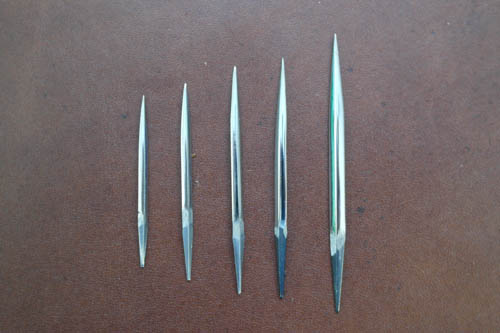
Ah, I knew I forgot something. Diamond shaped. Hardened, but still have some reasonable flex to them. They won't snap off with a little side pressure.
-
I now have a selection of awl blades. They are on the website under "Hand Tools". Also, I see a few people are wondering about other blades fitting in our handles. The collet set they come with have a range from 0"-1/8". So these should fit almost anything out there, whether round or diamond shape.
-
Anyone Have Experence Using A Cnc Laser Cutter On Leather?
BarryKing replied to punitor1's topic in Leather Tools
You will still have a "crisp" edge after edging the leather once cut with a laser. You can edge/cut most of it off, be it will still be there. We(King's) cut a lot of award plaques and blanket corners on a laser to make it cost effective and then dye the edges after slicking to cover the burn. Obviously you won't see the black burn on your black leather, but you will have the slightly crisp edge still there. The laser does work very well, depending on the project. -
Yep. The only thing with Sheridan Brown is the color of the antique. Same steps, nice color. We used to mix 1/2 light brown and 1/2 mahogany to get this color, then Fiebings caught on. You can use Bee Natural RTC instead of Neat lac or Sheridan lac(as it is called now). I like this better for the obvious, the smell. It works well if you use 2 coats.
-
I think you are at the best place on the net. There really isn't much unless you ask specific ?'s. You tube has a few short videos too. For books that come to mind to look for: Sheridan Style Carving by Clint Fay and Bill Gardner Bob Park's book, I don't recall the name, it's new. Pete Gorrell's books, he has 2 These provide some good pictures of "How to"
-
Stop Leather From Stretching While Carving
BarryKing replied to Chavez's topic in Floral and Sheridan Carving
Here is the way we have been doing it at King's for about 20 years: Try casing the leather first. This is by soaking in water for a few minutes then stretching with a glass slicker(or wood). Rub in all directions on most projects, on belts just go down the length a few times. After doing this, rubber cement it to plexiglass or lexon(basicly the same thing). Use Barge RUBBER Cememt, not Barge Cement. The rubber cement is in a light blue and white can, not the yellow and red can. You don't need to glue or tape belts if you case them properly, but the thin leather is a must on most small items. It doesn't matter what leather you are using, it is going to stretch when stamping if you do not prestretch it, that is what the slicker does. Tape will work, but the leather should be dry when applying. This is why we like to use rubber cement. When you apply it to wet leather, it sticks just well enough to hold it to the plexi, but still rubs off nicely after the leather drying out. Just giving you another option than tape. -
Using Petal Lifters / Undershot Bevelers
BarryKing replied to Bob Blea's topic in Floral and Sheridan Carving
Try it first, then last. That is, use it at BOTH times. Using it first lets you bevel just up to the lifts, so you are not trying to get a square beveler into the spots a lifter is used. Saves time too. After backgrounging, thumbprinting and all the other stamping, lift again, just before doing your finish cuts. If you like, re bevel some of the areas you want to stand out a little more, ie. flowers and leaves. -
Cutting does weaken it, but then again you can add a liner to the back of the item. Crowners and turnbacks come to mind for tools used without cutting the leather first. Cutting makes the leather "Pop" more, just a lot more definition. Using bevelers and such without cutting tend to "roll" the leather instead of having the crisp cut lines. Tooling when the leather is dryer will also help make lines crisper instead of the mushy look some tend to get. This will be the point when after casing, the leather is turning back to it's natural look, before wetting. It will feel cool to the touch, but look dry. This will also give the best burnish too.
-
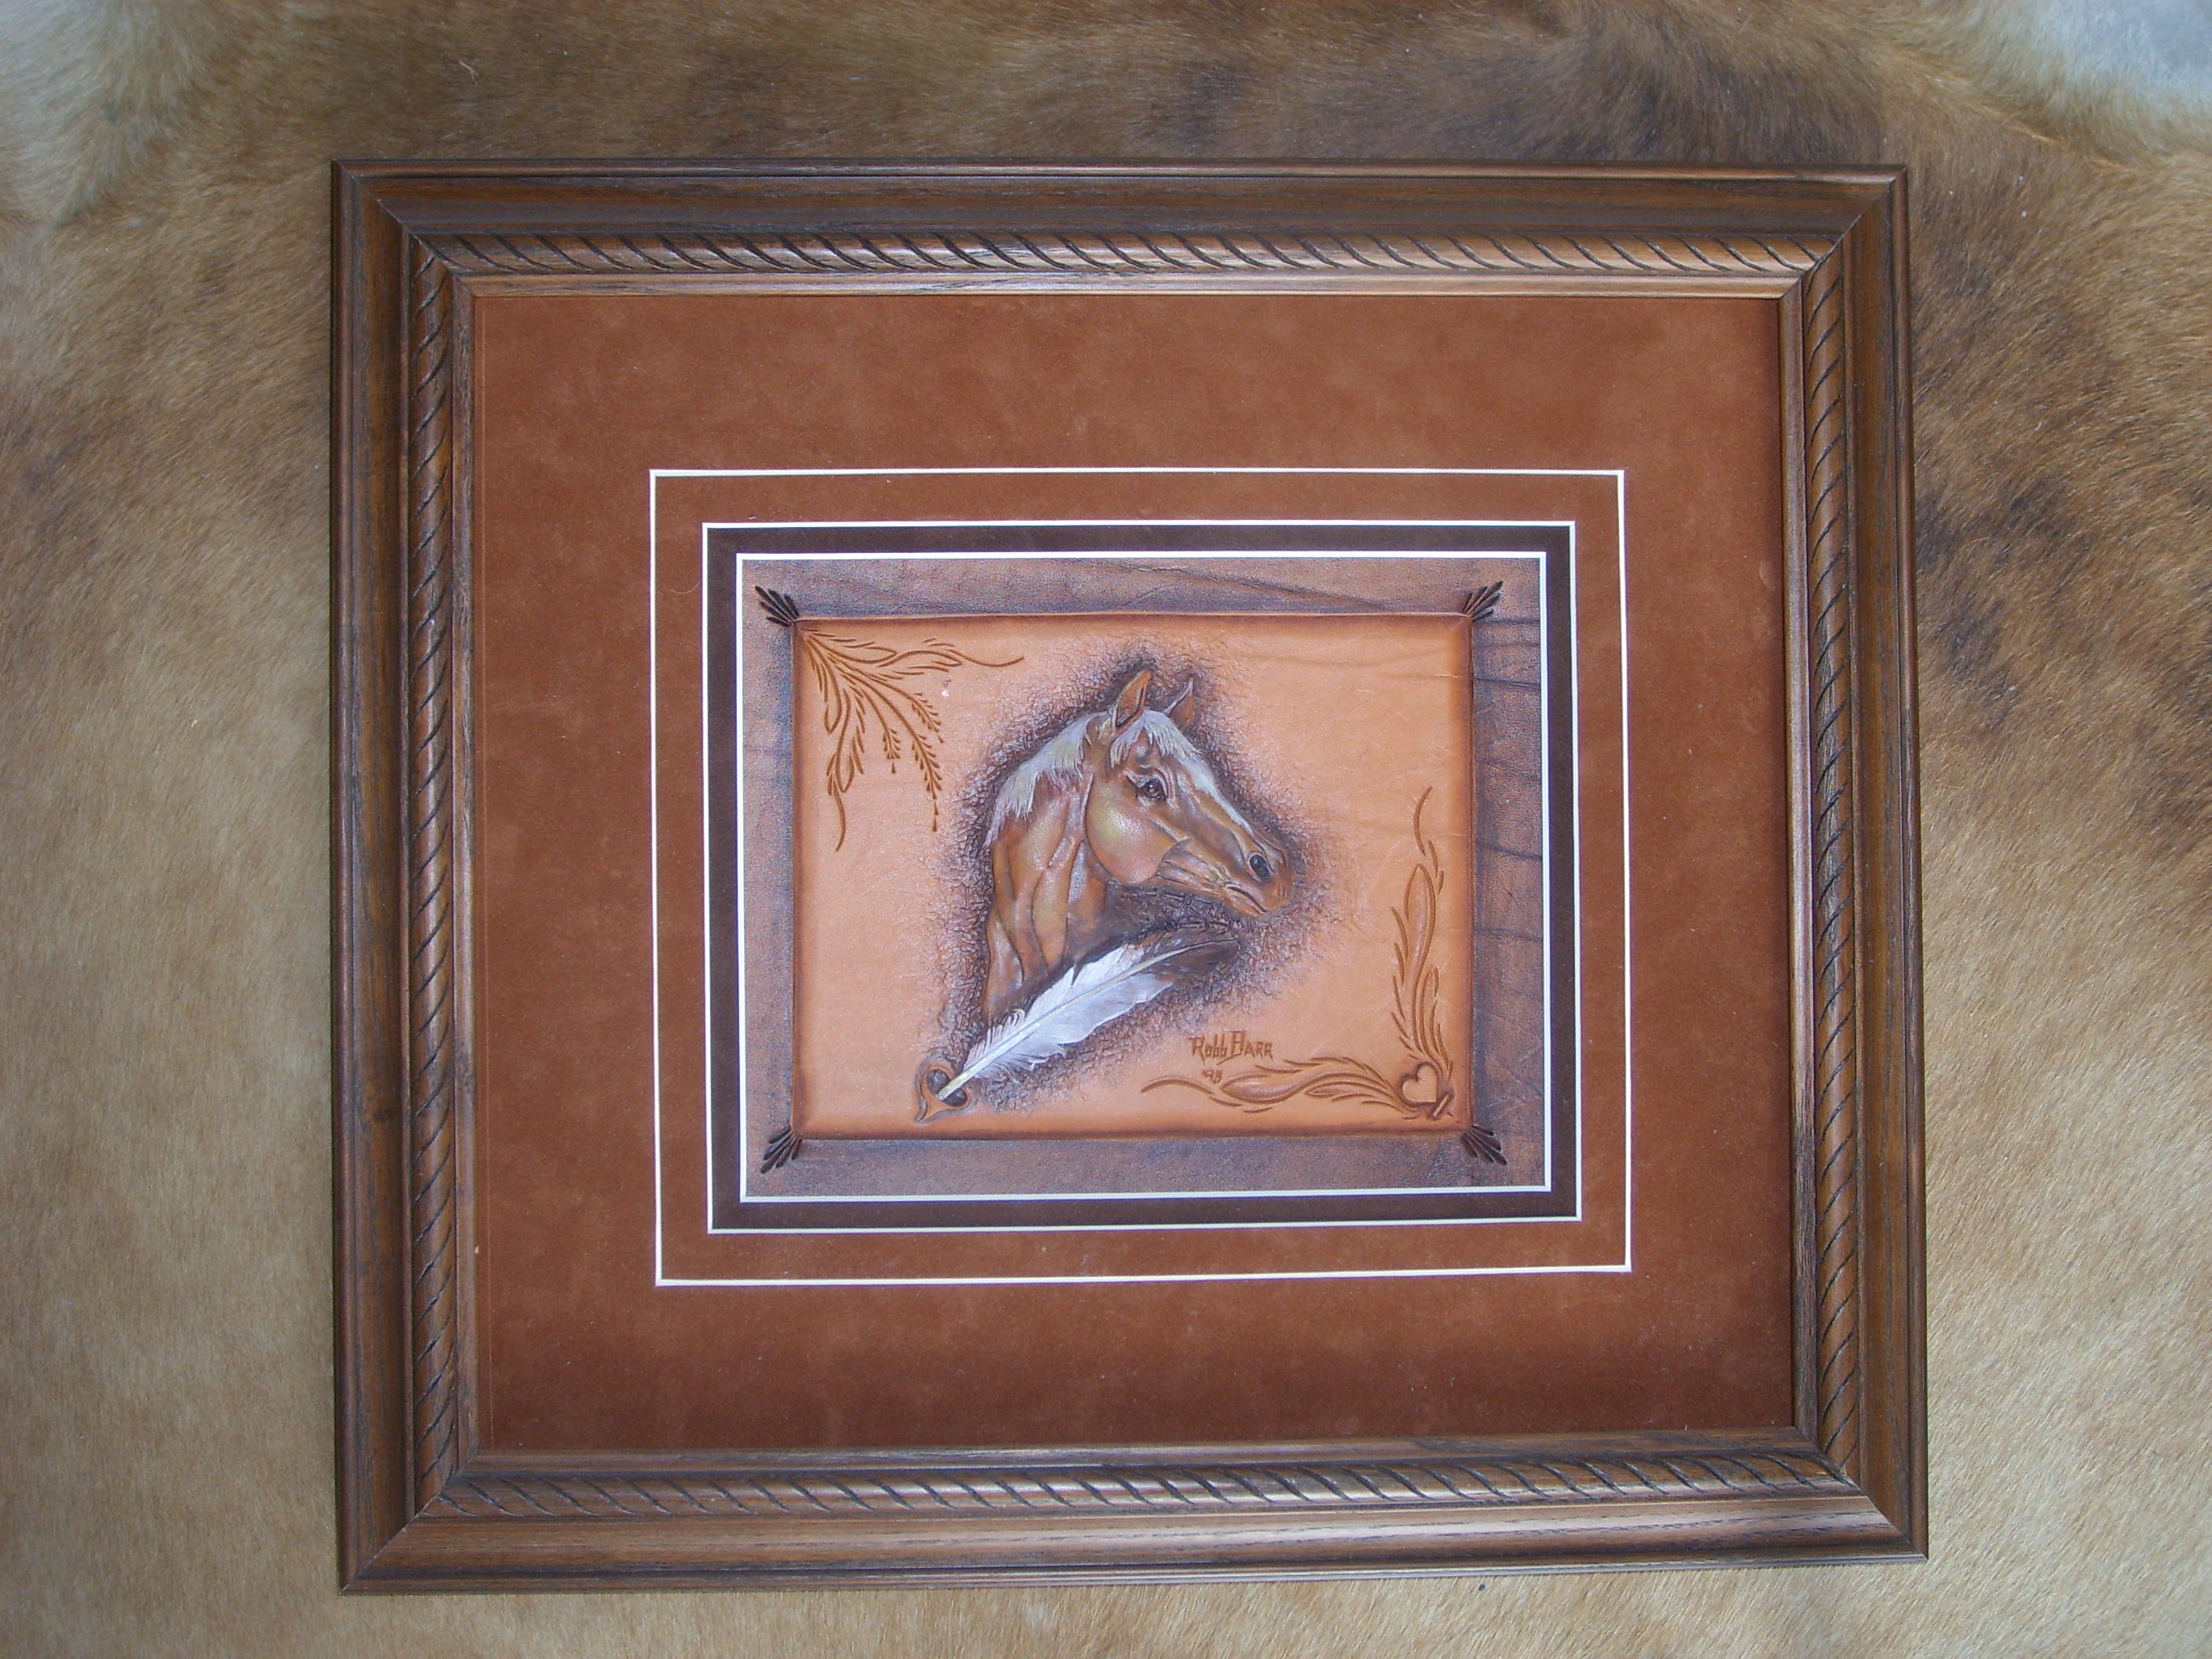
I have this listed on ebay. Just putting the word out that I have a piece for sale. I know it is hard to sell leather work to a leather worker, but there are not any more of these ever going to be made. A fine piece by Robb.
-
Well a 40 is a good size. My brother captains a 104" MY and my other brother used to be a first mate on a few from 104-165". They have encountered many projects and to do's on the boats they have worked on. And, believe me, I have heard some good stories.
-
The photo albumn is always a hit. Other idaes are: Picture frame (with a pic of your favorite at their bachelor or bachelorette party) Ice Bucket (helps if they are drinkers) Coasters Desk pad for the home office Mouse pad I usually put the monogram or the names and date on the cover. Sometimes just the last name initial can be very classy if done right.
-
How do you make a LARGE belt?
BarryKing replied to Shorts's topic in Purses, Wallets, Belts and Miscellaneous Pocket Items
Depends on the length you need to add. The using of the rectangle loops has worked great most of the time for me. This way works well because the tip covers the loop when the belt is worn, if the addition isn't too long. Otherwise, just tell the customer the leather shrunk, with a smile on your face, and see the response you get. I always seem to get a good one. Then they usually order a new belt and take the old one home for when the New Year's resolutions start next time. -
Molding problem
BarryKing replied to nobearsyet's topic in Gun Holsters, Rifle Slings and Knife Sheathes
Dwight has a good point on the molding, by taking the item out. While it is drying, reinsert the item a few times throughout the process. The leather tends to shrink, so you need to do this a few times, or the item may not fit again. Try using a fan or hairdryer to speed dry. I use a fan all the time so I don't have to twiddle my thumbs while waiting for the right temper when tooling. You should be careful with using the sun. It will suntan the leather just like your skin. I use this method too darken leather when I am looking for a deep, rich tan without using any dyes, just oil. Also, if you leave the item in the leather while wet, the plastic bag will sweat with moisture. This may make for an unhappy customer if you have their blued pistol in the bag. -
You may also try to hit the basket stamps around the one that is dark. This will also darken the ones around the mistake to make it look more even. Or dye the whole project black. I had to dye the first few projects black that I did while learning. The darker the color, the harder it is to see the mistakes.
-
You can always make/repair fender hooks for the larger yachts. One of my brothers does this now for some very nice MY's. He is basket stamping the leather covers and also lasering the yacht name in them too. Very first class for the multi million $ yachts. For the owner who just needs to spend more $. haha. He also did some replacement panels on the ceiling of one. They were covered in fabric, then recovered in upolstry leather. Used up about 40 hides. Guess it also depends if you are doing things in port or on sea to pass the time. I would hate to stick an awl through my hand at sea. Also, if you are looking to do repairs or new stuff.? If repairs; you can take on some canvas projects. Some of the tools overlap with leather, making repairs easy. Have a great time. What size are you on? MY or Wind power?
-
Defuzzing the back of really thin vegtan????
BarryKing replied to calanneh's topic in How Do I Do That?
Use a sander with 150 grit or so. This will take the fuzz off and still allow you to rub it smooth. Just the vibrating wood type sander works great. If it is really fuzzy, you may have to use coarser paper, as the finer will clog up faster. A belt sander ends up leaving streaking, similiar to a wood grain look. Try it on a scrap piece first, but it has worked for me several times. Barry -
Yes, I do make them. I am adding them to the website in the next week or so. We forgot a few things and that was one of them. BTW, they are glass, not plexi, just so everyone knows. These are used to prestretch and compress the leather. Use after soaking the leather in water, then rub, fairly hard, in all directions. You will see the leather stretch, before tooling it. Works great for taking the stretch out of belts before tooling or stamping. Barry
-
Yes, I will be in Wickenburg. Here is a list of places I will be at this spring: Denver, CO(WESA Show) January Moab, UT CSMA Winter Seminar/meeting Wickenburg, AZ (Leather Crafters Journal Show) Elko, NV (if they have the show, no info yet)(Ferdco Show) Sheridan, WY (Leather Crafters Journal Show) Thank you all for the orders. My little girl and boy need new shoes Barry
-
I guess that's one reason I left a lot of the custom stuff off, so some of you might not have to wait as long. Yea, you know what I mean Harvey. lol
-
FINALLY! I have my website done. We are adding more in the coming weeks, but it is functional. http://www.barrykingtools.com
-
Try buying at Fastenal, if there is one in your area(they seem to be across the country). You may also use a solid carbide drill bit. These are a little harder than the cobalt ones. Always use a cutting fluid on stainless. Also, run your RPM at about 1/2 as what you would on mild steel. This is where the steel tends to heat up and work harden. If you are just drilling very thin steel, ask for a "center drill". These tend not to "suck into" the steel as much as a drill bit.
-
Yes, rub from the center of the binder, out. This tends to curl the outer leather(cover). Most of you have seen albumns with the corners curling up, away from the pages. This starts the curl with the corners touching the pages, then as the cover shrinks, it flattens out instead of curling up, away from the pages. Try not to rub too hard or you will end up with a lot and it won't look very good. A glass slicker works well with light pressure. And yes, I will be at the Boot and Saddlemaker show, also the IFOLG
-
Dyeing Assistance
BarryKing replied to tft's topic in Dyes, Antiques, Stains, Glues, Waxes, Finishes and Conditioners.
If you are using Feibings Leather dye, try switching to their OIL dye. This will help a lot. The regular Leather dye seems to always turn out splotchy. Also, look for the grainy areas in the hide, it will soak up more dye than tighter grain areas, turning it darker. -
It depends on if you are using 1 layer, 2 layers(lined), or are lining and adding a stiffener in the middle. Try to get to around 9-10 ounce total. 6-7 with a 2-3 liner is great. I always also add a plastic stiffener, Ohio Travel Bag lists it as "Briefcase Stiffener". You may also use compressed cardboard or another type of thin plastic sheet(you need a tax ID to buy from Ohio Travel Bag). The trick to gluing the liner in is to rub the LINER side while assembling. This creates a curl on the cover of the albumn, allowing the outside of the cover to shrink slightly without the corners curling up, away from the pages. Hope this helps. Barry
-
Bullet loops for Western Gunbelt...
BarryKing replied to SCOUTER's topic in Gun Holsters, Rifle Slings and Knife Sheathes
I have done it both ways quite a few times, sewn the loops, and used a bag punch and fed it through and back on the same bag punch slot. The main problem I have found with the slot/loop method is that the loops tend to stretch over time, if used a lot. Then there is no way to tighten the leather loops, especially if you have 24 loops on the belt. When you use the sewn loop method, you can add a line of stitches in between the others to tighten up a loop or two. If that makes sense. Also, with either method, when you form the loops with the belt flat the loops tend to tighten when put around your waist. If you form when curved and they are nice and tight, then you lay it flat and turn it upside down, all your bullets fall out. SO, try to form the loops when the belt is flat, that way the leather loops will tend to stretch just enough on their own when you put it around your waist. The loop/bag punch method looks a lot cleaner though. You can get away without any stitching at all, but you also need to line the belt to make it look nice. Hope this helps a little.