


Bonecross
-
Posts
234 -
Joined
-
Last visited
Content Type
Profiles
Forums
Events
Blogs
Gallery
Store
Everything posted by Bonecross
-
I had not actually planned a second installment lol. Basically once you are done tooling and dyeing as usual, you stick the threads into the holes you punched into the background layer and tie a knot That's it, finito! Concealed stitches! Tip: You may want to add more stitch points than I showed... Depends on the project. Here is another one I made today, after it's base coat of green dye. I plan to make many of these and pick the top 5 but for now I am playing with the technique
-
I've done it cold and it worked, the rubbing action sort of melts it. So heating is not necessary, rub it in good with your fingers
-
Resolene or rub in beeswax!
-
I re-read Al Stohlman's description of the technique until it made sense and decided to make a walkthrough for this thread with a small project I have a project which involves small tooled dragons and I really do not want to have to pierce them with thread and ruin them...So what I want to do is use the Concealed Appliqué Stich. Here is a prototype: First step is to grab a piece of 8oz leather and make rough lines for the dragon. Then take a piece of thinner leather (I used 2oz) to act as a "plug" and make it slightly smaller than the shape of the dragon carving: We then flip our 8oz thick dragon over and carve the backside so that the plug fits into it (I used a variety of edging tools): Yaya it's fairly flush Position the Dragon and plug over the leather that will be used as the background (that you will stitch to), and make thread holes to properly support the piece through both plug and background layers: Use a needle to pass the thread through the holes in the plug. Leave 4-5 inches of thread ends. You can clean it up with a rubber band or something to make it manageable: Now contact cement the plug into the hole your carved into the back of the piece: Looking good after some flattening Now I prepare it by applying shelf liner to the back then leave some weight on it to keep it flat overnight. Tomorrow I will continue with the tooling stage and finish trimming it all nice...
-

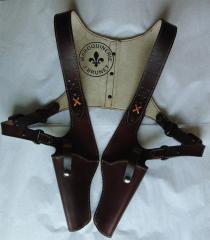
1930's Gangster Style Double Shoulder Holster
Bonecross posted a gallery image in Our Leatherwork Galleries
From the album: My Creations
8oz dark brown leather lined with pig skin suede and hand stitched with .035 bark tan thread. Black hardware was used (D-rings, rivets and Chicago screws) and light brown accent lacing acted as a cherry on the top. Made to order holsters were fitted for a pair of Model1892 revolvers (Lebel Revolvers).© Jonathan Brunet
-
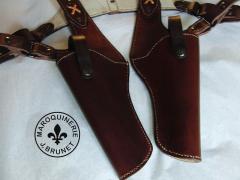
1930's Gangster Style Double Shoulder Holster
Bonecross posted a gallery image in Our Leatherwork Galleries
From the album: My Creations
© Jonathan Brunet
-
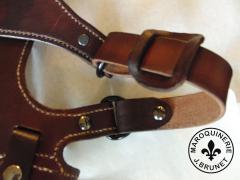
1930's Gangster Style Double Shoulder Holster
Bonecross posted a gallery image in Our Leatherwork Galleries
From the album: My Creations
© Jonathan Brunet
-
It seems like this technique is only mentioned once and then nothing! One of those lost techniques?
-
I was re-reading Al Stohlman's 1977 book "The Art of Hand Sewing leather" and on pages 54/55 he describes a technique called "Concealed Appliqué Stitch", which he uses to mount horse heads on a saddle. Has anyone tried this technique? Any other examples out there (which is quite vague in the book)? I'd like to know more about how this works exactly for an upcoming project...
-
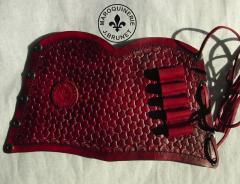
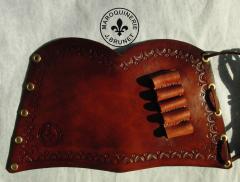
Buttstock Cover for Rifle with 45-70 Cartridge loops
Bonecross posted a gallery image in Our Leatherwork Galleries
From the album: My Creations
Full triweave pattern Oxblood leather with hand sewn black thread on edge and cartridge loops. Matching black hardware. -
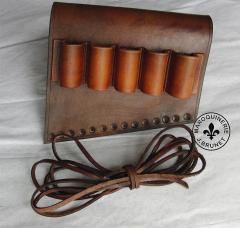
Buttstock Cover for a Rifle with 30-30 Cartridge Loops
Bonecross posted a gallery image in Our Leatherwork Galleries
From the album: My Creations
Simple tooled border and hand sewn contrasting cartridge loops. Brass hardware goes well with he light brown and mahogany antiqued leather. -
From the album: My Creations
Client provided photo of an elk from a game camera and wanted it carved into the shoulder pad. -
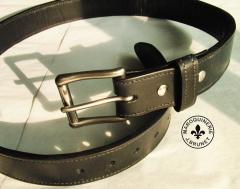
Dual layer Gun Belt - Stainless Steel Hardware
Bonecross posted a gallery image in Our Leatherwork Galleries
From the album: My Creations
Hand fabricated and stitched dual layer gun belt. -
12ga Shotgun Buttstock Cover
Bonecross commented on Bonecross's gallery image in Our Leatherwork Galleries
 Thanks
 -
Buttstock Cover For Rifle w/Magnetic Pouch Flap
Bonecross posted a gallery image in Our Leatherwork Galleries
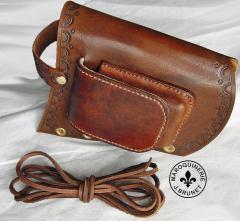
From the album: My Creations
Brown buttstock cover with cartridge pouch and magnetic flap retention. Pouch has internal stitched cartridge loops for added securing on ammunition. Brass eyelets and rivet. Back strap for preventing forward movement. Pouch and rear of cover lined with pigskin suede split. -
Buttstock Cover For Rifle w/Magnetic Pouch Flap
Bonecross posted a gallery image in Our Leatherwork Galleries
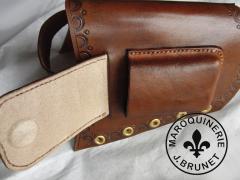
From the album: My Creations
View with pouch flap open, neodymium magnets visible. Magnet makes for silent operation of the ammo pouch for stealthy hunting. -
Buttstock Cover For Rifle w/Magnetic Pouch Flap
Bonecross posted a gallery image in Our Leatherwork Galleries
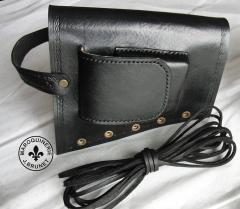
From the album: My Creations
Black buttstock cover with cartridge pouch and magnetic flap retention. Pouch has internal stitched cartridge loops for added securing on ammunition. Brass eyelets and rivets. Back strap for preventing forward movement. Pouch and rear of cover lined with pigskin suede split. -
From the album: My Creations
-
From the album: My Creations
-
From the album: My Creations
Pouch for 2 3/4" shogun shell ammunition box. -
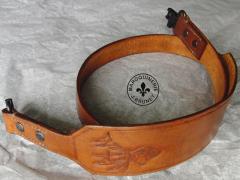
Period Hat Band for 18th Century Long Hunter's Hat
Bonecross posted a gallery image in Our Leatherwork Galleries
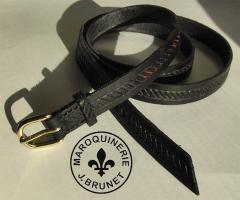
From the album: My Creations
Rough finished 1/2" hat band with brass buckle. Hand tooled rope design with angled tip and matching carved keeper. Black dyed with mahogany antiquing, finished with beeswax. -
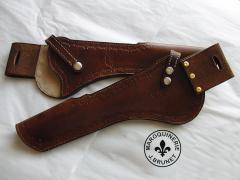
Custom S&W 629 Hunter Holsters with Shoulder Harnesses
Bonecross commented on Bonecross's gallery image in Our Leatherwork Galleries
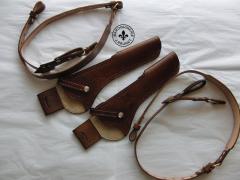 Custom made for specific firearm/scope configurations. One was for a S&W Performance Center 629 Hunter, 44 Magnum, 7.5” barrel length, 14” overall length. The other was for S&W Performance Center 629, 44 Magnum, 7.5” barrel length, 12.6 overall length.
 -
From the album: My Creations
-
Custom S&W 629 Hunter Holsters with Shoulder Harnesses
Bonecross posted a gallery image in Our Leatherwork Galleries
From the album: My Creations
-
From the album: My Creations