


DeWayne Hayes
-
Posts
73 -
Joined
-
Last visited
Content Type
Profiles
Forums
Events
Blogs
Gallery
Store
Everything posted by DeWayne Hayes
-
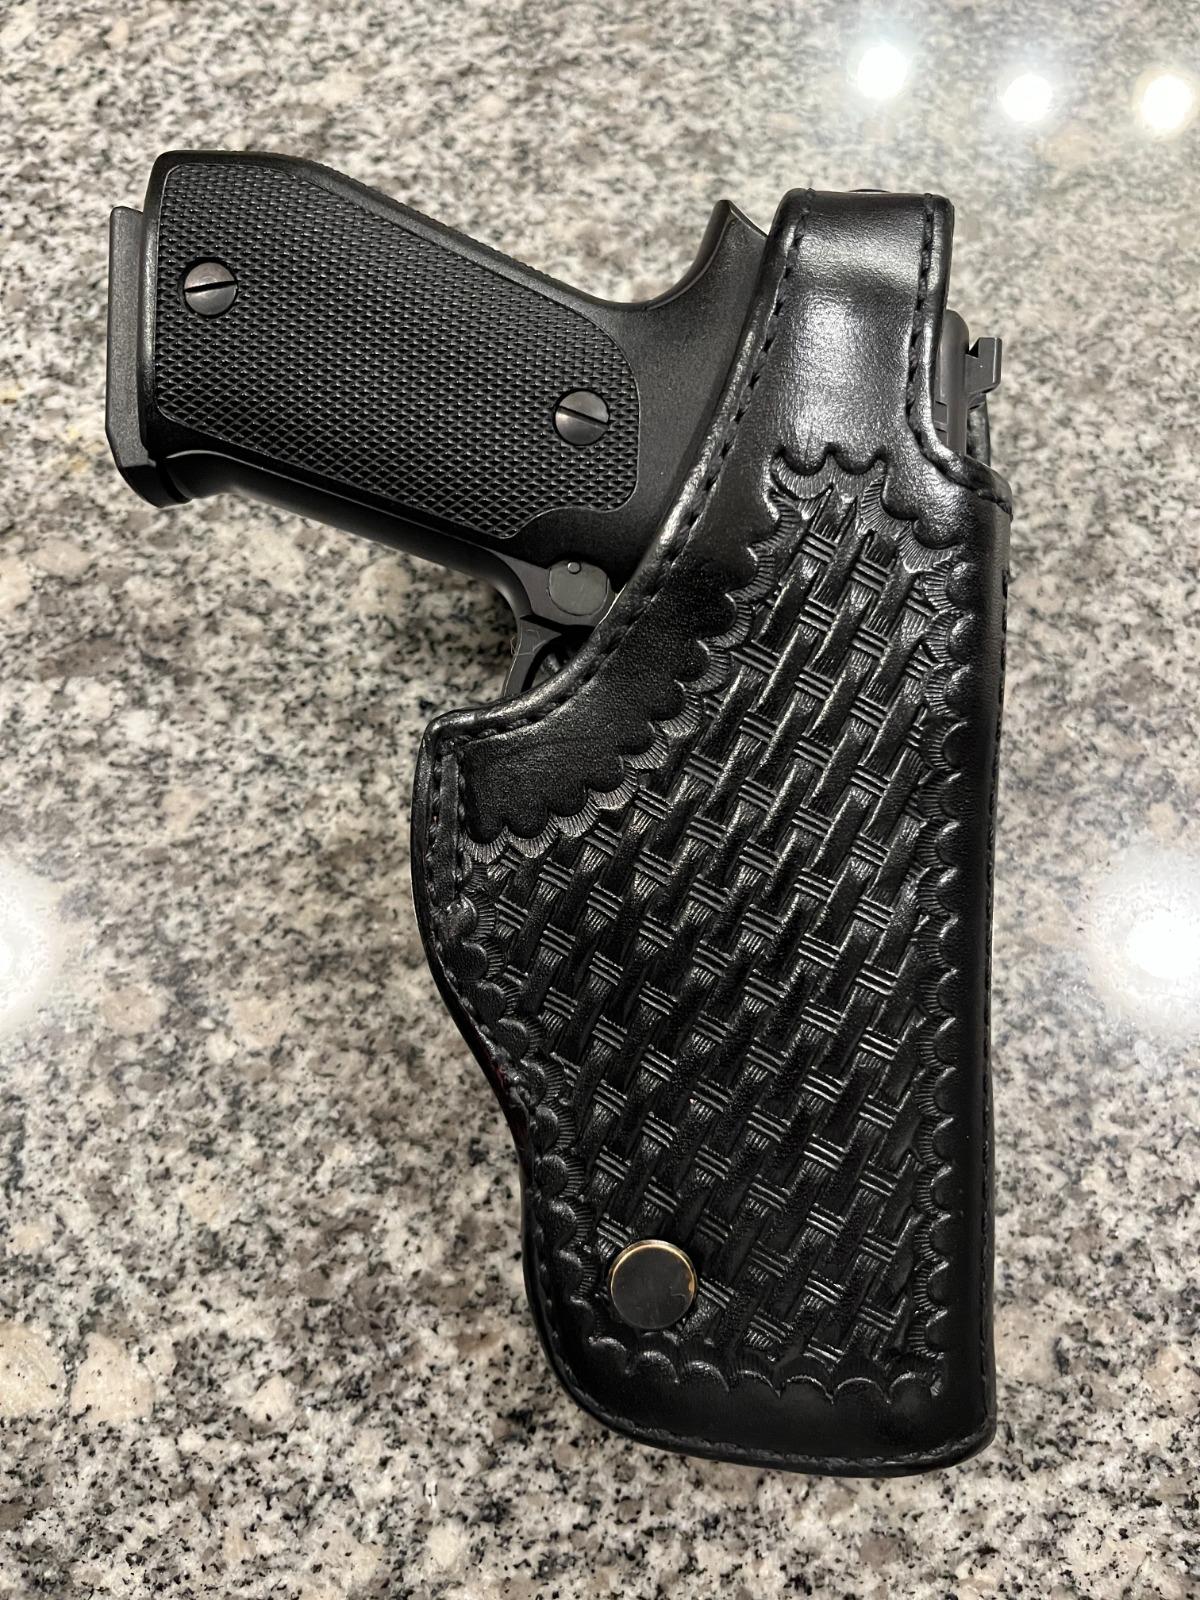
Though I make my own holsters, I recently grabbed a nice Ted Blocker duty holster off eBay - these sell for about $260 new; I got this one for $24! After I re-did the edge painting and used some Fiebing's Atom balm/wax on it, the holster could pass for new. Unfortunately, it was definitely used by a policeman, and it has a musty smell that I'm guessing is patrol car. Almost like a musty gym locker, or a musty old book. The smell actually clings to the gun too. I tried "bathing" the holster overnight in cedar shavings and that helped some. But the cedar smells wears off fairly quickly, leaving the musty smell. Does anyone have any tips for actually exorcising the holster of this squad car funk? I'm especially sensitive to off smells, so it's a bit of a buzz kill. Thanks, DeWayne
-
That's awesome! Every time I'd pull my phone out to answer a call, instead of saying, "Hello," I'd be tempted to say, "I'm your huckleberry ..."
-

A second generation of long-slide Glock holsters
DeWayne Hayes replied to DeWayne Hayes's topic in Show Off!!
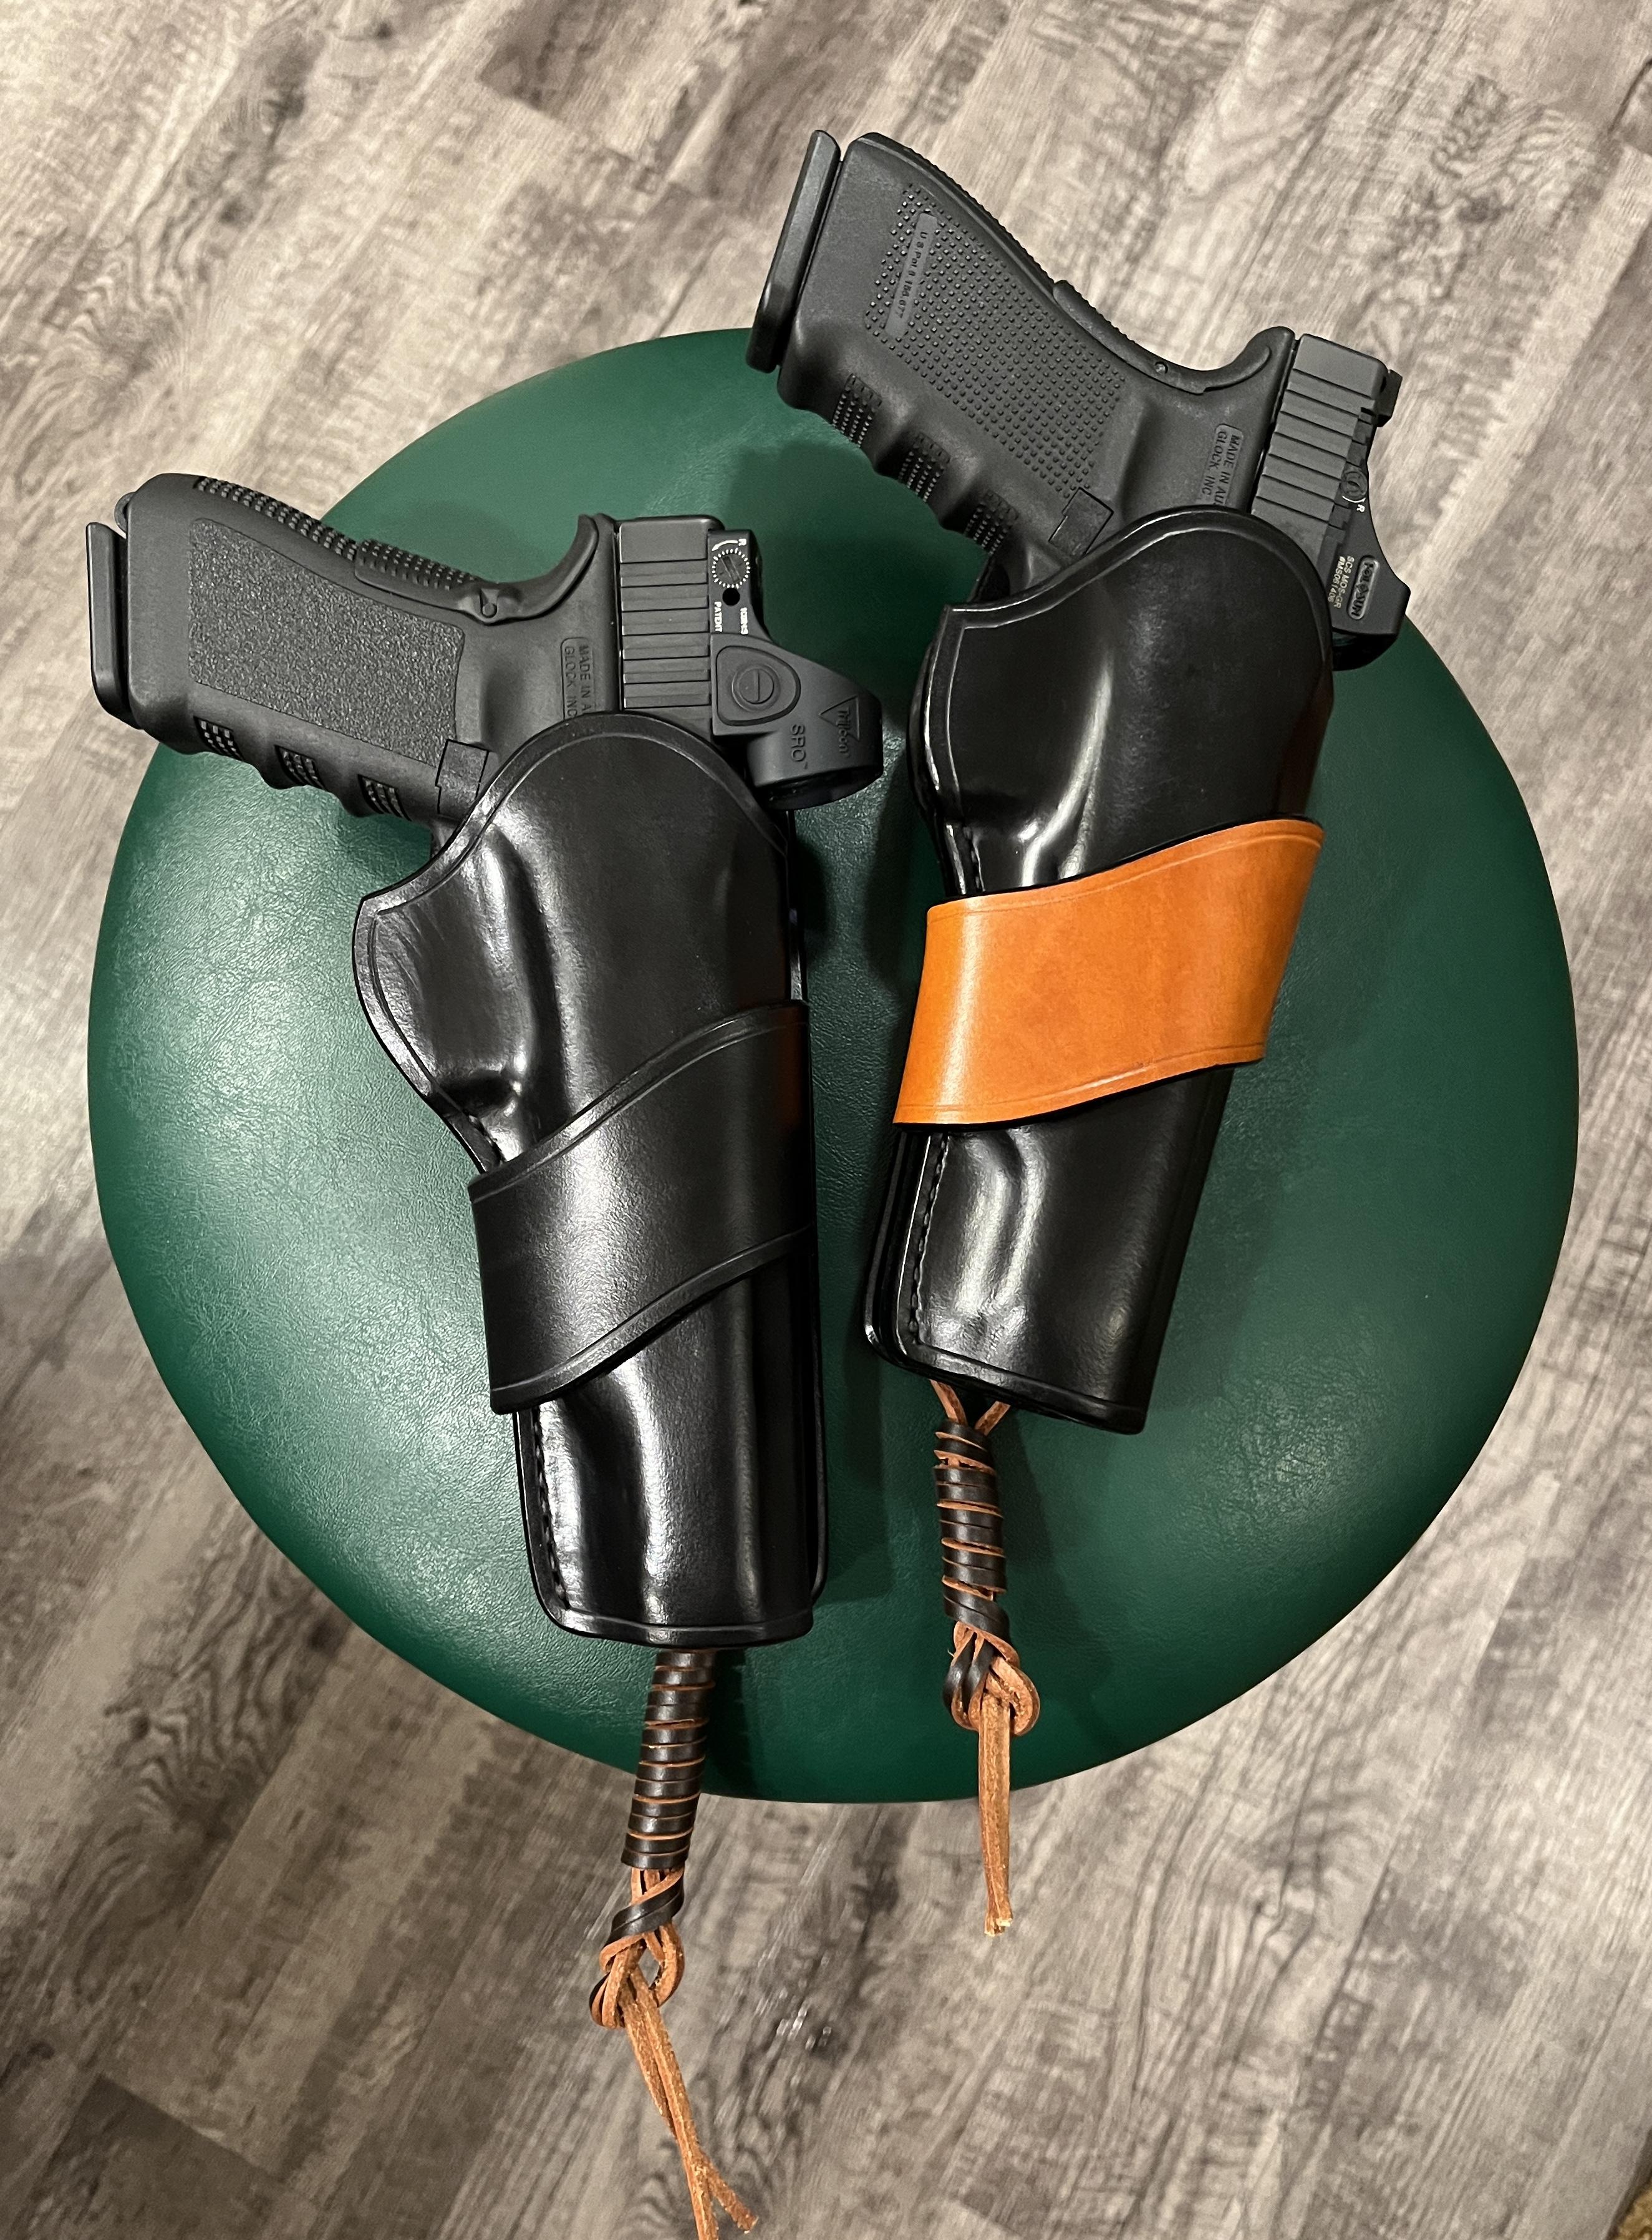
Thanks, Larry. I'm pretty paranoid about fully covering Glock triggers, since there's no external safety to activate on them. I want to make sure if I ever took a tumble in some brush or whatnot, no stick or limb is going to find its way into my trigger guard and come in contact with the trigger. Thus, the "bat wings." -
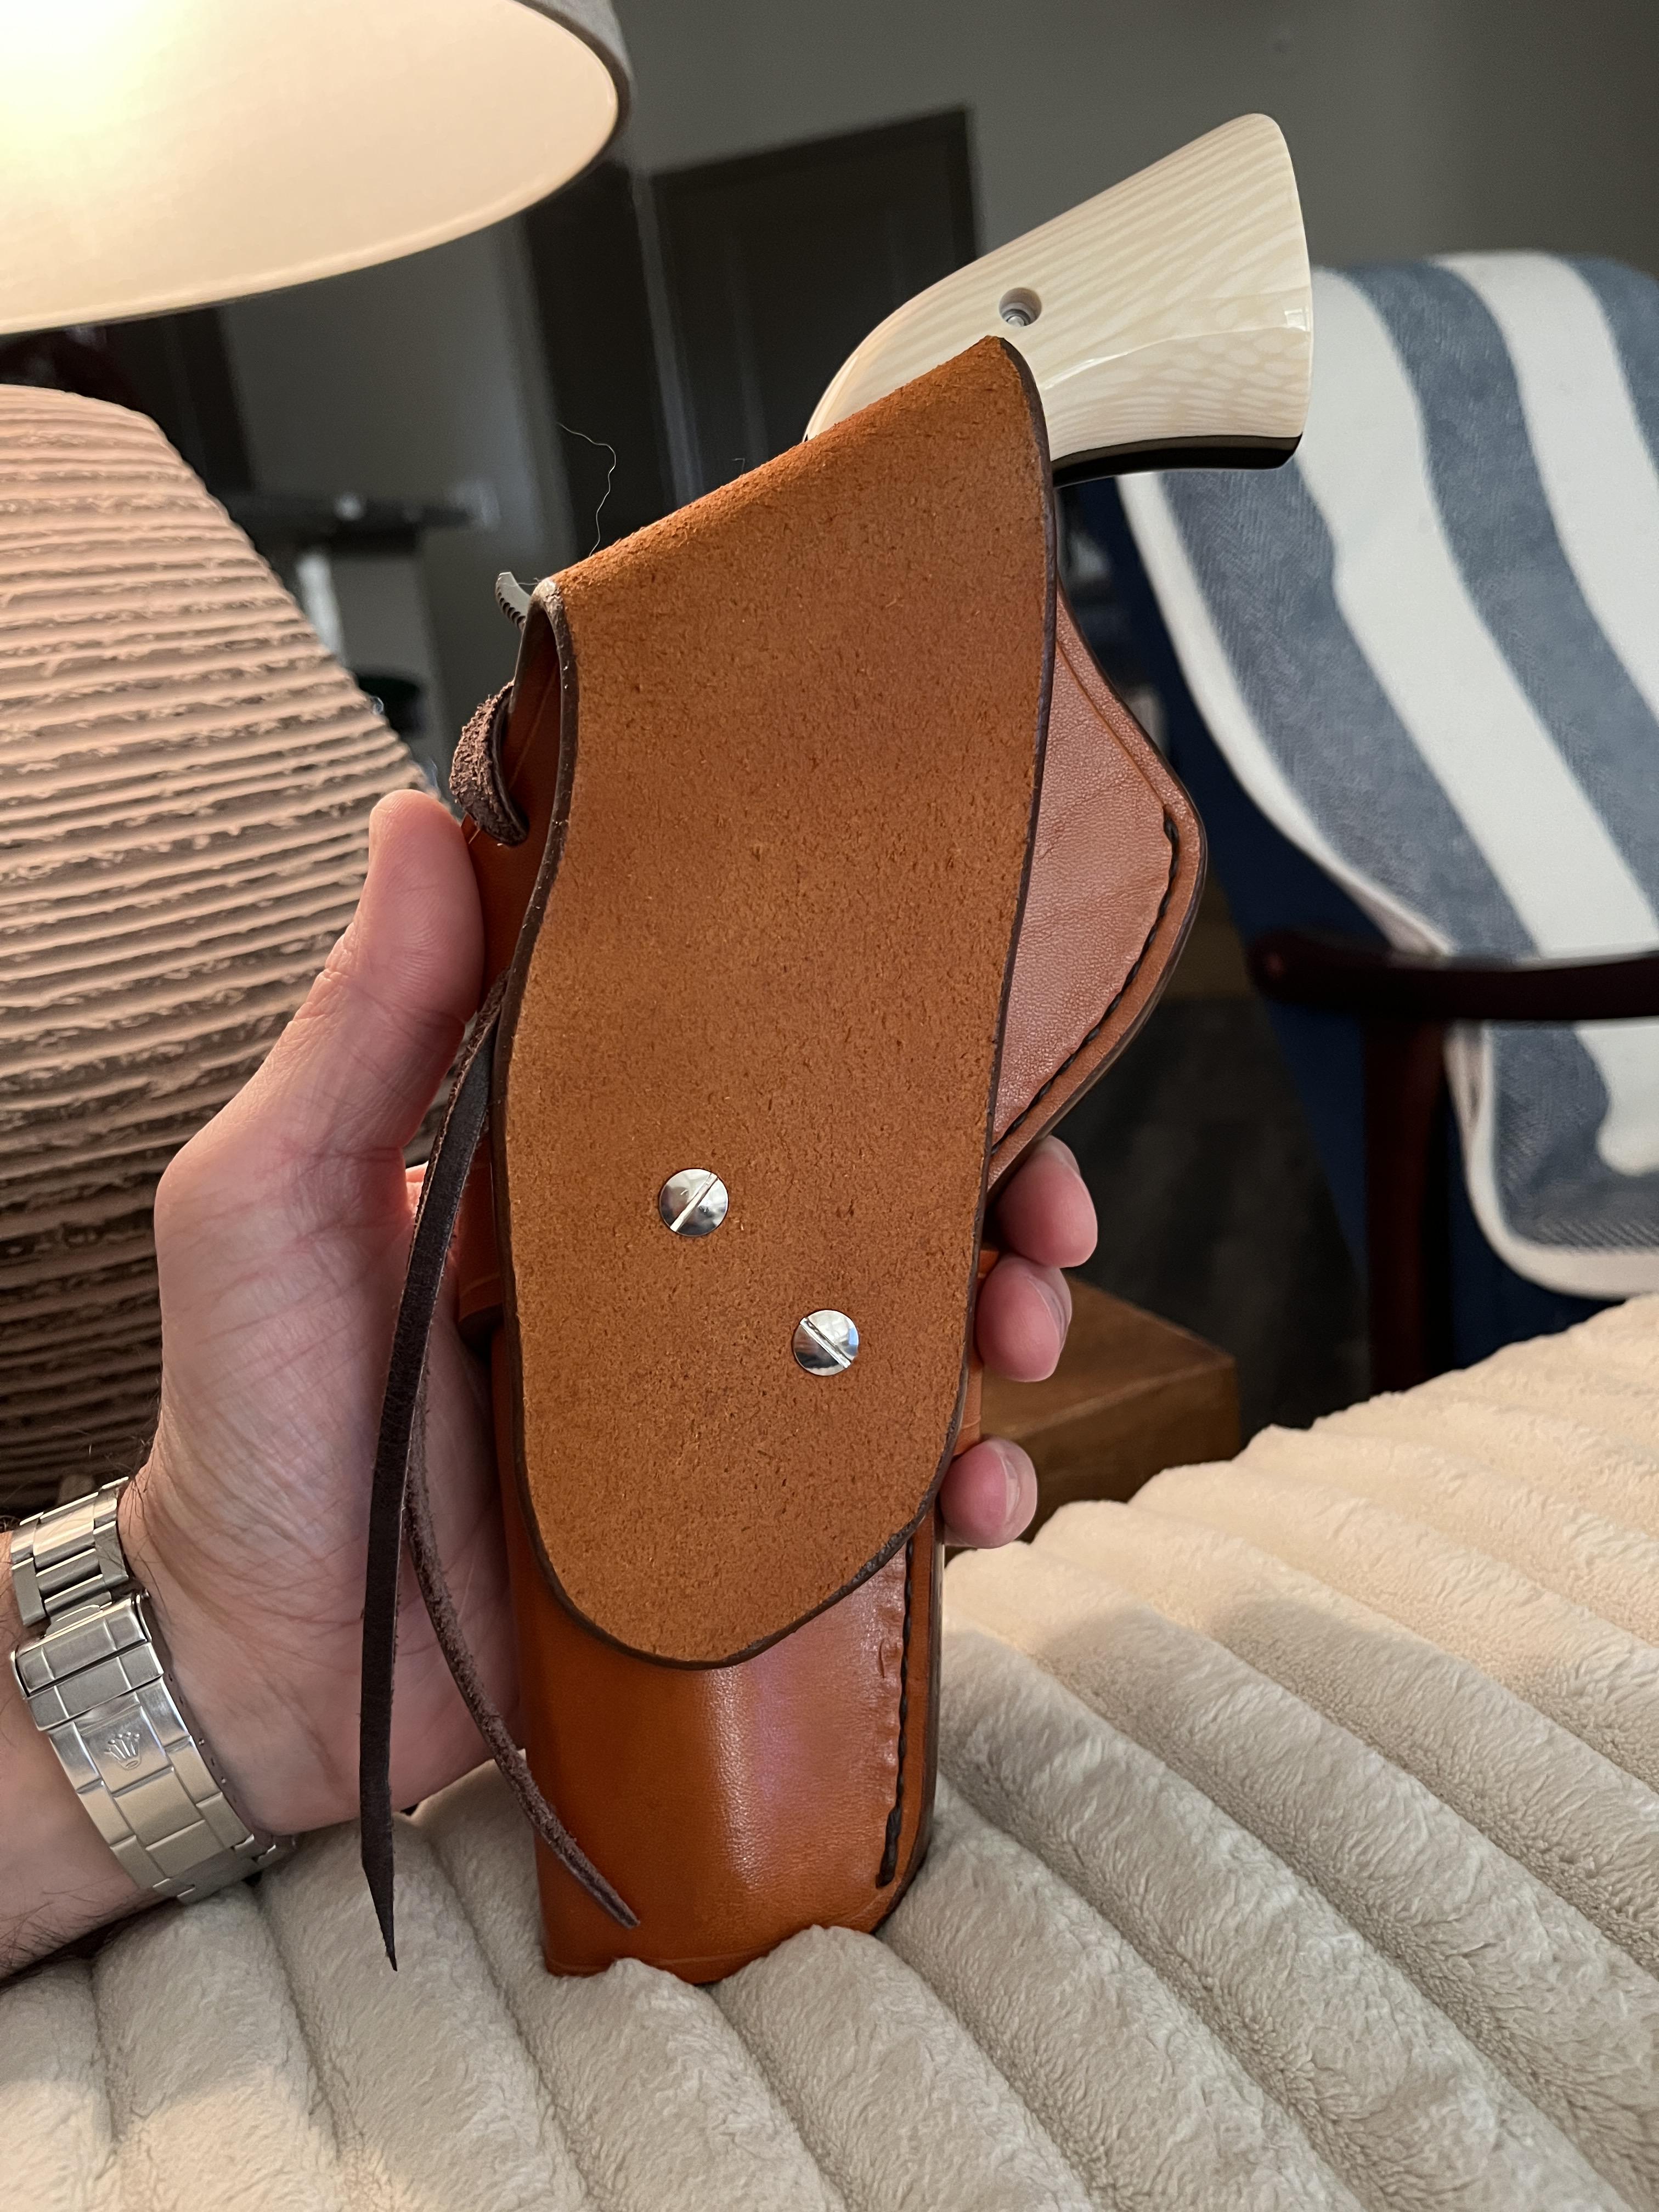
Hi folks, A year or more back, I posted on here about a pattern I'd created to make leather holsters for my two long-slide Glock pistols. They were thumb snap, cross-draw, which was something I just couldn't buy on the open market, so I had to "roll my own." Had a massive thick headache-inducing welt the same thickness as the Glock trigger guard. Recently, I have been shooting some of my single action revolvers and making holsters for them, but in a strong side, old-west style. And this got me to thinking that I'd like to be able to have one of my long-slide Glocks at "gunfighter" position for long hikes in the woods. Anyway, I adapted my sixgun holster pattern (pic for reference) and made the necessary adjustments to accommodate the Glocks, as well as their red-dot optics. Most importantly, I did away with my massive welt and just used a 1-ply welt, then bent the holster to create ears covering the trigger guard, as I typically seen done on leather Glock holsters. Saved a whole lot of work, for sure! I haven't found the need for any sort of retention strap, as the holsters were wet-molded to the guns and seem pretty secure. At any rate, if they ever loosen up to a point where retention is needed, I can pretty easily retro-fit a strap that would snap to the holster loop, which comes on and off via Chicago screws around back. Just posting these as they're kind of a novelty, but also, I had someone ask me for the pattern for my thumb snap version, so if anyone would like a copy of this pattern, I'm happy to provide—might save you some trial and error. Regards, DeWayne
-
Larry, beautiful work! Thanks for the tips. I tend to shy away from Neatsfoot, as my holsters are wet formed, and I don't want to soften them and lose that form. Al, thanks too - I looked at Leather-n-rich and it appears to be carnauba based, so I'm guessing my Atom Wax does about the same thing.
-
Hi folks. I've made several gun holsters, and always use Fiebings Pro Dye in either English Bridle or Black. I'm considering doing one in natural though ... but I'm not sure what that really means. If I was going to finish a holster and retain the natural, non-dyed color, would I do any finishing at all? Any thought? My usual finish is Leather Balm with Atom Wax, and on a holster that will see lots of weather, I will top-coat with diluted Mop&Glo for an acrylic layer. Think I could just do the same with a natural color holster? What about beeswax? I hear some dip leather holsters in melted beeswax, is this right? Thanks, DeWayne
-
Best way to tighten Chicago Screws?
DeWayne Hayes replied to DeWayne Hayes's topic in How Do I Do That?
Just circling back, folks. I tried the contact cement route and it seemed to work fine. Just a few dabs on the lip of the interior (domed, slotless) female end, and a little on the leather, wait 15-min, and she tightens up nicely now. Don't expect to ever need to take those female ends off the leather loop they're glued to, so should be good to go. Thanks for helping me brainstorm this. -
Best way to tighten Chicago Screws?
DeWayne Hayes replied to DeWayne Hayes's topic in How Do I Do That?
That's a cool tool when there is clearance on both sides, but I could never get it in there between the flap and the holster without bending or scarring the leather. The flap is pressed down tight to the holster body. I'm thinking a thin rubber washer or, as I said, a spot of contact cement might be my strategy. I'll try the rubber washer tactic first and see how it does. Thanks, folks. DeWayne -
Best way to tighten Chicago Screws?
DeWayne Hayes replied to DeWayne Hayes's topic in How Do I Do That?
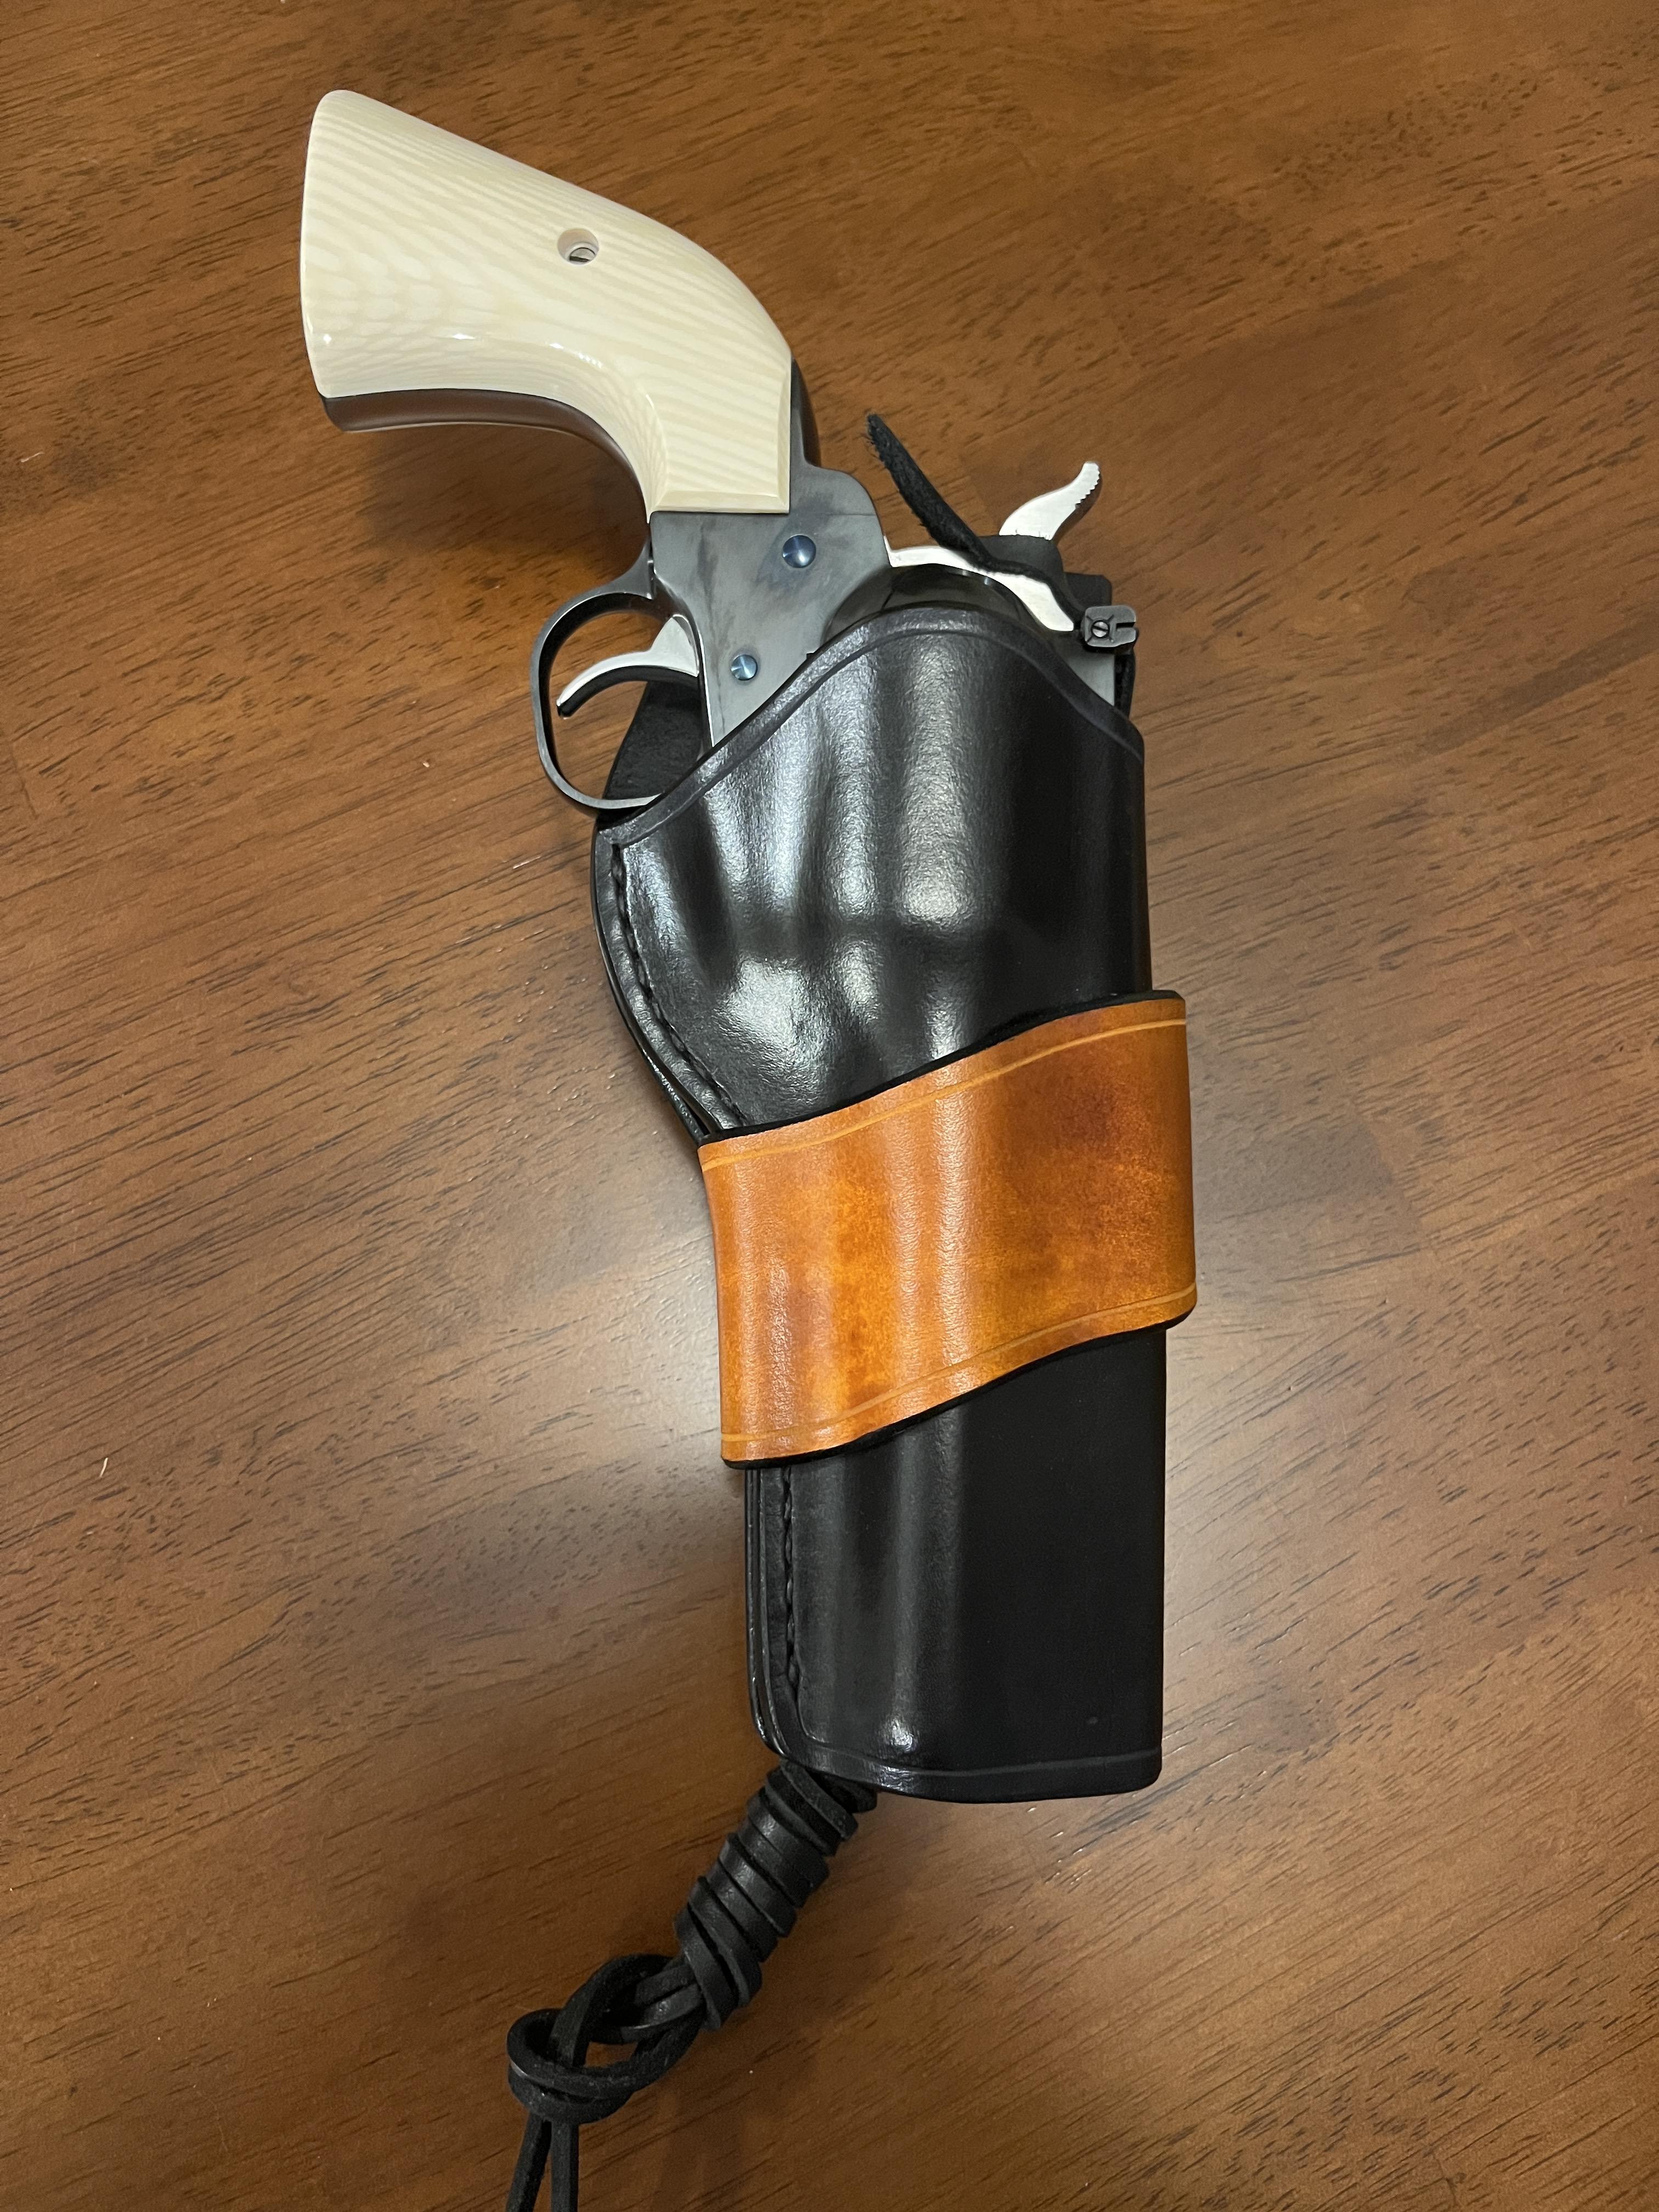
Thanks, folks. My leather is thick enough that the screw isn't bottoming out, it just can't grab firmly enough on the leather to really dig in and stop spinning. It tightens ok, just not as tight as I'd like. This is only exacerbated by the fact that when I attach the second one, I can no longer get my finger in there to hold it as there's no room. I think I may try a drop of contact cement on the lip of that female domed head. I suspect that's going to stop the spinning. Worst case scenario, the leather loop it's attaching to can be replaced easily enough if I ever have to. This was the first western style revolver holster I've made - all my holster making to this point has been thumb-break style for automatics. Being able to connect a loop in the back with Chicago Screws is such a pleasure - saves a ton of stitching for the belt loop.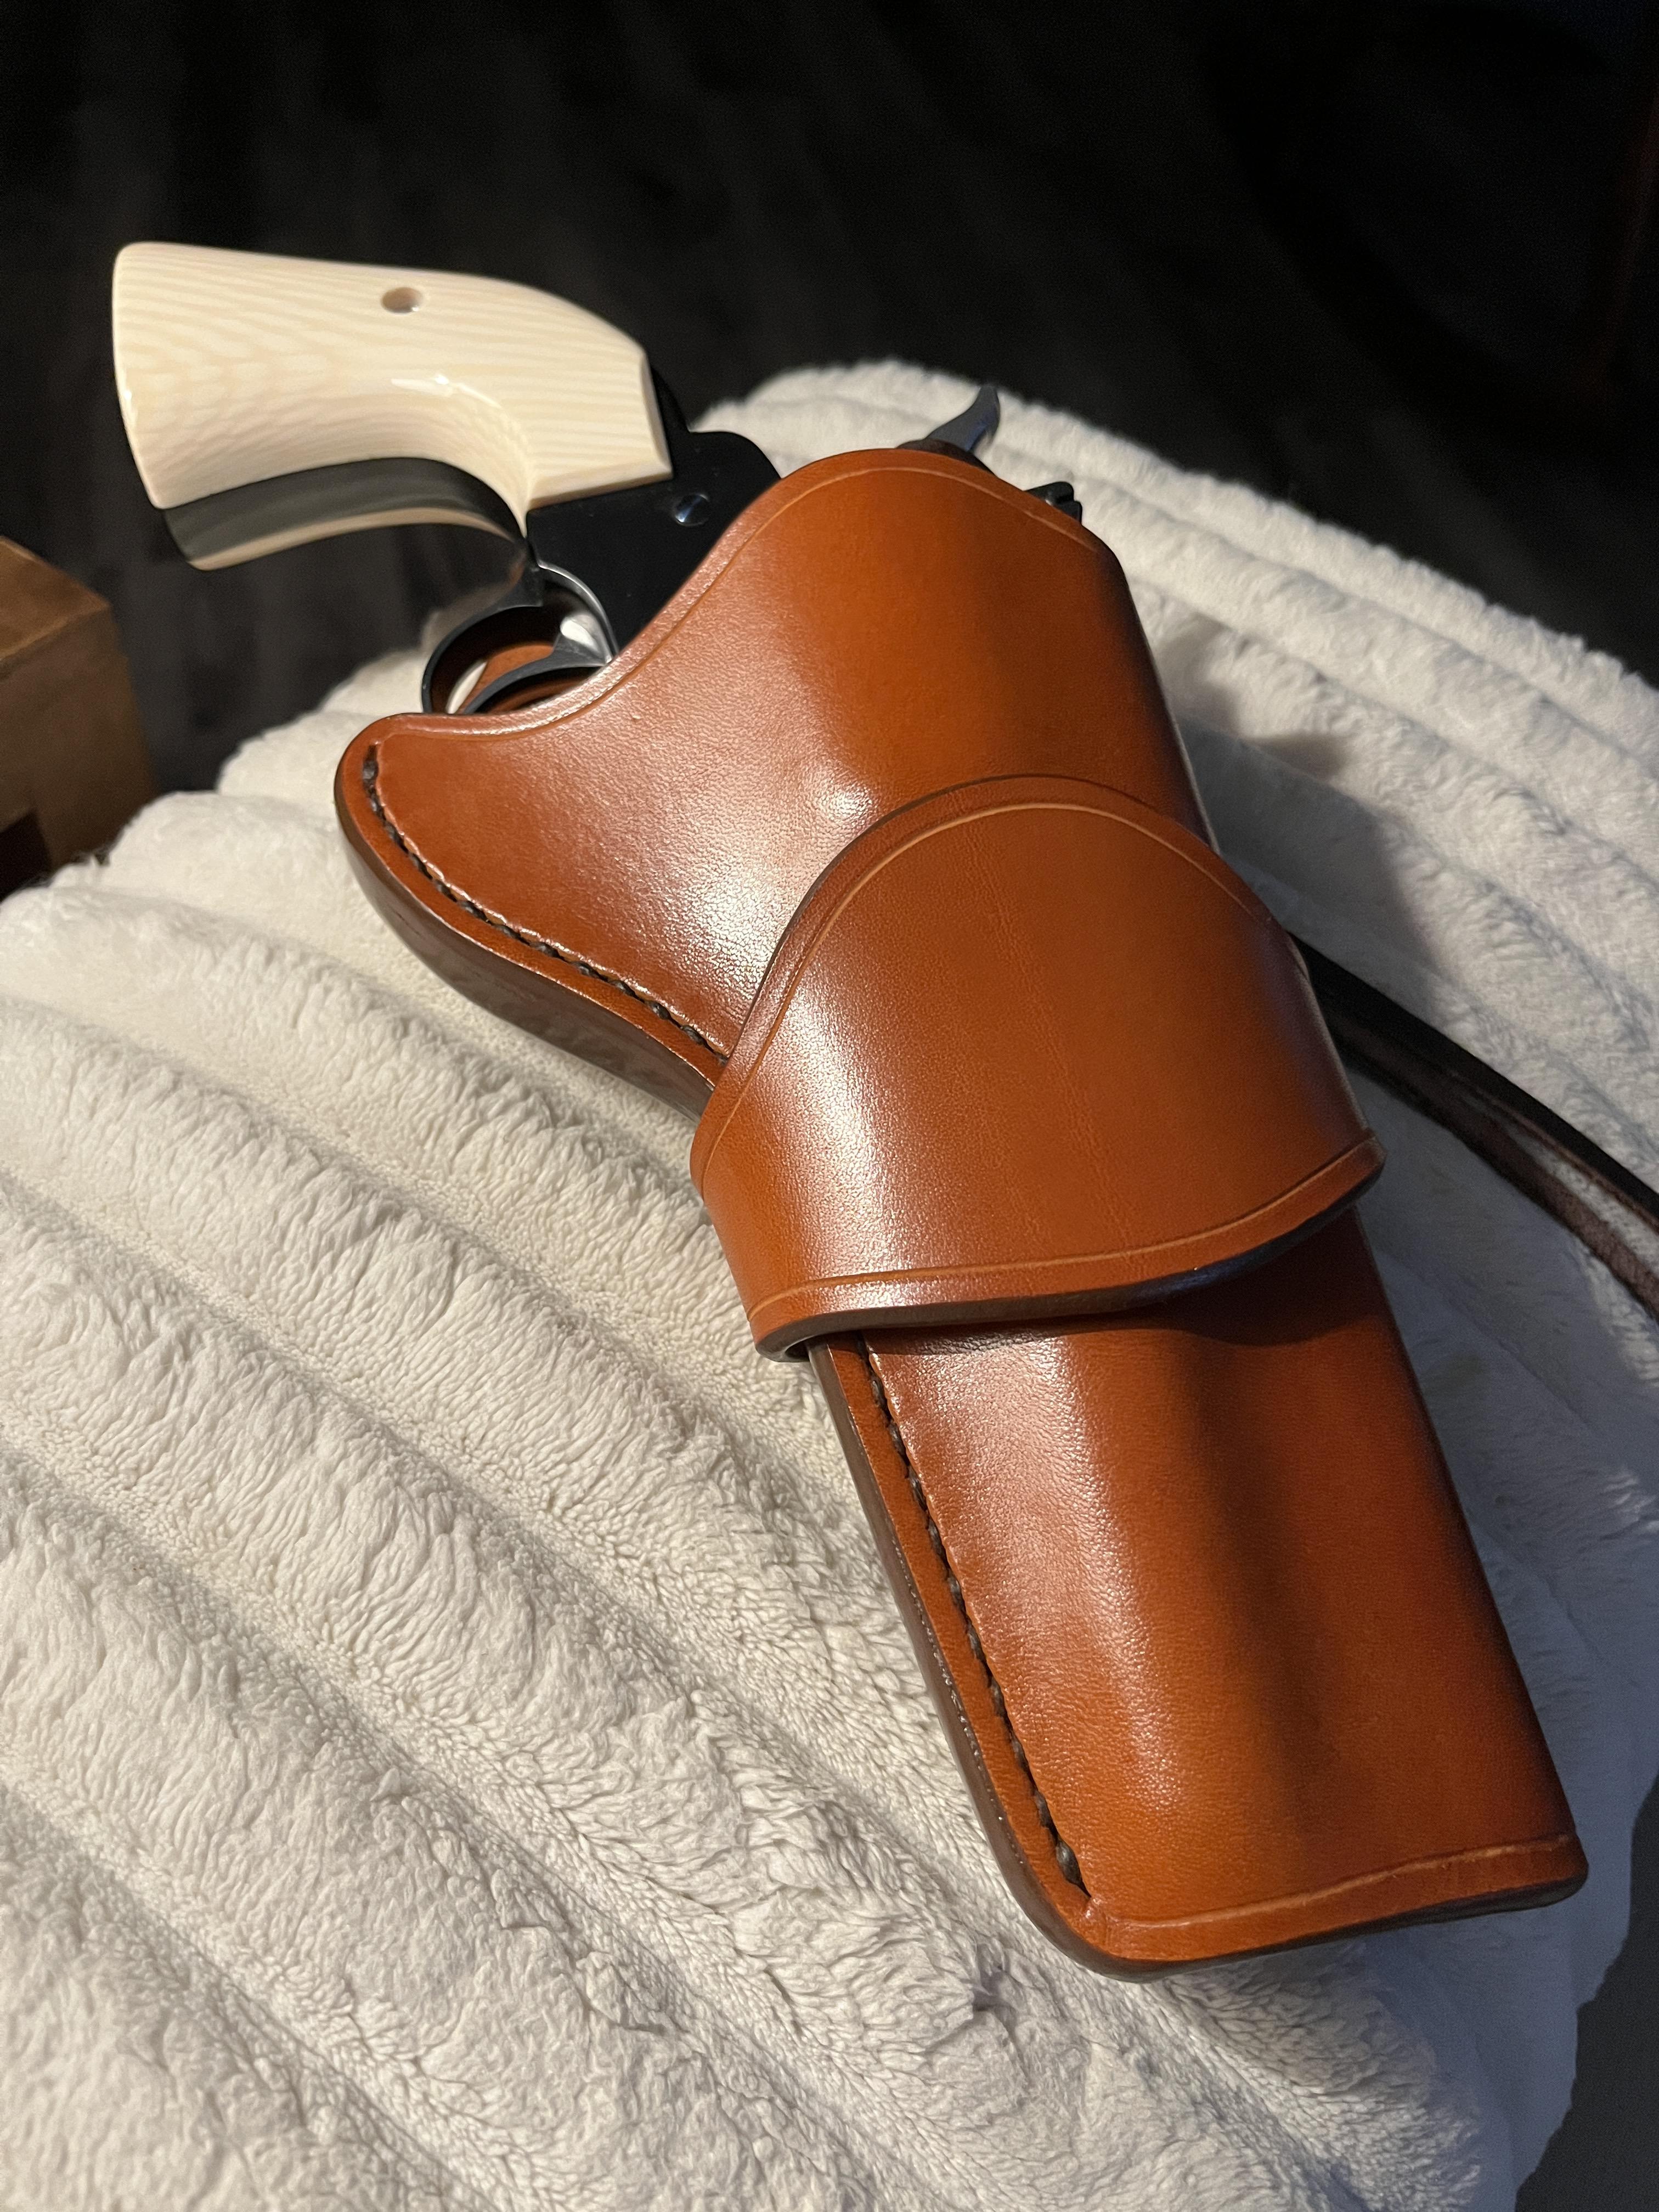
-
Folks, I have made a holster that has some Chicago Screws, and I can't figure a good way to tighten them when one side is domed/slotless. Finger pressure goes so far, but then the domed side just turns. Does anyone have a trick? Rubber washer, maybe? Contact cement in place of a washer on the domed side? Anything else? Thanks, DeWayne
-
That is gorgeous work all the way around!
-
Beautiful piece of work! That is one case where I'm not sure if you're wearing the holster, or the holster is wearing you, but either way - great looking piece!
-
Brilliant work - I've been thinking about an apron, myself. Well done!
-
Absolutely. I will split a canister over two or three projects until it's exhausted. Bear in mind, you use more dye this way, as a lot of it gets sprayed right past the edges of your project (as with any sprayed medium), so you'll see your dye jar going down faster than you might expect, as opposed to a dauber, where it all goes into the leather. But I freely move the Preval from one color to another. Give it a little blast to clear out the old color still in the tube, then carry on. Also bear in mind this one little trick - when you're screwing a Preval directly onto a Fiebings 4 oz jar of dye, you'll need to trim a tiny bit off the end of the Preval's plastic tube that extends down into the dye. They're made to go into a different reusable reservoir and are just a tiny bit too long for a Fiebings dye jar, but with a sharp knife or razor, if you trim it just a bit, you can screw the Preval unit right down onto the Fiebings jar and eliminate the need for a separate reservoir entirely. Very handy! BTW - I'm in an apartment too, and I just step outside in the parking lot and spray my piece quickly. You certainly don't want to spray that pro dye in the apartment!
-
No, it's one and done - once the canister is spent, it goes in the trash. They're around $10 a pop, so not cheap, but the trade-off is never having to clean an airgun or maintain a compressor, etc.
-
Yep, I can get full use out of a 4oz bottle with a Preval.
-
Just to add to your options, I gave up dying with a dauber almost immediately due to streaking and turned to first airbrushes, but later the much simpler Preval air canister. https://tandyleather.com/products/preval-power-unit?variant=31977386868867¤cy=USD&utm_medium=product_sync&utm_source=google&utm_content=sag_organic&utm_campaign=sag_organic&gad_source=1&gclid=CjwKCAiA75itBhA6EiwAkho9e4ayMpy0bMgtdKQ1BZLIJiDI4YnGrzmROkU0Ke8gBK-oJLUoiP6_pBoCSP0QAvD_BwE These will literally screw right into the top of a Fiebings small jar of Pro Dye and you've got an instant air gun with no clean up - use it until it's empty and throw away. It's my go-to method for dying now unless I'm doing Black, which I never have any streaking issues with when using a dauber. But that's the only color I do by hand. Anything brown or tan I use the Preval sprayer. Hope this helps! DeWayne
-
Thanks, guys!
-
Right on. Since all the holsters I do are cross-draw, so long as they have a 1.75" belt loop, I can slide them on there. I think I'll probably make one in black for the black holsters. One other benefit of this "modular" system that I've found is that I can easily pop the shoulder strap over to the other side of my neck. I imagine if I were wearing it all day, it might be really nice to swap sides to take the strain off the left side of my neck and even things out a bit.
-
Awesome - thank you!
-
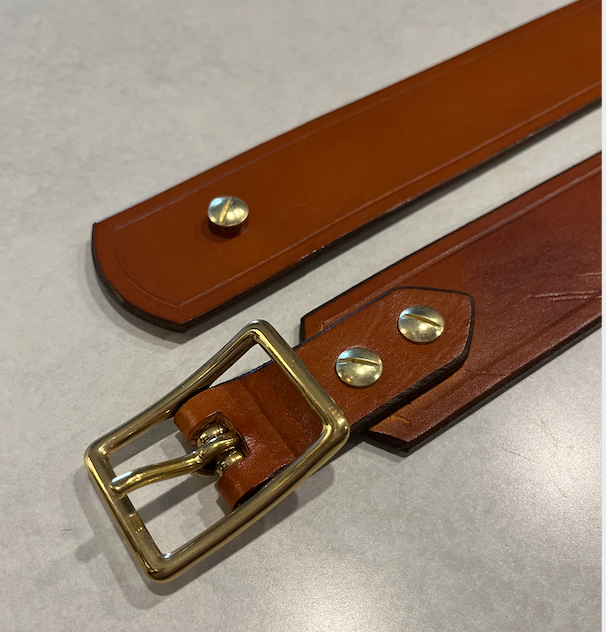
I'm thinking I probably better use some brass washers on both sides of where the shoulder strap attaches to the horizontal strap - otherwise those small brass bolt heads are going to compress too deeply into the leather - not to mention, the washers will add rigidity to that intersection. Does anyone know a source for brass washers? Maybe 7/8" OD, 1/4" ID?
-
I should make one with a sheep's wool fly patch sewn onto the shoulder strap!
-
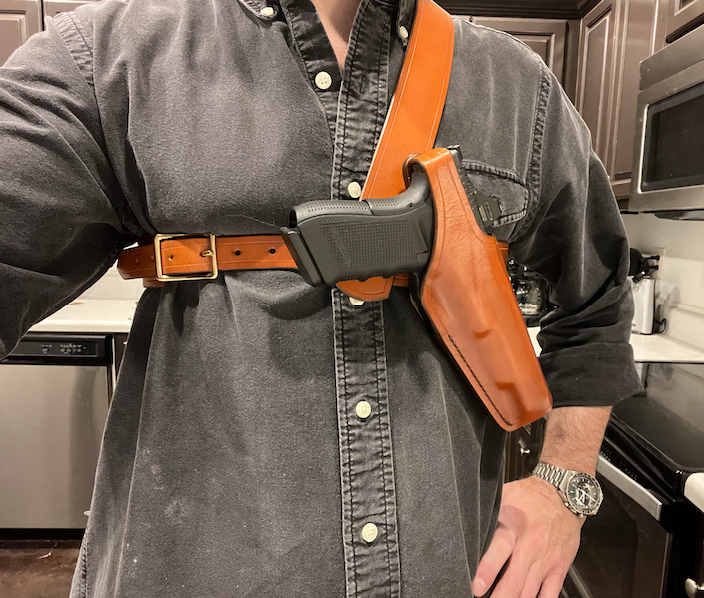
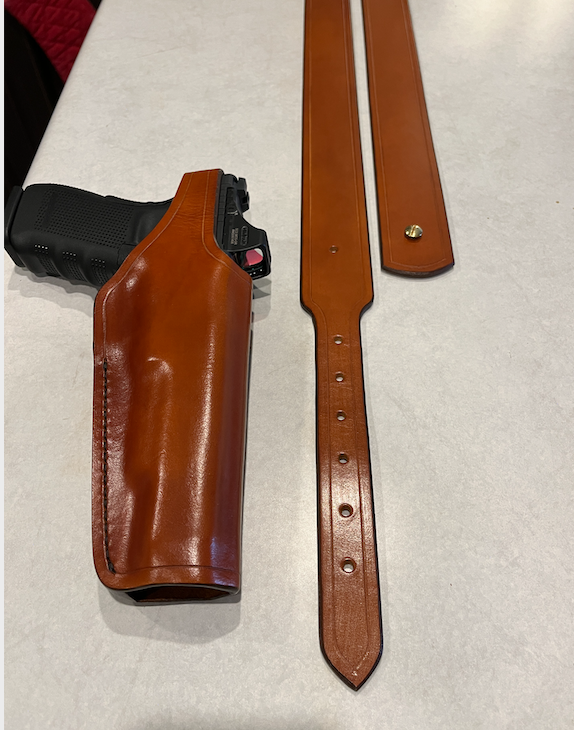
Decided I wanted to make an Alaskan style "guide holster" or chest rig, which allows you to fish up to your belly in water while keeping your self defense sidearm close at hand and dry. I could have bought one of these, but I wanted to have some flexibility - I wanted to simply use my standard cross-draw holster and be able to remove it when I want to wear on my belt. I also wanted something that would break apart for ease of packing/transport - in other words, not a complicated 3 dimensional "cage" but something that could easily lay flat or be rolled up. Finally, a last value add is I can use the horizontal strap as a belt when needed. So, theoretically, it's a chest rig AND/OR a cross draw belt holster rig. Good ol' Fiebings English Bridle Pro Dye, followed by Leather Balm + Atom Wax. Very simple (as is my style and limit of my abilities!). Hope you all enjoy. DeWayne
-
Ha ha! I work Veg-tan wet for my holsters, but the 8-10oz is as big as I've gone. Someday I'll get in the ring with the heavyweights!
-
That's tremendous! Wish I could work leather that thick.