


genewshipp
-
Posts
25 -
Joined
-
Last visited
Content Type
Profiles
Forums
Events
Blogs
Gallery
Store
Everything posted by genewshipp
-
Nice work. Winning looks. When I read the title I thought of western belts stitched together along the edges as if laid flat on a table side by side. And I pictured one side running horizontal and the other side running them at a 30-45 degree angle.
-
I wouldn’t have any trouble using the leather! At all. God is the first leather maker. He made clothes for Eve and clothes for Adam out of leather. I’d love it if you’d post pictures of all the newspaper articles where we can read them!!
-
Duane Watts' swivel knife is what I want to try. $110 last I checked. https://youtu.be/vI8tW30tn58 He makes one that is like a pen i.e. yoke-less. He's on https://www.etsy.com/shop/DWLeatherworks as DWLeatherworks. All that's showing up there is the pen type of swivel knife. Don't know why the yoked one can't be found there.
-
I'm looking for an 8 inch leather splitter. Anybody got any splitters they want to sell or had issues with a certain brand that they'd stay away from? I will mostly be splitting Veg. skirting Thanks
-
Custom stamps & maker's marks
genewshipp commented on Inth's gallery album in Shops, Tools & Machines
-
 I appreciate the comment. It took WAY too much time to be profitable. But it was not built for sale. It was made to last a lifetime. Or one and one-third of a lifetime. Seeing as how I plan on making it 2-3 inches shorter.
 -
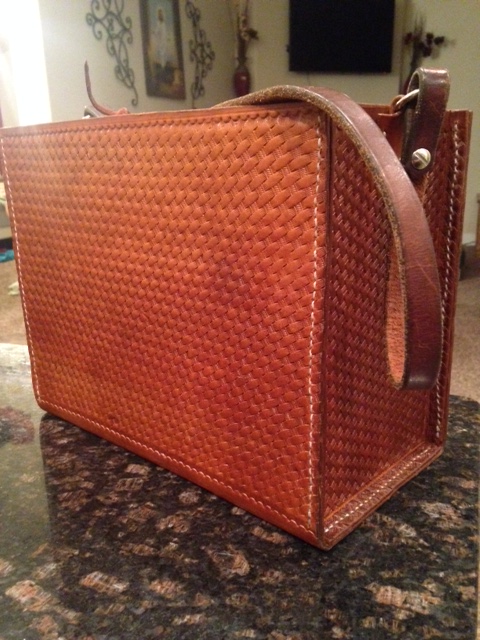
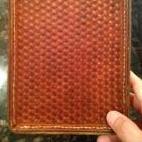
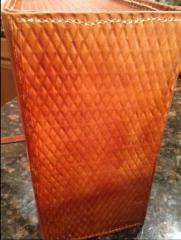
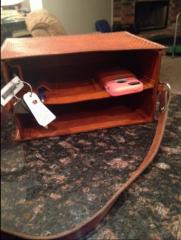
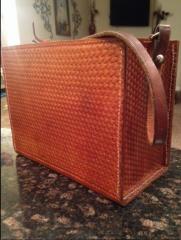
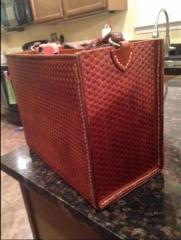 Aussie A. Long. Time. Learned a lot about getting the right amount of water in the leather prior to stamping. And once a part of the leather has been stamped; DO NOT spray it with water or dye unless you're willing to stamp it again. Only wet the area that needs stamping. Keeps the sharpness from fading. I get an hour or two max at my bench at a time so the whole project took about four months. I described the entire project from beginning to end and somehow that got lost when I posted the pics. This is my 3rd project. I started by making my son a belt and short sheath to go with a wooden sword and shield that I gave him for Christmas. Then I made a lined holster for my pistol. It is too tight and bulky. Think when I begin to carry <concealed> I will use a kydex holster instead. Because the purses that my wife has had in the past were either poorly designed or lacking in functional pockets I decided to make the kind of purse she wants that is easy to operate, reliable and helpful, kinda like your favorite gun, in addition to looking good and made for her by her hubby. Wife likes it and loves the pockets but I will cut about 2-3 inches off the top so that it is shorter thereby easier for her to get in/out of the car with. Might make a wallet out of what I cut off. Gene
 -
To do my mistakes, and the good parts, justice the pics need to be higher quality.
-
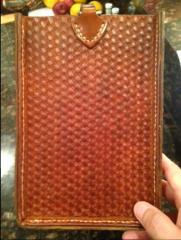
From the album: Gene Shipp
-
Purse for the wife.
-
-
From the album: Gene Shipp
-
From the album: Gene Shipp
-
From the album: Gene Shipp
-
From the album: Gene Shipp
-
I have not read every post here....but I recently destroyed my Craftool maul. I was basket weaving two layers of 1/16" leather. Not sure what weight that is. Because I had stamped it the first time with so much water that it was soggy, it looked poor. Very. Ugly. So with the right amount of water, which was a little hard to tell (a) because I had already stamped it and (b) because it is very white veg tan leather (from Tandy) it was hard to see much burnish, if any, after re-stamping an area. The stamp is a Tandy hourglass basket weave. (See a pattern?) Point is I was hitting it very hard. Had to to get a good looking impression. That and i previously whacked my daughter's flower stamp so hard that I broke my granite. That time the leather was thinner than 1/16 and one layer. The maul (i'm guessing two pound, it was the biggest one they had the day I was there) now has divots in it. If I hit one of them along its edge it turns the maul. Will every maul do this, if hit hard enough? Or are Craftool mauls softer than the high dollar ones? I probably did not have the leather soaked all the way through on both occasions. I realize that that adds to how hard I had to hit. Gene
-
Not a problem. Thanks Big Gun!
-
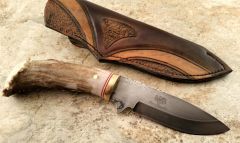 Blade, handle, sheath all very good looking.
 -
Thanks TLP!
-
Doc I used a file to make a dagger. After I heated it in the forge to a dim red, which I no longer have access to, I quenched it in water. No idea on the temp because it was fifteen years ago. It's so hard that I cannot sharpen it. Will more heat treating anneal it? If so I will probably use an acetylene torch and instead of a cutting tip, use one of those heating tips that has a humongous flame, does it need to be quenched after? If so, in water or oil? Thanks Gene
-
NICE!! Well done ghstrydr164. Off to the hardware store.... I'm thinking about a big rubber handle for stamps, large enough to make holding the stamp a little easier on the joints but not so big to obscure my line of sight. And make several of them with different size holes for all the sizes of my stamps. When done just pull it off and put it on the next stamp. Has anyone seen a stamp handle on the forum?
-
That's probably better than rubbing alcohol, which is what I used. Like me, you didn't want to spend money for Fiebing's deglazer.
-
 Looks like somebody from Odessa
 -
THANKS MUCH!!
-
It would be great to have the steps. I have already dyed a holster. Getting near my bench is a sure way to forget what I read here. Printing is a priority this time. My first coat of dye had some light patches so I rubbed the whole thing with alcohol before the second coat. The alcohol in the dye (fiebing's) plus the rubbing alcohol dried it up. Some people say not to use neatsfoot, to use Lexol instead. Thanks in advance Gene
-
I would also like to learn about when and how to pre-stretch. My first project was a holster. It was lined so I'm not sure that it needed stretching before or after bonding the liner or not. Any help would be appreciated. Thanks!